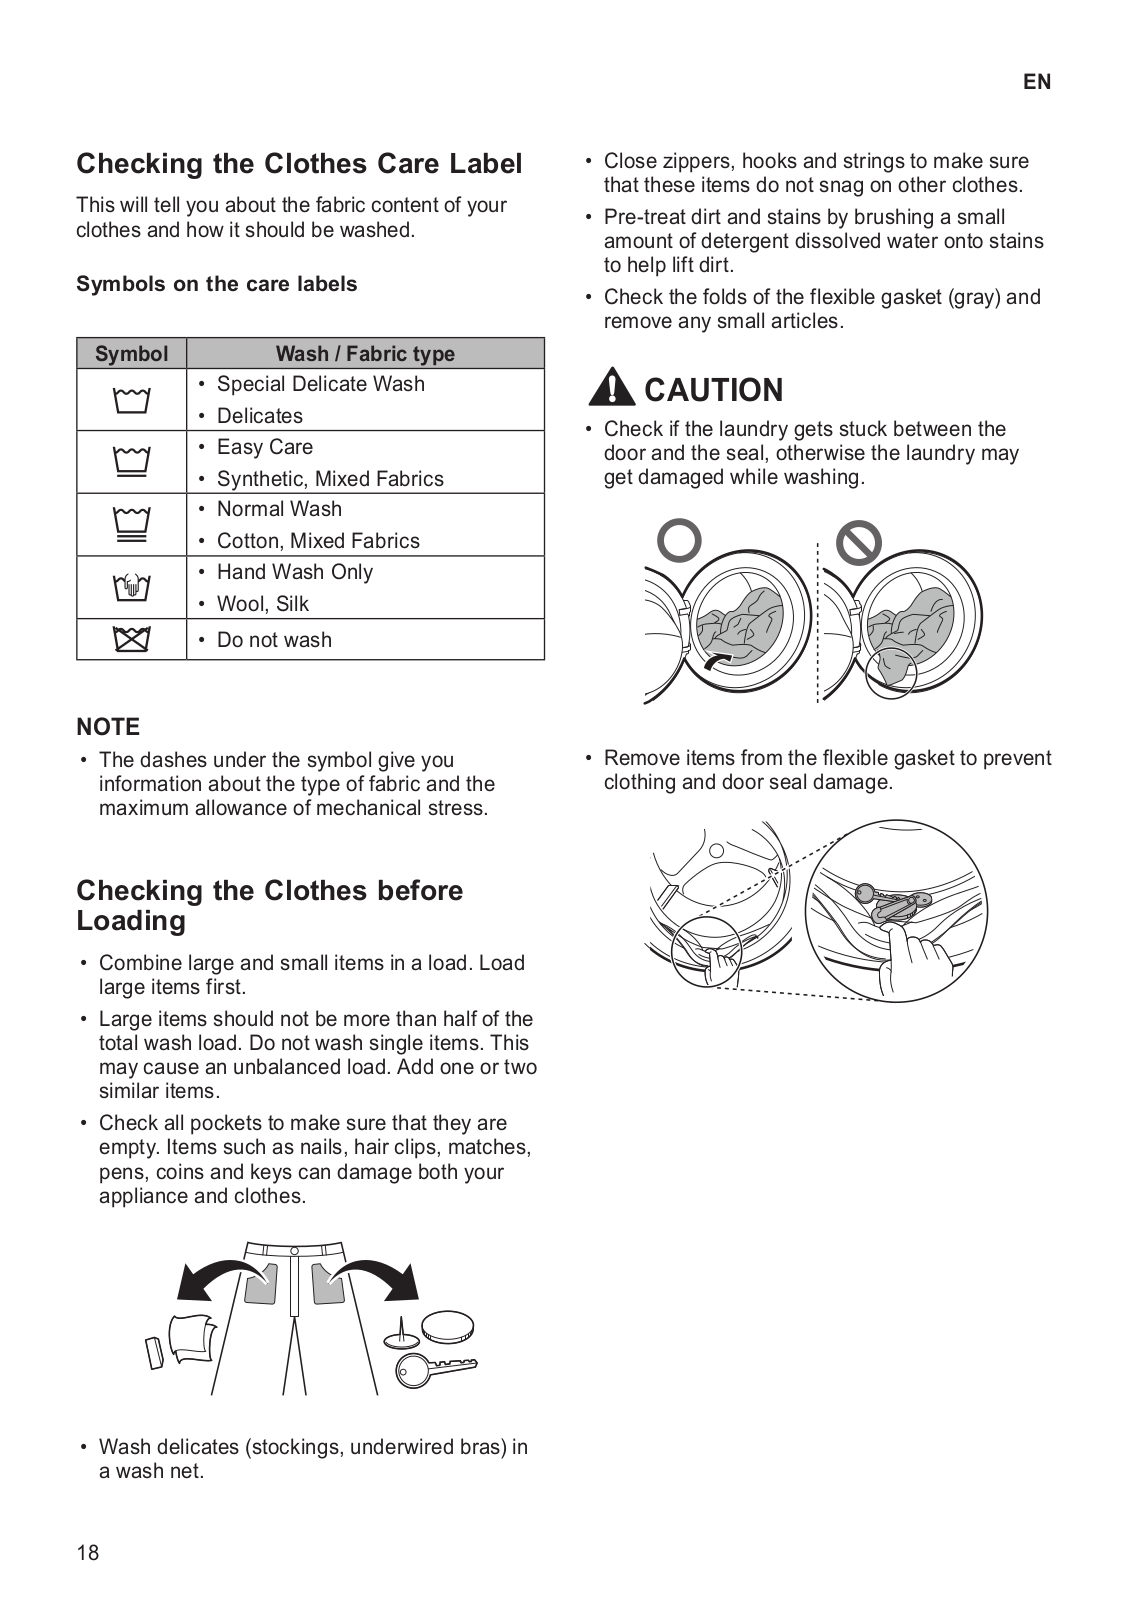
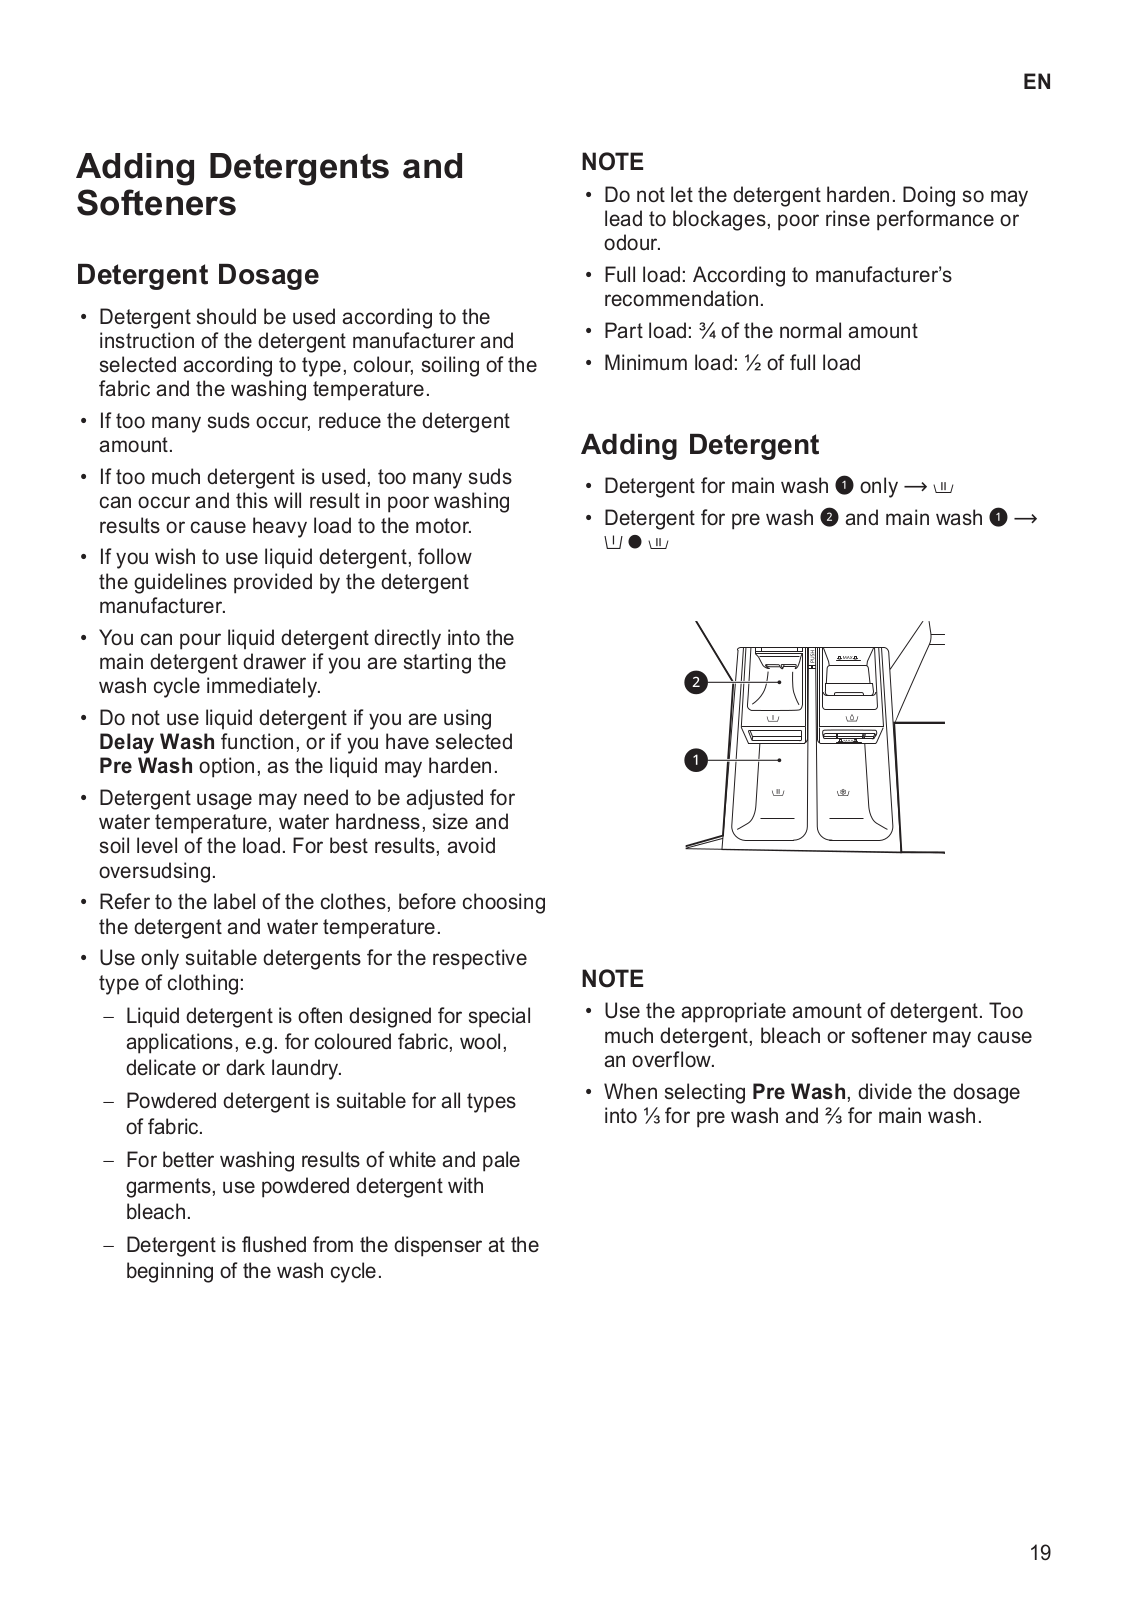
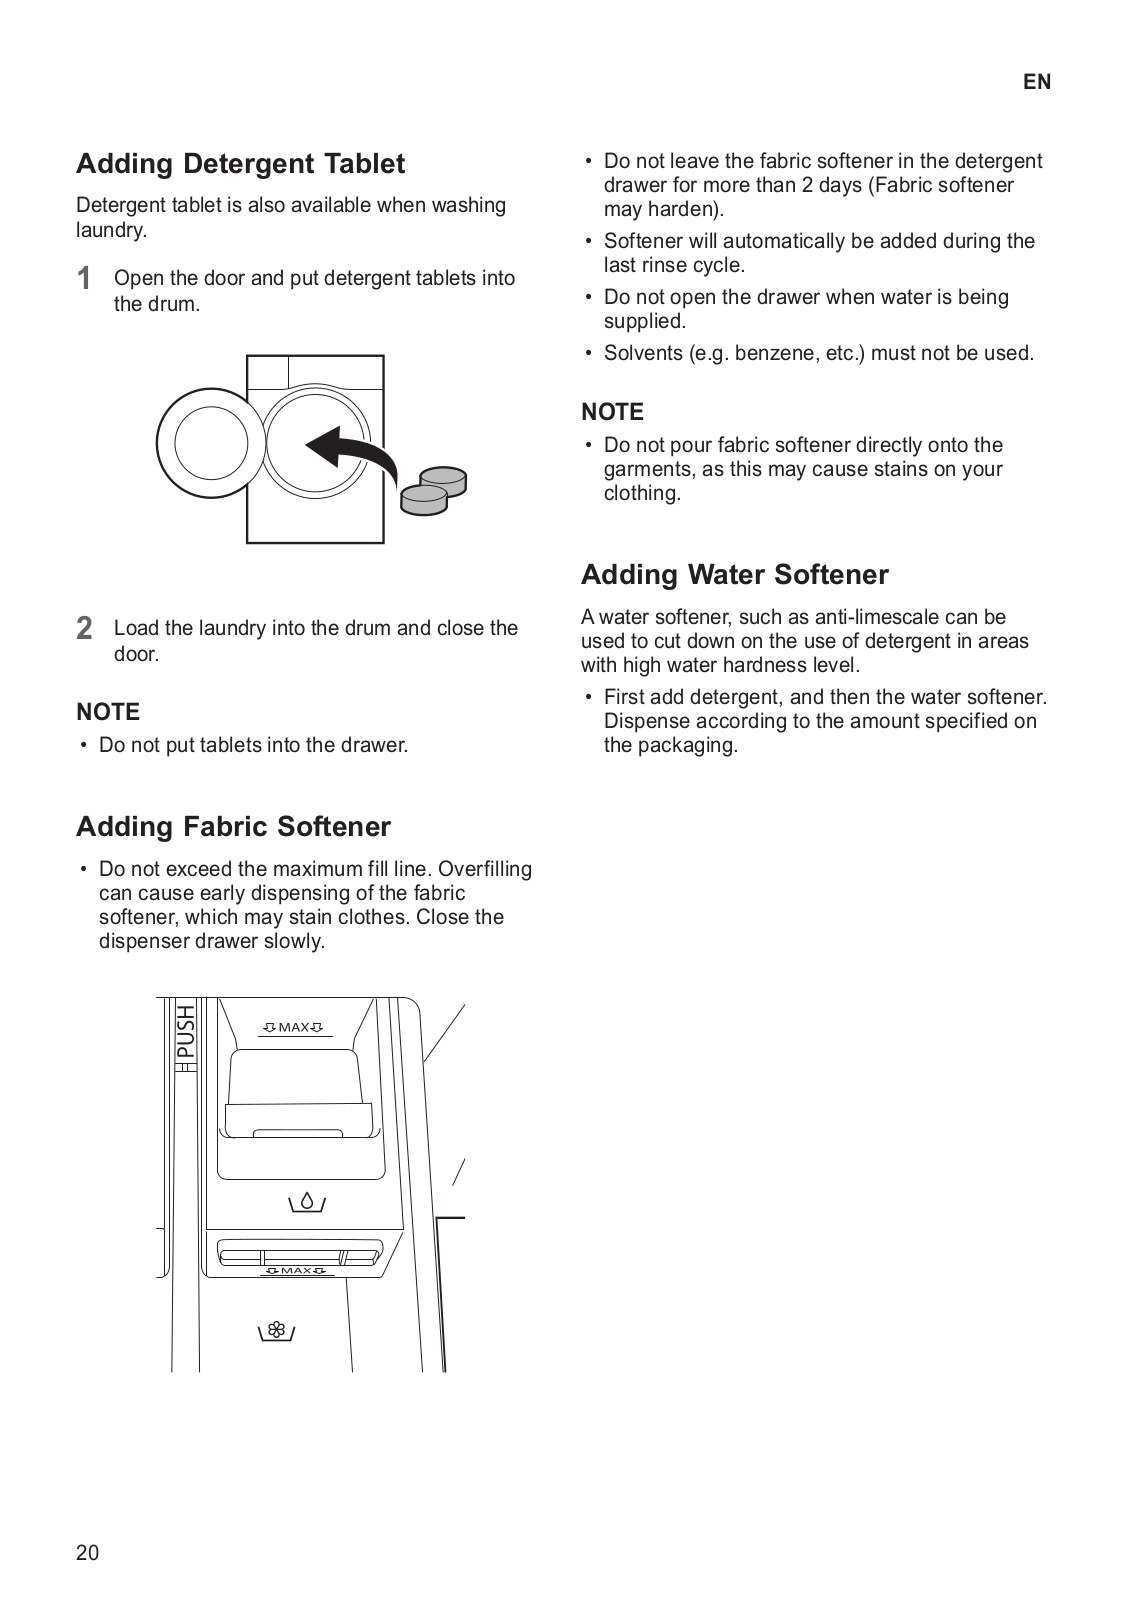
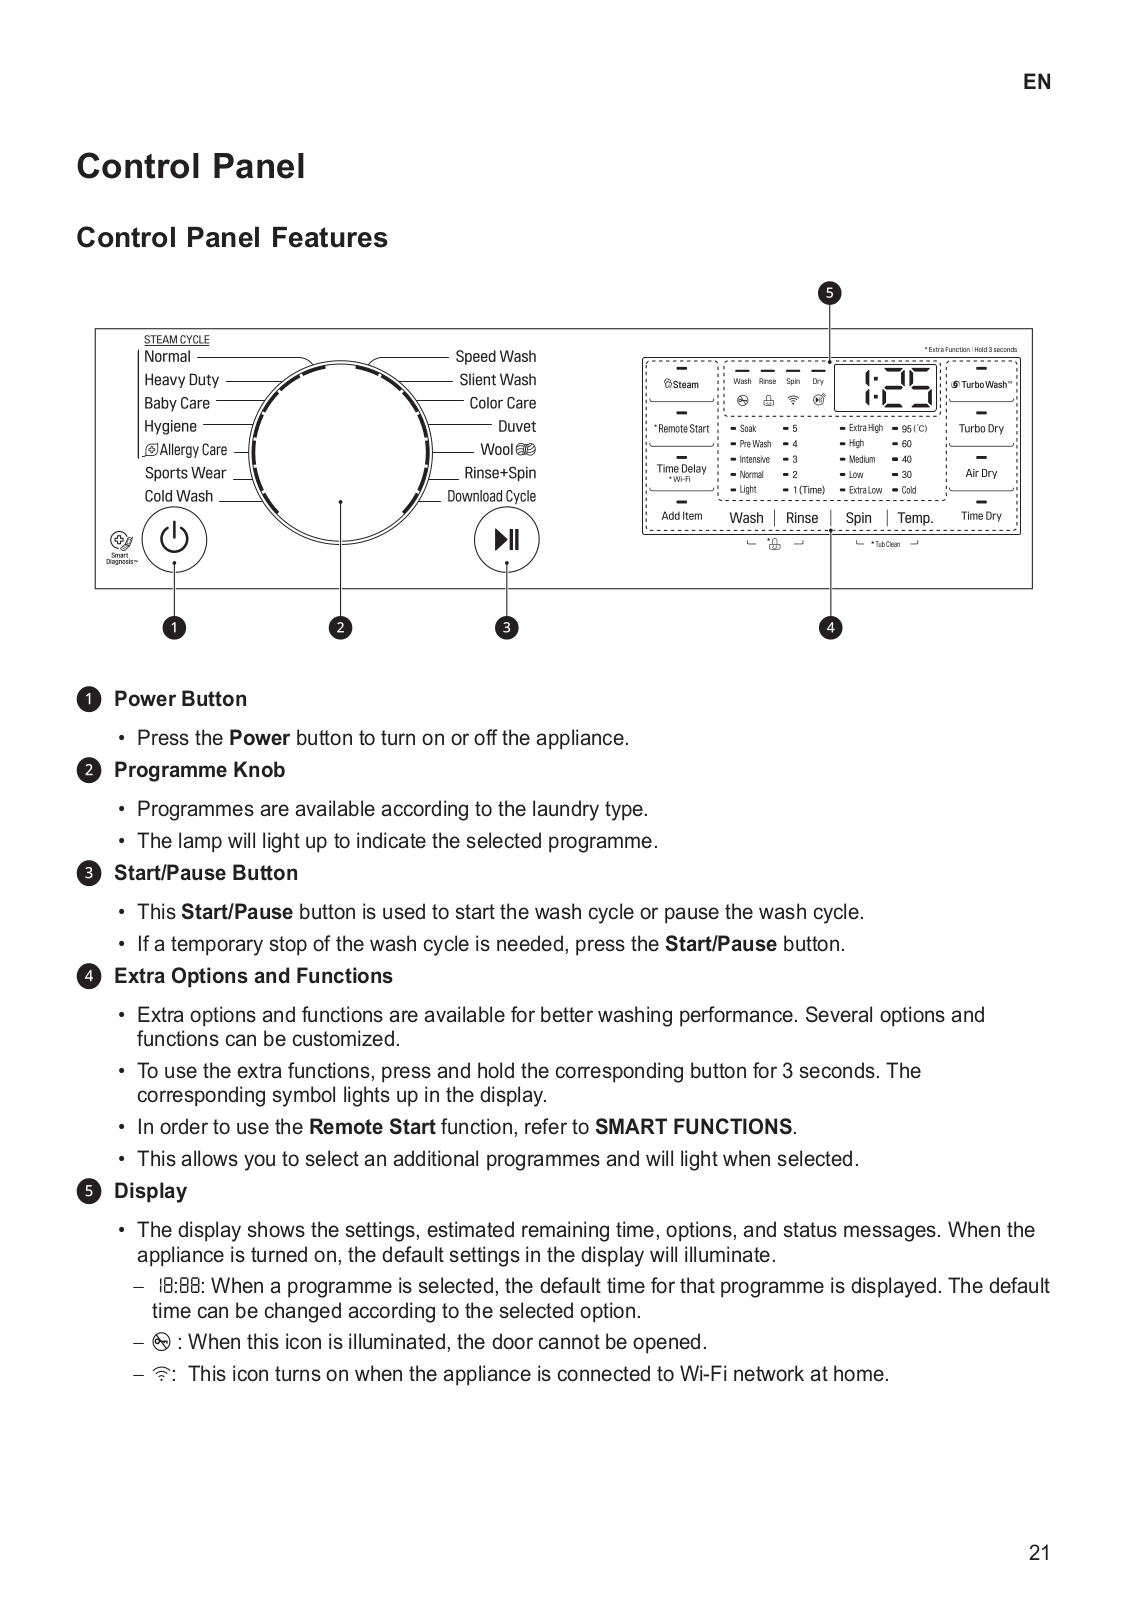
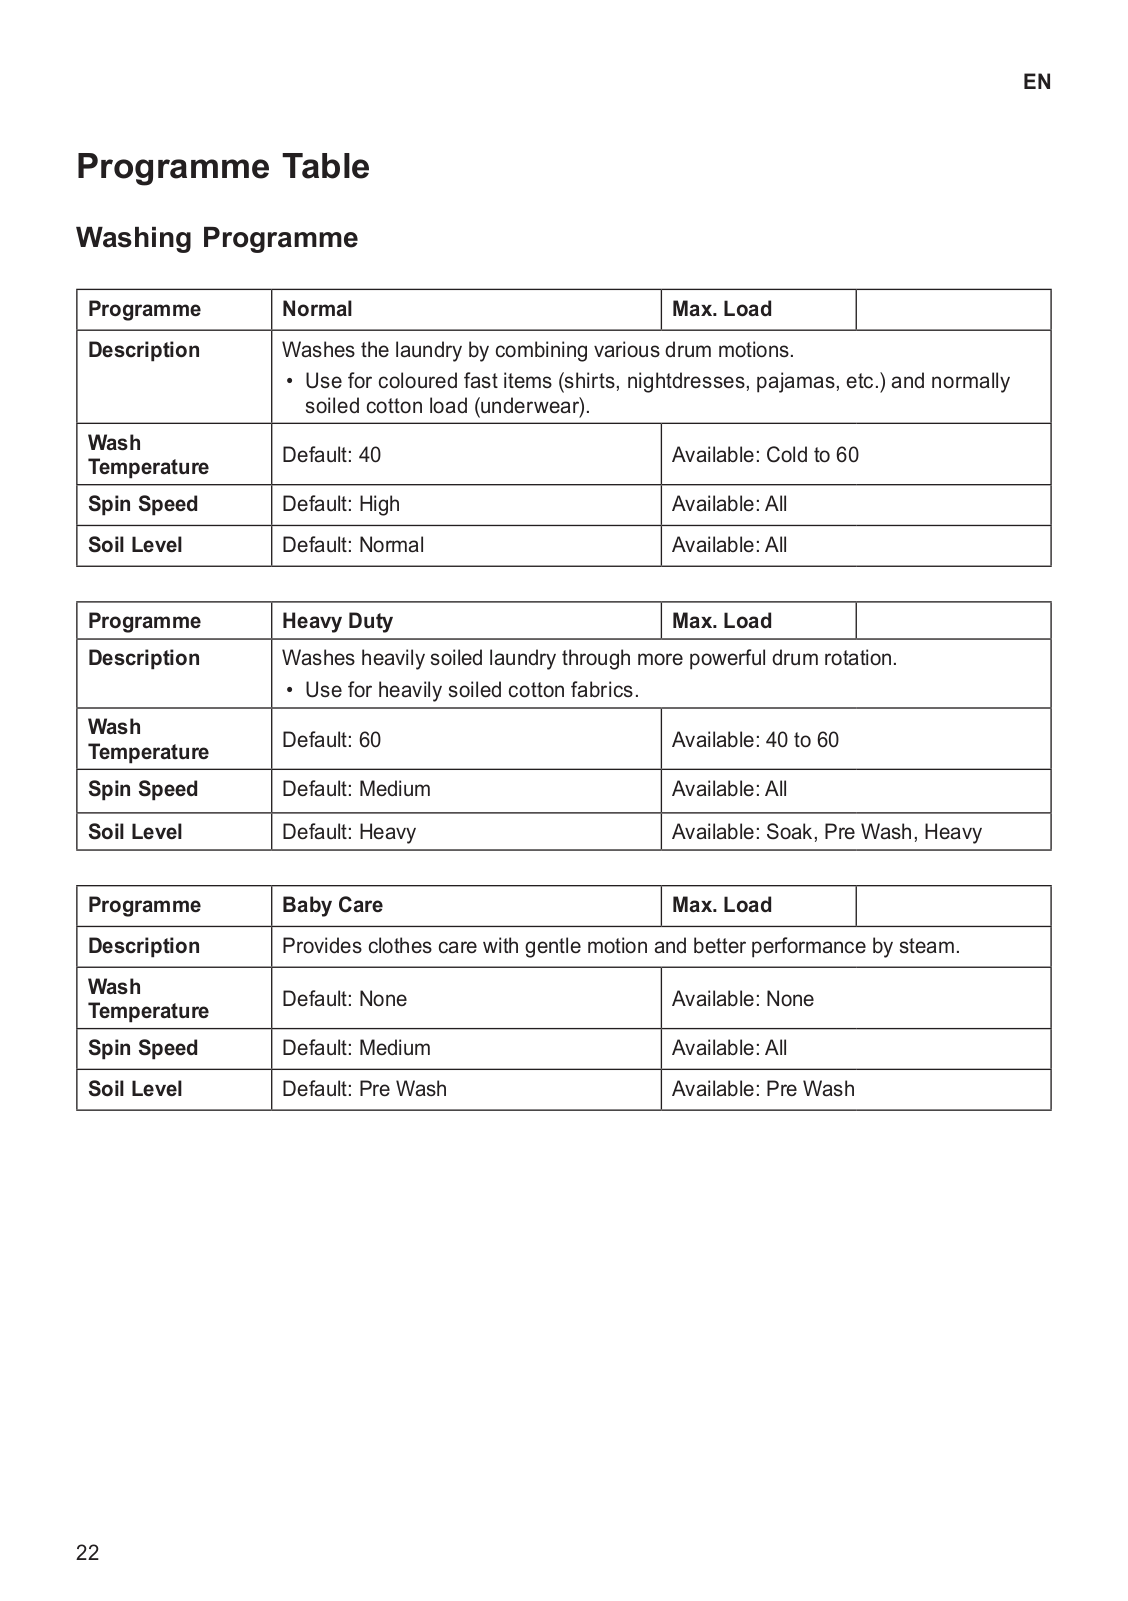
How it Works
Log In / Sign Up
Buy Points
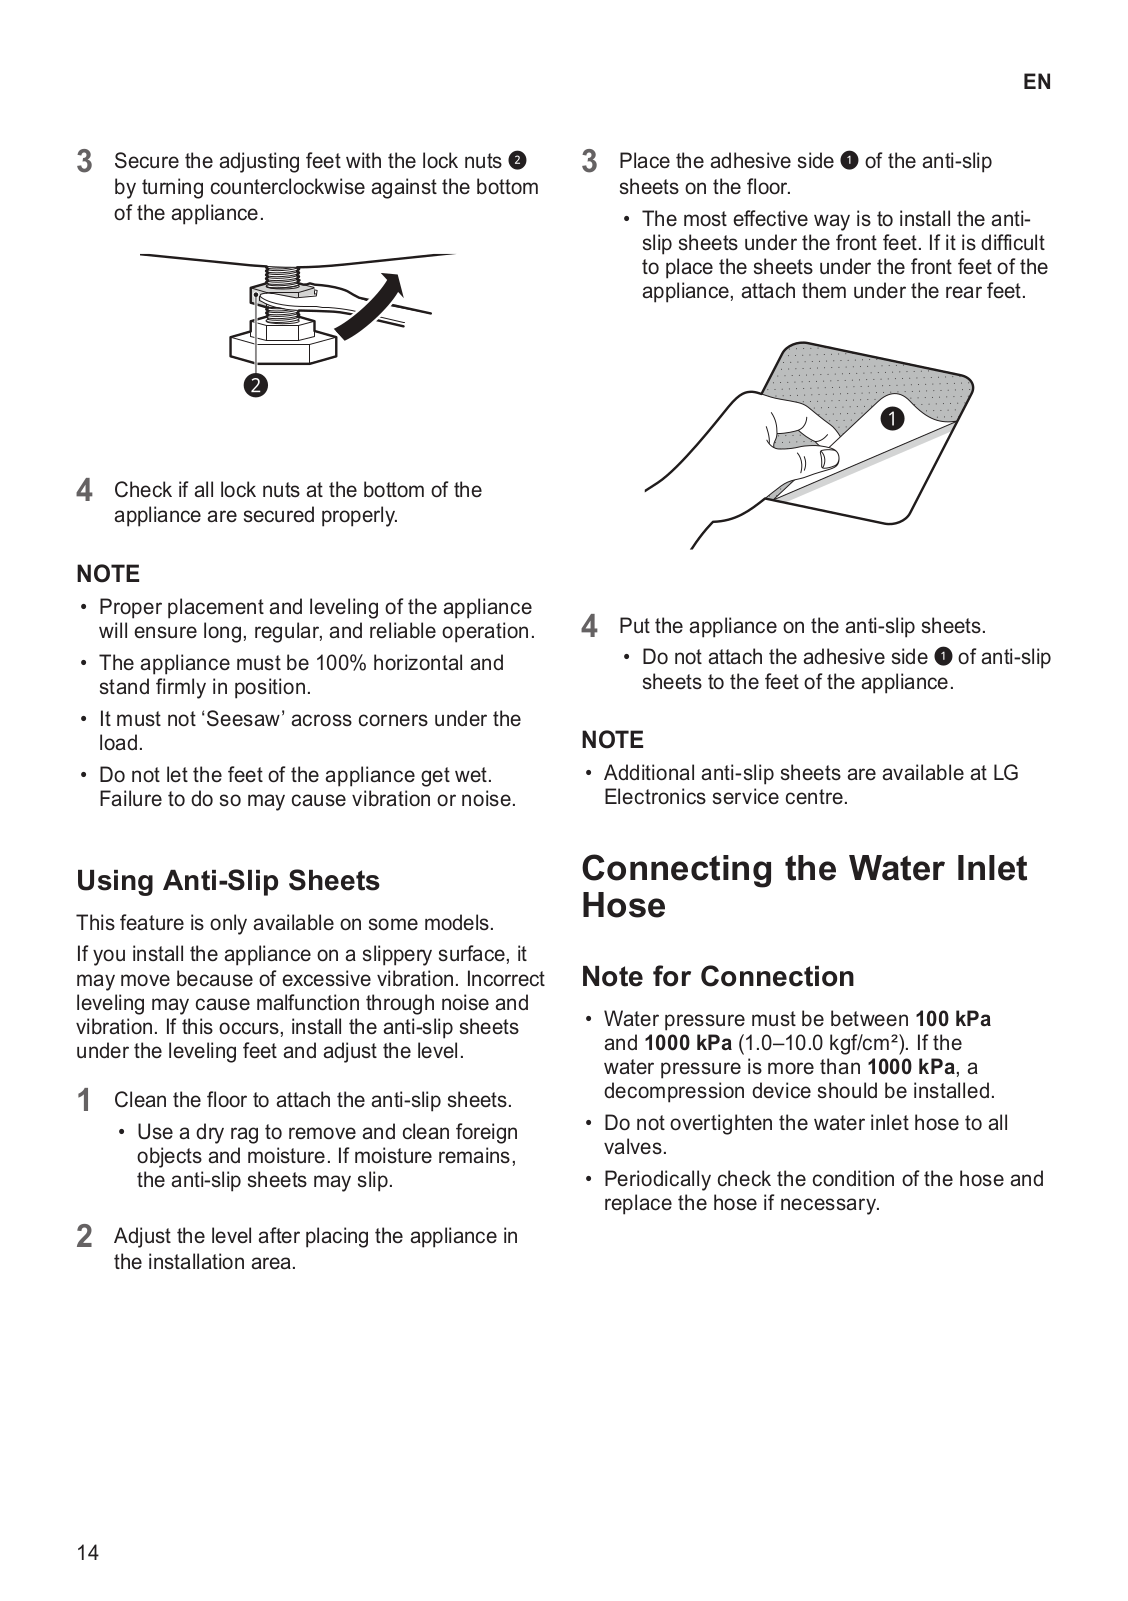
How it Works
FAQ
Contact Us
Questions and Suggestions
Users
LG
Loading...
F
F2WN4S6S0
3
F2WN4S7N0
F2WN4S7S0
4
F2WN4S7S1
F2WN4S7S2T
F2WN5S6N0
4
F2WN5S6S0
F2WN5S7S0
F2WN6S7S1
3
F2WN7S7S0
3
F2WN7S7S1
F2WP207N0WS
F2WP207S0WS
F2WT4S6AIDD
5
F2WV2S7S6E
F2WV3S7N6E
F2WV3S7S4E
F2WV3S7S6E
2
F2WV3S85S3W
2
F2WV4S7S0E
F2WV5N7S0E
F2WV5N8S0E
F2WV5S7S0E
F2WV5S7S2TE
F2WV5S85S0W
F2WV5S85S2S
F2WV5S8S0E
3
F2WV708S1S
F2WV7S8P1
5
F2WV7S8P2T
F2WV7S8S1E
F2WV9S8P2
11
F2WV9S8P2A
F2WV9S8P2E
F3000
25
F3000 - Cell Phone 31 MB
F300K
F300L
F310LR
F31GDA
F320L
F32580WH
F32586IXS
F32591WH
F350K
F350S
F362HX
4
F370K
F370L
F370S
F3L2CRV2T
F3Q
F4015RN4VC
F409MCB
F448MC12B
F448SW12B
F483CX
2
F483HX
4
F48J3TM5W
2
F48V3TN3W
F48V3TW4W
F48V5TW0W
F48V5TW1W
F48WSWY2
F49V3VW4W
3
F49V3VW6W
F49V5VW0W
F4AIDDWT4Z9
F4DN4008N0W
F4DN4008S1W
F4DN4009S0W
F4DN408N0
2
F4DN408S0
4
F4DN409N0
2
F4DN409S0
3
F4DN409S1
F4DN508N0
5
F4DN508S0
F4DN508S1
F4DN509S0
4
F4DT408AIDD
5
F4DV408S0E
F4DV409N1W
F4DV409S0E
F4DV5009S0W
2
F4DV5009S1W
F4DV508S1E
F4DV508S2TE
F4DV509H0E
2
F4DV7009S1W
F4DV7009S2S
F4DV7009S2W
F4DV7010S2S
F4DV709H0
2
F4DV709H0E
F4DV709H1
18
F4DV709H1E
F4DV709H2T
12
F4DV709H2TE
3
F4DV709S1E
3
Loading...
Loading...
Nothing found
F3L2CRV2T
Owner’s Manual
92 pgs
4.92 Mb
0
Table of contents
Loading...
LG F3L2CRV2T Owner’s Manual
...
LG Owner’s Manual
Download
Specifications and Main Features
Frequently Asked Questions
User Manual
Download
Loading...
+
64
hidden pages
Unhide
You need points to download manuals.
1 point = 1 manual.
You can buy points or you can get point for every manual you upload.
Buy points
Upload your manuals
 Loading...