

LG DT724A User guide

OWNER’S MANUAL
Portable DVD Player
Please read this manual carefully before operating
your set and retain it for future reference.
ENGLISH
DT724A
Getting Started2
Safety Information
1
Getting Started
CAUTION: TO REDUCE THE RISK OF ELECTRIC
SHOCK DO NOT REMOVE COVER (OR BACK) NO
USER-SERVICEABLE PARTS INSIDE REFER SERVICING
TO QUALIFIED SERVICE PERSONNEL.
enclosure that may be of sucient magnitude to
constitute a risk of electric shock to persons.
instructions in the literature accompanying the
product.
WARNING: TO PREVENT FIRE OR ELECTRIC SHOCK
HAZARD, DO NOT EXPOSE THIS PRODUCT TO RAIN
OR MOISTURE.
WARNING: Do not install this equipment in a
conned space such as a book case or similar unit.
CAUTION: Do not block any ventilation openings.
Install in accordance with the manufacturer’s
instructions.
Slots and openings in the cabinet are provided for
ventilation and to ensure reliable operation of the
product and to protect it from over heating. The
openings shall be never be blocked by placing
the product on a bed, sofa, rug or other similar
surface. This product shall not be placed in a builtin installation such as a bookcase or rack unless
proper ventilation is provided or the manufacturer’s
instruction has been adhered to.
CAUTION: CLASS 1M VISIBLE AND INVISIBLE LASER
RADIATION WHEN OPEN, DO NOT VIEW DIRECTLY
WITH OPTICAL INSTRUMENTS.
CAUTION
RISK OF ELECTRIC SHOCK
DO NOT OPEN
This lightning ash with arrowhead
symbol within an equilateral triangle
is intended to alert the user to the
presence of uninsulated dangerous
voltage within the product’s
The exclamation point within an
equilateral triangle is intended
to alert the user to the presence
of important operating and
maintenance (servicing)
Use of controls, adjustments or the performance of
procedures other than those specied herein may
result in hazardous radiation exposure.
CAUTION concerning the Power Cord
Most appliances recommend they be placed upon
a dedicated circuit;
That is, a single outlet circuit which powers only
that appliance and has no additional outlets or
branch circuits. Check the specication page of this
owner’s manual to be certain. Do not overload wall
outlets. Overloaded wall outlets, loose or damaged
wall outlets, extension cords, frayed power cords, or
damaged or cracked wire insulation are dangerous.
Any of these conditions could result in electric
shock or re. Periodically examine the cord of your
appliance, and if its appearance indicates damage
or deterioration, unplug it, discontinue use of the
appliance, and have the cord replaced with an
exact replacement part by an authorized service
center. Protect the power cord from physical or
mechanical abuse, such as being twisted, kinked,
pinched, closed in a door, or walked upon. Pay
particular attention to plugs, wall outlets, and
the point where the cord exits the appliance. To
disconnect power from the mains, pull out the
mains cord plug. When installing the product,
ensure that the plug is easily accessible.
This device is equipped with a portable battery or
accumulator.
Safety way to remove the battery or the
battery from the equipment: Remove the
old battery or battery pack, follow the steps
in reverse order than the assembly. To prevent
contamination of the environment and bring on
possible threat to human and animal health, the
old battery or the battery put it in the appropriate
container at designated collection points. Do
not dispose of batteries or battery together with
other waste. It is recommended that you use
local, free reimbursement systems batteries and
accumulators. The battery shall not be exposed to
excessive heat such as sunshine, re or the like.
NOTICE: For safety making information including
product identication and supply ratings, please
refer to the main label on the bottom of the
apparatus.
Getting Started 3
CAUTION:
• The apparatus should not be exposed to water
(dripping or splashing) and no objects filled with
liquids, such as vases, should be placed on the
apparatus.
• Minimum distances around the apparatus for
sufficient ventilation, no less than 5 cm.
• The ventilation should not be impeded by
covering the ventilation openings with items,
such as newspapers, table-cloth, curtains etc.
• No naked flame sources, such as lighted candles,
should be placed on the apparatus.
• Internal lithium battery in the unit should not be
replaced by user because of danger of explosion
if battery is incorrectly replaced ,and must be
replaced with the same type battery by expert.
• Use the apparatus in tropical and moderate climates only.
• The excessive sound pressure from earphones
and headphones can cause hearing loss.
Caution of usage in the car
• To prevent electrical shock and possible damage
to your unit or vehicle, always unplug the
automotive adapter from the cigarette lighter
socket before you remove the plug from your
unit.
• A 3 amp. 250 V fuse for protection is installed in
the automotive adapter.
• While the engine is being started, disconnect
the automotive adapter from the car’s cigarette
lighter socket.
• Do not operate your unit when the car battery is
discharged. Peak current from the car generator
may cause the DC fuse to blow.
• If the vehicle’s supply voltage drops below
approximately 10 volts, your unit may not work
properly.
• Do not leave your unit in a place where the
temperature exceeds 45 °C (113 °F), or the pickup device may be damaged.
Disposal of your old appliance
1. When this crossed-out wheeled bin
symbol is attached to a product it
means the product is covered by the
European Directive 2002/96/EC.
2. All electrical and electronic products
should be disposed of separately
from the municipal waste stream
via designated collection facilities
appointed by the government or the
local authorities.
3. The correct disposal of your old
appliance will help prevent potential
negative consequences for the
environment and human health.
4. For more detailed information about
disposal of your old appliance, please
contact your city office, waste disposal
service or the shop where you
purchased the product.
The equipment complies with requirements of the
Technical Regulation, in terms of restrictions for the
use of certain dangerous substances in electrical
and electronic equipment.
Disposal of waste batteries/
accumulators
1. When this crossed-out wheeled
bin symbol is attached to batteries/
accumulators of Your product it means
they are covered by European Directive
2006/66/EC.
2. This symbol may be combined with
chemical symbols for mercury(Hg),
cadmium(Cd) or lead(Pb) if the battery
Contains more that 0.0005% of
mercury,0.002% of cadmium or 0.004%
of lead.
3. All batteries/accumulators should be
disposed separately from the municipal
waste stream via designated collection
facilities appointed by the government
or the local authorities.
4. The correct disposal of Your old
batteries/accumulators will help
to prevent potential negative
consequences for the environment,
animal and human health.
1
Getting Started

Getting Started4
5. For more detailed information
about disposal of Your old batteries/
accumulators, please contact Your
city office, waste disposal service or
1
Getting Started
other relevant provisions of Directive 2004/108/EC,
2006/95/EC and 2009/125/EC.
European Standards Centre:
Krijgsman 1, 1186 DM Amstelveen The Netherlands
yPlease note that this is NOT a Customer Service
contact point. For Customer Service Information,
see Warranty Card or contact the dealer that you
purchased this product.
the shop where You purchased the
product.
LG Electronics hereby declares that this/
these product(s) is/are in compliance
with the essential requirements and
Notes on Copyrights
yThis product incorporates copyright protection
technology that is protected by U.S. patents
and other intellectual property rights. Use of
this copyright protection technology must be
authorized by Rovi Corporation, and is intended
for home and other limited viewing uses only
unless otherwise authorized by Rovi Corporation.
Reverse engineering or disassembly is prohibited.
yUnder the U.S. Copyright laws and Copyright
laws of other countries, unauthorized recording,
use, display, distribution, or revision of television
programs, videotapes, DVDs, CDs and other
materials may subject you to civil and/or criminal
liability.
Notes on Discs
yDo not touch the playback side of the disc. Hold
the disc by the edges so that ngerprints do not
get on the surface. Never stick paper or tape on
the disc.
yAfter playing, store the disc in its case. Do not
expose the disc to direct sunlight or sources of
heat and never leave it in a parked car exposed
to direct sunlight.
Notes on the Unit
yPlease save the original shipping carton and
packing materials. If you need to ship the unit,
for maximum protection, re-pack the unit as it
was originally packed at the factory.
yTo clean the unit, use a soft, dry cloth. If the
surfaces are extremely dirty, use a soft cloth
lightly moistened with a mild detergent solution.
Do not use strong solvents such as alcohol,
benzine, or thinner, as these might damage the
surface of the unit.
yThe unit is a high-tech, precision device. If the
optical pick-up lens and disc drive parts are dirty
or worn, the picture quality could be diminished.
For details, please contact your nearest
authorized service center.

Table of Contents
Table of Contents 5
1. Getting Started
2 Safety Information
6 Introduction
6 – About the “7” Symbol Display
6 – Symbols Used in this Manual
6 – Regional Code
6 – Playable Discs
7 – File compatibility
8 Main Unit
9 Remote control
9 – Battery Installation
10 Supplied Accessories
10 Revolving the LCD panel
10 Rechargeable battery
2 Connecting
11 Connecting the AC Adaptor
11 Connecting the Automotive Adaptor
11 Connecting Audio and Video cable
11 Connecting the TV Antenna
3 System Setting
12 Settings
12 – Adjust the Setup Settings
12 – [LANGUAGE] Menu
12 – [DISPLAY] Menu
13 – [AUDIO] Menu
13 – [LOCK] Menu
13 – [OTHERS] Menu
4 Operating
14 Viewing a TV Channel
15 General Playback
15 – Selecting an operating mode
15 – Playing a Disc
15 – Playing a file
15 – On-Screen Display
16 – General operation
16 Advanced Playback
16 – Movie
17 – Music
18 – Photo
5 Troubleshooting
19 Troubleshooting
6 Appendix
20 Area Code List
21 Language Code List
22 Specifications
22 Trademarks and Licenses
23 Enjoying in a car with the Headrest
Mounting Bracket
1
2
3
4
5
6
Getting Started6
Introduction
About the “7” Symbol Display
1
Getting Started
“7” may appear on the screen during operation
and indicates that the function explained in this
owner’s manual is not available on that specic
media.
Symbols Used in this Manual
A section whose title has one of the following
symbols are applicable only to the disc or le
represented by the symbol.
r
t
y
u
i
Regional Code
This unit has a regional code printed on the rear of
the unit. This unit can play only DVD disc labelled
same as the rear of the unit or “ALL”.
DVD-Video, DVD±R/RW
Audio CDs
Video les contained in the
USB/Disc
Audio les contained in the
USB/Disc
Photo les contained in the
USB/Disc
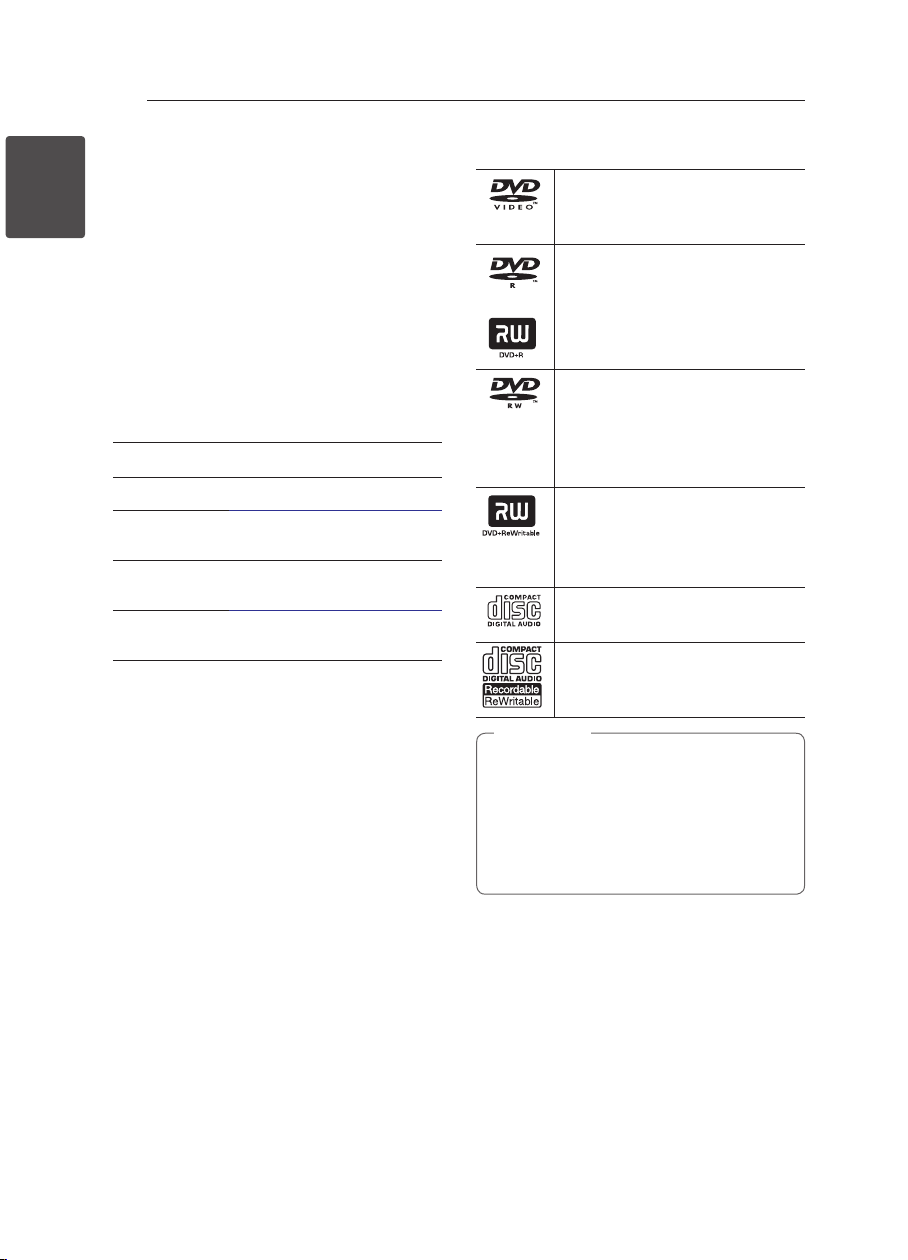
Playable Discs
DVD-VIDEO (8 cm / 12 cm disc)
Discs such as movies that can be
purchased or rented.
DVD±R (8 cm / 12 cm disc)
-Video mode and nalized only
-Supports the dual layer disc also
-DVD±R discs that contain Video,
Audio or Photo les.
DVD-RW (8 cm / 12 cm disc)
-VR mode, Video mode and
nalized only
-DVD-RW discs that contain Video,
Audio or Photo les.
DVD+RW (8 cm / 12 cm disc)
-Video mode and nalized only
-DVD+RW discs that contain Video,
Audio or Photo les.
Audio CD (8 cm / 12 cm disc)
CD-R/RW (8 cm / 12 cm disc)
-CD-R/RW discs that contain audio
titles, Video, Audio or Photo les.
Note
,
You have to set the disc format option
to [Mastered] in order to make the discs
compatible with the players when formatting
rewritable discs. When setting the option
to Live System, you cannot use it on player.
(Mastered/Live File System: Disc format system
for windows Vista)

Getting Started 7
File compatibility
Overall
Available File extensions: “.avi”, “.mpg”, ”.mpeg”,
“.mp3”, “.wma”, “.jpg”
yThe le name is limited to 20 characters.
yDepending on the size and number of the les,
it may take several minutes to read the contents
on the media.
Maximum Files/Folder: Less than 600 (total
number of les and folders)
CD-R/RW, DVD±R/RW Format: ISO 9660
Video Files
Available resolution size: 720 x 576 (W x H) pixels
Playable subtitle: SubRip (.srt/.txt), SAMI (.smi),
SubStation Alpha (.ssa/.txt), MicroDVD (.sub/.txt),
VobSub (.Sub), SubViewer 2.0 (.sub/.txt), TMPlayer
(.txt), DVD Subtitle System (.txt)
Playable Codec format: “DIVX3.xx”, “DIVX4.xx”,
“DIVX5.xx”, “MP43”, ”3IVX”, “DIVX6.xx (playback only)”
Playable Audio format: “Dolby Digital”, “PCM”,
“MP3”, “WMA”
Sampling frequency: within 8 to 48 kHz (MP3),
within 32 to 48 kHz (WMA)
Bit rate: within 8 to 320 kbps (MP3), within 32 to
192 kbps (WMA), less than 4 Mbps (DivX le)
Note
,
This unit does not support les that are
recorded with GMC*1 or Qpel*2. Those are video
encoding techniques in MPEG4 standard, like
DivX have.
*1 GMC – Global Motion Compensation
*2 Qpel – Quarter pixel
Photo Files
Photo size: Less than 2M recommended.
yProgressive and lossless compression photo
image les are not supported.
Notes of USB Device
yThis unit supports USB device with FAT16 or
FAT32 format.
yDo not extract the USB device during operation
(play, etc.).
yA USB device which requires additional program
installation when you have connected it to a
computer, is not supported.
yUSB device: USB device that supports USB1.1
and USB2.0.
yMovie, music and photo les can be played. For
details of operations on each le, refer to relevant
pages.
yRegular back up is recommended to prevent
data loss.
yIf you use a USB extension cable, USB HUB or
USB Multi-reader, the USB device may not be
recognized.
ySome USB device may not work with this unit.
yDigital camera and mobile phone are not
supported.
yUSB Port of the unit cannot be connected to PC.
The unit cannot be used as a storage device.
1
Getting Started
Audio Files
Sampling frequency: within 8 to 48KHz (MP3),
within 32 to 48KHz (WMA)
Bit rate: within 8 to 320 kbps (MP3), within 32 to
192 kbps (WMA)
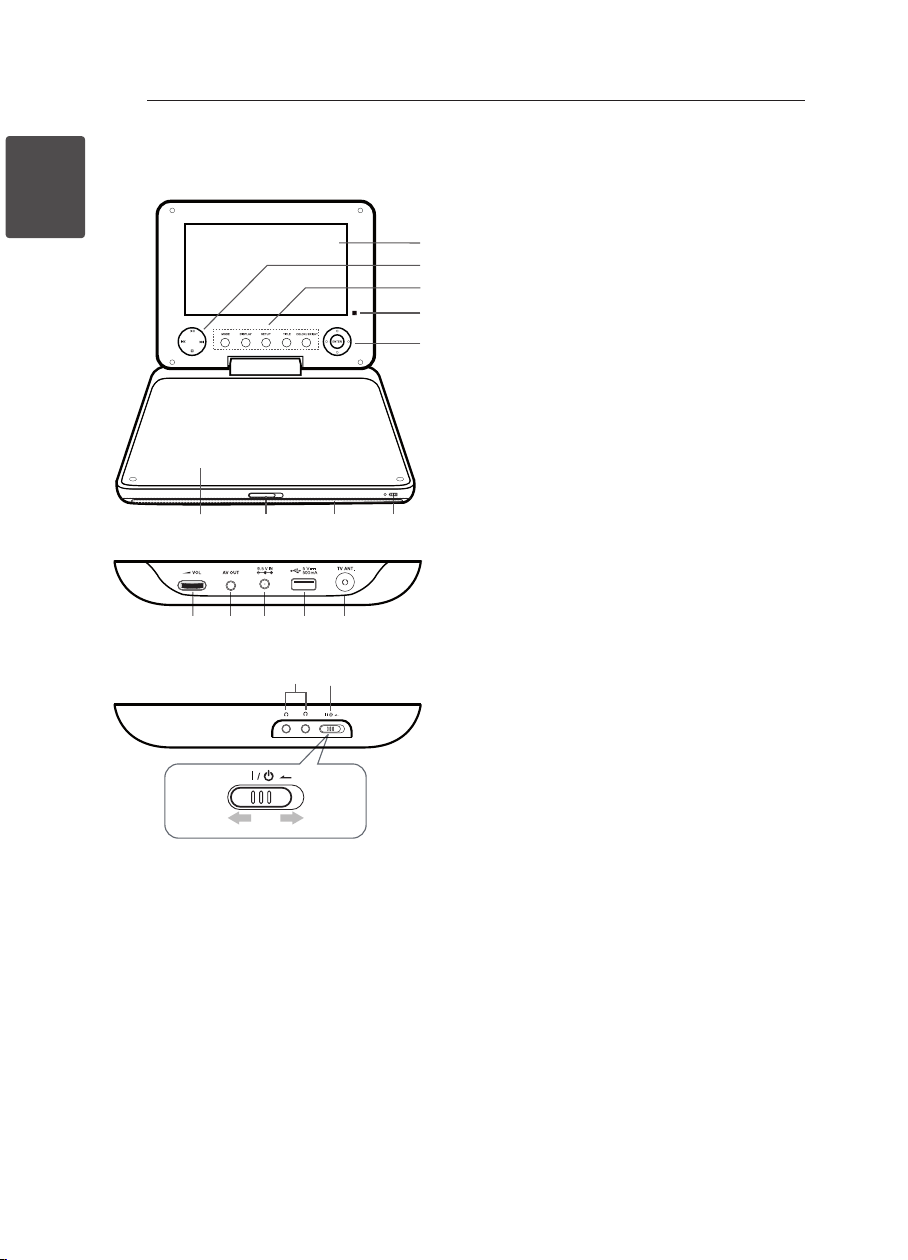
Main Unit
1
Getting Started
LCD screen
a
Playback control buttons
b
yT
pause playback temporarily, press again to exit
pause mode.
yY/U
chapter / track / le.
yI
Getting Started8
f
g h i
j k l m n
o
p
ON
(Play/Pause): Press to start playback and
(Skip): Goes to the next or previous
(Stop): Press to stop playback.
OFF
a
b
c
d
e
Function buttons
c
yMODE: Selects a operation mode among [DISC],
[USB] and [TV].
yDISPLAY: Accesses On-Screen Display.
ySETUP: Accesses or exits the setup menu.
yTITLE: Displays the DVD title menu, if available.
yCOLOR/BRIGHT: Press to display the Brightness or
Color menu for LCD display. To adjust the color
or brightness of the LCD display, press COLOR/
BRIGHT repeatedly on the main unit to display
the Brightness or Color menu then use a/d
to adjust the value. Press ENTER to confirm the
adjustment.
Remote sensor: Point the remote control here.
d
To control the unit using the remote control, do
not fold the LCD panel down.
Menu control buttons
e
yDirection buttons: Use to select an item in the
menu.
yENTER: Press to conrm menu selection.
Disc lid
f
CD OPEN: Use the slide open key to open the
g
disc lid.
Speakers
h
Battery charge and power indicator
i
yThe indicator turns red in charging and it will
be turned into green when the charging is
complete. (Refer to page 10 for details.)
yThe indicator turns green for a moment when
the unit is turned on.
VOL (Volume): Adjusts the volume level of
j -
the built-in speaker and earphones.
AV OUT: Connect to a TV with video and audio
k
input.
DC 9.5V IN: Connect the AC adaptor or
l
automotive adaptor.
USB Port: Connect a USB Flash Drive.
m
TV Antenna connector
n
(Earphones): Connect earphones here.
o <
I/1 (Power): Switches the unit ON or OFF.
p
 Loading...