

Page 1
OWNER’S MANUAL
Portable DVD Player
ENGLISH
Please read this manual carefully before operating
your set and retain it for future reference.
MODEL
DP650
DP650B/DP650W
DP650-P.AHUNLLW_7246_ENG.indd 1 12. 01. 09 �� 9:55
Page 2

DP650-P.AHUNLLW_7246_ENG.indd 2 12. 01. 09 �� 9:55
Page 3
1
Safety Information
3Safety Information
1
Safety Information
Cautions and Warnings
WARNING: TO PREVENT FIRE OR ELECTRIC SHOCK
HAZARD, DO NOT EXPOSE THIS PRODUCT TO RAIN
OR MOISTURE.
WARNING: Do not install this equipment in a
conned space such as a book case or similar unit.
CAUTION: Do not block any ventilation openings.
Install in accordance with the manufacturer’s
instructions.
Slots and openings in the cabinet are provided
for ventilation and to ensure reliable operation of
the product and to protect it from over heating.
The openings should never be blocked by placing
the product on a bed, sofa, rug or other similar
surface. This product shall not be placed in a builtin installation such as a bookcase or rack unless
proper ventilation is provided or the manufacturer’s
instruction have been adhered to.
CAUTION concerning the Power Cord
Most appliances recommend they be placed upon a
dedicated circuit;
That is, a single outlet circuit which powers only
that appliance and has no additional outlets or
branch circuits. Check the specication page of this
owner’s manual to be certain. Do not overload wall
outlets. Overloaded wall outlets, loose or damaged
wall outlets, extension cords, frayed power cords, or
damaged or cracked wire insulation are dangerous.
Any of these conditions could result in electric
shock or re. Periodically examine the cord of your
appliance, and if its appearance indicates damage
or deterioration, unplug it, discontinue use of the
appliance, and have the cord replaced with an exact
replacement part by an authorized service centre.
Protect the power cord from physical or mechanical
abuse, such as being twisted, kinked, pinched, closed
in a door, or walked upon. Pay particular attention
to plugs, wall outlets, and the point where the cord
exits the appliance. To disconnect power from the
mains, pull out the mains cord plug. When installing
the product, ensure that the plug is easily accessible.
This device is equipped with a portable battery or
accumulator.
Safe way to remove the battery or the battery
from the equipment: To remove the old battery
or battery pack, follow the installation steps in
reverse order than the assembly. To prevent
contamination of the environment and bring on
possible threat to human and animal health, the
old battery or the battery put it in the appropriate
container at designated collection points. Do not
dispose of batteries or battery together with other
waste. It is recommended that you use local, free
reimbursement systems batteries and accumulators.
The battery should not be exposed to excessive heat
such as direct sunlight, re or the like.
CAUTION: This product employs a Laser System.
To ensure proper use of this product, please read
this owner’s manual carefully and retain it for future
reference. Should the unit require maintenance,
contact an authorized service center. Use of controls,
adjustments or the performance of procedures other
than those specied herein may result in hazardous
radiation exposure. To prevent direct exposure to
laser beam, do not try to open the enclosure. Visible
laser radiation when open. DO NOT STARE INTO
BEAM.
CAUTION:
• The apparatus should not be exposed to water
(dripping or splashing) and no objects lled with
liquids, such as vases, should be placed on the
apparatus.
• Minimum distances around the apparatus for
sucient ventilation, no less than 5 cm.
• The ventilation should not be impeded by
covering the ventilation openings with items,
such as newspapers, table-cloth, curtains etc.
• No naked ame sources, such as lighted candles,
DP650-P.AHUNLLW_7246_ENG.indd 3 12. 01. 09 �� 9:55
Page 4
4 Safety Information
1
should be placed on the apparatus.
• Internal lithium battery in the DVD should not be
replaced by user because of danger of explosion
if battery is incorrectly replaced ,and must be
Safety Information
replaced with the same type battery by expert.
• Use the apparatus in tropical and moderate climates only.
Notes on Copyrights
• This product incorporates copyright protection
technology that is protected by U.S. patents
and other intellectual property rights. Use of
this copyright protection technology must be
authorized by Rovi Corporation, and is intended
for home and other limited viewing uses only
unless otherwise authorized by Rovi Corporation.
Reverse engineering or disassembly is prohibited.
• Under the U.S. Copyright laws and Copyright
laws of other countries, unauthorized recording,
use, display, distribution, or revision of television
programs, videotapes, DVDs, CDs and other
materials may subject you to civil and/or criminal
liability.
Caution of usage in the car
• To prevent electrical shock and possible damage
to your unit or vehicle, always unplug the
automotive adapter from the cigarette lighter
socket before you remove the plug from your unit.
• A 3 amp. 250 V fuse for protection is installed in
the automotive adapter.
• While the engine is being started, disconnect the
automotive adapter from the car’s cigarette lighter
socket.
• Do not operate your unit when the car battery is
discharged. Peak current from the car generator
may cause the DC fuse to blow.
• If the vehicle’s supply voltage drops below
approximately 10 volts, your unit may not work
properly.
• Do not leave your unit in a place where the
temperature exceeds 45 °C (113 °F), or the pick-up
device may be damaged.
Caution of Unit handling
• Shipping the unit
Save the original packing materials and re-pack
the unit with them to maximize protection.
• Cleaning the unit
Clean the unit using a soft and dry cloth with
a mild detergent solution, not strong solvents
occurred the damage of surface.
Do not leave the unit with rubber or plastic
materials for a long period.
• Maintaining performance of the unit
Maintain the cleaning status of optical pick-up
lens and disc drive parts clean. If they are dirty or
worn, the displayed quality could be diminished.
For details, please contact your nearest authorized
service center.
Disposal of your old appliance
1. When this crossed-out wheeled bin
symbol is attached to a product it means
the product is covered by the European
Directive 2002/96/EC.
2. All electrical and electronic products shall be
disposed of separately from the municipal
waste stream via designated collection facilities
appointed by the government or the local
authorities.
3. The correct disposal of your old appliance will
help prevent potential negative consequences
for the environment and human health.
4. For more detailed information about disposal
of your old appliance, please contact your city
oce, waste disposal service or the shop where
you purchased the product.
LG Electronics hereby declares that this/
these product(s) is/are in compliance with
the essential requirements and other relevant provisions of Directive 2004/108/EC, 2006/95/
EC, and 2009/125/EC.
European representative: LG Electronics Service
Europe B.V.Veluwezoom 15, 1327 AE Almere. The
Netherlands (Tel : +31–(0)36–547–8888)
DP650-P.AHUNLLW_7246_ENG.indd 4 12. 01. 09 �� 9:55
Page 5

5
Contents
1
Safety Information
3 Cautions and Warnings
2
Preparation
6 Introduction
6 Symbols Used in this
Manual
6 About the “
Display
6 Playable Discs
6 Regional Code
7 File compatibility
7 Rechargeable battery
8 Main Unit
8 Supplied Accessories
” Symbol
3
Installation
10 [LOCK] Menu
10 [OTHERS] Menu
4
Operation
11 On-Screen display
11 General Playback
12 General operation
12 Advanced Playback
12 Movie
13 Music
13 Photo
5
Troubleshooting
14 Troubleshooting
6
Appendix
15 Area Code List
16 Language code List
17 Specifications
17 Trademarks and Licenses
1
2
3
4
5
6
9 Connecting the AC Adaptor
9 Connecting the Automotive
Adaptor
9 Connecting Audio and
Video cable
9 Setup
9 Adjust the settings
10 [LANGUAGE] Menu
10 [DISPLAY] Menu
10 [AUDIO] Menu
DP650-P.AHUNLLW_7246_ENG.indd 5 12. 01. 09 �� 9:55
Page 6
6 Preparation
2
Preparation
2
Introduction
Preparation
Symbols Used in this Manual
A section whose title has one of the following
symbols are applicable only to the disc
represented by the symbol.
DVD
ACD
MOVIE
MUSIC
PHOTO
About the “ ” Symbol Display
“ ” may appear on the screen during operation
and indicates that the function explained in
this owner’s manual is not available on that
specic media.
DVD-Video, DVD±R/RW
Audio CDs
Movie les contained in the
USB/Disc
Music les contained in the
USB/Disc
Photo les
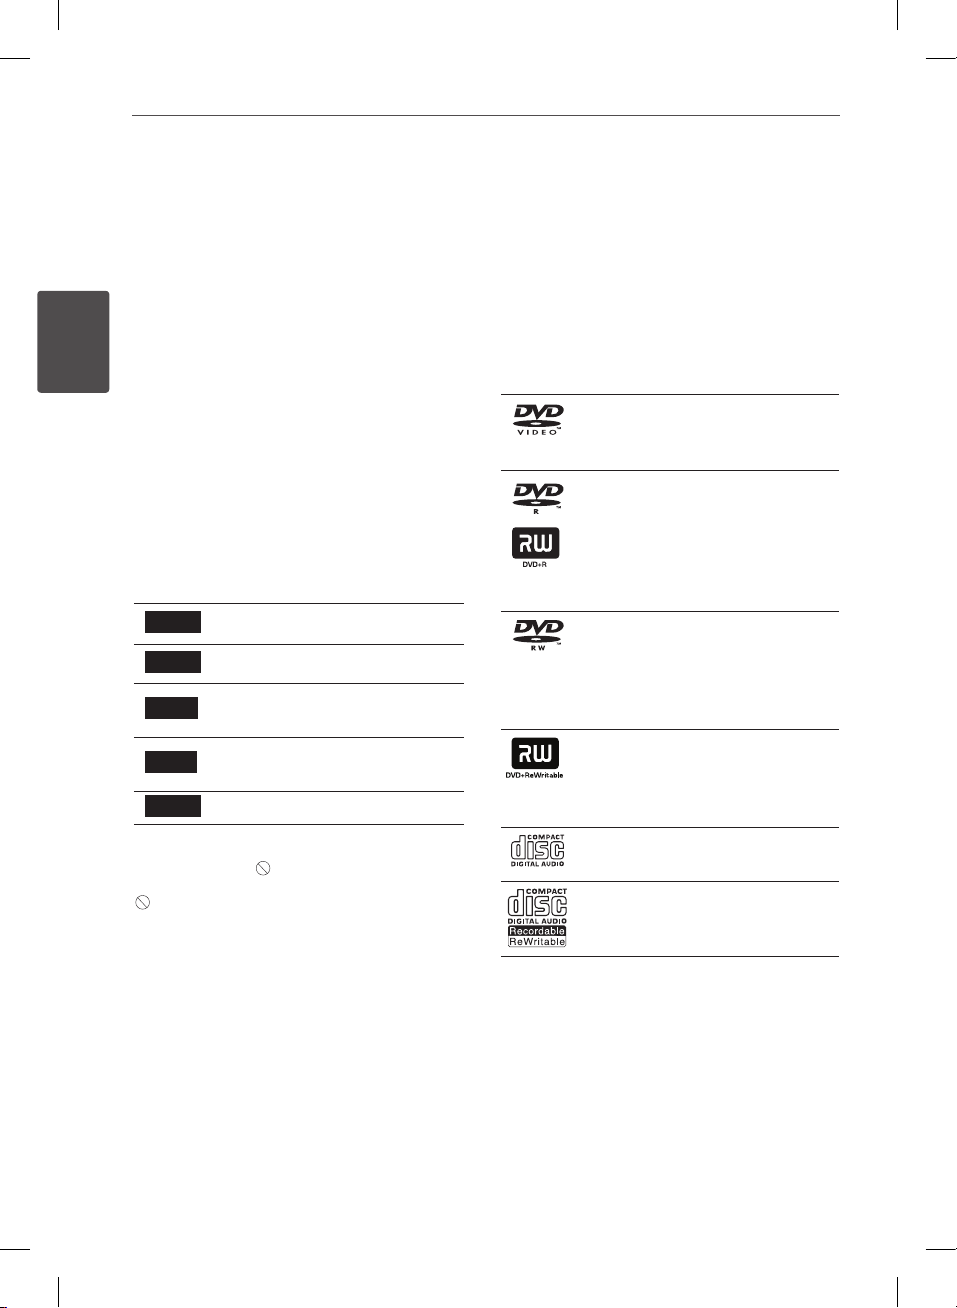
Playable Discs
DVD-VIDEO (8 cm / 12 cm disc)
Discs such as movies that can be
purchased or rented.
DVD±R (8 cm / 12 cm disc)
- Video mode and nalized only
- Supports the dual layer disc
also
- DVD±R discs that contain
Movie, Music or Photo les.
DVD-RW (8 cm / 12 cm disc)
- VR mode, Video mode and
nalized only
- DVD-RW discs that contain
Movie, Music or Photo les.
DVD+RW (8 cm / 12 cm disc)
- Video mode and nalized only
- DVD+RW discs that contain
Movie, Music or Photo les.
Audio CD (8 cm / 12 cm disc)
CD-R/RW (8 cm / 12 cm disc)
CD-R/RW discs that contain audio
titles, Movie, Music or Photo les.
Regional Code
This unit has a regional code printed on the
rear of the unit. This unit can play only DVD
disc labeled same as the rear of the unit or
“ALL”.
DP650-P.AHUNLLW_7246_ENG.indd 6 12. 01. 09 �� 9:55
Page 7

7Preparation
File compatibility
Overall
Available File extensions: “.jpg”, “.avi”, “.divx”,
“.mpg”, “.mpeg”, “.mp3”, “.wma”
• Some wav les are not supported on this
player.
• The le name is limited to 45 characters.
• Depending on the size and number of the
les, it may take several minutes to read the
contents on the media.
Maximum Files/Folder: Less than 600 (total
number of les and folders)
CD-R/RW, DVD±R/RW Format:
ISO 9660+JOLIET
MOVIE
Available resolution size:
720 x 576 (W x H) pixels
Playable subtitle: SubRip (.srt / .txt), SAMI
(.smi), SubStation Alpha (.ssa/.txt), MicroDVD
(.sub/.txt), SubViewer 2.0 (.sub/.txt), TMPlayer
(.txt), DVD Subtitle System (.txt)
Playable Codec format: “DIVX3.xx”, “DIVX4.xx”,
“DIVX5.xx”, “DIVX6.xx” (Standard playback only),
“MP43”, “3IVX”
• This player does not support the le that are
recorded with GMC*1 or Qpel*2. Those are video
encoding techniques in MPEG4 standard, like DivX
or XVID have.
*1 GMC – Global Motion Compensation
*2 Qpel – Quarter pixel
Playable Audio format: “Dolby Digital”, “PCM”,
“MP3”, “WMA”
Sampling frequency: within 32 - 48 kHz
(WMA), within 8 - 48 kHz (MP3)
Bit rate: within 32 - 192 kbps (WMA),
within 8 - 320 kbps (MP3)
MUSIC
Sampling frequency: within 32 - 48 kHz
(WMA), within 8 - 48 kHz (MP3)
Bit rate: within 8 - 320 kbps (MP3),
within 32 - 192 kbps (WMA)
PHOTO
Recommended size:
more than 32 x 32 x 32 bit/pixel
less than 5760 x 4608 x 32 bit/pixel
Rechargeable battery
• The internal rechargeable battery provides
you with the freedom to pass it around and
play the les without the power cord.
• The internal rechargeable battery will start
charging only when the unit is turned
o and the AC adaptor is connected to a
power outlet.
• The charging stops if you turn on the unit.
• The charging will take approximately 2
hours and 30 minutes.
• Operating time on battery: approximately
2 hours and 30 minutes. The operating
time on battery may vary depending on
the battery status, operational status and
environment conditions, and the maximum
playing time is possible up to 3 hours.
• When the remaining time of the battery
power is under a few minutes, “
Battery” will blink on the screen.
Check
2
Preparation
DP650-P.AHUNLLW_7246_ENG.indd 7 12. 01. 09 �� 9:55
Page 8

8 Preparation
Main Unit
2
N/X / ./>
Preparation
Previous/Next/Stop)
/ V / b/ B/ENTER
v
(Up/Down/Left/Right)
x
/
(Play/Pause/
SETUP
LCD Screen
DISPLAY
TITLE
Speakers
MENU
OPTION
O
(RETURN)
Z
(Open)
Battery charge and Power Indicator
(ON)
(OFF)
DC 9.5 V IN
AV OUT
(Earphone Jack)
USB Port
w
VOL (Volume)
(Power On/O Switch)
Supplied Accessories
RCA Video/Audio Adaptor (1) Automotive Adaptor (1) AC Adaptor (MPA-20P) (1)
• The actual AC Adaptor may dier
from the drawing.
DP650-P.AHUNLLW_7246_ENG.indd 8 12. 01. 09 �� 9:55
Page 9

3
Installation
9Installation
Connecting the AC Adaptor
Connect the unit to the power supply with the
supplied AC Adaptor.
Plug into a
power source
• Contact an electrical parts distributor for
assistance in selecting a suitable AC plug adaptor
or AC cord set.
• This AC adaptor is manufactured by NANJING
WANLIDA TECHNOLOGY CO., LTD.
Connecting the Automotive
Adaptor
Connect the unit to the Cigarette lighter socket
with the supplied Automotive Adaptor.
• This Automotive Adaptor is manufactured by
NANJING WANLIDA TECHNOLOGY CO., LTD.
Connecting Audio and Video
cable
Connect the AV OUT on the unit to AV cable
connected from TV with the supplied AV
Adaptor.
Audio/Video Cable
(not supplied)
(White)
(Red)
(Yellow)
Setup
When the unit is turned-on for the rst time,
you have to select the desired language.
3
Installation
Adjust the settings
1. Press SETUP.
2. Use
Plug into the car’s
cigarette lighter socket.
• Contact an electrical parts distributor for
assistance in selecting a suitable Automotive
Adaptor.
DP650-P.AHUNLLW_7246_ENG.indd 9 12. 01. 09 �� 9:56
press B to move to the second level.
3. Use
and press B to move to the third level.
4. Press vV to move the desired option and
press ENTER.
to select the rst setup option, and
vV
to select a second setup option,
vV
Page 10

10 Installation
3
[LANGUAGE] Menu
Menu Language/Disc Audio/Disc
Subtitle/Disc Menu
Select and set the language you prefer or
appropriate.
[DISPLAY] Menu
TV Aspect
Select and set TV aspect ratio according to
your TV type and preference.
[4:3]: Standard TV type
[16:9]: Wide TV type
Installation
Display Mode
Select and set Display Mode according to your
preference. Display Mode works only when the
TV Aspect mode is 4:3.
[Letterbox]: Display wide screen with black
stripe at top and bottom on TV
[Panscan]: Display full screen with cut nonmain scene on TV
and ENTER.
Rating
To rate level from 1(Kids) to 8 (Adult).
Password
To create or change the password.
If you forget the password
Remove the disc, press SETUP and OPTION
buttons, and then press ENTER after input “2104”
The password will be cleared.
Area Code
To input the standardized area code refer to
the Area Code List on page 15.
[OTHERS] Menu
REC Bitrate
To select bitrate when you record from Audio
CD to USB directly. Higher bitrate gives better
sound quality. For detailed recording method,
see page 13.
DivX VOD
[AUDIO] Menu
Set the player’s Audio options according to
various disc output type you use.
DRC (Dynamic Range Control)
To adjust the volume level automatically when
the Audio level reaches to more than the
predetermined level (Dolby Digital only).
Vocal
To mix or not the vocal with music using the
multi-channel karaoke DVD.
[LOCK] Menu
First, you have to create a 4-digit password
on Area Code to use the LOCK menu. You can
create or change the password using
DP650-P.AHUNLLW_7246_ENG.indd 10 12. 01. 09 �� 9:56
vVbB
ABOUT DIVX VIDEO: DivX® is a digital video
format created by DivX, Inc. This is an ocial
DivX Certied® device that plays DivX video.
Visit www.divx.com for more information and
software tools to convert your les into DivX
video.
ABOUT DIVX VIDEO-ON-DEMAND: This DivX
Certied® device must be registered in order
to play purchased DivX Video-on-Demand
(VOD) movies. To obtain your registration
code, locate the DivX VOD section in your
device setup menu. Go to vod.divx.com for
more information on how to complete your
registration.
[Register]: Displays the registration code of
your unit.
[Deregister]: Deactivate your unit and
display the deactivation code.
Page 11

4
Operation
11Operation
On-Screen display
You can display and adjust various information
on-screen about the loaded disc and USB Flash
Drive.
Displaying content information
on-screen
You can see the various playback information
using DISPLAY and vV
Title current title number/
Chapter
Time
Audio
Subtitle
DVD MOVIE
b B
total number of titles
current chapter
number/total number
of chapters
elapsed playing time/
total playback time
selected audio
language or channel
selected subtitle
.
General Playback
Playing Disc
1. Turn on the Power Switch.
2. Open the disc lid by pressing Z and insert
a disc.
3. Close the disc lid.
N/
4. Press
DVD disc will be automatically loaded.
Playing USB Flash Drive
1. Turn on the Power Switch.
2. Insert the USB Flash Drive to unit.
3. Press
4. Select the desired le.
5. Press
to play.
X
O
(RETURN) to use USB Flash Drive.
N/
to play the le.
X
4
Operation
Code Page
Angle
DP650-P.AHUNLLW_7246_ENG.indd 11 12. 01. 09 �� 9:56
selected proper subtitle
MOVIE file
code (
selected angle/total
number of angles
only)
Page 12

12 Operation
4
General operation
To Do this
Playback/
Pause
Stop
Skip to the
next or
previous
Fast playback
forward or
backward
Resume
playback
Operation
Adjust color/
brightness
Playback disc
or USB Flash
Drive with
several kinds
of les
Screen Saver The Screen Saver operates
Power Saver The Power Saver operates
N/
Press
Press
X
x
Press . or > during
playback
Long-press . or
during playback
• DVD/MOVIE:
• ACD/MUSIC:
P
mmb
MpMBpMMpMMB
p
x2
or
M
M
Press x during playback to
save the stopped point.
• Press x once
on the screen (Resume Stop)
• Press x twice
on the screen (Complete Stop)
Press OPTION and adjust the
color and brightness from 0 to
15 using
b B
Select the proper menu by
continuously pressing TITLE as
MUSIC, PHOTO, and MOVIE.
when the unit is left for 5
minutes on Stop. Press any
buttons to deactivate it.
when the unit is left for
5 minutes on the Screen
Saver mode. Press
deactivate it.
>
mmPmbPm
P
mx8
x4
x4
m
p
x8
M
: Displayed
: Displayed
P
m
Xx
.
N/
to
X
x
Advanced Playback
Movie
To Do this
Search for the
le Number
or
x2
Display disc
menu
Play
repeatedly
Slow
playback
forward
Set the
desired
staring time
of playback
Last Scene
Memory
DVD
Press OPTION and select
Number Search, and then
press ENTER. Select the
desired Number using vV
and select OK using B, and
then press ENTER. (MOVIE le
only)
Press MENU (DVD only)
Press OPTION during playback
and select Repeat. And then,
press OPTION or RETURN after
selecting a repeat mode using
.
b B
• DVD: Chapter/Title/Off
• MOVIE: Track/All/Off
Long-press > in the paused
state.
• IB1/16pIB1/8pIB1/4pIB1/2
Press DISPLAY during
playback. Select the Time box.
Press OPTION and set the
desired starting time of
playback using
buttons, and then press
ENTER.
For example, set “2:10:20” to
start at 2 hours, 10 minutes,
and 20 seconds.
This unit can memorize and
play the last viewed scene
even if disc is inserted again
after removal or unit is turned
on after o with same disc.
(DVD only)
MOVIE
vV b B
DP650-P.AHUNLLW_7246_ENG.indd 12 12. 01. 09 �� 9:56
Page 13

13Operation
Music
To Do this
Search for the
le Number
Play
repeatedly
Play
randomly
Create or
delete your
own program
Display
the le
information
Last Scene
Memory
Press OPTION and select
Number Search, and then
press ENTER. Select the
desired Number using vV
and select OK using B, and
then press ENTER.
Press OPTION during playback
and select Repeat. And then,
press OPTION or RETURN after
selecting a repeat mode using
Track/All/Off)
. (
b B
Press OPTION and select
Random, and then select ON
or OFF using
Press OPTION or RETURN.
Select the desired le and
press B to move to “
then press ENTER to create the
music lists.
Select the undesired le and
press B to move to “
then press ENTER to delete
programmed music lists.
But, if you want to delete all
from programmed lists, press
to move to [Clear All] and
V
then press ENTER.
Press DISPLAY repeatedly to
see the contained information
in MP3 le, [TITLE/ARTIST/
ALBUM/YEAR/COMMENT].
This unit can memorize and
play the last viewed scene
even if disc is inserted again
after removal or unit is turned
on after o with same disc.
(ACD only)
MUSICACD
.
b B
“, and
Record the
Audio CD to
USB Flash
Drive
The making of unauthorized copies of copy-
protected material, including computer programs,
les, broadcasts and sound recordings, may be
an infringement of copyrights and constitute a
criminal oense. This equipment should not be
Photo
”, and
To Do this
Search for the
le Number
View the slide
show
Adjust the
slide show
speed
Listen to
music during
slide show
Insert a USB ash drive and
Audio CD in the unit. Press
OPTION and select [CD
Recording] menu.
Select a desired track using
and press ENTER.
vV
• [X1] or [X4] option
Press OPTION on recording
- X1: Recording to 1X speed
listening to music
- X4: Recording to 4X speed
non-listening to music
used for such purposes.
Be responsible
Respect copyrights
PHOTO
Press OPTION and select
Number Search, and then
press ENTER. Select the desired
Number using vV and select
OK using B, and then press
ENTER.
Press
vV b B
” and press ENTER to view
“
the slide show.
Press
vV b B
and press
adjust the slide show speed.
Press
vV b B
” and press ENTER to listen
“
to music during slide show.
to move to
to move to “
repeatedly to
b B
to move to
4
Operation
”
DP650-P.AHUNLLW_7246_ENG.indd 13 12. 01. 09 �� 9:56
Page 14

14 Troubleshooting
5
Troubleshooting
Troubleshooting
Symptom Cause Solution
No power. • The power cord is disconnected. • Plug the power cord into the wall
The power is
on, but the unit
does not work.
No picture
on other
connected
display devices,
TV etc.
No sound. • The volume is set to minimum. • Use the volume controller to adjust
5
Troubleshooting
The unit does
not start
playback.
outlet securely.
• Disc is not inserted. • Insert a disc.
• The TV is not set to receive the
signal from the unit.
• The video cable is not
connected securely.
• The equipment connected with
the audio cable is not set to
receive the signal from the unit.
• The AUDIO options are set to
the wrong position.
• The earphone jack is connected
to the unit.
• The disc is inserted upside
down.
• The disc surface is dirty by
Fingerprints and dust on the
disc.
• An unplayable disc is inserted. • Insert a playable disc. (Check the disc
• The rating level is set. • Change the rating level.
• Select the appropriate video input
mode on the TV.
• Connect the video cable securely.
the volume.
• Select the correct input mode of the
audio amplier.
• Set the AUDIO settings to the correct
position.
• Seperate the earphone jack from the
unit.
• Ensure the disc label is upwards.
• Clean the disc with a clean, soft, lint-
free cloth, wipe the disc outwards
from the center. (Do not use strong
solvents such as alcohol, benzine,
thinner, etc)
type and regional code.)
DP650-P.AHUNLLW_7246_ENG.indd 14 12. 01. 09 �� 9:56
Page 15

6
Appendix
Area Code List
Choose an area code from this list.
Area Code Area Code Area Code Area Code
Afghanistan AF
Argentina AR
Australia AU
Austria AT
Belgium BE
Bhutan BT
Bolivia BO
Brazil BR
Cambodia KH
Canada CA
Chile CL
China CN
Colombia CO
Congo CG
Costa Rica CR
Croatia HR
Czech Republic CZ
Denmark DK
Ecuador EC
Egypt EG
El Salvador SV
Ethiopia ET
Fiji FJ
Finland FI
France FR
Germany DE
Great Britain GB
Greece GR
Greenland GL
Hong Kong HK
Hungary HU
India IN
Indonesia ID
Israel IL
Italy IT
Jamaica JM
Japan JP
Kenya KE
Kuwait KW
Libya LY
Luxembourg LU
Malaysia MY
Maldives MV
Mexico MX
Monaco MC
Mongolia MN
Morocco MA
Nepal NP
Netherlands NL
Antilles AN
New Zealand NZ
Nigeria NG
Norway NO
Oman OM
Pakistan PK
Panama PA
Paraguay PY
Philippines PH
Poland PL
Portugal PT
Romania RO
Russian
Federation RU
Saudi Arabia SA
Senegal SN
Singapore SG
Slovak Republic SK
Slovenia SI
South Africa ZA
South Korea KR
Spain ES
Sri Lanka LK
Sweden SE
Switzerland CH
Taiwan TW
Thailand TH
Turkey TR
Uganda UG
Ukraine UA
United States US
Uruguay UY
Uzbekistan UZ
Vietnam VN
Zimbabwe ZW
15Appendix
6
Appendix
DP650-P.AHUNLLW_7246_ENG.indd 15 12. 01. 09 �� 9:56
Page 16

16 Appendix
6
Appendix
Language code List
Use this list to input your desired language for the following initial settings: [Disc Audio],
[Disc Subtitle] and [Disc Menu].
Language Code Language Code Language Code Language Code
Afar 6565
Afrikaans 6570
Albanian 8381
Ameharic 6577
Arabic 6582
Armenian 7289
Assamese 6583
Aymara 6588
Azerbaijani 6590
Bashkir 6665
Basque 6985
Bengali; Bangla 6678
Bhutani 6890
Bihari 6672
Breton 6682
Bulgarian 6671
Burmese 7789
Byelorussian 6669
Chinese 9072
Croatian 7282
Czech 6783
Danish 6865
Dutch 7876
English 6978
Esperanto 6979
Estonian 6984
Faroese 7079
Fiji 7074
Finnish 7073
French 7082
Frisian 7089
Galician 7176
Georgian 7565
German 6869
Greek 6976
Greenlandic 7576
Guarani 7178
Gujarati 7185
Hausa 7265
Hebrew 7387
Hindi 7273
Hungarian 7285
Icelandic 7383
Indonesian 7378
Interlingua 7365
Irish 7165
Italian 7384
Japanese 7465
Kannada 7578
Kashmiri 7583
Kazakh 7575
Kirghiz 7589
Korean 7579
Kurdish 7585
Laothian 7679
Latin 7665
Latvian, Lettish 7686
Lingala 7678
Lithuanian 7684
Macedonian 7775
Malagasy 7771
Malay 7783
Malayalam 7776
Maori 7773
Marathi 7782
Moldavian 7779
Mongolian 7778
Nauru 7865
Nepali 7869
Norwegian 7879
Oriya 7982
Panjabi 8065
Pashto, Pushto 8083
Persian 7065
Polish 8076
Portuguese 8084
Quechua 8185
Rhaeto-Romance
8277
Rumanian 8279
Russian 8285
Samoan 8377
Sanskrit 8365
Scots Gaelic 7168
Serbian 8382
Serbo-Croatian 8372
Shona 8378
Sindhi 8368
Singhalese 8373
Slovak 8375
Slovenian 8376
Spanish 6983
Sudanese 8385
Swahili 8387
Swedish 8386
Tagalog 8476
Tajik 8471
Tamil 8465
Telugu 8469
Thai 8472
Tonga 8479
Turkish 8482
Turkmen 8475
Twi 8487
Ukrainian 8575
Urdu 8582
Uzbek 8590
Vietnamese 8673
Volapük 8679
Welsh 6789
Wolof 8779
Xhosa 8872
Yiddish 7473
Yoruba 8979
Zulu 9085
DP650-P.AHUNLLW_7246_ENG.indd 16 12. 01. 09 �� 9:56
Page 17

17Appendix
Specifications
Power consumption 12 W
Power requirements
AC adaptor
requirements
Automotive Adaptor
requirements
Dimensions
(W x H x D)
Net Weight
(Approx.)
Operating
temperature
Operating humidity 5 % to 90 %
Laser Semiconductor laser
Signal system R.G.B. stripe
Bus Power Supply
(USB)
Video/Audio Out
Video Out
Audio Out
Earphone terminal
2 A
9.5 V
100 - 240 V ~ 1 A,
50/60 Hz
8.5 V -16 V DC
Approx.
(200 x 16.5 x 38.5) mm
0.73 kg
0 °C to 40 °C
500 mA
5 V
ø 3.5 mm mini jack x 1
1.0 V (p-p), 75 Ω, sync
negative
1.5 Vrms (1 kHz,
0 dB)
ø 3.5 mm stereo mini
jack x 1
Trademarks and
Licenses
Manufactured under license from Dolby Laboratories.
Dolby and the double-D symbol are trademarks of
Dolby Laboratories.
DivX®, DivX Certied® and associated logos are
trademarks of DivX, Inc. and are used under license.
“DVD Logo” is a trademark of DVD Format/Logo
Licensing Corporation.
• Design and specications are subject to
change without notice.
6
Appendix
Liquid Crystal Display
Panel size 17.8 cm (diagonal)
Projection system
Driving system
Resolution
DP650-P.AHUNLLW_7246_ENG.indd 17 12. 01. 09 �� 9:56
R.G.B. stripe
TFT active matrix
480 x 234 (WQVGA)
Page 18

DP650-P.AHUNLLW_7246_ENG.indd 18 12. 01. 09 �� 9:56
 Loading...