

LG DP461A-P Owner’s Manual
ENGLISH
DP461A / DP461D
P/NO. : MFL62512601
CAUTION
RISK OF ELECTRIC SHOCK
DO NOT OPEN
CAUTION: TO REDUCE THE RISK OF ELECTRIC SHOCK. DO NOT REMOVE COVER (OR BACK). NO USER-SERVICEABLE PARTS INSIDE. REFER SERVICING TO QUALIFIED SERVICE PERSONNEL.
This lightning flash with arrowhead symbol within an equilateral triangle is intended to alert the user to the presence of uninsulated dangerous voltage within the productʼs enclosure that may be of sufficient magnitude to constitute a risk of electric shock to persons.
The exclamation point within an equilateral triangle is intended to alert the user to the presence of important operating and maintenance (servicing) instructions in the literature accompanying the product.
WARNING: TO PREVENT FIRE OR ELECTRIC SHOCK HAZARD, DO NOT EXPOSE THIS PRODUCT TO RAIN OR MOISTURE.
WARNING: Do not install this equipment in a confined space such as a book case or similar unit.
CAUTION: Do not block any ventilation openings. Install in accordance with the manufacturer's instructions. Slots and openings in the cabinet are provided for ventilation and to ensure reliable operation of the product and to protect it from over heating. The openings should be never be blocked by placing the product on a bed, sofa, rug or other similar surface. This product should not be placed in a built-in installation such as a bookcase or rack unless proper ventilation is provided or the manufacturer's instruction has been adhered to.
CAUTION: This product employs
a Laser System. To ensure proper use of this product, please read this ownerʼs manual carefully and retain it for future refer-
ence. Should the unit require
maintenance, contact an authorized service center.Use of controls, adjustments or the performance of procedures other than those specified herein may result in hazardous radiation exposure. To prevent direct expo-
sure to laser beam, do not try to open the enclosure. Visible laser radiation when open. DO NOT STARE INTO BEAM.
CAUTION: The apparatus should not be exposed to water (dripping or splashing) and no objects filled with liquids, such as vases, should be placed on the apparatus.
CAUTION
•The ventilation should not be impeded by covering the ventilation openings with items, such as newspapers, table-cloth, curtains etc.
•No naked flame sources, such as lighted candles, should be placed on the apparatus.
•Used batteries should be disposed of safely and not incinerated. Attention should be shown to the environment aspects of battery disposal.
•Use the apparatus in tropical and moderate climates only.
•The excessive sound pressure from earphones and headphones can cause hearing loss.
•The battery shall not be exposed to excessive heat such as sunshine, fire or the like.
•Do not remove the battery incorporated with product for your safety.
If you need to replace the battery, take it to the nearest authorized LG Electronics service point or dealer for assistance
CAUTION concerning the Power Cord
Most appliances recommend they be placed upon a dedicated circuit;
That is, a single outlet circuit which powers only that appliance and has no additional outlets or branch circuits. Check the specification page of this owner's manual to be certain. Do not overload wall outlets. Overloaded wall outlets, loose or damaged wall outlets, extension cords, frayed power cords, or damaged or cracked wire insulation are dangerous. Any of these conditions could result in electric shock or fire. Periodically examine the cord of your appliance, and if its appearance indicates damage or deterioration, unplug it, discontinue use of the appliance, and have
the cord replaced with an exact replacement part by an authorized service center. Protect the power cord from physical or mechanical abuse, such as being twisted, kinked, pinched, closed in a door, or walked upon. Pay
particular attention to plugs, wall outlets, and the point where the cord exits the appliance.To disconnect power from the mains, pull out the mains cord plug. When installing the product, ensure that the plug is easily accessible.
Warning for replaceable lithium battery
•danger of explosion if battery incorrectly replaced.
•replace only with the same type battery.
•additional warning marking close to the battery if intended to be replaced by users.
POWER: This unit operates on a mains supply of 100240V, 50/60Hz.
WIRING: This unit is supplied with a BSI 1363 approved 13 amp mains plug, fused at 5 amp. When replacing the fuse always use a 5 amp BS 1362, BSI or ASTA approved type. Never use this plug with the fuse cover omitted. To obtain a replacement fuse cover contact your dealer. If the type of plug supplied is not suitable for the mains sockets in your home, then the plug should be removed and a suitable type fitted. Please refer to the wiring instructions below: WARNING: A mains plug removed from the mains lead of this unit must be destroyed. A mains plug with bared wires is hazardous if inserted in a mains socket. Do not connect either wire to the earth pin,
marked with the letter E or with the earth symbol  or coloured green or green and yellow.
If any other plug is fitted, use a 5 amp fuse, either in the plug, or at the distribution board.
IMPORTANT: The wires in this mains lead are coloured in accordance with the following codes:
- BLUE: NEUTRAL, BROWN: LIVE - As the colours of the wires in the mains lead of this unit may not correspond with the coloured marking identifying the terminals in your plug, proceed as follows: The wire which is coloured blue must be connected to the terminal which is marked with the letter N or coloured black. The wire which is coloured brown must be connected to the terminal which is marked with the letter L or coloured red.
2
|
Types of Playable Discs ............................................................................. |
3 |
|
Rechargeable battery ................................................................................. |
3 |
|
Main Unit .................................................................................................... |
4 |
|
Remote Control .......................................................................................... |
5 |
|
Power connections ..................................................................................... |
6 |
|
Hooking up the unit ................................................................................... |
7 |
|
Revolving the LCD panel ........................................................................... |
7 |
| <![if ! IE]> <![endif]>Contents |
Using an USB Flash Drive ....................................................................... |
13 |
|
Selecting the operation mode .................................................................... |
7 |
|
Adjust the settings .................................................................................. |
8-9 |
|
Displaying Disc Information........................................................................ |
9 |
|
Playing a Disc...................................................................................... |
10-11 |
|
Playing a DivX movie file........................................................................... |
11 |
|
Listening to Music Disc or files................................................................. |
12 |
|
Viewing photo files ................................................................................... |
12 |
|
Watching the TV program ........................................................................ |
14 |
|
Auto Channel Memory.............................................................................. |
15 |
|
Language Codes ...................................................................................... |
16 |
|
Area Codes .............................................................................................. |
16 |
|
Troubleshooting........................................................................................ |
17 |
|
Specifications ........................................................................................... |
17 |
|
Enjoying in a car with the Headrest Mounting Bracket(DP461D Only).... 18 |
|
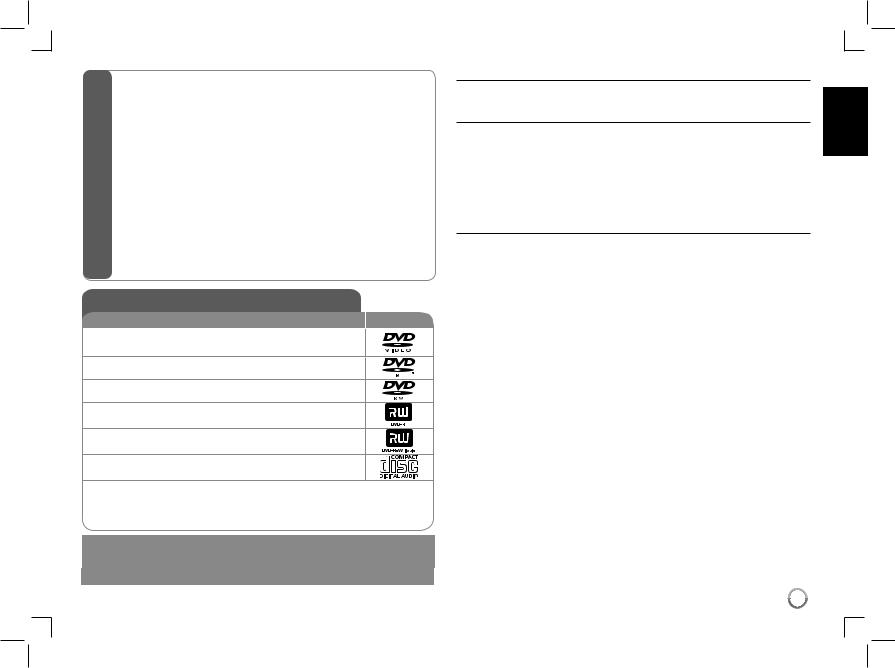
Types of Playable Discs |
|
|
|
Type |
Logo |
DVD-VIDEO: Discs such as movies that can be purchased or rented.
DVD-R: Video mode and finalized only
DVD-RW: VR mode, Video mode and finalized only
DVD+R: Video mode only
DVD+RW: Video mode only
Audio CD: Music CDs or CD-R/CD-RW in music CD format that can be purchased.
This unit plays DVD±R/RW and CD-R/RW that contains audio titles, DivX, MP3, WMA and/or JPEG files. Some DVD±RW/DVD±R or CD-RW/CD-R cannot be played on this unit due to the recording quality or physical condition of the disc, or the characteristics of the recording device and authoring software.
Manufactured under license from Dolby Laboratories. Dolby and the double-D symbol are trademarks of Dolby Laboratories.
"DVD Logo" is a trademark of DVD format/Logo Licensing Corporation.
About the  Symbol Display
“  ” may appear on your TV display during operation and indicates that the function explained in this ownerʼs manual is not available on that disc.
Regional Codes
This unit has a regional code printed on the rear of the unit. This unit can play only DVD discs labeled same as the rear of the unit or “ALL”.
•Most DVD discs have a globe with one or more numbers in it clearly visible on the cover. This number must match your unitʼs regional code or the disc cannot play.
•If you try to play a DVD with a different regional code from your player, the message “Check Regional Code” appears on the TV screen.
Copyrights
It is forbidden by law to copy, broadcast, show, broadcast via cable, play in public, or rent copyrighted material without permission. This product features the copy protection function developed by Macrovision. Copy protection signals are recorded on some discs. When recording and playing the pictures of these discs picture noise will appear. This product incorporates copyright protection technology that is protected by U.S. patents and other intellectual
property rights. Use of this copyright protection technology must be authorized by Macrovision, and is intended for home and other limited viewing uses only unless otherwise authorized by Macrovision. Reverse engineering or disassembly is prohibited.
Rechargeable battery
•Its internal rechargeable battery provides you with the freedom to pass it around and play the files without the power cord.
•The internal rechargeable battery will start charging only when the unit is turned off and the AC adapter is connected to a power outlet.
•The charging stops if you turn on the unit.
•The charging will take approximately 2 hours and 30 minutes.
•Operating time on battery: approximately 2 hour 20 minutes.
The operating time on battery may vary depending on the battery status, operational status and environment conditions.
•The battery indicator will turn red while charging. Once the charging is complete, the indicator light changes to green.
•When the remaining time of the battery power is under a few minutes, “ ” or " Check Battery Status" will blink on the screen.
3
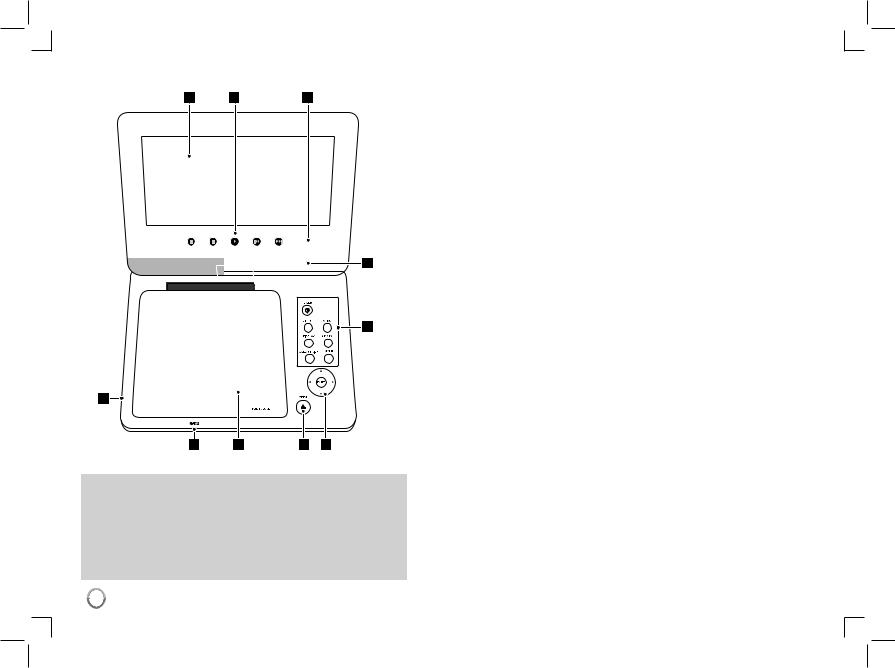
Main Unit
Volume: You can adjust the volume level using the volume controller on the right side.
Earphones: Connect a earphones to the earphones jack on the right side to enjoy the sound individually.
Antenna Input: Refer to page 14.
AV OUT: Refer to page 7.
aLCD screen
bPlayback Control Buttons
•x (Stop): Stops playback.
•X (PAUSE/STEP): Pauses playback temporarily/ press repeatedly for frame-by-frame playback.
•N (Play): Starts playback.
•. (Skip): Search backward* or returns to the beginning of current chapter or track or go to the previous chapter or track.
•> (Skip): Search forward* or Go to next chapter or track.
*Press and hold button for about two seconds.
cRemote sensor: Point the remote control here. To control the unit using the remote control, do not fold the LCD panel down.
dSpeakers
eFunction Buttons
•POWER (1): Turn the unit ON or OFF.
•SETUP: Accesses or exits the setup menu.
•MENU: Accesses the DVD menu.
•DISPLAY: Accesses On-Screen Display.
•LCD MODE: Selects the LCD mode. (16:9, 4:3 or Off)
•COLOR/BRIGHT*: Displays the Brightness or Color menu for LCD display.
•MODE: Selects a operation mode between [DISC], [TV] and [USB].
*To adjust the color or brightness of the LCD display, press COLOR/BRIGHT repeatedly on the main unit to display the Brightness or Color menu then use b / B to adjust the value. Press ENTER to confirm the adjustment.
fMenu Control Buttons
•b B v V (left/right/up/down): Selects an item in the menu.
•ENTER: Confirms menu selection.
gOPEN (Z): Opens the disc lid.
hDisc Lid
iBattery charge and power indicator
•The indicator turns red in charging and changes to green color when the charging is complete. (Refer to page 3 for details.)
•The indicator turns green for a few seconds when the unit is turned on.
jUSB Port: Connect an USB Flash Drive.
4

Remote Control
 a
a
b
c
d
• • • • • • • a • • • • • • •
POWER (1): Switches the unit ON or OFF.
AUDIO (  ): Selects an audio language or audio channel.
SUBTITLE ( ): Selects a subtitle language.
ANGLE ( ): Selects a DVD camera angle, if available.
SKIP/SEARCH (. / >): Search* backward / forward. Go to next or previous chapter/track.
* Press and hold button for about two seconds.
SLOW (t / T): Reverse/ Forward slow playback.
• • • • • • • b • • • • • • •
SETUP: Accesses or exits the setup menu.
MENU: Accesses the DVD menu. vV b B: Navigates the menus.
ENTER ( ): Confirms menu selection.
RETURN (O): Press to move backwards in the menu or exit the menu.
DISPLAY: Accesses On-Screen Display.
• • • • • • • c • • • • • • •
PAUSE/STEP (X): Pauses playback temporarily/ press repeatedly for frame-by-frame playback.
PLAY (N): Starts playback.
STOP (x): Stops playback.
Numerical buttons: Selects numbered options in a menu.
PROG.: Enters the program edit mode.
CLEAR: Removes a track number on the Program List.
• • • • • • • d • • • • • • •
TITLE: Access the discʼs title menu.
REPEAT: Repeats a chapter, track, title or all.
A-B: Repeats a section.
ZOOM: Enlarges video image.
MARKER : Marks any point during playback.
SEARCH : Displays [Marker Search] menu.
RANDOM: Plays tracks in random order.
Put the battery into the Remote Control
Pinch the battery holder clip together then pull the tab to remove the battery holder. Insert the battery with the + facing in the same direction as the + on the battery holder. Replace the battery holder with battery into the Remote Control unit making sure that it is fully inserted.
•Replace Remote Control unit battery with 3V micro lithium cells such as CR. 2025 or its equivalent.
•Dispose of battery safety in accordance with local laws. Do not dispose of in fire.
Warning : The battery used in this device may present a fire or chemical burn hazard if mistreated. Do not recharge, disassemble, incinerate, or heat above 100 °C (212 °F).
Replace the battery with Matsushita Elec. Ind. Co., Ltd. (Panasonic), part no. CR. 2025 only. Use of another battery may present a risk of fire or explosion. Dispose of used batteries. Keep batteries away from children. Do not disassemble or dispose of in fire.
5
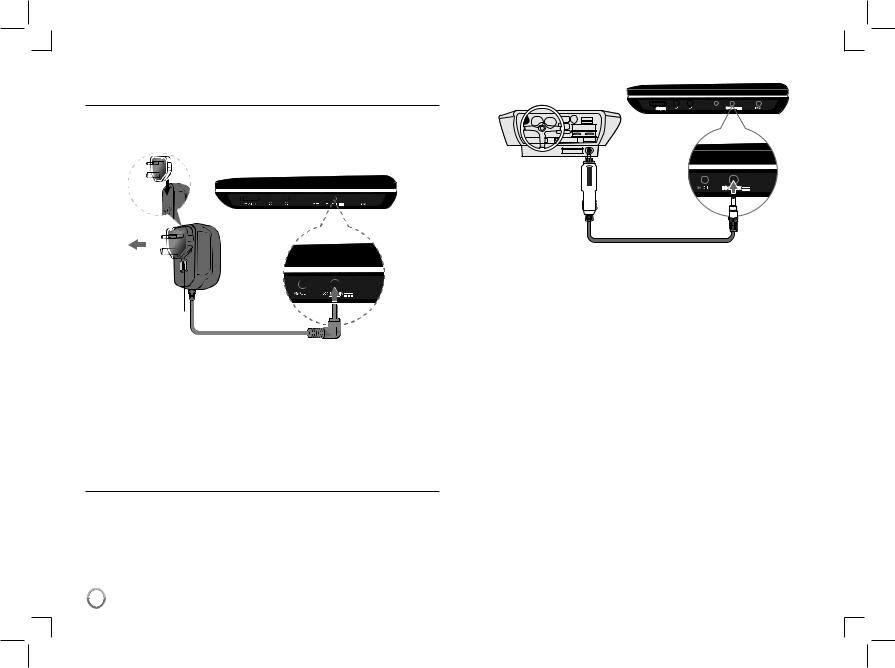
Power connections
Connecting the Power Cable
Connect the supplied power cable from the unit to a power socket.
Attach the power plug to the body of the AC adapter. (The actual set may differ from the drawing.)
Right side of the unit
Plug into a power source.
Power cord release knob
Plug into the “DC 12V IN” jack.
AC adapter
•This AC adapter operates on 100-240V~ 1A 50/60Hz.
•Contact an electrical parts distributor for assistance in selecting a suitable AC plug adapter or AC cord set.
•Manufactured by NANJING WANLIDA TECHNOLOGY CO., LTD
Connect the Automotive adapter
This unit and its automotive adapter are designed for use in vehicles that have 8.5-16 volt, negative ground electrical systems. This is standard for most vehicles. If your vehicle has a different type of electrical system, the DC power system cannot be used.
Right side of unit
Plug into the carʼs cigarette lighter socket.
Plug into the “DC 12V IN” jack.
Automotive adapter
•This automotive adapter operates on DC 8.5-16V.
•Contact an electrical parts distributor for assistance in selecting a suitable automotive adapter.
•Manufactured by NANJING WANLIDA TECHNOLOGY CO., LTD.
Caution
•To prevent electrical shock and possible damage to your unit or vehicle, always unplug the automotive adapter from the cigarette lighter socket before you remove the plug from your unit.
•A 3 amp. 250V fuse for protection is installed in the automotive adapter.
•While the engine is being started, disconnect the automotive adapter from the carʼs cigarette lighter socket.
•Do not operate your unit when the car battery is discharged.
Peak current from the car generator may cause the DC fuse to blow.
•If the vehicleʼs supply voltage drops below approximately 10 volts, your unit may not work properly.
•Do not leave your unit in a place where the temperature exceeds 70°C (158°F), or the pick-up device may be damaged.
Examples include:
-Inside a car with the windows closed and in direct sunshine.
-Near a heating appliance.
6
 Loading...