

Page 1

LG C900K User Guide
- English
This document is the user guide for the LG C900K Windows Phone
Smartphone. All rights for this document are reserved by LG Electronics.
Copying, modifying and distributing this document without the consent of
LG Electronics are prohibited.
Page 2

Part 15.21 statement
This Device is not intended for sale the U.S.A
" Change or Modifications that are not expressly approved by the manufacturer could void
the user's authority to operate the equipment. “
Part 15.105 statement
This equipment has been tested and found to comply with the limits for a class B digital
device, pursuant to Part 15 of the FCC Rules.
These limits are designed to provide reasonable protection against harmful interference in
a residential installation. This equipment generates uses and can radiate radio frequency
energy and, if not installed and used in accordance with the instructions, may cause harmful
interference to radio communications. However, there is no guarantee that interference will
not occur in a particular installation. If this equipment does cause harmful interference or
television reception, which can be determined by turning the equipment off and on, the user
is encouraged to try to correct the interference by one or more of the following measures:
- Reorient or relocate the receiving antenna.
- Increase the separation between the equipment and receiver.
- Connect the equipment into an outlet on a circuit different from that to
which the receiver is connected.
- Consult the dealer or an experienced radio/TV technician for help.
Page 3

Part 15 Class B Compliance
This device and its accessories comply with part15 of FCC rules and ICES-003 Class B
digital apparatus requirements for Industry Canada.
Operation is subject to the following two conditions:
(1) This device & its accessories may not cause harmful interference.
(2) This device & its accessories must accept any interference received,
including interference that may cause undesired operation.
Body-worn Operation
This device has been tested for typical body-worn operations
with the distance of 0.79inches (2.0cm) from the user’s body.
To comply with FCC RF exposure requirements, a minimum separation distance
of 0.79inches(2.0cm) must be maintained from the user's body.
Additionally, Belt clips, holsters & other body-worn accessories may not contain
metallic components.
Page 4

LG C900K Features
Phone Components
Hands-free Connector/
Charger/Cable Connector
Proximity Sensor
Turns off the LCD automati-
cally when in close proximity
to your face, during a call.
Touch Screen
Send Key
Opens the touchscreen
Dialpad and answers
incoming calls
<Left> <Right>
Power/End Key
Hold down to power the phone On or
Off.
Earpiece
Allows you to listen to the
other party/caller.
Fingerprint Navigation sensor
Scrolls right and left or up and
down to navigate menus.
End Key
Ends or rejects a call.
Back button
Returns to the previous menu
Stylus Connector Slot
Volume Keys
v
When the screen is idle:
Adjust the phone volumes
v
During a call:
Adjust the in-call earpiece
volumes
MicroSD Card Slot
Multitasking Key
Camera key
Activates the camera
17
Page 5
LG C900K Features
How to hold your LG C900K
External Camera Lens
Soft Reset Key
SIM card slot
Battery Terminals
18
For better RF antenna reception, LG suggests that you hold the handset as
depicted in the figure below.
Do not cover the RF antenna area with your hand during a call or when
using a Bluetooth connection. This may degrade speech quality.
RF antenna
Page 6

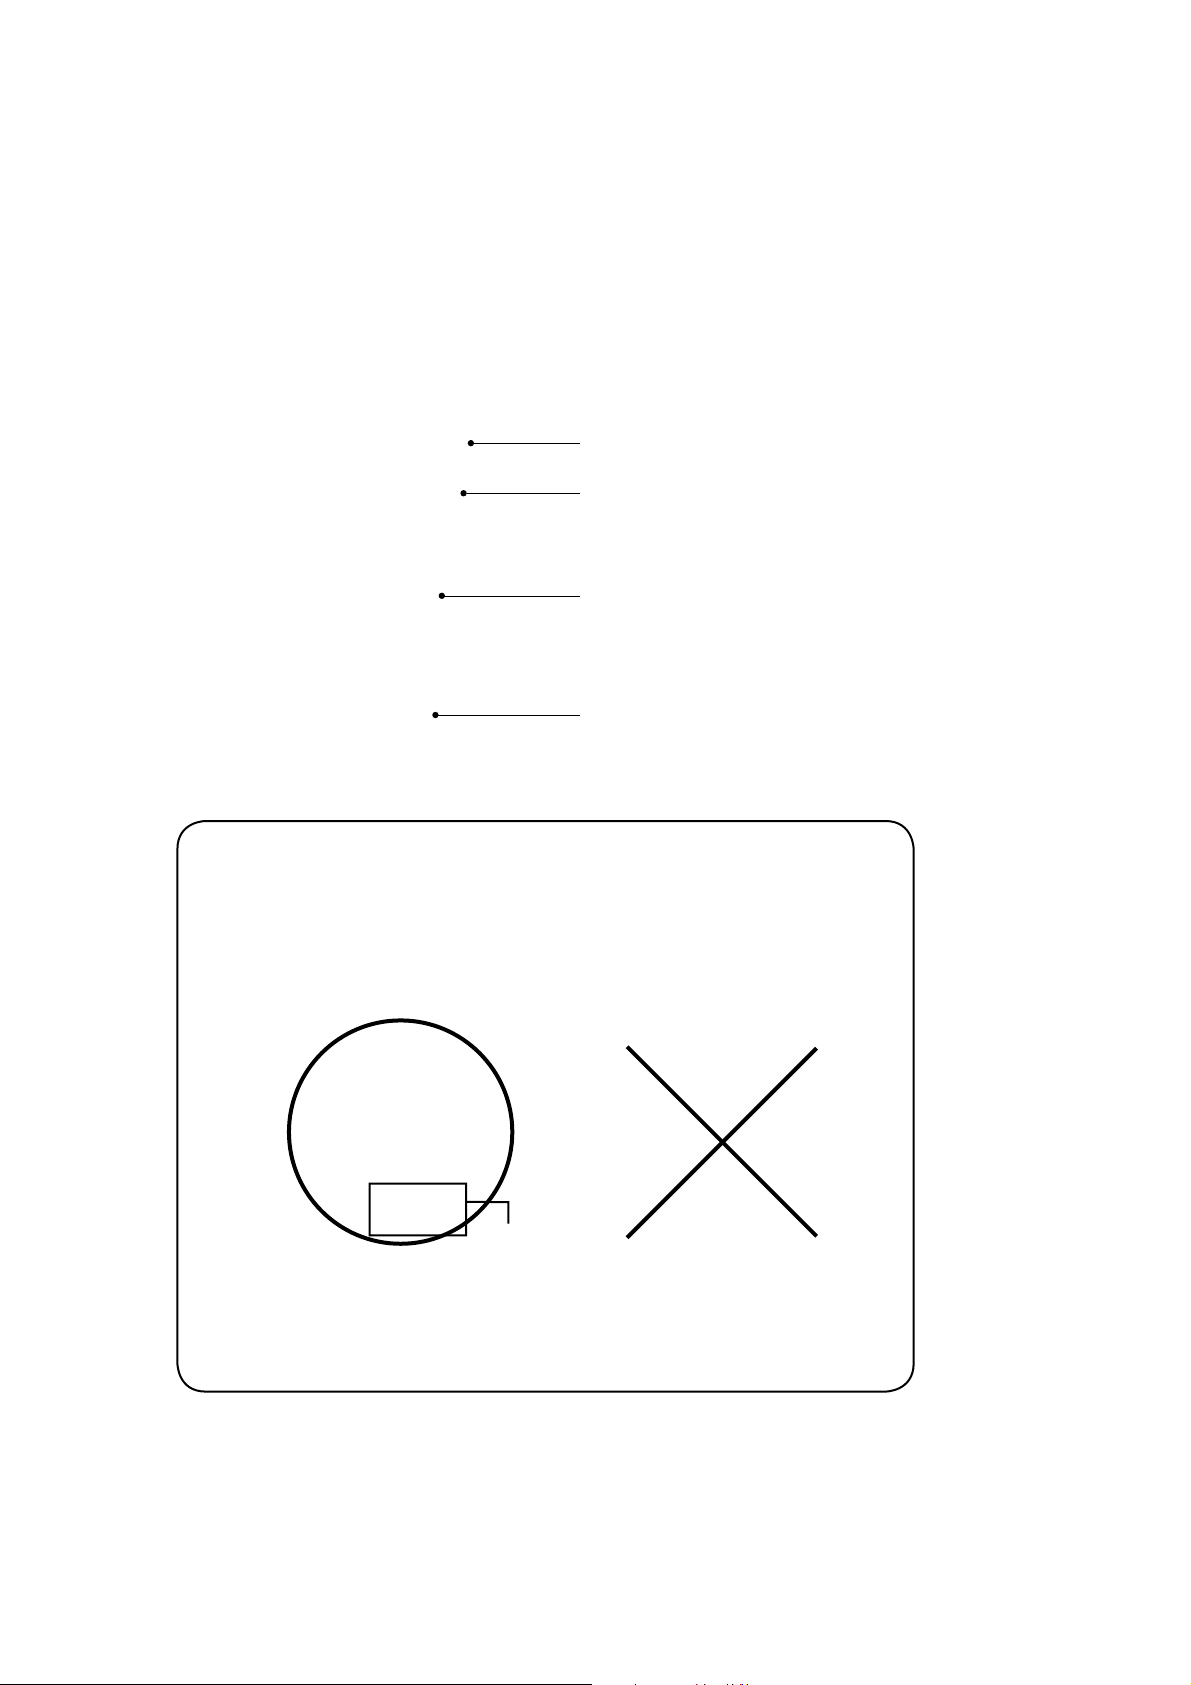
Touchscreen Guidelines
This product’s keys consist of touch keys displayed on the LCD screen. Be sure to read follow these
Touchscreen Guidelines before using this product.
1.
Make sure your hands are clean and dry.
v
In humid environments, remove any moisture from your fingers or the touch keys.
Touchscreen
2.
It is unnecessary to press the touch keys hard for them to work. Do not subject the product to
severe impact, as this may damage the touch key sensors.
3.
Use the tip of your finger to press precisely on the touch key you want, being careful not to tap
any other keys.
4.
Touch keys may not work properly if a mobile phone case or plastic cover is covering them.
5.
Keep metallic or other conductive materials away from the surface of the touchscreen. Contact
with them may result in errors.
6.
This phone allows you to use a pen or stylus to select Menus. You can also use your finger to
select Menus.
7.
The touchscreen may not function properly in hot and humid environments.
19
Page 7

Getting Started
Installing the SIM Card and Battery
1. Installing the SIM card
Your SIM card contains your phone number, service details and contacts and must be inserted into your
handset. If your SIM card is removed, your handset becomes unusable (except for emergency calls,
depending on which Country you are in at the time) until a valid one is inserted. Always disconnect the
charger and other accessories from your handset before inserting or removing your SIM card. Slide the
SIM card into the SIM card holder. Make sure that the SIM card is properly inserted and the gold contact
area on the card is facing downwards. To remove the SIM card, press down lightly and pull it gently
outwards.
20
To remove the SIM card To insert the SIM card
Note
v
The metal contact of the SIM card can easily be damaged by scratches. Pay special attention to the SIM
card while handling. Follow the instructions supplied with the SIM card.
Page 8

2. Installing the battery.
Remove the battery cover (as shown below). Align the metal contacts on the bottom edge of the battery
compartment. Press the other end of the battery down until it clicks into place. Finally, place the battery
cover on the phone as shown below.
Charging the Battery
Before connecting the charger to the phone, you must first check if the battery is installed.
21
Page 9

Getting Started
Charging Mode
1.
When you charge your phone, the phone’s LED next to the earpiece of your phone turns red.
2.
When the phone is fully charged, the LED turns green.
Note
v
If the phone is off while charging, you can press the power key for approx. 2 seconds and it will turn on.
v
When the battery is completely discharged, the red LED blinks and you can’t turn on the phone at this
moment. As soon as the charged power reaches 1%(after a few minutes), the LED stops blinking and
charging animation is displayed. Then you can power on the phone.
CAUTION!
s7HENYOUCHARGEAFULLYDISCHARGEDBATTERYITMAYTAKEOVERAMINUTEFORTHEDISPLAYTORESPOND
4HISISNOTAMALFUNCTIONBUTCOMPLETELYNORMAL)FUSINGA53"CABLEITMAYTAKEOVERMINUTES
s$ONOTFORCETHECONNECTORINASTHISMAYDAMAGETHEPHONEANDORTHECHARGER
s)FYOUUSETHECHARGEROUTOFYOUROWNCOUNTRYUSEANATTACHMENTPLUGADAPTORFORTHEPROPER
CONFIGURATION
22
s$ONOTREMOVEYOURBATTERYORTHE3)-CARDWHILECHARGING
s4HEREISRISKOFEXPLOSIONIFTHEBATTERYISREPLACEDBYANINCORRECTTYPE$ISPOSEOFUSEDBATTERIES
ACCORDINGTOTHEMANUFACTURERSINSTRUCTIONS
WARNING
s5NPLUGTHECHARGERFROMTHEPOWERSOURCEANDTHEPHONEDURINGLIGHTNINGSTORMSTOAVOIDELECTRIC
SHOCKORFIRE
s-AKESURETHATNOSHARPEDGEDITEMSSUCHASANIMALTEETHORNAILSCOMEINTOCONTACTWITHTHE
BATTERY)TMAYCAUSEAFIRE
Page 10

Disconnecting the Charger
Disconnect the travel adapter from the phone as shown in the diagram below. Make sure you pull the
plug, not the cord.
23
Page 11

Getting Started
How to Use a MicroSD Memory Card (Optional)
The EXpo supports microSD™ cards of up to a 32GB capacity. For more information on microSD™, please
refer to the memory card instruction manual.
<MicroSD memory card>
How to insert a microSD™ memory card
1.
Lift the plastic cover which protects the microSD™ slot.
2.
Insert the memory card into the slot with the metal contacts facing down. Do not force the memory
card into the slot, if the card does not slide in easily, please check that the card is being inserted in the
correct way or if there is a foreign object in the slot.
3.
Once inserted, push the memory card until it clicks, meaning that the card has been correctly engaged.
24
4.
Close the plastic slot protection.
5.
Do not remove the memory card when reading and writing the memory card.
Page 12

Attention:
v
Avoid using the microSD™ memory card when the battery is low.
v
When you save data to the card, wait for the operation to complete and remove the card.
v
The card is designed to fit easily into the slot.
v
Do not bend the card or force it into the slot.
v
Do not insert any memory cards other than microSD™.
WARNING
s$ONOTINSERTORREMOVEMEMORYCARDWHENTHEPHONEISSWITCHEDONASTHISMAYDAMAGEMEMORY
CARD
Power On the Device
<Top of Device>
Turn on/off the LG C900K
Press and hold the power key on the top right of the phone for a few seconds to turn the LG C900K on or
off.
25
Page 13

Getting Started
Go to sleep mode / Wake up from sleep mode
With the power on, press the power key once to go to sleep mode. To return from sleep mode, press the
power key again.
Lock or unlock your phone
Press End key for about 3 seconds to lock the device. To unlock your phone, slide the button on the screen
to left or right.
26
Page 14
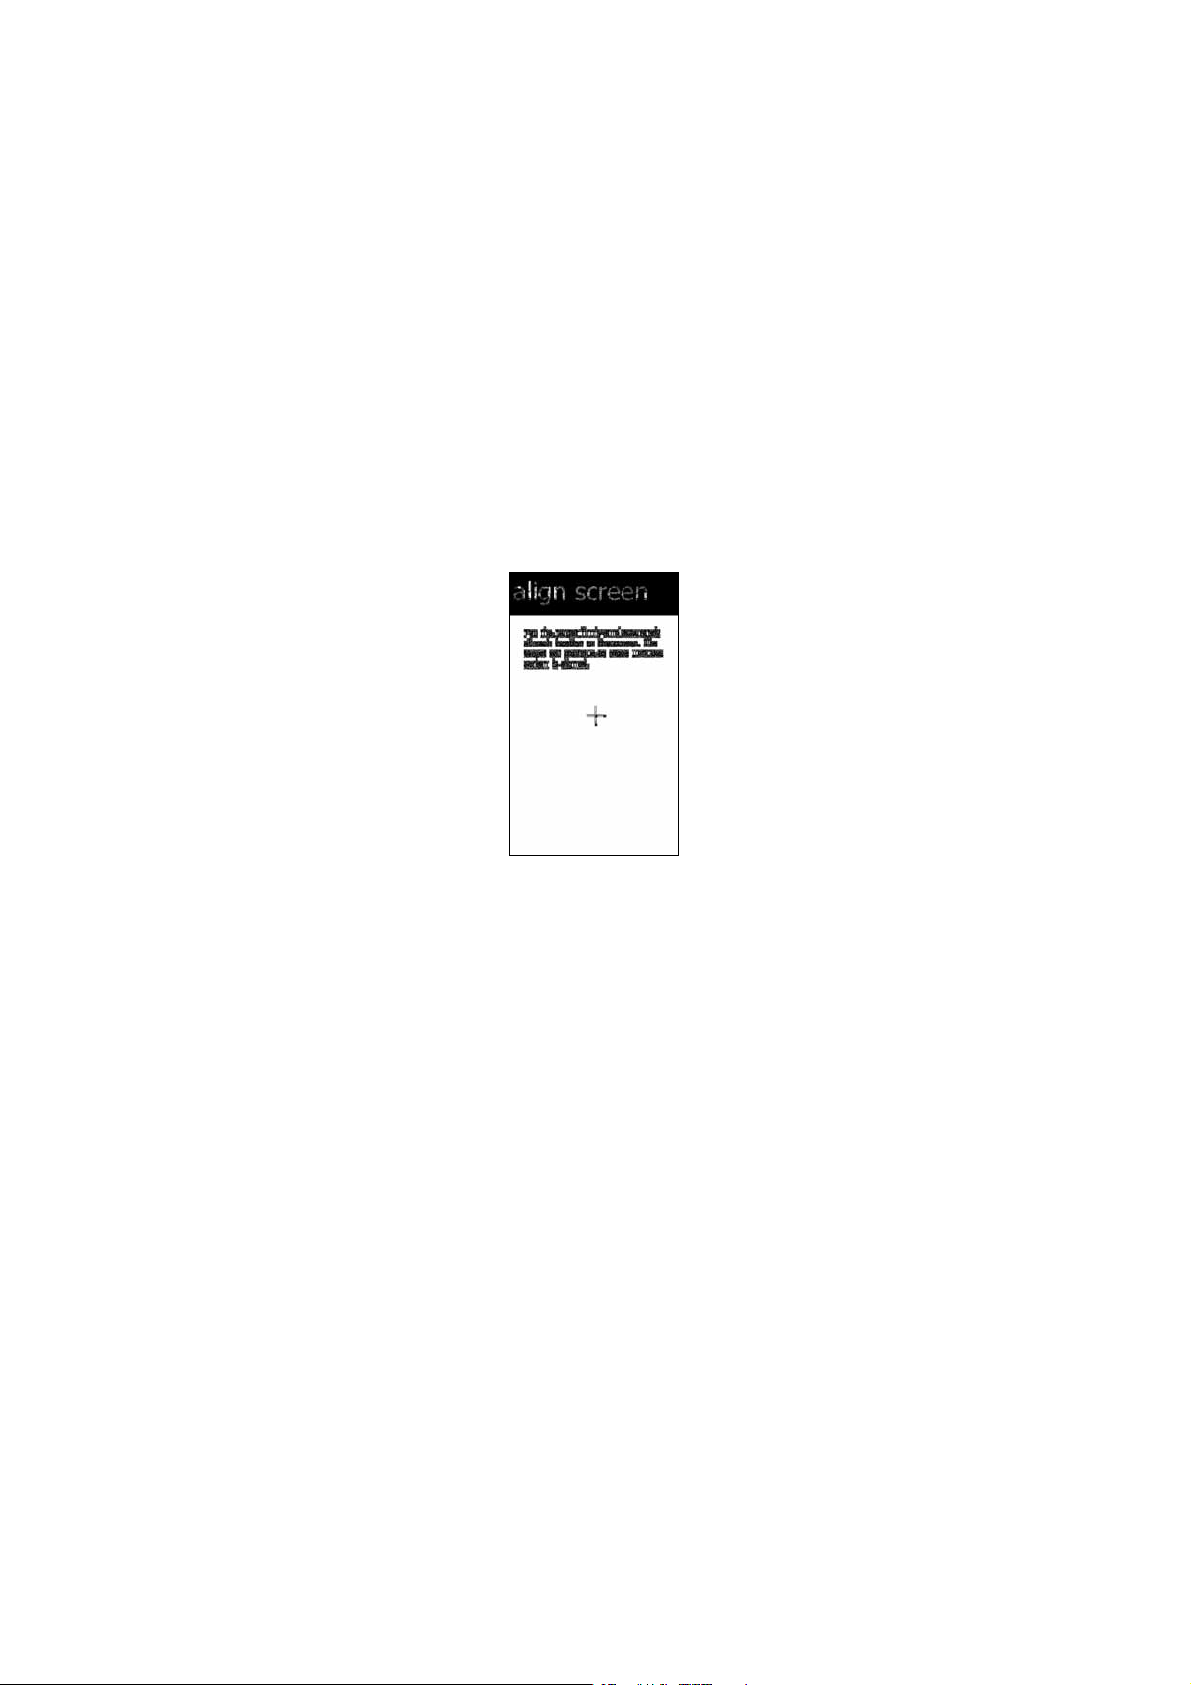
Calibrate the touch screen
When you’re turning on your phone for a first time, touch calibration screen will appear.
Calibrating the device screen involves tapping, with the stylus, the center of a cross as it moves around
the screen.
If your device does not accurately respond to screen taps, follow these steps to re-calibrate it:
1.
Tap Start > Settings > System > Screen.
2.
On the Alignment tab, tap
calibration is completed, Align screen reappears. Click OK on upper right corner to return to the home
screen.
Align Screen
button, and follow the instructions on the screen. After
27
Page 15

Getting Started
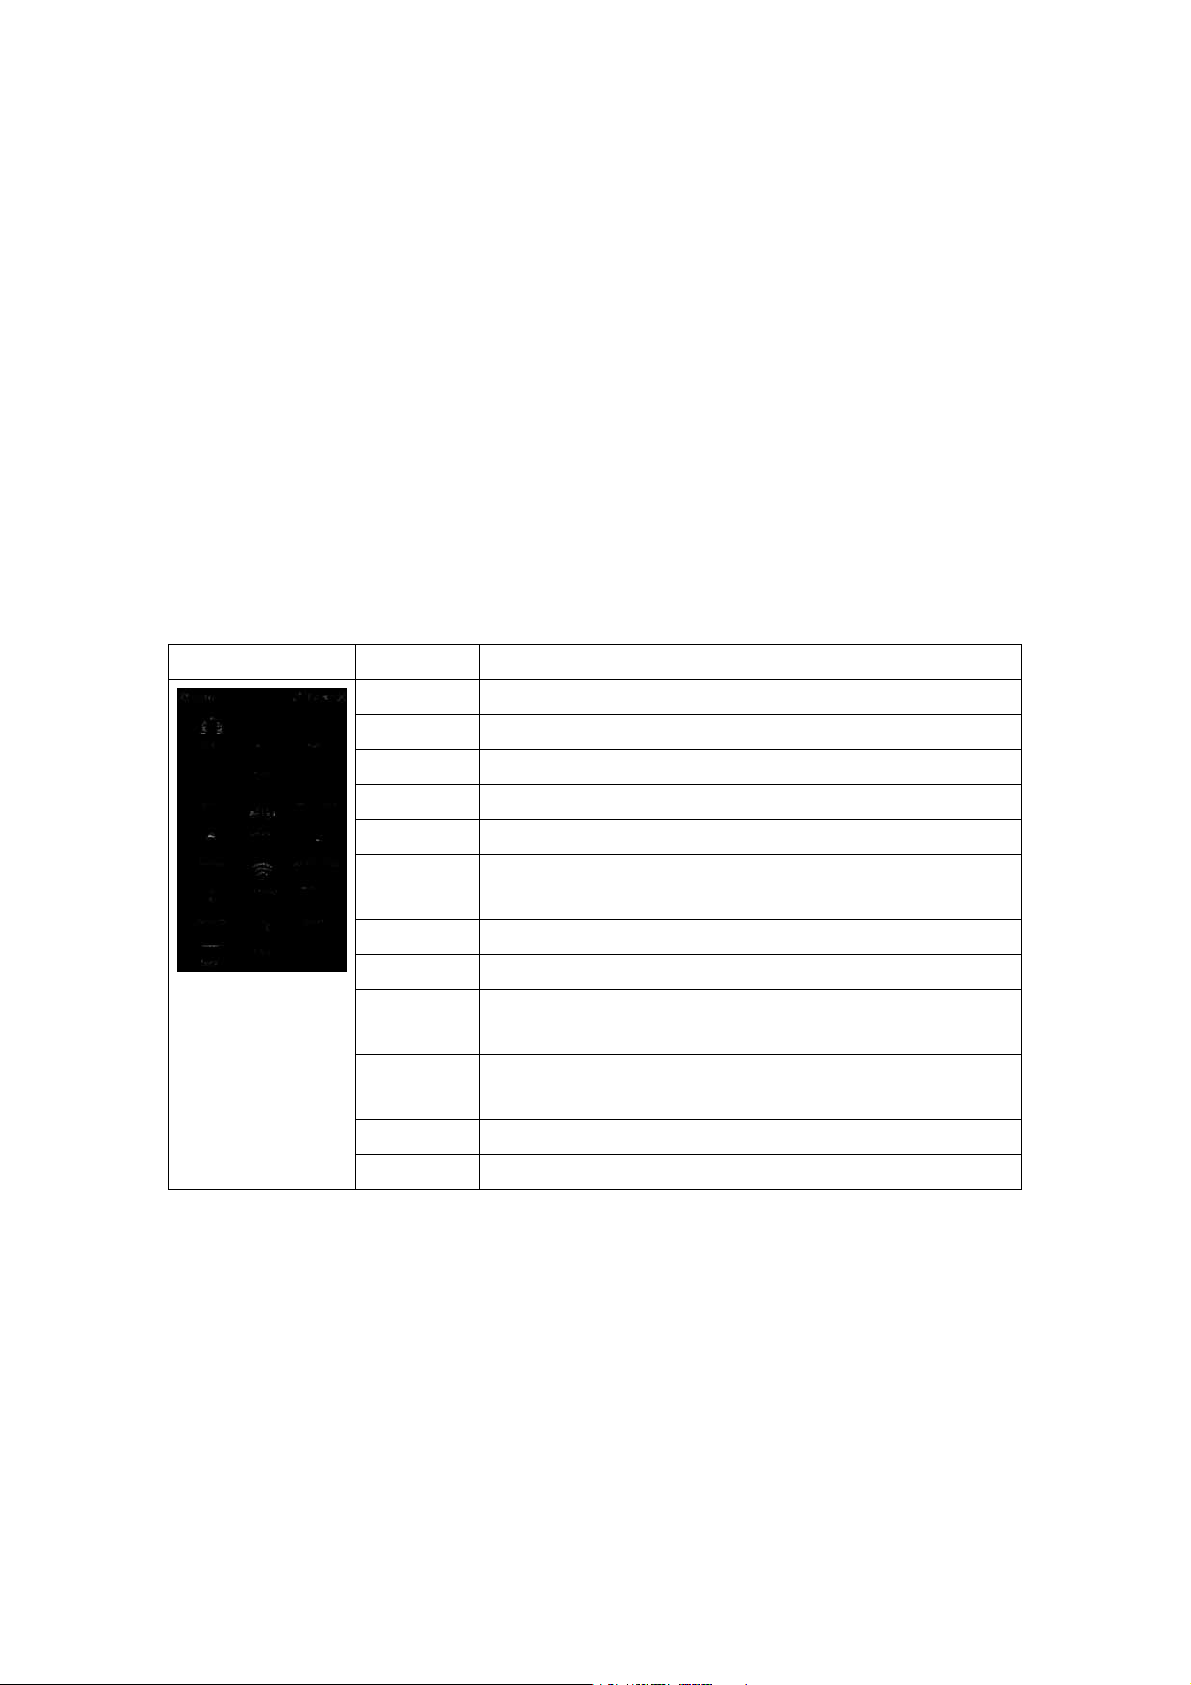
Windows Default Today Screen
When turning on the phone, you can see ‘Windows Default’ today screen. On this screen, you can see
important and recent information. You can also move to each function by selecting items on the screen.
Start:
Opens the MS Start menu.
28
sPICTURES
sMUSIC
sGETTINGSTARTED
sPHONE
sVOICEMAIL
sCLOCK
sTEXT
sCALENDAR
sFAVORITES
* Sliding open the qwerty keyboard will rotate the screen to landscape.
Shows the list of images and videos.
You can play the music directly.
Shows today’s date and current time.
You can see the missed call history.
You can see new voicemail.
Shows the current time and date (if highlighted).
You can see the unread message from Inbox account.
Link to Calendar
You can go bookmark directly.
Page 16
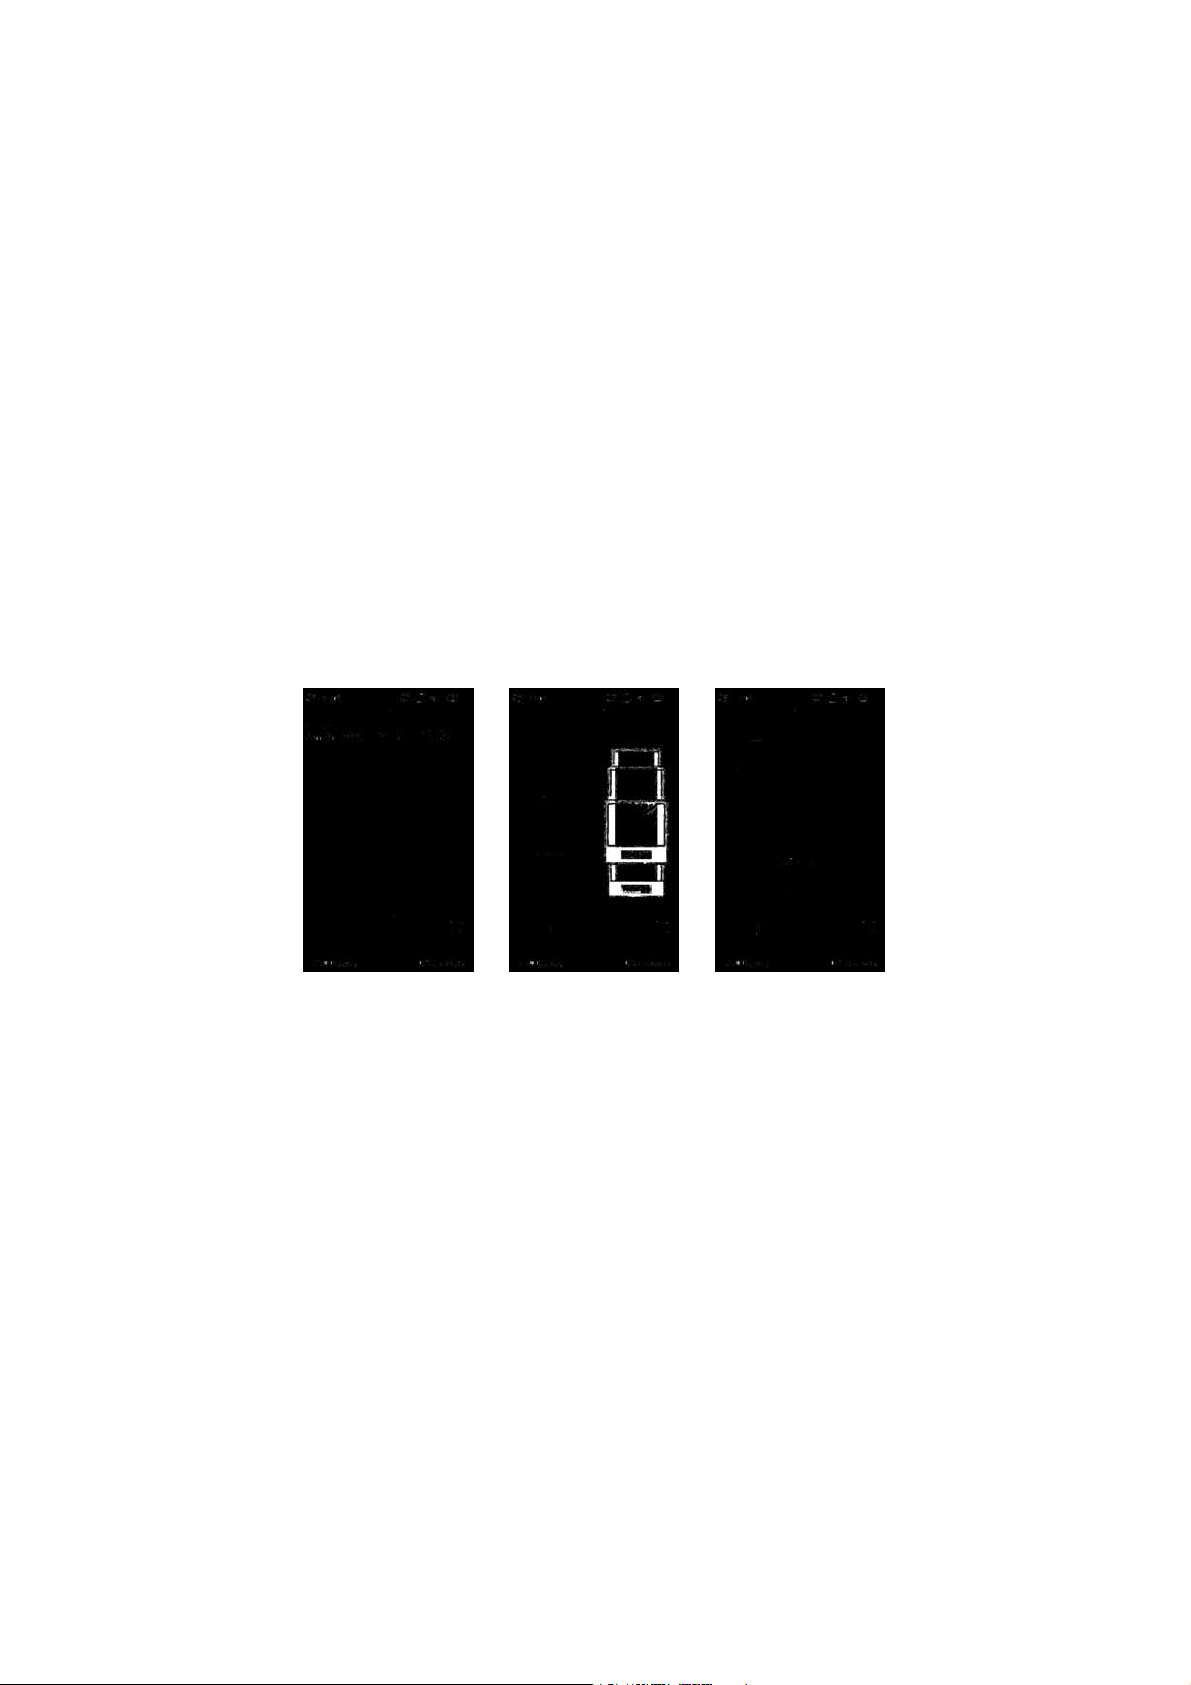
LG Home Screen
LG home screen is specially designed to provide an easy-to-use smart phone experience.
There are 3 home screens available, drag the touchscreen from side to side to view them. You can easily
control most features of LG C900K using LG Home. You can add favorite contacts and media to the
corresponding screens for quick access.
There are shortcut icons for some of the menus and functions at the bottom of the home screen, allowing
you to access them directly from the home screen.
To set or change the Today screen (including the LG Home Screen and Windows Default), tap Start >
Settings > Today > Items (tab) > LGIdles / Windows Default > OK (on the top right of the screen).
29
Page 17

Getting Started
LG S-class UI Tutorial
The LG S-class UI Tutorial will be displayed if you set the LG home screen. This is the video tutorial
showing you how to access and use the phone menus, such as Contacts and Messaging. It plays
automatically every time you turn on the device, if the LG Home screen is set. If you want to see the
movie again, tap the Quick Settings tab on the Home screen. See the next page for more information.
30
Page 18
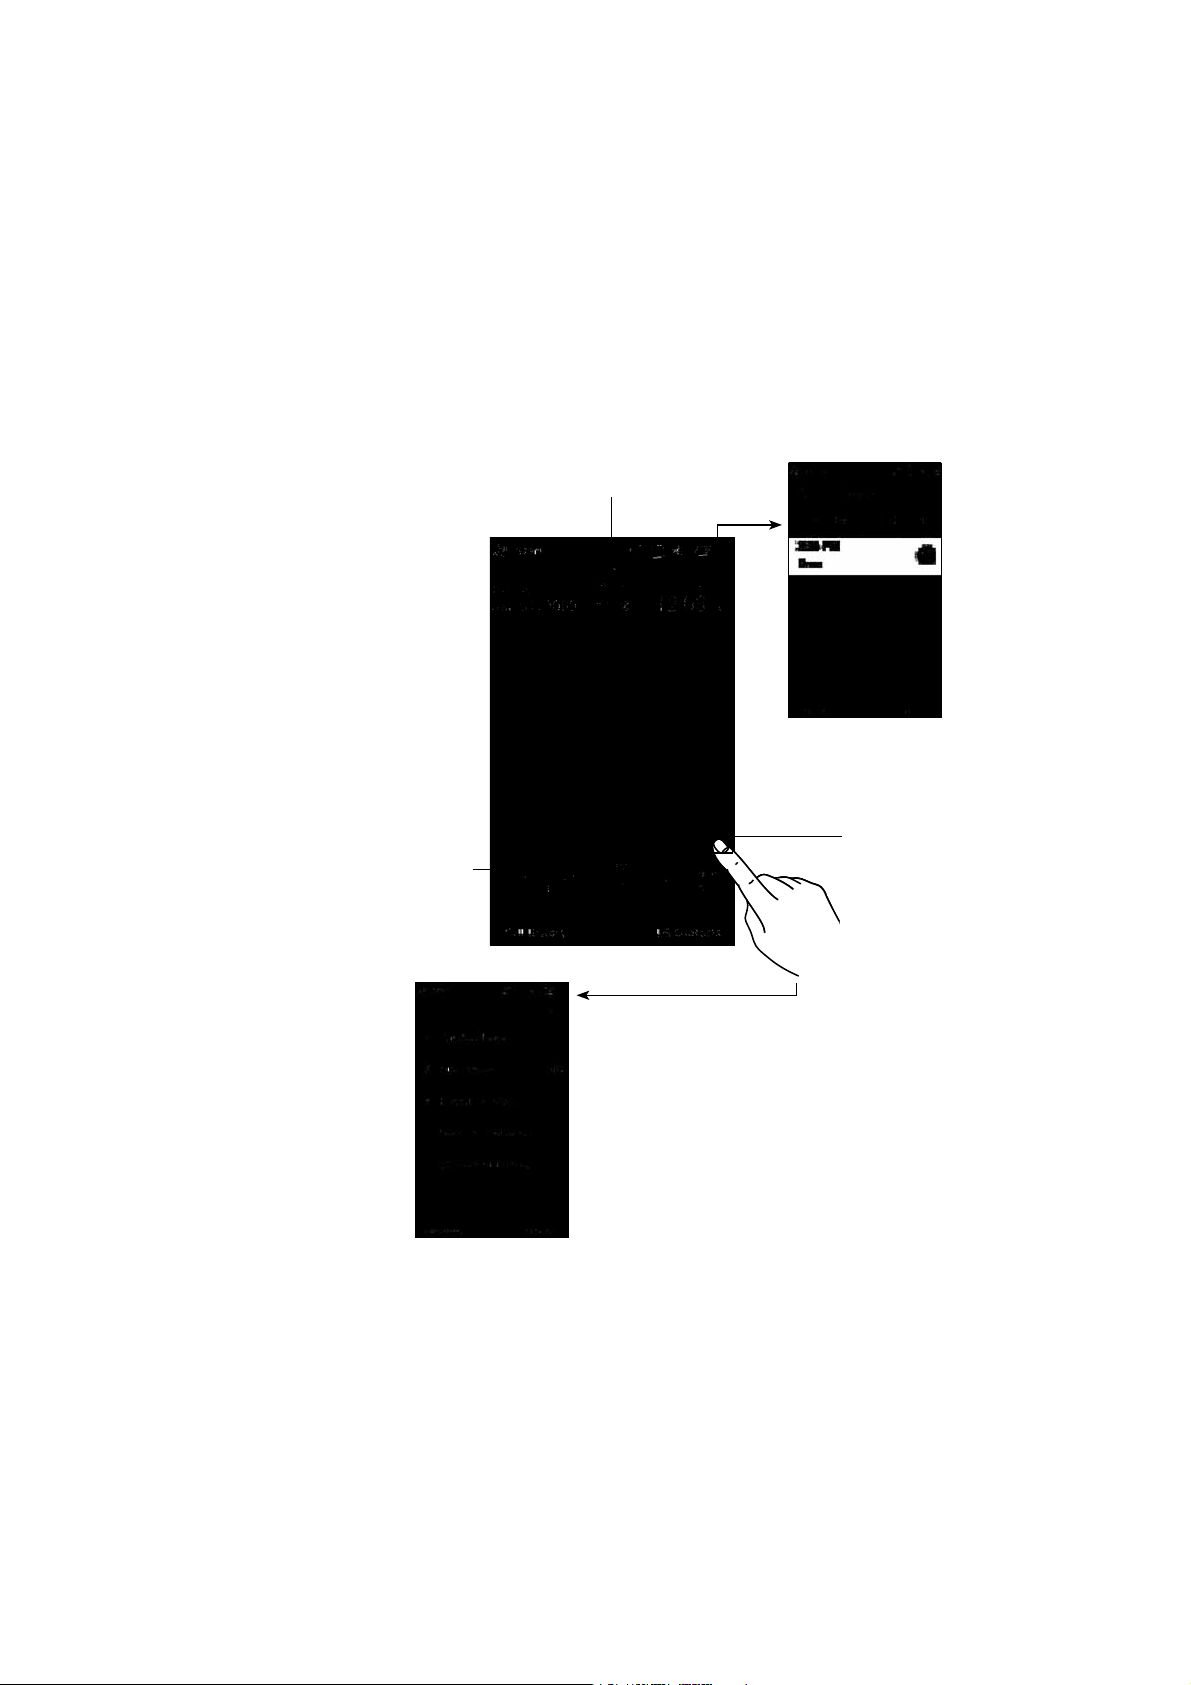
4AKINGALOOKAT,'HOMESCREEN
Tap to open the Wireless Manager
You can access various menus and
functions directly from the home
screen using the icons on the bottom of
the screen. Slide your finger to access
the other options. Press and hold an
icon to rearrange order.
Tap to open the Alarm menu.
Tap to open the
Quick Settings
menu.
Wireless Manager:
Phone and/or Data Connection.
Flight Mode:
communications.
Ringtone & Alerts:
right from the home screen. You can choose from
Normal, Vibrate All,Silent All, Outdoor or Automatic.
Theme & Wallpapers:
wallpaper.
LG S-Class UI Tutorial:
Turn on/off the Wi-Fi, Bluetooth,
Set to ON to turn off the phone’s wireless
Change the notification setting
Change the phone theme or
Launches the tutorial.
31
Page 19
Getting Started
* Sliding open the qwerty keyboard will display the options (on the left). These are
major functions that most use the slide-out keyboard.
Favorite Media & Contact
Drag the Home screen from side to side to reveal the Media and Contact Favorites screens. You can
easily access the favorite Contacts or Multimedia files from these screens.
Press and hold the Add Contacts and Add Files buttons to add/edit items for the screen.
32
Page 20
Indicators
The following are some of the status icons that you may see on your device. It may appears right-upper
corner of the screen.
Icon Description
Bluetooth Hands-Free connection established
Bluetooth Hands-Free channel opened
Bluetooth High Quality Audio channel opened
Remaining battery life
Battery is very low
Battery charging
Sound on
Sound off
Ringer in vibration mode
Connection is active
Connection is not active
Synchronization in progress
Synchronization error
Maximum signal strength
No signal
Bluetooth service is active
No phone service
Searching for phone service
Voice call in progress
Calls are forwarded
33
Page 21
Getting Started
Icon Description
Call on hold
Missed call or rejected call
Voice command
TTY
Wi-Fi status
GPRS (General Packet Radio Services) available
EDGE (Enhanced Data Rates For Global Evolution) available
WCDMA or HSDPA available
New e-mail or text messages
New voice mail
There are more notifications. Tap the icon to view all.
SIM is not inserted. You can not use Network service without SIM.
34
Shows the list of running Applications by tapping this indicator.
Page 22

Menu Tree
Tap Start and then to open the top menu. From here you can access the following menus and
categories:
Communications, Multimedia, Applications
and
Settings
Communications
LG Contacts
Call History
Messaging
E-mail
Instant Messaging
Write New Message
Write New E-mail
RSS Reader
Multimedia
AppCenter
Mobile Web
Telstra Music
Mobile Video
Mobi4Biz
Music Player
Photo Album
My Multimedia
Podcasts
Games
Apps
FM Radio
Camera
Video
35
Page 23
Menu Tree
Applications
Downloaded
Telstra Navigator
Mobile Banking
Pocket Express
Internet Explorer
Schedules
Alarm
Multitasking
Weather
Calculator
Tip calculator
Stopwatch
Sprite Backup
Tools
Settings
Phone Settings
Fingerprint Sensor
Touch Feedback
Sensors
XT9 in put
Screen Outputs
Homescreen Layout
Bluetooth
TTY
36
Page 24
Using the Start Menu
The Start menu, located at the top left corner of the Today screen, displays a list of programs. It allows
you to open a screen and switch from one program to another. You can start a program by scrolling
through the programs list and tap a program.
Scroll down with your finger to see more programs that are installed in your device. Tap and hold an item
to move to the top.
Image Menu Description
Today Takes you to the Today screen.
Phone Opens the dialing screen and keypad.
Text Opens the Message menu (SMS/MMS).
E-mail Opens the Email accounts screen.
Calendar Opens the MS calendar
Internet
Explorer
Contacts Opens MS Contacts
Telstra Wi-Fi Link to the Telstra Wi-Fi Client Download page.
Instant
Messaging
AppCenter Link to an Telstra web site to download ring tones, graphics, and
Mobile Web Opens the Telstra Web portal.
Camera Opens the Camera (and Camcorder) function.
Web Browser to access the Internet
Opens the AIM, MSN, and Yahoo Messenger client.
multimedia files.
37
Page 25
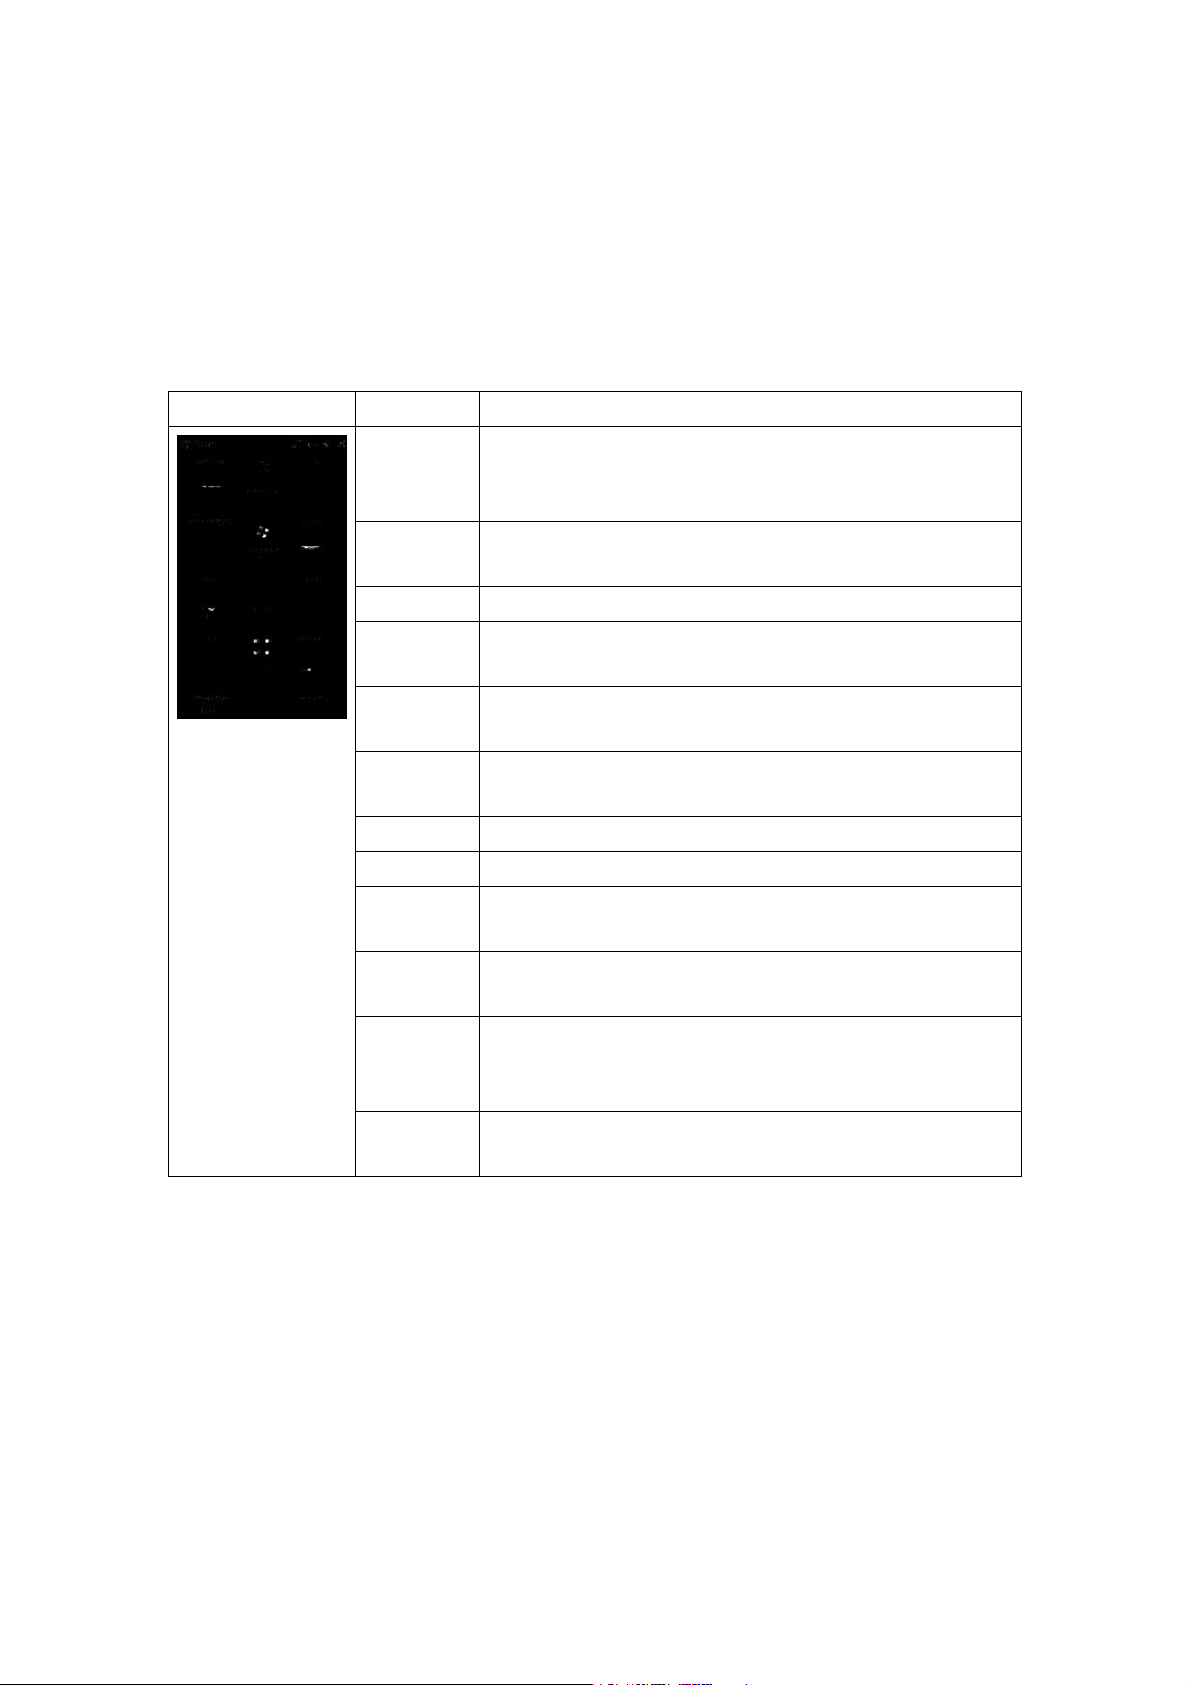
Image Menu Description
Telstra
Navigator
Marketplace Link to (download) the Windows® Marketplace for Mobile
Settings Opens the phone’s Settings menu.
Apps Opens the folder containing the pre-loaded apps, like Mobile
Multimedia Opens the folder containing Multimedia applications, such as
Tools Opens the folder that contains Tools, such as Task Manager,
Games Opens the folder containing Games.
LG Menu Opens the LG Menu.
Telstra
Music
Windows
Live
The Telstra Navigator™ application on your device uses GPS
positioning technology and your carrier’s data network to provide
you with driving directions and a host of other services.
application.
Banking and Mobi4Biz.
FM Radio, Music Video, and Podcast.
Java, MobileZip and more.
Opens the folder containing a variety of music apps.
Lets users sync their email from Windows Live Hotmail as well
as their Windows Live Contacts
38
Office
Mobile
File Explorer File Explorer is a program for managing files on the phone and
Opens the folder containing the MS Office Mobile applications
Excel Mobile, PowerPoint Mobile, OneNote Mobile and Word
Mobile.
memory card
Page 26

Image Menu Description
Help Opens up the help function, allowing you to access more
information about how to use your phone.
Getting
Started
Search
Phone
Pictures &
Videos
Windows
Media
Allows you to easily set up the most commonly used functions
on your phone.
Search Phone widget that will search your phone and its various
apps, including e-mail, calendar, contacts, messages, tasks, and
Word documents, to find results
Allows you to browse your phone folders for Pictures and Videos.
Opens Windows Media Player.
39
Page 27
Using the LG Menu
Tap Start and then LG Menu to access the LG Menu. The available functions are organized by
category. The categories are Communications, Multimedia, Applications, and Settings.
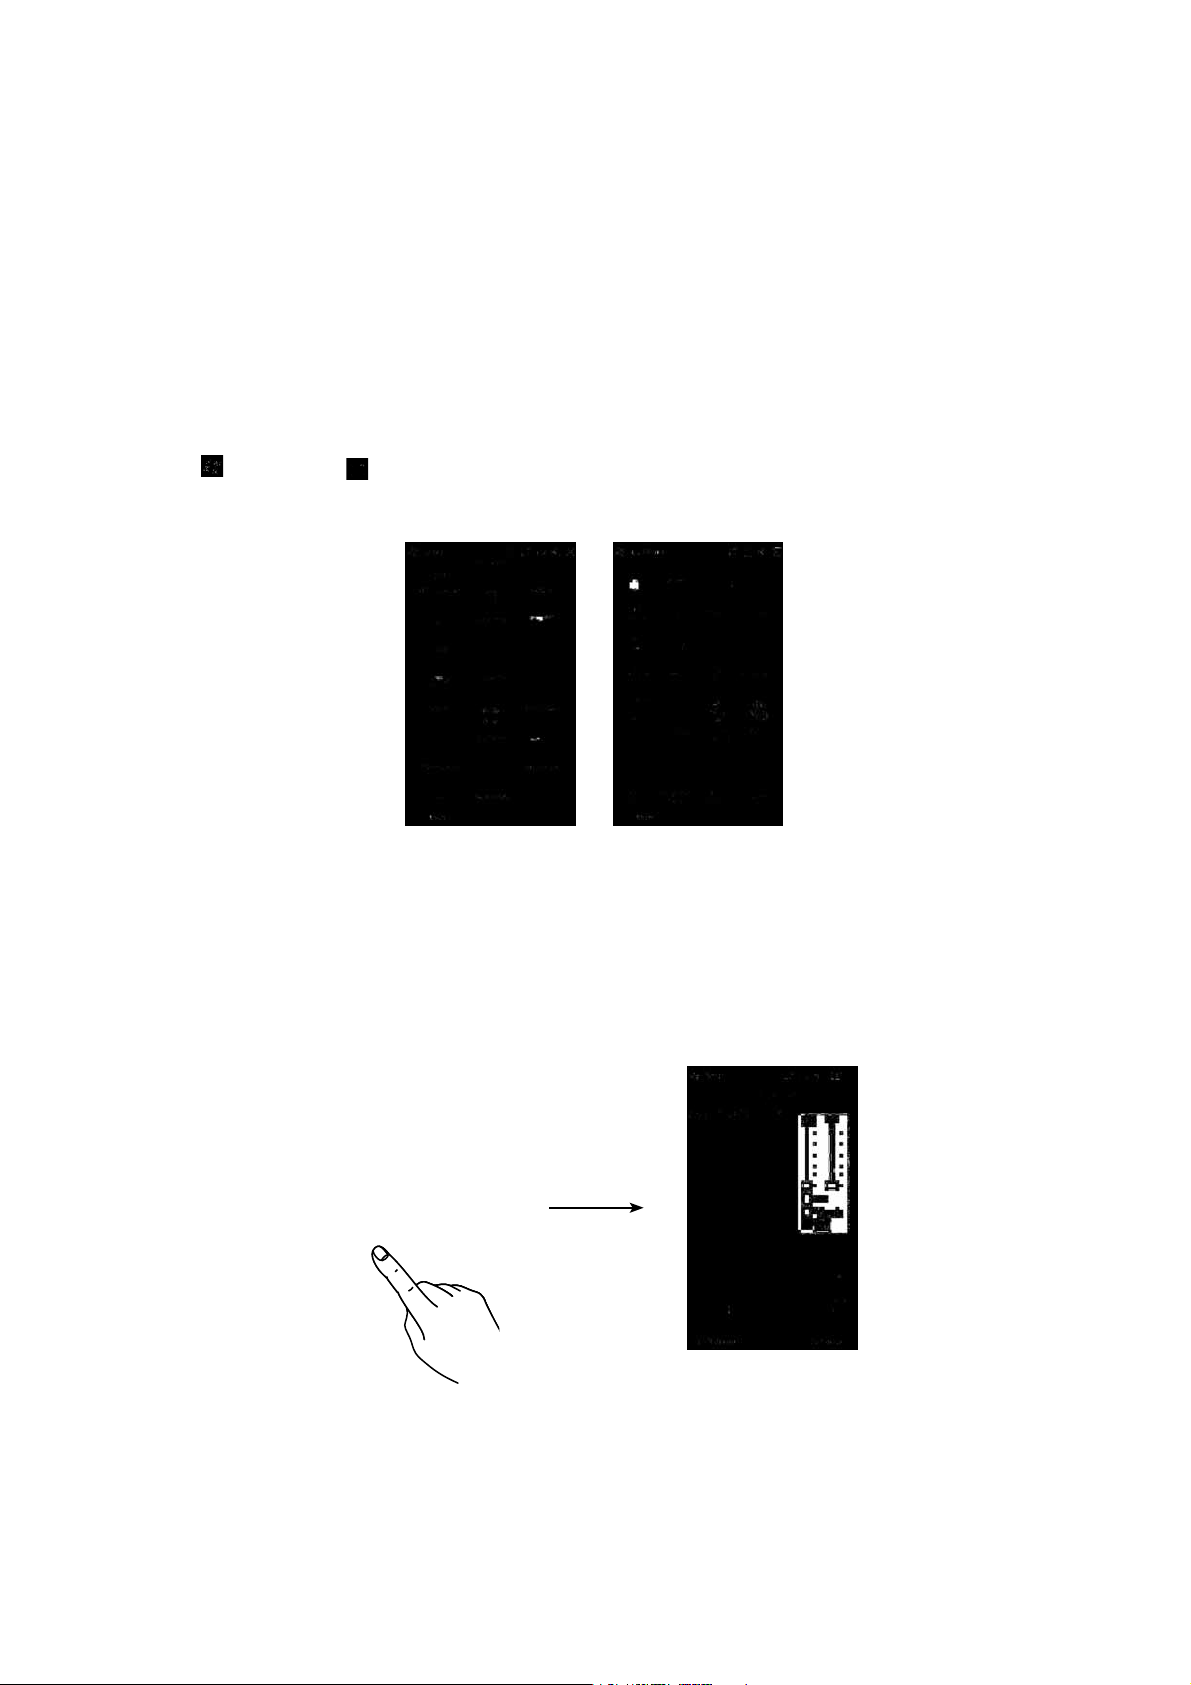
6OLUMEKEYS
The side volume keys will control the System volume when the screen is idle, the Earpiece volume during
a call, and the Music/Sound volume when playing a track.
40
Page 28
5SINGTHE-ULTITASKINGFUNCTION
You can press the Multitasking Key to go directly to the Multitasking menu. From here you can view the
applications that are currently running and access, or close, them with one touch.
If you touch Menu, you can end all tasks at a time or activate MS task manager.
41
Page 29
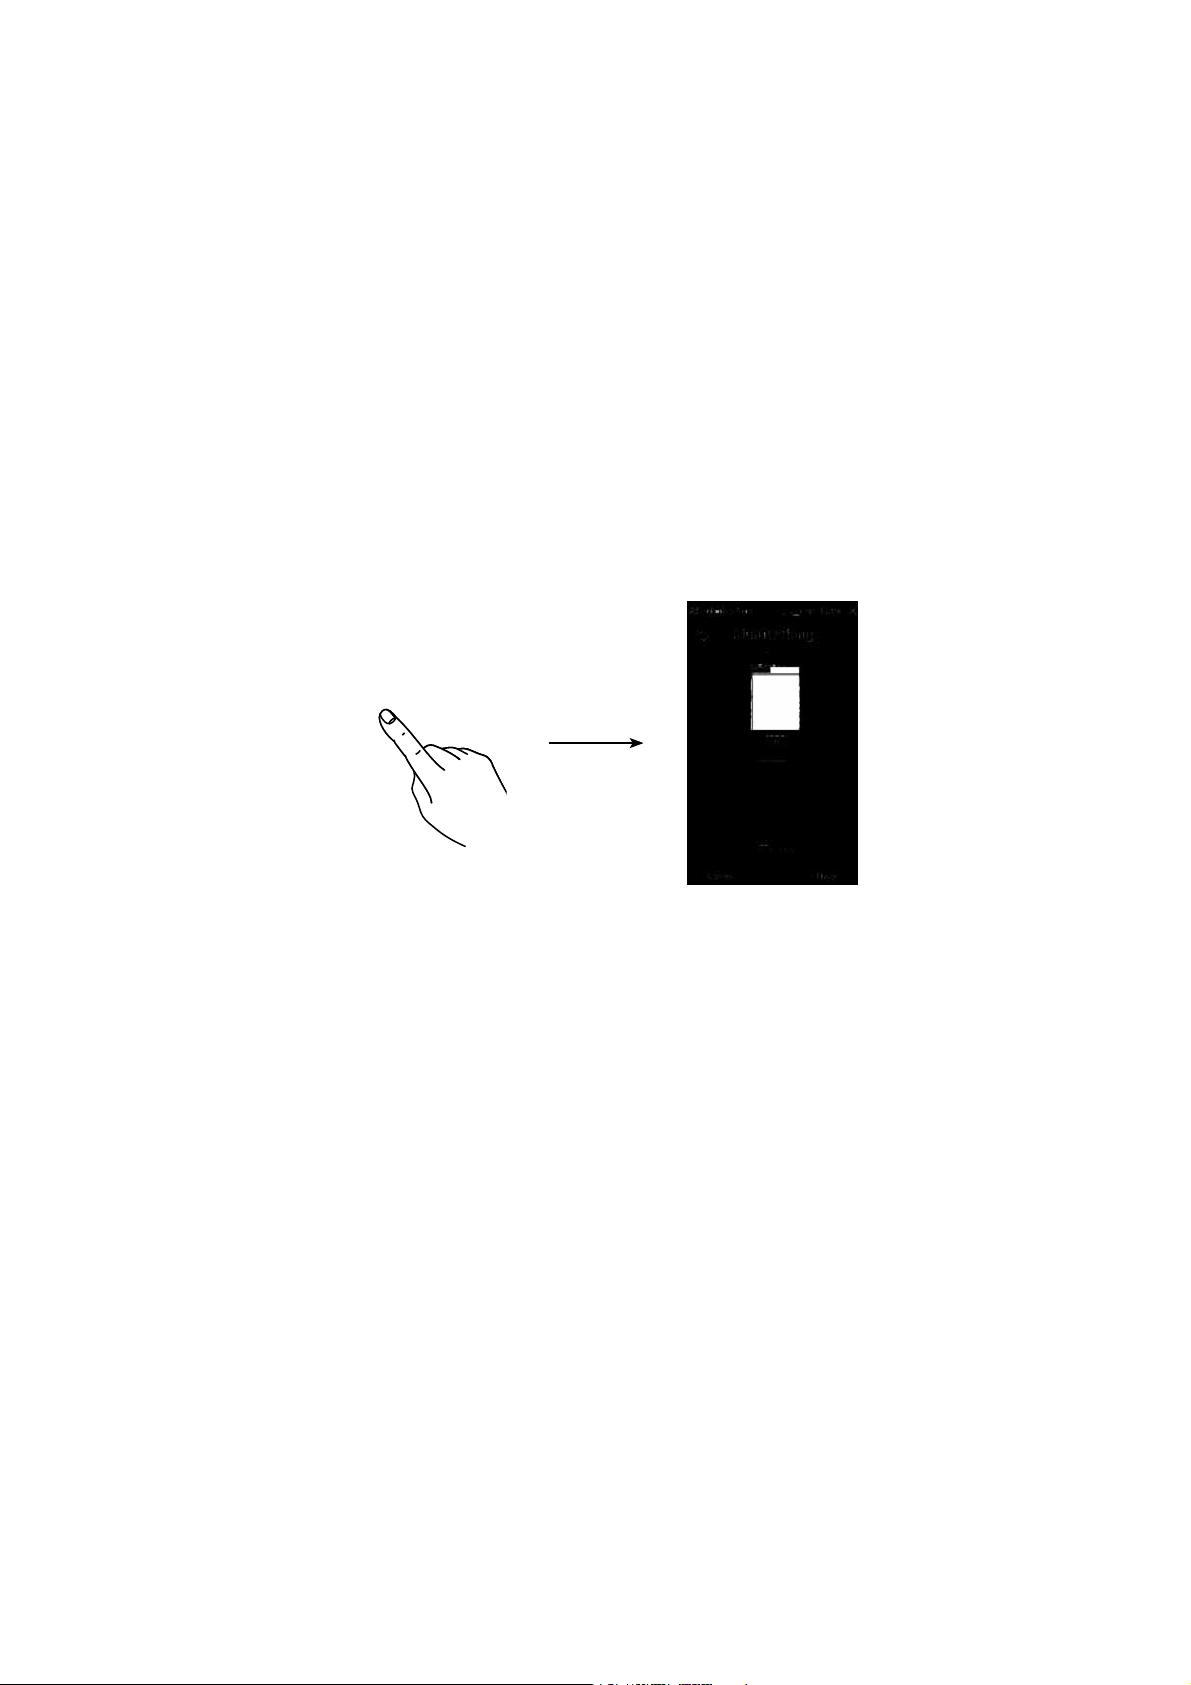
Customizing Today Screen
The Today screen displays important information, such as upcoming appointments and status indicators.
Go to Start > Settings > Today > Appearance (tab) to configure the overall look of your phone. Go to Start
> Settings > Today > Items (tab) to configure the Today screen.
To change to the LG Home screen (otherwise known as the LG Idle screen, see page 27 for details), select
LGIdles. To select the default MS Today screen, select Windows Default.
Check the Today timeout and select the number of hours from the drop down list. If you don’t use your
phone after the specified length of time has elapsed, the screen switches to the Today screen.
42
Page 30

The Today screen, below, is available, if you choose to deselect both the Windows Default screen
and the LG Idle screen options. This screen is able to display more options and menus, making it more
customizable.
43
Page 31

Call
You can call easily with the smart dial feature. If you press any one or more buttons on the dialpad, the
screen displays the phone number or the names in Contacts or Call History starting with the number(s) or
characters you enter. Then, you can select the number you want to call.
Note
v
If you tap a wrong number, tap the Back arrow ( ) to erase individual numbers one at a time. To
delete all the numbers, tap and hold the Back arrow.
Call History
Your phone saves the most recent missed, received and dialed calls, along with the call lengths in the
Call history menu. From this menu, you can easily place a call to the most recent dialed, received or
missed calls.
Tap the Send key , then select Call History.
-AKEACALL
Making a Call from Phone
1.
On the Home screen, press the Send key to open the keypad.
2.
Key in the number using the keypad and tap the Send key or the Send button on the screen.
3.
To end the call, press the End hard key or the End button.
Making a Call from your contacts
1.
Tap Start > LG Menu > LG Contacts or tap Contacts on the bottom left of your Home screen.
2.
Scroll to the contact you want to call.
44
3.
Tap the contact to select it and press the Send key .
Page 32

Answering and rejecting the call
When your phone rings, press the Send key
or tap the
To reject an incoming call, press the End key or tap the
In-call options
3PEAKER
Mute -
to cannot hear you.
Hold -
Menu -
Touch
Touch to turn the microphone off so the person you are talking
Touch
Choose from a list of further in-call options.
- Ends the call.
- Search your contacts during a call.
- Invite a 3rd person into the call.
to put a call on hold.
Answer
Reject
button on the screen.
to turn the speaker phone on. Touch again to turn off.
button on the screen.
Keypad -
numbered options, when dialing call centers or other automated telephone
services.
Touch to open a numerical keypad for navigating menus with
45
Page 33

Sharing a Video during your Phone Call
During a call, you are able to share and/or receive video with others who have a Video Share capable
phone. During a voice call, the phone will let you know whenever you can share video by showing the
“Video Share Ready” button.
Note
This service is only available in the following conditions.
v
Subscribed on the Video Share service.
v
Presence of square-shaped indication such as ‘3G’ at the top of your signal strength icon.
Initiating a Video Share Session
1.
Once the voice call has been established, after a few seconds you can see the
the screen, provided that the other party’s phone is also Video Share capable. Then, you are ready to
start sharing your video with the other party.
2.
To suggest Live Video Share session to the other party, simply tap
the camera key on the right side.
Video Share Ready
Video Share Ready
on the screen or
on
46
Note
v
If you set Audio Alert (Tap
will receive an audio alert when Video Share is ready.
Note
v
If the other party is not able to hold a Video Share Call, then the call will be terminated.
Start > Settings > System
>
Video Share
) as ON (default set is OFF), you
Page 34

There are options to select the type of Video Share between Live and Recorded. You can choose one of
the sharing types after selecting Video Share on the Menu.
v
Live:
You can share a real-time video stream with the other party while having a conversation.
v
Recorded:
You can share a pre-recorded video clip with the other party while having a conversation.
Note
v
Only video files that recorded on resolution 176 * 144 are able to be shared.
3.
If the other party accepts your request, a video share session begins.
(It can take a few seconds for the other party to accept your invitation and start the Video Share Call.)
4.
Select the STOP menu item at any time when you want to quit sending video, or press the to
finish both the voice call and the video share session.
Note
1. The Video Share Call will be terminated in the following cases:
v
When you accept a 3rd party, Conference Call, or a 2nd incoming call during a Video Sharing.
v
When the voice call is placed on hold.
v
When the voice call is disconnected.
v
When moving out of a Telstra 3G service area.
v
When the network connection is poor.
2. The Video Sharing will not be available in the following cases (“Video Share Ready” button will be
grayed out).
v
When trying to make a conference call/second call during a call.
v
When the voice call is placed on hold.
v
When moving out of a Telstra 3G service area.
47
Page 35

Receiving a Video Share Session
1.
If you get the Video Share invitation pop-up, tap
If you don’t want to accept the request, tap
Note
v
The speakerphone will be automatically turned on when a Video Share session gets started, and
automatically back to the previous mode when a Video Share session ends.
v
When a Hands-free device (Bluetooth or stereo headset) is connected, Speakerphone will not be turned
on automatically.
Accept
Decline
to allow the other party to send video stream.
.
Additional Ways to Initiate a Video Share Call
From
Contacts, Call History
Initiating a Video Share Call From Camera Preview
When you see scenery through the camera preview screen, you may want to share. Then you can initiate
the video share call with who has a video share capable phone.
1.
Open the Camera function. The, tap the icon on the left bottom of the camera preview screen.
and the
Camera
preview screen, you can initiate a Video Share call.
48
2.
Select a contact from the list to initiate a Video Share Call:
a. Tap the number to call. Or
b. Enter a new phone number. Tap the lower-right Menu option and select
3.
After a successful call setup and checking the other party’s capability of Video Share, the video share
invitation will be automatically requested.
Enter New Number.
Page 36

Initiating a Video Share Call From Contacts
You can also initiate a Video Share Call directly from the Contacts list.
1.
Select the contact and highlight the number, if it has more than one phone number.
2.
Tap the
3.
After a successful call setup and checking the other party’s capability of Video Share, Video share
invitation will be automatically requested.
Menu > Video Share
and you can choose the sharing type between
Live
and
Recorded
.
Initiating a Video Share Call From Call History
You can also initiate Video Share Call from Call History.
1.
Press the Send key and select Call History. Highlight the desired contact.
2.
Tap the
3.
After a successful call setup and checking the other party’s capability of Video Share, Video share
invitation will be automatically requested.
Menu > Video Share
and you can choose the sharing type between
Live
and
Recorded
.
Saving your Video Share
You can record a video stream as a clip during a live Video Share session. There will be a prompt
asking if you would like to save or discard the video at the end of a recording. If you choose to save the
video, it will be saved in the
My Documents
folder in your phone.
Note
v
When you have recorded Video Share file, you can make video share call in Photo Album or My
Multimedia.
49
Page 37

Contacts
Tap
Start > LG Menu > LG Contacts in the Communications tab
Overview of Contacts
Contacts serves as your address book and information storage space for the people and businesses you
communicate with. You can store phone numbers, e-mail addresses, home addresses, and any other
information that relates to a contact, such as a birthday or an anniversary date. You can also add a picture
(if the contact is saved in the Phone’s memory) or assign a ring tone to a contact.
From the contact list, you can quickly communicate with people. Tap a contact in the list for a summary of
contact information. From there, you can call, send a message and so on.
Searching for a contact
1. Start > LG Menu > LG Contacts
2.
Browse the Contacts list to find the Contact you are looking for or touch on the top of the list and
enter the contact name using the keypad.
3.
Select the contact you want, then the options appear on the screen. Choose what you would do from
the Send Message, Blog, Video Share, Send Vcard, Edit, Change Storage, and Delete functions.
You can also view the contacts in 4 categories such as Contacts, Groups, Favorites, and Recently Viewed
by tapping the box on top of the screen (Contacts is set to default).
(In the Communications tab).
Adding a new contact
Select LG Contacts to open the address book. Tap
such as Name, Company, Displayed Name Type and so on. You can also choose whether to save the
contact to Handset or USIM and
Add Picture.
New Contacts
and enter the new contact information
50
Page 38

To Create a Contact
1.
Tap
Start > LG Menu > LG Contacts
2.
Tap
New Contacts
3.
Tap
Save To
4.
Enter contact details.
5.
When finished, tap OK.
and enter the contact information.
and choose from Handset or USIM.
in the
Communications
tab.
Tip
v
If someone who is not in your list of contacts calls you or sends you a message, you can create a
Menu
>
contact from Call History by tapping
contact who sent you a message, tap
Save to Contacts
Menu
and
Save Number
. If you want to save the number of the
from the message.
To Change Contact Information
1.
Tap
Start > LG Menu > LG Contacts
2.
Choose the contact from the list.
3.
Tap
Menu > Edit
4.
When finished, tap
and enter the changes.
Save
.
in the
Communications
tab.
51
Page 39

To Find a Contact
There are several ways to find a contact when your contact list is long.
1.
Tap
Start > LG Menu > LG Contacts
2.
Tap the Search icon to be able to search the contact list by entering the Contact name.
3.
In the contact list, do any of the following:
v
In Name view, the contacts are listed in alphabetical order. If not in Name view (default), tap
View by Name in the contact menu
v
To see a summary of information about a contact, tap the contact. From there you can also make a call,
send a message, etc.
v
You can also see a list of available actions for a contact by tapping the contact's name on the list.
v
To see a list of contacts employed by a specific company, tap
the company name.
in the
.
Communications
Menu > View by Company
tab.
Menu
. Then, tap
To Copy SIM Contact to Handset
If you have saved contacts on your SIM card, you can copy them to the Handset memory. They can be
copied one at a time, several at a time, or all at once.
1.
Tap
Start > LG Menu > LG Contacts
in the
Communications
tab
>
52
2.
Tap
Menu > Change Storage > Copy to Handset.
can be selected for Copying.
3.
Check the contact to copy to your handset one by one or tap
Note
v
You can also copy Contacts on your device to your SIM card by selecting Copy To SIM, as shown in step
2 (above).
Your Contacts will appear in a list, from where they
Menu
to Search or Select All.
Page 40

Sending Messages Tap
Start > LG Menu > Messaging
in the
Communications
tab
> Menu > New > SMS/MMS
1.
Tap the To field to enter the recipient. Simply type the number, or open your contacts or favorites
by tapping . Once you check the recipients, tap
You can add multiple contacts by separating each number with a semi-colon (;). When you have
finished, tap the text field below to compose the message text.
When you have finished entering the text, tap OK, and then tap Send SMS on the top of the screen
to send the message. Note that when you are entering the text, you can add text templates,
emoticons, or names and numbers by touching
. Or, simply select
Menu
Tap to enter recipient
Tap to insert attachments
Message menu
text > Compose
Insert
to return to the message screen.
at the lower right of the message.
(Left soft key)
> SMS or MMS
Note
v
You can add up to 10 recipients.
53
Page 41

Entering texts
Using text input method
There are various input methods when using the touchscreen, including Block Recognizer, Keyboard,
Letter Recognizer, Transcriber, and XT9 Keypad. The Input icon appears on the menu bar to indicate which
input method is currently selected. The Input Selector arrow (shown at the right of the Input icon) opens a
list of available input methods.
Transcriber is a
handwriting recognition
program that allows you
to write in cursive, block
letters, or a combination
of both. Transcriber works
transparently in the
background of programs,
recognizing words with
its integrated dictionary.
To enter text, symbols, and
numbers, you can either type
using the QWERTY Keyboard
to type ABC characters or the
standard on-screen Keyboard.
When Transcriber is turned
on, it interprets stylus
movement anywhere on
the screen as handwriting
input.
54
Page 42

Transcriber Gestures
Use quick strokes of the stylus to edit your text or insert returns, spaces, or tabs.
Do To
Insert a paragraph return at the cursor.
The horizontal part of the gesture must be at least twice the length of the vertical part.
Insert a space at the cursor.
The horizontal part of the gesture must be at least twice the length of the vertical part.
Move the cursor one space back to erase any text.
Make the gesture by drawing a line from right to left.
Open the menu of alternate words if a word is selected, or open the onscreen Transcriber
keyboard if no text is selected.
Make the gesture by drawing a line straight down and back up.
Change the capitalization of a selected letter, word, or block of text.
Make the gesture by drawing a line straight up.
Undo the last action.
Make the gesture by drawing a line straight up and back down.
Copy the selected text.
Make the gesture by drawing a line from left to right and back.
Cut the selected text.
Make the gesture by drawing a line from right to left and back.
Paste copied or cut text.
Make the gesture by drawing a line from the lower left of the screen diagonally up toward
the right and back down to the right.
Insert a tab.
The horizontal part of the gesture must be at least twice the length of the vertical part.
55
Page 43

Note
v
You can also use the Enter, Space, and Backspace buttons on the Transcriber toolbar.
Entering Text on your device using the QWERTY Keypad
: When you press once, it
allows you to use the Upper
character, such as special
characters and numbers on
each button. Press and hold
the FN button if you want
to continue entering upper
characters.
: When you press this button once, it acts
as a Shift button. Press and hold this button if
you want to use the Shift function continuously.
56
Page 44

Entering Text on your device in portrait view
<Full QWERTY(Default mode)> <Half QWERTY>
With the XT9 keypad, you can enter text by touching the keys displayed on the screen. This is the
most common way to enter text in portrait mode.
v
The XT9 Keypad is available when text entry is possible.
v
Enter letters by touching the labeled keys.
Full QWERTY
In portrait mode, Full QWERTY mode lets you enter characters by touching the labeled key.
57
Page 45

The Half QWERTY
In Half QWERTY mode, a single tap will display the first letter of the key you touched. Quickly
touching the key a second time results in entering the second letter on the key. If XT9 is set to On,
you can tap each key once for each letter, the phone will display the word you are typing. This
option reduces the number of key presses.
Tap the
FN
and
DEL
keys to switch between Full QWERTY and Half QWERTY.
Entering symbols
Symbol mode allows you to enter various symbols and special characters.
In full or Half QWERY mode:
space key to enter additional symbols.
Tap FN, and then choose what you want to enter. Or tap FN and the
Entering numbers
Full Qwerty:
Half Qwerty:
Tap FN to enter just one number. Tap and hold FN to enter numbers continuously.
Tap the
123
key.
CAPS key
Tap briefly to activate Uppercase letters for just one character. Tap and hold to enter Uppercase
letters continuously.
FN key
58
Tap briefly to enter the Upper characters. Tap and hold to enter the Upper characters continuously.
Page 46

Entering the text with XT9 mode
XT9 key
If you set XT9 keypad is ON, you can enter the text with XT9 mode. XT9 mode uses a built-in dictionary to
recognise your words based on the key sequences you touch. Simply touch the key associated with the
letter you want to enter, and the dictionary will predict the word you want to use.
Email Tap
Start > LG Menu > E-mail
in the
Communications
tab
About Email
Your Windows Phone smartphone can connect to:
s0ERSONALEMAILACCOUNTSFROM)NTERNETSERVICEPROVIDERS)30LIKE9AHOO!/,AND(OTMAIL9OU
can wirelessly synchronize these personal email accounts with your LG C900K.
s#ORPORATEEMAILACCOUNTSON-ICROSOFT%XCHANGE3ERVEROR)"-,OTUS$OMINO9OUCAN
wirelessly synchronize corporate email accounts with your LG C900K. To set up corporate
wireless email on your smartphone, use the Microsoft® Direct Push setup.
59
Page 47

Set up a Personal Email
1.
Tap
Setup E-mail
2.
Enter your E-mail address, Password, and tap
Auto configuration attempts to download necessary e-mail server settings so that you do not need to
enter them manually.
Note
v
Select the Save Password check box if you want to save your password so that you do not
need to enter it again.
3.
Once Auto configuration has finished, tap
4.
Enter Your name (the name you want displayed when you send e-mail) and the Account display name.
Then, tap
If Auto configuration was successful, the Account display name and User name fields are automatically
populated. Tap
additional settings.
If Auto configuration is unsuccessful, contact your ISP or network administrator for the setup information
and enter it manually.
Next
.
Next
in the
e-mail
, and then
menu.
Next
.
Next
.
Finish
to complete setting up your account, or tap
Options
to access
60
Wireless Corporate Email
s#ORPORATE7IRELESS%MAIL3ETUP
To set up corporate wireless email on your LG C900K, contact your IT administrator for setup
instructions and support for Microsoft Direct Push. Microsoft Direct Push provides wireless
access to your corporate email, contacts, calendar, and tasks for Microsoft Exchange Server.
Activate an appropriate enterprise data plan for your Telstra account before using Microsoft
Direct Push.
Page 48

Send an Email
1.
Tap
Start > LG Menu > New E-mail
provider (if applicable).
2.
In the To field, do one of the following:
- Enter an email address
- Enter a contact name
3.
Tap the Subject field, and then enter the subject.
4.
Type the text in the message box. To edit your email, such as adding files or Message Options,
tap
Menu
, and then select the option you want.
5.
After finishing, tap
Send
at the lower left of the screen.
in the
Communications
tab, and then select your email
Downloading Messages
How you download messages depends on the type of account:
s4OSENDANDRECEIVEEMAILFORAN/UTLOOK%MAILACCOUNTBEGINSYNCHRONIZATIONWITH%XCHANGE
Server through ActiveSync.
s4OSENDANDRECEIVEEMAILFORANEMAILACCOUNTTHATYOUHAVEWITHAN)NTERNET3ERVICE0ROVIDER
(ISP), download messages through a remote email server.
s9OUAUTOMATICALLYRECEIVETEXTMESSAGESWHENYOURPHONEISTURNEDON7HENYOURPHONEIS
turned off, your service provider stores messages until the next time your phone is turned on.
61
Page 49

To Reply to or Forward a Message
1.
Open the received MMS message and then tap
2.
Enter your response. To quickly add common messages, tap
tap a message.
3.
Tap
Send
.
Note
v
You will receive an alert when you receive messages. Messages are stored in the Inbox.
v
In the Inbox, you can identify each message by icons.
v
If the phone notifies you that there is no more space for SIM messages, you must delete
some messages from the Inbox.
v
If the phone notifies you that there is no more space for more messages, you can free space
by deleting messages, media, and applications.
Reply, Menu
>
Reply, Reply All, or Forward.
Menu > Text Templates,
Messaging
This menu includes functions related to text messaging and MMS.
and then
62
Managing Messages
v
Tap
Start > LG Menu
tab to view your accounts, including Messages and email.
1. Inbox:
2. Outbox:
3. Sent Items:
4. Drafts:
5. Deleted Items:
View received messages. Select a message to view it.
The Outbox is a temporary storage area for messages waiting to be sent. Failed
messages are also placed in the Outbox.
Lists the messages you sent (Messages/email).
View saved messages. Select a message, and then edit it.
. From there you can select the
View deleted items.
Messaging
menu in the
Communications
Page 50

AppCenter Tap
Note
v
Additional charges may apply when you download new content. Contact Telstra for more
information.
Start > LG Menu > AppCenter
in the
Multimedia
tab
Ringtones
This menu option connects to Telstra’s ringtone download site.
Games
This menu option contains the games to enjoy.
Cool Tool/Apps
Videos
This menu option allows to download the video files from network.
Color Graphics
This menu option connects to Telstra’s graphics download site.
Fun Packs
Themes
This menu option allows to download the wallpaper themes.
Answer tones
This menu option allows to set the tone for answering a call.
MEdia Net Home
This menu option connects to Telstra’s web portal that you can customize to display your favorite
information.
63
Page 51

Mobile Web Tap
Mobile Web is Telstra’s web portal that you can customize to display your favorite information.
Note
v
May require an Telstra data plan. Please contact your Telstra wireless representative for more
information.
Start > LG Menu > Mobile Web
in the
Multimedia
tab
Music Player Tap
Allows you to use the music player and displays your music. You can play digital audio files stored
on your device or on a memory card.
If you tap Menu on the right side, you can check menus as below.
v
New Playlist:
v
Add to Playlist:
v
Delete Playlist:
Create personal playlists.
Add new song to playlist.
Delete a playlist.
Start > LG Menu > Music Player
in the
Multimedia
tab
64
Page 52

v
Send:
Send the song via Message, E-mail or Bluetooth.
v
Move/ Copy:
v
Delete:
v
Visualiser:
v
Sort by:
Note
v
Copyrights of music files may be protected by copyright and intellectual property laws.
Therefore, you may be required to obtain permissions or licenses before you can reproduce
or copy the material. In some countries, national law prohibits copying of copyrighted
content for personal archiving as well. Prior to downloading or copying files, make sure
that you adhere to applicable local laws and the laws of corresponding countries or regions
regarding the Terms of Use of content.
Move or copy the song between folder or memory.
Delete a song.
Allows you to change the background image for the music player.
Sort the song or list by name or date.
Adding Music to your Handset
Before You Start
To transfer music from your PC to your device, you will need the following:
s7INDOWS-EDIA0LAYERORLATER
s7INDOWS803ERVICE0ACK7INDOWS6ISTAOR7INDOWS
s-USICONYOUR0#INONEOFTHESEFORMATS7-!-0'!!!#!-2-)$-)$)7!6
MP3D, MP3DRM, or M4A
sMICRO3$©CARD
s53"DATACABLE
65
Page 53

Transferring Music from the Digital Music Stores
Transferring Music from the Digital Music Store. To download music from your computer to your LG
C900K, handset, a microSD card is required. This item is sold separately;
go to http://www.wireless.att.com/.
Steps to transfer music may vary, depending on the music store and software being used.
1.
Using your computer, open your preferred PC music management software (not all music
management programs are guaranteed to work).
2.
Download the song you want to your library.
3.
Insert the microSD™ card into the handset.
4.
Use the USB adapter cable to connect the handset to the target PC.
5.
Mobile Device will display on the computer screen.
6.
Highlight the song you want to download to the handset.
7.
Right-click the highlighted song, and then select Transfer Track(s) to Portable Device from the
drop-down menu. This step begins the download process.
Adding Music to your Handset
Add music files to your handset using one or more of the
following methods:
66
s$OWNLOADMUSICANDRINGTONESOVERTHE4ELSTRANETWORKDIRECTLYTOYOURDEVICEUSINGTHE3HOP
Music feature(Start > Telstra Music > Shop Music).
s&ROMYOUREXISTINGDIGITALMEDIACOLLECTIONIN7INDOWS-EDIA0LAYER
®
.
s&ROMMUSICSTORESTHROUGHTHEAPPLICABLEMUSICSOFTWARE
Transferring Music using Windows Media Player
A USB cable, microSD™ card, and of Windows Media Player are required for this procedure.
1.
Open Windows Media Player (version 10.0 or later).
2.
Use the USB adapter cable to connect the handset to the target PC.
3.
Mobile Device will display on the computer screen.
4.
In the Windows Media Player application, click the Sync tab. Previously downloaded songs then
display (on the left side of the application if you are using Window Media Player 11).
Page 54

5.
Choose the destination location for the media files.
Note
v
If there are no items in the playlist, click the Edit Playlist button to begin adding music files from the
various media categories.
6.
To synchronize the songs with your handset, select the songs, and then right-click and select to
add them to the Sync List.
7.
Click
Start Sync
in the lower-right corner of the application to download the selected songs to
your handset. Do not unplug the handset during this process.
8.
It is now safe to unplug the USB connector from the handset.
Transferring a Playlist to the handset
1.
Open Windows Media Player (version 10.0 or later).
2.
Use the USB adapter cable to connect the handset to the target PC.
3.
Mobile Device will display on the computer screen.
4.
In the Windows Media Player application, click the Library tab.
5.
On the left side of the Library tab, click
songs the player previously found.
All Music
. The right side of the page then displays all the
6.
Right-click the song entry, and then select
7.
In the Add to Playlist dialog, click the
8.
Click OK. The new Windows Media playlist is then displayed in the My Playlist section of the
Add to > Additional Playlists
New
button, and then enter a unique playlist name.
.
Library tab (left side).
9.
Drag and drop the newly created playlist from the My Playlist section to the phone's Music Sync
Player, listed just above it. Click
Start Sync
.
Note
v
If there are no items in the playlist, click the Edit Playlist button to begin adding music files from the
various media categories.
10.
It is now safe to unplug the USB connector from the handset.
67
Page 55

Note
1.
If you connect your handset to a USB Hub on your PC, the Music Sync service may not work.
We recommend direct USB Connection to your PC, without using a HUB.
2.
Do not disconnect during transfer. Check if your PC is running Windows XP and Windows Media
Player 10 or later. If your PC is running Windows XP and Windows Media Player 9, download
Windows Media Player 10 or 11 from the Microsoft website.
3.
If you have connected your handset to the PC but cannot correctly send a file using Music
Sync, please check the following:
A. The length of the file you are transmitting.
B. Whether the license of the file you are transmitting has expired.
C. Whether the file you are transmitting is the right format for your phone (MP3, WMA,
AAC).
4.
If you transfer files as listed below, the transferred files will not display in third-party
applications or in Windows Media Player.
A. Transmit a file by directly inserting external memory into a PC.
5.
To delete files from your phone after transferring them with Music Sync, reconnect your
phone to your PC with Music Sync. If you have deleted files transferred with Music Sync as
listed below, delete them again using Music Sync. Otherwise you will not be able to transfer
files identical to the deleted files.
68
A. Deletion of a file using Windows Explorer.
B. Deletion of a file by directly inserting external memory into a PC.
C. Deletion of a file using the delete function of the phone.
Page 56

Telstra Music Tap
Start > LG Menu > Telstra Music
in the
Multimedia
tab
.
Shop Music
Selecting Shop Music from the Telstra Music submenu launches a music page in your browser
where you can purchase music from third-party stores and Telstra.
Music ID
MusicID is an application that uses the onboard microphone to analyze song samples and then
compare them to a remote database of songs. Once the application completes the analysis
of a song sample, it tells you the name of the song, the artist, and album artwork as well as
opportunities to buy related content.
69
Page 57

XM Radio
Selecting XM Radio from the Telstra Music submenu launches a preinstalled application. The
application allows you to listen to dozens of channels of digital radio on your mobile phone. Get
unlimited access to commercial-free music, the latest Hip Hop, R&B, Rock, Jazz, and Country
anywhere you go.
WARNING!
volume charges incurred.
This product downloads a large amount of data, and you are responsible for all data
Music Videos
Selecting Music Videos from the Telstra Music submenu launches MobiVJ. With this application,
YOUWILLHAVEACCESSTOMUSICVIDEOSFROMTHEMOSTPOPULARARTISTSANDMORE7ITHTHISAPPLICATION
3IMPLYCLICKONA#HANNELANDSTARTWATCHING
Music Sync
Selecting Music Sync from Telstra Music submenu launches an application that gives you access to the
music collection on your PC.
Community
Selecting Community from the Telstra Music submenu launches your browser to visit the hot user
communities. The application allows you to interact with the community as well as artist sites.
70
Page 58

Music Apps
Selecting Music Apps from the Telstra Music submenu launches the browser to visit an area where
you can purchase music-related applications for download.
Note
v
Additional charges may apply when you download content. Contact Telstra for more
information.
Mobile Video Tap
CV brings you quick, on-demand access to news, sports, weather, and entertainment video clips.
Catch up on TV’s hottest shows, funniest comedians, biggest headlines, and latest sports scores.
You can even personalize your homepage for quick access to your favorites. In addition, the CV
service streams local weather information to your personalized News & Weather page every day.
Mobi4Biz Tap
Mobi4BIZ is a mobile finance application. Mobi4Biz is a fee-based, video-centric application that offers
stock data, business news and related information, including company-specific VOD content.
Start > LG Menu > Mobile Video
Start > LG Menu > Mobi4Biz
in the
Multimedia
in the
Multimedia
tab
tab
71
Page 59

Games Tap
In the Games submenu, Java and Windows games can be found. You can download the full
versions of these games since only Trial versions are included for some of the games.
Start > LG Menu > Games
in the
Multimedia
tab
Apps Tap
In the Apps submenu of Menu, some of the several Java apps (My-Cast Weather, Notifier for
iSkoot, and WikiMobile) can be found.
Using your Alarm Tap
1.
Choose
2.
Select Repeat, and then choose the days on which to repeat the alarm.
3.
Tap Sound/Vibration, and then choose the type of alarm: Always Sound & Vibrate, Always
Sound, Always Vibrate, and so on.
4.
Tap
5.
You can also select
Start > LG Menu > Apps
New Alarm
Save
or
More
, and then use your fingers to set the time on the clock.
to further customize your alarm settings.
1UICK!LARM
Tap this icon to toggle the
Alarm On or Off.
in the
Applications
Start > LG Menu > Alarm
, to use the phone as a timer quickly and easily.
tab
in the
Applications
tab
72
Page 60

Using the RSS Reader Tap
Start > LG Menu > RSS Reader
in the
Communications
RSS (Really Simple Syndication) is a family of Web feed formats used to publish frequently updated
content, such as blog entries, news headlines, and podcasts. An RSS document, called a feed, Web
feed, or channel, contains either a summary of content from an associated website or its full text.
Users subscribe to feeds by entering their links into the reader. Users can update the subscribed
feeds regularly for new content and downloads any updates it finds.
Weather Tap
Check today’s weather and the weather forecast in any city you choose.
tab
Start > LG Menu > Weather
in the
Applications
tab
To Change the City and State
1.
Tap the Settings tab.
2.
Scroll and select the Region, Country, State, and City where you want to get weather data.
3.
Set Automatic Update to ON to receive automatic updates (Every 1hour).
Note
v
This function may result in additional data transfer fees from your provider.
73
Page 61

Using your Calculator Tap
1.
Tap the number keys to enter numbers.
2.
For simple calculations, tap the function you want (+, –, x or ÷), followed by =.
3.
For more complex calculations, tap at the upper right of the screen, and then choose
between sin, cos, tan, log, ln, and so on.
Start > LG Menu > Calculator
in the
Applications
tab
Tip calculator Tap
This feature allows you to calculate the tip quickly and easily based on the total bill; it also lets you
calculate the split of the total bill according to the number of people.
v
Bill
- Type the bill amount.
v
Tip (%)
v
Split
- Type the percentage of the Tip
- Enter the number of people.
Using your Stopwatch Tap
tab
This menu allows you to record the elapsed time of an event. You can also display an individual lap time
and the total time.
1.
To start timing, tap
seconds, and hundredths of a second).
2.
During the timing, you can record an individual lap time by tapping Lap. Up to 99 lap times can be
recorded.
3.
Stop and resume timing by tapping
Start > LG Menu > Tip Calculator
Start > LG Menu > Stopwatch
Start
. The running time is displayed as HH.MM.SS.hh (hours, minutes,
Stop
or
Resume
.
in the
Applications
in the
tab
Applications
74
4.
To reset the stopwatch, tap
5.
You can see the recorded lap times on the lap time list.
Stop
and
Reset
.
Page 62

3PRITE"ACKUPTap
v
Backup
Start > LG Menu 3PRITE"ACKUP
in the
Applications
tab
Provides a number of options to help you backup information on your phone.
v
Restore
Provides different restore options; these options are used to maximize the restore operation. In
most cases, you will get the best results using the default option. However, depending on the
complexity of the restore operation, you may need to change the options to get better results.
v
Schedule
This option allows you to set a backup schedule.
v
Options
You can view and access all Backup, Restore, Networking, Security History, and Help options.
- General Restore Options:
Used for standard restore operations. (Restore to the same device or
similar device with identical hardware and OS version.)
- Upgrade Mode Options:
Used when restoring between different devices (Hardware types)
or devices with different OS versions (AKU and AKU2). We continuously strive to improve our
upgrade mode restore feature, but ongoing development and changes to the Windows Phone
platform means that
Upgrade Mode
may not always restore your device to the state you want.
75
Page 63

Telstra Navigator Tap
Start > LG Menu > Telstra Navigator
in the
Applications
tab
The Telstra Navigator™ application on your device uses GPS positioning technology and your
carrier’s data network to provide you with driving directions and a host of other services, including:
v
GPS navigation gives you turn-by-turn directions to any address in the continental United States.
If you miss a turn or get off track, Telstra Navigator will calculate a new route for you. You can
enter an address using Telstra Navigator’s automatic voice recognition system or by entering it on
the device’s keypad.
v
Audio and visual traffic alerts while driving or viewing maps, as well as traffic rerouting
capabilities to minimize delays on your trip.
v
A Search feature that allows you to find businesses or points of interest near your current
location, an airport, a waypoint, or any address entered. You can read ratings and reviews of
businesses and easily call the business you found to check on the availability of an item or make a
reservation. You can navigate to the business location now or save the address for later use.
v
Maps of the area around your current location, around a marked waypoint, or around an address
that you previously entered. You can pan the map (adjust left, right, up, or down) and zoom in or
out.
You can also mark a point under the cursor as a waypoint.
v
A compass-like indicator specifying your direction of travel, location, and speed.
76
v
Personalization of your application preferences by selecting U.S. customary or metric distance
units, the audible guidance language, and so on.
Page 64

Note
v
To improve GPS antenna sensitivity, do not cover the GPS antenna area with your hand.
Hold the handset as shown in the figure below.
v
You will not be able to obtain a GPS location if you are in a restricted GPS signal area, such as a
building, underground, or a location surrounded by metal or concrete.
v
If you are indoors, use near a window for better GPS antenna sensitivity.
v
It is suggested that you use the vehicle power adapter in your car.
v
It may take up to two to three minutes to get your GPS position. This time depends on the
environment and network.
77
Page 65

Login
After launching Telstra Navigator, the Login screen will appear. Your phone number is
automatically
generated. Your phone number MUST be the same as your carrier phone number, beginning with
the area code; this way, you don't have to enter it when you call the Voice Address Input System.
Correct the number, if necessary.
Enter your first and last names, and then click
If you have already signed up for the TeleNav service, then the next Login screen will ask you to
enter the 4-digit PIN you provided when registering for TeleNav at www.telenav.com.
You can also use many of Telstra Navigator’s features on the TeleNav website, such as driving
directions (Route Planning) and the Search function to find businesses, churches, schools, and
government offices. You can also use the TeleNav website to add an address to your My Favorites
list, manage your My Favorites and Recent Places lists, and shop at the TeleNav Store.
Login
.
Warning Screen
This next screen presents a warning regarding safe use.
If you agree to the conditions, click Go.
78
Page 66

Product Tour
If you choose to continue, a pop-up screen will offer you a brief tour
of Telstra Navigator. Choose
key features. To go directly to the application, choose No.
Note
v
The product tour is only displayed the first time you
log into Telstra Navigator and does not appear after
subsequent logins. You can always access the Product
Tour again in the Tools/Extras menu.
Yes
to see a tour of Telstra Navigator’s
Telstra Navigator Menu Overview
This section gives you a brief overview of the Telstra Navigator menus.
Main Menu
The Telstra Navigator Main Menu options are:
s$RIVE4O
s$IRECTORY
s-APS
s%XTRAS
79
Page 67

Drive To Menu
Use Drive To to select from a variety of ways to navigate to an address. The Drive To Menu options
are:
s
My Favorites -
them.
s
Recent Places -
in a Directory (Business) search, 2) Viewed as a map, or 3) Located using a street address,
intersection, city, or airport.
Places that you have found and saved in the past, giving you quick access to
Telstra Navigator automatically saves all the places that you: 1) Found
80
s
Business -
businesses by average star rating, and read user reviews. Once you find what you are looking for,
you can get audible and visual driving or walking directions, place a call, view a map, or save it to
your My Favorites list.
s
Address -
type in a city name to get directions to the center of the city.
s
Intersection -
s
Airport -
using the Drive To Menu.
Search the directory and find the addresses and phone numbers of businesses. Sort
Enter a street address by typing or speaking. You can leave the address field blank and
Enter an intersection by typing or speaking.
Quickly find airports by typing in the name or 3-letter code. For more information about
Page 68

Directory Menu
The Directory menu provides you with different ways to find the addresses and phone numbers of
businesses, such as restaurants, motels, gas stations, churches, schools, government offices, and
police and fire stations.
You have the following options in the Directory menu:
s
Spell Name -
Type in a keyword for the search.
s
Recent Searches -
s
Food/Coffee -
s
Gas Stations -
s
Gas By Price -
s
"ANK!4-
s
Hotels/Motels -
s
0ARKING
s
Other -
minus sign (-) to collapse it.
Search for nearby parking facilities.
Search the Directory by category. Press the plus (+) sign to expand a category and the
Access a list of the businesses you have recently viewed.
Search from a variety of categorized restaurants.
Search for nearby gas stations.
Find the cheapest gas in your area.
Search for nearby banks.
Search for nearby hotels and motels.
81
Page 69

Maps Menu
Use the Maps menu to view a map and traffic information for one of the following:
s9OUR#URRENT,OCATION
s!&AVORITE0LACE
s!2ECENT0LACE
s!"USINESSTHISISTHESAMEASTHE3EARCHMENUOPTION
82
s!N!DDRESS
s!N)NTERSECTION
s!N!IRPORT
s!#ITY
Page 70

Extras Menu
The Extras menu allows you to set your preferences for a number of options and features.
The Extras Menu options are:
s
Share Address –
s
Record Location –
know your current address or if you want to mark an area that does not have a street address.
Share an address with friends on their mobile devices.
Record your current location using GPS. This option is useful when you do not
s
My Favorites –
s
My Contacts –
Manage your Favorites list by renaming or deleting items.
Manage your contacts by organizing them into categories or editing contact
information.
s
Refer a Friend –
s
Preferences –
s
Compass –
s
About -
View information such as your Telstra Navigator version number, the Customer Support
Invite another person to try the Telstra Navigator service.
Set your preferences for the Telstra Navigator application.
View a compass showing your current heading.
phone number, and your account information. You can also take a Product Tour.
Note
v
Please press the Close button (X) or Exit menu button to shut down Telstra Navigator. If you press the
End key, Telstra Navigator disappears, but it is still running in the background, continuing to consume
battery power.
83
Page 71

Wireless Manager
Wireless Manager allows you to manage Wi-Fi Internet and Bluetooth connections on your device.
It allows the phone to connect to local wireless networks, or access the Internet wirelessly.
Note
v
The charges for using a data plan to access the Internet and using Wi-Fi are different. Please contact
your network operator for further information.
v
Tap
Start > Settings > Connections > Wireless Manager
v
Tap the Wi-Fi option to turn On/Off.
A bubble window appears if a new network has been detected.
v
Select the network that you are permitted to access, and then tap
v
Then select
Note
v
If your Wi-Fi service provider or network administrator sets an encryption key, for network security,
you must enter the key in the pop-up window. If encryption is not set, this pop-up window will not
appear. If you don’t know the key, you must ask your Wi-Fi service provider or network administrator.
The Internet
to get Internet service, and tap
Connect
OK
.
.
84
Note
v
When the battery level becomes exceedingly low, the Wi-Fi connection will be disconnected.
Page 72

Changing your Phone Settings Tap
Start > LG Menu >Phone Settings
in the
Settings
You have the freedom to adapt the LG C900K to your preferences.
Date & Time -
the time is updated.
Ringtone & Alerts -
Automatic.
Themes & Wallpapers -
0OWER"ACKLIGHT
,OCK
Fonts Memory Manager -
and an external memory card that you may need to purchase separately. You can use memory
manager to determine how each memory is used and see how much space is available.
Using the Screen Outputs Tap
Settings
tab
Adjust your date and time settings, or choose whether to receive notification when
Choose your ringtone type: Normal, Vibrate All, Silent All, Outdoor, and
Choose your phone's Theme and Wallpaper.
Set up the Power and Backlight settings for Battery and External.
Set the lock mode status.
Adjust the text size to see more content, or increase the readability in many programs.
Your LG C900K has three possible memories: the phone itself, the SIM Card,
Start > LG Menu > Screen Outputs
tab
in the
Pico Projector (sold separately) TV Out-
Allows you to output to TV.
Projects LG C900K’s screen onto the screen or wall.
85
Page 73

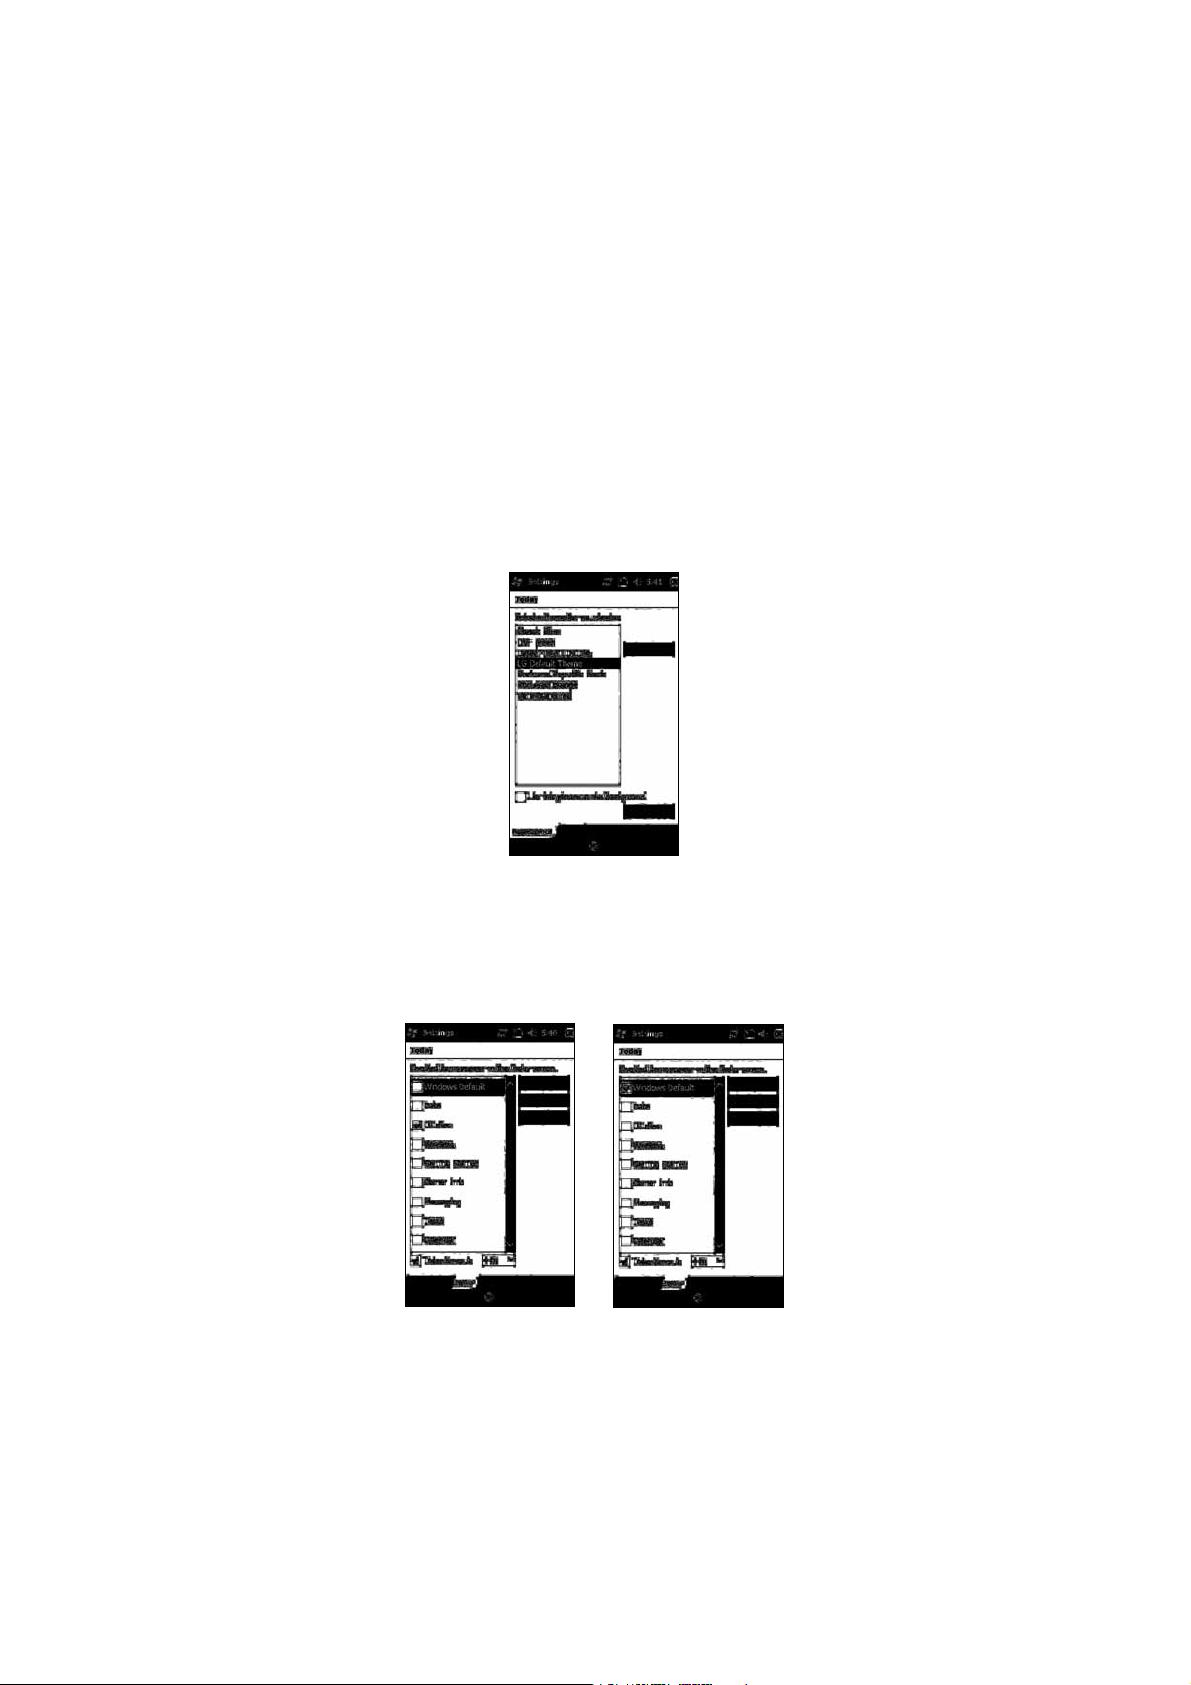
Displaying the Today screen Tap
the
Settings
tab
Start > LG Menu > Homescreen Layout
in
Checked items appear on the Today screen. If you check
be able to select other items. For more information, see page 26 and 27.
Using Bluetooth Tap
Bluetooth enables compatible mobile devices, peripherals, and computers that are in close
proximity to communicate directly with each other wirelessly. This handset has built-in Bluetooth
connectivity, which makes it possible to connect it with compatible Bluetooth headsets, computer
applications, and so on.
Note
v
If you use
v
When you receive data from another Bluetooth device, the phone requests confirmation. After
confirming the transfer, the data transfer will continue.
v
Bluetooth must be turned on to use these features.
There are three tabs for Bluetooth: Settings, My Devices, and Accessories.
1. Settings
Go to
Go to
Go to
PC Sync via Bluetooth
Bluetooth > Settings > Add a device
Bluetooth > Settings > Disable Bluetooth
Bluetooth > Settings > Advanced
Start > LG Menu > Bluetooth
, you can exchange data within the phonebook.
to set up a new Bluetooth device.
to set up additional options.
LGIdles
to turn off Bluetooth.
, or
Windows Default
in the
Settings
, you will not
tab
86
2. My Devices:
Allows you to see the information and properties of the paired devices.
Page 74

3. Accessories
Go to
Bluetooth > Accessories > Print Images
Go to
Bluetooth > Accessories > PC Remote Control
Go to
"LUETOOTH!CCESSORIES.ETWORKING-ANAGER
to lay out and print pictures from your handset.
to remotely control a PC with your device.
to network with other Bluetooth
devices.
Go to
Bluetooth > Accessories > Business Card Exchange
Go to
Bluetooth > Accessories > BT Send Object
to send objects such as
#ONTACTS4ASKS.OTES#ALENDAR)TEMS!UDIO2ING4ONES)MAGES
to send and receive business cards.
/UTLOOK%MAIL
and
Videos
Bluetooth device.
Note
v
If you want your phone to be discovered by other Bluetooth devices, change the discoverability setting
as indicated below. Go the Settings tab and select
Visible for 60 seconds
.
Not Discoverable
, and change to
Always Visible
to a
another
or
Using TTY Tap
Start > LG Menu > TTY
in the
Settings
tab
Allows you to attach a TTY device so you can communicate with other parties using TTY devices.
A phone with TTY support is able to translate typed characters into voice. Voice can also be
translated into characters and then displayed on the TTY device.
87
Page 75

TTY Mode (Teletypewriter)
TTY modes are as follows:
Menu User Feature
TTY Full
TTY + Talk
TTY + Hear
1. TTY Full:
- Users who cannot talk or hear send and receive text messages through TTY equipment.
4494ALK
- Users who can talk but cannot hear receive text messages and send voice messages through
TTY equipment.
3. TTY Hear:
- Users who can hear but cannot talk send text messages and receive voice messages through
TTY equipment.
4. TTY Off:
- Users send and receive without TTY equipment.
For hearing/
speech impaired
For hearing
impaired
For speech
impaired
can talk
audible
Transmission/Receiving
Mode
text message transmission,
text message reception
voice transmission, text
message reception
text message transmission,
voice reception
When communicating
with a non-TTY
terminal
operator required
operator required
operator required
88
Page 76

Connecting TTY Equipment to a Terminal
1.
Connect a TTY cable to the TTY connector on the terminal. (The TTY connector location is the
same as a hands-free ear socket.)
2.
Enter the TTY menu, and set the desired TTY mode. (For a TTY mode, see above.)
3.
After setting a TTY mode, check the LCD screen of the phone for the TTY icon.
4.
Connect the TTY equipment to a power source, and then turn it on.
5.
Call a number.
6.
When a connection is made, use the TTY equipment to enter and send text or voice messages.
7.
The voice or text message from the receiver end appears on the TTY equipment display.
89
Page 77

4AKINGPHOTOSANDRECORDINGTap
Multimedia
seconds
1.
Holding the phone horizontally, point the lens towards the subject you want to take a picture of.
2.
Hold down the camera button on the right side of the phone for 1~2 seconds, or tap the camera
button on the screen.
tab, or press and hold the Camera button (on the right side of the phone) for 1~2
Start > LG Menu > Camera
in the
90
Page 78

3ETTINGS"EFORETAKINGAPICTURE
To see the Settings menu, tap the screen once. These settings options disappear automatically if you do
not make selections.
Back
Change mode - Drag this icon to switch
to camera/ record mode.
Opens the Photo Album
Video Share Call
Brightness - Adjust the brightness.
Macro/Auto
Flashlight - Choose Auto/Always On/Always Off
Settings - Reset Settings/Image Size/Scene Mode/Colour Effect/White
Balance/Timer/Shot Mode/Preview Style/ISO/Image Quality/Memory In Use/
Hide Icons/Shutter Sound/Grid View.
91
Page 79

3ETTINGS!FTERTAKINGAPHOTO
Rename - Edits the filename.
Use As - Allows you to use as a Wallpaper and Contact Image.
Send - Send Via Message, Email, Bluetooth, or HP’s Snapfish®.
Back
Delete
Returns to the camera preview
Opens the Photo Album
92
Page 80

Settings - Before recording
To see the Settings menu, tap the screen once.
Brightness - Adjust the brightness.
Recording Mode - Choose from Auto, Portrait, Landscape,
and Sports.
Flashlight - Choose Always On/Always Off
Back
Change mode - Drag this icon to
switch to camera/ record mode.
Opens the Photo Album
Settings - Reset Settings/Video Size/Scene Mode/Colour
Effect/White Balance/Video Quality/Duration/Memory In
Use/Voice/Hide Icons.
93
Page 81

Settings - After recording
Rename - Edits the filename
Send - Send Via Message, Email or
Bluetooth
Play - Replays the recorded video clip
Back
Delete
Record - Return to record mode
Opens the Photo Album
94
Page 82

Photo Album Tap
Note
v
Tap
Menu
to delete or sort files, or see a slideshow.
Start > LG Menu > Photo Album
Tap to choose one from Photo Album,
Favorites, Pictures only, or Videos only.
in the
Multimedia
tab
My Multimedia Tap
You can view your files, including Audio and Pictures files, stored in the Handset and Memory Card.
You can also see how much storage space is being used. The Pictures and Videos program collects,
organizes, and sorts images and video clips in the following formats:
File Type File Extensions
Image BMP, JPG
Video WMV, MP4, 3GP
Audio AAC ,MP4,3GP,3G2,3GA,MP3,WMA
You can view pictures as a slideshow, delete them, send them by email, edit them, or set them as
the background of the Today screen.
Start > LG Menu > My Multimedia
,WMV,M4A ,AMR ,MID
in the
Multimedia
tab
95
Page 83

To Copy a Picture or Video Clip to your device
You can copy pictures from your PC and view them on your device.
v
Copy the pictures from your PC or a storage card to the My Pictures folder of your device.
Note
v
You can also copy pictures from your PC to your device using a memory card. Insert the memory card
into the memory card slot on your device, and then copy the pictures from your PC to the folder you
created on the memory card.
FM Radio Tap
Your LG C900K has an built-in FM radio so you can listen to your favorite stations on the go.
Tune in to radio stations by searching for them manually or automatically. They will then be saved to specific
channel numbers, so you don’t have to search for them each time. To set your listening environment, tap
Menu
on the FM Radio screen, and then choose an option you want to set, such as
Start > LG Menu > FM Radio
in the
Multimedia
tab
Scan
and
Alarm
.
Note
v
You must attach your headphones to listen to the radio. Insert them into the headphone jack.
v
To improve radio reception, extend the headset cord, which functions as an FM antenna.
1.
To save/add a station, tap the 123ch button on the FM Radio screen, tap
Add
.
2.
After saving the radio channels, you can listen to any preset channel by touching the left or right
Menu
, and then tap
arrow.
3.
Access the following options menus by touching
Menu
:
96
Page 84

v
Scan:
If you tap Scan, it automatically finds radio channels. If you want to save the current
channel, then tap
v
Mute:
Select this option to turn off the sound.
v
Preset Scan:
v
Save preset:
Stop > Menu > Save preset
.
Choose whether to erase the existing presets before scanning for new stations.
Allows you to set the channels you use frequently, and assign Shortcut keys. This is
found in the preset list.
v
Presets:
v
Alarm:
v
Options:
Displays the entire presets list.
Choose a preset as an alarm. Check the [Enable Alarm] box for setup.
Allows you to enable RDS and switch Alternative Frequency.
Note
v
Enable RDS:
Displays the received data message from the radio station on the screen.
To Set Sound & Notifications of Actions
1.
Tap
Start > Settings > Sounds & Notifications.
s)NTHE
s)NTHE
Sounds
tab, choose how you want to be notified by selecting the appropriate check boxes.
Notifications
tab, under Event, tap an event name, and then choose how you want to be
notified by selecting the appropriate drop-down boxes. Choose from several options, connection
event of call , active sync, or wireless network.
s)NTHE
Vibrations
tab, choose how you want to be notified by vibrations when touching the
screen.
97
Page 85

Using Fingerprint Sensor Tap
Start > LG Menu > Fingerprint Sensor
in the
Settings
Allows you to adjust Motion Sensitivity and Turbo Scrolling Speed for the Fingerprint Sensor.
The Finger Sensor can be used as follows:
s)NCAMERAMODEZOOMINANDOUTBYTOUCHINGTHEFINGERPRINTSENSOR
s9OUCANLOCKTHE,'#+USINGFINGERPRINTRECOGNITION
(Go to Tap
sensor
s)NTHE3TART-ENUNAVIGATEICONSBYTOUCHINGTHEFINGERPRINT3ENSOR
Note
v
v
tab
Start > LG -ENU0HONE3ETTINGS,OCK5NLOCKDEVICEWITHFINGERPRINT
.)
Register at least two fingerprints to best use this function.
If the phone is locked and the fingerprint is not recognized, tap the
PIN.
Emergency Call
button to enter the
98
Page 86

Voice Command
Voice command is the function whereby your phone’s voice recognition engine identifies the voice of the
user and carries out the requested commands. When the user operates the voice command function,
there are many available commands (see the following pages for more info).
Voice command is activated when you press and hold Back key
under the Fingerprint Navigation sensor. You can see the icon on
the upper side of the screen.
The LG C900K activates as you speak and command.
Tap Start > Settings > Personal> Voice Command
Allows you to see
options for chosen item
of the list.
Allows you to choose
the Notification Options
99
Page 87

Voice Command Options
s#ALENDAROPTIONS
- Enable/ Disable: Announces to remind the calendar.
s-EDIAOPTIONS
- Enable/ Disable: Announces the album, artist, genre of music.
s-ESSAGEOPTIONS
- Enable/ Disable/ High priority: Announces to arrive new message.
s0HONEOPTIONS
- Confirm when calling by name
- Confirm when calling by number
- Announce incoming calls
100
Page 88

Category
Making Phone
Calls
Step 1 Step 2
Call <contact>
ex. Say “Call Frank”
Call <contact> at/on <location>
ex. Say “Call Frank at Home”
Dial
Voice Command
Nickname
First Last
First Last Suffix
First Middle Last Suffix
Company (if shown in contacts list view)
Home
Home2
Work
Work2
Mobile
Car
Pager
Assistant
Local Call
Showing Contacts
ex. Say “Dial 111 2222 2222”
“Dial +49 17 2233 5645”
Callback
Redial
Show/look up <Contact>
ex. Say “Show Frank”
International Call
Nickname
First Last
First Last Surfix
First Middle Last Suffix
Company (only if available)
101
Page 89

Category
Reading
Appointment
Playing Music
Start >
Go to
Settings >
Personal > Voice
Command
Enable the Media
Voice Commands
to
Voice Command
Step 1 Step 2
What’s my next appointment?
What’s my schedule today?
What’s my schedule tomorrow?
Reminders ON
Reminders Off
What’s my next meeting?
What’s my next appointment?
What are my
appointments(today)?
What are my meetings(today)?
What’s my schedule(today)?
What’s my calendar(today)?
What’s my calendar for today?
What are my appointments
tomorrow?
What are my meetings tomorrow?
What’s my calendar for tomorrow?
What’s my schedule tomorrow?
Play anything
Say Album, Artist, Genre or Anything. While the
Play music(music)
Play album
Play artist Hold down the Back key to say the Artist name.
Play genre Hold down the Back key to say the Genre name.
Turn Shuffle On
Turn Shuffle Off
What song is this?
What track is this?
options are being read out loud, hold down the
Back key to the say option.
Hold down the Back key to say the Album
name.
102
Page 90

Category
Starting Programs
Getting Phone
Status
Getting Help
Step 1 Step 2
Start/Open <program>
ex. Say “Open Word”
What time is it?
What date is it?
What is my battery level?
Turn flight mode on
Turn flight mode off
What is my signal strength?
What calls have I missed?
What missed calls do I have?
Set Ringer High
Set Ringer Loud
Set Ringer Medium
Set Ringer Middle
Set Ringer Low
Set Ringer Soft
Set Ringer Off
Set Ringer Mute
Set Ringer Vibrate
Help
What can I say?
What are my choices?
Voice Command
Internet Explorer
Word
Excel
MSN
Messaging
Windows Media
MSN Messenger
103
Page 91

4ASK-ANAGER
In some cases, programs automatically close to free memory. However, you can close programs
manually.
1.
Tap
3TART4OOLS4ASK-ANAGER
2.
Check the running programs list in the Application column, also included are the Memory and
CPU information for each program.
3.
End the programs manually by touching
the highlighed task one at a time.
%ND4ASK
at the lower left of the screen. This will close
Internet Sharing
Note
v
ActiveSync software version 4.5, or later, is required on your PC.
v
Windows XP SP2 or later is required.
104
1.
Connect the USB cable to the PC.
2.
Tap
Start > Tools > Internet Sharing.
3.
Set PC Connection to USB or Bluetooth PAN.
v
The data connection indicator (G/E/3G) is displayed when internet sharing is performed
successfully.
Page 92

ActiveSync
ActiveSync synchronizes information on your device with information on your PC, such as Outlook
content. ActiveSync can also synchronize over a cellular network with Microsoft Exchange
Server, if your company or service provider is running Microsoft Exchange Server with Exchange
ActiveSync. When you synchronize, ActiveSync compares the information on your device with the
information on your PC and/or Exchange Server and updates all locations with the most recent
information. For newer versions of Windows, refer to the next page.
With ActiveSync, you can:
v
Synchronize information, such as Outlook Email, Contacts, Calendar, or Tasks information on
your device with your PC, as well as pictures, video, and music.
v
Synchronize Outlook Email, Contacts, Calendar appointments, and Tasks on your device directly
with Exchange Server so that you can stay up to date even when your PC is turned off.
v
Exchange files between your device and your PC without synchronizing.
v
Select which types of information are synchronized, and specify how much information is
synchronized. For example, you can choose how many weeks of past Calendar appointments to
synchronize.
You can synchronize your e-mail, contacts, calendar, songs, pictures and internet favorites with
your Windows-based PC. Start by visiting this Microsoft Web site - www.microsoft.com/getstarted
Once you have installed ActiveSync and set up a synchronization relationship, ActiveSync on the
PC recognizes your device when you connect it and automatically transfers the synchronization
settings you specified on your device.
You may be able to synchronize your device with Exchange Server through your company or
wireless service provider. If you plan to do so, get the email address, Exchange Server address, user
name, password, and domain name from your administrator before starting the Sync Setup Wizard.
105
Page 93

Setting with Windows Vista™
Microsoft Windows Phone® Device Center is the replacement for Microsoft® ActiveSync® on
Windows Vista™.
Set up synchronization in Windows Phone Device Center
When you connect your device to your PC and start Windows Phone Device Center for the first time,
you are asked to create a Windows Phone partnership with your device. Follow the steps below to
create a partnership.
v
Connect your device to your PC. Windows Phone Device Center configures itself and then opens.
v
On the license agreement screen, click
v
On the Windows Phone Device Center’s Home screen, click
Note
v
Choose
updates, or explore your device but not sync Outlook information.
v
Select the items you want to synchronize, and then click
v
Enter a device name, and then click
Device Center synchronizes your device automatically. Outlook emails and other information will
appear on your device after synchronization.
Connect without setting up your device
Accept
Set Up
.
Set up your device
if you only want to transfer media files, check for
Next
.
. When you finish the setup wizard, Windows Phone
.
106
Page 94

Use Windows Phone Device Center
To open Windows Phone Device Center, click
Center
following:
v
v
v
on your Windows Vista computer. In Windows Phone Device Center, you can do the
Click
Mobile Device Settings
Click
Pictures, Music, and Video > Add media to your device from Windows Media Player
to synchronize music and video files using Windows Media® Player.
Click
File Management > Browse the contents of your device
from your device.
to change synchronization settings.
Start > All Programs > Windows Phone Device
to view documents and files
Setting up Windows XP
1.
Select
2.
After installation has completed, connect your device to your PC using the sync cable.
3.
The Synchronization Setup Wizard automatically starts and guides you in creating a
4.
To synchronize your device with your computer, clear the Synchronize directly with a server
Setup and Installation
- Connect the smaller end of the USB cable into your LG C900K.
- Connect the larger end of the USB cable into the USB port of your computer.
synchronization relationship. Click
running Microsoft Exchange Server check box, and then click
, and then follow the on-screen instructions to install ActiveSync.
Next
to proceed.
Next
.
5.
Select the information types that you want to synchronize, and then click
6.
Click
Finish
.
When you finish the wizard, ActiveSync synchronizes your device automatically.
Next
.
107
Page 95

Synchronizing Information
When you connect your device to the PC using a USB or Bluetooth connection, ActiveSync will
immediately synchronize. While the device is connected, ActiveSync synchronizes every time you
make a change on either the PC or the device.
Synchronizing Outlook information
If you have set up a synchronization relationship between your device and the PC, synchronization
keeps Outlook information up to date on both computers. ActiveSync synchronizes a limited amount
of information by default to save storage space on your device. You can change the amount of
information synchronized for a given information type in the Settings for the information type.
You can set up your device to synchronize with more than one PC or with a combination of one or
more PCs and Exchange Server. When synchronizing with multiple computers, the items that you
synchronize will appear on all of the computers with which they are synchronized.
For example, if you have set up synchronization with two PCs (PC1 and PC2), each with different
items, and then you synchronize Contacts and Calendar on the device with both computers, the
result is as follows:
Location New state
108
PC1
PC2
Device
All Outlook contacts and calendar events that were on PC2 are now also on PC1.
All Outlook contacts and calendar events that were on PC1 are now also on PC2.
All Outlook contacts and calendar events from both PC1 and PC2 are on the device.
Page 96

To start and stop synchronization
v
To synchronize Outlook information and other local information on the PC, including media files,
connect your device to the PC using Bluetooth or a cable.
v
If you are synchronizing directly with Exchange Server, you can use the PC connection to a
network that is “Desktop Pass-through,” or you can synchronize over a cellular network without
connecting to the PC.
v
In ActiveSync, click
which information is synchronized
1.
In ActiveSync on the device, tap
2.
Do one or both of the following:
v
Select the box for any items you want to synchronize. If you cannot select a box, you might have
to clear the box for the same information type elsewhere in the list.
v
Clear the box for any items you want to stop synchronizing.
3.
To stop synchronizing with one PC, tap the PC, and then tap
Note
v
Outlook email can be synchronized with only one computer. To change the synchronization settings,
select the type of information, and then tap
Sync
. To end synchronization before it completes, click
Menu > Options
.
Delete
Settings
.
Stop
. To change
.
109
Page 97

To synchronize directly with Exchange Server
You can set up synchronization with Exchange Server, if it is available to you through your company
or wireless service provider. However, you should first ask your administrator for the following
information, and then continue the setup process: email address, Exchange Server address, user
name, password, and domain name.
1.
In ActiveSync on the device, tap
synchronization with Exchange Server, you will see
2.
Enter the email address, and then tap
3.
In Server address, enter the address of the server running Exchange Server, select the box if this
Server requires an encrypted (SSL) connection. Tap
4.
Enter the user name, password, and domain, and then tap
synchronization conflicts, tap
5.
Select the boxes for the types of information items that you want to synchronize with Exchange
Server.
6.
To change available synchronization settings, select the type of information, and then tap
Settings
7.
Tap
.
Finish
.
Menu > Configure Server
Add Server Source
Next
.
Next
Advanced
.
. If you have not yet set up
.
.
Next
. To change the rules for resolving
110
Synchronizing using Bluetooth
You can connect your device to the PC to synchronize using Bluetooth.
To synchronize with a PC using Bluetooth
1.
First, check
menu on your PC. (On ActiveSync on your PC, go to
Select the
If there are no available connections, then you should first make a Bluetooth pairing.
2.
Select the ActiveSync via Bluetooth item in the Bluetooth connection wizard (Bluetooth Settings
> Bluetooth Manager > new > ActiveSync via Bluetooth).
Allow connections to one of the following
File > Connection Settings...
COM port
.
in the ActiveSync connections Settings
).
Page 98

Synchronizing Music, Video, and Pictures
If you want to take your music or other digital media with you when you are on the go, ActiveSync
works with Windows Media Player to synchronize music, video, and pictures.
Other than selecting the Media information type you want to synchronize in ActiveSync, you
must specify all media synchronization settings in Windows Media Player. Before media can be
synchronized, you must do the following:
v
Install Windows Media Player Version 10 on the PC.
v
Connect your device to the PC using a USB cable. If the device is currently connected using
Bluetooth, you must end that connection before media can be synchronized.
v
Insert a storage card into your device (32 MB or more is recommended).
v
Set up a sync partnership between the storage card and Windows Media Player.
Change Media synchronization settings
Once you select the Media information type you want to synchronize in ActiveSync, you can
synchronize any of your favorite music, video, or picture files in Windows Media Player playlists. All
you have to do is set up synchronization in Windows Media Player for those media files.
To set up a sync relationship with a storage card
1.
Open Windows Media Player.
2.
Click on the arrow on the
3.
Select the Storage Card (or the phone, if no memory card is inserted in your phone). target device
on the right column.
4.
Click
Set up Sync
your phone and your PC’s Windows Media Player.
Sync
tab.
. From this menu you will be able to configure the Sync partnership between
111
Page 99

4OUCH&EEDBACKTap
You can set the sound and vibration feedback for when you use the touch screen and set sounds for
when you press buttons.
Start > LG Menu 4OUCH&EEDBACK
in the
Settings
tab
Screen Tab
Select whether to set Vibration mode to ON or
You can also choose Vibration Type and Vibration Strength. To set up Sound Type and Sound Tone,
you must set Sound to
ON
.
OFF
. If set to ON, the screen vibrates when tapped.
Button Tab
Select whether you want sounds for every button press. Once you set to ON, you will be able to
select the sound type and volume.
Sensors Tap
Start > LG Menu > Sensors
in the
Settings
tab
Accelerometer Sensor
If set to On, the rotation sensor automatically detects the orientation of your device and decides the
view mode of the screen display: Portrait or Landscape. You can also set the phone to vibrate when
the screen display switches.
Note
112
v
This function does not work when a program is launching.
Page 100

Auto Luminous Control Sensor
If set to On, the LCD backlight brightness is automatically adjusted based on the lighting conditions.
Proximity Sensor
With this feature, the LCD will automatically turn off when in close proximity to your face, allowing
you to only adjust the volume or end the call. This function allows you to save power and prevents
you from unintentionally activating features during a call.
The LCD backlight reverts when you are far away from the sensor.
WARNING
s"ECAREFULNOTTODAMAGETHEPROXIMITYSENSORPROTECTIONMATERIAL$AMAGETOTHECOVERCANLEADTHE
SENSORTOMALFUNCTION
IM
You can only use the Instant Messaging feature with the support of the network operator or
COMMUNITIESSUCHAS!)-7INDOWS,IVEAND9AHOO-ESSENGER
For Instant Messaging, you need a valid User ID and Password to log in and exchange messages as
well as check online status.
The menu items below might not appear since not all IM communities support the various options.
Also, the menu strings may appear differently depending on the IM community selected. Keywords,
such as User ID, Login, and Contact, are used as general terms in IM menus based on the
COMMUNITYSELECTEDSUCHAS!)-7INDOWS,IVEAND9AHOO-ESSENGER
113
 Loading...