

Page 1
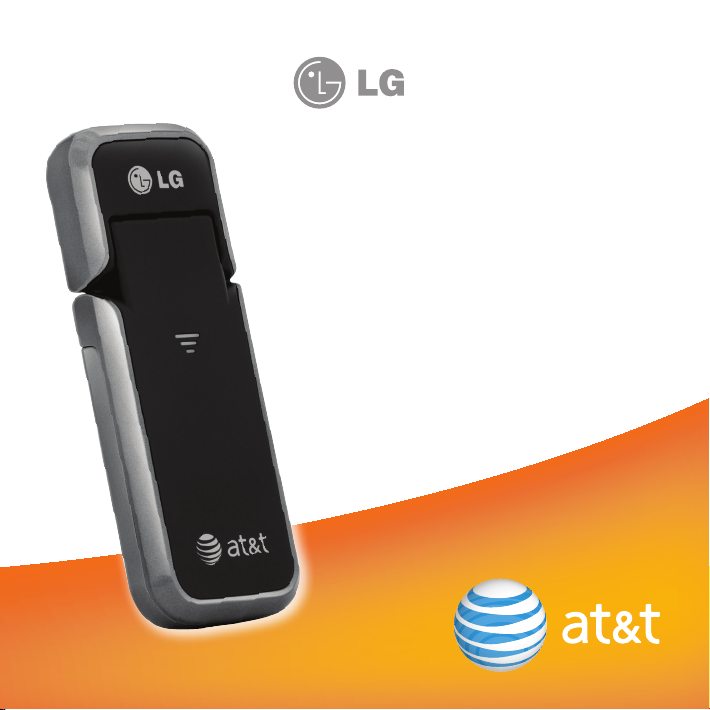
AT&T USBConnect
Adrenaline
Quickstart
Page 2

Welcome to AT&T
Thank you for purchasing the AT&T USBConnect Adrenaline.
Please use this Quickstart for a brief overview of device setup
OR
take advantage of our interactive web tutorials at
att.com/Tutorials
for the most complete and up-to-date device setup information. The
online tutorials include step-by-step instructions and an easy search
function to find what you need quickly.
2
Page 3
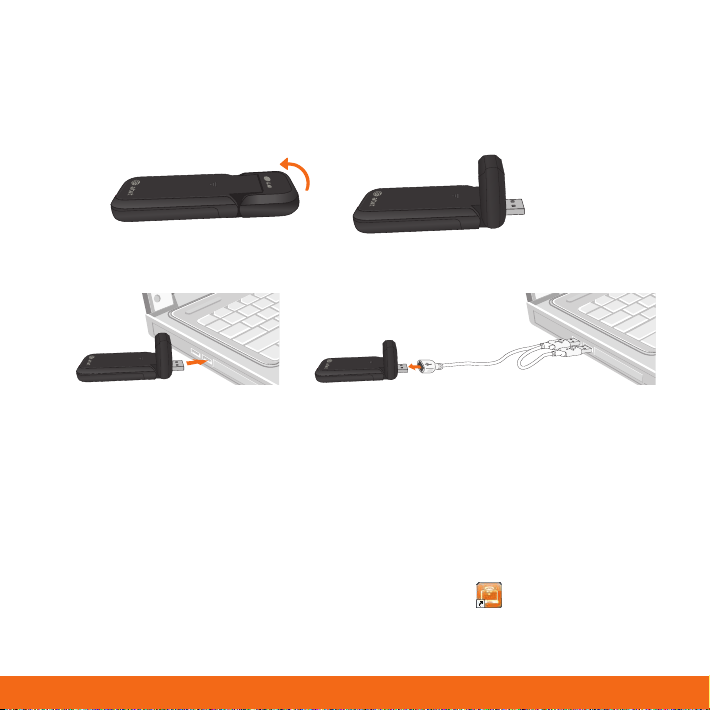
Getting Started
Insert the device into your laptop (SIM card is pre-loaded)
1. Open the USB connection part of the device
2. Insert the device into an available USB port.
Note: Optional USB cable accessory included for
convenience and optimal performance
Install the software
1. After you insert the device into the laptop for the first time, the AT&T Communication
Manager (ACM) auto-install begins. Follow the on-screen prompts. A CD is included
with a backup copy of ACM.
2. Start AT&T Communication Manager
• Windows: ACM launches automatically, or double-click on your desktop to
launch it.
• Mac: Go to Applications > AT&T > AT&T Communication Manager
3
Page 4

AT&T Communication Manager
AT&T Communication Manager (ACM) is an auto-loading application that lets you control
connections to the AT&T mobile network, other mobile networks worldwide and to
available Wi-Fi networks, including thousands of AT&T Wi-Fi Hot Spots. ACM will autoinstall when you first plug the device into your laptop and works on both Microsoft
Windows (Windows 7, Vista and XP) and Apple Macintosh (MacOS 10.4 and above). ACM
offers a range of tools to manage connections, find the best connection available and
connect quickly.
Connection: Use this screen to choose between connecting to the Mobile
AT&T Network or to a local Wi-Fi network in range
Settings: Use this screen to display all the settings or to customize ACM to
better meet your needs.
Updates: Use this screen to control update alerts and the status of any
installed updates.
Text Messages: Use this screen to send text messages or see sent or received
messages.
Contacts: Use this screen to view, add or shows a list of the numbers/names
of those who you have sent or received text messages from, or allows you to
add new numbers/names.
4
Page 5

Connect Options
ACM offers two easy ways to access
the Internet. Choose a mobile
connection to get on the AT&T mobile
network or a Wi-Fi connection. Both
are available from the main Connect
screen. Your data usage through the
Mobile network is tracked and part of
your data plan. Data usage through
Wi-Fi does not count against your
AT&T data usage.
• Connect via Mobile network
To get started, click the blue
Connect button in the Mobile
section. Once connected, launch
your browser, email or other
Internet application. To disconnect,
click the orange Disconnect
button. The usage meter is
displayed as a bar near the bottom
of the Mobile connection section.
5
Page 6

Connect Options (continued)
• Connect via Wi-Fi
To get started, select a Wi-Fi
network in the Wi-Fi network list
by clicking on it and then click
the blue Connect button. Once
connected, launch your browser,
email or other Internet application.
To view available Wi-Fi networks
click rescan. To disconnect, click
the orange Disconnect button.
Note: Upon initial connection to the Internet, some of the software on your device
may check for updates. Operating systems, virus protection software, and other
software applications (i.e. tax software, iTunes, etc.) may request permission to get
updates or connect directly to ensure that you have the most current version on your
device. Although such update checks are intended to be helpful, the updates can
involve transferring a significant amount of data over your network connection. AT&T
recommends that you control and monitor your usage to stay within your data plan limits.
For large updates, AT&T recommends that you consider using Wi-Fi.
6
Page 7

Manage data usage
For all DataConnect plans, you can manage your monthly
wireless data usage and avoid overage charges by:
• Taking advantage of the usage meter provided as a way to easily track your
data usage. The Usage meter in the Mobile connection section shows the
estimated data usage within your monthly billing cycle compared to your
monthly allowance as a bar graph as well as the number of days left in the
cycle. Additional details are available by selecting the Details link.
• Using your Internet service (DSL, Cable, etc.) and home Wi-Fi networks to connect
while at home and in the office.
• Utilizing public Wi-Fi hotspots to connect. Unlimited usage on AT&T’s entire national
Wi-Fi network is included at no additional charge with a DataConnect plan.
“AT&T Wi-Fi Hot Spot” will appear in the Wi-Fi network list when available. Wi-Fi
enabled device required. Other restrictions apply. For more details and locations
see attwifi.com.
7
Page 8

Need help?
For more information about using your new device and AT&T
Communication Manager, please refer to the interactive web tutorial
available at att.com/Tutorials.
Call AT&T Customer Care at 800-331-0500 for assistance with your AT&T
service. Please enter the 10-digit wireless phone number associated with
your DataConnect service when prompted. This will direct your call to a
specialized Care team. The wireless phone number associated with your
DataConnect rate plan can be found:
• on your sales receipt;
• on your monthly statement;
• on the main ACM screen (device must be inserted into laptop).
Additional support is available online including device specifications,
troubleshooting and user forums at att.com/DeviceSupport
LG and the LG logo are registered trademarks of LG Electronics. Inc. © 2010 AT&T
Intellectual Property. All rights reserved. AT&T, the AT&T logo and all other AT&T marks
contained herein are trademarks of AT&T Intellectual Property and/or AT&T affiliated
companies. All other marks contained herein are the property of their respective
owners.
MBM63196301 (1.0) G
Printed in Korea
 Loading...