

LG 530G User Manual
•
Some of the contents of this manual
may not apply to your phone
depending on your phone’s software
or your service provider.
•
Copyright ©2012 LG Electronics,
Inc. All rights reserved. LG and the
LG logo are registered trademarks of
LG Group and its related entities. All
other trademarks are the property of
their respective owners.
LG-530G User Guide

Contents
Contents . . . . . . . . . . . . . . . . . . . 2
Your Phone . . . . . . . . . . . . . . . . . 5
Phone Components . . . . . . . . . . . . . . . .5
Rear view . . . . . . . . . . . . . . . . . . . . . . .7
Getting Started . . . . . . . . . . . . . . 8
Installing the SIM card and battery. . . .8
Charging your phone . . . . . . . . . . . . . . .9
Installing a memory card . . . . . . . . . .10
General Functions . . . . . . . . . . 12
Making a Call. . . . . . . . . . . . . . . . . . . .12
Answering a Call . . . . . . . . . . . . . . . . .13
Ending a Conference Call . . . . . . . . 20
Menu Tree . . . . . . . . . . . . . . . . . 21
Prepaid . . . . . . . . . . . . . . . . . . . 24
Contacts . . . . . . . . . . . . . . . . . . 25
Contact List . . . . . . . . . . . . . . . . . . . . .25
New Contact . . . . . . . . . . . . . . . . . . . .25
Caller Groups . . . . . . . . . . . . . . . . . . . .25
Speed Dial . . . . . . . . . . . . . . . . . . . . . .25
SIM Management . . . . . . . . . . . . . . . .26
Own number . . . . . . . . . . . . . . . . . . . .26
My business card . . . . . . . . . . . . . . . .26
Adjusting the Volume . . . . . . . . . . . . .14
Entering Text . . . . . . . . . . . . . . . . . . . .14
In-Call Menu . . . . . . . . . . . . . . . 17
During a Call . . . . . . . . . . . . . . . . . . . .17
Making a Second Call . . . . . . . . . . 17
Swapping Between Two Calls . . . . . 17
Answering an Incoming Call . . . . . . 17
Rejecting an Incoming Call . . . . . . . 18
Using the Speakerphone . . . . . . . . 18
Making a Second Call . . . . . . . . . . 19
Setting Up a Conference Call . . . . . 20
Place the Conference Call on Hold . 20
Adding Calls to the Conference Call 20
Private Call in a Conference Call . . . 20
Messages . . . . . . . . . . . . . . . . . 27
Create Message . . . . . . . . . . . . . . . . .27
Inbox . . . . . . . . . . . . . . . . . . . . . . . . . .30
Drafts . . . . . . . . . . . . . . . . . . . . . . . . . .31
Outbox . . . . . . . . . . . . . . . . . . . . . . . . .32
Voicemail . . . . . . . . . . . . . . . . . . . . . . .33
Message Settings . . . . . . . . . . . . . . . .33
Message Alert . . . . . . . . . . . . . . . . 33
Save To . . . . . . . . . . . . . . . . . . . . . 33
Signature . . . . . . . . . . . . . . . . . . . . 33
Text Message . . . . . . . . . . . . . . . . 33
Multimedia Msg . . . . . . . . . . . . . . . 34
Voicemail Number . . . . . . . . . . . . . 35
2

Service Message . . . . . . . . . . . . . . 35
Recent Calls . . . . . . . . . . . . . . . 36
Notepad . . . . . . . . . . . . . . . . . . . . 53
Calculator . . . . . . . . . . . . . . . . . . . 53
Tasks . . . . . . . . . . . . . . . . . . . . . . 53
Games & Apps . . . . . . . . . . . . . 37
E-Mail . . . . . . . . . . . . . . . . . . . . 38
Sending an email using your new
account . . . . . . . . . . . . . . . . . . . . . . . 38
Retrieving your email . . . . . . . . . . . 38
Message folders . . . . . . . . . . . . . . 38
Changing your email settings . . . . . 39
Music. . . . . . . . . . . . . . . . . . . . . 40
Music . . . . . . . . . . . . . . . . . . . . . . . . . .40
Adding Music To Your Handset . . . . 42
Additional Music Services . . . . . . . . . .43
Camera . . . . . . . . . . . . . . . . . . . 45
Take Photo . . . . . . . . . . . . . . . . . . 45
Record Video . . . . . . . . . . . . . . . . . 46
Camera Album . . . . . . . . . . . . . . . . 48
Stopwatch . . . . . . . . . . . . . . . . . . . 54
Tip Calculator . . . . . . . . . . . . . . . . 54
Unit Converter . . . . . . . . . . . . . . . . 55
Voice Recorder . . . . . . . . . . . . . . . 55
Browser . . . . . . . . . . . . . . . . . . . 56
Settings . . . . . . . . . . . . . . . . . . . 58
Audio & Ringtones . . . . . . . . . . . . . . . .58
Ringtone . . . . . . . . . . . . . . . . . . . . 58
Message Tone . . . . . . . . . . . . . . . . 58
Alert Tone . . . . . . . . . . . . . . . . . . . 59
Keypad Tone . . . . . . . . . . . . . . . . . 59
Multimedia . . . . . . . . . . . . . . . . . . 59
Call . . . . . . . . . . . . . . . . . . . . . . . . 59
Phone Settings . . . . . . . . . . . . . . . . . .59
Languages . . . . . . . . . . . . . . . . . . 59
Set Hotkeys . . . . . . . . . . . . . . . . . . 59
Auto Key Lock . . . . . . . . . . . . . . . . 60
My Folder . . . . . . . . . . . . . . . . . 49
Audio . . . . . . . . . . . . . . . . . . . . . . 49
Picture . . . . . . . . . . . . . . . . . . . . . 49
Video . . . . . . . . . . . . . . . . . . . . . . . 49
Other Files . . . . . . . . . . . . . . . . . . . 50
File Manager . . . . . . . . . . . . . . . . . 50
Tools . . . . . . . . . . . . . . . . . . . . . 51
Alarm Clock . . . . . . . . . . . . . . . . . . 51
Calendar . . . . . . . . . . . . . . . . . . . . 51
Set Flight Mode . . . . . . . . . . . . . . . 60
Security . . . . . . . . . . . . . . . . . . . . . 60
Reset Settings . . . . . . . . . . . . . . . . 61
Display . . . . . . . . . . . . . . . . . . . . . . . . .62
Wallpapers . . . . . . . . . . . . . . . . . . 62
Fonts . . . . . . . . . . . . . . . . . . . . . . . 62
Clocks & Calendar . . . . . . . . . . . . . 62
Brightness . . . . . . . . . . . . . . . . . . . 62
Backlight Timer . . . . . . . . . . . . . . . 62
Color Schemes . . . . . . . . . . . . . . . 62
3

Contents
Menu Styles . . . . . . . . . . . . . . . . . 62
Call . . . . . . . . . . . . . . . . . . . . . . . . . . . .63
Send My Number . . . . . . . . . . . . . . 63
Answer Mode . . . . . . . . . . . . . . . . 63
Time . . . . . . . . . . . . . . . . . . . . . . . 63
TTY . . . . . . . . . . . . . . . . . . . . . . . . 63
Hearing Aid . . . . . . . . . . . . . . . . . . 63
Bluetooth . . . . . . . . . . . . . . . . . . . . . . .64
Memory . . . . . . . . . . . . . . . . . . . . . . . .66
Used Space . . . . . . . . . . . . . . . . . . 66
Set Storage Defaults . . . . . . . . . . . 67
Application Settings . . . . . . . . . . . . . .67
Messages . . . . . . . . . . . . . . . . . . . 67
Browser . . . . . . . . . . . . . . . . . . . . . 67
Phone Info. . . . . . . . . . . . . . . . . . . . . .69
Accessories . . . . . . . . . . . . . . . 70
For Your Safety . . . . . . . . . . . . . 71
Safety Guidelines . . . . . . . . . . . 77
4

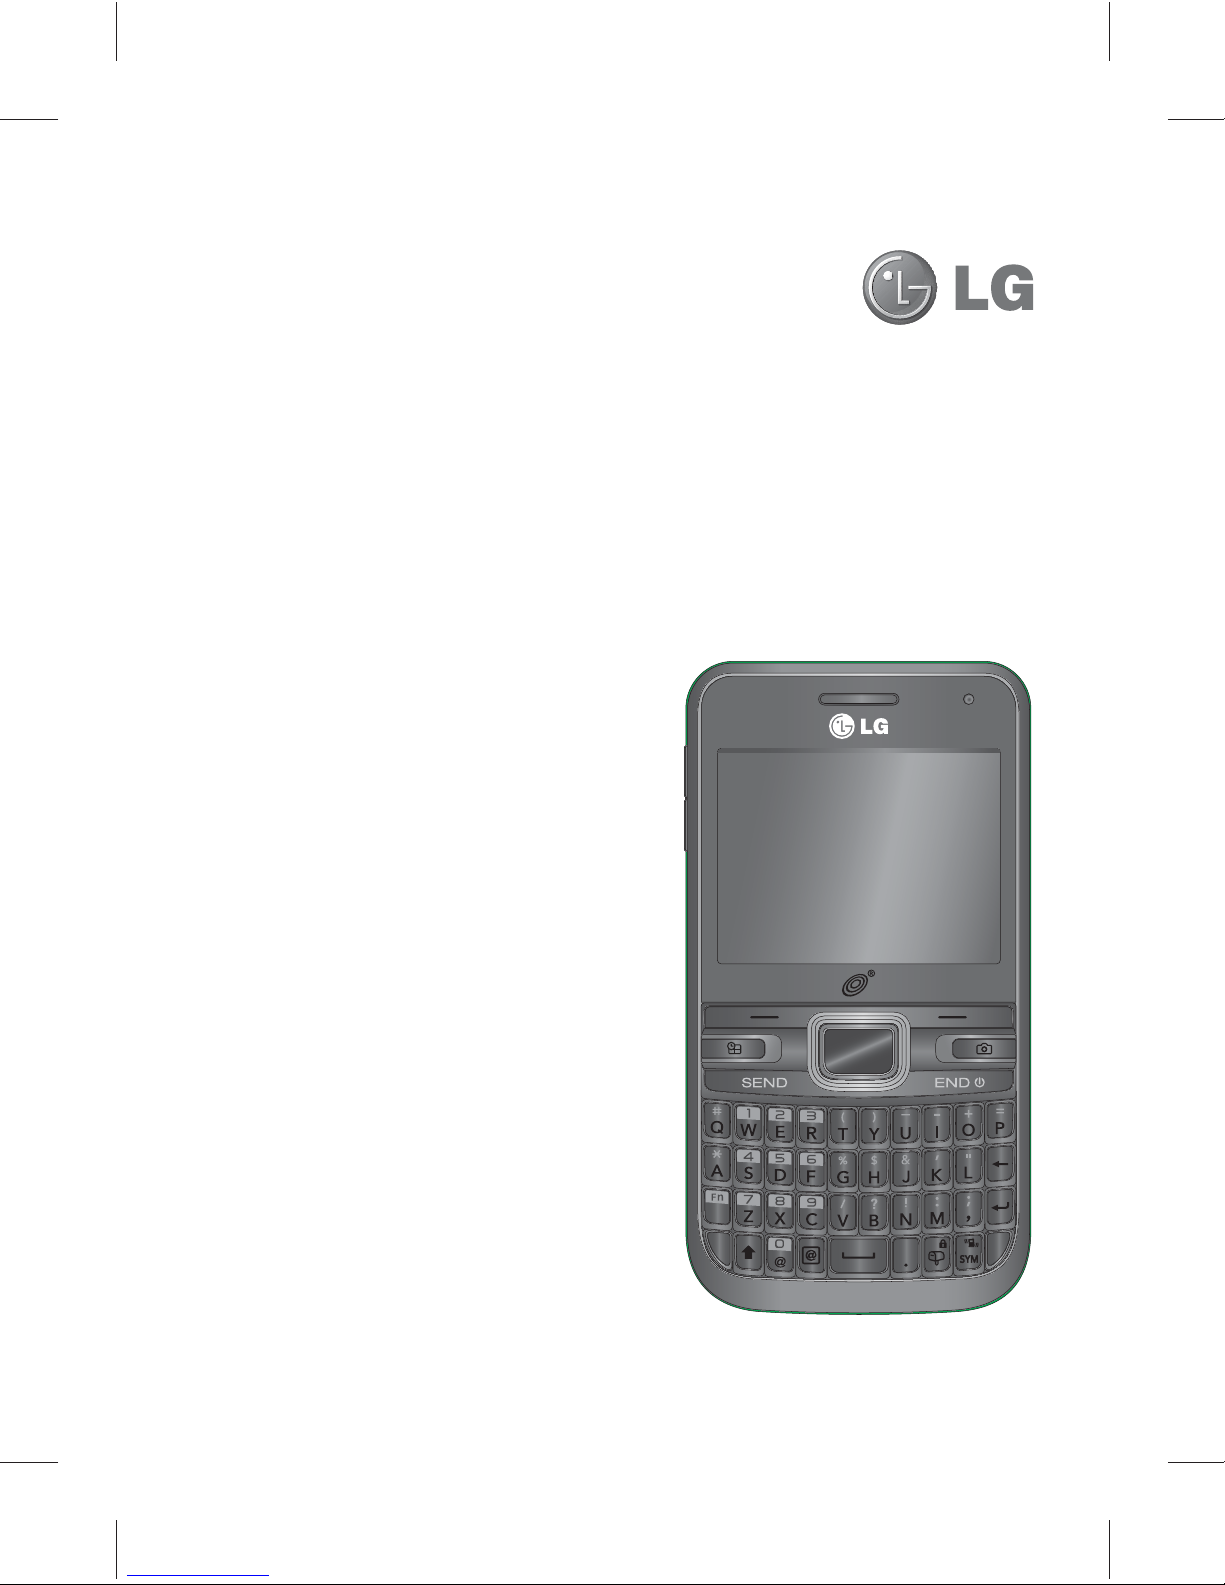
Your Phone
Phone Components
1
2
3
4
5
Press and hold
to access Voice
Recorder.
9
6
7
8
Press and hold to
activate/deactivate
Vibration Mode.
10
5

Your Phone
1. Earpiece: Lets you hear the
caller during a call.
2. Main LCD: Displays phone
status icons, menu items, web
items, web information, pictures
and more, in full color.
3. Left soft key/Right soft key:
Each of these keys perform the
functions indicated by the text on
the display immediately above
them.
4. Navigation keys
6. OK key
7. End/Power key: Allows you to
power the phone on or off, end
calls, or return to standby mode.
8. Clear key: Allows you to return
to the previous screen. Press
and hold to activate the Voice
Command function.
9. Volume keys: Allows you
to control the Master Volume
while in standby mode and the
earpiece volume during a call.
Standby Mode Hotkeys:
Games & Apps
Contact List
Music Player
Message
- In a menu: Navigates between
menus.
5. Send key: Press this key in
standby mode to quickly access
the most recent missed, dialed,
and received calls.
10. Charger/USB port
6
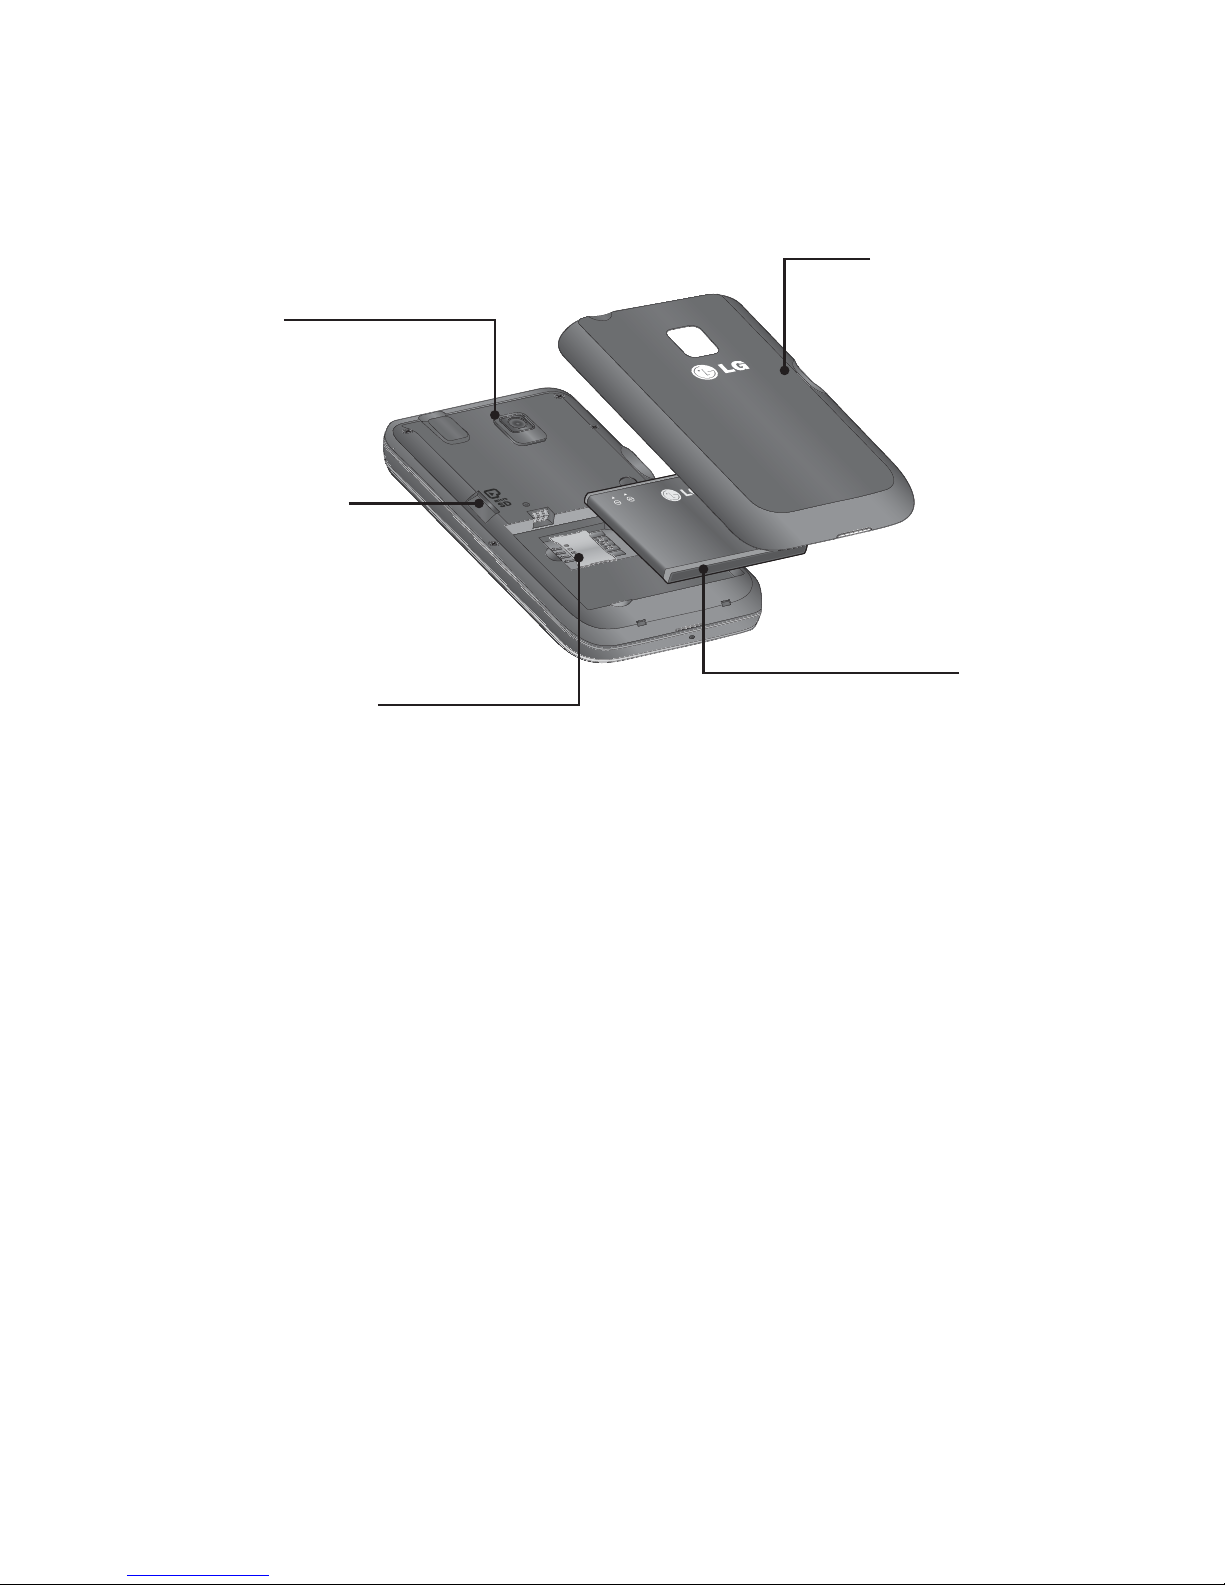
Rear view
EXTERNAL
CAMERA LENS
SD CARD SLOT
SIM CARD SLOT
BATTERY COVER
BATTERY
7
Getting Started
Installing the SIM
card and battery
1. Remove the battery cover
Use your right thumb to press
on the bottom center of the
battery cover, then slide the cover
upwards (as depicted below).
Then, lift the cover to remove it.
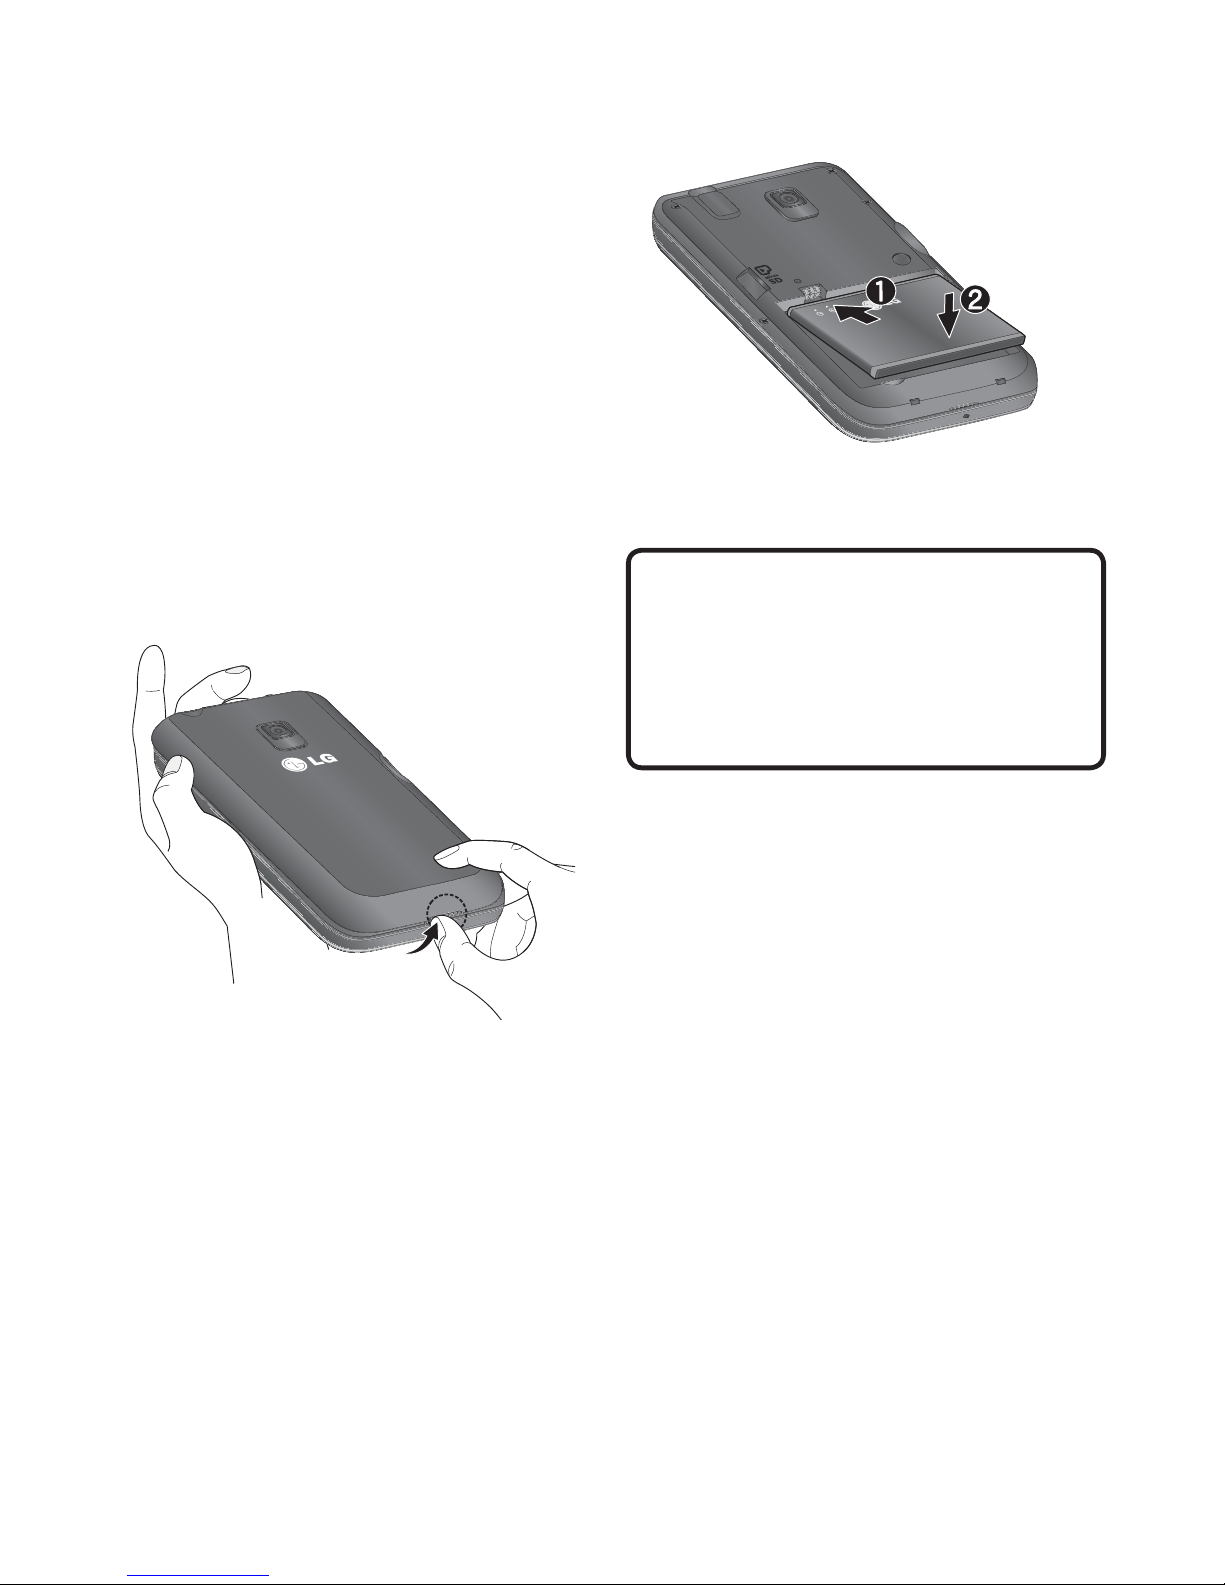
2. Remove the battery
Hold the top edge of the phone
Warning
Do not remove the battery when
the phone is turned on; this can
damage the phone.
3. Install the SIM card
Slide the SIM card into the SIM
card slot (as shown below). Make
sure that the gold contact area
on the card is facing downwards.
To remove the SIM card, pull it
gently in the opposite direction.
and use the fingernail cutouts
near the bottom of the battery to
lift the battery from the phone.
8
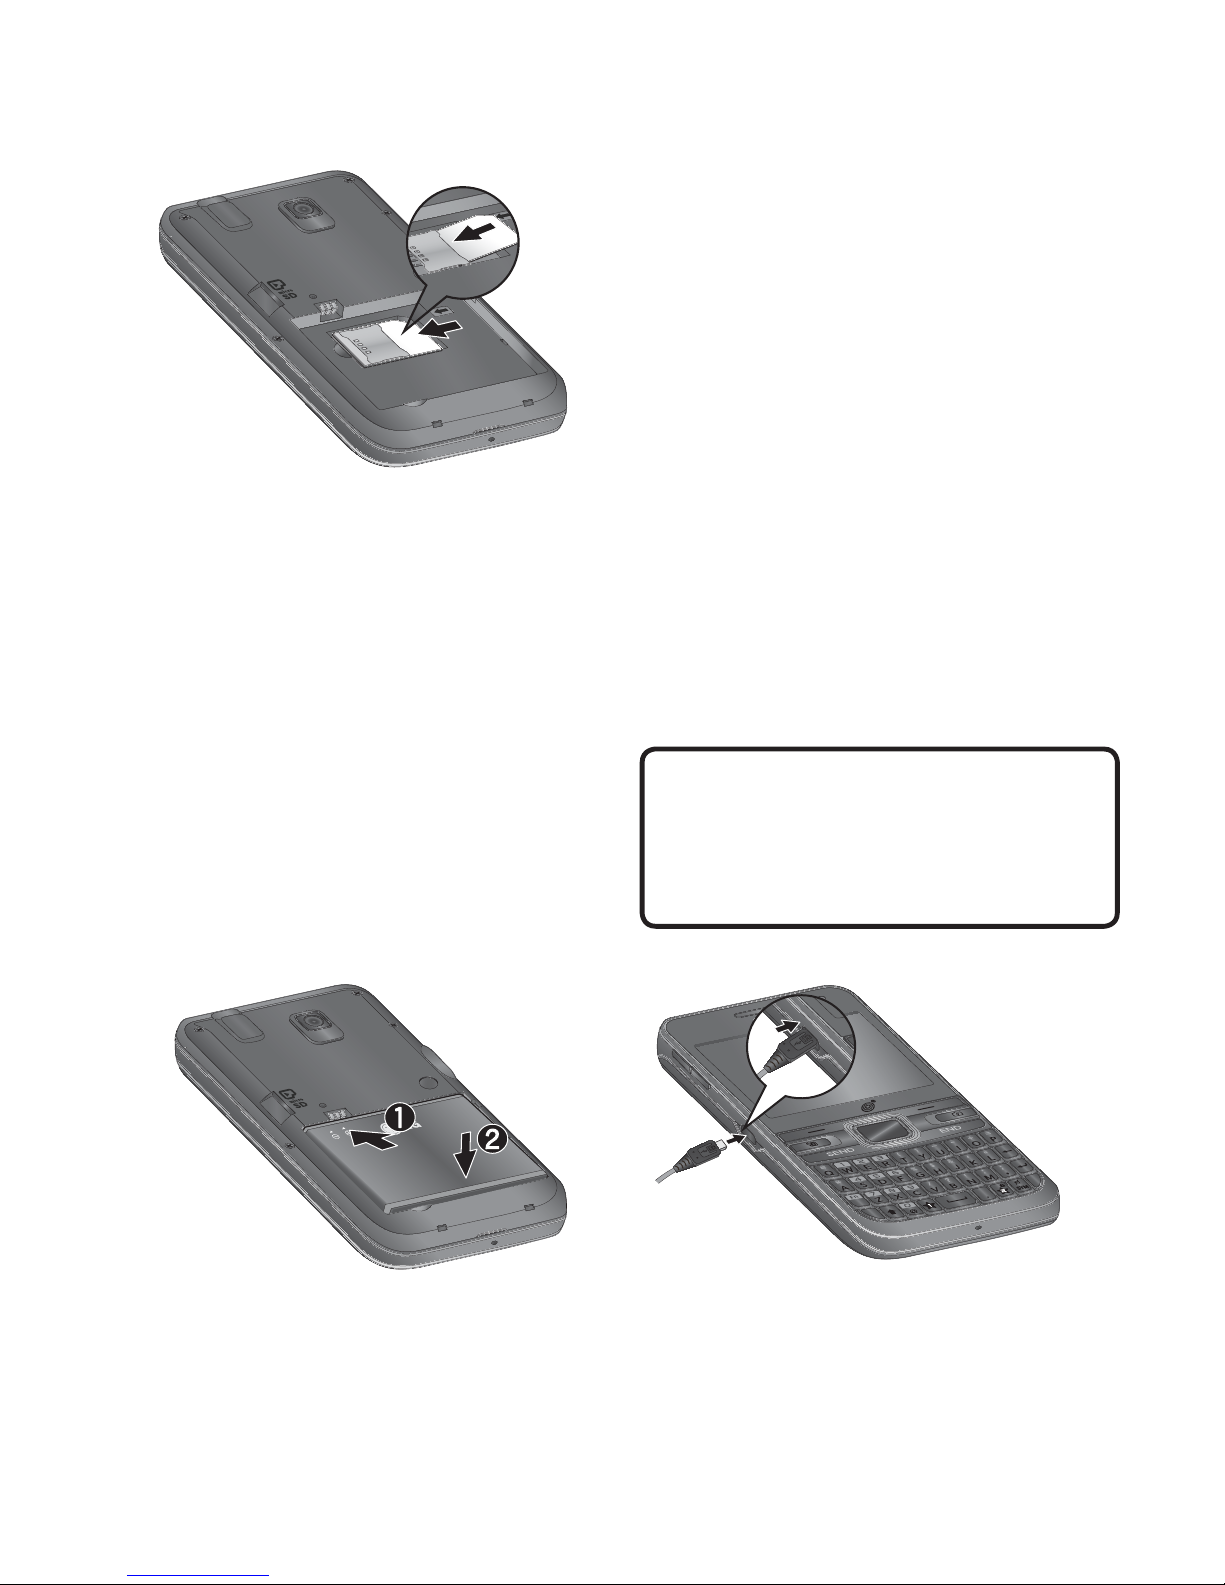
Charging your phone
Unfasten the cover of the Charger/
USB port on the left side of your
phone. Insert the charger connector
to the phone (the ‘LG’ side of the
connector has to be facing up when
connecting to the phone) and then
plug into the wall socket. Your LG-
4. Install the battery
Insert the top of the battery first
into the top edge of the battery
compartment. Ensure that the
battery contacts align with the
terminals on the phone. Press the
bottom of the battery down until
it snaps into place.
530G will need to be charged until
the Full Battery message appears
on the screen.
Important!
You must insert the battery
before charging.
9
Getting Started
Warning
Use of unauthorized accessories
could damage your phone and
void your warranty.
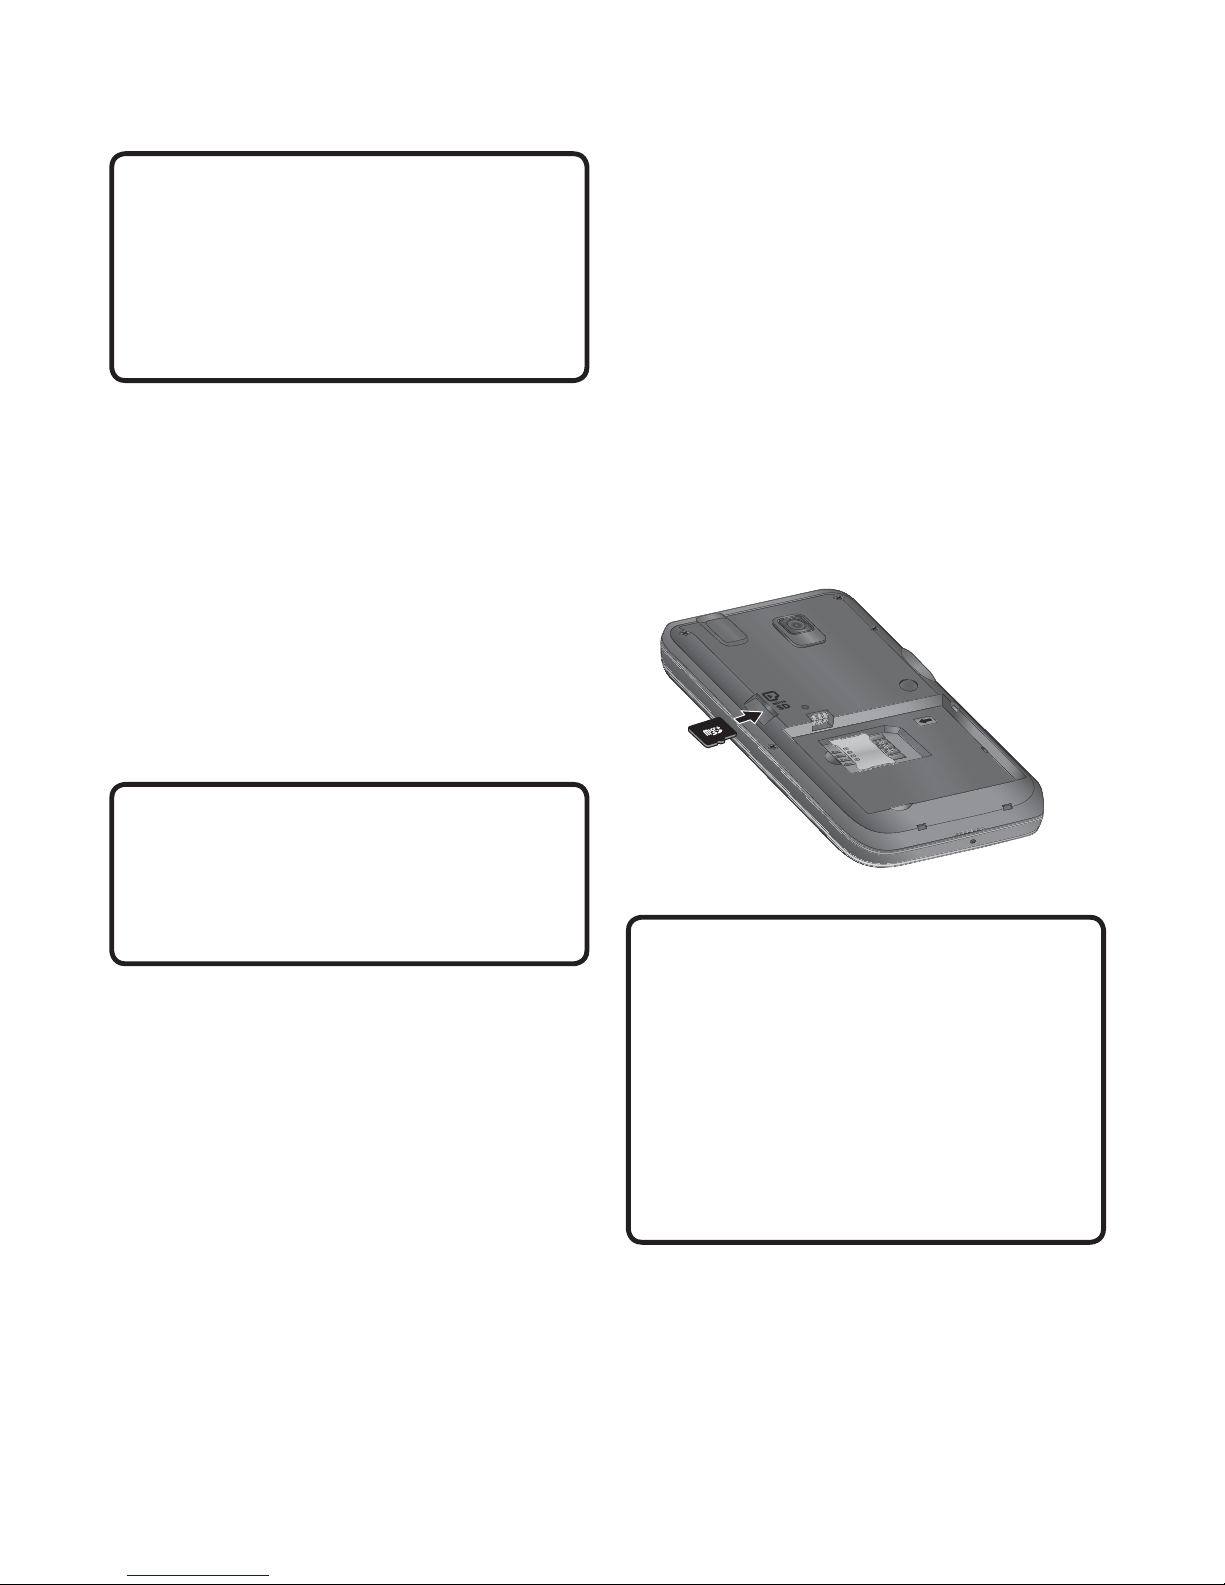
Installing a memory
card
You can expand the memory
available on your phone by using a
microSD™ memory card.
2 With the microSD card facing up,
slide it into the microSD card slot
(as demonstrated in the following
image).
Push the memory card in until it
locks into place.
3 Replace the slot cover on the
phone.
Tip
A memory card is an optional
accessory.
1 Locate the microSD card slot on
the right side of the phone. Then,
use your fingernail to gently lift
the cover.
The cover will remain attached
to the phone, so that it does not
become lost.
Note
If your memory card has existing
content, it will automatically
be filed in the correct folder.
For example, videos will be
accessible from the Videos folder.
10
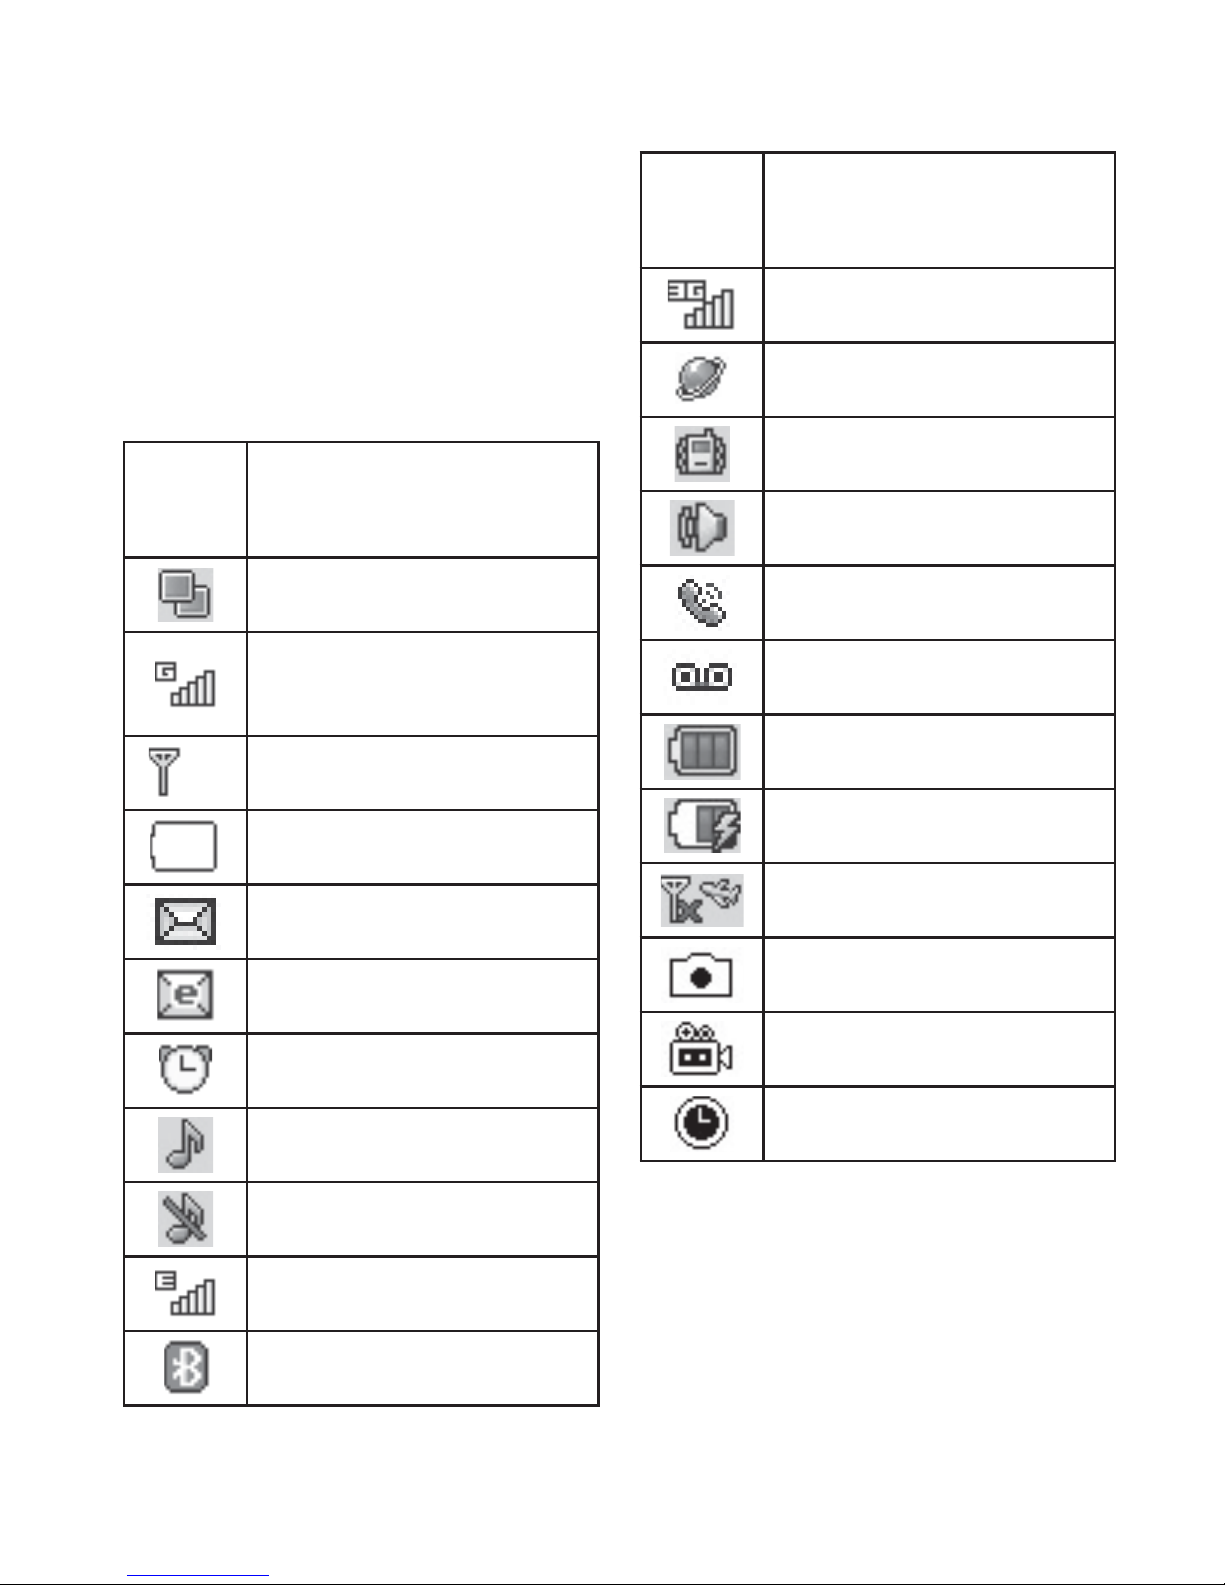
On-Screen Icons
The table below describes various
ICON/
DESCRIPTION
INDICATOR
display indicators or icons that
appear on the phone’s display
screen.
ICON/
DESCRIPTION
INDICATOR
Multitasking
Network signal strength
(number of bars will vary)
No network signal
Low Battery
3G network available
The browser is active
Vibrating Mode On
Speakerphone
Call in Progress
Voicemail
Battery Full
Battery Charging
New text message
New email
An alarm is set
Ring profile in use
Silent All profile in use
EDGE network available
Bluetooth is active
Flight Mode On
camera in use
camcorder is recording
camcorder timer
11

General Functions
Before you begin
Remember that you can select the
menu icons from Menu screen
using the number keys if you set
the Menu style as List Style. If you
set the Menu style as Grid Style,
you can only use the Navigation
keys for selecting the menu icons.
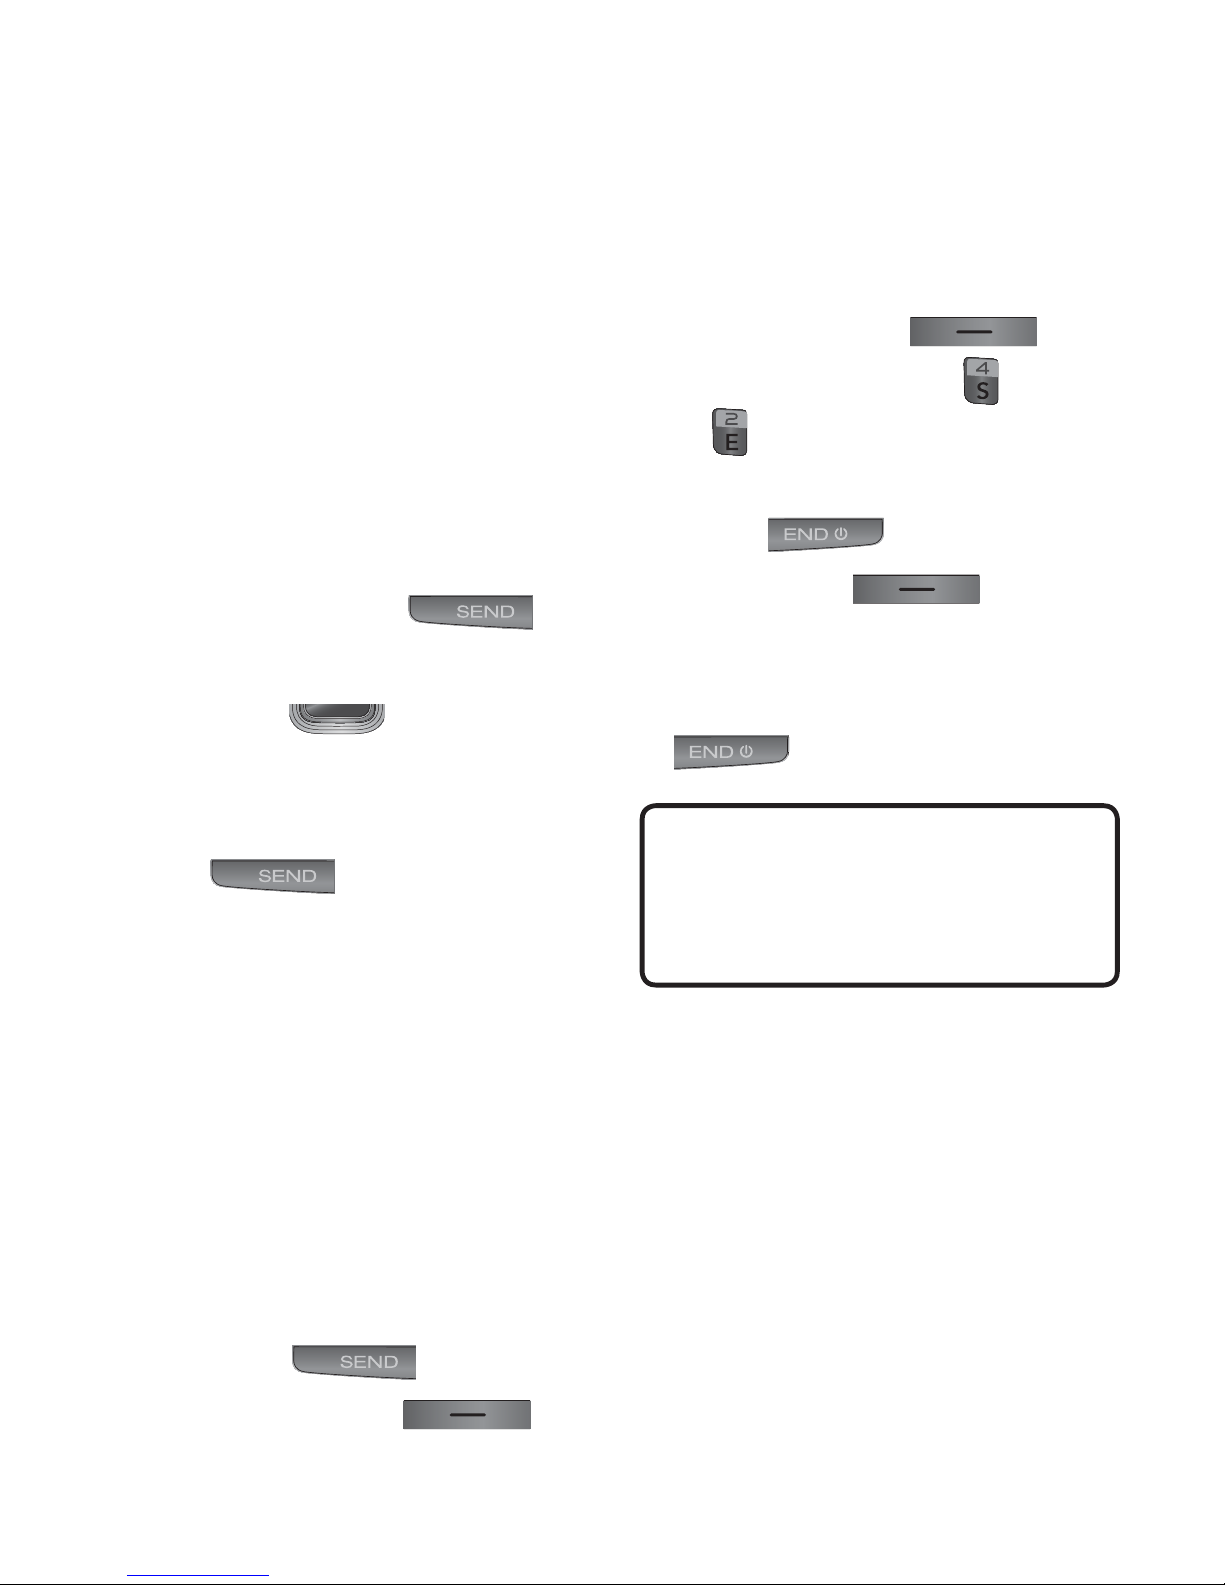
Making a Call
1 Make sure your phone is
Making a Call with the
Send Key
1 Press the [SEND] key,
and the most recent missed,
dialed and received calls will be
displayed.
2 Highlight the desired number by
using the navigation keys.
3 Press the
[SEND] key.
Making International
powered on.
2 Enter a phone number including
the area code. To edit a number
on the display screen, simply
press the
digit at a time.
Ź
3 Press the [SEND] key
4 To end the call, press the
Press and hold the key to
erase the entire number.
to call the number.
key to erase one
Calls
1 Press and hold the key and
the international access character
‘+’ will appear.
2 Enter the country code, area
code, and the phone number.
3 Press the
to call the number.
[SEND] key
Ending a Call
To end a call, press the
[END] key.
12
[END] key.
Making a Call from the
Accept to answer an incoming
Contacts
You can store frequently called
names and phone numbers in the
SIM card as well as in the phone
memory known as the Contacts.
You can dial a number by simply
highlighting a name in the Contacts
List and pressing the
[SEND] key.
1 Press the [Down] key to
access the Contact List.
call.
If the Answer Mode has been
set as Any Key (
Menu > Settings >
>
press will answer a call, except
for the
right soft key , or the
volume keys .
2 End the call by pressing the
Answer Mode), any key
[END] key, the
[END] key.
Call
2 Highlight the Contact and press
the
[SEND] key.
Answering a Call
When you receive a call, the phone
displays a notification on the screen
and rings and/or vibrates. If the
caller can be identified, the caller’s
phone number (or name, if stored in
your Address Book) is displayed.
1 Press the
[SEND] key
Note
You can answer a call while using
other functions or features.
or the left soft key
13

General Functions
Adjusting the Volume
Use the side volume keys during a
call to adjust the earpiece volume.
While in standby mode, you can
adjust the Master Volume using the
side volume keys.
Vibrating Mode (Quick)
Vibrating Mode can be activated
by pressing and holding down the
key.
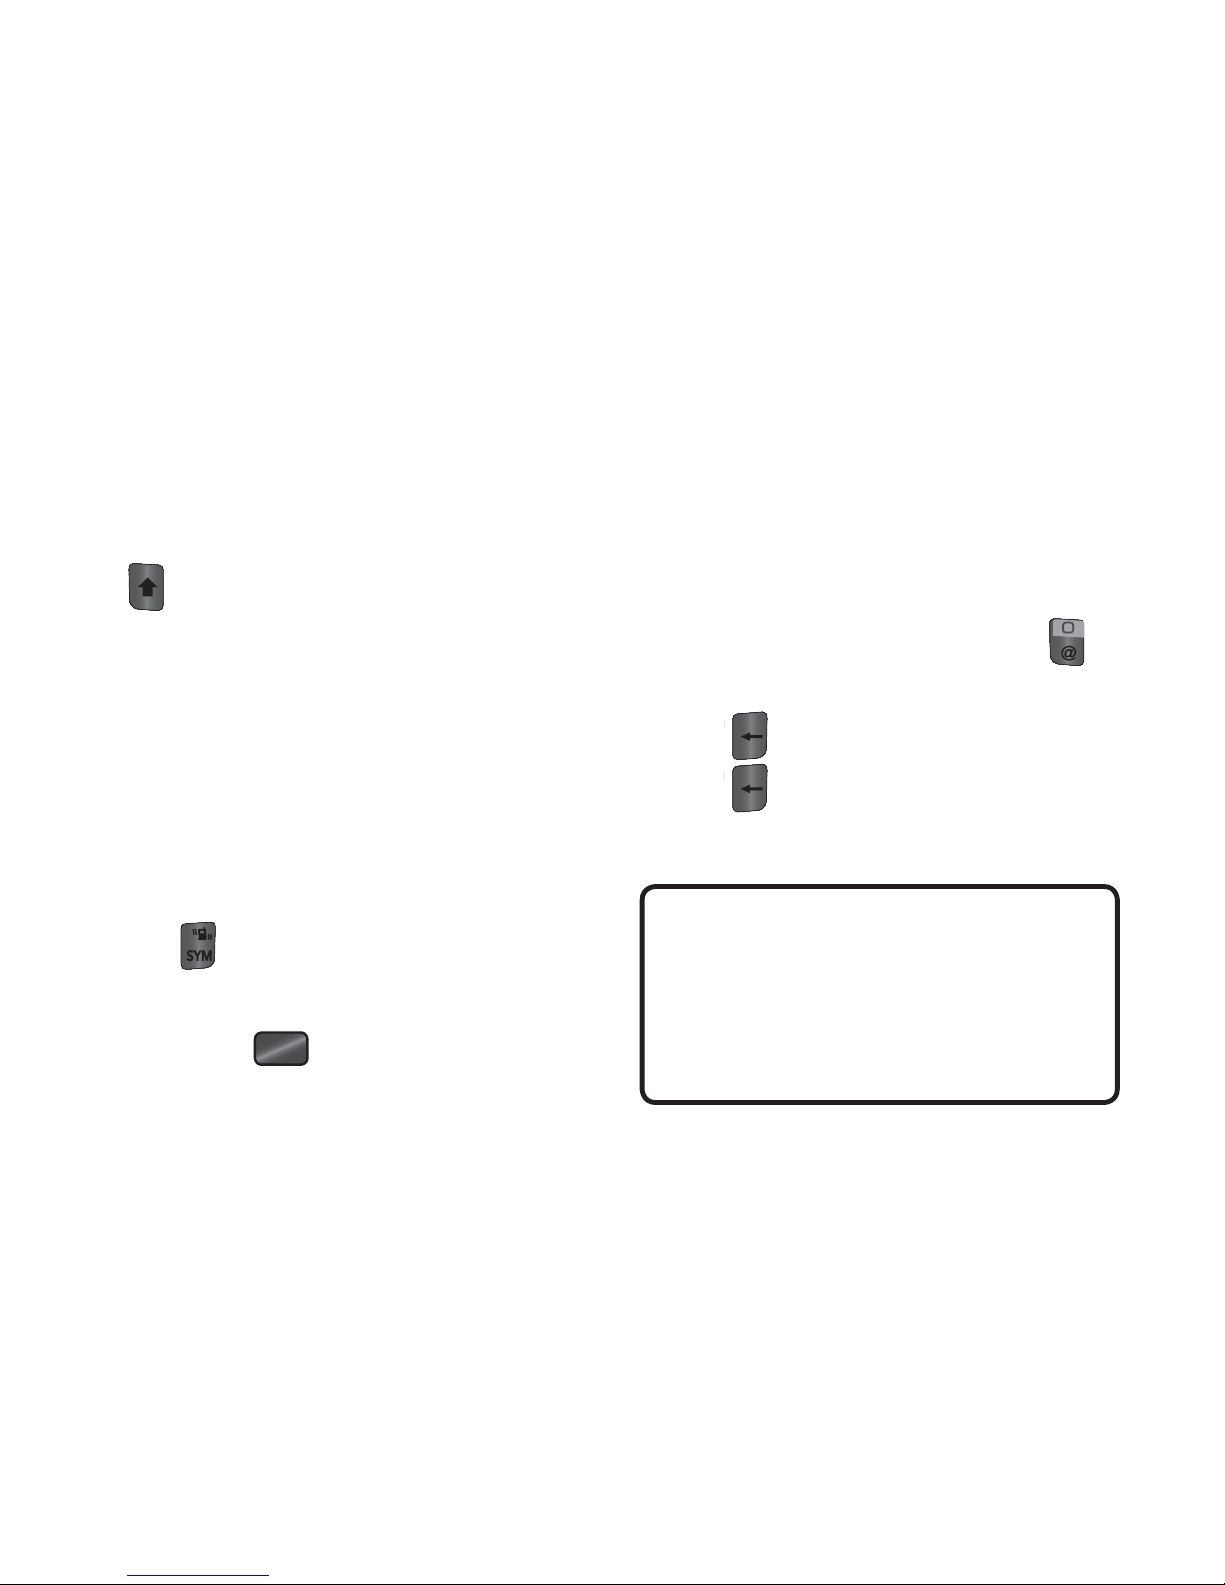
Entering Text
You can enter alphanumeric
characters by using the phone’s
keypad. For example, storing names
in the Address Book, writing a
message, or scheduling events in
the calendar all require text to be
entered.
Changing the Text Input
Mode
Change the text input mode by
Signal Strength
If you are inside a building, being
near a window may give you better
reception. You can see the strength
of your signal by the signal indicator
on your phone’s display screen.
holding down
entry field.
You can check the current text input
mode in the upper right corner of
the screen.
The following text input modes are
available on the phone.
ABC Mode
This mode allows you to enter
letters by pressing the key labeled
when in a text
14
with the required letter one, two,
three, or four times until the letter
is displayed.
Using the ABC Mode
Use the alphanumeric keypad to
123 Mode (Numbers
Mode)
Type numbers using one keystroke
per number. To change to 123
mode in a text entry field, press the
key until 123 mode is displayed
in the upper right corner.
Symbol Mode
The Symbol Mode enables you to
enter various symbols or special
enter your text.
1 Press the key labeled with the
required letter:
Ź
Once for the first letter.
Ź
Twice for the second letter.
Ź
And so on.
2 To insert a space, press the
key once. To delete letters, press
the
the
key. Press and hold down
key to erase all of the
entered text.
characters. To enter a symbol, press
the
key. Use the navigation keys
to highlight the desired symbol and
press the key.
Note
Refer to the table below for more
information on the characters
available using the keys.
15

General Functions
Characters in the Order Displayed
Key
Upper Case Lower Case
. , ’ @ ? !
1
- : / 1
2 A B C 2 a b c 2
3 D E F 3 d e f 3
4 G H I 4 g h i 4
5 J K L 5 j k l 5
6 M N O 6 m n o 6
7 P Q R S 7 p q r s 7
8 T U V 8 t u v 8
. , ’ @ ? ! - : / 1
Using the 123 (Numbers)
Mode
The 123 Mode enables you to
enter numbers in a text message
(a telephone number, for example)
more quickly. Press the keys
corresponding to the required digits
before manually switching back to
the appropriate text entry mode.
9 W X Y Z 9 w x y z 9
Space Key,
0
0 (Long press)
Space Key,
0 (Long press)
16

In-Call Menu
During a Call
Your phone provides a number
Ź
Press the [SEND] key.
Ź
Press the left soft key
of control functions that you can
use during a call. To access these
functions during a call, press the
left soft key Options.
Making a Second Call
You can select a number you wish
to dial from the Address Book to
make a second call.
1 Press the left soft key
Options, then select Address
Book.
Options and then select “Swap
Calls”.
Ź
Press Up/Down on the navigation
key.
Answering an Incoming
Call
To answer an incoming call when
the handset is ringing, simply press
the [SEND] key. The
handset is also able to warn you
of an incoming call while you are
2 Highlight the contact, then press
the
make a second call.
[SEND] key to
Swapping Between Two
Calls
Once the second call has been
dialed (or answered), you can switch
between the calls by using one of
the following three methods:
already on a call. A tone sounds
in the earpiece and the display
will show that a second call is
waiting. This feature, known as Call
Waiting, is only available if your
network supports it.
If Call Waiting is turned on, you can
put the first call on hold and answer
the second call by pressing the
[SEND] key.
17
In-Call Menu
Rejecting an Incoming
Call
You can reject an incoming call
without answering by simply
pressing the [END] key.
Muting the Microphone
You can mute the microphone
during a call by pressing the
right soft key
The handset can be unmuted by
pressing the right soft key
Mute.
Using the Speakerphone
You can use the integrated
Speakerphone during a call
by pressing the key.
The loudspeaker is automatically
deactivated when you end the call.
Warning
Due to increased volume levels,
do not place the phone near your
ear while the speakerphone is
enabled.
Unmute. When the handset is
muted, the caller cannot hear you,
but you can still hear the caller.
18

Conference Calls
Making a Second Call
The conference call feature
provides you with the ability to
have a simultaneous conversation
with more than one caller. The
conference call feature can be used
only if your network service provider
supports this feature.
Once a conference call is set up,
calls may be added, disconnected
(Exclude Call option allows you
to select a call to disconnect from
the conference call), or separated
You can make a second call
while currently on a call simply
by entering the second number
with the keypad and pressing the
[SEND] key. When the
second call is connected, the first
call is automatically placed on hold.
You can swap between calls by
pressing the [SEND] key.
(Private Call option allows you to
separate a call from the conference
call, but still connected to you)
by the person who set up the
conference call. These options are
all available from the In-Call menu.
The maximum number of callers
in a conference call is five. Once
started, you are in control of the
conference call, and only you can
add calls to the conference call.
19

Setting Up a Conference
Private Call in a
Call
To set up a conference call,
place the first call. Once that is
connected, follow the steps above
to make a second call. You can
then join the two separate calls by
pressing the left soft key
Options, selecting Conference
Call, and then Join Calls.
Place the Conference Call
on Hold
Conference Call
To have a private call with one of
the callers in the conference call,
press the left soft key
Options, select Conference Call,
and then Private Call. When
the numbers of the callers are
displayed, select the one with which
you wish to speak in private.
Ending a Conference Call
An active conference call can
To place a conference call on hold,
press the [SEND] key.
Adding Calls to the
Conference Call
To add a call to an existing
conference call, press the left
soft key
Conference Call, and then select
Join Calls.
Options, select
be disconnected by pressing the
[END] key.
20

Menu Tree
1. Prepaid
1.1 Add Airtime
1.2 Buy Airtime
1.3 My Phone Number
1.4 My Airtime Info
1.5 Airtime Display
1.6 Serial Number
1.7 SIM Number
1.8 Code Entry Mode
2. Contacts
3.5 Message Settings
4. Recent Calls
4.1 All Calls
4.2 Missed Calls
4.3 Dialed Calls
4.4 Received Calls
5. Games & Apps
5.1 Buy Games
5.2 [Preload application]
2.1 Contact List
2.2 New Contact
2.3 Groups
2.4 Speed Dial
2.5 SIM Management
2.6 Own Number
2.6 My Business Card
3. Messages
3.1 Create Message
3.2 Inbox
6. Email
7.1 Write Email
7.2 [Account 1]
7.3 [Account 2]
7.4 [Settings]
7. Music
7.1 Now Playing
7.2 All Songs
7.3 Playlists
3.3 Drafts
3.4 Outbox
7.4 Artists
7.5 Albums
21

Menu Tree
7.6 Genres
7.7 Shuffle All Songs
8. Camera
8.1 Take Photo
8.2 Record Video
8.3 Camera Album
9. My Folder
9.1 Audio
9.2 Pictures
10.9 Voice Recorder
10.10 [STK (USIM Service)]
11. Browser
12. Settings
12.1 Audio & Ringtones
12.1.1 Ringtone
12.1.2 Message Tone
12.1.3 Alert Tone
12.1.4 Keypad Tone
9.3 Video
9.4 Other Files
9.5 File Manager
10. Tools
10.1 Alarm Clock
10.2 Calendar
10.3 Notepad
10.4 Calculator
10.5 Tasks
10.6 Stopwatch
12.1.5 Multimedia
12.1.6 Call
12.2 Phone Settings
12.2.1 Languages
12.2.2 Set Hotkeys
12.2.3 Auto Key Lock
12.2.4 Set Flight Mode
12.2.5 Security
12.2.6 Reset Settings
10.7 Tip Calculator
10.8 Unit Converter
22

12.3 Display
12.6 Memory
12.3.1 Wallpapers
12.3.2 Fonts
12.3.3 Clocks & Calender
12.3.4 Brightness
12.3.5 Backlight Timer
12.3.6 Color Schemes
12.3.7 Menu Styles
12.4 Call
12.4.1 Send My Number
12.4.2 Answer Mode
12.4.3 Accessibility
12.6.1 Used Space
12.6.2 Set Storage Defaults
12.7 Application
12.7.1 Messages
12.7.2 Browser
12.8 Phone Info.
12.4.4 Time
12.5 Bluetooth
12.5.1 Turn On(Turn Off)
12.5.2 Search New Device
12.5.3 My Devices
12.5.4 My Bluetooth Info
23

Prepaid
This manu allows you to check the
prepaid related contents.
To access Prepaid, from the standby
screen, press the left soft key
Menu and Prepaid.
You can access the Menu below.
1 Add Airtime – Recharge the fee
using the Airtime PIN code.
2 Buy Airtime – Recharge the fee
by selecting from the calling plan.
8 Code Entry Mode – Allows you
to insert the device code for
Tracfone’s PPE setting or info.
3 My Phone Number – Shows your
phone number.
4 Airtime Info – Shows you the
Airtime info. Based on different
brand such as Balance, Due
Date, and Service End Date etc.
5 Airtime Display – Set On/Off for
displaying Balance / Due Date on
Idle screen.
6 Serial Number – Shows you the
Serial Number.
7 SIM Number – Shows you the
SIM Number.
24

Contacts
Contact List
This menu allows you to save
and manage contact address
information. The Conta ct List’s
functions allow you to add a new
address or search saved contact
addresses by name.
To access Contact List, from the
standby screen, press the left soft
key
and
Contact List.
Menu, Contacts
Caller Groups
This menu allows you to manage
group information. You can also
configure a ring tone for a group
so that the group ring tone sounds
when a call from a specific contact
address within that group is
received and there is no ring tone
configured for the specific contact
address.
To access Caller Groups, from the
standby screen, press the left soft
New Contact
This menu allows you to add a new
contact to the Contact List. You can
enter contact address information
including name, phone numbers,
email addresses, group information
items, memos, ring tones, and a
contact Picture ID.
To access New Contact, from the
standby screen, press the left soft
key
Menu, Contacts
key
and
Caller Groups.
Menu, Contacts
Speed Dial
This menu allows you to assign
a frequently-called contact to the
Speed Dial List. You can select a
number from 2 to 9 as a speed dial.
To access Speed Dial List, from the
standby screen, press the left soft
key
Menu, Contacts
and
New Contact.
and
Speed Dial.
25

SIM Management
My business card
This menu allows you to copy
information from your SIM card
to your handset and vice versa. If
a name is duplicated during the
copying operation, the information is
also duplicated. You can also delete
information from the SIM card.
To access SIM Management,
from the standby screen, press
the left soft key
Contacts and SIM
Management.
Menu,
This display your business card
stored in the handset. You can also
delete or edit.
To access My business card, from
the standby screen, press the left
soft key
Contacts and
card.
Menu,
My business
Own number
This displays your phone numbers
stored in the SIM card.
To access Own number, from the
standby screen, press the left soft
key
and
26
Own Number.
Menu, Contacts
Messages
This menu includes functions
related to SMS (Short Message
Service), MMS (Multimedia Message
Service), Voicemail as well as the
network’s service messages.
Create Message
1 From the standby screen, press
the left soft key
2 Press
3 Press
Messages.
Create Message.
Menu.
Note
If you insert a Picture, Audio,
or Video file while writing a
multimedia message, the file
loading time will take about
5 seconds. You will not be able
to activate any key during the
file loading time. When the file
loading is complete, you will
be able to write a multimedia
message.
OR
You can simply press
the standby screen.
[left] from
Editing a message
The following options are available
when editing a message.
Using Insert
While entering text, press the left
soft key
menu, you can choose Insert.
Ź
Symbol: You can insert various
symbols into your message.
Pressing the Up and Down keys
Options. In this
/ scrolls through
the pages.
27

Messages
Ź
Picture: You can select a picture
• Quality: Set the audio’s quality
to insert by using the navigation
keys. You can preview the
selected picture by pressing the
left soft key View.
Ź
Audio: You can insert an audio
file from your saved audio files.
Ź
Video: You can insert a video
clip from your saved video clips.
Ź
Take New Picture: you can
take and insert a picture in your
message.
Ź
Record New Audio: You can
record a new audio clip by
pressing Record. Press the
right soft key Options
before you begin recording to
set the options (below). After
to Fine, Normal, or Economy.
• Select Storage Defaults:
You can assign the default
storage to Phone Memory or
Memory Card.
Ź
Record New Video: You can
record a new video by pressing
Record. When finished
recording, press Insert.
Ź
Template
• Text: Allows you to easily insert
frequently used sentences in
the text message.
• Multimedia: Preset
multimedia templates can be
created (
Menu
recording a new audio clip, you
can delete it by pressing the
right key Delete.
28
>
Message Settings >
Multimedia Msg >
Messages >
Multimedia Templates >
New).

• Signature: Allows you to insert
Writing language allows you
your own created signature.
For further details.
Ź
More: Allows you to insert
vCard, vCalendar, vNote, vTask
or Contact.
Note
vCard, vCalendar, vNote and
vTask are created by the Address
Book, Calendar, Notepad, and
Tasks functions, respectively. Go
to the Tools and Address Book
sections in this Manual for more
detailed information.
to set the text entry language to
English, Spanish.
• Save to Drafts: Saves the
message to Drafts.
• Cancel Message: Allows you to
exit the text input mode without
saving your message.
Sending a Message
After completing a message, using
Insert and/or Options, press
Send To to select a recipient.
• Enter the recipient(s). For more
options, press the left soft key
Using Options
While entering text, press the right
soft key Options.
Insert allows you to insert Symbol,
Picture, Audio, Video, template
or more. You can also take new
picture or record new audio/video
to insert.
Options. In this
menu, you can choose from the
following options:
- Enter Number: Allows you to
enter the phone number using
the keypad.
- Enter Email: Allows you to
enter an email address instead
of a phone number.
29

Messages
- Insert Symbol: Allows you to
enter symbols.
- Caller Groups: Displays
Contacts Groups.
- Recent Messages: Choose a
Contact from Recent Messages.
- Recent Calls: Choose a
Contact from Recent Calls.
- Delivery Options: Allows you
to set the options for Add Cc,
and Add Bcc.
Inbox
You will be alerted when you receive
a message. New messages are
stored in the Inbox. In the Inbox, you
can identify each message by icons.
If you are notified that you have
received a multimedia message, you
can download the whole multimedia
message by selecting it in the Inbox
menu. To reach the Inbox, from
the standby screen, press the left
- Edit Message: Go back to the
message editing mode.
- Save to Draft: Saves the
selected message to Drafts.
- Writing language: allows you
to set the text entry language to
English, Spanish.
- Cancel Message: Allows you
to cancel the message.
soft key
Messages >
Ź
Add to Contact: You can save
Menu >
Inbox.
the sender’s phone number in
the Contact List.
Ź
Reply: You can reply to the
sender of the message.
Ź
Delete: You can delete the
selected message.
Ź
Forward: You can forward the
selected message to another
30
person.
 Loading...