


INSTALLATION MANUAL
LED TV*
Please read this manual carefully before operating your
set and retain it for future reference.
UW76**
LW64**
UW96**
UW95**
UW34**
UV34**
www.lg.com

2
TABLE OF CONTENTS
ENGLISH
ENG
TABLE OF CONTENTS
3 LOCATION AND FUNCTION OF
CONTROLS
3 Using the button
4 LED Clock Connection
5 EZMANAGER
5 INTRODUCTION
5 EZ-MANAGER WIZARD
6 LANGUAGE & COUNTRY SELECTION
8 - Automatically for Setup
11 - Manually for Setup
15 - USB LG Smart Install Utility
18 INSTALLATION MENU
18 INTRODUCTION
19 LG HOTEL MODE
19 - Hotel Mode Operation
19 - Power On Status
20 - Volume
20 - Key Management
21 - Limited Mode
21 - DTV Programme Update
22 - Power On Default
22 - Aux Source Setting
22 - Power Management
22 - Radio Video Blank
22 - Factory Reset
23 NETWORK
23 - MAC Address
23 - Network Setting
24 - Wake On LAN
25 PRO:CENTRIC
25 - Mode
25 - WORF
25 - Room Number Setting
26 - Media Type
26 - Receive Data
26 - Native EPG
27 GENERAL
27 - Configuration Setup
30 - External Speaker
31 - Set ID Setup
31 - Power Saving
31 - HCEC Setup
32 - Clock Setup
33 - Password Change
33 - PreLoaded App
33 - Lock Mode
33 - Crestron
34 MEDIA SHARE
34 - SmartShare
34 - Screen Share
34 - Media Renderer
34 - Bluetooth Sound Sync
35 - DIAL
35 - TV Name
35 - SoftAP
36 TV MANAGER
36 - USB Download Menu
LOCATION AND FUNCTION OF CONTROLS
3
LOCATION AND FUNCTION OF CONTROLS
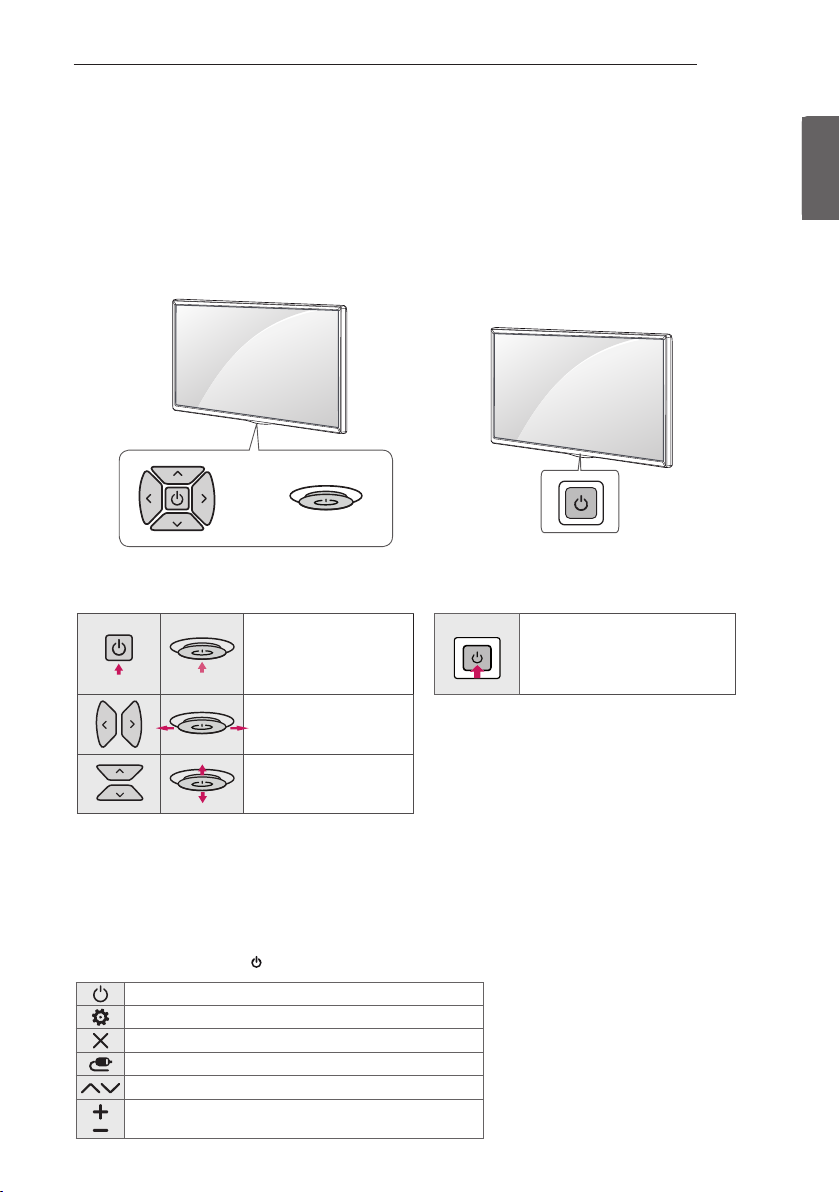
Using the button
(Depending on model)
You can simply operate the TV functions, using the button.
<A type> <B type>
or
Basic functions
<A type> <B type>
Power On (Press)
Power O 1 (Press and hold)
Power On (Press)
Power O 1 (Press and Hold)
Menu Control (Press 2)
Menu Selection (Press and Hold 3)
ENGENGLISH
Volume Control
Programmes Control
1 All running apps will close, and any recording in progress will stop.
2 You can access and adjust the menu by pressing the button when TV is on.
3 You can use the function when you access menu control.
Adjusting the menu
(Depending on model)
When the TV is turned on, press the button one time. You can adjust the Menu items using the button.
Turns the power o.
Accesses the settings menu.
Clears on-screen displays and returns to TV viewing.
Changes the input source.
Scrolls through the saved programmes.
Adjusts the volume level.
4
CLOCK
LOCATION AND FUNCTION OF CONTROLS
ENGLISH
ENG
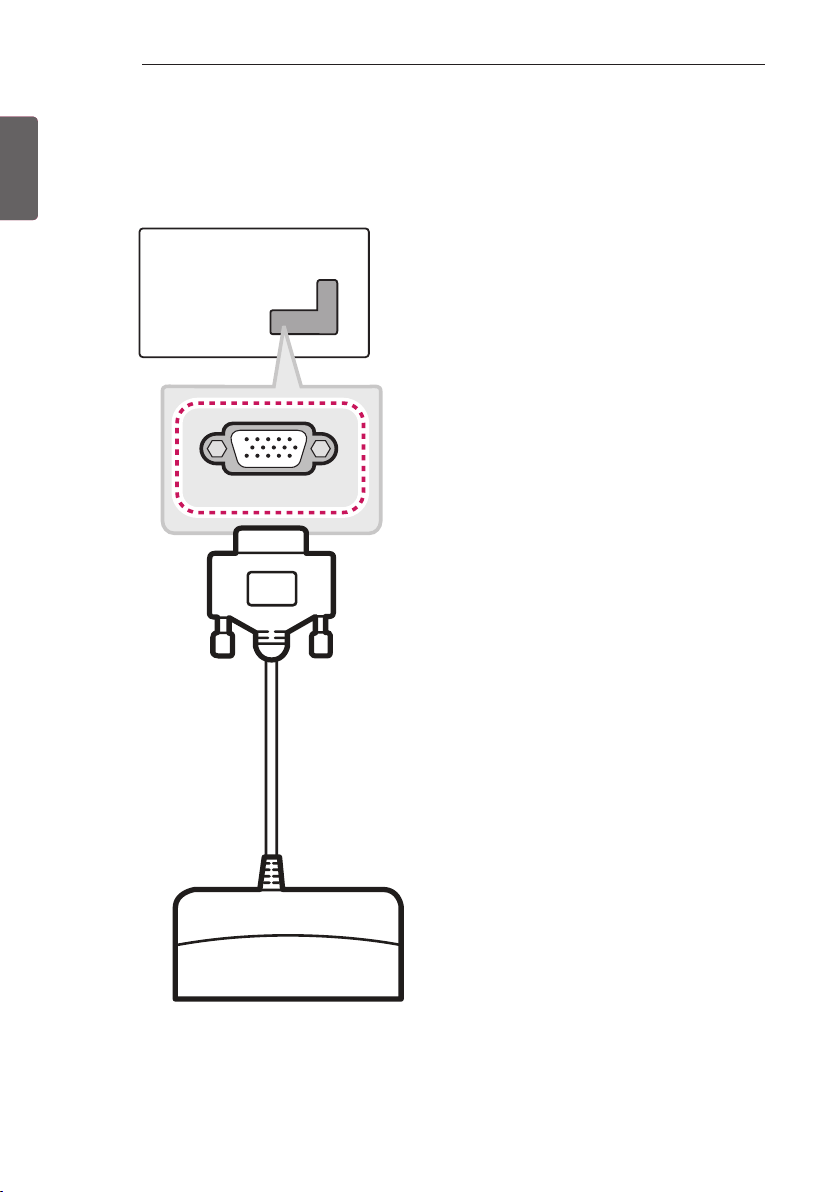
LED Clock Connection
(Except for LW64**, UW34**, UV34**)
This TV can be connected to a LED Clock via the CLOCK port.
LED Clock
(*Not Provided)
EZMANAGER
5
EZMANAGER
• Image shown may differ from your TV.
•
INTRODUCTION
(Except for UW34**, UV34**)
The Pro:Centric Platform enables you to simply install, manage and use guest-centric solutions. The default Domain “procentric.local”
and IP Server Address are needed to be registered in DNS TV will contact the IP Server using the default Domain “procentric.local” via IP
on server search page. If TV doesn’t contact the Server, TV will search the pre-defined channel earlier than all channels. (Only DVB-C)
The frequencies of pre-defined channels are below.
Germany: ‘51000, 858000, 778000, 698000, 618000, 538000, 458000, 378000, 298000, 218000, 138000 khz’.
Philippines 6Mhz: ‘57000, 651000, 591000, 531000, 471000, 411000, 351000, 291000, 231000, 171000, 111000 khz’.
Other Country: ‘50000, 842000, 762000, 682000, 602000, 522000, 442000, 362000, 282000, 202000, 122000 khz’.
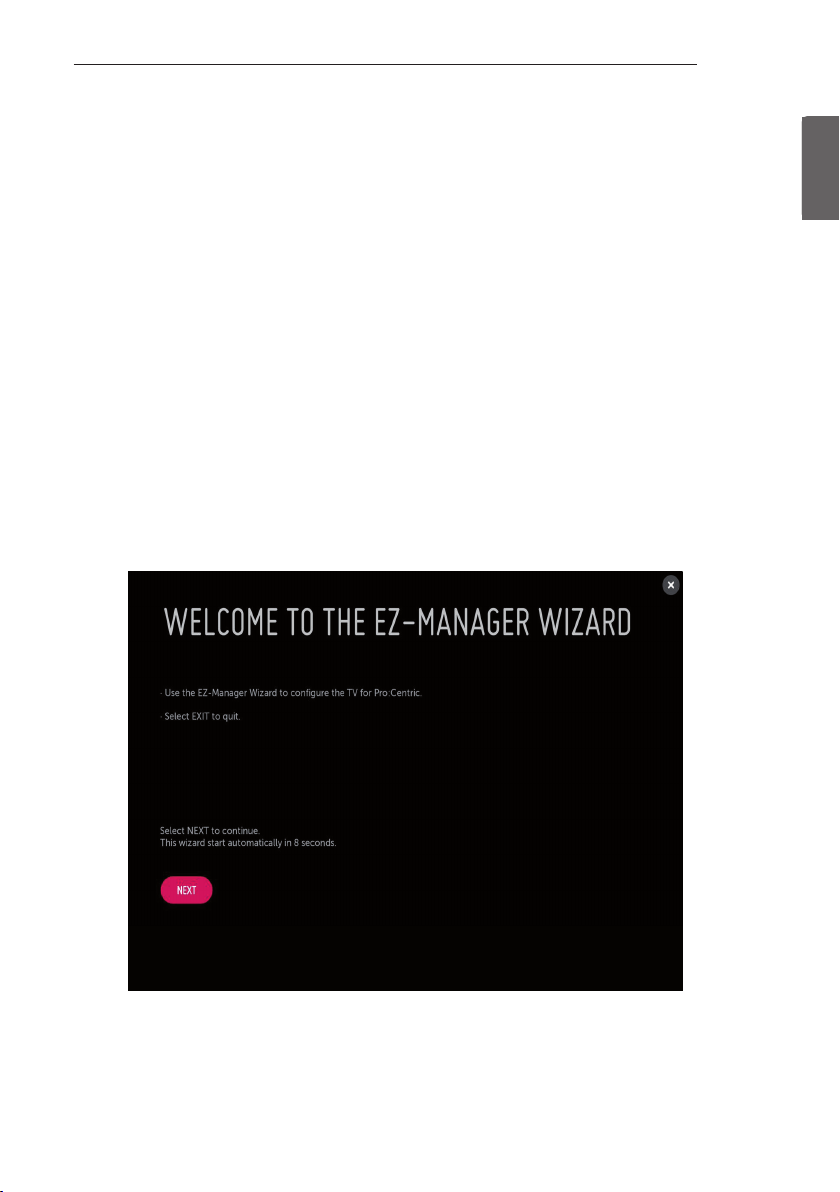
EZ-MANAGER WIZARD
(Except for UW34**, UV34**)
ENGENGLISH
-If you are using Pro:Centric, this setup wizard till help you easily set up the TV. Select ‘NEXT’ to continue.
-Otherwise, if you will not be installing a Pro:Centric Server, select ‘EXIT’ to quit.
6
EZMANAGER
ENGLISH
ENG
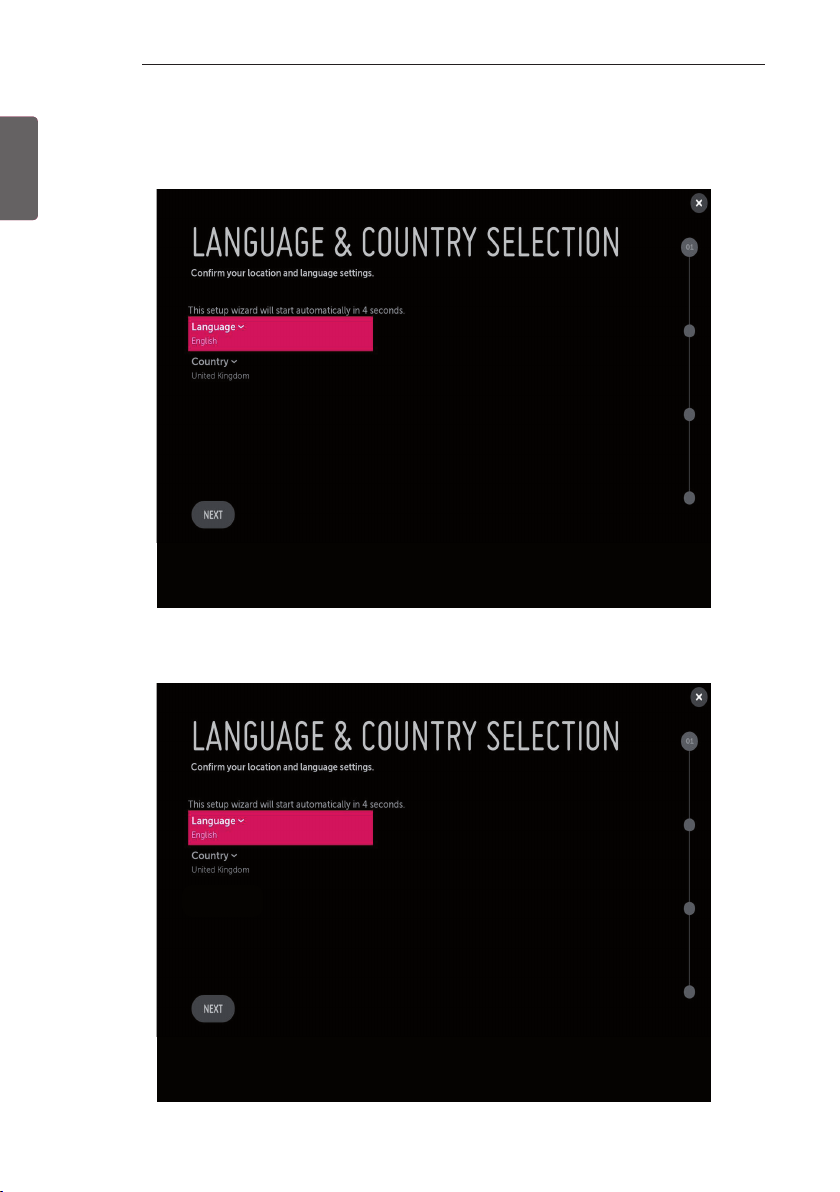
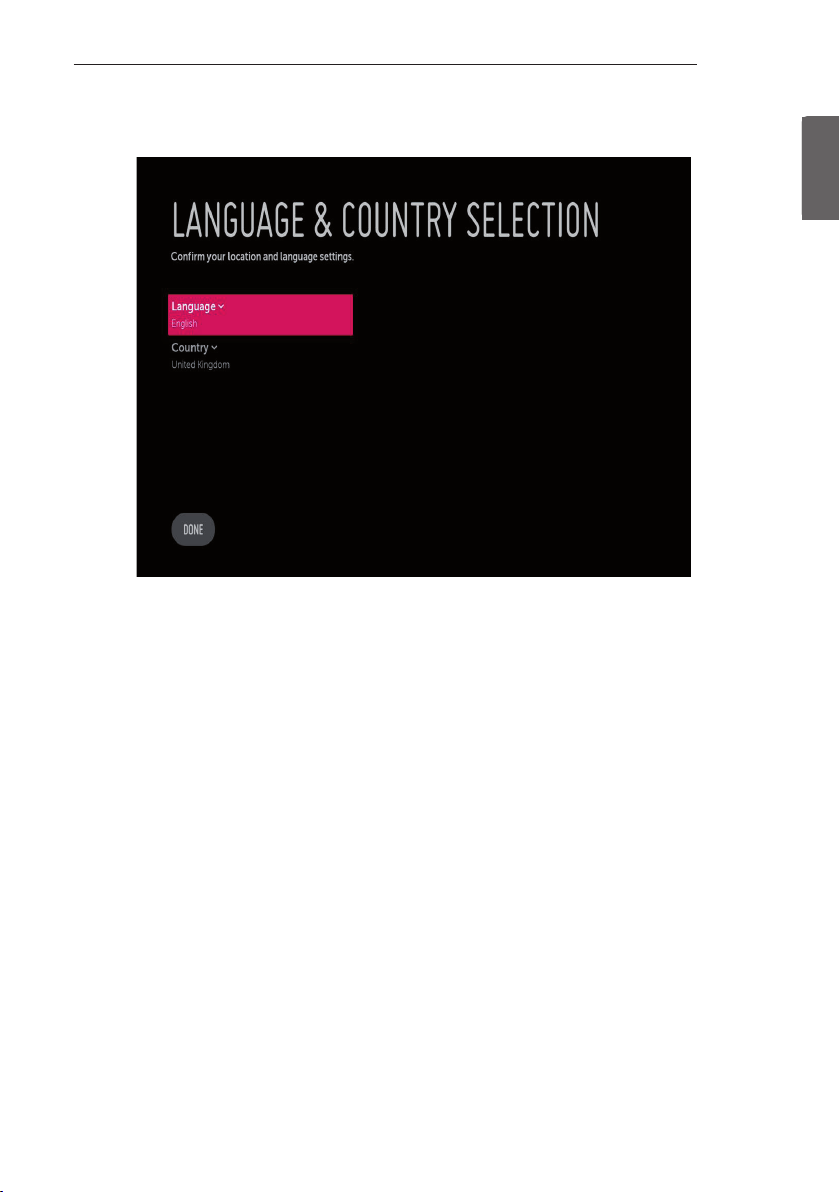
LANGUAGE & COUNTRY SELECTION
(Except for Iran)
-Please select the Language and Country. Some countries need to select the Time Zone.
(Only Iran)
-Please select the Language.
EZMANAGER
7
(Only UW34**, UV34**)
-Please select the Language and Country. Some countries need to select the Time Zone.
ENGENGLISH
8
EZMANAGER
ENGLISH
ENG
Automatically for Setup
(Except for UW34**, UV34**)
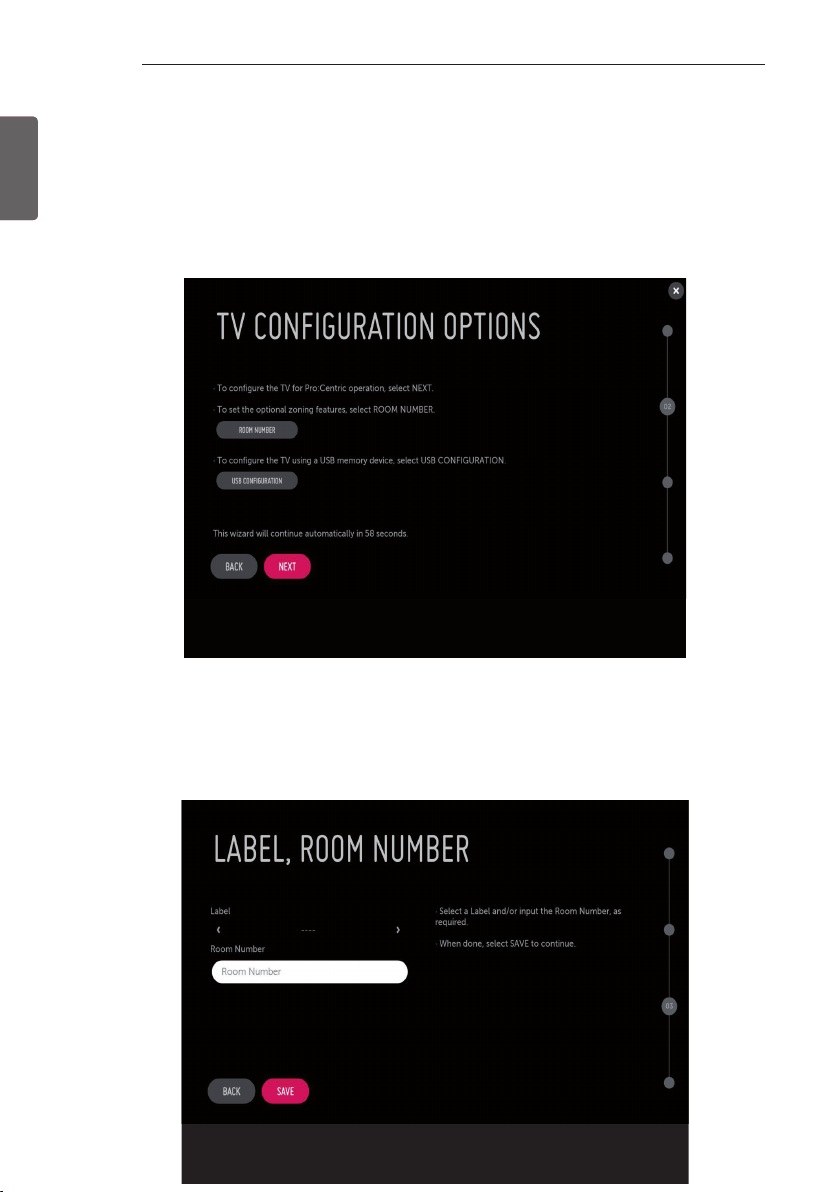
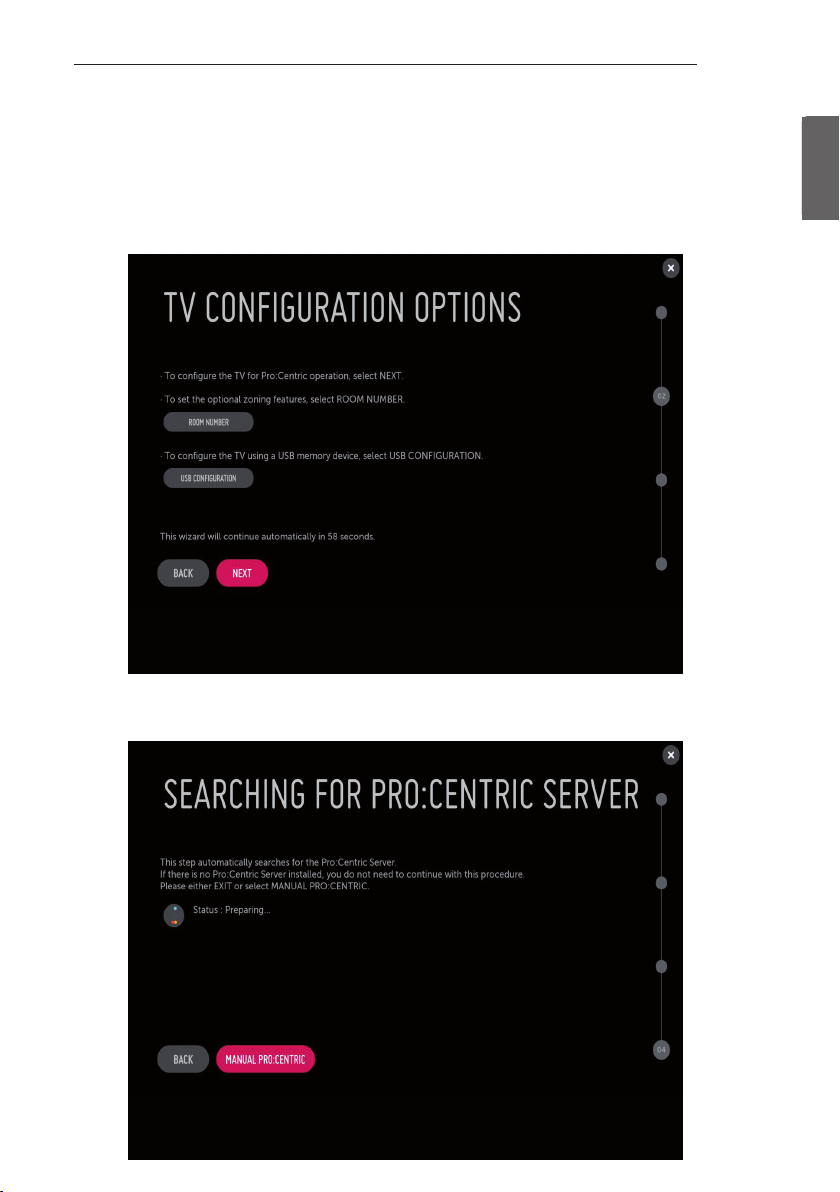
1 From the TV Conguration Options screen, you can choose how to proceed with the conguration of this TV. Whether you will
congure the TV for Pro:Centric operation via the wizard or use a USB memory device to congure the TV, you may rst wish to set
the Room Number on the TV.
-If you intend to set Room Number as part of the TV configuration, use the Room Number option to assign the Room # for
this TV before you continue with additional configuration.
-In the Label field, use the Left/Right arrow keys to specify a North, South, East, or West designation for this TV.
-In the Room Number field, you can use the number keys on the Installer Remote to direct enter a room number or use the
virtual keyboard on the TV screen.
-To continue, move and select ‘NEXT’.
EZMANAGER
9
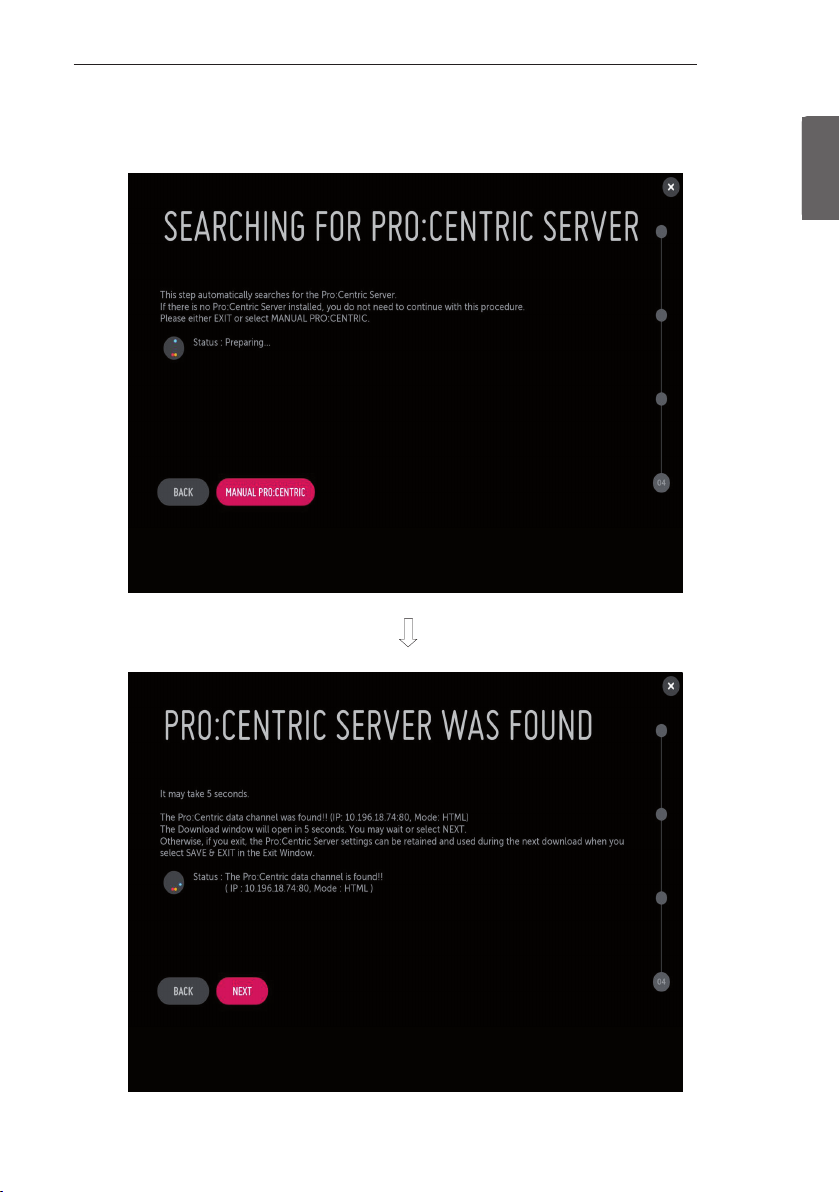
2 This step automatically searches for the Pro:Centric Server. If was found the Pro:Centric data channel, select the ‘NEXT’.
ENGENGLISH
10
EZMANAGER
ENGLISH
ENG
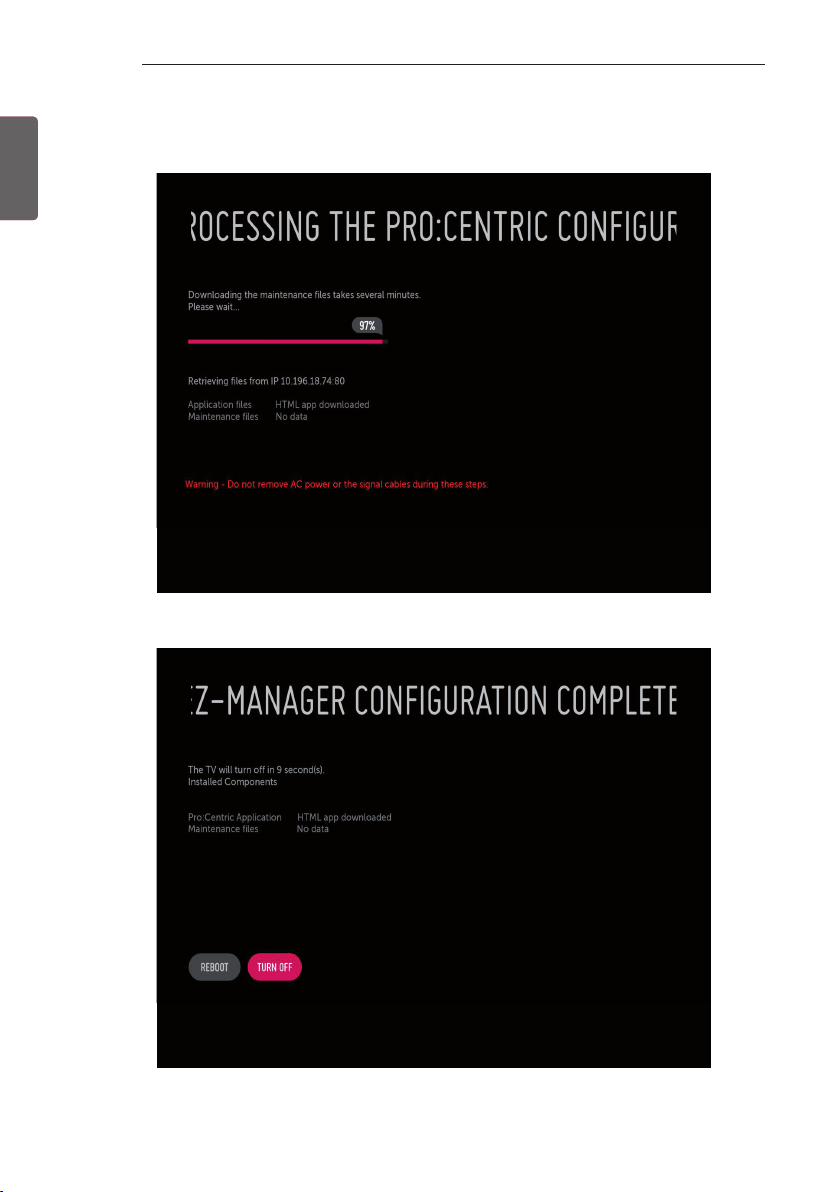
3 Downloading the Pro:Centric application les takes few minutes.
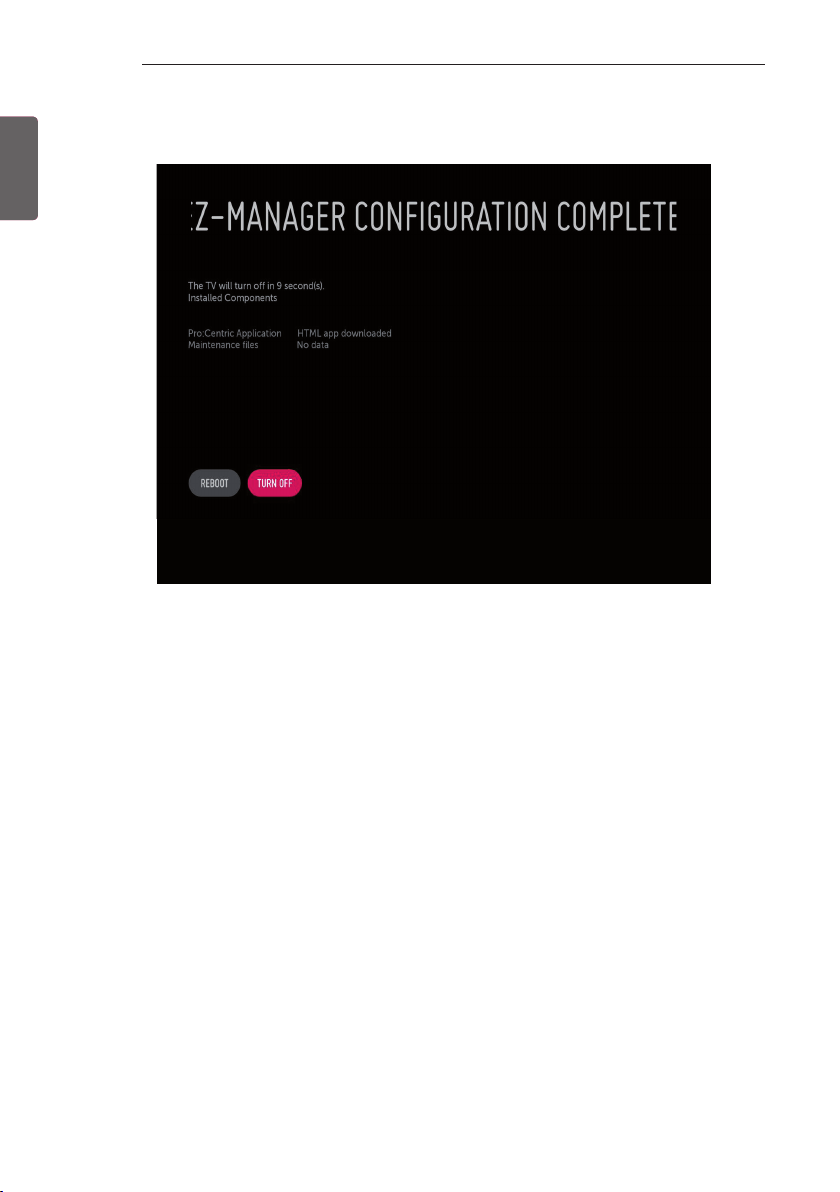
4 After the installation is completed, the following screen will be displayed.
EZMANAGER
Manually for Setup
(Except for UW34**, UV34**)
1 Select a Label and/or enter the Room Number using the numeric keypad on the remotes or using the virtual keyboard on the TV
screen. To continue, move and select ‘NEXT’.
11
ENGENGLISH
2 Please select the ‘MANUAL PRO:CENTRIC’.

12
EZMANAGER
ENGLISH
ENG
3 Congure the appropriate Pro:Centric settings in the TV.
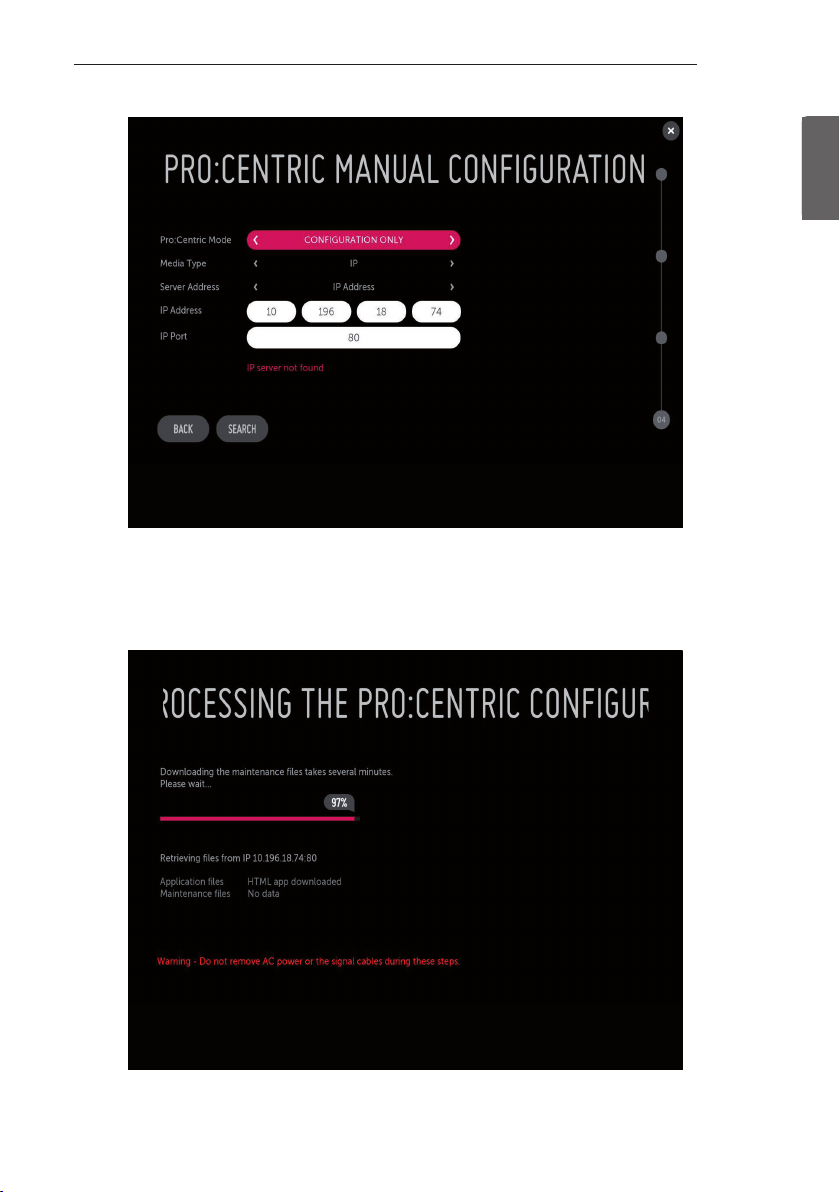
4 Downloading the Pro:Centric application les takes few minutes.
EZMANAGER
13
ENGENGLISH
14
EZMANAGER
ENGLISH
ENG
5 After the installation is completed, the following screen will be displayed.
 Loading...