

LG 43UN700, 43BN70U, 43UN700T Owner's Manual

Owner's Manual
IPS LED MONITOR
(LED MONITOR*)
*LG LED Monitors are LCD Monitors with LED Backlighting.
Please read the safety information carefully before using the product.
IPS LED Monitor (LED Monitor) Model List
43UN700
43BN70U
43UN700T
www.lg.com

2
Contents
ENGLISH
ENG
CONTENTS
3 LICENSE
4 ASSEMBLING AND PREPARING
4 Supported Drivers and Software
5 Component and Button Description
5 - How to Use the Joystick Button
6 Moving and Lifting the Monitor
7 - Using the cable holder
7 - Installing onto a table
8 - Adjusting the angle
9 - Using the Kensington lock
10 - Installing the wall mount plate
10 - Installing to a wall
12 REMOTE CONTROL
24 TROUBLESHOOTING
26 SPECIFICATIONS
28 Factory Support Mode (Preset Mode, PC)
28 HDMI
28 DisplayPort / USB-C
29 HDMI Timing (Video)
29 Power LED
30 EXTERNAL CONTROL DEVICE
SETUP
30 - Communication Parameters
30 - Transmission
30 - OK Acknowledgement
30 - Error Acknowledgement
31 - Command Reference List
13 USING THE MONITOR
13 Connecting to a PC
13 - HDMI connection
13 - DisplayPort connection
14 - USB-C connection
14 Connecting to AV Devices
14 - HDMI connection
15 Connecting Peripherals
15 - USB Cable connection - PC
16 Connecting to External Devices
16 - Connecting Headphones
17 USER SETTINGS
17 Activating the Main Menu
17 - Main Menu Features
18 User Settings
18 - Menu Settings

LICENSE
3
LICENSE
Each model has different licenses. Visit
The terms HDMI and HDMI High-Definition Multimedia Interface, and the HDMI Logo
are trademarks or registered trademarks of HDMI Licensing Administrator, Inc.
VESA, VESA logo, DisplayPort compliance logo and DisplayPort compliance logo for
dual-mode source devices are all registered trademarks of the Video Electronics Standards Association.
The SuperSpeed USB Trident logo is a registered trademark of USB Implementers
Forum, Inc.
www.lg.com
for more information on the license.
ENGLISH
ENG
The following content is only applied to the monitor which is sold in Europe market and which needs to meet the ErP
Directive:
* This monitor is set to be turned off automatically in 4 hours after you turned on display if there is no adjustment to
display.
* To make this setting be disabled, change the option to ‘Off’ in OSD menu of “Automatic Standby”.
ASSEMBLING AND PREPARING
4
ENGLISH
ENG
ASSEMBLING AND PREPARING
CAUTION
Always use genuine LG components to ensure safety and product performance.
y
The product warranty will not cover damage or injury caused by the use of unauthorized components.
y
It is recommended that use the supplied components.
y
If you use generic cables not certified by LG, the screen may not display or there may be image noises.
y
Illustrations in this document represent typical procedures, so they may look different from the actual product.
y
Do not apply foreign substances (oils, lubricants, etc.) to the screw parts when assembling the product. (Doing so
y
may damage the product.)
Applying excessive force when tightening screws may cause damage to the monitor. Damage caused in this way
y
will not be covered by the product warranty.
Do not carry the monitor upside down by just holding the base. This may cause the monitor to fall off the stand
y
and could result in personal injury.
When lifting or moving the monitor, do not touch the monitor screen. The force applied to the monitor screen
y
may cause damage to it.
For wave pattern on appearance, unlike the general method of coating, it’s applied to added glittering material in
y
raw material.With no peeled-off appearance, it has good durability. Please use it with confidence because there is
no problem in using the product at all.
NOTE
The components may look different from those illustrated here.
y
Without prior notice, all product information and specifications contained in this manual are subject to change to
y
improve the performance of the product.
To purchase optional accessories, visit an electronics store or an online shopping site, or contact the retailer from
y
which you purchased the product.
The power cord provided may differ depending upon the region.
y
Supported Drivers and Software
You can download and install the latest version from the LGE website (
Drivers and Software Installation Priority
Monitor Driver Recommended
On Screen Control Recommended
Dual Controller Optional
www.lg.com
).
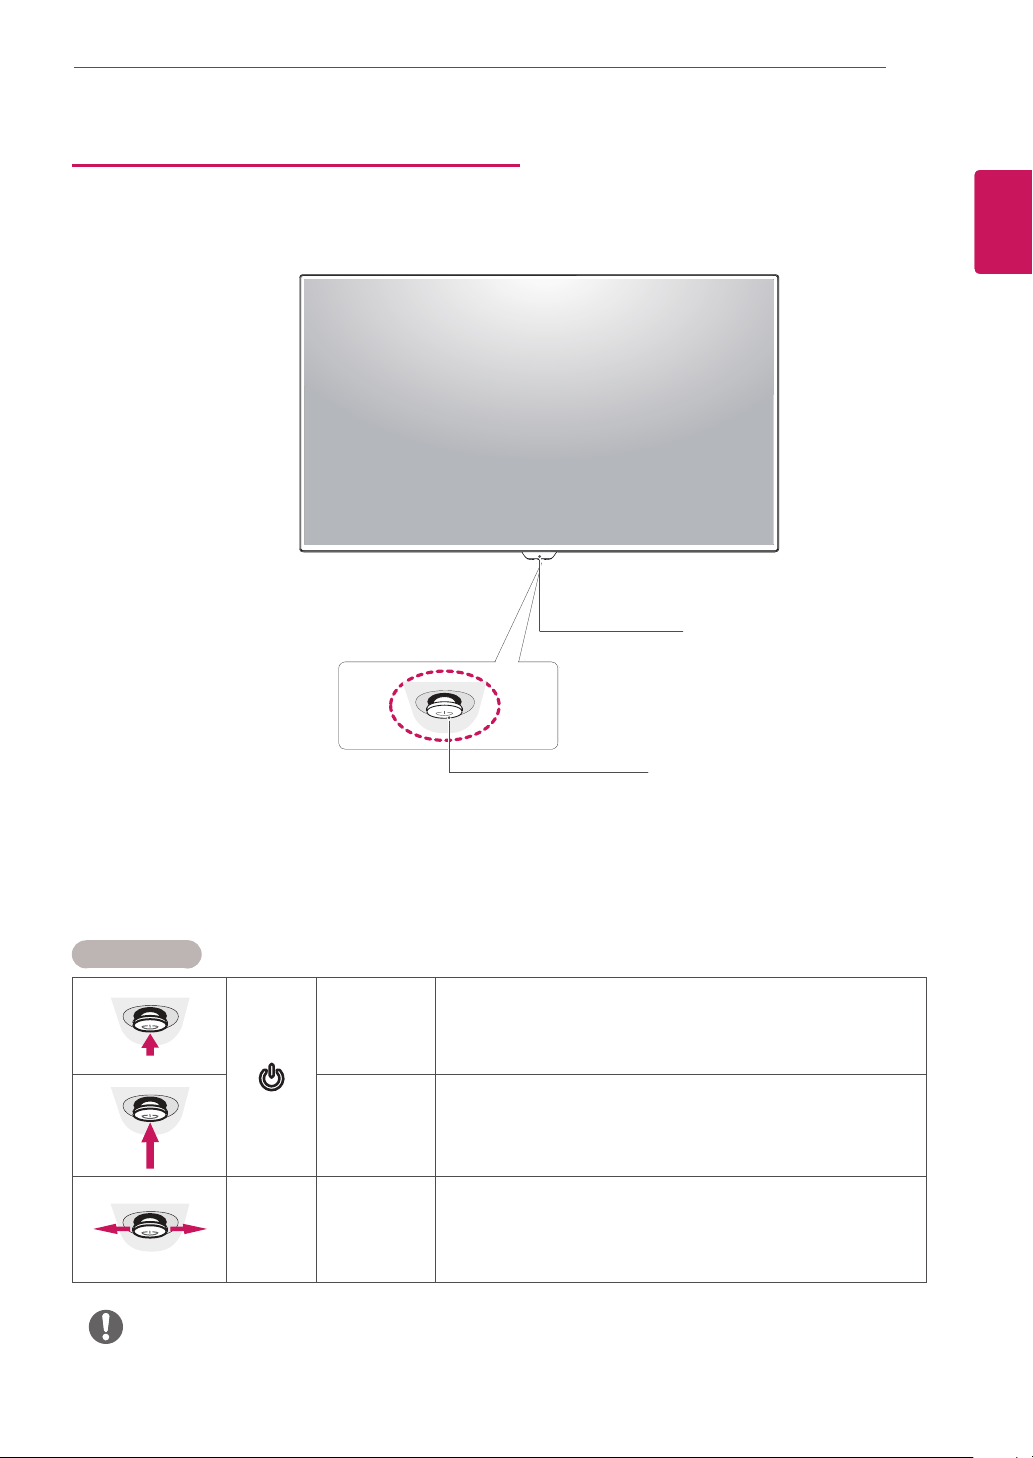
Component and Button Description
ASSEMBLING AND PREPARING
IR Receiver
y
5
ENGLISH
ENG
Joystick Button
Power LED
On: power is on
y
Off: power is off
How to Use the Joystick Button
You can easily control the functions of the monitor by pressing the joystick button or moving it left/right with your
finger.
Basic Functions
Press the joystick button once with your finger to turn on the
monitor.
Press and hold the joystick button once with your finger to turn off the
monitor.
You can control the volume by moving the joystick button left/right.
◄/►
Power on
Power off
Volume
Control
y
NOTE
The joystick button is located at the bottom of the monitor.
y
ASSEMBLING AND PREPARING
6
ENGLISH
ENG
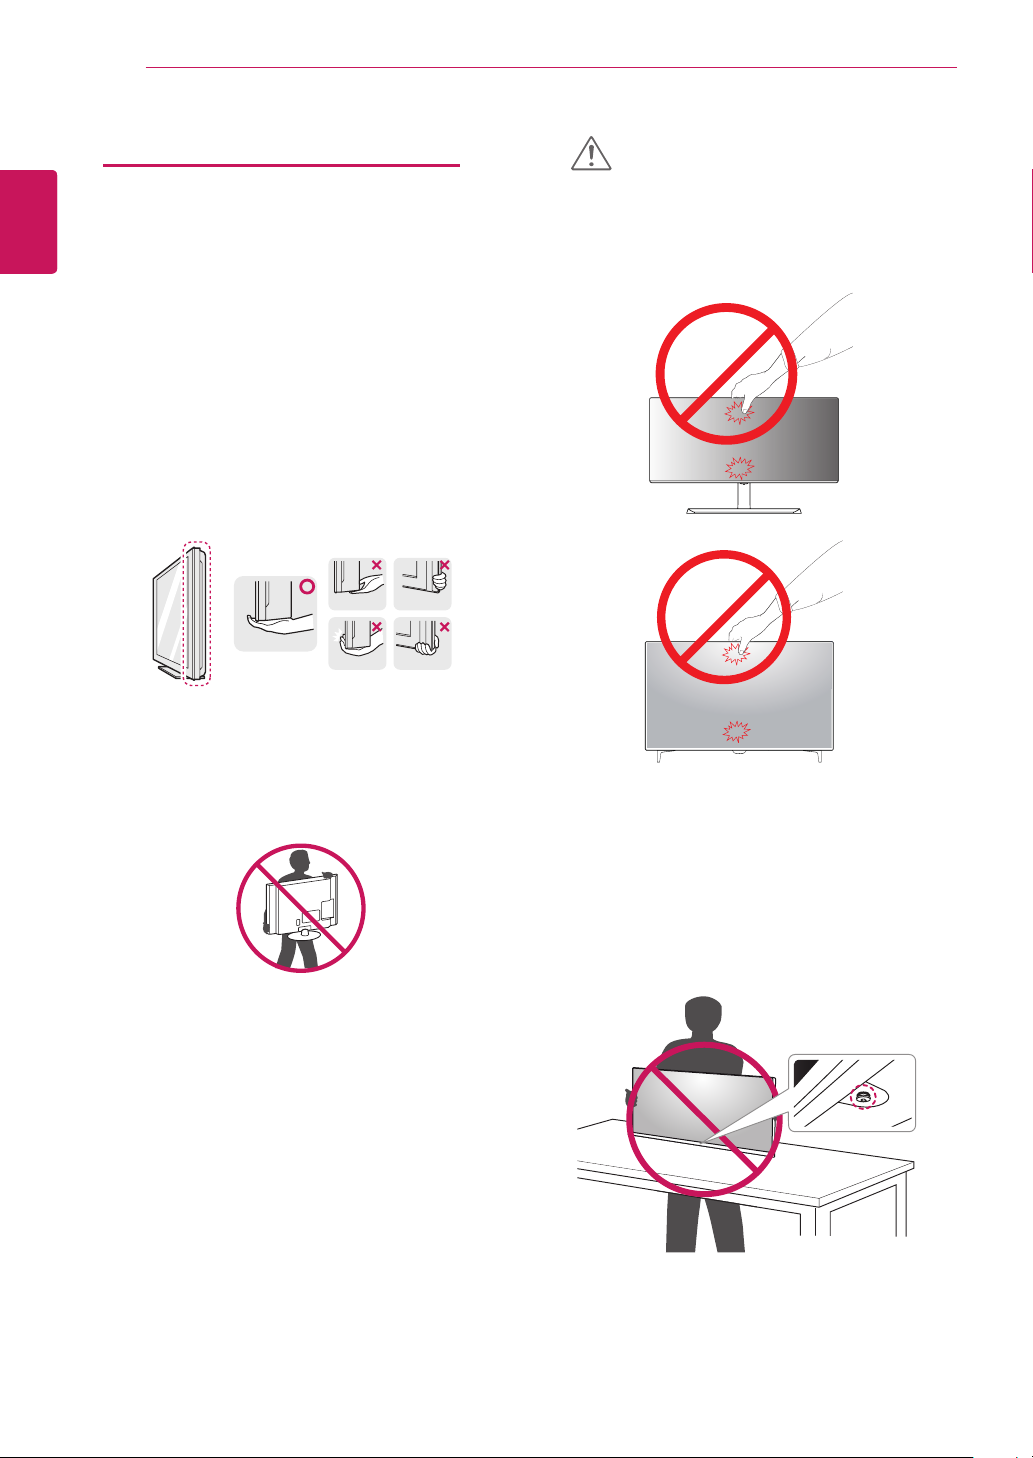
Moving and Lifting the Monitor
When moving or lifting the monitor, follow these instructions to prevent the monitor from being scratched
or damaged and to ensure safe transportation regardless of its shape or size.
It is advisable to place the monitor in the original
y
box or packing material before attempting to
move it.
Before moving or lifting the monitor, disconnect
y
the power cord and all cables.
Hold the top and bottom of the monitor frame
y
firmly. Do not hold the screen itself.
CAUTION
As far as possible, avoid touching the monitor
y
screen. This may result in damage to the screen or
some of the pixels used to create images.
Or
When holding the monitor, the screen should face
y
away from you to prevent it being scratched.
When moving the monitor, avoid any strong shock
y
or vibrations to the product.
When moving the monitor, keep it upright, never
y
turn the monitor on its side or tilt it sideways.
If you use the monitor panel without the stand
y
base, its joystick button may cause the monitor to
become unstable and fall, resulting in damage to
the monitor or human injury. In addition, this may
cause the joystick button to malfunction.
ASSEMBLING AND PREPARING
7
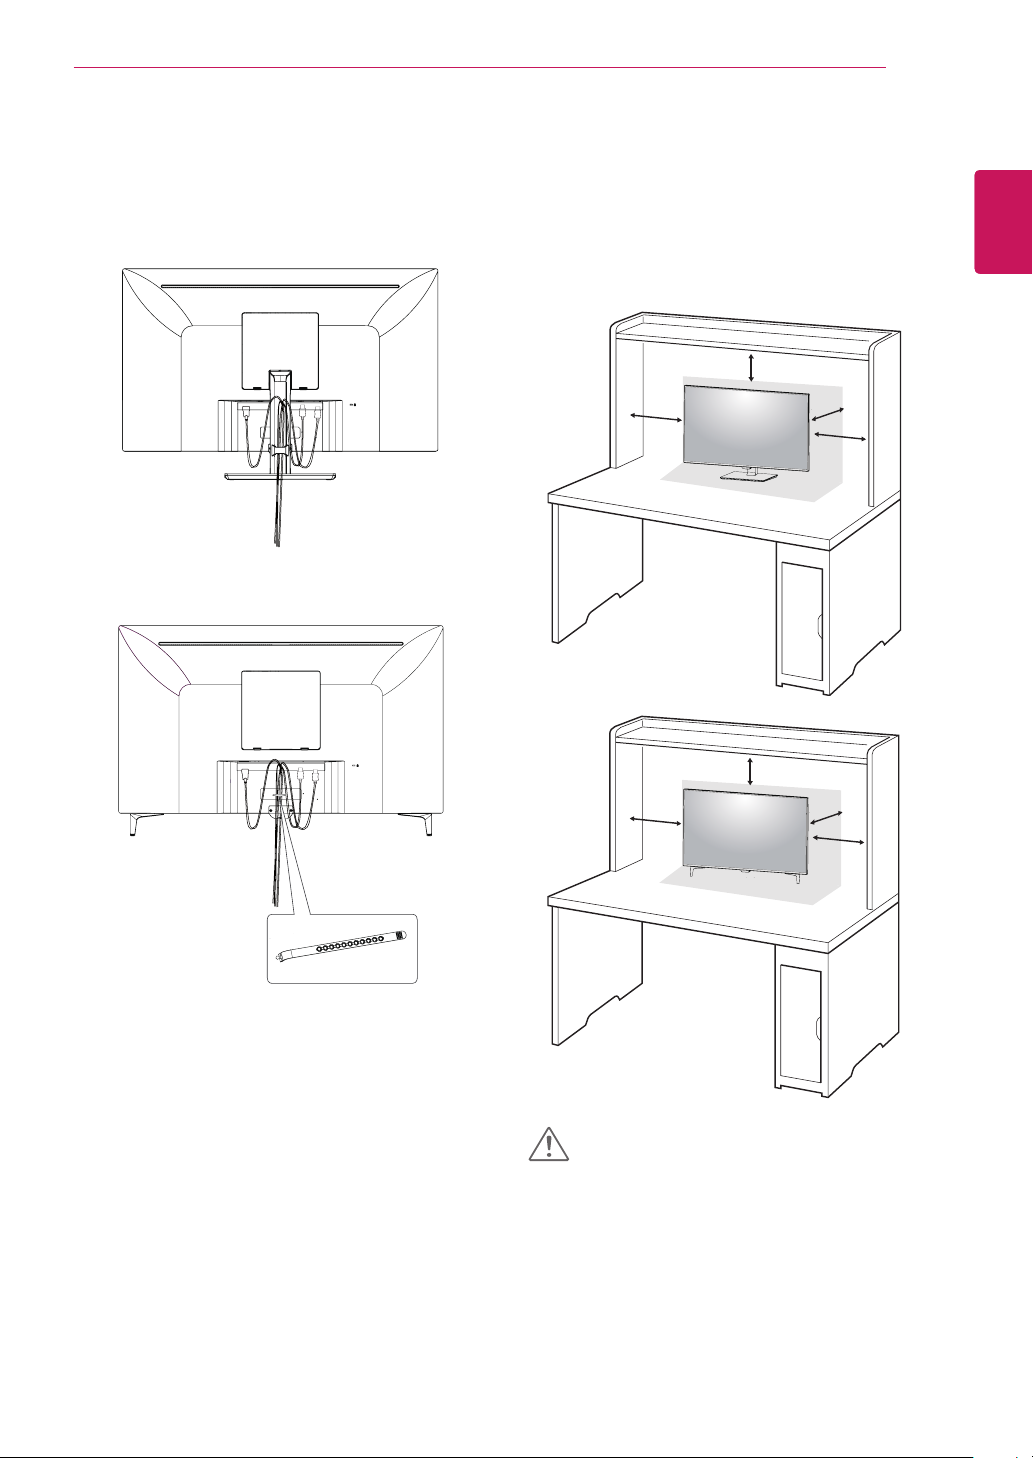
Using the cable holder
Arrange the cables using the cable holder as shown in
the illustration.
Or
Installing onto a table
Lift the monitor and place it on the table in an upright
position.
Place at least 100 mm (3.94 inches) away from the
wall to ensure sufficient ventilation.
100 mm
Or
100 mm
(3.94 inches)
(3.94 inches)
100 mm
(3.94 inches)
100 mm
(3.94 inches)
ENGLISH
ENG
Cable Holder
100 mm
100 mm
(3.94 inches)
(3.94 inches)
100 mm
(3.94 inches)
100 mm
(3.94 inches)
CAUTION
Unplug the power cord before moving or installing
y
the monitor. There is risk of electric shock.
Make sure to use the power cord that is pro-
y
vided in the product package and connect it to a
grounded power outlet.
If you need another power cord, please contact
y
your local dealer or the nearest retail store.
ASSEMBLING AND PREPARING
8
ENGLISH
ENG
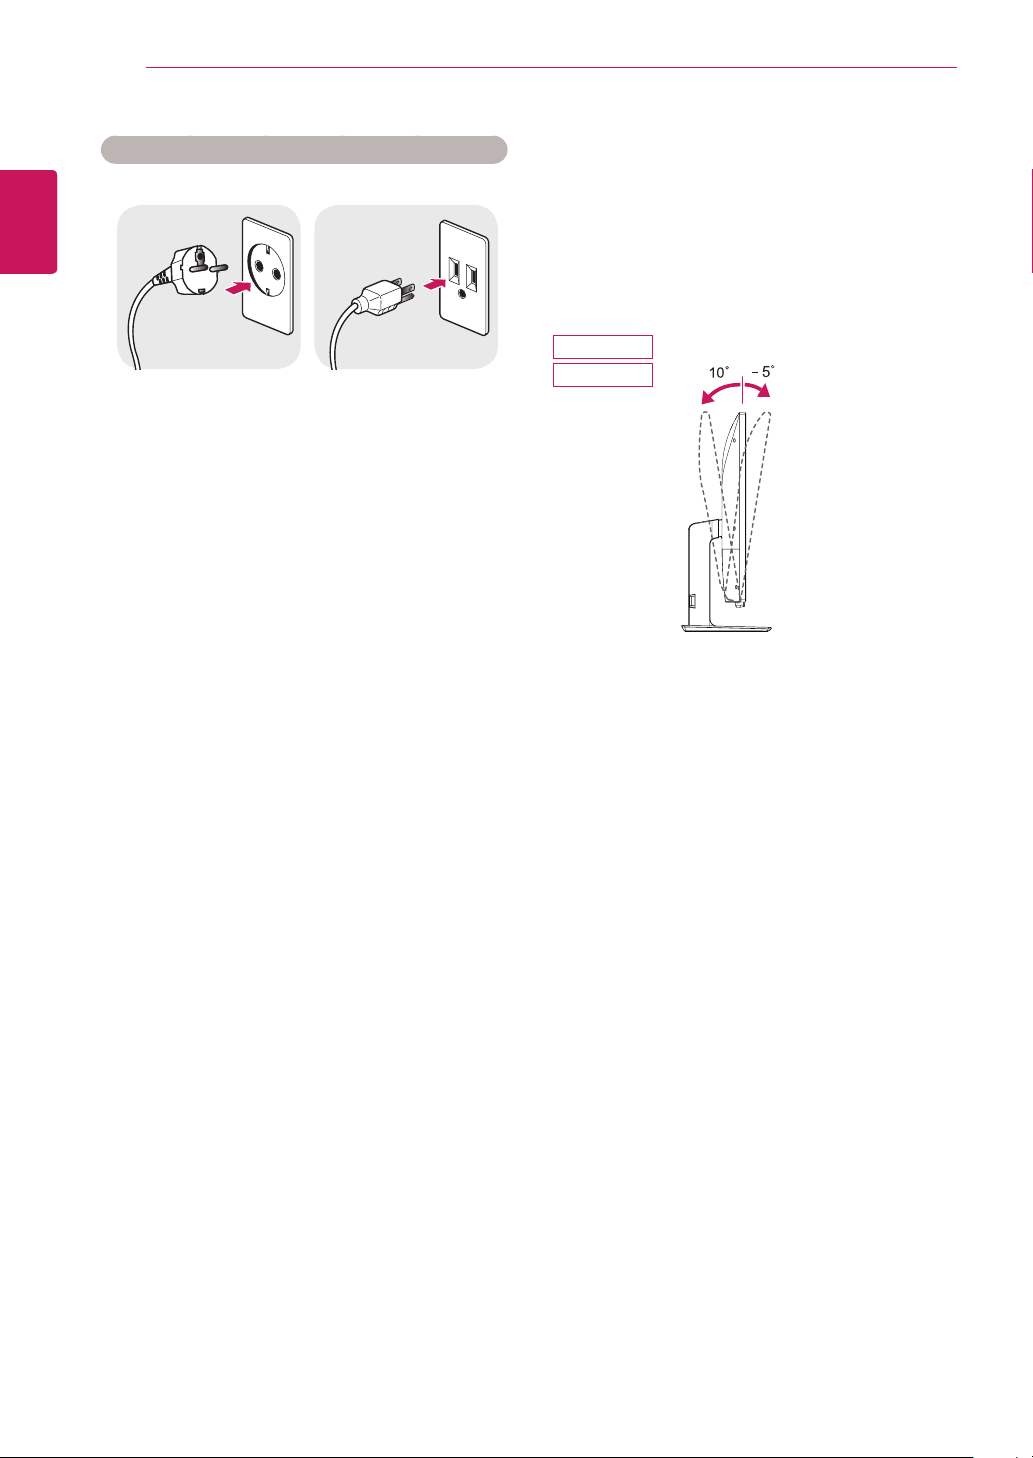
Cautions When Connecting Power Cord
100-240 V ~
Make sure to use the power cord that is pro-
y
vided in the product package and connect it to a
grounded power outlet.
If you need another power cord, please contact
y
your local dealer or the nearest retail store.
Adjusting the angle
Place the monitor in an upright position, mounted
1
on the stand base.
Adjust the angle of the screen. The angle of the
2
screen can be adjusted forwards or backwards for a
comfortable viewing experience.
43UN700
43BN70U
Front SideRear Side
ASSEMBLING AND PREPARING
9
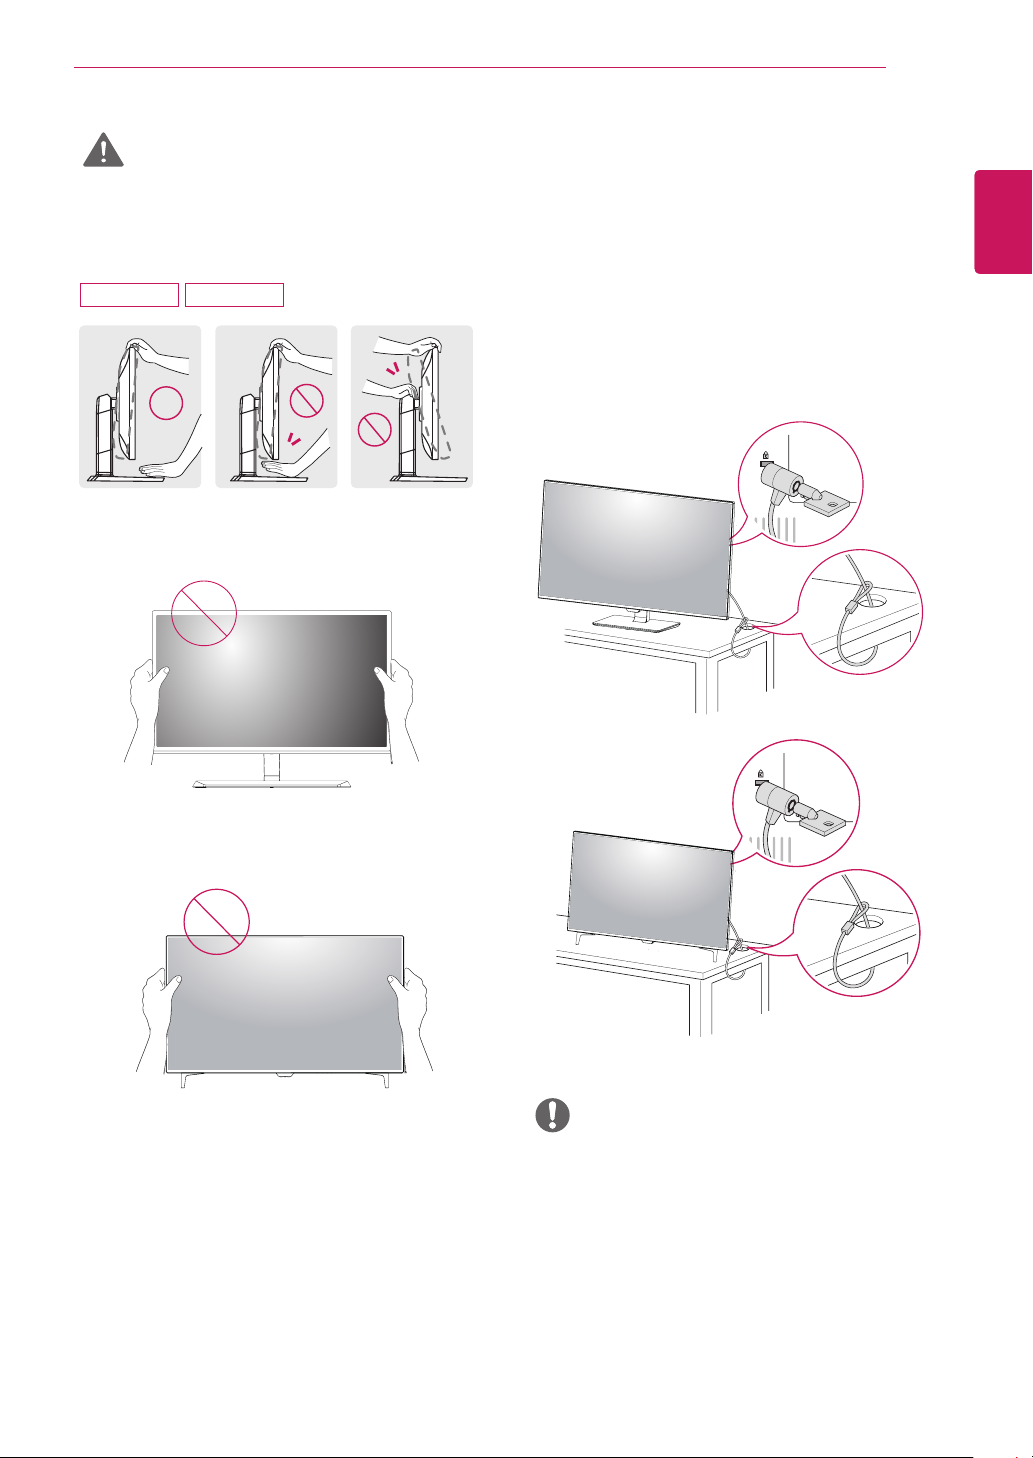
WARNING
To avoid injury to the fingers when adjusting the
y
screen, do not hold the lower part of the monitor's frame as illustrated below.
43UN700 43BN70U
Be careful not to touch or press the screen area
y
when adjusting the angle of the monitor.
Using the Kensington lock
The Kensington security system connector is located at
the back of the Monitor set.
For more information on installation and usage, refer to
the Kensington lock user manual or visit the website at
http://www.kensington.com.
Connect the Kensington security system cable between
the Monitor set and a table.
ENGLISH
ENG
Or
Or
NOTE
Use of the Kensington lock is optional.
y
The accessories can be purchased at your local
electronics store.
ASSEMBLING AND PREPARING
10
ENGLISH
ENG
Installing the wall mount plate
This monitor supports the specification of the standard
wall mount plate or compatible device.
Place the screen face down. To protect the screen
1
from scratches, cover the surface with a soft cloth.
Place the wall mount plate onto the monitor and
2
align it with the screw holes.
Tighten the four screws to fix the plate to the moni-
3
tor using a screwdriver.
NOTE
The wall mount plate is sold separately.
y
For more information on installation, refer to the
y
wall mount plate's installation guide.
Be careful not to use excessive force when
y
mounting the wall mount plate, as this can damage the monitor's screen.
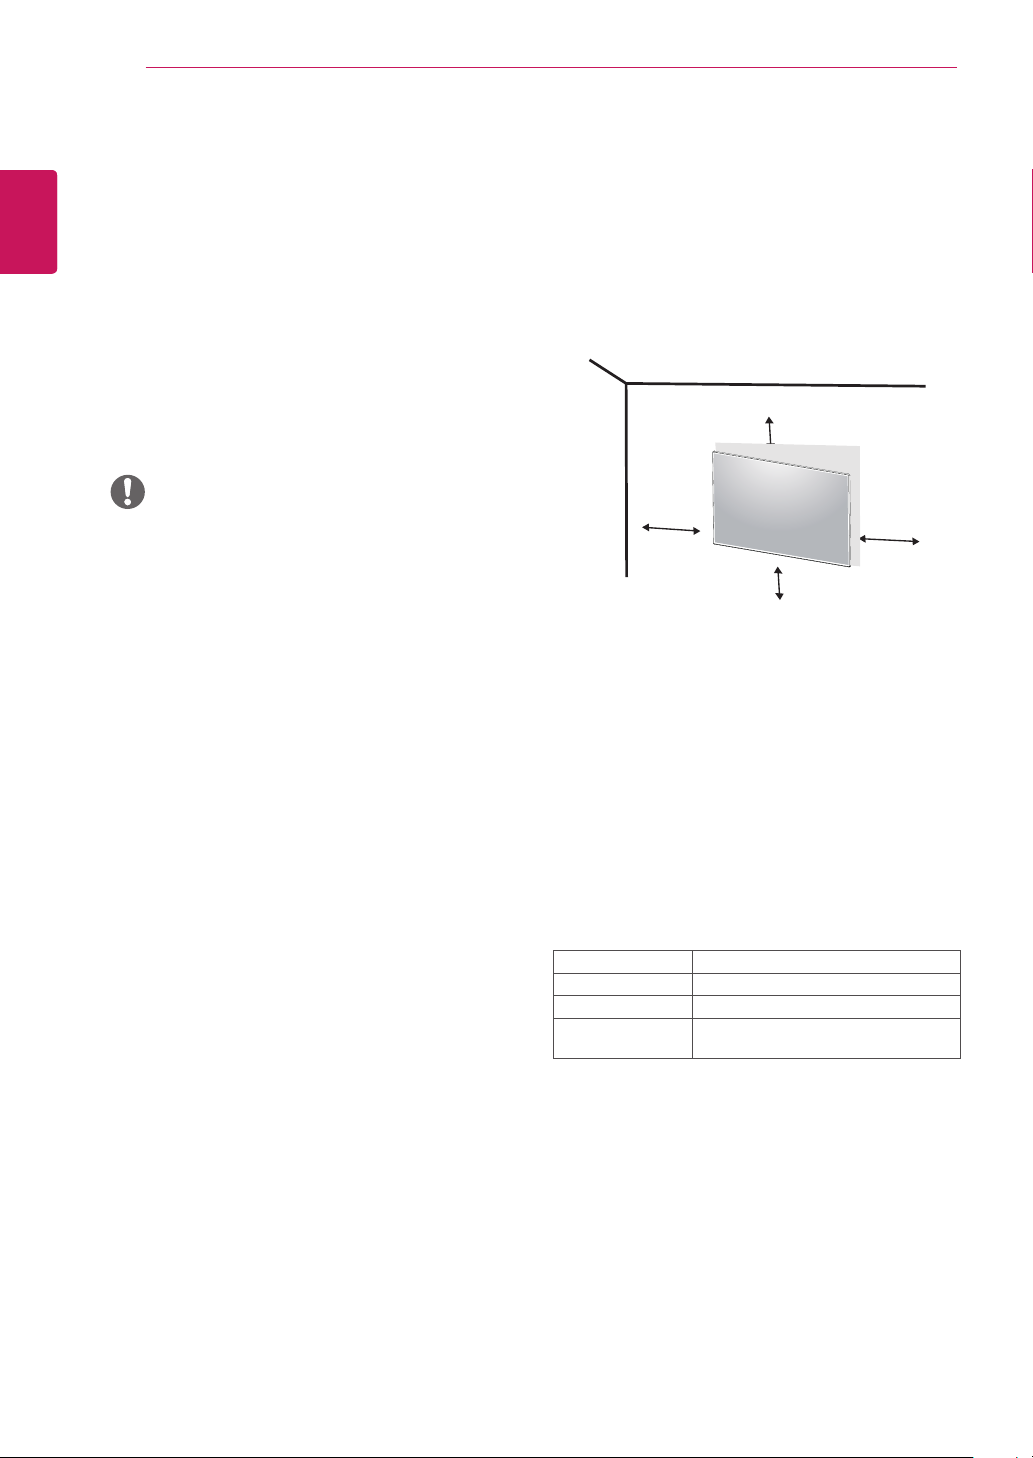
Installing to a wall
Install the monitor at least 100 mm (3.94 inches) away
from the wall and leave about 100 mm (3.94 inches)
of space at each side of the monitor to ensure sufficient ventilation. Detailed installation instructions can
be obtained from your local retail store. Please refer to
the manual to install and set up a tilting wall mounting
bracket.
100 mm
(3.94 inches)
100 mm
(3.94 inches)
100 mm
(3.94 inches)
To install the monitor to a wall, attach a wall mounting
bracket (optional) to the back of the monitor.
Make sure that the wall mounting bracket is securely fixed
to the monitor and to the wall.
100 mm
(3.94 inches)
1 If you use screw longer than standard, the monitor
might be damaged internally.
2 If you use improper screw, the product might be dam-
aged and drop from mounted position.
In this case, LG Electronics is not responsible for it.
Wall Mount (A x B) 200 x 200
Standard screw M6
Number of screws 4
Wall Mount Plate
(Optional)
LSW240B
 Loading...