

LG 43LM5500PVA Owner’s Manual

Please read this manual carefully before operating
your set and retain it for future reference.
* LG LED TV applies LCD screen with LED backlights.
LED TV*
OWNER’S MANUAL
Safety and Reference
*MFL71143003*
(2002-REV03)
www.lg.com
Copyright © 2019 LG Electronics Inc. All Rights Reserved.
ENGLISH
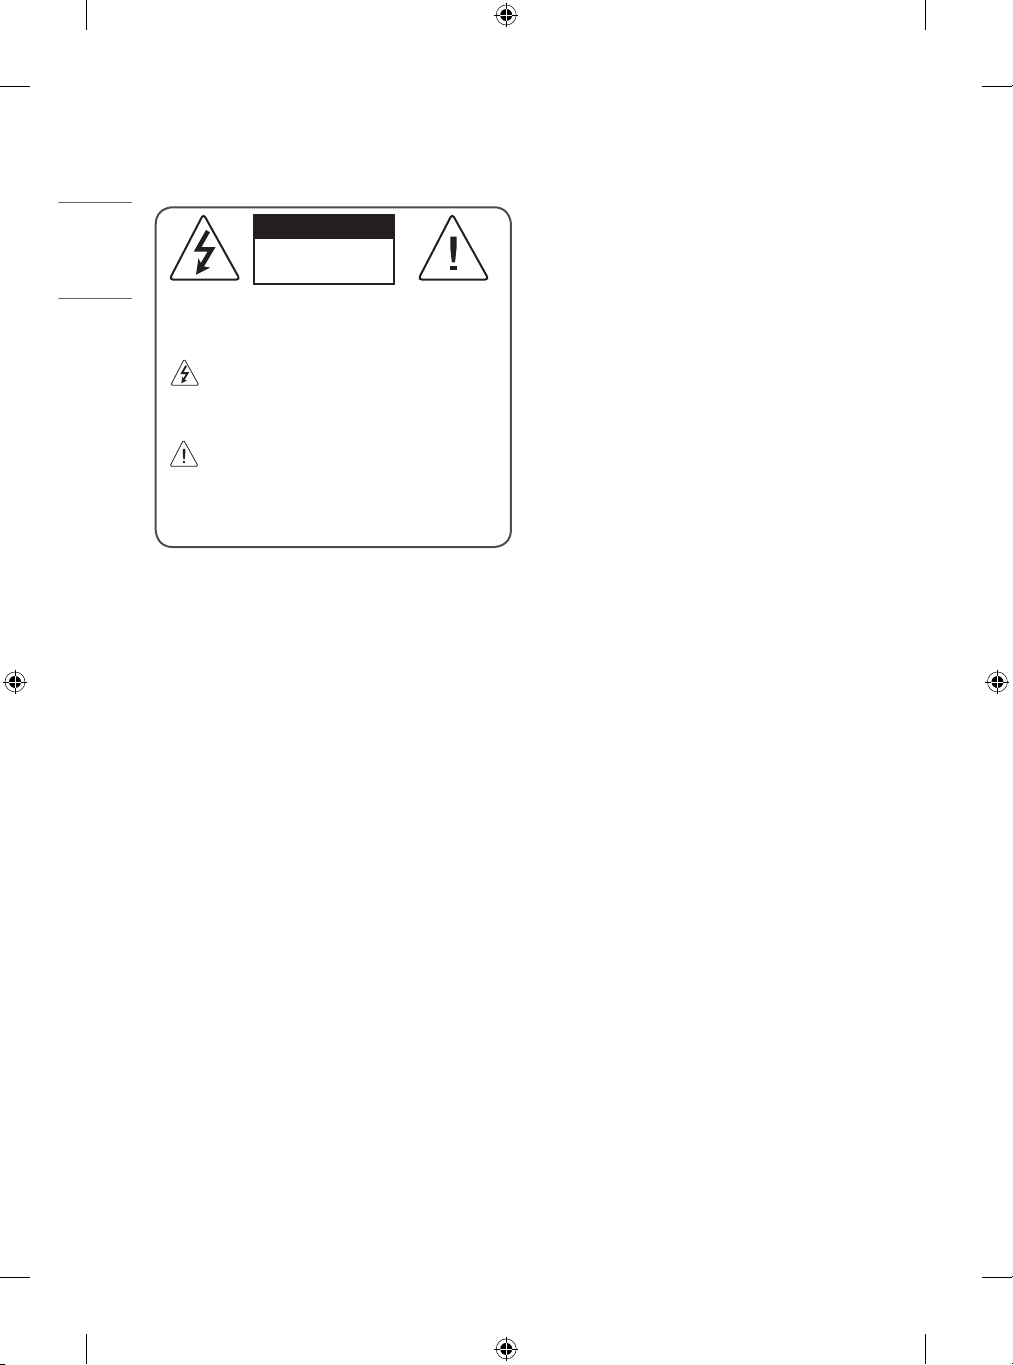
Warning! Safety instructions
CAUTION
RISK OF ELECTRIC SHOCK
DO NOT OPEN
CAUTION : TO REDUCE THE RISK OF ELECTRIC SHOCK, DO NOT
REMOVE COVER (OR BACK). NO USER-SERVICEABLE PARTS INSIDE.
REFER TO QUALIFIED SERVICE PERSONNEL.
This symbol is intended to alert the user to the presence of
uninsulated “dangerous voltage” within the product’s
enclosure that may be of sufficient magnitude to constitute a risk
of electric shock to persons.
This symbol is intended to alert the user to the presence of
important operating and maintenance (servicing)
instructions in the literature accompanying the appliance.
WARNING : TO REDUCE THE RISK OF FIRE AND ELECTRIC SHOCK, DO
NOT EXPOSE THIS PRODUCT TO RAIN OR MOISTURE.
• TO PREVENT THE SPREAD OF FIRE, KEEP CANDLES OR OTHER ITEMS
WITH OPEN FLAMES AWAY FROM THIS PRODUCT AT ALL TIMES.
• Do not place the TV and/or remote control in the following
environments:
- Keep the product away from direct sunlight.
- An area with high humidity such as a bathroom
- Near any heat source such as stoves and other devices that
produce heat.
- Near kitchen counters or humidifiers where they can easily be
exposed to steam or oil.
- An area exposed to rain or wind.
- Do not expose to dripping or splashing and do not place objects
filled with liquids, such as vases, cups, etc. on or over the
apparatus (e.g., on shelves above the unit).
- Near flammable objects such as gasoline or candles, or expose
the TV to direct air conditioning.
- Do not install in excessively dusty places.
Otherwise, this may result in fire, electric shock, combustion/
explosion, malfunction or product deformation.
• Ventilation
- Install your TV where there is proper ventilation. Do not install in
a confined space such as a bookcase.
- Do not install the product on a carpet or cushion.
- Do not block or cover the product with cloth or other materials
while unit is plugged in.
• Take care not to touch the ventilation openings. When watching
the TV for a long period, the ventilation openings may become hot.
• Protect the power cord from physical or mechanical abuse, such as
being twisted, kinked, pinched, closed in a door, or walked upon.
Pay particular attention to plugs, wall outlets, and the point where
the cord exits the device.
• Do not move the TV whilst the Power cord is plugged in.
• Do not use a damaged or loosely fitting power cord.
• Be sure do grasp the plug when unplugging the power cord. Do not
pull on the power cord to unplug the TV.
• Do not connect too many devices to the same AC power outlet as
this could result in fire or electric shock.
• Disconnecting the Device from the Main Power
- The power plug is the disconnecting device. In case of an
emergency, the power plug must remain readily accessible.
• Do not let your children climb or cling onto the TV. Otherwise, the
TV may fall over, which may cause serious injury.
• Outdoor Antenna Grounding (Can differ by country):
- If an outdoor antenna is installed, follow the precautions below.
An outdoor antenna system should not be located in the vicinity
of overhead power lines or other electric light or power circuits,
or where it can come in contact with such power lines or circuits
as death or serious injury can occur.
Be sure the antenna system is grounded to provide some
protection against voltage surges and built-up static charges.
Section 810 of the National Electrical Code (NEC) in the U.S.A.
provides information with respect to proper grounding of the
mast and supporting structure, grounding of the lead-in wire
to an antenna discharge unit, size of grounding conductors,
location of antenna discharge unit, connection to grounding
electrodes and requirements for the grounding electrode.
Antenna grounding according to the National Electrical Code,
ANSI/NFPA 70
2

• Grounding (Except for devices which are not grounded.)
ENGLISH
- TV with a three-prong grounded AC plug must be connected to
a three-prong grounded AC outlet. Ensure that you connect the
earth ground wire to prevent possible electric shock.
• Never touch this apparatus or antenna during a lightning storm.
You may be electrocuted.
• Make sure the power cord is connected securely to the TV and wall
socket if not secured damage to the Plug and socket may occur and
in extreme cases a fire may break out.
• Do not insert metallic or inflammable objects into the product. If a
foreign object is dropped into the product, unplug the power cord
and contact the customer service.
• Do not touch the end of the power cord while it is plugged in. You
may be electrocuted.
• If any of the following occur, unplug the product
immediately and contact your local customer service.
- The product has been damaged.
- If water or another substance enters the product (like an AC
adapter, power cord, or TV).
- If you smell smoke or other odors coming from the TV
- When lightning storms or when unused for long periods of time.
Even the TV is turned off by remote control or button, AC power
source is connected to the unit if not unplugged in.
• Do not use high voltage electrical equipment near the TV (e.g., a
bug zapper). This may result in product malfunction.
• Do not attempt to modify this product in any way without written
authorization from LG Electronics. Accidental fire or electric shock
can occur. Contact your local customer service for service or repair.
Unauthorized modification could void the user’s authority to
operate this product.
• Use only an authorized attachments / accessories approved by
LG Electronics. Otherwise, this may result in fire, electric shock,
malfunction, or product damage.
• Never disassemble the AC adapter or power cord. This may result in
fire or electric shock.
• Handle the adapter carefully to avoid dropping or striking it. An
impact could damage the adapter.
• To reduce the risk of fire or electrical shock, do not touch the TV
with wet hands. If the power cord prongs are wet or covered with
dust, dry the power plug completely or wipe dust off.
• Batteries
- Store the accessories (battery, etc.) in a safe location out of the
reach of children.
- Do not short circuit, disassemble, or allow the batteries to
overheat. Do not dispose of batteries in a fire. Batteries should
not be exposed to excessive heat.
• Moving
- When moving, make sure the product is turned off, unplugged,
and all cables have been removed. It may take 2 or more people
to carry larger TVs. Do not press or put stress on the front panel
of the TV. Otherwise, this may result in product damage, fire
hazard or injury.
• Keep the packing anti-moisture material or vinyl packing out of the
reach of children.
• Do not allow an impact shock, any objects to fall into the product,
and do not drop anything onto the screen.
• Do not press strongly upon the panel with a hand or a sharp
object such as a nail, pencil, or pen, or make a scratch on it. It may
causedamage to screen.
• Cleaning
- When cleaning, unplug the power cord and wipe gently with a
soft/dry cloth. Do not spray water or other liquids directly on the
TV. Do not clean your TV with chemicals including glass cleaner,
any type of air freshener, insecticide, lubricants, wax (car,
industrial), abrasive, thinner, benzene, alcohol etc., which can
damage the product and/or its panel. Otherwise, this may result
in electric shock or product damage.
3
Preparing
A
B
ENGLISH
Separate Purchase
• If the TV is turned on for the first time after it was shipped from the
factory, initialization of the TV may take a few minutes.
• Image shown may differ from your TV.
• Your TV’s OSD (On Screen Display) may differ slightly from that
shown in this manual.
• The available menus and options may differ from the input source
or product model that you are using.
• New features may be added to this TV in the future.
• The device must be easily accessed to a location outlet near the
access. Some devices are not made by turning on / off button,
turning off the device and unplugging the power cord.
• The items supplied with your product may vary depending on the
model.
• Product specifications or contents of this manual may be changed
without prior notice due to upgrade of product functions.
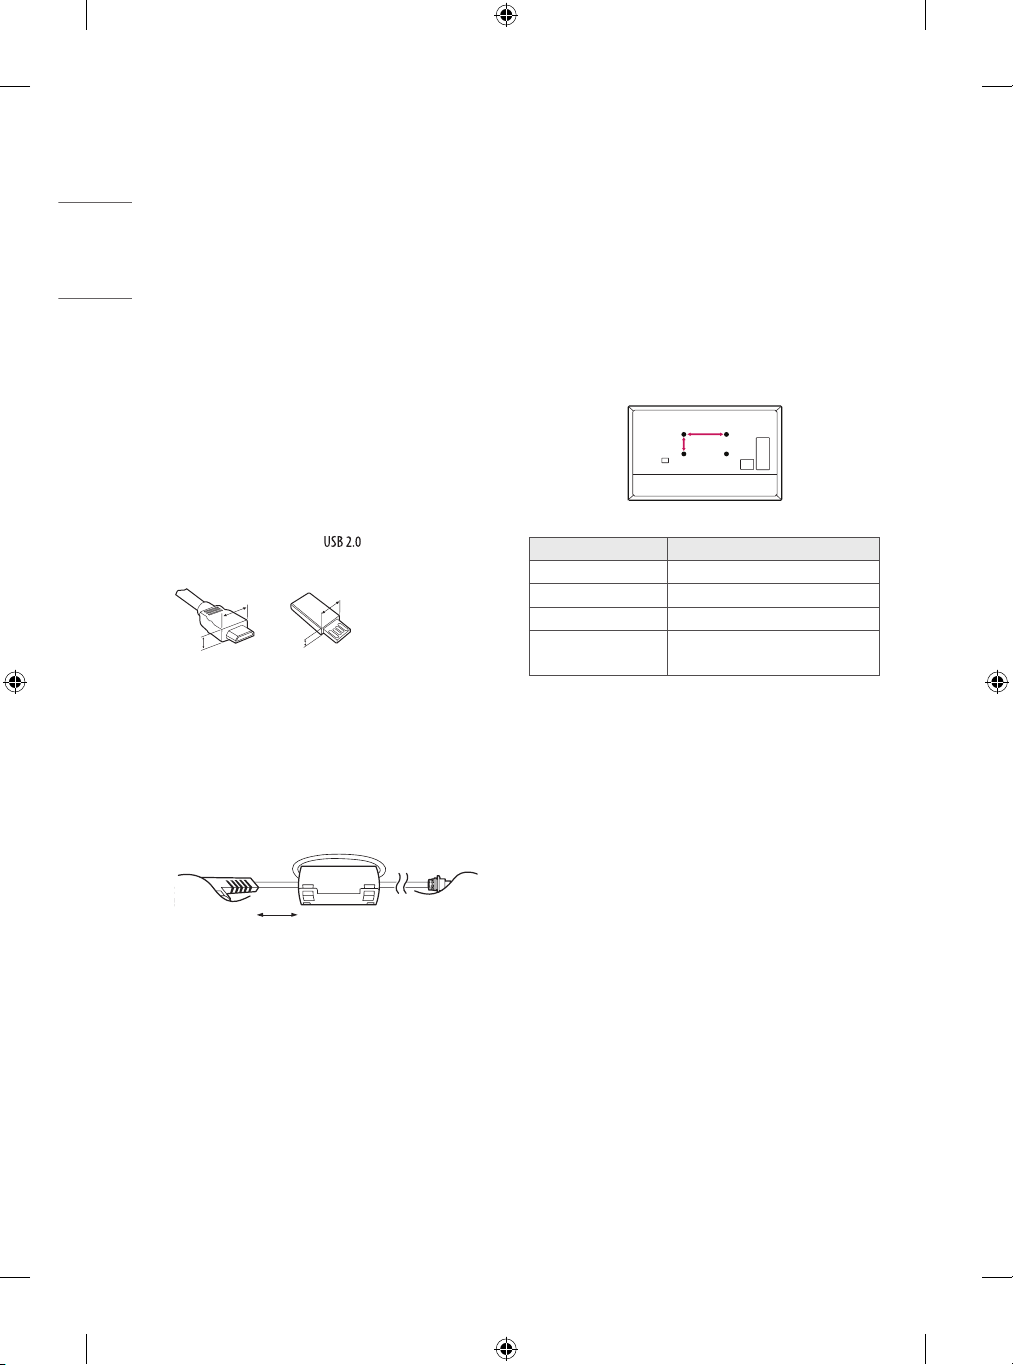
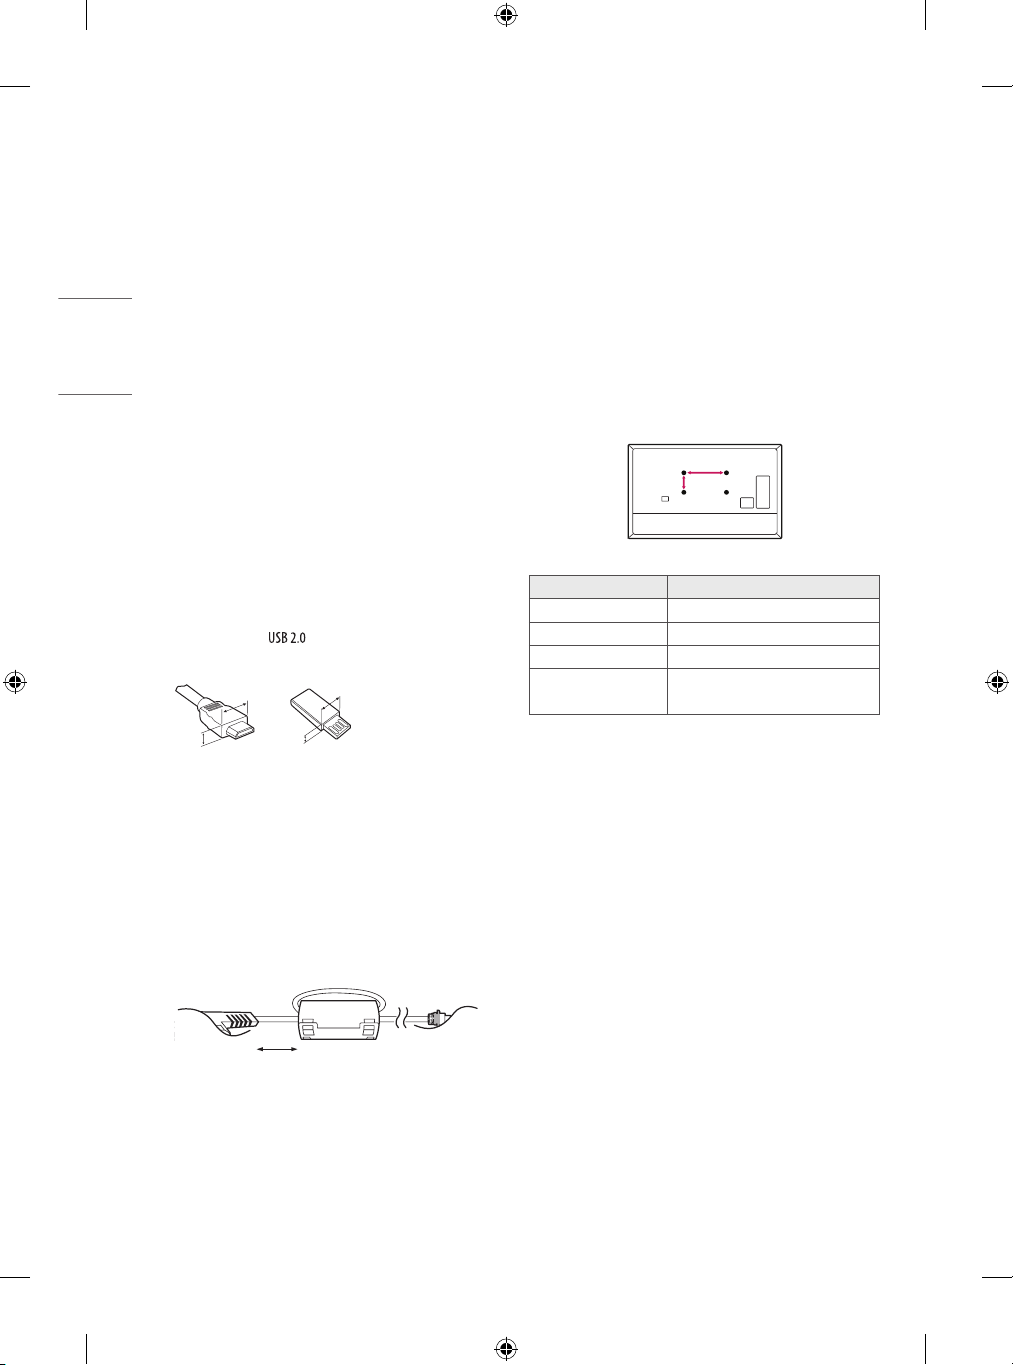
• For an optimal connection, HDMI cables and USB devices should
have bezels less than 10 mm thick and 18 mm width. Use an
extension cable that supports if the USB cable or USB
memory stick does not fit into your TV’s USB port.
B
B
A
• Use a certified cable with the HDMI logo attached.
• If you do not use a certified HDMI cable, the screen may not display
or a connection error may occur. (Recommended HDMI Cable Types)
- Ultra High Speed HDMI®/TM Cable (3 m or less)
• How to use the ferrite core (Depending on model)
- Use the ferrite core to reduce the electromagnetic interference in
the power cord. Wind the power cord on the ferrite core once.
A
* A < 10 mm
* B < 18 mm
Separate purchase items can be changed or modified for quality
improvement without any notification. Contact your dealer to buy these
items. These devices only work with certain models.
The model name or design may be changed depending on the upgrade
of product functions, manufacturer’s circumstances or policies.
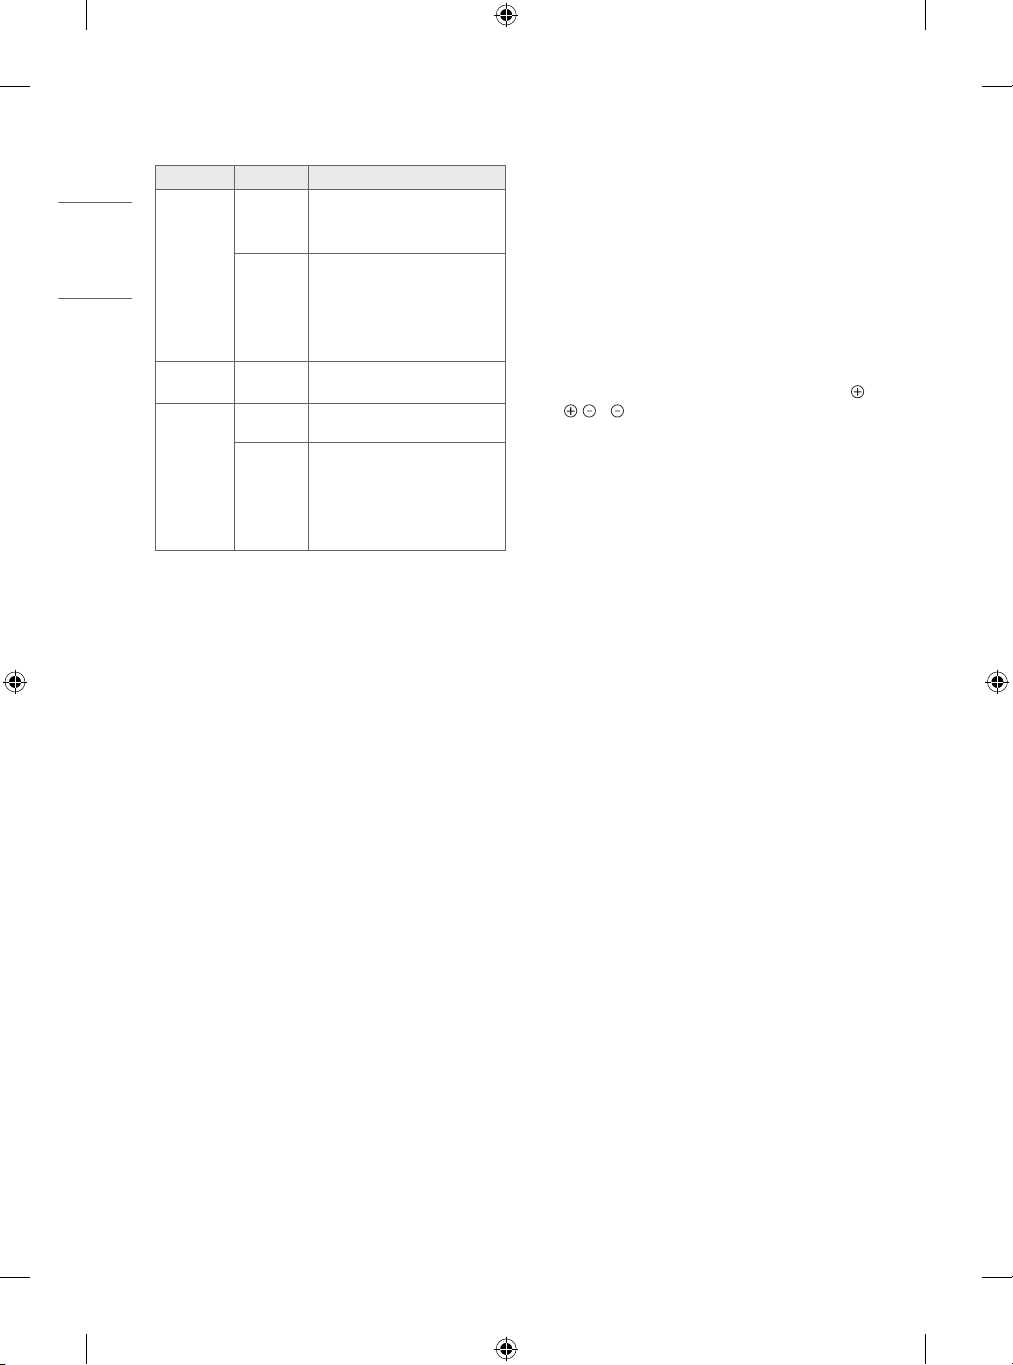
Wall Mounting Bracket
Make sure to use screws and wall mount bracket that meet the VESA
standard. Standard dimensions for the wall mount kits are described in
the following table.
Model 32/43LM55*
VESA (A x B) (mm) 200 x 200
Standard screw M6
Number of screws 4
Wall mount bracket
LSW240B
MSW240
[Wall side]
10 cm (+ / -2 cm)
4
[TV side]
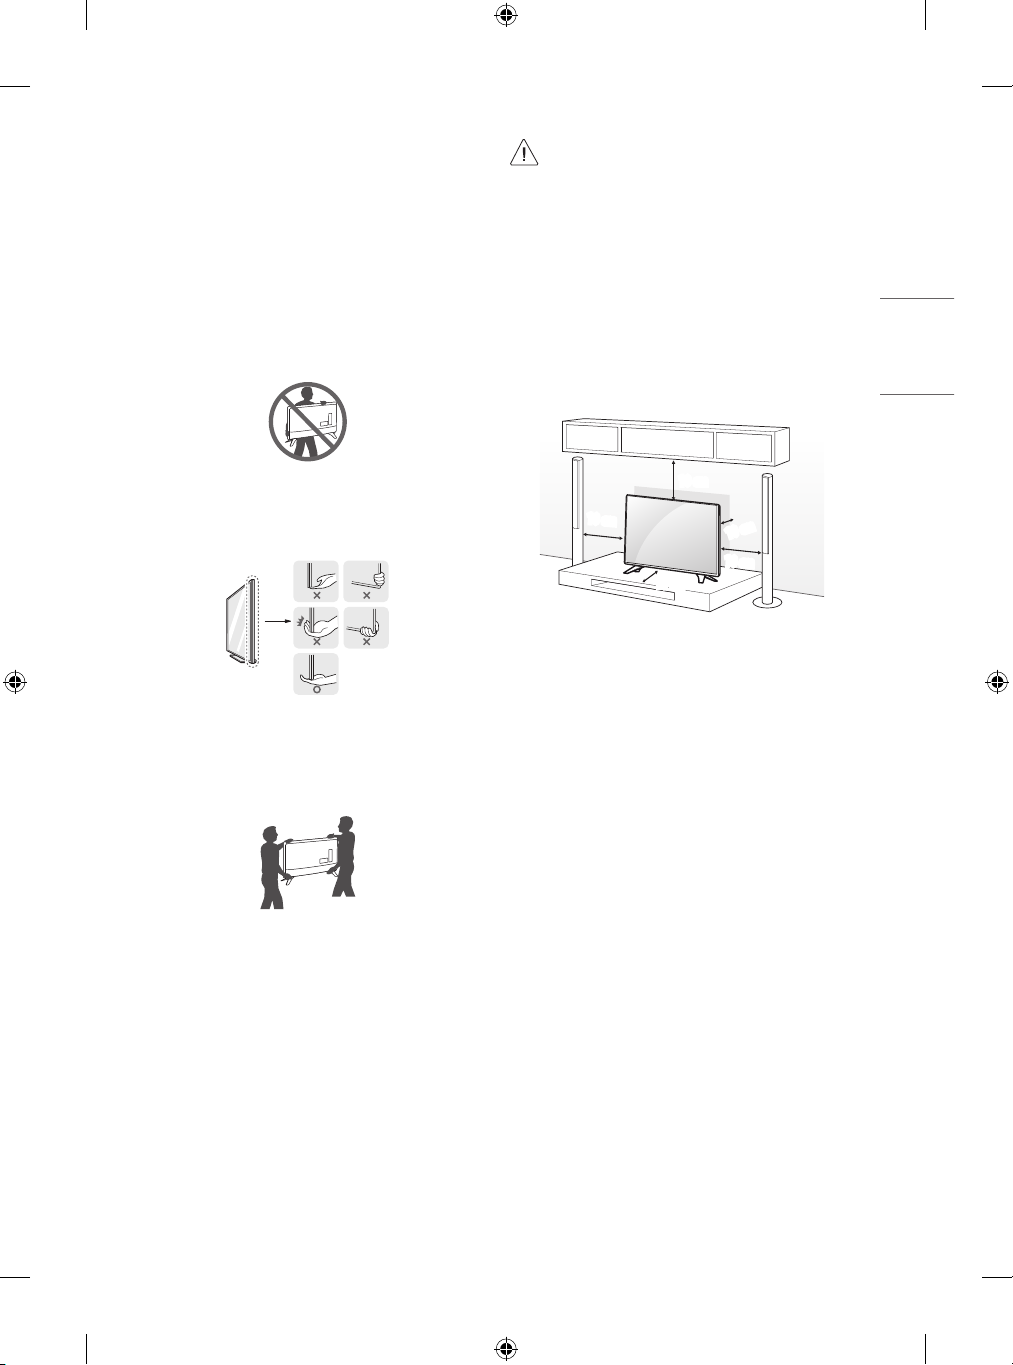
Lifting and moving the TV
ENGLISH
Please note the following advice to prevent the TV from being scratched
or damaged and for safe transportation regardless of its type and size.
• It is recommended to move the TV in the box or packing material
that the TV originally came in.
• Before moving or lifting the TV, disconnect the power cord and all
cables.
• When holding the TV, the screen should face away from you to
avoid damage.
• Avoid touching the screen at all times, as this may result in
damage to the screen.
• When attaching the stand to the TV set, place the screen
facing down on a cushioned table or flat surface to protect
the screen from scratches.
Mounting on the Table
1 Lift and tilt the TV into its upright position on a table.
• Leave a 10 cm (minimum) space from the wall for proper
ventilation.
• Hold the top and bottom of the TV frame firmly. Make sure not to
hold the transparent part, speaker, or speaker grill area.
• When transporting a large TV, there should be at least 2 people.
• When transporting the TV by hand, hold the TV as shown in the
following illustration.
• When transporting the TV, do not expose the TV to jolts or excessive
vibration.
• When transporting the TV, keep the TV upright, never turn the TV
on its side or tilt towards the left or right.
• Do not apply excessive pressure to cause flexing / bending of frame
chassis as it may damage screen.
• When handling the TV, be careful not to damage the protruding
buttons.
10 cm
10 cm
10 cm
(Depending on model)
2 Connect the power cord to a wall outlet.
10 cm
10 cm
5

ENGLISH
• Do not apply foreign substances (oils, lubricants, etc.) to
the screw parts when assembling the product. (Doing so
may damage the product.)
• If you install the TV on a stand, you need to take actions
to prevent the product from overturning. Otherwise, the
product may fall over, which may cause injury.
• Do not use any unapproved items to ensure the safety and
product life span.
• Any damage or injuries caused by using unapproved items
are not covered by the manufacturer’s warranty.
• Make sure that the screws are inserted correctly and
fastened securely. (If they are not fastened securely
enough, the TV may tilt forward after being installed.)
Do not use too much force and over tighten the screws;
otherwise screw may be damaged and not tighten
correctly.
• If a television is not positioned in a sufficiently stable
location, it can be potentially hazardous due to falling.
Many injuries, particularly to children, can be avoided by
taking simple precautions such as:
- Using cabinets or stands recommended by the
manufacturer of the television.
- Only using furniture that can safely support the
television.
- Ensuring the television is not overhanging the edge of
the supporting furniture.
- Not placing the television on tall furniture (for
example, cupboards or bookcases) without anchoring
both the furniture and the television to a suitable
support.
- Not standing the televisions on cloth or other
materials placed between the television and
supporting furniture.
- Educating children about the dangers of climbing on
furniture to reach the television or its controls.
Securing TV to the Wall
(Depending on model)
1 Insert and tighten the eye-bolts, or TV brackets and bolts on the
back of the TV.
• If there are bolts inserted at the eye-bolts position, remove the
bolts first.
2 Mount the wall brackets with the bolts to the wall. Match the
location of the wall bracket and the eye-bolts on the rear of the TV.
3 Connect the eye-bolts and wall brackets tightly with a sturdy rope.
Make sure to keep the rope horizontal with the flat surface.
• Use a platform or cabinet that is strong and large enough to
support the TV securely.
• Brackets, bolts and ropes are not provided. You can obtain
additional accessories from your local dealer.
6

Mounting to the Wall
ENGLISH
Attach an optional wall mount bracket at the rear of the TV carefully
and install the wall mount bracket on a solid wall perpendicular to
the floor. When you attach the TV to other building materials, please
contact qualified personnel. LG recommends that wall mounting be
performed by a qualified professional installer. We recommend the use
of LG’s wall mount bracket. LG’s wall mount bracket is easy to move with
cables connected. When you do not use LG’s wall mount bracket, please
use a wall mount bracket where the device is adequately secured to the
wall with enough space to allow connectivity to external devices. It is
advised to connect all the cables before installing fixed wall mounts.
10 cm
10 cm
(Depending on model)
10 cm
10 cm
10 cm
• When installing the wall mounting bracket, it is recommended to
cover the stand hole using tape, in order to prevent the influx of
dust and insects. (Depending on model)
Stand hole
• Remove the stand before installing the TV on a wall mount
by performing the stand attachment in reverse.
• For more information of screws and wall mount bracket,
refer to the Separate Purchase.
• If you intend to mount the product to a wall, attach VESA
standard mounting interface (optional parts) to the back
of the product. When you install the set to use the wall
mounting bracket (optional parts), fix it carefully so as
not to drop.
• When mounting a TV on the wall, make sure not to install
the TV by hanging the power and signal cables on the back
of the TV.
• Do not install this product on a wall if it could be exposed
to oil or oil mist. This may damage the product and cause
it to fall.
Connections
Connect various external devices to the TV and switch input modes to
select an external device. For more information of external device’s
connection, refer to the manual provided with each device.
Antenna/Cable
Connect the TV to a wall antenna socket with an RF cable (75 Ω).
• Use a signal splitter to use more than 2 TVs.
• If the image quality is poor, install a signal amplifier properly to
improve the image quality.
• If the image quality is poor with an antenna connected, try to
realign the antenna in the correct direction.
• An antenna cable and converter are not supplied.
Satellite dish
Connect the TV to a satellite dish to a satellite socket with a satellite RF
cable (75 Ω). (Depending on model)
7

ENGLISH
Other connections
Connect your TV to external devices. For the best picture and audio
quality, connect the external device and the TV with the HDMI cable.
Some separate cable is not provided.
HDMI
• When connecting the HDMI cable, the product and external devices
should be turned off and unplugged.
• Supported HDMI Audio format (Depending on model) :
DTS (44.1 kHz, 48 kHz),
Dolby Digital / Dolby Digital Plus (32 kHz, 44.1 kHz, 48 kHz),
PCM (32 kHz, 44.1 kHz, 48 kHz, 96 kHz, 192 kHz)
External Devices
Available external devices are: Blu-ray player, HD receivers, DVD players,
VCRs, audio systems, USB storage devices, PC, gaming devices, and
other external devices.
• The external device connection may differ from the model.
• Connect external devices to the TV regardless of the order of the
TV port.
• If you record a TV program on a Blu-ray/DVD recorder or VCR, make
sure to connect the TV signal input cable to the TV through a DVD
recorder or VCR. For more information of recording, refer to the
manual provided with the connected device.
• Refer to the external equipment’s manual for operating
instructions.
• If you connect a gaming device to the TV, use the cable supplied
with the gaming device.
• In PC mode, there may be noise associated with the resolution,
vertical pattern, contrast or brightness. If noise is present, change
the PC output to another resolution, change the refresh rate to
another rate or adjust the brightness and contrast on the PICTURE
menu until the picture is clear.
• In PC mode, some resolution settings may not work properly
depending on the graphics card.
Using Button
You can simply operate the TV functions, using the button.
Basic functions
Power On (Press)
Power Off (Press and Hold)
Menu Control (Press1)
Menu Selection (Press and Hold2)
1 You can access and adjust the menu by pressing the button when
TV is on.
2 You can use the function when you access menu control.
Adjusting the menu
When the TV is turned on, press the button one time. You can adjust
the Menu items using the button.
Turns the power off.
Changes the input source.
Scrolls through the saved programmes.
Adjusts the volume level.
8
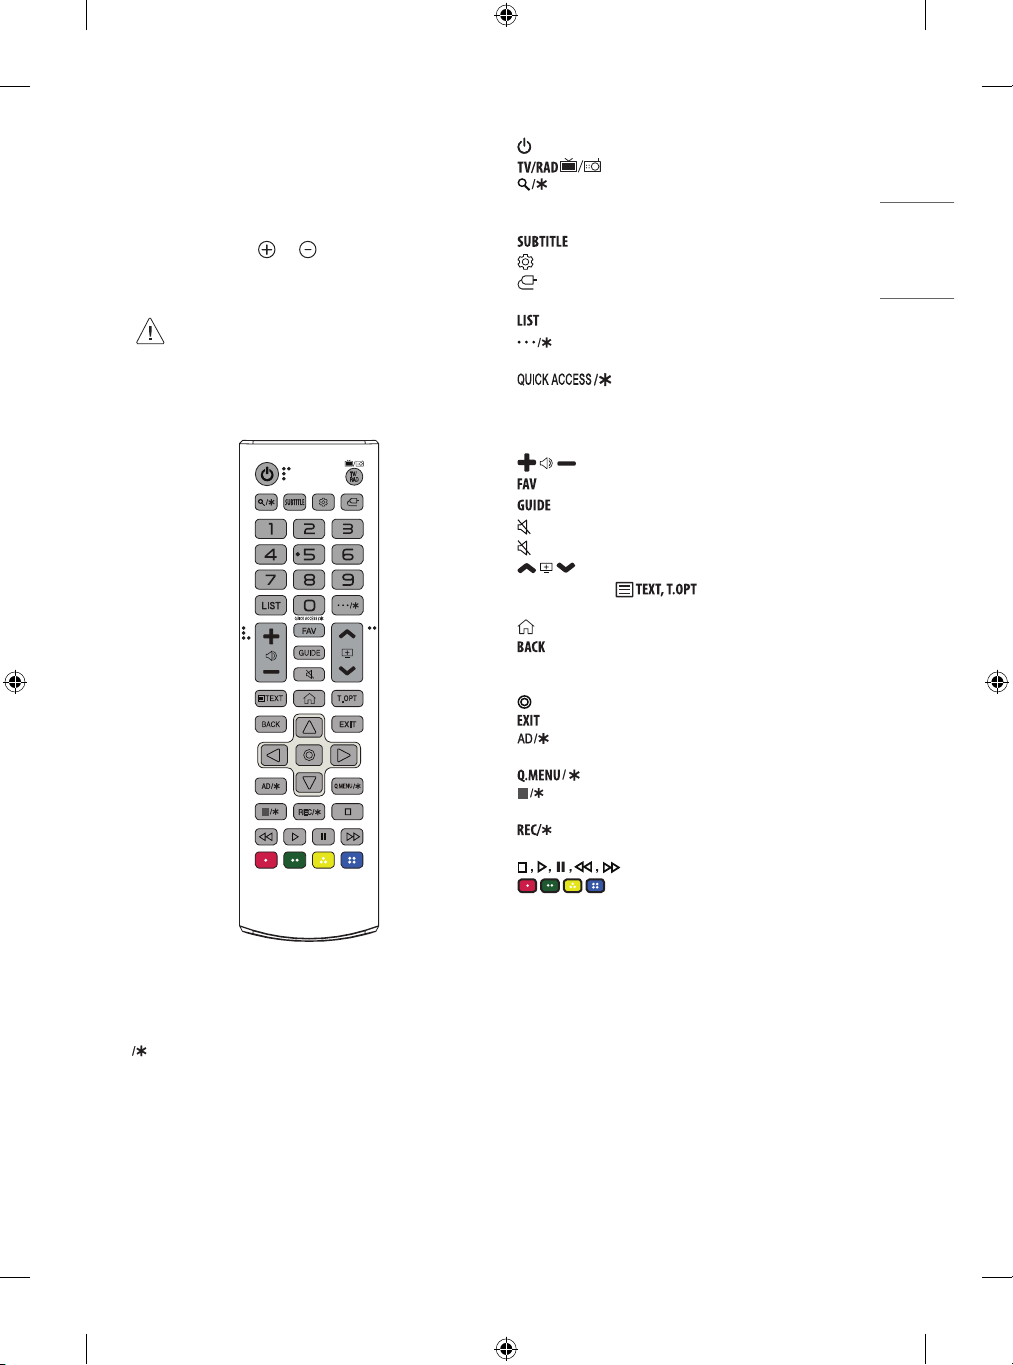
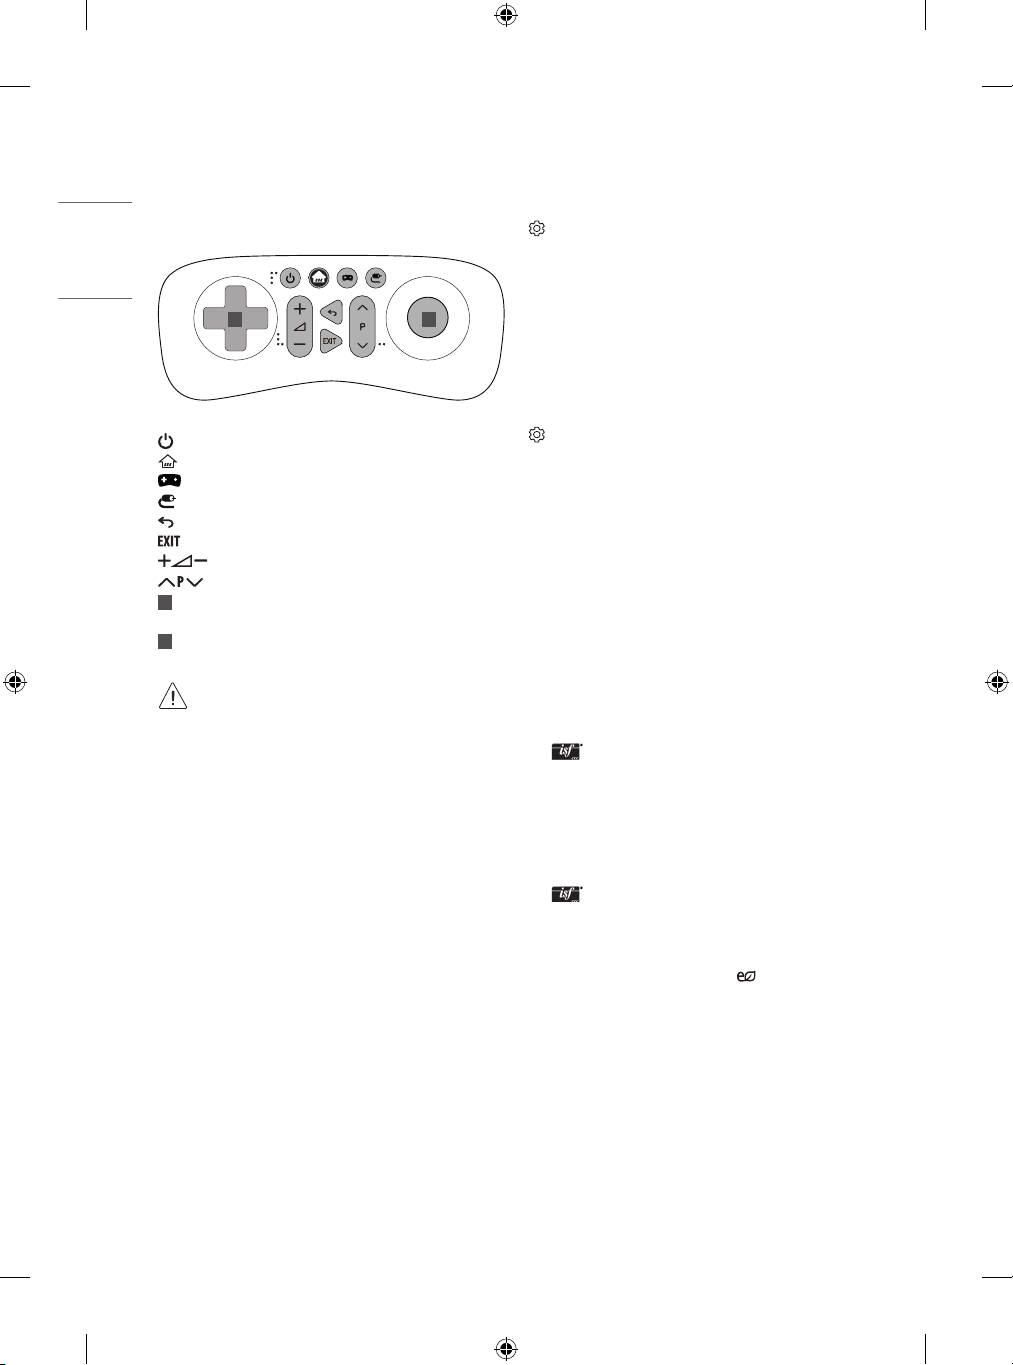
Using Remote Control
ENGLISH
The descriptions in this manual are based on the buttons on the remote
control. Please read this manual carefully and use the TV correctly.
To replace batteries, open the battery cover, replace batteries
(1.5VAAA) matching the and ends to the label inside the
compartment, and close the battery cover. To remove the batteries,
perform the installation actions in reverse.
• In Analogue TV and some countries, some remote control
buttons may not work.
Make sure to point the remote control toward the remote control sensor
on the TV.
1
(POWER) Turns the TV on or off.
Selects Radio, TV and DTV programme.
(SEARCH) Search for content such as TV programmes, movies
and other videos, or perform a web search by entering text in the
search bar. (Depending on model)
Recalls your preferred subtitle in digital mode.
(Settings) Accesses the Settings menu.
(INPUT) Changes the input source.
Number buttons Enters numbers.
Accesses the saved programmes list.
(MORE ACTIONS) Displays more remote control functions.
(Depending on model)
**
Edits QUICK ACCESS.
-QUICK ACCESS is a feature that allows you to enter a specified app or
Live TV directly by pressing and holding the number buttons.
(Depending on model)
Adjusts the volume level.
Accesses your Favourite programme list.
Shows programme guide.
(MUTE) Mutes all sounds.
**
(MUTE) Accesses the [Accessibility] menu.
Scrolls through the saved programmes.
Teletext buttons ( ) These buttons are used for
teletext.
(HOME) Accesses the Home menu.
Returns to the previous level.
Navigation buttons (up/down/left/right) Scrolls through menus
or options.
(OK) Selects menus or options and confirms your input.
Clears on-screen displays and returns to TV viewing.
Audio descriptions function will be enabled. (Depending on
model)
Accesses the Quick menus. (Depending on model)
1
Streaming Service buttons Connects to the Video Streaming
Service. (Depending on model)
Starts to record and displays record menu. (Only Time
Ready
Machine
supported model) (Depending on model)
(Control buttons) Controls media contents.
, , , These access special functions in some menus.
(Some buttons and services may not be provided depending on models
or regions.)
**
To use the button, press and hold for more than 1 second.
: Some TVs may not support the function of this key.
9
Game remote functions
ENGLISH
Settings
(Depending on model)
Game Hot Key works only in normal TV viewing mode. (Not in USB
Playback)
1 2
(POWER) Turns TV on or off.
(HOME) Accesses the Home menu.
(Game) Opens Game menu.
(Input list) Changes the input source.
(Back) Returns to the previous level.
Clears on-screen displays and returns to TV viewing.
Adjusts the volume level.
Scrolls through the saved programmes.
1
Navigation buttons (up/down/left/right) Scrolls through
menus or options.
2
OK Game selection / Game play
• Do not mix new batteries with old batteries. This may
cause the batteries to overheat and leak.
• Failure to match the correct polarities of the battery may
cause the battery to burst or leak, resulting in fire, personal
injury, or ambient pollution.
• This apparatus uses batteries. In your community there
might be regulations that require you to dispose of these
batteries properly due to environmental considerations.
Please contact your local authorities for disposal or
recycling information.
• Batteries inside or inside the product shall not be exposed
to excessive heat such as sunshine, fire or the like.
Automatically Setting Up Programme
(Settings) → [Programmes] → [Auto Tuning]
Automatically tunes the programmes.
• If Input Source is not connected properly, programme registration
may not work.
• [Auto Tuning] only finds programmes that are currently
broadcasting.
• If [Lock System] is turned on, a pop-up window will appear asking
for password.
To select Picture Mode
(Settings) → [Picture] → [Picture Mode Settings] → [Picture
Mode]
Select the picture mode optimized for the viewing environment or the
programme.
• [Vivid]: Heightens contrast, brightness and sharpness to display
vivid images.
• [Standard]: Displays images in standard levels of contrast,
brightness and sharpness.
• [Eco] / [APS]: (Depending on model)
The Energy Saver feature changes settings on the TV to reduce
power consumption.
• [Cinema] / [Game]: Displays the optimum picture for movie, game.
• [Soccer] / [Cricket]: (Depending on model)
Optimizes the video image for high and dynamic actions by
emphasizing primary colours such as white, grass, or sky blue.
• [Exper t1] / [Expert2]: Menu for adjusting picture quality
that allows experts and amateurs to enjoy the best TV viewing. This
is the adjustment menu provided for ISF-certified picture tuning
professionals. (ISF logo can only be used on ISF-certified TVs.)
ISFccc: Imaging Science Foundation Certified Calibration Control
• Depending on input signal, available range of picture modes may
differ.
• Exper t mode is for picture tuning professionals to control
and fine-tune using a specific image. For normal images, the
effects may not be dramatic.
• The ISF function is only available on some models.
• Changing [Picture Mode] may modify [Energy Saving]
and [Motion Eye Care] settings, which can also affect energy
consumption.
10

Fine-tuning Picture Mode
ENGLISH
(Settings) → [Picture] → [Picture Mode Settings]
This feature allows you to adjust the selected picture mode in detail.
• [Backlight]: Controls the level of screen brightness by adjusting the
backlight. The closer to 100, the brighter the screen.
• [Contrast]: Adjusts the contrast of the bright and dark areas of the
picture. The closer to 100, the higher the contrast.
• [Brightness]: Adjusts the overall screen brightness. The closer to
100, the brighter the screen.
• [Sharpness]: Adjusts the sharpness of the image. The closer to 50,
the sharper and clearer the image.
• [Colour]: Tones down or up the colours displayed on the screen. The
closer to 100, the deeper the colour.
• [Tint]: Adjusts the colour balance between red and green displayed
on the screen. The closer to Red 50, the more red the colour will be.
The closer to Green 50, the more green the colour will be.
• [Colour Temperature]: Adjusts the colour temperature from cold
to warm.
• Depending on input signal or other picture settings, the range of
detailed items for adjustment may differ.
To set advanced controls
(Settings) → [Picture] → [Picture Mode Settings] → [Advanced
Controls] / [Expert Controls]
Calibrates the screen for each picture mode; or adjusts picture settings
for a special screen.
• [Dynamic Contrast]: Adjusts the contrast to the optimal level
according to the brightness of the image.
• [Dynamic Colour]: Adjusts colours to make the image appear in
more natural colours.
• [Preferred Colour]: Adjust the colours of skin, grass and sky to your
personal preferences.
• [Gamma]: Sets the gradation curve according to the output of
picture signal in relation to the input signal.
• [Colour Gamut]: Selects the range of colours that can be expressed.
• [Colour Filter]: Filters a specific colour spectrum in RGB colours to
fine-tune colour saturation and hue accurately.
• [White Balance]: Adjusts the overall tone of the screen as desired.
• [Colour Management System]: This is a system that experts use
when they adjust colour with a test pattern. They can select from
six colour areas (Red / Green / Blue / Cyan / Magenta / Yellow)
without affecting other colours. For normal images, adjustments
may not result in noticeable colour changes.
• Depending on input signal or other picture settings, the range of
detailed items for adjustment may differ.
To set additional picture options
(Settings) → [Picture] → [Picture Mode Settings] → [Picture
Options]
Adjusts detailed setting for images.
• [Noise Reduction]: Eliminates noise in the picture.
• [MPEG Noise Reduction]: Eliminates noise generated while creating
digital picture signals.
• [Black Level]: Adjusts the brightness and contrast of the screen
to suit the black level of the input picture by using the blackness
(black level) of the screen.
• [Real Cinema]: Optimizes the screen for movie viewing.
• [Motion Eye Care]: Automatically adjusts brightness and reduces
image blur based on image data to reduce eyestrain.
• Depending on input signal or other picture settings, the range of
detailed items for adjustment may differ.
Resetting picture settings
(Settings) → [Picture] → [Picture Mode Settings] → [Picture
Reset]
Resets picture settings that the user customizes. Each picture mode is
reset. Select the picture mode you wish to reset.
To use Energy Saving feature
(Settings) → [Picture] → [Energy Saving]
Reduces power consumption by adjusting screen brightness.
• [Auto]: (Depending on model)
The TV sensor detects the ambient lighting and automatically
adjusts the screen brightness.
• [Off]: Turns off the [Energy Saving] mode.
• [Minimum] / [Medium] / [Maximum]: Applies the pre-set
[Energy Saving] mode.
• [Screen Off]: Screen is turned off and only sound is played. Press
any button except Power button on the remote control to turn the
screen back on.
• Depending on the [Energy Saving] ([Auto] / [Maximum]), you
may not be able to adjust the [Backlight].
In this case, navigate to (Settings) → [Picture] →
[Energy Saving] and set to [Off] or [Minimum].
11
ENGLISH
To use Eye Comfort Mode feature
(Settings) → [Picture] → [Additional Settings] → [Eye Comfort
Mode]
If you turn this option on, colour temperature will be automatically
adjusted to reduce eye strain.
• On: Automatically adjusts the screen colour temperature.
• Off: Turns off the [Eye Comfort Mode].
Capturing the TV screen
(Depending on model)
You can capture your TV screen.
1 Connect the USB device to the USB port on the side or back of the TV.
2 During watch the live broadcast, press the button. (Only DTV)
3 Press the [SCREEN CAPTURE] button left corner of the screen. (or
press the (Red) button on the Remote Control.)
4 Screen-captured image will be saved in connected USB device.
• Applies to digital broadcasting.
• You can view screen-captured images in the [My Media] → ’Screen
Capture’ Folder.
• The captured image is saved in the same size as the original image.
Selecting Sound Mode
(Settings) → [Sound] → [Sound Mode Settings] → [Sound
Mode]
Adjusts TV audio to an optimal level based on a selected sound mode.
• [Standard]: Optimizes the sound for all types of content.
• [Clear Voice]: Boosts voice clarity from the TV.
• [Music] / [Bollywood]: (Depending on model) Optimizes the sound
for music.
• [Cinema]: Optimizes the sound for cinemas.
• [Soccer] / [Cricket]: (Depending on model) Optimizes the sound
for sports.
• [Game]: Optimizes the sound for gameplay.
Adjusting audio balance
(Settings) → [Sound] → [Sound Mode Settings] → [Balance]
Adjust the volume of the left and right speakers.
Using the Sound Effect function
(Settings) → [Sound] → [Sound Mode Settings]
The user can select various sound effects.
• [Virtual Surround]: Enjoy an immersive soundscape with the virtual
multi-channel surround sound effect.
• [Equalizer]: Set the desired sound by adjusting the equalizer
directly.
• [Reset]: Reset the sound effect settings.
• This is only available if [Sound Mode] is set to [Standard].
To use TV Speaker
(Settings) → [Sound] → [Sound Out] → [Internal TV Speaker]
(Depending on model)
Sound is output through the TV speaker.
To use External Speaker
(Settings) → [Sound] → [Sound Out] → [Audio Out (Optical)]
(Depending on model)
Sound is output through the speaker connected to the optical port.
• SimpLink is supported.
To use Internal TV Speaker + Audio Out
(Optical)
(Settings) → [Sound] → [Sound Out] → [Internal TV Speaker +
Audio Out (Optical)]
(Depending on model)
Audio is played through the TV’s built-in speakers and the audio device
connected to the digital optical audio output port simultaneously.
To connect and use LG audio device
(Settings) → [Sound] → [Sound Out] → [LG Sound Sync (Optical)]
(Depending on model)
Connect LG audio device with the logo to the optical digital audio
output port. LG audio device allows you to enjoy rich powerful sound
easily.
12
To use Digital Sound Out
ENGLISH
(Settings) → [Sound] → [Sound Out] → [Internal TV Speaker +
Audio Out (Optical)] → [Digital Sound Out]
(Depending on model)
Sets up [Digital Sound Out]
Item Audio Input Digital Audio Output
MPEG
[Auto]
[PCM] All PCM
• Supported DTV Audio: MPEG, Dolby Digital, Dolby Digital Plus,
HE-AAC
Dolby Digital
Dolby Digital Plus
HE-AAC
PCM
Dolby Digital
Dolby Digital
Dolby Digital
To synchronize audio and video
(Settings) → [Sound] → [AV Sync Adjustment]
(Depending on model)
Synchronizes video and audio directly when they do not match. If you
set [AV Sync Adjustment] to on, you can adjust the sound output (TV
speakers or External Speaker) to the screen image.
If you select the [Bypass], Outputs the broadcast signals or the sound
from external devices without any audio delay. The audio may be
output before the video because of the time the TV takes to process the
video input.
Using Music Catch
(Depending on model)
It is a function you can use to record the music from the TV any time.
1 Connect the USB device to the USB port on the side or back of the TV.
2 During watch the Live broadcast, press the button.
3 Press the [START MUSIC RECORDING] button right corner of the
screen.
4 If you want to stop the music recording, press the [STOP MUSIC
RECORDING] button.
• If there is not enough remaining space in the USB device, Music
Catch may not work properly. To use Music Catch function, you need
the USB device which has at least 100 MB.
• Stored files can be viewed in the [My Media] → ’Music Catch’
Folder, and you can open them on your PC or portable devices.
• Recorded files are stored in .wav format.
• If you switch apps or input during recording, recording
automatically ends and the recorded files will be saved.
• With the Music Catch function, you can play a music for up to two
hours.
• If the USB device is removed by force while music recording, the
music recording will not complete properly.
To use SIMPLINK
(Depending on model)
SIMPLINK is a feature that enables you to control and manage various
multimedia devices conveniently via the SIMPLINK menu.
1 Connect the TV’s HDMI IN terminal and the SIMPLINK device’s HDMI
output terminal using an HDMI cable.
• (Depending on model)
For home theatre units with a SIMPLINK function, connect HDMI
terminals as above, and use an optical cable to connect Optical
Digital Audio Out from the TV to Optical Digital Audio In of the
SIMPLINK device.
2 Select (Settings) → [General] → [SIMPLINK].
SIMPLINK menu window appears.
3 In SIMPLINK Setting window, set SIMPLINK function to [On].
4 Configure the [Auto Power Sync] settings to on or off.
• You can also set the SIMPLINK in (HOME) → [Inputs] →
[SIMPLINK]. In SIMPLINK menu window, selects the device you
want to control.
• This function is only compatible with devices with the SIMPLINK
logo.
• To use the SIMPLINK function, you need to use a high-speed HDMI®
cable (with CEC (Consumer Electronics Control) feature added).
High-speed HDMI® cables have the No. 13 pin connected for
information exchange between devices.
• If you switch to another input, the SIMPLINK device will stop.
• If a third-party device with the HDMI-CEC function is also used, the
SIMPLINK device may not work normally.
• (Depending on model)
If you select or play media from the device with a home theatre
function, the [HT Speaker] (Speaker) is automatically connected.
Be sure to connect with an optical cable (sold separately) to use the
[HT Speaker] (Speaker) function.
13

ENGLISH
SIMPLINK function description
• Direct Play: Plays the multimedia device on the TV instantly.
• Controlling devices with the TV remote control: Manages the
multimedia device with the TV remote control.
• Main Power Off: If [Auto Power Sync] is set to on in the SIMPLINK
settings and turn off your TV, the devices connected to your TV via
SIMPLINK will also be turned off.
• Main Power On: If [Auto Power Sync] is set to on in the SIMPLINK
settings, turning on a SIMPLINK-linked device will turn the TV on.
(Behavior may vary depending on connected device.)
• [Speaker]: (Depending on model)
Select speaker either on the home theatre unit or the TV.
To set password
(Settings) → [Safety] → [Set Password]
Sets or changes the TV password.
• The initial password is set to ‘0000’.
To return Reset to Initial Settings
(Settings) → [General] → [Reset to Initial Settings]
All stored information is deleted and TV settings are reset.
The TV turns itself off and back on, and all settings are reset.
• When [Lock System] is in place, a pop-up window appears and asks
for password.
• Do not turn off the power during initialization.
To remove the USB device
Select the connected USB HDD from (HOME) → [Inputs] and select
the [Eject] button to disconnect the USB HDD storage device.
When you see a message that the USB device has been removed,
separate the device from the TV.
• Once a USB device has been selected for removal, it can no longer
be read. Remove the USB storage device and then re-connect it.
Using a USB storage device - warning
• If the USB storage device has a built-in auto recognition
programme or uses its own driver, it may not work.
• Some USB storage devices may not work or may work incorrectly.
• Use only USB storage devices formatted with the Windows FAT32
or NTFS File System.
• For external USB HDDs, it is recommended that you use devices
with a rated voltage of less than 5 V and a rated current of less
than 500 mA.
• It is recommended that you use USB memory sticks of 32 GB or less
and USB HDDs of 2 TB or less.
• If a USB HDD with power-saving function does not work properly,
turn the power off and on. For more information, refer to the user
manual of the USB HDD.
• Data in the USB storage device can be damaged, so be sure to back
up important files to other devices. Data maintenance is the user’s
responsibility and the manufacturer is not responsible for data loss.
14
My Media supporting file
ENGLISH
• Maximum data transfer rate: 20 Mbps (Mega bit per second)
• External supported subtitle formats : *.smi, *.srt, *.sub
(MicroDVD, SubViewer1.0/2.0), *.ass, *.ssa, *.txt (TMplayer), *.psb
(PowerDivX)
Supported Video Formats
• Maximum: 1,920 x 1,080 @ 30p Max 20Mbps (Only Motion JPEG
640 x 480 @ 30p)
Extension Codec
MPEG-4 Part2, Xvid, H.264/AVC,
Video
.asf, .wmv
.avi
.ts, .trp, .tp,
.mts, .m2ts
.vob
.mp4, .m4v,
.mov
.mkv
motion JPEG
.mpg, .mpeg,
.mpe
.dat
.flv
.3gp
1
.rm1, .rmvb
1 Depending on country
VC1(WMV3, WVC1)
WMA Standard, WMA9(Pro), MP3, AAC,
Audio
AC3
Video MPEG-2, MPEG-4 Part2, Xvid, H.264/AVC
HE-AAC, LPCM, ADPCM, MPEG-1 Layer I,
Audio
MPEG-1 Layer II, Dolby Digital, MPEG-1
Layer III (MP3)
Video H.264/AVC, MPEG-2, H.265/HEVC
MPEG-1 Layer I, MPEG-1 Layer II, MPEG-1
Audio
Layer III (MP3), Dolby Digital, Dolby Digital
Plus, AAC, HE-AAC
Video MPEG-1, MPEG-2
Dolby Digital, MPEG-1 Layer I, MPEG-1
Audio
Layer II, DVD-LPCM
Video MPEG-2, MPEG-4 Part2, Xvid, H.264/AVC
Audio AAC, MPEG-1 Layer III (MP3)
Video MPEG-2, MPEG-4 Part2, Xvid, H.264/AVC
HE-AAC, Dolby Digital, MPEG-1 Layer III
Audio
(MP3), LPCM
Video MJPEG
Audio LPCM, ADPCM
Video MPEG-1, MPEG-2
MPEG-1 Layer I, MPEG-1 Layer II, Dolby
Audio
Digital, LPCM
Video MPEG-1, MPEG-2
Audio MP2
Video Sorenson H.263, H.264/AVC
Audio MP3, AAC, HE-AAC
Video H.264/AVC, MPEG-4 Part2
Audio AAC, AMR(NB/WB)
Video RV30, RV40
Audio AAC, HE-AAC
Supported Audio Formats
File Format Item Info
Bit rate 32 Kbps ~ 320 Kbps
.MP3
.AAC
.M4A
.WAV
.WMA
.WMA 10 Pro
.OGG
Sample freq. 16 kHz ~ 48 kHz
Support MPEG-1, MPEG-2, Layer2, Layer3
channels mono, stereo
Bit rate Free Format
Sample freq. 8 kHz ~ 48 kHz
Support ADIF, ADTS
Bit rate Free Format
Sample freq. 8 kHz ~ 48 kHz
Support MPEG-4
channels mono, stereo
Bit rate 64 kbps ~ 1.5 Mbps
Sample freq. 8 kHz ~ 48 kHz
Support LPCM
channels mono, stereo
Bit rate 128 Kbps ~ 320 Kbps
Sample freq. 8 kHz ~ 48 kHz
Support WMA7, WMA8, WMA9 Standard
channels up to 6 ch
Bit rate ~ 768 Kbps
M0: up to 2 Channel @ 48 kHz
Channel /
Sample freq.
(Except LBR mode),
M1: up to 5.1 Channel @ 48 kHz,
M2: up to 5.1 Channel @ 96 kHz
Support WMA 10 Pro
Bit rate 64 kbps - 320 kbps
Sample freq. 8 kHz ~ 48 kHz
Support Vorbis
channels mono, stereo
15
ENGLISH
Supported Photo Formats
File Format Item Resolution
Available
File Type
.jpeg, .jpg,
.jpe
Photo Size
.BMP Photo Size
Available
File Type
.PNG
Photo Size
* BMP and PNG format files may be slower to display than JPEG.
SOF0: Baseline
SOF1: Extend Sequential
SOF2: Progressive
Minimum: 64 (W) x 64 (H)
Maximum (Normal Type):
15,360 (W) x 8,640 (H)
Maximum (Progressive Type):
1,920 (W) x 1,440 (H)
Minimum: 64 (W) x 64 (H)
Maximum: 9,600 (W) x 6,440 (H)
Interlace, Non-Interlace
Minimum: 64 (W) x 64 (H)
Maximum (Interlace):
1,200 (W) x 800 (H)
Maximum (Non-Interlace):
9,600 (W) x 6,400 (H)
To see web manual
To obtain detailed User Guide information, please visit www.lg.com.
Troubleshooting
Cannot control the TV with the remote control.
• Check the remote control sensor on the product and try again.
• Check if there is any obstacle between the product and the remote
control.
• Check if the batteries are still working and properly installed (
to , to ).
No image display and no sound is produced.
• Check if the product is turned on.
• Check if the power cord is connected to a wall outlet.
• Check if there is a problem in the wall outlet by connecting other
products.
The TV turns off suddenly.
• Check the power control settings. The power supply may be
interrupted.
• Check if the auto-off function is activated on the settings related
time.
• If there is no signal while the TV is on, the TV will turn off
automatically after 15 minutes of inactivity.
When connecting to the PC (HDMI), no signal is detected.
• Turn the TV off/on using the remote control.
• Reconnect the HDMI cable.
• Restart the PC with the TV on.
16

Abnormal Display
ENGLISH
• If the product feels cold to the touch, there may be a small “flicker”
when it is turned on. This is normal, there is nothing wrong with
product.
• This panel is an advanced product that contains millions of pixels.
You may see tiny black dots and/or brightly coloured dots (red, blue
or green) at a size of 1ppm on the panel. This does not indicate a
malfunction and does not affect the performance and reliability of
the product. This phenomenon also occurs in third-party products
and is not subject to exchange or refund.
• You may find different brightness and colour of the panel
depending on your viewing position(left/right/top/down).
This phenomenon occurs due to the characteristic of the panel.
It is not related with the product performance, and it is not
malfunction.
• Displaying a still image for a prolonged period of time may cause
image sticking. Avoid displaying a fixed image on the TV screen for
a long period of time.
Generated Sound
• “Cracking” noise: A cracking noise that occurs when watching or
turning off the TV is generated by plastic thermal contraction due
to temperature and humidity. This noise is common for products
where thermal deformation is required.
• Electrical circuit humming/panel buzzing: A low level noise is
generated from a high-speed switching circuit, which supplies a
large amount of current to operate a product. It varies depending
on the product. This generated sound does not affect the
performance and reliability of the product.
17
ENGLISH
Specifications
(Depending on country)
Broadcasting Specifications
Digital TV Analogue TV
1
Television system
Programme coverage VHF, UHF, C-Band2, Ku-Band
Maximum number of
storable programmes
External antenna
impedance
DVB-T/T2
DVB-T/T2/C/S/S2
2
2
DVB-T/T2 & Analogue TV : 2,000
DVB-S/S2 : 6,000
75 Ω
1 Only DVB-T2 support models. (Despite DVB-T2 model, DVB-T/T2 function does not apply in Philippines.)
2 Only DVB-T2/C/S2 support models.
Environment condition
Operating Temperature 0 °C to 40 °C
Operating Humidity Less than 80 %
Storage Temperature -20 °C to 60 °C
Storage Humidity Less than 85 %
• The energy information provided with the product is indicated in accordance with the regulations of each country. (Depending on Country)
- The Energy consumption is measured in accordance with IEC 62087.
• Actual Energy consumption may vary depending on factors such as the type of video content being played and TV settings.
PAL B/B, PAL B/G,
PAL D/K, PAL-I,
SECAM B/G, SECAM D/K,
NTSC-M
VHF, UHF, CATV
18
HDMI-DTV supported mode
ENGLISH
Resolution
640 x 480
720 x 480
720 x 576 31.25 50.00
1280 x 720
1920 x 1080
Horizontal
Frequency (kHz)
31.46
31.50
31.47
31.50
37.50
45.00
44.96
28.12
33.75
33.72
56.25
67.50
67.43
27.00
26.97
33.75
33.71
Frequency (Hz)
HDMI-PC supported mode
Use HDMI IN 1 for PC mode
Vertical
59.94
60.00
59.94
60.00
50.00
60.00
59.94
50.00
60.00
59.94
50.00
60.00
59.94
24.00
23.97
30.00
29.97
Component port connecting
information
Component ports on the TV Y P
Y P
Video output ports on DVD player
Signal Component
480i / 576i O
480p / 576p O
720p / 1080i O
1080p
Y B-Y R -Y
Y Cb Cr
Y Pb Pr
O
(Only 50 Hz / 60 Hz)
P
B
R
P
B
R
Resolution
Horizontal
Frequency (kHz)
640 x 350 31.46 70.09
720 x 400 31.46 70.08
640 x 480 31.46 59.94
800 x 600 37.87 60.31
1024 x 768 48.36 60.00
1152 x 864 54.34 60.05
1360 x 768 47.71 60.01
1
1280 x 1024
1920 x 1080
1
63.98 60.02
67.50 60.00
1 Except for 32LM55*
Vertical
Frequency (Hz)
19

ENGLISH
Open Source Software
Notice Information
To obtain the source code under GPL, LGPL, MPL, and other open source
licenses, that is contained in this product, please visit http://opensource.
lge.com.
In addition to the source code, all referred license terms, warranty
disclaimers and copyright notices are available for download.
LG Electronics will also provide open source code to you on CD-ROM
for a charge covering the cost of performing such distribution (such
as the cost of media, shipping, and handling) upon email request to
opensource@lge.com.
This offer is valid for a period of three years after our last shipment of
this product. This offer is valid to anyone in receipt of this information.
Licenses
The terms HDMI and HDMI High-Definition Multimedia Interface,
and the HDMI Logo are trademarks or registered trademarks of
HDMI Licensing Administrator, Inc. in the United States and other
countries.
Manufactured under license from Dolby Laboratories. Dolby, Dolby
Vision, Dolby Audio, Dolby Atmos, and the double-D symbol are
trademarks of Dolby Laboratories.
20
Regulatory
ENGLISH
WARNING!
Never place a television set in an unstable location. A television set may fall, causing serious personal injury or death. Many injuries, particularly to
children, can be avoided by taking simple precautions such as:
• Using cabinets or stands recommended by the manufacturer of the television set.
• Only using furniture that can safely support the television set.
• Ensuring the television set is not overhanging the edge of the supporting furniture.
• Not placing the television set on tall furniture (for example, cupboards or bookcases) without anchoring both the furniture and the television set
to a suitable support.
• Not placing the television set on cloth or other materials that may be located between the television set and supporting furniture.
• Educating children about the dangers of climbing on furniture to reach the television set or its controls.
If your existing television set is being retained and relocated, the same considerations as above should be applied.
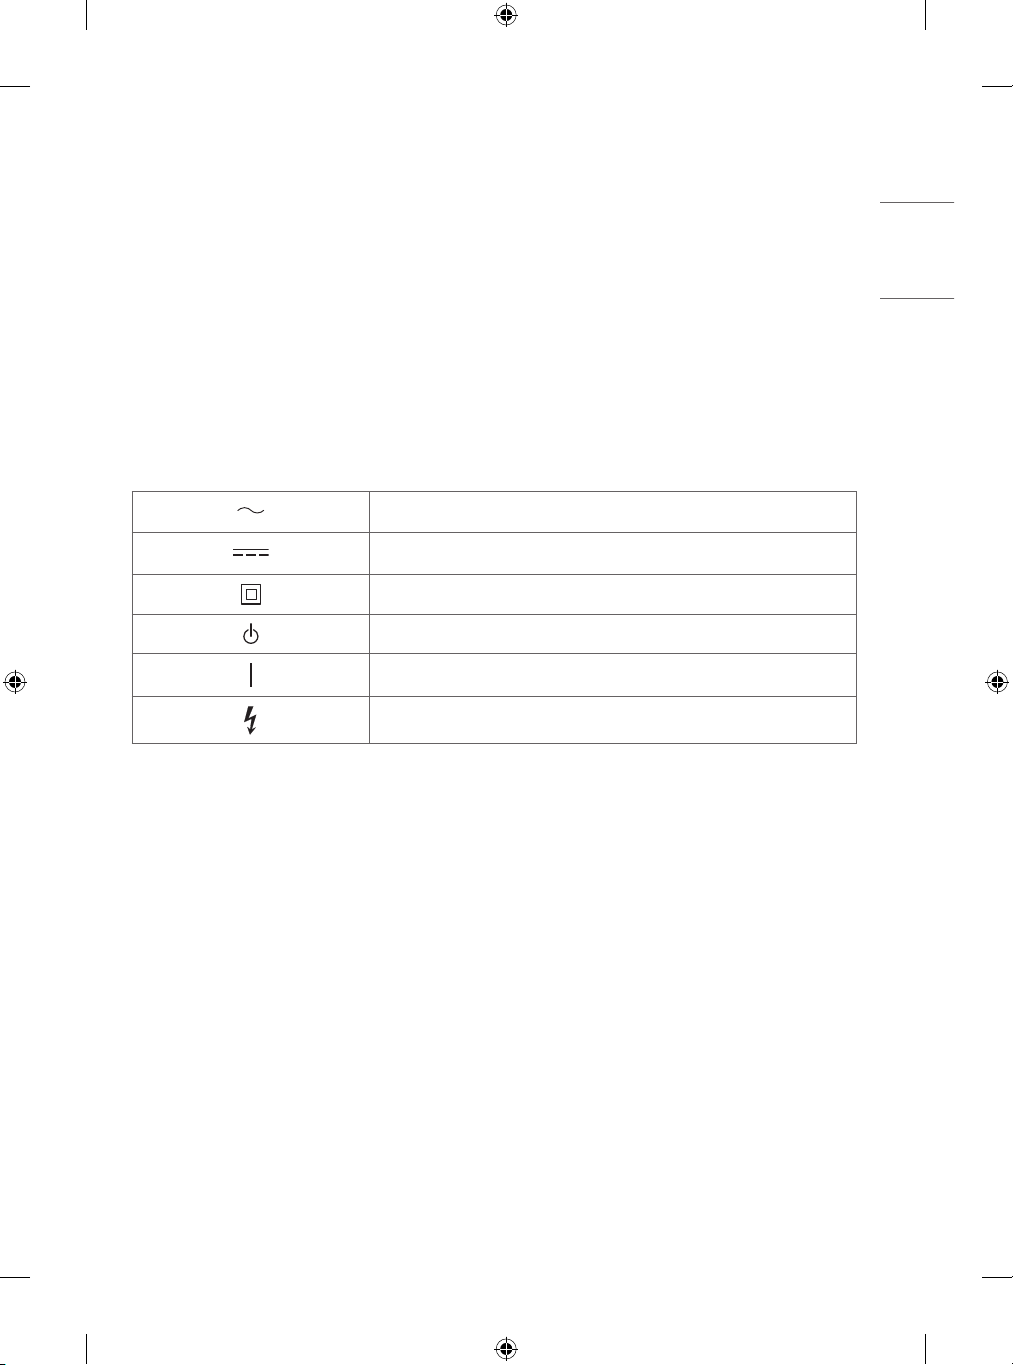
Symbols
Refers to alternating current(AC).
Refers to direct current(DC).
Refers to class II equipment.
Refers to stand-by.
Refer to “ON” (power).
Refers to dangerous voltage.
21

ENGLISH
22

ENGLISH
23
For any Suggestion, Opinion,
Complaints, Please Call
800 54 in UAE
0800 545454 in South Africa
080 100 54 54 in Morocco
19960 in Egypt
021 36 54 54 in Algeria
Other countries, Please contact our
local dealer or log into
http://www.lg.com
The model and serial number of the product are located
on the back and on one side of the product.
Record them below in case you ever need service.
Model
Serial No.

Veuillez lire attentivement ce manuel avant de mettre en
service votre produit et conservez-le afin de pouvoir vous y
référer ultérieurement.
* Le téléviseur LED de LG combine un écran LCD et un rétroéclairage LED.
Téléviseur LED*
MANUEL D’UTILISATION
Sécurité et référence
www.lg.com
Copyright © 2019 LG Electronics Inc. Tous droits réservés.
FRANÇAIS
Avertissement! Consignes
de sécurité
AVERTISSEMENT
RISQUE
D'ÉLECTROCUTION.
NE PAS OUVRIR.
AVERTISSEMENT : AFIN DE RÉDUIRE LE RISQUE D'ÉLECTROCUTION,
NE RETIREZ PAS LE CAPOT (OU L'ARRIÈRE). AUCUNE PIÈCE N'EST
RÉPARABLE PAR L'UTILISATEUR LUI-MÊME. CONFIEZ L'ENTRETIEN
DE CET APPAREIL À UN PERSONNEL QUALIFIÉ.
Ce symbole est destiné à prévenir l'utilisateur de la présence
d'une «tension dangereuse» non isolée dans le boitier du
produit. Cette tension peut être d'amplitude suffisante pour
constituer un risque d'électrocution.
Ce symbole est destiné à prévenir l'utilisateur que des
instructions importantes sur le fonctionnement et
l’entretien (réparation) de l'appareil se trouvent dans la
documentation.
AVERTISSEMENT: AFIN DE RÉDUIRE LE RISQUE D'INCENDIE ET
D'ÉLECTROCUTION, N'EXPOSEZ PAS LE PRODUIT À LA PLUIE OU À
L'HUMIDITÉ.
• POUR PRÉVENIR TOUT RISQUE D’INCENDIE, TENEZ LES BOUGIES OU
AUTRES OBJETS À FLAMMES NUES ÉLOIGNÉS DE CE PRODUIT EN
TOUT TEMPS.
• N’installez pas la TV et la télécommande dans les
environnements suivants:
- Évitez d’exposer l’appareil à la lumière directe du soleil.
- Une zone fortement humide comme une salle de bain
- À proximité d’une source de chaleur comme une cuisinière et
tout autre appareil produisant de la chaleur.
- À proximité d’un plan de travail de cuisine ou d’un
humidificateur où elles pourraient facilement être exposées à la
vapeur ou à l’huile.
- Une zone exposée à la pluie et au vent.
- Ne placez pas d'objets contenant du liquide (tel qu'un vase, une
tasse, etc.) sur ou au-dessus de ce produit (par exemple, sur une
étagère au-dessus de l'unité).
- N'installez pas le téléviseur à proximité d'objets inflammables,
comme de l'essence ou des bougies. N'exposez pas directement
le téléviseur à l'air conditionné.
- N'installez pas l'appareil dans un endroit excessivement
poussiéreux.
Le non-respect de cette consigne peut provoquer un incendie, un
choc électrique, une combustion/explosion, un dysfonctionnement
ou une déformation du produit.
• Ventilation
- Installez le téléviseur dans un endroit bien aéré. Évitez les
espaces fermés, tels qu'un meuble de bibliothèque.
- N’installez pas le produit sur un tapis ou un coussin.
- Évitez de bloquer ou de couvrir le produit avec un tissu ou autre
matériau lorsque l'unité est branchée.
• Évitez de toucher les ouvertures de ventilation. Lors de l'utilisation
prolongée du téléviseur, les ouvertures de ventilation peuvent
surchauffer.
• Protégez le câble d’alimentation contre les mauvais traitements
physiques ou mécaniques, la torsion, la pliure, le pincement, et
évitez qu’il ne puisse être pris dans une porte ou que l’on puisse
marcher dessus. Vérifiez soigneusement les fiches, les prises
murales et les points de sortie du cordon de l'appareil.
• Ne déplacez pas le téléviseur tant que le cordon d'alimentation
est branché.
• N'utilisez pas de cordon d'alimentation endommagé ou déformé.
• Veillez à tenir le cordon d'alimentation par la fiche pour le
débrancher. Ne tirez pas sur le cordon d'alimentation pour
débrancher le téléviseur.
• Ne branchez pas trop d'appareils à la même prise secteur pour
éviter les risques d'incendie ou de choc électrique.
• Déconnexion de l'appareil de l'alimentation principale
- La fiche d'alimentation est l'élément de déconnexion. En
cas d'urgence, la fiche d'alimentation doit rester facilement
accessible.
• Ne laissez pas les enfants grimper sur la TV ou s’agripper dessus.
Dans le cas contraire, la TV risque de tomber ce qui peut entraîner
des blessures graves.
• Mise à la terre de l'antenne extérieure (peut varier selon le
pays):
- Si une antenne extérieure est installée, respectez les précautions
suivantes.
Un système d'antenne extérieure ne doit pas être installé à
proximité de lignes électriques aériennes ou autres lumières
ou circuits électriques. Il ne doit pas entrer en contact avec des
lignes ou circuits électriques au risque d'entraîner un décès ou
des blessures graves.
Assurez-vous que le système d'antenne est mis à la terre
pour assurer une certaine protection contre les surtensions et
l'accumulation des charges statiques.
La section810 du National Electrical Code (NEC) aux États-Unis
fournit des informations concernant la mise à la terre correcte
de l'antenne et de la structure porteuse, la mise à la terre du
câble d'entrée à une unité de décharge d'antenne, la taille des
conducteurs de terre, l'emplacement de l'unité de décharge
d'antenne, la connexion et les prérequis des électrodes de terre.
Mise à la terre d'une antenne selon le National Electrical Code,
ANSI/NFPA70
2
FRANÇAIS
• Mise à la terre (ne s'applique pas aux appareils ne nécessitant pas
de mise à la terre)
- Un téléviseur muni d'une fiche électrique secteur mise à la terre
avec trois broches doit être branché sur une prise secteur mise à
la terre avec trois broches. Veillez à brancher le câble de mise à la
terre pour éviter les chocs électriques.
• Ne touchez jamais cet appareil ou cette antenne pendant un orage.
Vous pourriez vous électrocuter.
• Assurez-vous que le cordon d'alimentation est bien branché
au téléviseur et à la prise murale. Si ce n'est pas le cas, la fiche
d'alimentation et la prise risquent d'être endommagées. Dans des
situations extrêmes, un incendie peut se déclarer.
• N'insérez pas d'objets métalliques ou inflammables dans le produit.
Si un corps étranger tombe dans le produit, débranchez le cordon
d'alimentation et contactez le service client.
• Ne touchez pas le bout du cordon d'alimentation lorsqu'il est
branché. Vous risqueriez de subir un choc électrique.
• Si vous êtes confronté à l'une des situations suivantes,
débranchez immédiatement le produit et contactez votre
service client local.
- Le produit a été endommagé.
- Si de l'eau ou une autre substance pénètre dans le produit
(adaptateur secteur, cordon d'alimentation ou téléviseur).
- Si vous sentez de la fumée ou toute autre odeur émanant du
téléviseur
- Pendant les orages ou lorsque l'appareil n'est pas utilisé pendant
un long moment.
Même si le téléviseur est éteint via la télécommande ou un bouton,
l'alimentation secteur est connectée à l'unité si elle n'est pas
débranchée.
• N'utilisez pas d'appareil électrique à haute tension à proximité du
téléviseur (par exemple, un tue-mouches électrique). Cela pourrait
endommager le produit.
• N'essayez pas de modifier ce produit sans une autorisation écrite
de LGElectronics. Un incendie accidentel ou un choc électrique
peuvent se produire. Contactez votre service client local pour tout
service ou réparation. Des modifications non autorisées peuvent
annuler le droit de l'utilisateur à utiliser ce produit.
• Utilisez uniquement des pièces/accessoires approuvés par
LGElectronics. Le non-respect de cette consigne peut provoquer
un incendie, un choc électrique, un dysfonctionnement ou des
dommages au produit.
• Ne démontez pas l’adaptateur secteur ou le câble d’alimentation.
Le non-respect de cette consigne peut provoquer un incendie ou
une électrocution.
• Manipulez l'adaptateur avec précaution pour éviter de le faire
tomber ou de l'abîmer. Un impact pourrait endommager
l'adaptateur.
• Pour réduire les risques d'incendie ou de choc électrique, ne
touchez pas le téléviseur avec les mains mouillées. Si le cordon
d'alimentation est mouillé ou couvert de poussière, séchez
intégralement la prise d'alimentation ou essuyez la poussière.
• Batteries
- Rangez les accessoires (batterie, etc.) dans un endroit sûr hors de
portée des enfants.
- Ne court-circuitez pas les batteries, ne les démontez pas et ne
les laissez pas surchauffer. Ne jetez pas les batteries dans un feu.
N’exposez pas les piles à une température excessive.
• Déplacement
- Lorsque vous déplacez le produit, assurez-vous qu'il est éteint,
débranché et que tous les câbles ont été retirés. Il faut deux
(2) personnes ou plus pour porter un téléviseur de grande
taille. Ne vous appuyez pas sur le panneau avant du téléviseur
et n'appliquez aucune pression dessus. Vous risqueriez
d'endommager le produit ou de vous exposer à un risque
d'incendie ou de blessure.
• Ne laissez pas le matériau d'emballage anti-humidité ou
l'emballage en vinyle à la portée des enfants.
• Évitez tout impact ou chute d'objets sur l'appareil, et ne laissez rien
tomber sur l'écran.
• N’appuyez pas fortement sur le panneau avec la main ou un
objet pointu tel qu'un clou, un crayon ou un stylo. Ne rayez pas le
panneau. Cela risquerait d'endommager l'écran.
• Nettoyage
- Lorsque vous nettoyez le produit, débranchez le cordon
d'alimentation et essuyez délicatement la surface avec un chiffon
doux et sec. Ne pulvérisez pas d'eau ou autre liquide directement
sur le téléviseur. N’utilisez jamais de produit pour vitre, de
désodorisant, d’insecticide, de lubrifiant, de cire pour voiture ou
industrielle, d’abrasif, de diluant, de benzène, d’alcool, etc., car
ces produits risqueraient d’endommager le produit et / ou son
écran. Le non-respect de cette consigne peut provoquer un choc
électrique ou endommager le produit.
3
FRANÇAIS
Préparation
A
B
Achat séparé
• Si le téléviseur est mis sous tension pour la première fois depuis
son expédition depuis l’usine, l’initialisation peut prendre quelques
minutes.
• L’image présentée peut être différente de votre téléviseur.
• L’affichage à l’écran de votre TV peut différer légèrement de celui
qui est présenté dans ce manuel.
• Les menus et options disponibles peuvent être différents selon la
source d’entrée ou le modèle de produit utilisé.
• De nouvelles fonctionnalités pourront être ajoutées ultérieurement
à ce téléviseur.
• Le téléviseur doit être raccordé à une prise électrique facile d'accès
située à proximité. Le bouton marche/arrêt n'est pas présent sur
tous les modèles de produit. Pour éteindre ces appareils, il est
nécessaire de débrancher le cordon d'alimentation.
• Les éléments fournis avec votre produit diffèrent en fonction du
modèle choisi.
• Les caractéristiques des produits ou le contenu de ce manuel
peuvent être modifiés sans préavis en cas de mise à jour des
fonctions.
• Pour une connexion optimale, les câbles HDMI et les périphériques
USB doivent comporter des connecteurs d’une épaisseur inférieure
à 10mm et d’une largeur inférieure à 18mm. Utilisez une rallonge
prenant en charge si le câble USB ou la clé USB ne s’adapte
pas au port USB de la TV.
B
B
A
A
* A < 10 mm
* B < 18 mm
Des articles vendus séparément peuvent faire l’objet de remplacements
ou de modifications sans préavis dans le but d’améliorer la qualité du
produit. Contactez votre revendeur pour vous procurer ces articles. Ces
périphériques fonctionnent uniquement avec certains modèles.
Le nom ou le design du modèle peut changer en cas de mise à niveau
des fonctions du produit, des conditions de diffusion ou des politiques
de confidentialité du fabricant.
Support de fixation murale
Veillez à utiliser des vis et un support mural conformes aux normes
VESA. Les dimensions standard des kits de support mural sont indiquées
dans le tableau suivant.
Modèle 32/43LM55*
VESA (A x B) (mm) 200 x 200
Vis standard M6
Nombre de vis 4
Support mural
LSW240B
MSW240
• Utilisez un câble certifié sur lequel est apposé le logo HDMI.
• Si vous utilisez un câble non certifié HDMI, l’écran peut ne pas
s’afficher ou une erreur de connexion peut survenir. (Types de
câbles HDMI recommandés)
- CâbleHDMI®/TM ultra haut débit (max. 3m)
• Utilisation de la ferrite (Selon le modèle)
- La ferrite peut être utilisée pour réduire les ondes
électromagnétiques dans le cordon d’alimentation. Enroulez une
seule fois le cordon d’alimentation autour de la ferrite.
[Côté du mur]
10 cm (+ / -2 cm)
4
[Côté du téléviseur]
FRANÇAIS
Soulever et déplacer la TV
Lisez les consignes suivantes afin d’éviter de rayer ou d’endommager
la TV en la déplaçant, en la soulevant ou en la transportant, quels que
soient le type et les dimensions de l’appareil.
• Nous vous recommandons de déplacer la TV dans sa boîte ou son
emballage d’origine.
• Avant de déplacer ou de soulever la TV, déconnectez le câble
d’alimentation et tous les câbles.
• Lorsque vous soulevez la TV, orientez l’écran à l’opposé de vous
pour éviter de l’endommager.
• Évitez toujours de toucher l’écran, car vous risqueriez de
l’endommager.
• Pour fixer le support au téléviseur, placez l’écran face vers
le bas sur une table ou sur une surface plane munie d’une
protection pour éviter de le rayer.
Installation sur une table
1 Soulevez et positionnez la TV à la verticale sur une table.
• Laissez au moins 10cm entre le mur et le moniteur pour assurer
une bonne ventilation.
• Maintenez fermement la TV par le haut et le bas du cadre. Veillez à
ne pas la tenir par la partie transparente, le haut-parleur ou la zone
de la grille du haut-parleur.
• Si votre téléviseur est volumineux, faites-vous aider par une autre
personne.
• Lorsque vous transportez la TV, tenez-la comme indiqué sur
l’illustration suivante.
• Lorsque vous transportez la TV, ne l’exposez pas à des secousses ou
à des vibrations excessives.
• Lorsque vous transportez la TV, maintenez-la à la verticale, sans la
coucher sur le côté ni l’incliner vers la gauche ou la droite.
• N’exercez pas une pression excessive qui pourrait plier le châssis car
cela pourrait endommager l’écran.
• Lorsque vous manipulez le téléviseur, assurez-vous de ne pas
endommager les boutons.
10 cm
10 cm
10 cm
(Selon le modèle)
2 Branchez le cordon d’alimentation sur une prise murale.
10 cm
10 cm
5
 Loading...