

LG 22LK230-TA Owner’s Manual
User’s Guide Specification
User’s Guide Specification
Model Description
1.
담 당 관 리 자
Suo jw
11.11.29
Niu Yang
11.11. 29
MODEL
SUFFIX
2.
22LK230-TA
For Asia
Printing Specification
BRAND
Product Name
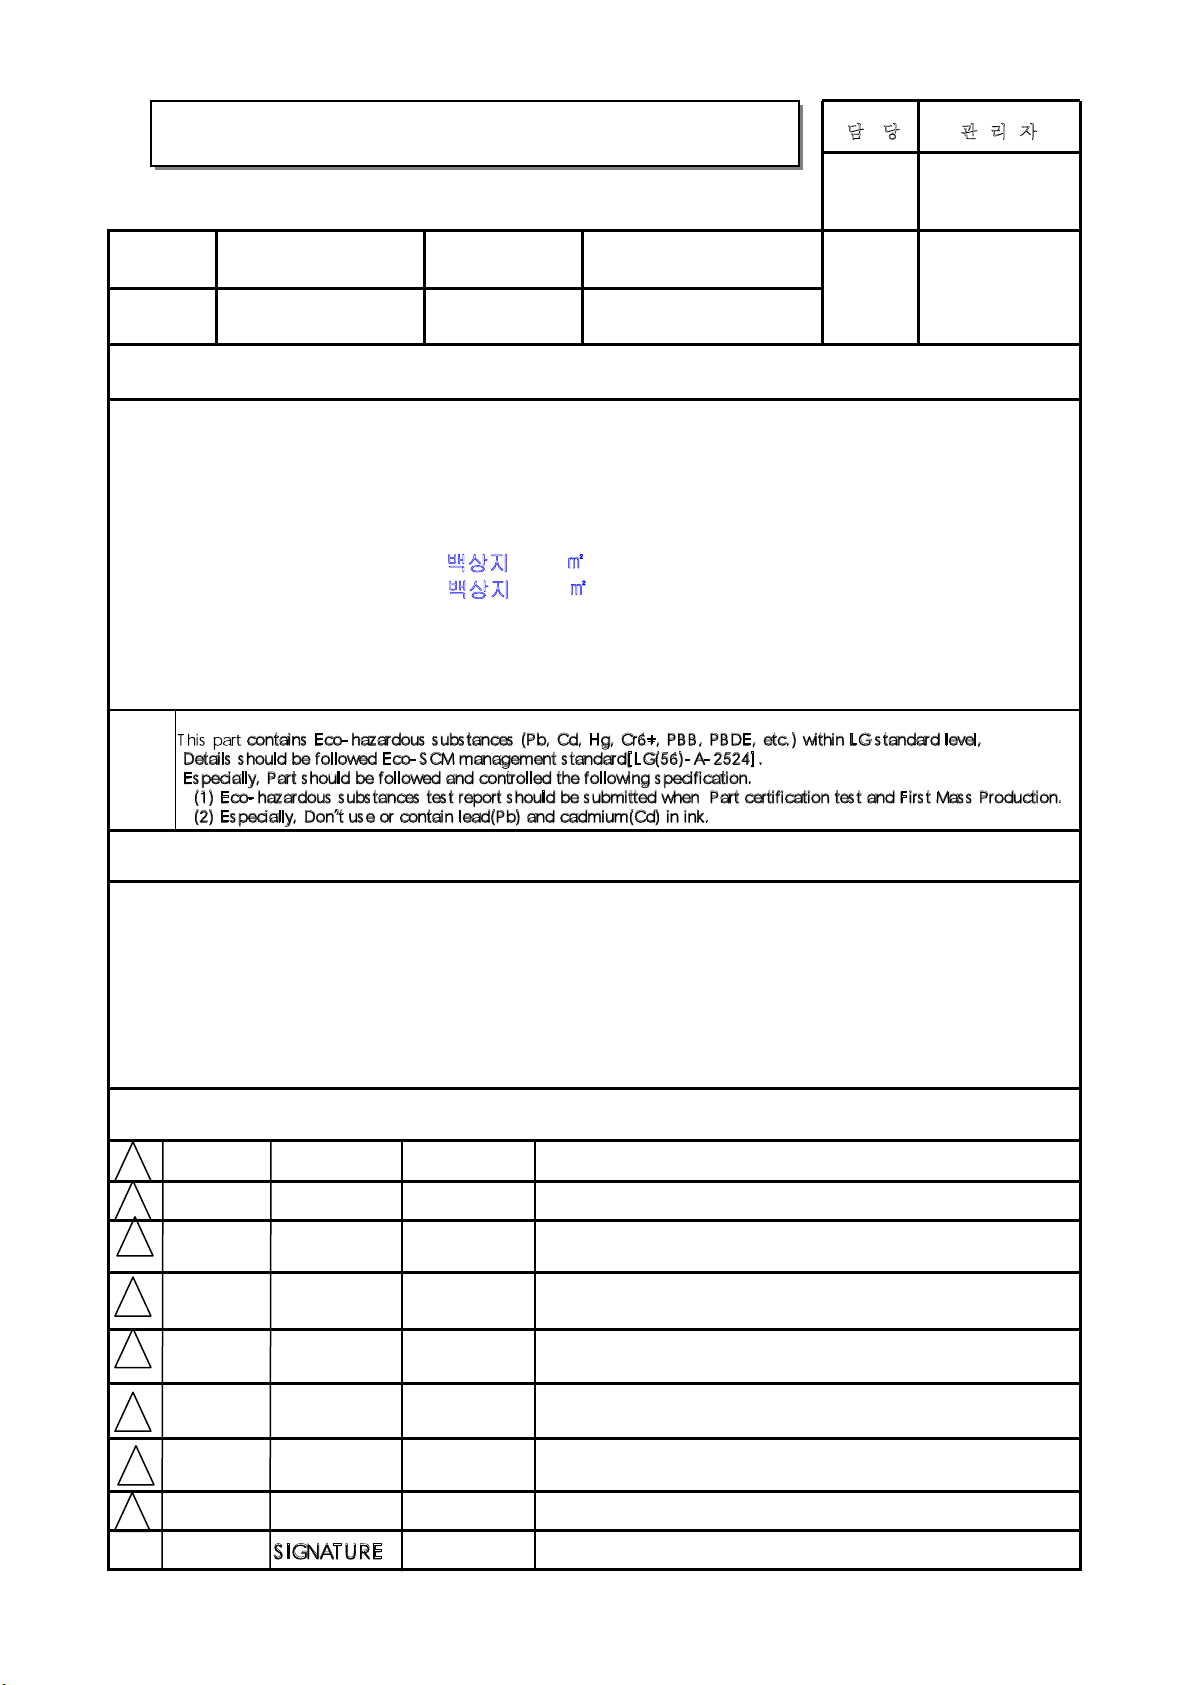
1. Trim Size (Format) : 185mm x 260 mm
2. Printing Colors
• Cover : 1 COLOR (BLACK)
• Inside : 1 COLOR (BLACK)
3. Stock (Paper)
• Cover : Uncoated paper , 백
상지 60 g/㎡
• Inside : Uncoated paper , 백상지 60 g/㎡
4. Printing Method : Off-set
5. Bindery : Saddle stitch
6. Language : English (1)
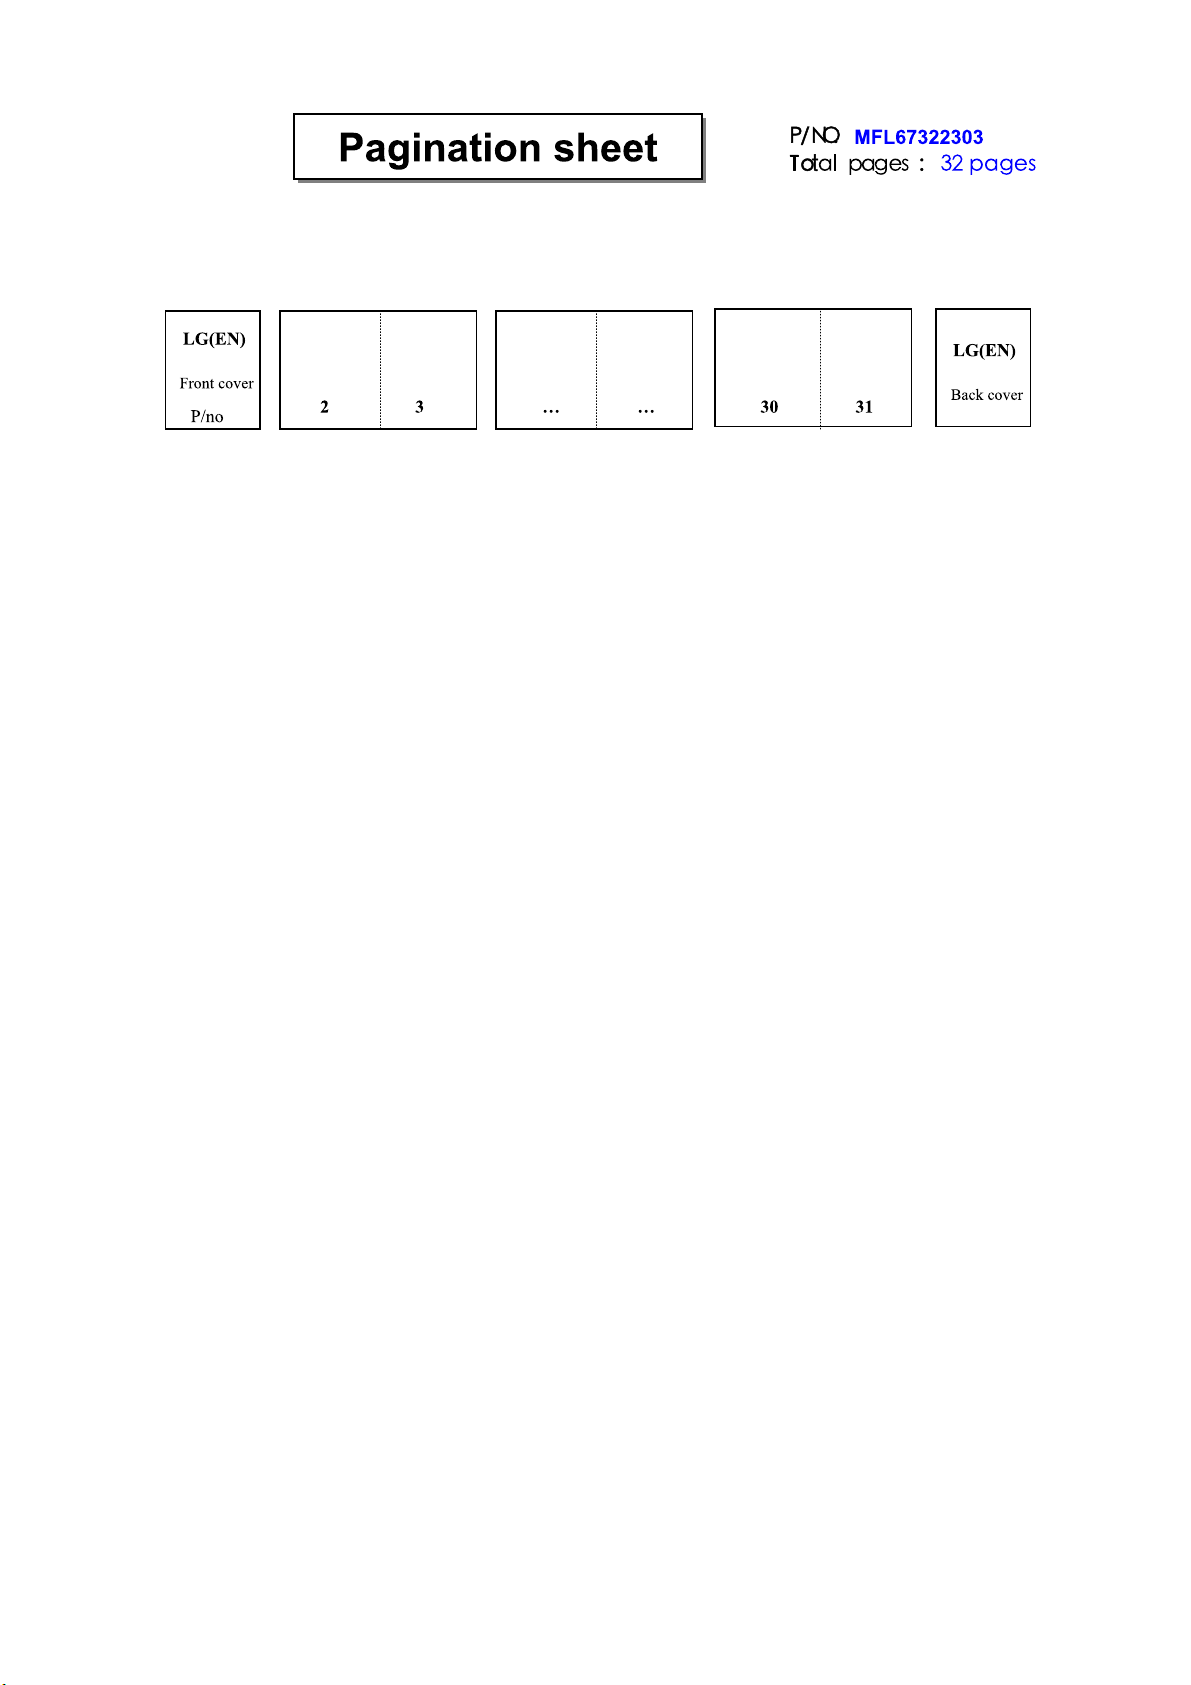
7. Number of pages : 32 pages
Notes
LG
22LK2**
Part No.
MFL67322303
(1111-REV01)
4.
8
7
6
5
4
3
Special Instructions3.
(1) Origi
* LGEIN: Printed in Indonesia * LGEWA : Printed in U.K.
* LGESP : Printed in Brazil * LGEMX : Printed in Mexico
* LGEND/NP/SY : Printed in China * LGEIL : Printed in India
* LGEMA : Printed in Poland
(2) Bag:
n Notification
3880TVZ021H(refer to the drawing)
Changes
2
1
REV.
MM/DD/YY CHANGE NO.
NO.
CHANGE CONTENTS

OWNER’S MANUAL
LCD TV
Please read this manual carefully before operating the
set and retain it for future reference.
P/NO : MFL67322303 (1111-REV01)
Printed in China
www.lg.com

ENGLISH
ENG
LICENSES
2
LICENSES
Supported licenses may differ by model. For more information about licenses, visit www.lg.com.
HDMI, the HDMI logo and High-Definition Multimedia Interface are trademarks or
registered trademarks of HDMI Licensing LLC.
NOTE
Image shown may differ from you TV.
y
Your TV's OSD(On Screen Display) may differ slightly from that shown in this manual.
y
The available menus and options may differ from the input source or product model that you are
y
using.

TABLE OF CONTENTS
TABLE OF CONTENTS
3
ENGENGLISH
2 LICENSES
4 ASSEMBLING AND PREPAR-
ING
4 Unpacking
4 Parts and buttons
6 Lifting and moving the TV
6 Setting up the TV
6 - Attaching the stand
7 - Tidying cables
8 - Mounting on a table
9 - Mounting on a wall
10 REMOTE CONTROL
11 WATCHING TV
11 Connecting to an antenna
11 - Connecting an antenna
11 Turning the TV on for the first time
11 Watching TV
12 Managing programmes
12 - Automatically setting up programme
12 - Manually setting up programme
14 - Editing your programme list
14 - Using favourite programmes
15 Using additional options
15 - Adjusting aspect ratio
16 - Using the input list
23 MAKING CONNECTIONS
23 Connection Overview
24 Connecting to a HD receiver, DVD, or
VCR player
24 - HDMI connection
24 - Composite Connection
25 Connecting to an Audio System
25 - External Stereo Connection
26 TELETEXT
26 Switch On/Off
26 Simple Text
26 - Page selection
26 - Programming a colour button in LIST
mode
27 Top Text
27 - Block / Group / Page Selection
27 - Direct Page Selection
27 Fastext
27 - Page selection
27 Special Teletext Function
28 MAINTENANCE
28 Cleaning Your TV
28 - Screen and frame
28 - Cabinet and stand
28 - Power cord
28 Preventing “Image burn” or “Burn-in” on
your TV screen
17 CUSTOMIZING TV SETTINGS
17 The SETUP Menu
17 Customizing Settings
17 - SETUP Settings
18 - PICTURE Settings
20 - AUDIO Settings
22 - TIME Settings
22 - OPTION Settings
29 TROUBLESHOOTING
31 SPECIFICATIONS
ENGLISH
ENG
ASSEMBLING AND PREPARING
4
ASSEMBLING AND PREPARING
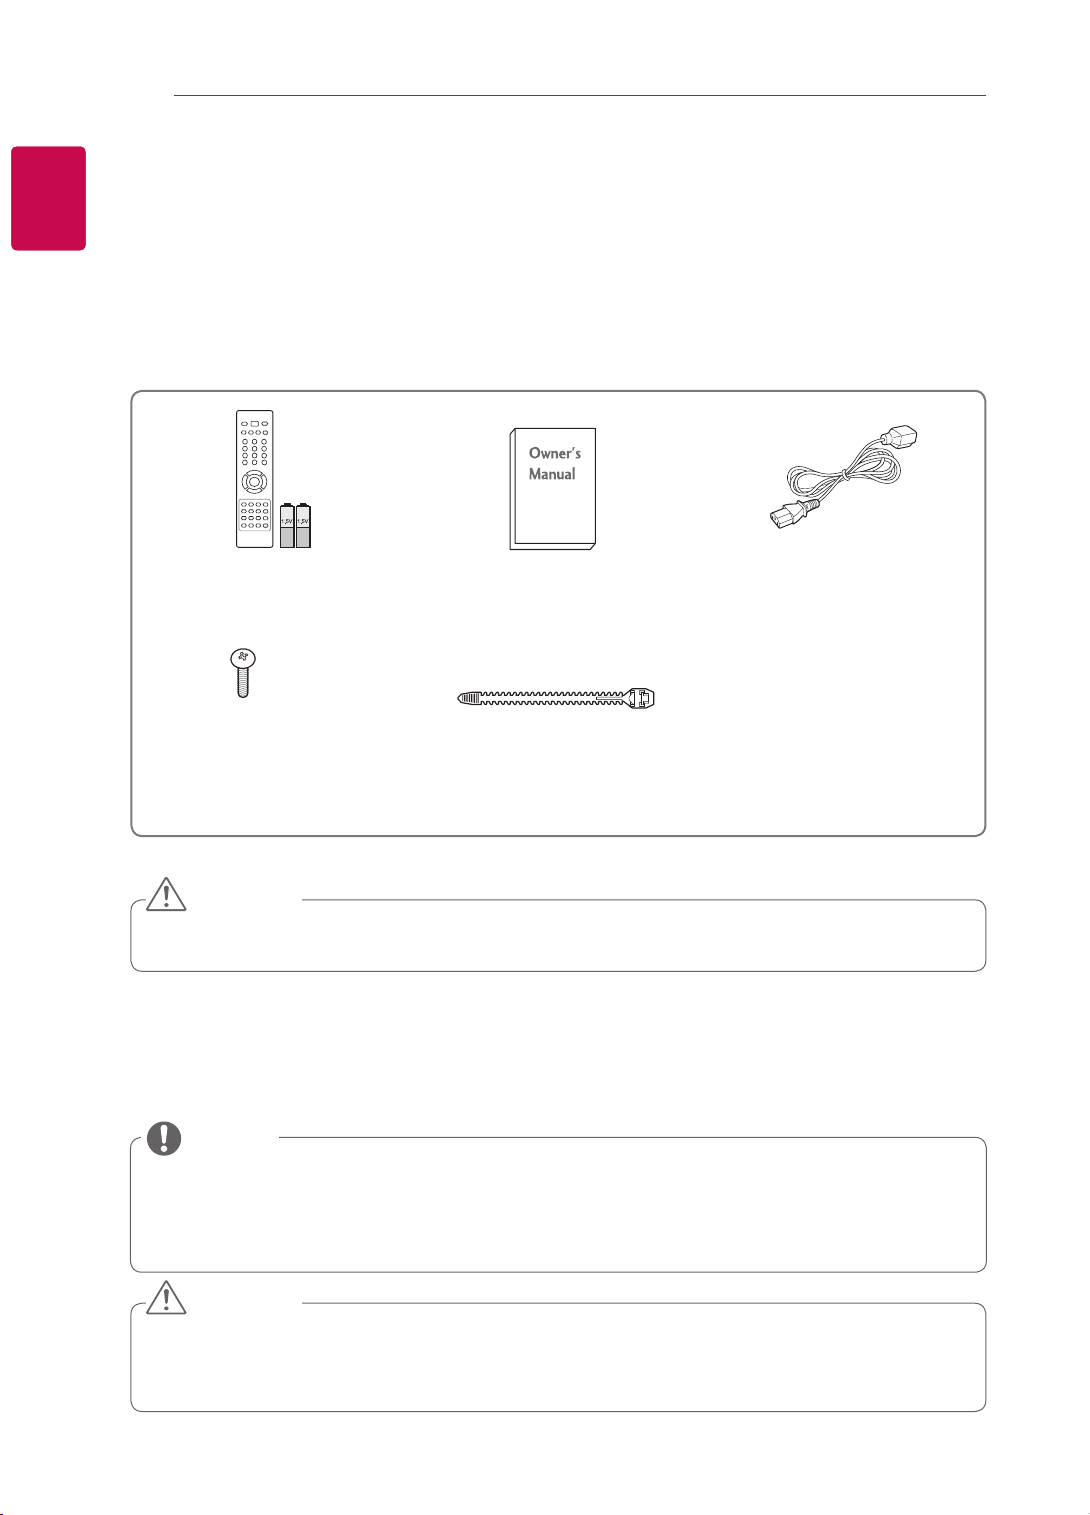
Unpacking
Check your product box for the following items. If there are any missing accessories, contact the local
dealer where you purchased your product.
The illustrations in this manual may differ from the actual product and item.
Remote control and batteries
(AAA)
x 2
M4 x 20
Screw for assembly
Owner’s manual Power Cord
Cable holder
CAUTION
y Do not use any unapproved items to ensure the safety and product life span.
y Any damages or injuries by using unapproved items are not covered by the warranty.
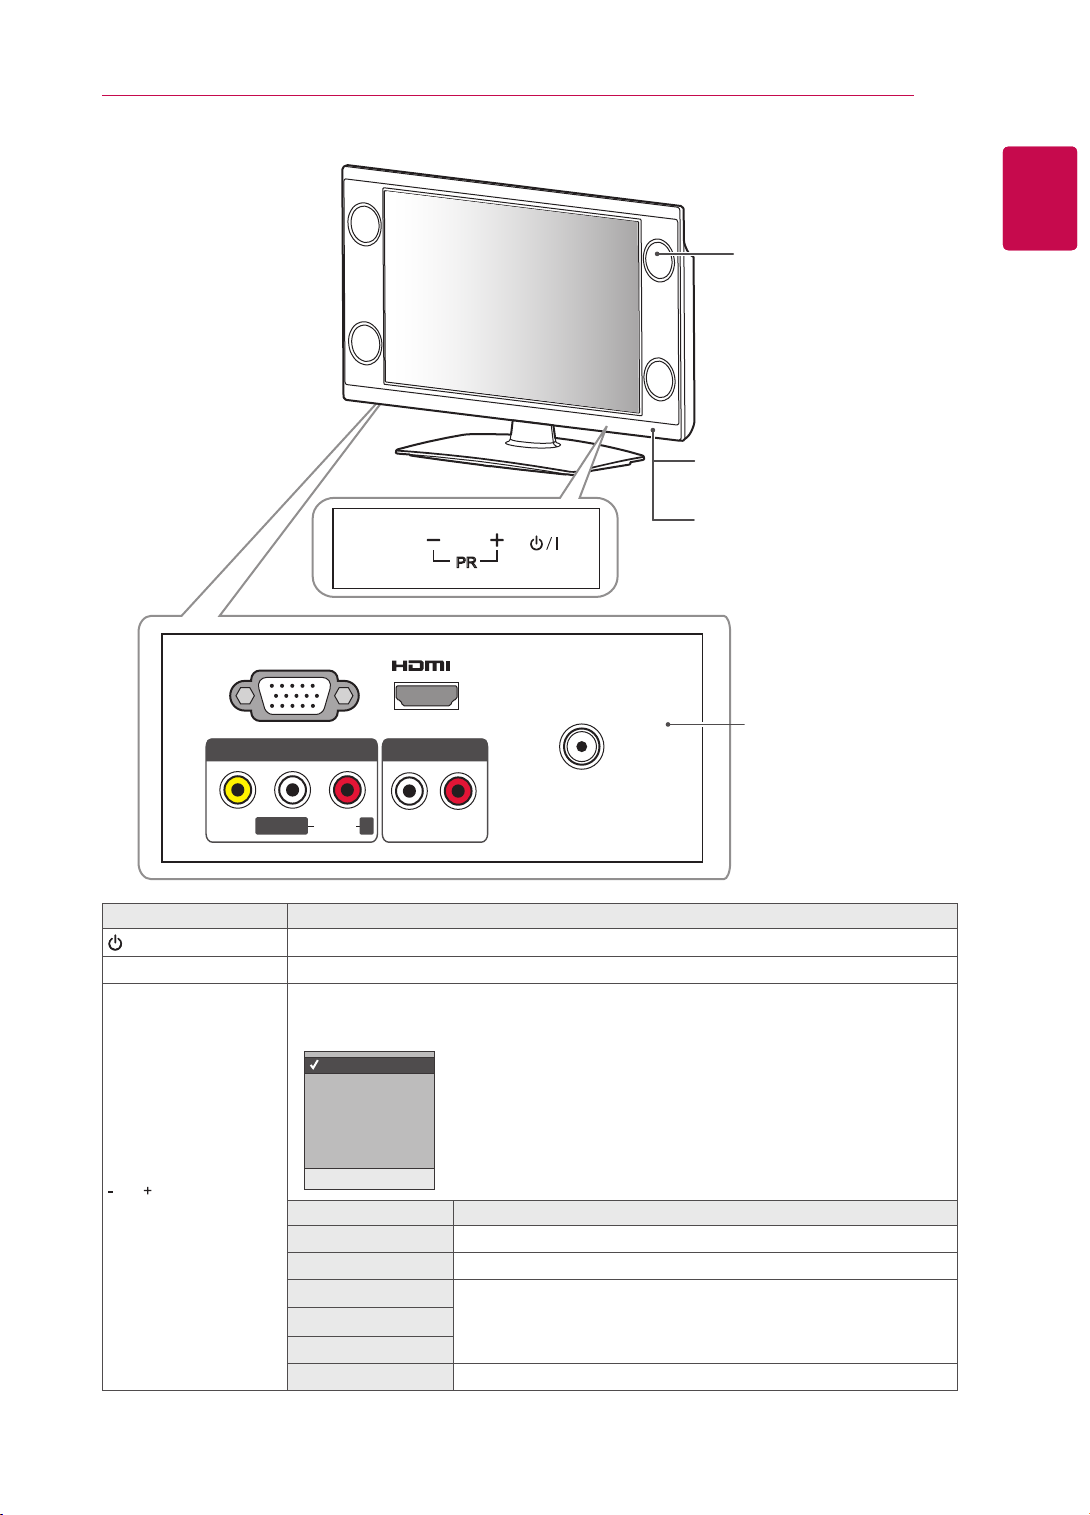
Parts and buttons
Image shown may differ from your TV.
y
NOTE
TV can be placed in standby mode in order to reduce the power consumption. And TV should be
y
turned off if it will not be watched for some time, as this will reduce energy consumption.
The energy consumed during use can be significantly reduced if the level of brightness of the picture
y
is reduced, and this will reduce the overall running cost.
CAUTION
y Do not step on the glass stand or subject it to any impact. It may break, causing possible injury from
fragments of glass, or the TV may fall.
y Do not drag the TV. The floor or the product may be damaged.
ASSEMBLING AND PREPARING
Speakers
Remote control sensors
5
ENGENGLISH
MODE
PR
SERVICE ONLY
IN
Rear Connection panel
Power indicator
AV IN
L/MONO R
VIDEO
Button Description
/
I
MODE Selects the Volume, Input, Picture Mode, Sound Mode, Aspect Ratio, Auto Tuning.
PR
AUDIO
Turns the power on or off.
Scrolls through the saved programmes.
Sets the MODE selected Volume, Input, Picture Mode, Sound Mode, Aspect Ratio, Auto
Tuning.
Volume
Input
Picture Mode
Sound Mode
Aspect Ratio
Auto Tuning
+
Volume
Input
Picture
Sound
Aspect Ratio
Auto Tuning
AUDIO OUT
ANTENNA IN
L R
Press the - button to select the desired menu.
1
Press the + button to access the selected menu.
2
Press the MODE button to return to the nomal TV viewing.
3
When you using the function, press the MODE button to return
*
OK -
Menu Button
to the previous menu.
+ : Volume Up / - : Volume Down
+ : Selects the mode / - : Scrolls the menu
+ : Scrolls the menu to the right / - : Scrolls the menu to the left
+ : Searches the channel / - : Stops searching the channel
(See p.23)
ENGLISH
ENG
ASSEMBLING AND PREPARING
6
Lifting and moving the TV
When moving or lifting the TV, read the following to
prevent the TV from being scratched or damaged
and for safe transportation regardless of its type
and size.
CAUTION
Avoid touching the screen at all times, as this
y
may result in damage on the screen.
It is recommended to move the TV in the box
y
or packing material that the TV originally came
in.
Before moving or lifting the TV, disconnect the
y
power cord and all cables.
When holding the TV, the screen should face
y
away from you to avoid damage.
Setting up the TV
Put your TV on a pedestal stand and mount the TV
on a table or wall.
Attaching the stand
If you are not mounting the TV to a wall, use the
following instructions to attach the stand.
CAUTION
y Tighten the screws firmly to prevent the TV
from tilting forward. Do not over tighten.
Lay the TV with the screen side down on a flat
1
surface.
Hold the top and bottom of the TV frame firmly.
y
Make sure not to hold the transparent part,
speaker, or speaker grill area.
When transporting a large TV, there should be
y
at least 2 people.
When transporting the TV by hand, hold the
y
TV as shown in the following illustration.
When transporting the TV, do not expose the
y
TV to jolts or excessive vibration.
When transporting the TV, keep the TV
y
upright, never turn the TV on its side or tilt
towards the left or right.
CAUTION
Lay a foam mat or soft protective cloth on the
y
surface to protect the screen from damage.
Make sure no objects press against the
screen.
Assemble the parts of the Stand Body with the
2
Stand Base of the TV.
Stand Body
Stand Base
ASSEMBLING AND PREPARING
7
Assemble the TV as shown.
3
4 Secure the TV and the stand with the 2 screws.
Screw for assembly Number of screws
M4 x 20 2
Tidying cables
Gather and bind the cables with the Cable
Holder on the TV back cover.
Cable Holder
CAUTION
ENGENGLISH
y Do not move the TV by holding the Cable
Holder, as the Cable holders may break,
and injuries and damage to the TV may occur.
ENGLISH
ENG
ASSEMBLING AND PREPARING
8
Mounting on a table
Lift and tilt the TV into its upright position on a
1
table.
- Leave a 10 cm (minimum) space from the
wall for proper ventilation.
10 cm
10 cm
Connect the power cord to a wall outlet.
2
10 cm
10 cm
Securing the TV to a wall
(This feature is not available for all models.)
Insert and tighten the eye-bolts, or TV brackets
1
and bolts on the back of the TV.
- If there are bolts inserted at the eye-bolts
position, remove the bolts first.
Mount the wall brackets with the bolts to the
2
wall.
CAUTION
y Do not place the TV near or on sources of
heat, as this may result in fire or other damage.
Using the Kensington security system
(This feature is not available for all models.)
The Kensington security system connector is located at the rear of the TV. For more information of
installation and using, refer to the manual provided
with the Kensington security system or visit http://
www.kensington.com.
Connect the Kensington security system cable
between the TV and a table.
Match the location of the wall bracket and the
eye-bolts on the rear of the TV.
Connect the eye-bolts and wall brackets tightly
3
with a sturdy rope.
Make sure to keep the rope horizontal with the
flat surface.
CAUTION
y Make sure that children do not climb on or
hang on the TV.
NOTE
y Use a platform or cabinet that is strong and
large enough to support the TV securely.
ASSEMBLING AND PREPARING
9
Mounting on a wall
Attach a wall mount bracket at the rear of the TV
carefully and install the wall mount bracket on a
solid wall perpendicular to the floor. When you
attach the TV to other building materials, please
contact qualified personnel.
LG recommends that wall mounting be performed
by a qualified professional installer.
10 cm
10 cm
10 cm
10 cm
Make sure to use screws and wall mount bracket
that meet the VESA standard. Standard dimensions for the wall mount kits are described in the
following table.
Separate purchase(Wall Mounting Bracket)
Model 22LK2
VESA (A x B) 100 x 100
Standard screw M4
Number of screws 4
Wall mount
bracket
**
LSW100B, LSW100BG
CAUTION
ENGENGLISH
y Disconnect the power first, and then move or
install the TV. Otherwise electric shock may
occur.
y If you install the TV on a ceiling or slanted
wall, it may fall and result in severe injury.
Use an authorized LG wall mount bracket
and contact the local dealer or qualified
personnel.
y Do not over tighten the screws as this may
cause damage to the TV and void your warranty.
y Use the screws and wall mount bracket that
meet the VESA standard. Any damages or
injuries by misuse or using an improper accessory are not covered by the warranty.
NOTE
y Use the screws that are listed on the VESA
standard screw specifications.
y The wall mount kit includes an installation
manual and necessary parts.
y The length of screws may differ depending
on the wall mount. Make sure to use the
proper length.
y For more information, refer to the manual
supplied with the wall mount bracket.
A
B
 Loading...