

LG 21FG3RGE4AZ Owner’s Manual

OWNER'S MANUAL
Colour Television
Chassis : CP-079B
P/No. : MFL61862104 (04)
www.lge.com

CONTENTS
Important Precautions 3
Location and function of controls 6
Remote control handset / Front panel
Basic operation 8
On and Off / Programme selection
Volume adjustment / Quick view Mute function
On screen menus 9
Menu selection
Setting up TV stations 10
Auto programme tuning / Manual programme tuning
Assigning a programme name / Fine tuning
Programme edit / Deleting a programme / Copying a programme
Moving a programme / Skipping a programme number
Favourite programme (option) / Calling The Programme
Selecting programme in the programme table
Paging through a programme table
/
Picture adjustment 15
XDP Demo (option) / PSM (Picture Status Memory) /
Picture adjustment / Eye (option) / Excellent digital picture selection (option)
Picture format (option)
Sound adjustment (option) 17
Sound adjustment / Balance adjustment / Woofer On/Off (option)
Woofer gain (option) / Excellent digital surround selection (option)
Stereo/Dual reception (option) / Mono sound selection
Language selection for dual language broadcast / Music Mode(Yellow Button)
Equalizer(option)(Red Button)
Other functions 19
Time functions / On/Off Time / Off Time / On Time / Auto sleep
Sleep timer / X-SORT (option) / Adding a program to a desired category
On screen language selection (option) / TV and AV Input (option)
Child lock / Blue Back / AVL (Auto Volume Leveler)(option)
Connection of external equipment 22
Aerial socket / Audio Video in/out sockets (option)
Euro scart socket (option) /
Component in sockets (option) / Headphone socket (option)
Troubleshooting check list 24
Warranty Card 25
S-video / Audio in sockets (S-AV) (option)
Sound output selection /
CSM (Colour Status Memory)
2

Important Precautions
This unit has been engineered and manufactured to assure your personal safety,
however improper use may result in potential electrical shock or fire hazards. In order
to allow the proper operation of all safeguards incorporated in this TV set, observe
the following basic rules for its installation, use and servicing. Keep it in an accessible
place for future reference. (TV operating voltage is : 110V ~ 240V AC)
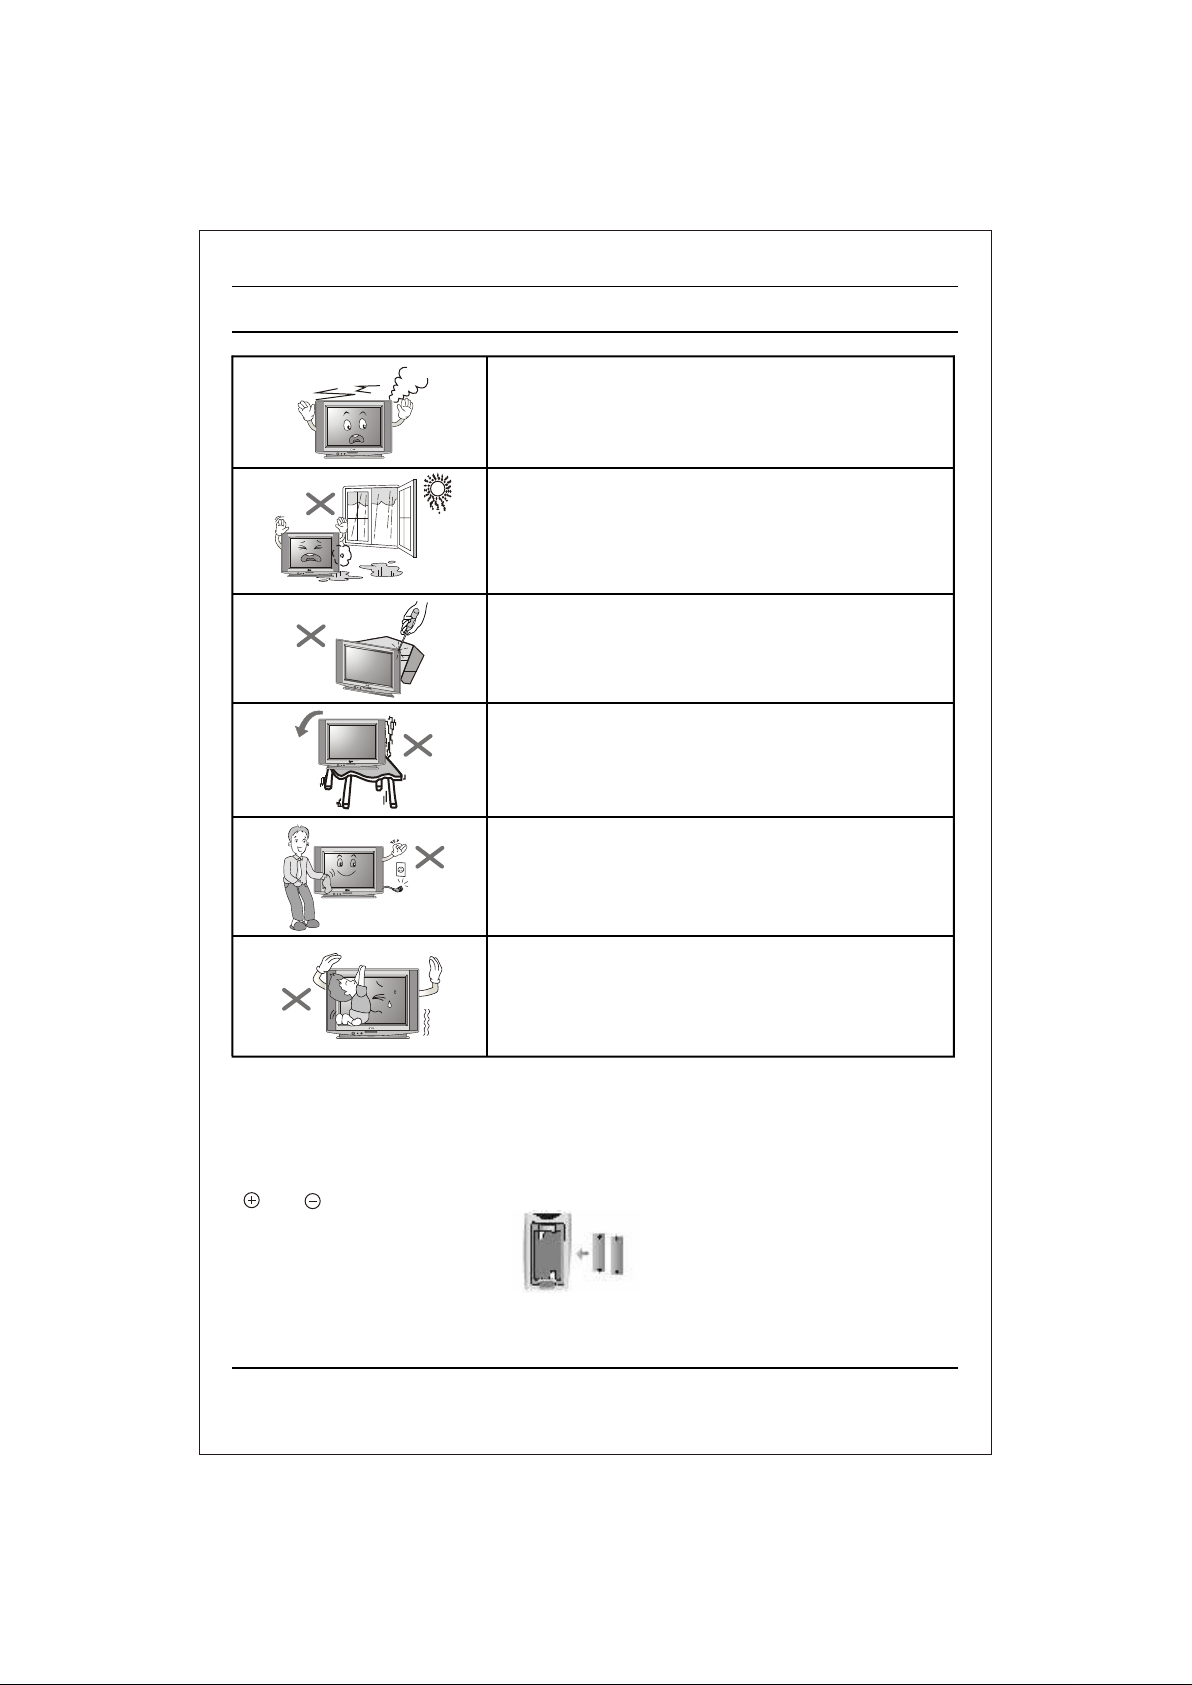
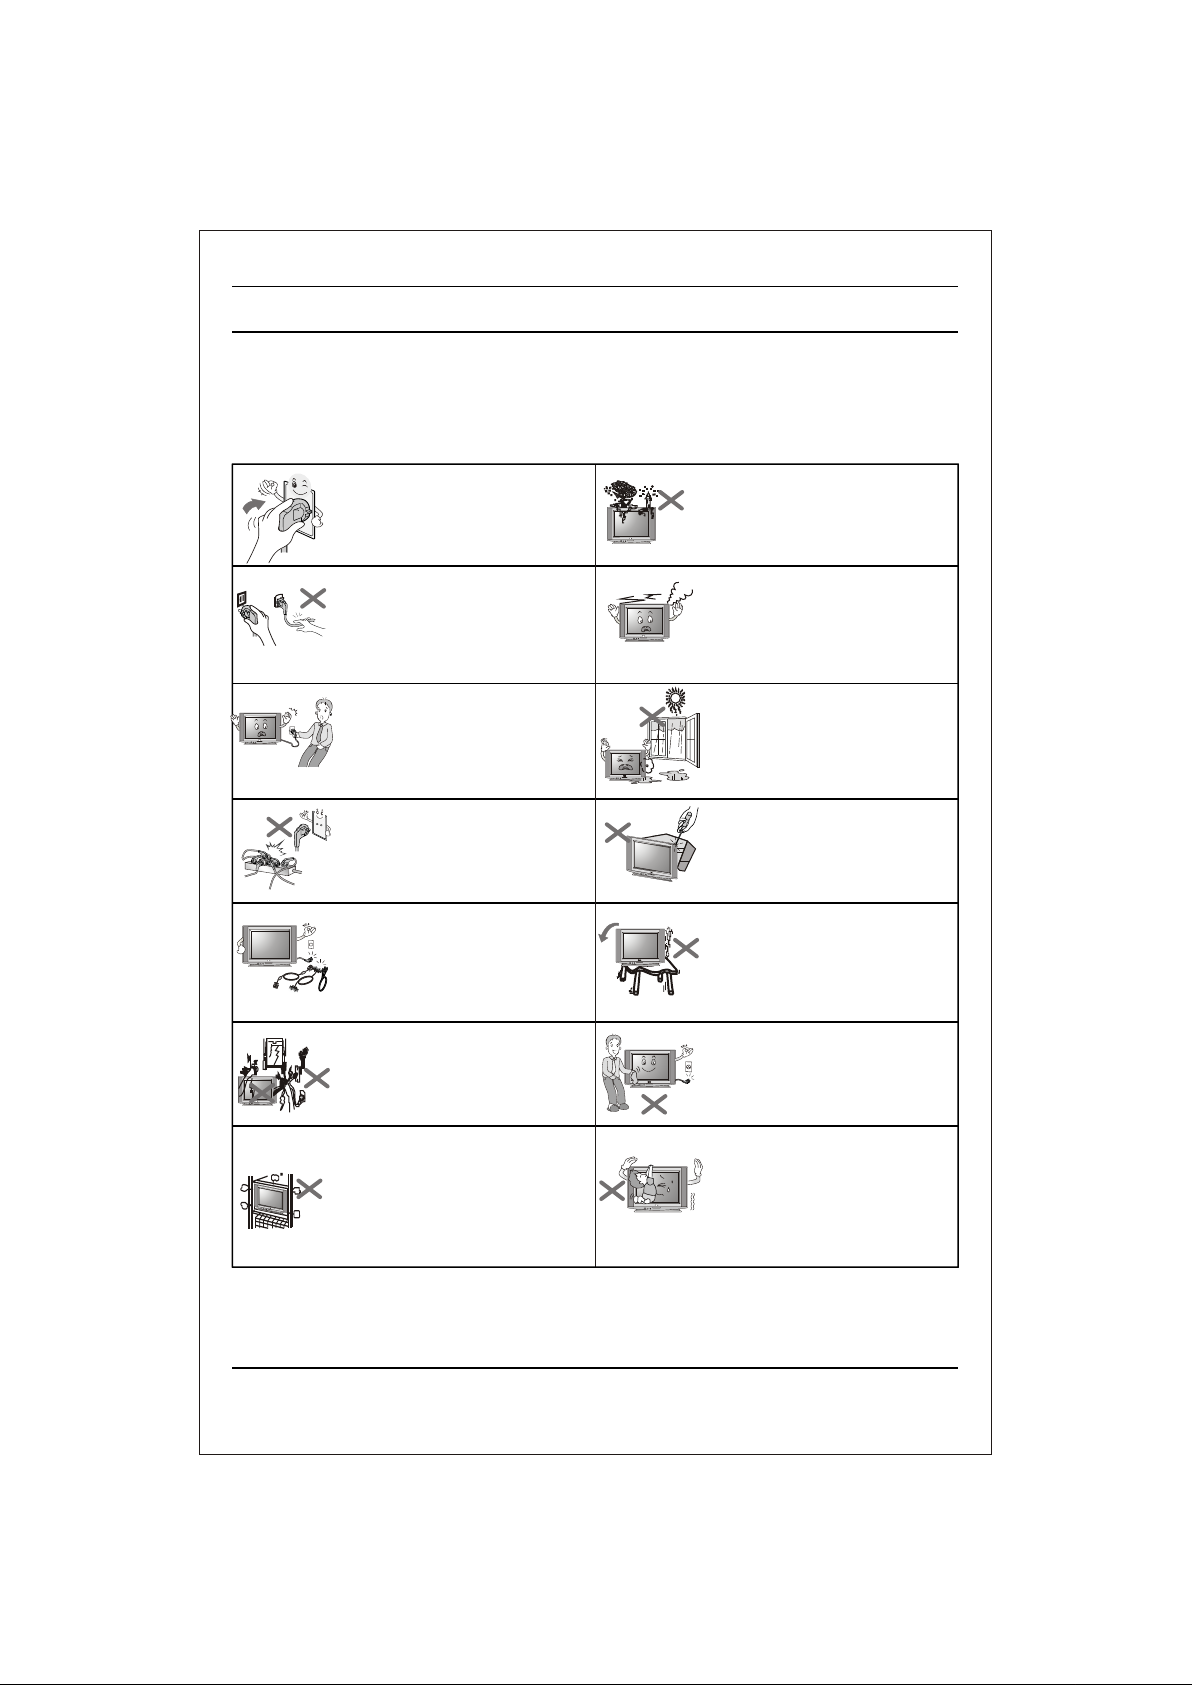
Make sure to insert the power plug completely. If power
cable is not fixed completely, a fire can break out .
Do not pull out the power cord. Always Pull out by the
power plug. Do not touch the plug with wet hands. Do
not damage the power cord.
Do not unplug the power cord while the product is in
use. Do not use the power plug to turn the product
ON/OFF. Electric shock can damage the product.
Do not overload AC outlets by plugging too many
appliances in the same socket or extension cords.
They may result in a shock or fire hazard.
Never leave the TV set “ON” - standby when leaving
the house. Unplug the TV before moving it or if you are
not going to use it for several days or during lightning
storms.
For Own safety, Never touch any part of product, the
power cord, and the antenna cable during lightning
storms. You may be electrocuted.
TV set are provided with ventilation holes to allow the
release of heat generated.Make sure that these holes
are not blocked. Do not install the product in a confined
place, such as book case or built in cabinet .
Do not place any object filled with liquid such as Vases,
cup, glass etc on the TV set. Do not place the lighted
candles on the TV set. This may cause fire or an
electric shock hazard.
3
Important Precautions
If you can smell a smoke or other odors or hear a
strange sound unplug the power cord and contact
the service center. If you continue to use, electric
shock can occur.
Do not place the product where it might be
exposed to excessive heat, sunlight, rain or
moisture.
Do not attempt to open the product. There are
dangerous High Voltages inside. Refer to
Servicing through Qualified Personnel if the TV is
not operating properly.
Avoid personal injury / set damage by Installing
the product on a flat and stable place that can
support the weight of the set and has no risk of
dropping the product.
While cleaning the product, Unplug the Power
cord and clean with dry & soft cloth. Do not use
thinner, aerosol or any other chemical to clean .
Do not allow children to climb over it. If the
product falls / collapses, you may be hurt. Do not
drop or push objects (like coins, hair pins etc) into
the TV cabinet openings. Some internal parts
carry hazardous voltages.
Do Not use the stabilizer, as this set has a In built stabilizer. Use of External
•
Inferior Quality stabilizer may damage your product .
Battery Installation: The remote control Handset is powered by two AA/ AAA
batteries. To Load the Batteries, turn the remote control handset over and open
the battery compartment. Install two batteries as per the polarity symbols
( and ) marked inside the battery compartment .
•
To avoid battery leakage and damage to the remote, remove the batteries from
the remote if you are not going to use it for several days. If any liquid leaks from
the batteries and touch your skin, immediately wash it away with water.
4
lqj{kk funsZ'k
Ñi;k [kqn dks pksV ls vkSj mRikn dks uqdlku ls cpkuk lqfuf'pr djus ds fy, bu funsZ'kksa dk ges'kk ikyu djsaA
• fp=k vkids mRikn ls FkksM+k fHkUu gks ldrk gS] D;ksafd ;g flQZ funsZ'kksa dks le>us esa enn ds fy, ,d mnkgj.k gSA
• Vhoh dk vkWijsfVax oksYVst gS% 110 - 240 V ,lhA
• LVsfcykbt+j dk iz;ksx ugha djsa] D;ksafd bl lsV esa fcYV bu LVsfcykbt+j gSA ?kfV;k DokfyVh ds ckgjh LVsfcykbt+j ds iz;ksx ls vkids
mRikn dks uqdlku igqap ldrk gSA
lqfuf'pr djsa fd ikWoj Iyx vPNh rjg ls yx
x;k gSA ;fn ikWoj Iyx Bhd ls ugha yxk gS rks
vkx yx ldrh gSA
ikWoj dkWMZ dks [khapsa ughaA ges'kk ikWoj Iyx
dks idM+dj [khapsA xhys gkFkksa ls Iyx dks u
Nq,aA ikWoj dkWMZ dks {kfr u igqapk,aA
tc mRikn dks bLrseky dj jgs gksa rks ikWoj
Iyx dks u fudkysaaA mRikn dks vkWu@vkWQ
djus ds fy, ikWoj Iyx dk bLrseky u djsaA
fctyh dk >Vdk mRikn dks {kfr igqapk ldrk
gSA
,d gh lkWdsV vFkok ,DlVsa'ku dkWMZ esa dbZ
midj.k yxkdj ,lh vkmVysV dks vksojyksM
u djsaA ugha rks >Vdk yx ldrk gS ;k vkx
yx ldrh gSA
?kj ls fudyrs le; Vhoh dks dHkh ^^vkWu**
LVSaMck; u NksM+saA Vhoh dks f[kldkus ls igys
vFkok ;fn vki dqN fnuksa rd Vhoh dk
bLrseky ugha djus okys gSa vFkok vka/kh&rwQku
ds nkSjku Vhoh dk Iyx fudky nsaA
vka/kh&rwQku ds nkSjku viuh lqj{kk ds fy,]
midj.k ds fdlh fgLls dks] ikWoj dkWMZ dks ;k
,aVhuk ds rkj dks u Nq,aA vkidks fctyh dk
>Vdk yx ldrk gSA
Vhoh lsV ij ;k rjy inkFkZ ls Hkjh phtsa tSls
Qwynku] di] fxykl vkfn ;k tyh gqbZ
eksecfÙk;ka u j[ksaA blls vkx yx ldrh gS ;k
fctyh dk >Vdk yx ldrk gSA
vxj vkidks /kq,a dh ;k dksbZ vkSj xa/k vk, ;k
dksbZ vthc vkokt+ lqukbZ nsa] rks dks
Iyx ls fudky nsa vkSj lfoZl lsaVj ls laidZ
djsaA vxj vki bLrseky tkjh j[krs gSa rks
fctyh dk >Vdk yx ldrk gSA
mRikn dks ogka u j[ksa tgka ml ij csgn xehZ]
/kwi] o"kkZ ;k ueh dk vlj gks ldrk gksA
mRikn dks [kksyus dh dksf'k'k u djsaA blds
Hkhrj [krjukd gkbZ oksYVst gksrs gSaA vxj Vhoh
Bhd ls dke u dj jgk gks] rks ;ksX;rkizkIr
dfeZ;ksa ls lfoZflax djk,aA
[kqn dks pksV@lsV dks uqdlku ls cpkus ds fy,
mRikn dks ,sls lery vkSj fLFkj LFkku ij j[ksa
tks lsV dk otu laHkky ldrk gks vkSj mRikn
ds fxjus dk [krjk u gksA
mRikn dks lkQ djrs le; dks
f
udky nsa vkSj lkQ lw[ks diM+s ls iksaNsaA lkQ
djus ds fy, fFkuj] ,vjkslksy ;k fdlh vU;
dsfedy dk iz;ksx u djsaA
ikWoj dkWMZ
ikWoj Iyx
iSnk gksus okyh xehZ ds fudyus ds fy, Vhoh
lsVksa esa osafVys'ku fNnz cus gksrs gSaA ;g
lqfuf'pr djsa fd ;s fNnz can u gksaA mRikn dks
cqd dsl ;k fcYV bu dSfcusV tSlh can txgksa
ij baLVky u djsaA
• cSVjh yhdst vkSj fjeksV dks uqdlku ls cpkus ds fy,] tc vki fjeksV dks dbZ fnuksa rd bLrseky ugha djus okys gksa rks cSVfj;ksa dks mlesa
ls fudky nsaA vxj cSVfj;ksa ls dksbZ rjy inkFkZ fjldj vkidh Ropk ij yx tkrk gS] rks rRdky bls ikuh ls /kks nsaA
5
cPpksa dks blds Åij u p<+us nsaA vxj mRikn
fxjrk@<g tkrk gS] rks vkidks pksV yx ldrh
gSA Vhoh dSfcusV ds Nsnksa esa dksbZ pht ¼tSls
flDds] gs;jfiu vkfn½ u fxjk,a vkSj u ?kqlk,aA
dqN Hkhrjh ikVZ~l esa [krjukd oksYVst gksrs gSA
POWER
1
2
7
C
I
S
U
M
19
18
SLEEP
13
VOL
VOL
5
TV/AV
10
21
FAV/X-SORT*
16
(Option-1)
1
MUTE
9
18
MUSIC
19
EQ*
2
3
MENU
VOL
5
6
21
FAV/X-SORT
16
7
13
(Option-2)
1
4
7
P
S
M
/
E
Q
*
W
/
S
E
I
V
O
M
PR
PR
USB/*
MOVIES
1 2
4
7
PSM
2
5
8
0
O
E
O
N
F
E
R
*
OK
Q-VIEW
XDS/* XDP
l/ll/*
POWER
NEWS
MMWOOFER*
5
8
0
PR
OK
PR
Q-VIEWUSB/*
XDS/*
SLEEP
I/II*
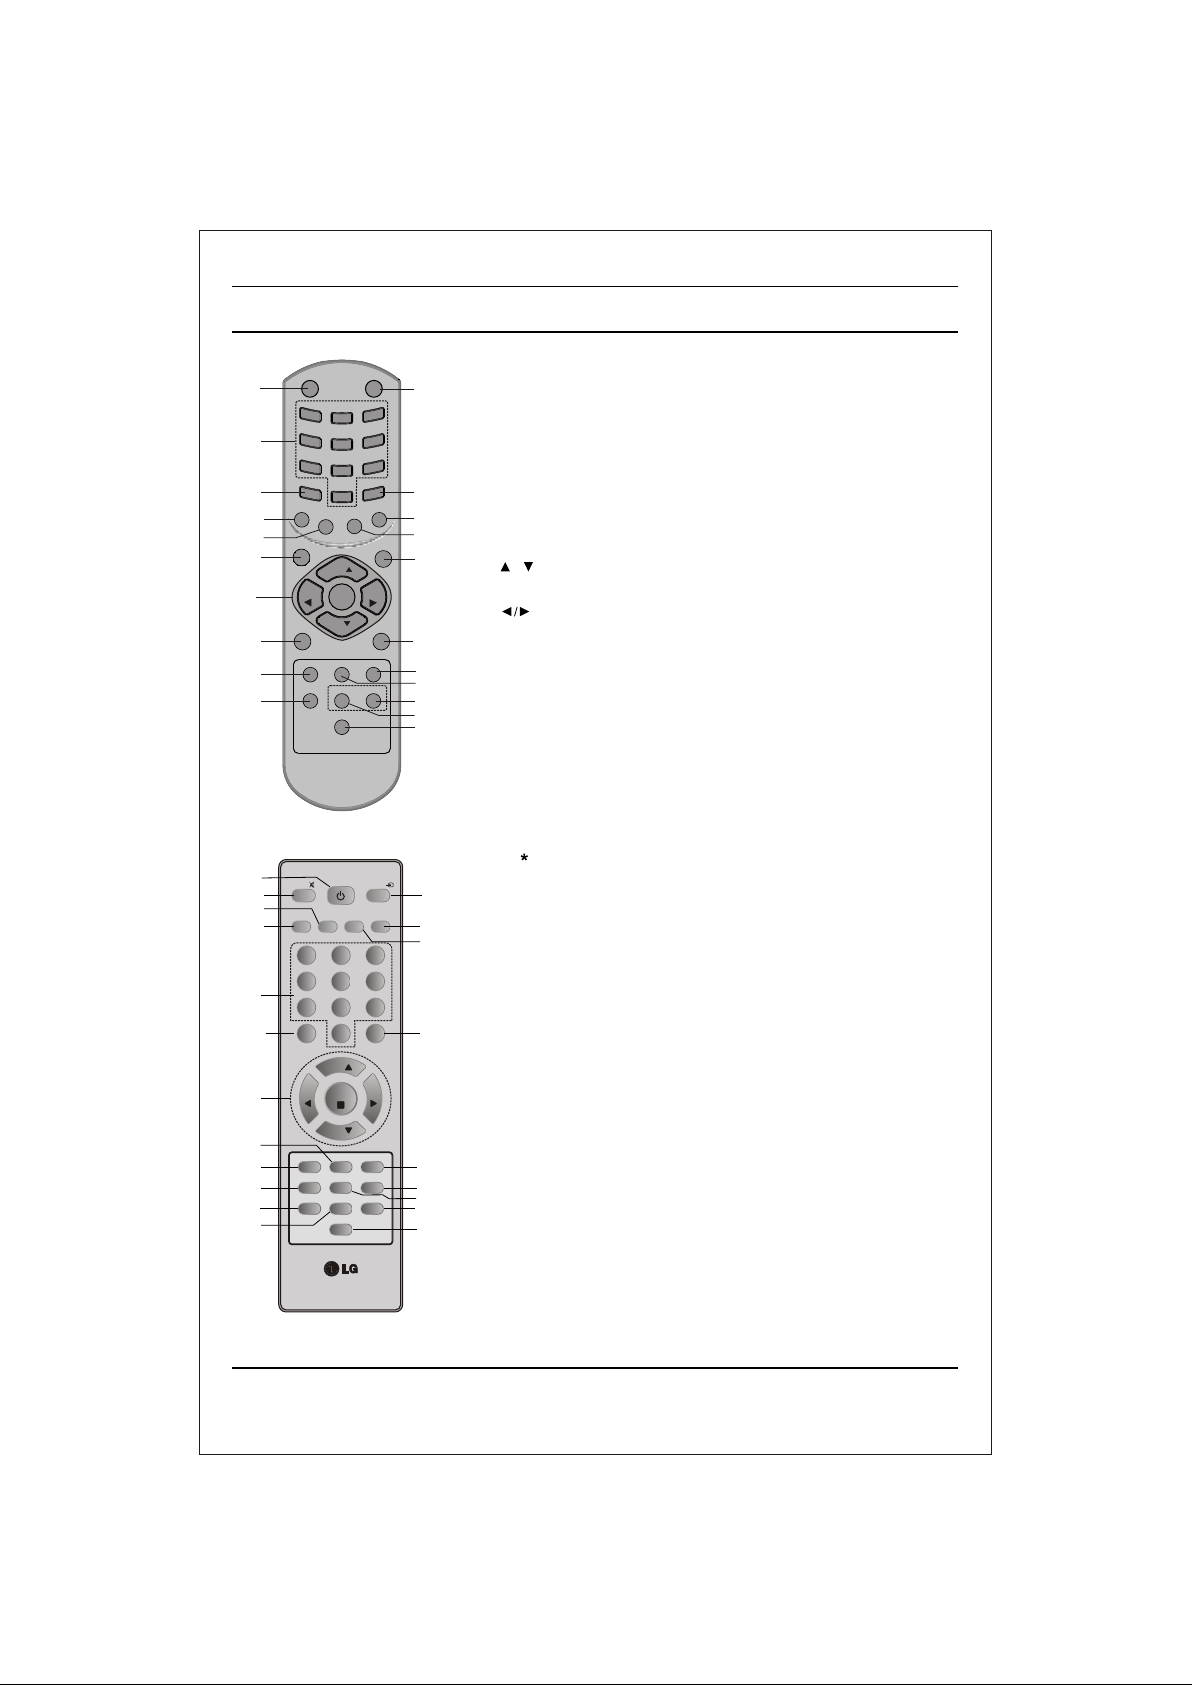
Location and function of controls
All the functions can be controlled with the remote control handset. Some
functions can also be adjusted with the buttons on the front panel of the set.
Remote control handset
9
Before you use the remote control handset, please install the batteries. See
the previous page.
1. POWER
switches the set from On to standby or standby to On.
2. NUMBER BUTTONS
switches the set On from standby or directly select a Programme
14
15
17
3
4
12
6
8
20
11
10
15
17
4
12
8
20
14
11
number.
3. MENU
selects a menu.
4. EYE/ (option)
5. / (Programme Up/Down)
(Volume Up/Down)
OK accepts your selection or displays the current mode.
6. Q. VIEW
7. PSM (Picture Status Memory)
8. XDP
9. MUTE
10. TV/AV
11. I/II/ (option)
*
switches the eye function On or Off.
selects a programme or a menu item.
switches the set On from standby.
adjusts the volume.
adjusts menu settings.
returns to the previously viewed programme.
recalls your preferred picture setting.
Select Excellent Digital Picture.
switches the sound On or Off.
selects TV or AV mode.
switches the set On from Standby.
selects the language during dual language broadcast. (option)
selects the sound output in AV mode.
12. LIST/X-LIST* (option)
displays the programme table. press LIST / X-LIST key again to clear
the LIST / X-LIST table from the screen.
13. SLEEP
sets the sleep timer.
14. SSM/* (option) (Sound Status Memory)
recalls your preferred sound setting.
15. ARC
change picture format (Normal/Zoom).
16. FAVOURITE (OPTION) / X-SORT (option)
pressing each time this button will select a stored favourite programme.
X-SORT switches X- SORT (option) On/Off.
17. MM
select music mode.
18. WFR /* (Woofer/*)
direct access key for woofer on/off.
19. EQ/* (option)
direct access key to select EQ (Graphics Equalizer).
20. XDS/*
selects excellent digital surround.
21. USB/* (option)
to enter into USB mode.
COLOURED BUTTONS : When Menu is On some of these buttons are used
for programme edit.
Remarks : 1. Some keys in remote can be non-functional, these keys
are used in other models & marked with *.
2. Colour keys will not work as direct access keys during X-Sort on mode.
# Remote Design / Aesthetic may vary from model to model.
# Turbo Sound is equivalent to XDS.
# When XDS is ON, SSM is not applicable.
(option)
(option)
S
/
M
W
M
LIST/X-LIST*
LIST/X-LIST*
MUTE
SS
VOL
VOL
EYE/*
VOL
XDP
SSM/*
3
6
9
M
M
A
R
D
EYE/
TV/AV
DRAMA
ARC
3
6
9
*
/
A
/
A
R
C
MENU
*
6

Location and function of controls
FRONT PANEL / SIDE PANEL
Shown below is a simplified representation of front or side panel, here shown may be somewhat different from your set.
AV3
7
S VIDEO
9
8
L/MONOVIDEO
AUDIO
R
AV3
7
9
8
8
3
S VIDEO
4
L/MONOVIDEO
1
AUDIO
R
AV2
3
4
LVIDEO
AUDIO
R
1
7
8
7
8
OR
11
MENU
OK/
ON/OFF
MENU
OK/
ON/OFF
AV3
21FU8 series
21FD5 series
5 2
21FE4 series
5 2
1
ON/OFF
1 2 3 4 56
PR
VOL
PR
VOL
6
2
6
21FU1 series
8
7
1
21FU3 series
8
7
6
21SA4 series
8
7
1
2 6
MENU
OK/
VOL
PR
10
1. MAIN POWER
switches the set On or Off.
2. POWER/STANDBY INDICATOR
illuminates brightly when the set is in
standby mode.
dims when the set is switched On.
3. MENU
selects a menu.
106
4. OK /
accepts your selection of current mode
or to select AV/Component / RF mode.
5 (Programme Up/Down)
selects a programme or a menu item.
switches the set on from standby.
If X-Sort is on, switch to the next prog.
10
in same group.
(Volume Down/Up)
adjusts the volume.
3
adjusts menu settings.
4
6. REMOTE CONTROL SENSOR
Note : Only use the supplied remote
5
10
control handset. (When you use other,
they'll be not able to function).
7. HEADPHONE SOCKET (option)
Connect the headphone plug to this
3
socket.
4
8. AUDIO/VIDEO IN SOCKETS (AV2/AV3)
5
2
6
(option)
Connect the audio/video out sockets of
External equipment to these sockets.
9. S-VIDEO/AUDIO IN SOCKETS (S-AV)
3
(option)
4
Connect the video out socket of an S
VIDEO VCR to the S-VIDEO socket.
5
Connect the audio out sockets of the
S-VIDEO VCR to the audio sockets as
in Av3.
10. EYE (option)
3
OK/
adjusts picture according to the Surrounding conditions.
4
11. USB - socket (option)
5
Connect the USB pen drive to this socket
Note : Do not place any heavy objects on
the TV set.
SWIVEL STAND
This feature is available with 21SA4 model only.
After installing the TV, you can adjust the TV
set manually to the left or right direction by
15 degrees to suit your viewing position.
7
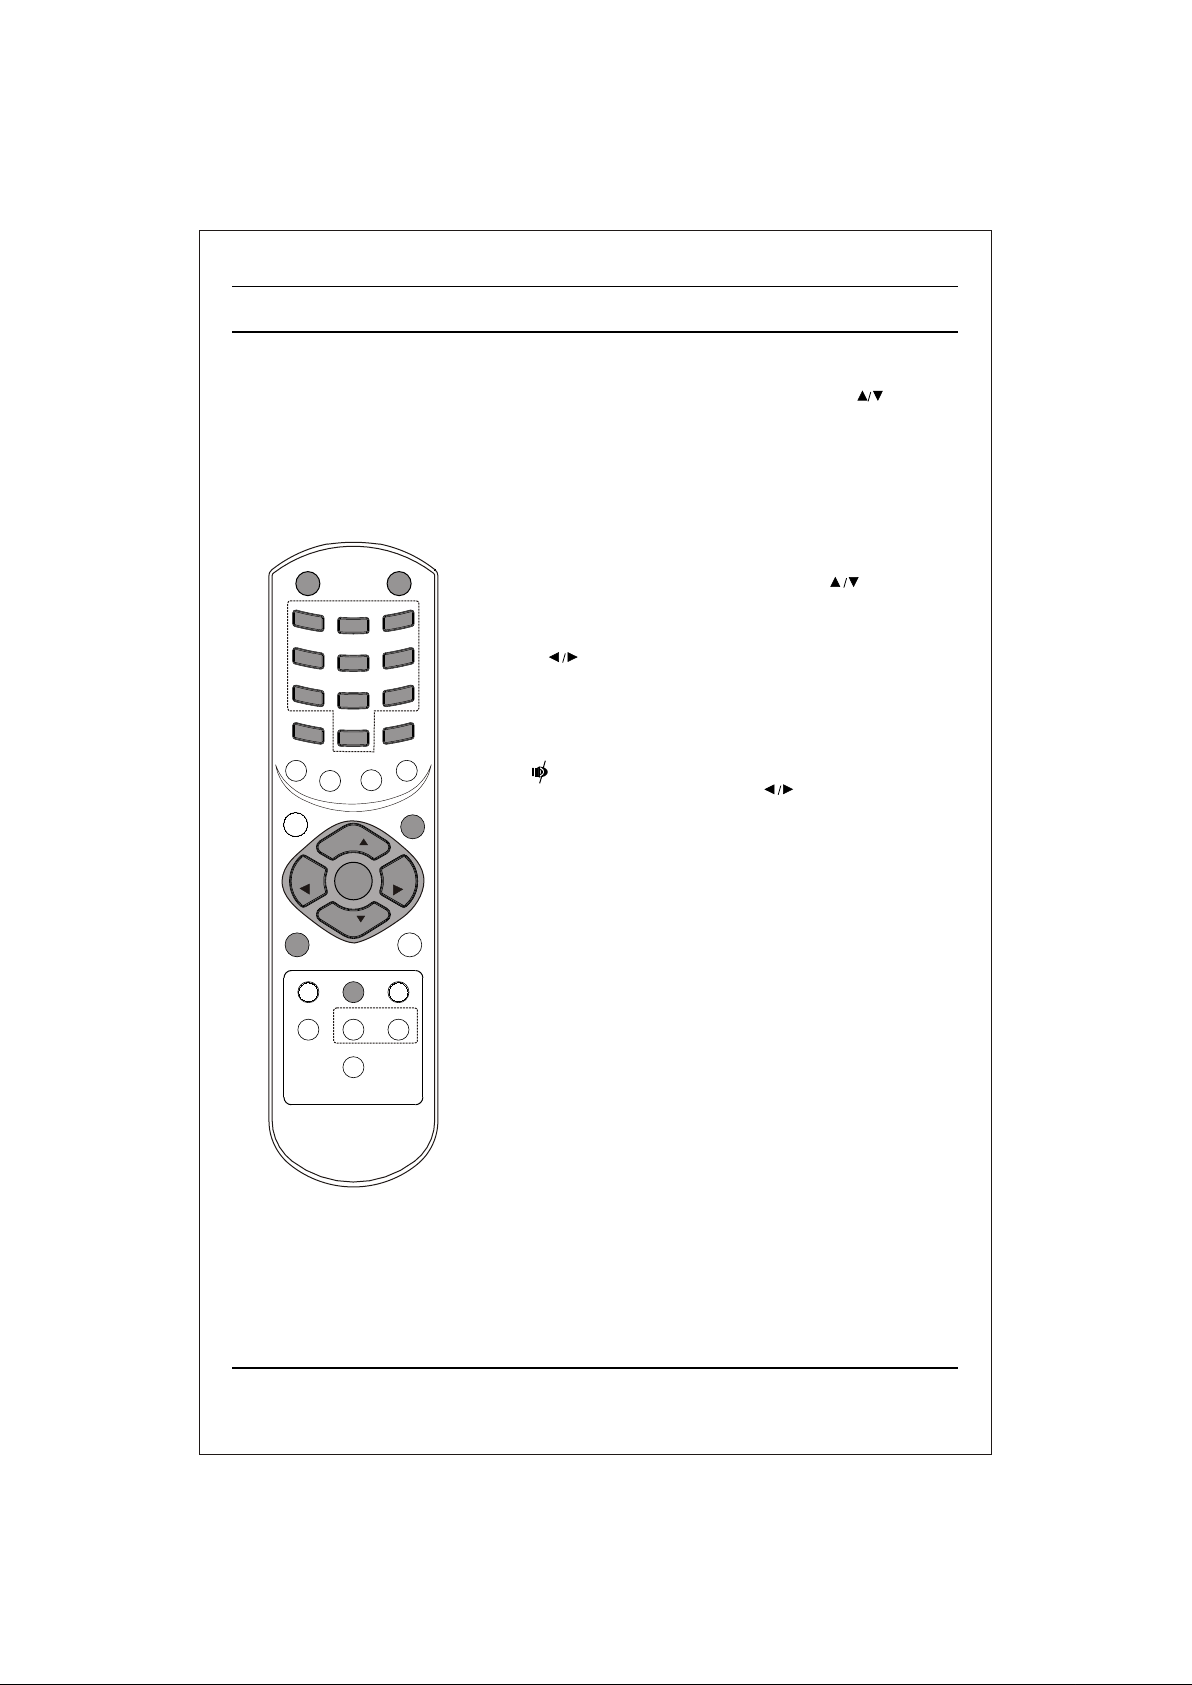
Basic operation
On and Off
1. Press the main power button at front side of set to switch On.
2. If the set is in standby mode, press the POWER, , TV/AV or
NUMBER buttons on the remote control handset to switch it On
fully.
3. Press the POWER button on the remote control handset.
The set reverts to standby mode.
4. Press the main power button again to switch the set Off.
Note : while the set is switched On and mains plug is disconnected,
if mains plugged again then set will switch to standby or power On.
POWER
P
C
I
/
S
E
Q
U
M
SLEEP
VOL
VOL
TV/AV
USB/*
FAV/X-SORT*
MUTE
Programme selection
You can select a programme number with the or NUMBER
1
4
7
SM
*
W
/
O
S
E
I
V
O
M
3
2
6
5
9
8
*
/
S
S M
0
A
/
M
A
A
R
D
S
/
M
W
M
E
O
N
F
E
R
*
MENU
Buttons.
Volume adjustment
Press the button to adjust the volume.
Quick view
Press the Q.VIEW button to view the last viewed programme.
Mute function
Press the MUTE button. The sound is switched Off and the
R
C
display appears.
You can cancel it by pressing the MUTE, , SSM, XDS,
Woofer (option) button.
PR
VOL
VOL
OK
PR
Q-VIEW
XDS/*
EYE/
*
LIST/X-LIST*
XDP
l/ll/*
8

U
M
SLEEP
POWER
C
I
/
S
VOL
VOL
On screen menus
The dialogue between you and your set takes place on screen with
an operator menu. The buttons required for the operating steps are
also displayed.
Menu selection
1. Press the MENU button and then button to display each menu.
2. Press the button and then button to select a menu item.
3. Press the button to display the sub menu or the pull-down menu.
4 Change the setting of an item in the sub or pull-down
menu with or .
5. Press OK button to save the setting mode.
MUTE
1
4
7
P
SM
E
Q
*
W
/
O
S
E
I
V
O
M
3
2
6
5
9
8
/*SSM
0
A
/
M
A
A
R
D
S
/
M
W
M
E
O
N
F
E
R
*
MENU
PR
VOL
VOL
OK
6. Repeatedly press the MENU or button to return to normal TV
viewing.
Note :
a. In the AV mode the Programme Menu is not displayed.
b. In sound menu woofer gain & AVL is optional (In some models)
c. In programme menu favourite is optional (In some models)
d. In picture menu, XDP demo is optional in some models.
Programme
R
C
Picture
CSM
Auto programme
Manual programme
22
TV/AV
USB/*
FAV/X-SORT*
PR
Q-VIEW
XDS/*
EYE/
*
LIST/X-LIST*
XDP
l/ll/*
Sound
(For Stereo Models)
Time
Programme edit
or
Special
9
 Loading...