

LG 15LA6R, 20LA6R Service Manual

LCD
Color Television
OWNER’S MANUAL
MODELS: 15LA6R
20LA6R
Please read this manual carefully before operating your set.
Retain it for future reference.
Record model number and serial number of the set.
See the label attached on the back cover and quote this information to your dealer when you require service.
P/NO : 3828TUL283A(0411-REV00)
Printed in Korea
Internet Home Page : http://www.lge.com
http://www.lg.ca
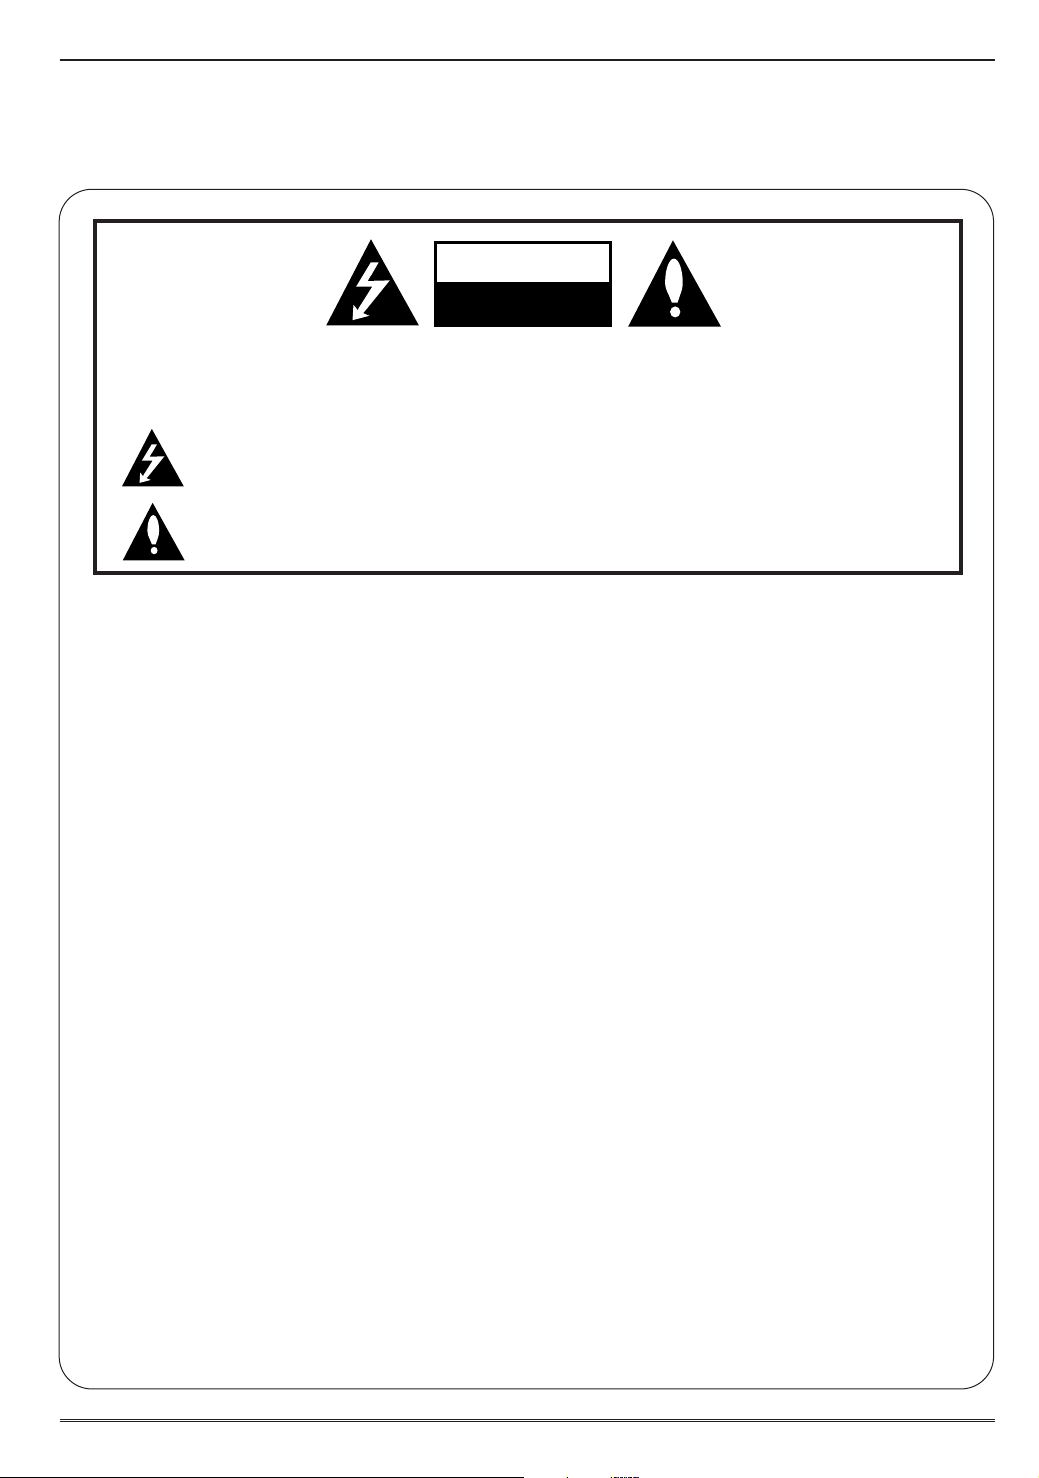
Warning
CAUTION
RISK OF ELECTRIC SHOCK
DO NOT OPEN
W
arning
W
arning
WARNING:
TO REDUCE THE RISK OF ELECTRIC SHOCK DO NOT REMOVE COVER (OR BACK). NO USER
SERVICEABLE PARTS INSIDE. REFER TO QUALIFIED SERVICE PERSONNEL.
The lightning flash with arrowhead symbol, within an equilateral triangle, is intended to alert the user to
the presence of uninsulated “dangerous voltage” within the product’s enclosure that may be of sufficient magnitude to constitute a risk of electric shock to persons.
The exclamation point within an equilateral triangle is intended to alert the user to the presence of
important operating and maintenance (servicing) instructions in the literature accompanying the appliance.
NOTE TO CABLE/TV INSTALLER:
This reminder is provided to call the CATV system installer’s attention to Article 820-40 of the National Electric
Code (U.S.A.). The code provides guidelines for proper grounding and, in particular, specifies that the cable
ground shall be connected to the grounding system of the building, as close to the point of the cable entry as practical.
REGULATORY INFORMATION
This equipment has been tested and found to comply with the limits for a Class B digital device, pursuant to Part
15 of the FCC Rules. These limits are designed to provide reasonable protection against harmful interference in
a residential installation. This equipment generates, uses and can radiate radio frequency energy and, if not
installed and used in accordance with the instructions, may cause harmful interference to radio communications.
However, there is no guarantee that interference will not occur in a particular installation. If this equipment does
cause harmful interference to radio or television reception, which can be determined by turning the equipment off
and on, the user is encouraged to try to correct the interference by one or more of the following measures:
- Reorient or relocate the receiving antenna.
- Increase the separation between the equipment and receiver.
- Connect the equipment into an outlet on a circuit different from that to which the receiver is connected.
- Consult the dealer or an experienced radio/TV technician for help.
Any changes or modifications not expressly approved by the party responsible for compliance could void the
user’s authority to operate the equipment.
CAUTION:
Do not attempt to modify this product in any way without written authorization from LG Electronics Corporation.
Unauthorized modification could void the user’s authority to operate this product.
U.S.A. only -----------------------------------------------
COMPLIANCE:
The responsible party for this product’s compliance is:
LG Electronics U.S.A., Inc.
1000 Sylvan Avenue, Englewood Cliffs, NJ 07632
Phone: 1-201-816-2000
http://www.lgusa.com
---------------------------------------------------------------
2

Safety Instructions
Safety Instructions
Safety Instructions
WARNING :
To reduce the risk of fire or electric shock, DO NOT expose this apparatus to rain or moisture.
Apparatus shall not be exposed to dripping or splashing and no objects filled with liquids, such as vases, shall be placed on the
apparatus.
CAUTION :
These servicing instructions are for use by qualified service personnel only. To reduce the risk of electric shock, do not perform
any servicing other than that contained in the operating instructions unless you are qualified to do so.
IMPORTANT SAFETY INSTRUCTIONS
1. Read these instructions.
2. Keep these instructions.
3. Heed all warnings.
4. Follow all instructions.
5. Do not use this apparatus near water.
6. Clean only with a dry cloth.
7. Do not block any of the ventilation openings. Install in accordance with the manufacturer’s instructions.
8. Do not install near any heat sources such as radiators, heat registers, stoves, or other apparatus (including amplifiers) that
produce heat.
9. Do not defeat the safety purpose of the polarized or grounding type plug. A polarized plug has two blades with one wider
than the other. A grounding type plug has two blades and a third grounding prong. The wide blade or the third prong is
provided for your safety. When the provided plug does not fit into your outlet, consult an electrician for replacement of the
obsolete outlet.
10. Protect the power cord from being walked on or pinched particularly at plugs, convenience receptacles, and the point
where they exit from the apparatus.
11. Only use the attachments / accessories specified by the manufacturer.
3
Safety Instructions
Safety Instructions continued
Safety Instructions continued
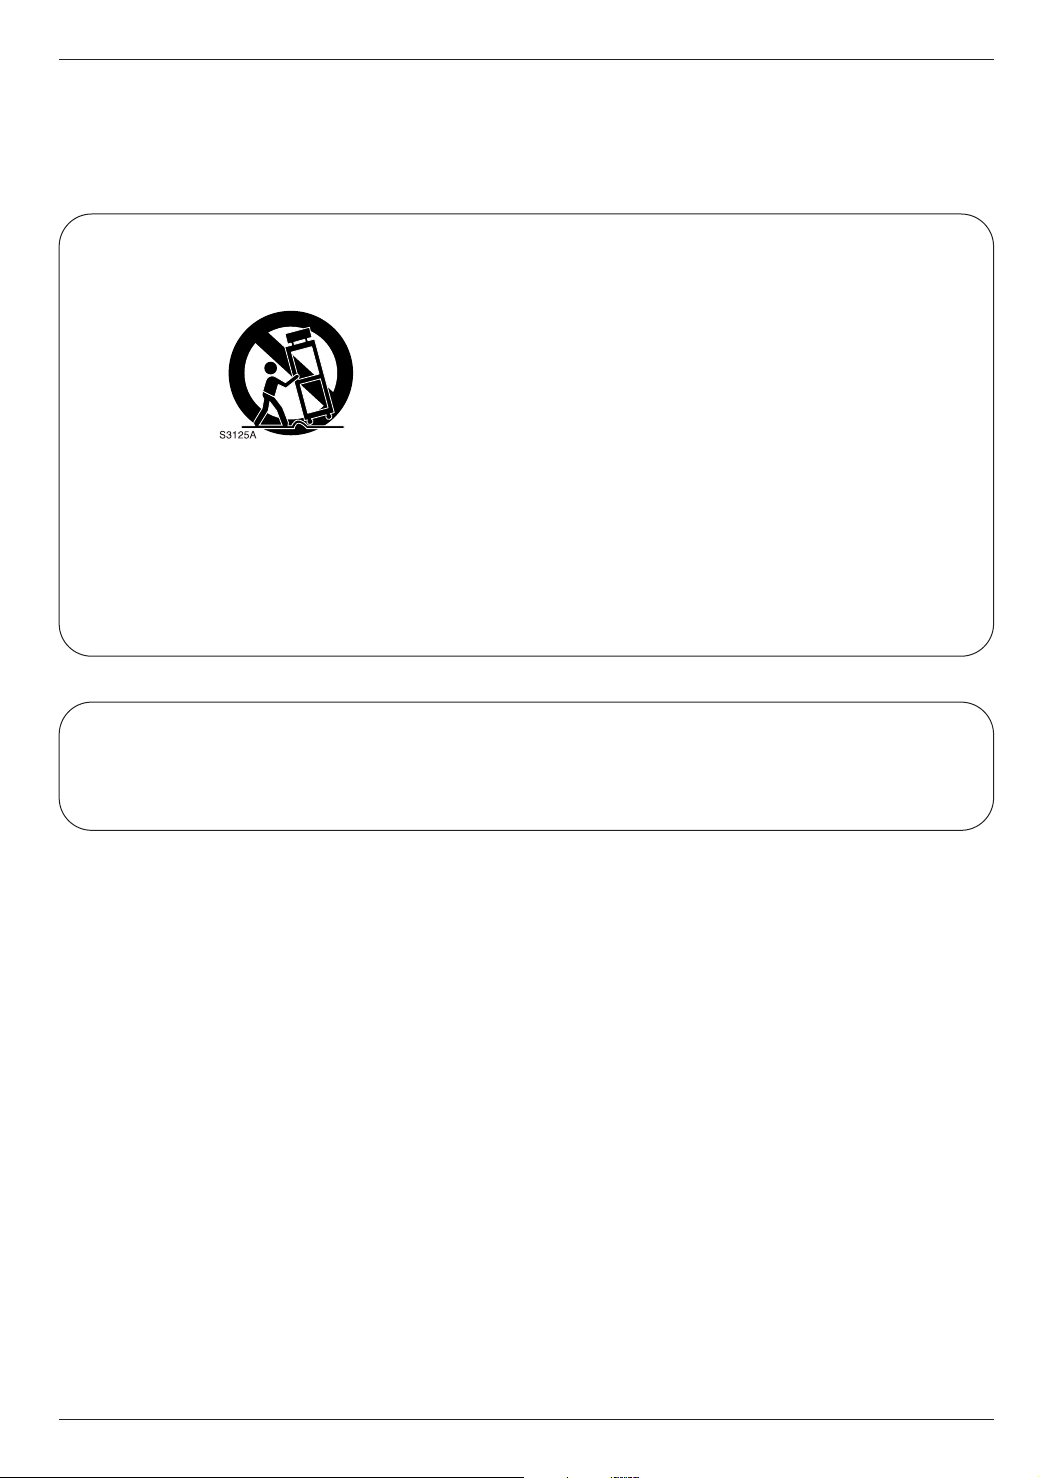
12. Use only with a cart, stand, tripod, bracket, or table specified by the manufacturer, or sold with the apparatus. When a
cart is used, use caution when moving the cart / apparatus combination to avoid injury from tip-over.
13. Unplug this apparatus during lightning storms or when unused for long periods of time.
14. Refer all servicing to qualified service personnel. Servicing is required when the apparatus has been damaged in any
way, such as power supply cord or plug is damaged, liquid has been spilled or objects have fallen into the apparatus, the
apparatus has been exposed to rain or moisture, does not operate normally, or has been dropped.
On Disposal
a. The fluorescent lamp used in this product contains a small amount of mercury.
b. Do not dispose of this product with general household waste.
Disposal of this product must be carried out in accordance to the regulations of your local authority.
4

Contents
Contents
Contents
Warnings . . . . . . . . . . . . . . . . . . . . . . . . . . . . . . . . . . . . .2
Safety Instructions . . . . . . . . . . . . . . . . . . . . . . . . . . . . .3~4
Introduction
Controls . . . . . . . . . . . . . . . . . . . . . . . . . . . . . . .6
Connection Options . . . . . . . . . . . . . . . . . . . . . . 7
Remote Control Key Functions . . . . . . . . . . . . . .8
Installation
Accessories . . . . . . . . . . . . . . . . . . . . . . . . . . . .9
Kensington Security System . . . . . . . . . . . . . . . .9
Installation Instruction . . . . . . . . . . . . . . . . . . . . . .10
External Equipment Connections . . . . . . . . . .11~14
Antenna Connection . . . . . . . . . . . . . . . . . . . . .11
VCR Setup . . . . . . . . . . . . . . . . . . . . . . . . . . . .12
Cable TV Setup . . . . . . . . . . . . . . . . . . . . . . . .12
External A/V Source Setup . . . . . . . . . . . . . . . .12
DVD Setup . . . . . . . . . . . . . . . . . . . . . . . . . . . .13
DTV Setup . . . . . . . . . . . . . . . . . . . . . . . . . . . .13
Using Headphones . . . . . . . . . . . . . . . . . . . . . .13
PC Setup . . . . . . . . . . . . . . . . . . . . . . . . . . . . .14
Operation
PC Menu Options . . . . . . . . . . . . . . . . . . . . . . . . .15
TV Operation Overview . . . . . . . . . . . . . . . . . . . .16
Menu Language Selection . . . . . . . . . . . . . . . . . .16
Channel Menu Options
Memorizing the Channels with EZ Scan . . . . . .17
Add/Delete Channels with Manual Program . . .17
Favorite Channels Setup . . . . . . . . . . . . . . . . . .17
Picture Menu Options
EZ Video . . . . . . . . . . . . . . . . . . . . . . . . . . . . .18
Manual Picture Control (User option) . . . . . . . .18
Sound Menu Options
EZ Audio . . . . . . . . . . . . . . . . . . . . . . . . . . . . .19
Equalizer Adjustments . . . . . . . . . . . . . . . . . . .19
AVL (Auto Volume Leveler) . . . . . . . . . . . . . . . .19
Sound Balance . . . . . . . . . . . . . . . . . . . . . . . . .19
Stereo/SAP Broadcasts Setup . . . . . . . . . . . . .19
Time Menu Options
Auto Clock Setup . . . . . . . . . . . . . . . . . . . . . . .20
Manual Clock Setup . . . . . . . . . . . . . . . . . . . . .20
On/Off Timer Setup . . . . . . . . . . . . . . . . . . . . .21
Sleep Timer Setup . . . . . . . . . . . . . . . . . . . . . .21
Auto Off . . . . . . . . . . . . . . . . . . . . . . . . . . . . . .21
Special Menu Options
Closed Captions . . . . . . . . . . . . . . . . . . . . . . . .22
Caption/Text . . . . . . . . . . . . . . . . . . . . . . . . . . .23
Captions . . . . . . . . . . . . . . . . . . . . . . . . . . . . . .23
Key Lock . . . . . . . . . . . . . . . . . . . . . . . . . . . . .23
Lock Options . . . . . . . . . . . . . . . . . . . . . . . . . . . .24
Lock Menu Setup . . . . . . . . . . . . . . . . . . . . . . .25
Maintenance . . . . . . . . . . . . . . . . . . . . . . . . . . . . . . . . .26
Product Specifications . . . . . . . . . . . . . . . . . . . . . . . . .26
Troubleshooting Checklist . . . . . . . . . . . . . . . . . . . . . .27
5
Introduction
CH
VOL
MENU
ENTER
ON/OFF
TV
VIDEO
/ I
Introduction
Introduction
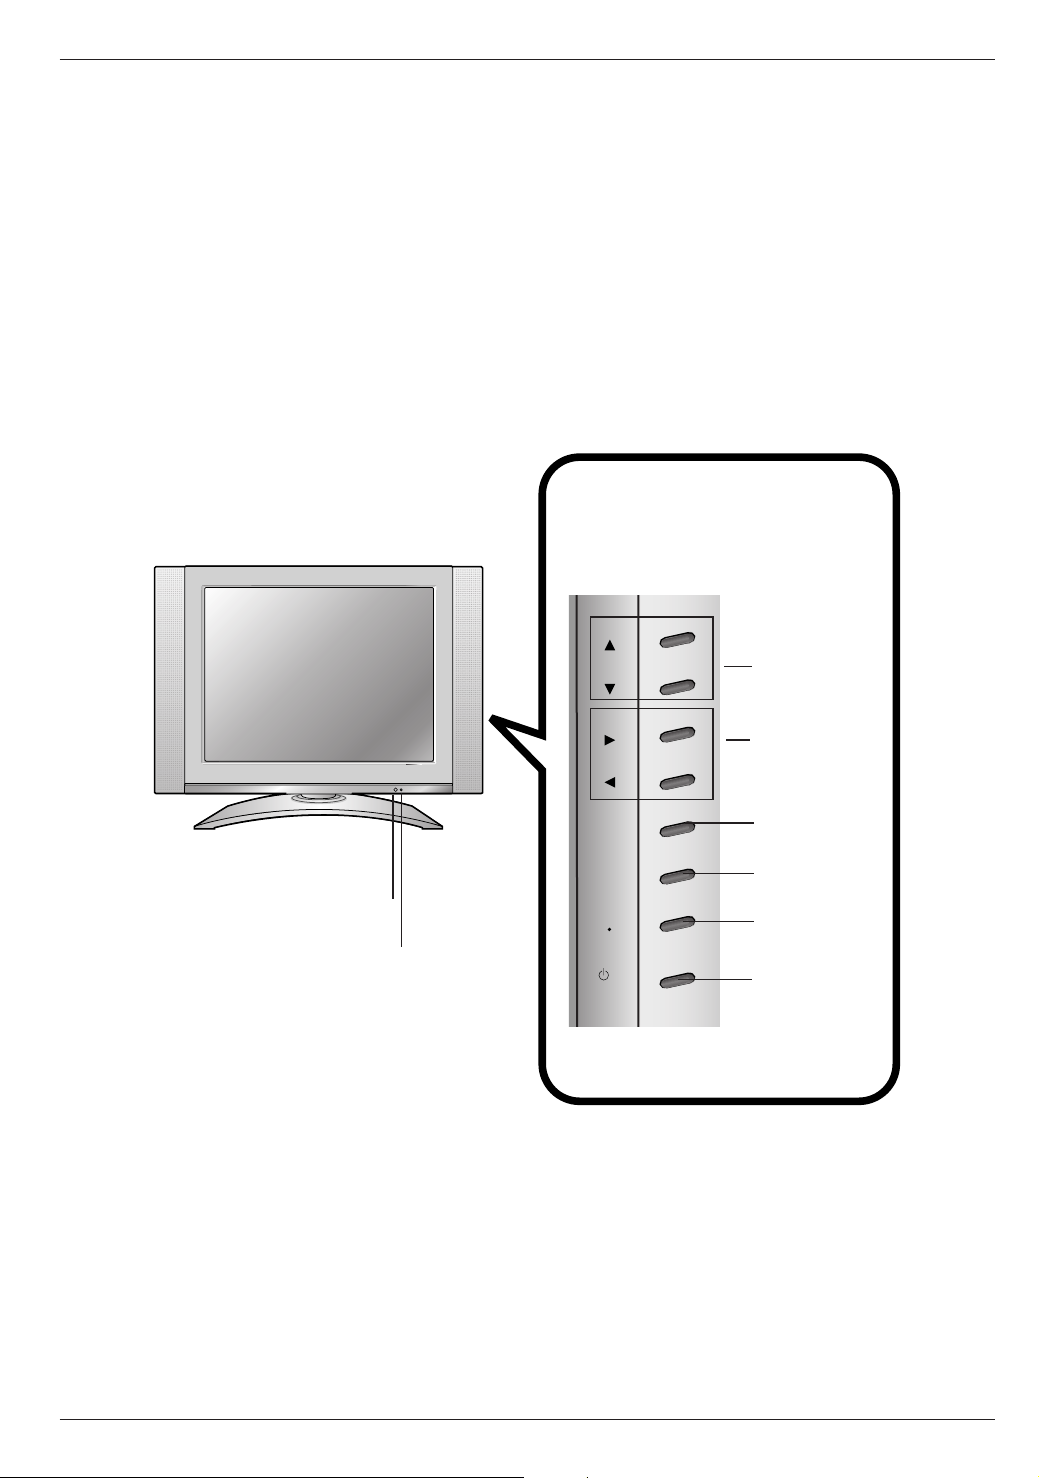
Controls
Controls
Side Control Panel
Side Control Panel
Remote Control Sensor
Power/Standby Indicator
Glows red in Standby mode,
Glows green when the TV is turned on.
Channel Buttons
Volume Buttons
Enter Button
Menu Button
TV
/Video Button
On/Off Button
6
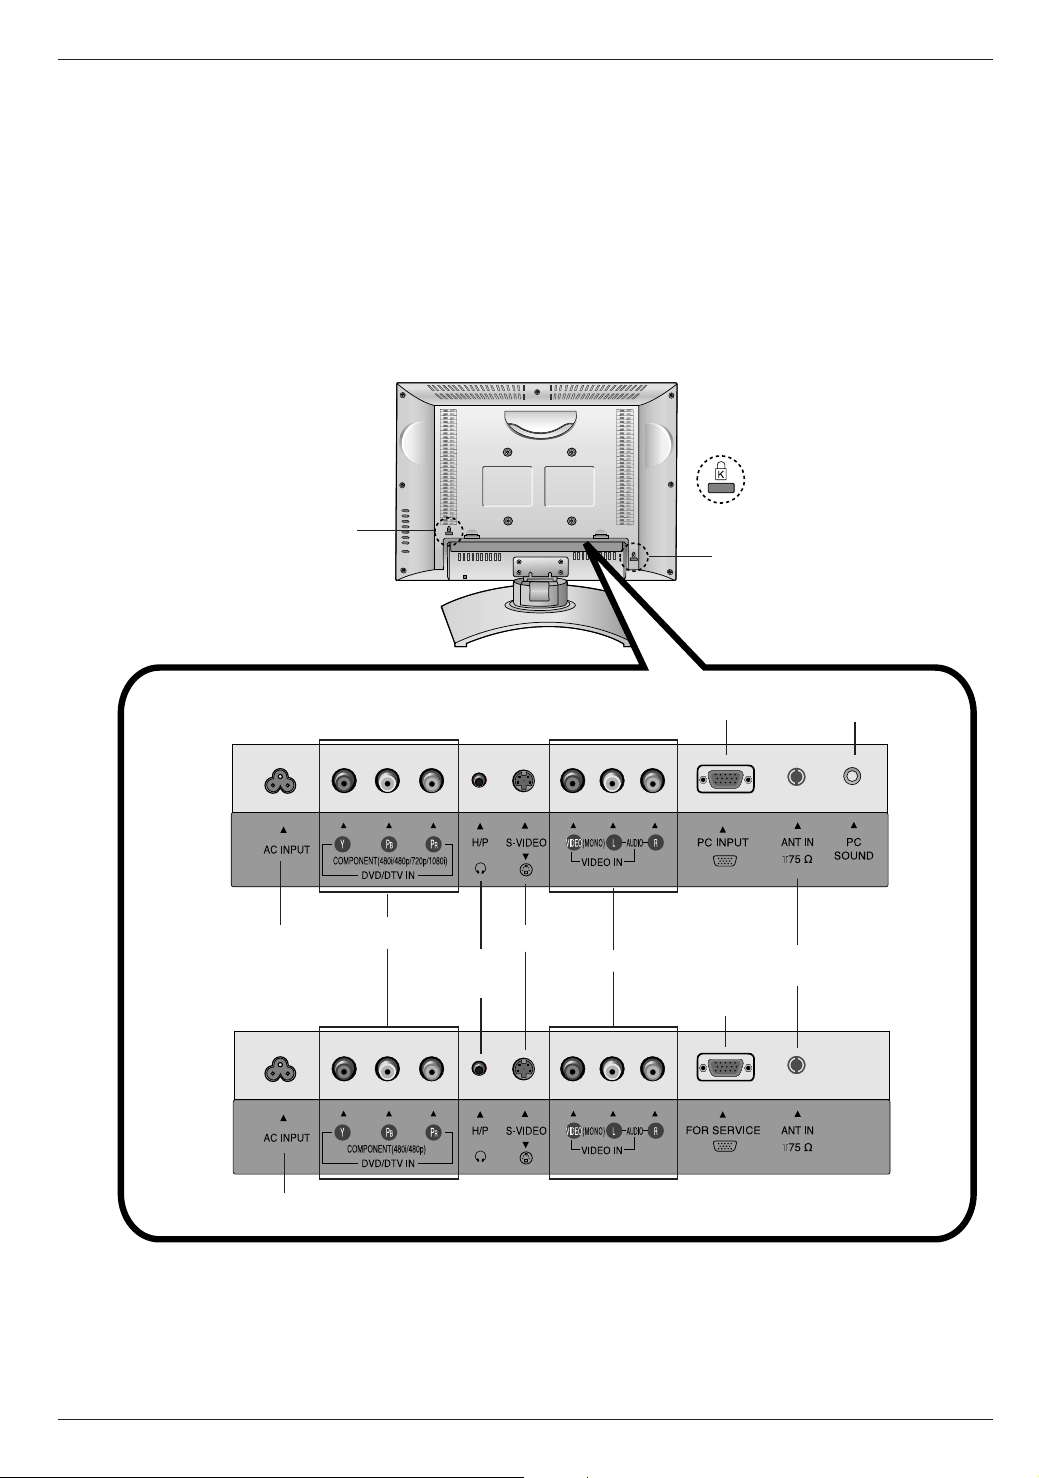
Connection Options
Connection Options
20LA6R
Introduction
* Kensington Security
System Connector
(Refer to P.9)
15LA6R
15LA6R
15LA6R
20LA6R
20LA6R
AC Input
AC Input
DVD/DTV Input
S-Video Input
Headphone
Jack
Audio / Video Input
PC Input
Antenna Input
Service Jack
PC sound Input
- This manual mainly explains the features for the 15LA6R.
7
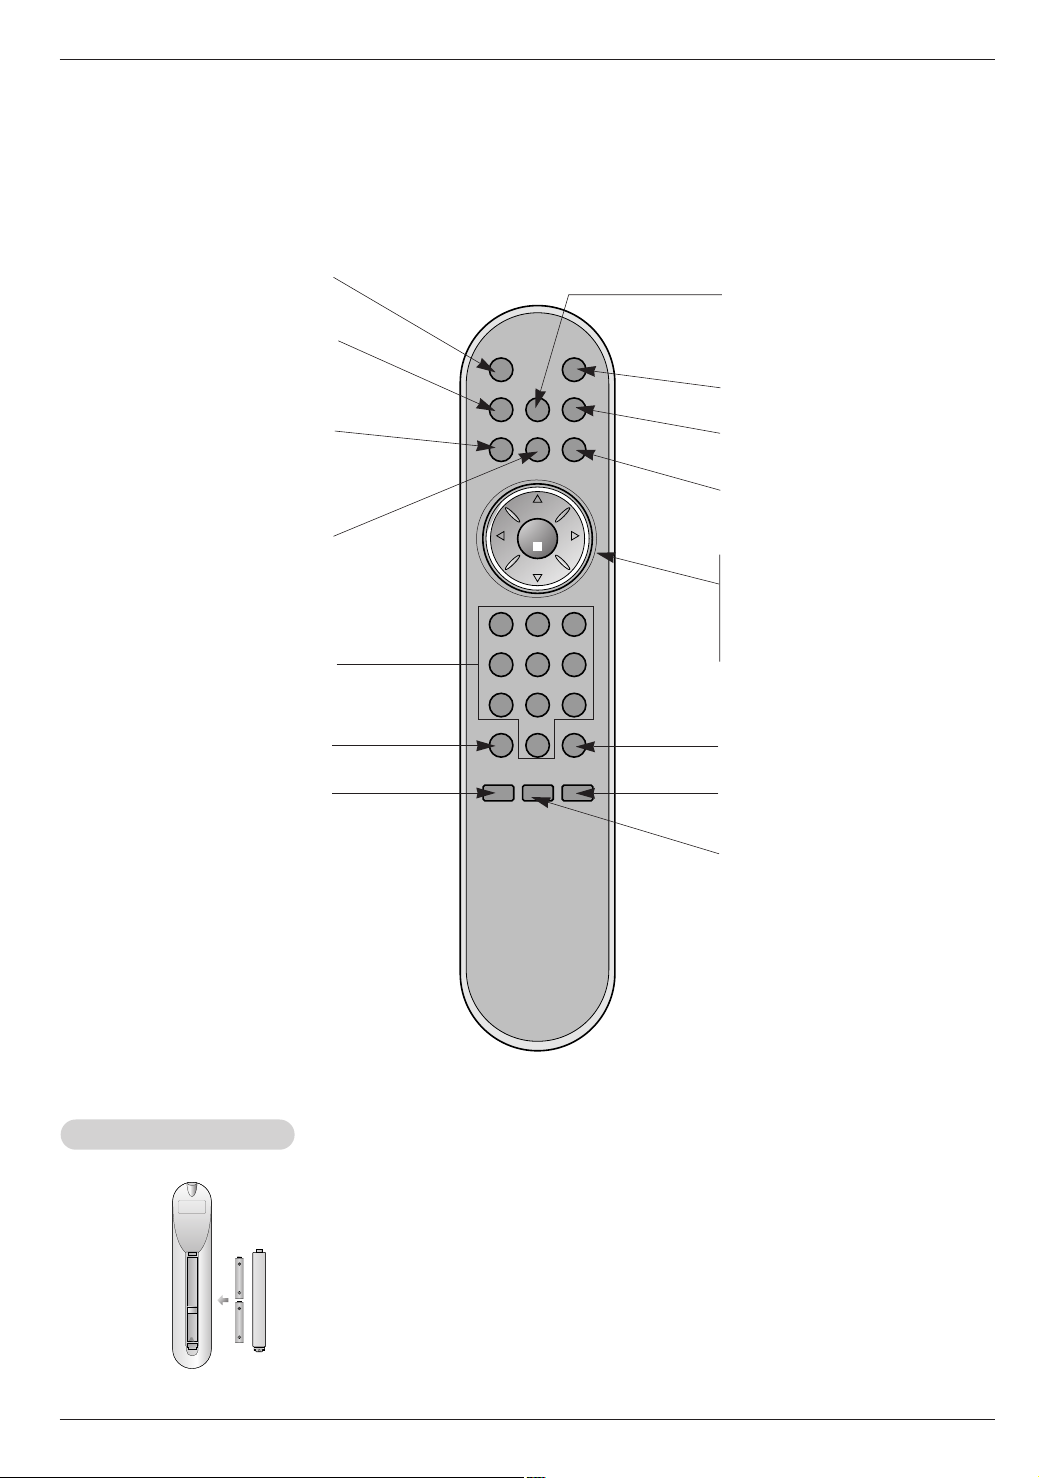
Introduction
powermute
tv/video
multimedia
mts
fcr
ch
ch
vol
enter
123
456
789
0
vol
exit
menu
audio
flashbkcc sleep
video
Remote Control Key Functions
Remote Control Key Functions
- When using the remote control, aim it at the remote control sensor on the TV.
Switches the sound on or off.
Selects: TV, Video, S-Video,
Component or PC(only
15LA6R) mode.
(Refer to p.17)
number buttons
(Refer to p.19)
(Refer to p.23)
mute
tv/video
fcr
exit
audio
cc
multimedia
Selects:
PC(only 15LA6R) mode.
TV, Component or
power
mts
(Refer to p.19)
menu
enter
ch
vol
DD / EE
FF / GG
(Channel button)
(Volume button)
video
(Refer to p.18)
sleep
(Refer to p.21)
flashbk
Press the flashbk button to return to
the last channel you were watching.
Installing Batteries
Installing Batteries
8
• Open the battery compartment cover on the back side and
insert the batteries with correct polarity.
• Install two 1.5V batteries of AAA type. Don’t mix used batteries
with new batteries.
Installation
1.5V
1.5V
powermute
tv/video
multimedia
mts
fcr
ch
ch
vol
enter
123
456
789
0
vol
exit
menu
audio
flashbkcc sleep
video
K
K
Installation
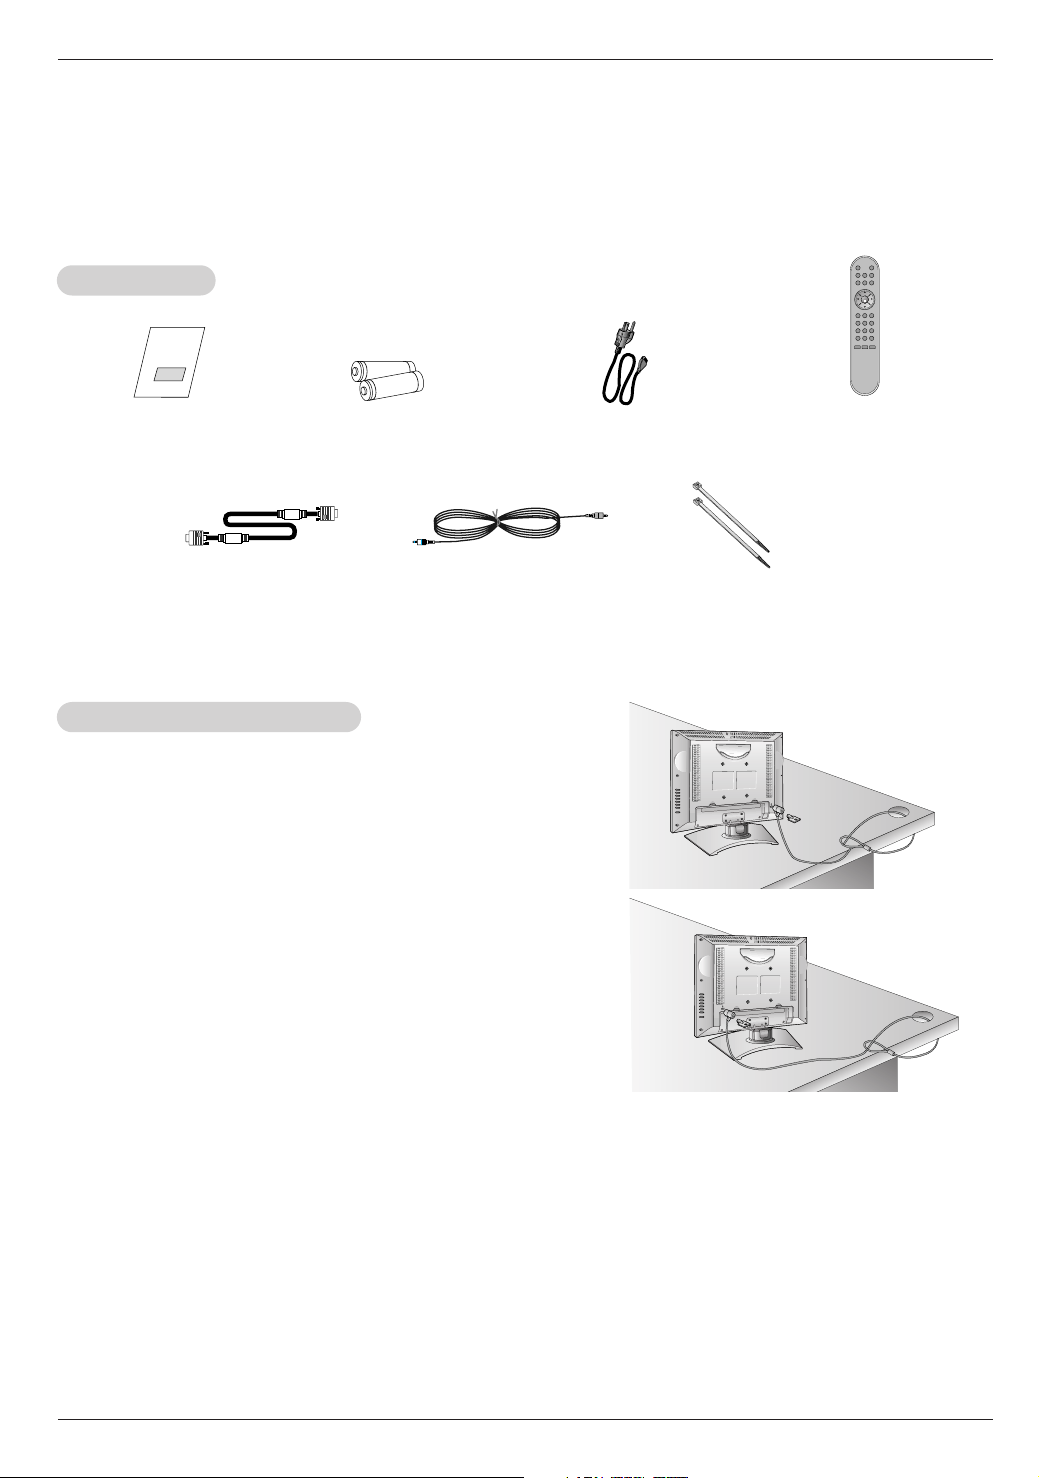
Accessories
Accessories
Installation
Owner’s Manual
PC Signal Cable
(15LA6R Only)
Kensington Security System
Kensington Security System
AAA Batteries
PC Sound Cable
(15LA6R Only)
- The TV is equipped with a Kensington Security System connector
on the back panel. Connect the Kensington Security System cable
as shown below.
- For the detailed installation and use of the Kensington Security
System, refer to the user’s guide provided with the Kensington
Security System.
For further information, contact http://www.kensington.com, the
internet homepage of the Kensington company. Kensington sells
security systems for expensive electronic equipment such as notebook PCs and LCD projectors.
- Note: The Kensington Security System is an optional accessory.
Power Cord
Remote Control
Tie Bands
- Arrange the wires
with the tie bands.
15LA6R
20LA6R
NOTES
a. If the TV feels cold to the touch, there may be a small “flicker” when when it is turned on.
This is normal, there is nothing wrong with TV.
b. Some minute dot defects may be visible on the screen, appearing as tiny red, green, or blue spots. However, they have no
adverse effect on the monitor's performance.
c. Avoid touching the LCD screen or holding your finger(s) against it for long periods of time.
Doing so may produce some temporary distortion effects on the screen.
9
 Loading...