

Quick Reference
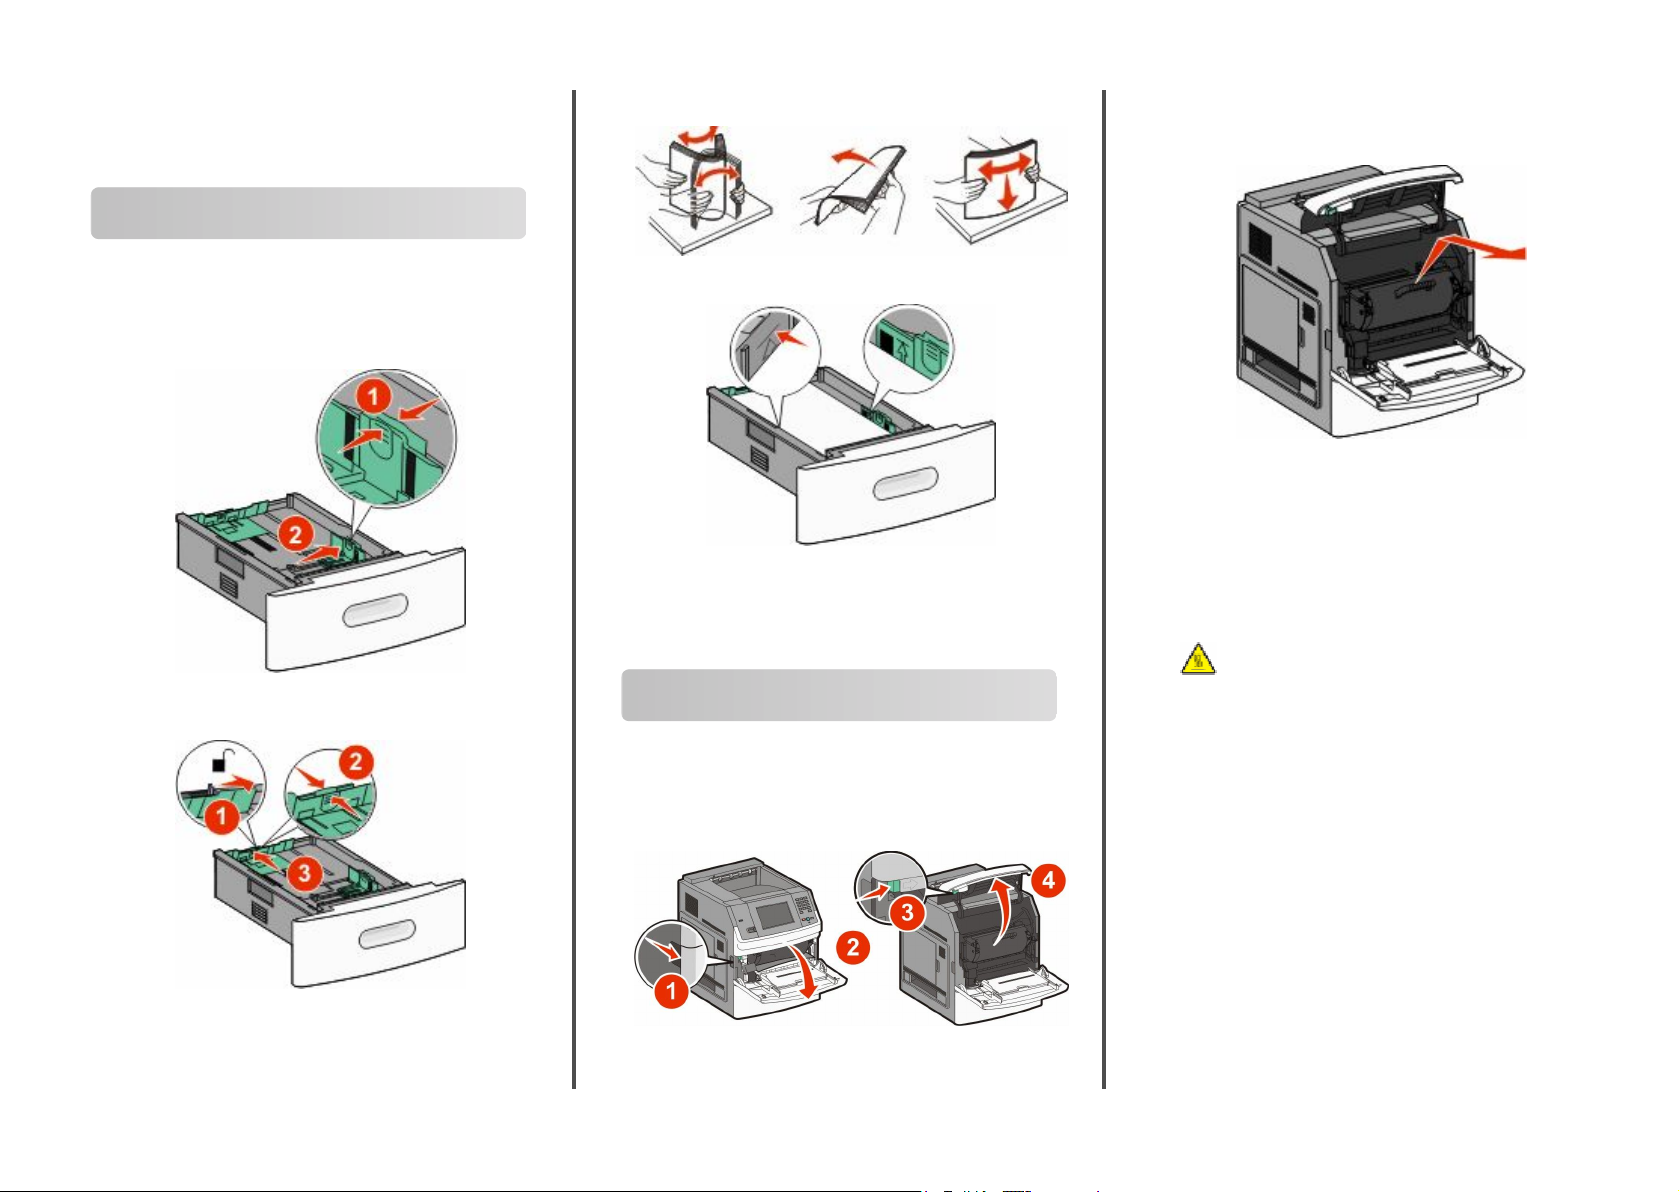
Loading paper
3 Flex, fan, and straighten the paper stack.
Warning—Potential Damage: Do not touch the
photoconductor drum on the underside of the cartridge. Use
the cartridge handle whenever you are holding the cartridge.
Loading paper
1 Squeeze the width guide tab inward and move it to fit the
paper size being loaded.
2 Unlock the length guide, squeeze the length guide tab inward,
and slide it to fit the paper size being loaded.
4 Load the paper.
Note: The maximum fill line. Do not overload the tray.
5 If a different paper type was loaded, then change the Paper
Type setting for the tray from touch screen.
Clearing jams
200 and 201 paper jams
1 Lower the multipurpose feeder door, and then push the
release latch to open the front cover.
3 Place the print cartridge aside on a flat, smooth surface.
Warning—Potential Damage: Do not leave the cartridge
exposed to light for extended periods.
Warning—Potential Damage: The jammed paper may be
covered with unfused toner which can stain garments and
skin.
4 Remove the jammed paper.
CAUTION—HOT SURFACE: The inside of the printer
might be hot. To reduce the risk of injury from a hot
component, allow the surface to cool before touching.
Note: If the paper is not easy to remove, then open the rear
door and remove the paper from there.
5 Align and reinstall the print cartridge.
6 Close the front cover.
7 Close the multipurpose feeder door.
8 Touch Continue.
2 Lift and pull the print cartridge out of the printer.
1
202 and 203 paper jams
Touch Status/Supplies to identify the location of the jam. If the
paper is exiting the printer, then pull the paper out, and then touch
Continue.
If the paper is not exiting the printer:
1 Open the upper rear door.
2 Slowly remove the jammed paper to avoid tearing it.
3 Close the upper rear door.
4 Touch Continue.
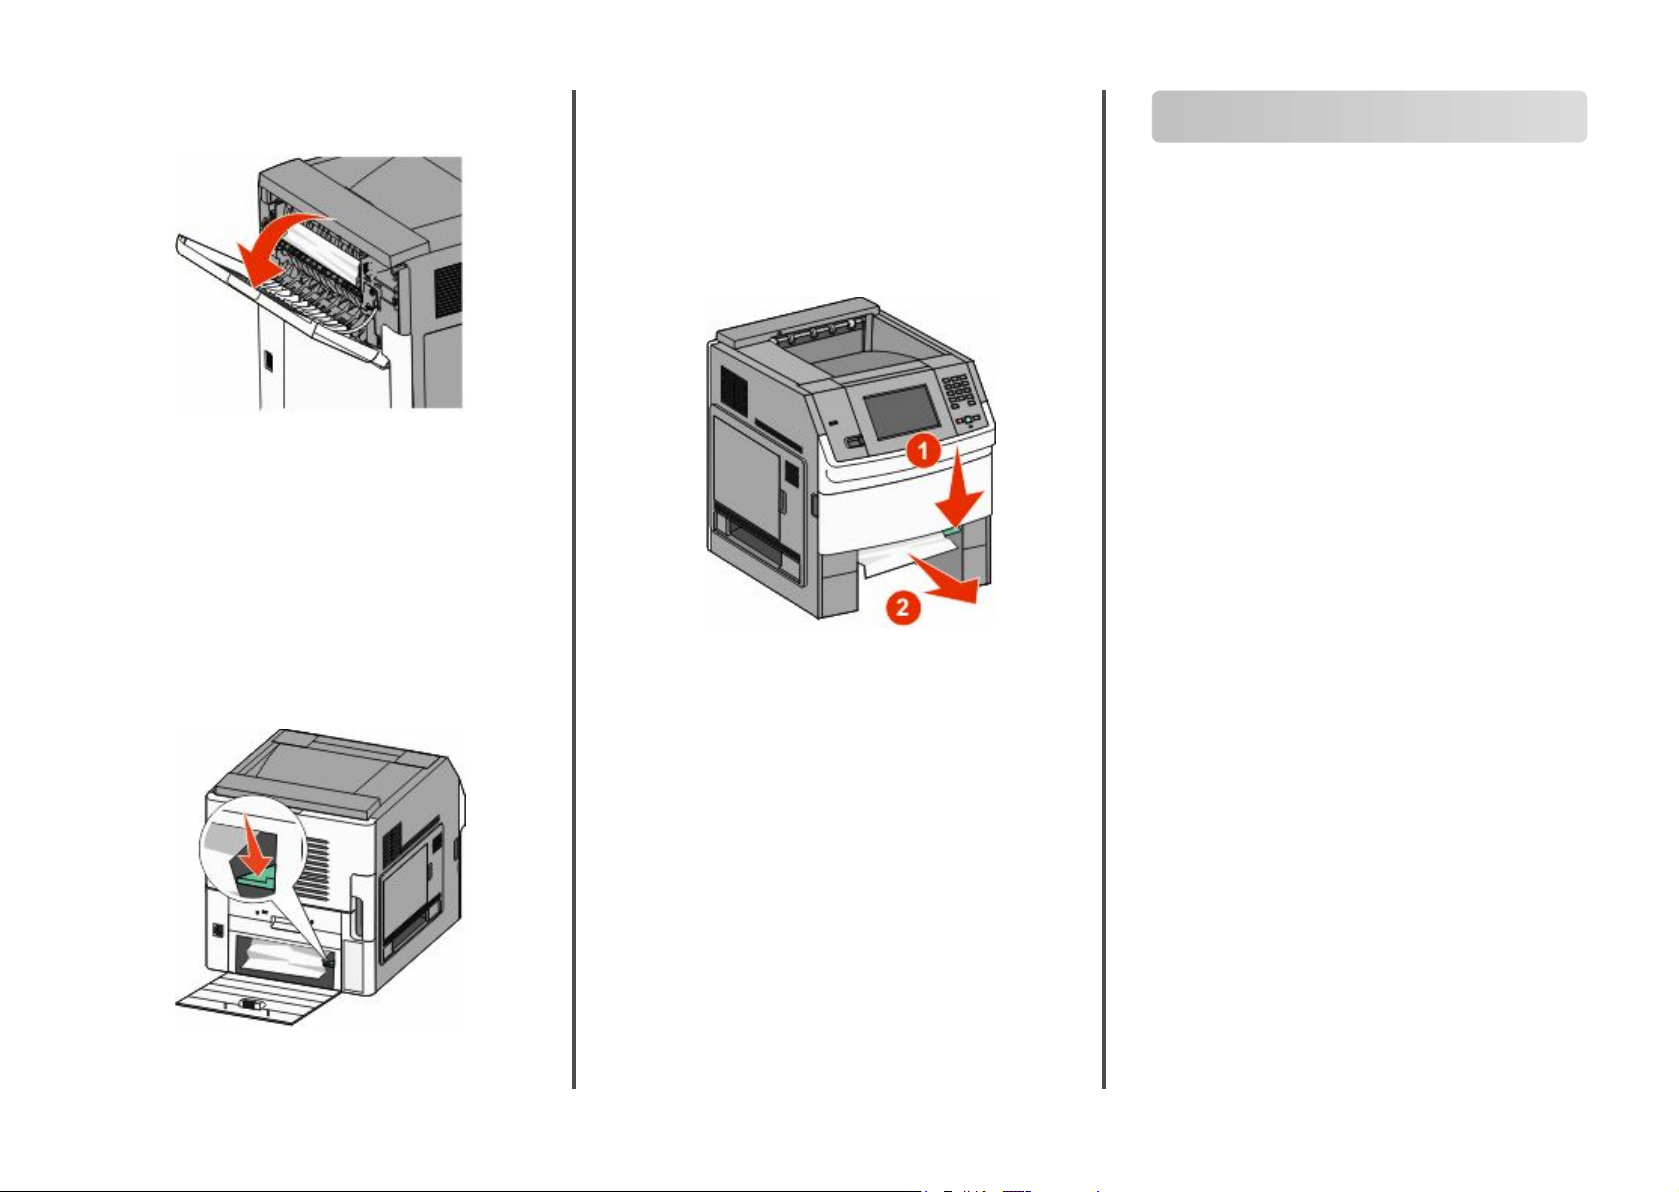
230 paper jam
Rear paper jams
1 Remove the standard tray.
2 Open the lower rear door.
3 If you do not find the jam, push the tab down.
5 Close the lower rear door.
6 Insert the standard tray.
7 Touch Continue.
Front paper jams
1 Remove the standard tray from the printer.
2 Push the tab down.
3 Remove the jammed paper.
4 Insert the standard tray.
5 Touch Continue.
Finding more information
Finding information about the printer
• Check the User's Guide for information on:
– The touch screen and its applications
– Setting up and using printer software
– Caring for and maintaining the printer
The latest comprehensive User's Guide is available on our Web
site at www.lexmark.com/publications.
• Check the Lexmark Support Web site—support.lexmark.com
—for:
– E-mail support
– Live chat support
– Telephone support numbers and hours of operation for
your country or region (also available on the printed
warranty that came with your printer)
Note: Select your country or region, and then select your
product to view the appropriate support site.
4 Remove the jammed paper.
241–245 paper jams
1 Pull out the tray indicated on the display.
2 Remove any jammed paper, and then insert the tray.
3 Touch Continue.
4 If the jam message persists for a 250- or 550-sheet tray, then
remove the tray from the printer.
5 Remove the jammed paper, and then insert the tray.
6 Touch Continue.
2
 Loading...