

Page 1

S310 Series User's Guide
October 2011 www.lexmark.com
Machine type(s):
4448
Model(s):
S310 Series: 301, 30E
Page 2

Contents 2
Contents
Safety information.......................................................................................5
About your printer.......................................................................................6
Thank you for choosing this printer!.........................................................................................................6
Minimizing your printer's environmental impact......................................................................................6
Finding information about the printer......................................................................................................7
Understanding the parts of the printer...................................................................................................10
Ordering and replacing supplies.................................................................12
Ordering ink cartridges............................................................................................................................12
Using genuine Lexmark ink cartridges.....................................................................................................13
Replacing ink cartridges..........................................................................................................................13
Ordering paper and other supplies.........................................................................................................14
Recycling Lexmark products....................................................................................................................15
Using the printer control panel buttons and menus....................................16
Using the printer control panel...............................................................................................................16
Changing the Sleep timeout....................................................................................................................17
Saving paper and energy.........................................................................................................................17
Restoring factory default settings...........................................................................................................18
Using the printer software.........................................................................19
Minimum system requirements..............................................................................................................19
Using the Windows printer software......................................................................................................19
Using the Macintosh printer software....................................................................................................21
Finding and installing optional software.................................................................................................22
Updating the printer software................................................................................................................23
Downloading PCL and PS drivers (Windows only)...................................................................................23
Reinstalling the printer software.............................................................................................................23
Loading paper and original documents.......................................................25
Loading paper..........................................................................................................................................25
Saving paper settings..............................................................................................................................28
Loading original documents on the scanner glass...................................................................................29
Page 3

Contents 3
Printing......................................................................................................30
Tips for printing.......................................................................................................................................30
Printing basic documents........................................................................................................................30
Printing on specialty media.....................................................................................................................33
Working with photos...............................................................................................................................35
Printing on both sides of the paper (duplexing)......................................................................................38
Managing print jobs................................................................................................................................40
Printing from a mobile device.................................................................................................................44
Copying......................................................................................................45
Tips for copying.......................................................................................................................................45
Making copies.........................................................................................................................................45
Copying an ID card...................................................................................................................................46
Enlarging or reducing images..................................................................................................................46
Adjusting copy quality.............................................................................................................................46
Making a copy lighter or darker..............................................................................................................47
Collating copies using the printer control panel.....................................................................................47
Placing separator sheets between copies...............................................................................................47
Copying multiple pages on one sheet.....................................................................................................48
Placing an overlay message on each page..............................................................................................48
Removing the background of a copy.......................................................................................................48
Making a two-sided (duplex) copy..........................................................................................................49
Canceling copy jobs.................................................................................................................................50
Scanning....................................................................................................51
Tips for scanning......................................................................................................................................51
Scanning to a local computer..................................................................................................................51
Scanning to a network computer............................................................................................................52
Scanning to a flash drive or memory card...............................................................................................52
Scanning photos for editing.................................................................................................... ................53
Scanning documents for editing..............................................................................................................53
Scanning directly to e‑mail using the printer software...........................................................................54
Scanning to a PDF....................................................................................................................................55
Scanning FAQ...........................................................................................................................................56
Canceling scan jobs.................................................................................................................................56
Page 4

Contents 4
E-mailing....................................................................................................57
Setting up the printer to e-mail...............................................................................................................57
Sending e-mail.........................................................................................................................................58
Canceling an e‑mail.................................................................................................................................59
Networking................................................................................................60
Installing the printer on a wireless network............................................................................................60
Advanced wireless setup.........................................................................................................................67
Networking FAQ......................................................................................................................................77
Maintaining the printer..............................................................................91
Maintaining ink cartridges.......................................................................................................................91
Cleaning the exterior of the printer........................................................................................................92
Cleaning the scanner glass......................................................................................................................93
Moving the printer to another location..................................................................................................93
Troubleshooting.........................................................................................95
Before you troubleshoot.........................................................................................................................95
If Troubleshooting does not solve your problem....................................................................................95
Setup troubleshooting.............................................................................................................................95
Understanding printer messages..........................................................................................................100
Jams and misfeeds troubleshooting......................................................................................................107
Print troubleshooting............................................................................................................................112
Copy and scan troubleshooting.............................................................................................................114
Network troubleshooting......................................................................................................................116
Notices.....................................................................................................127
Product information..............................................................................................................................127
Edition notice........................................................................................................................................127
Power consumption..............................................................................................................................131
Index........................................................................................................138
Page 5
Safety information 5
Safety information
Connect the power cord to a properly grounded electrical outlet that is near the product and easily accessible.
Do not place or use this product near water or wet locations.
CAUTION—POTENTIAL INJURY: The lithium battery in this product is not intended to be replaced. There is a
danger of explosion if a lithium battery is incorrectly replaced. Do not recharge, disassemble, or incinerate a
lithium battery. Discard used lithium batteries according to the manufacturer's instructions and local
regulations.
Use only the power supply and power cord provided with this product or the manufacturer's authorized replacements.
CAUTION—SHOCK HAZARD: Make sure that all external connections (such as Ethernet and telephone system
connections) are properly installed in their marked plug-in ports.
This product is designed, tested, and approved to meet strict global safety standards with the use of specific
manufacturer's components. The safety features of some parts may not always be obvious. The manufacturer is not
responsible for the use of other replacement parts.
CAUTION—POTENTIAL INJURY: Do not cut, twist, bind, crush, or place heavy objects on the power cord. Do not
subject the power cord to abrasion or stress. Do not pinch the power cord between objects such as furniture
and walls. If any of these things happen, a risk of fire or electrical shock results. Inspect the power cord regularly
for signs of such problems. Remove the power cord from the electrical outlet before inspecting it.
Refer service or repairs, other than those described in the user documentation, to a professional service person.
CAUTION—SHOCK HAZARD: To avoid the risk of electric shock when cleaning the exterior of the printer, unplug
the power cord from the wall outlet and disconnect all cables from the printer before proceeding.
CAUTION—SHOCK HAZARD: Do not use the fax feature during a lightning storm. Do not set up this product or
make any electrical or cabling connections, such as the fax feature, power cord, or telephone, during a lightning
storm.
SAVE THESE INSTRUCTIONS.
Page 6

About your printer 6
About your printer
Thank you for choosing this printer!
We've worked hard to make sure it will meet your needs.
To start using your new printer right away, use the setup materials that came with the printer, and then skim the User’s
Guide to learn how to perform basic tasks. To get the most out of your printer, read the User’s Guide carefully, and
make sure you check the latest updates on our Web site.
We're committed to delivering performance and value with our printers, and we want to make sure you're satisfied. If
you do encounter any problems along the way, one of our knowledgeable support representatives will be delighted to
help you get back on track fast. And if you find something we could do better, please let us know. After all, you are the
reason we do what we do, and your suggestions help us do it better.
Minimizing your printer's environmental impact
We are committed to protecting the environment and are continually improving our printers to reduce their
environmental impact. By selecting certain printer settings or tasks, you may be able to reduce your printer's
environmental impact even further.
Conserving energy
• Activate Eco-Mode. This feature sets the screen brightness to low and sets the printer to change to Sleep mode
after the printer is left idle for 10 minutes.
• Select the lowest Sleep timeout. The Sleep feature puts the printer in a minimum‑power standby mode after the
printer has been idle for a set amount of time (the Sleep timeout).
• Share your printer. Wireless/network printers allow you to share a single printer among multiple computers, thus
conserving energy and other resources.
Conserving paper
• Print more than one page image on one side of the paper. The Pages per Sheet feature allows you to print multiple
pages on one sheet. You can print up to 16 page images on one side of a sheet of paper.
• Print on both sides of the paper. Duplexing lets you print on both sides of the paper manually or automatically
(depending on your printer model).
• Preview print jobs before printing. Use the preview features found in Toolbars, the Print or Print Preview dialog,
or the printer display (depending on your printer model).
• Use recycled paper.
• Reduce the margins of documents to be printed.
• Scan and save. To avoid printing multiple copies, you can scan documents or photographs and save them to a
computer program, application, or flash drive for presentation.
Page 7
About your printer 7
Conserving ink
• Use Quick Print or Draft Mode. These modes can be used to print documents using less ink than normal and are
ideal for printing documents that are mostly text.
• Use font types and font settings that requires less ink. Most programs or applications let you adjust the darkness
of the colors.
• Use high yield cartridges. Inks in high yield cartridges allow you to print more pages.
Recycling
• Return ink cartridges for reuse or recycling through the Lexmark Cartridge Collection Program. To return an ink
cartridge, go to www.lexmark.com/recycle. Follow the instructions to request a postage‑paid bag.
• Recycle the product packaging.
• Recycle your old printer instead of throwing it away.
• Recycle paper from discarded print jobs.
• Use recycled paper.
To read the Lexmark Environmental Sustainability Report, see www.lexmark.com/environment.
Note: Your printer may not come with some of these programs or some of the functions of these programs,
depending on the features of the printer that you purchased.
Finding information about the printer
Publications
What are you looking for? Find it here
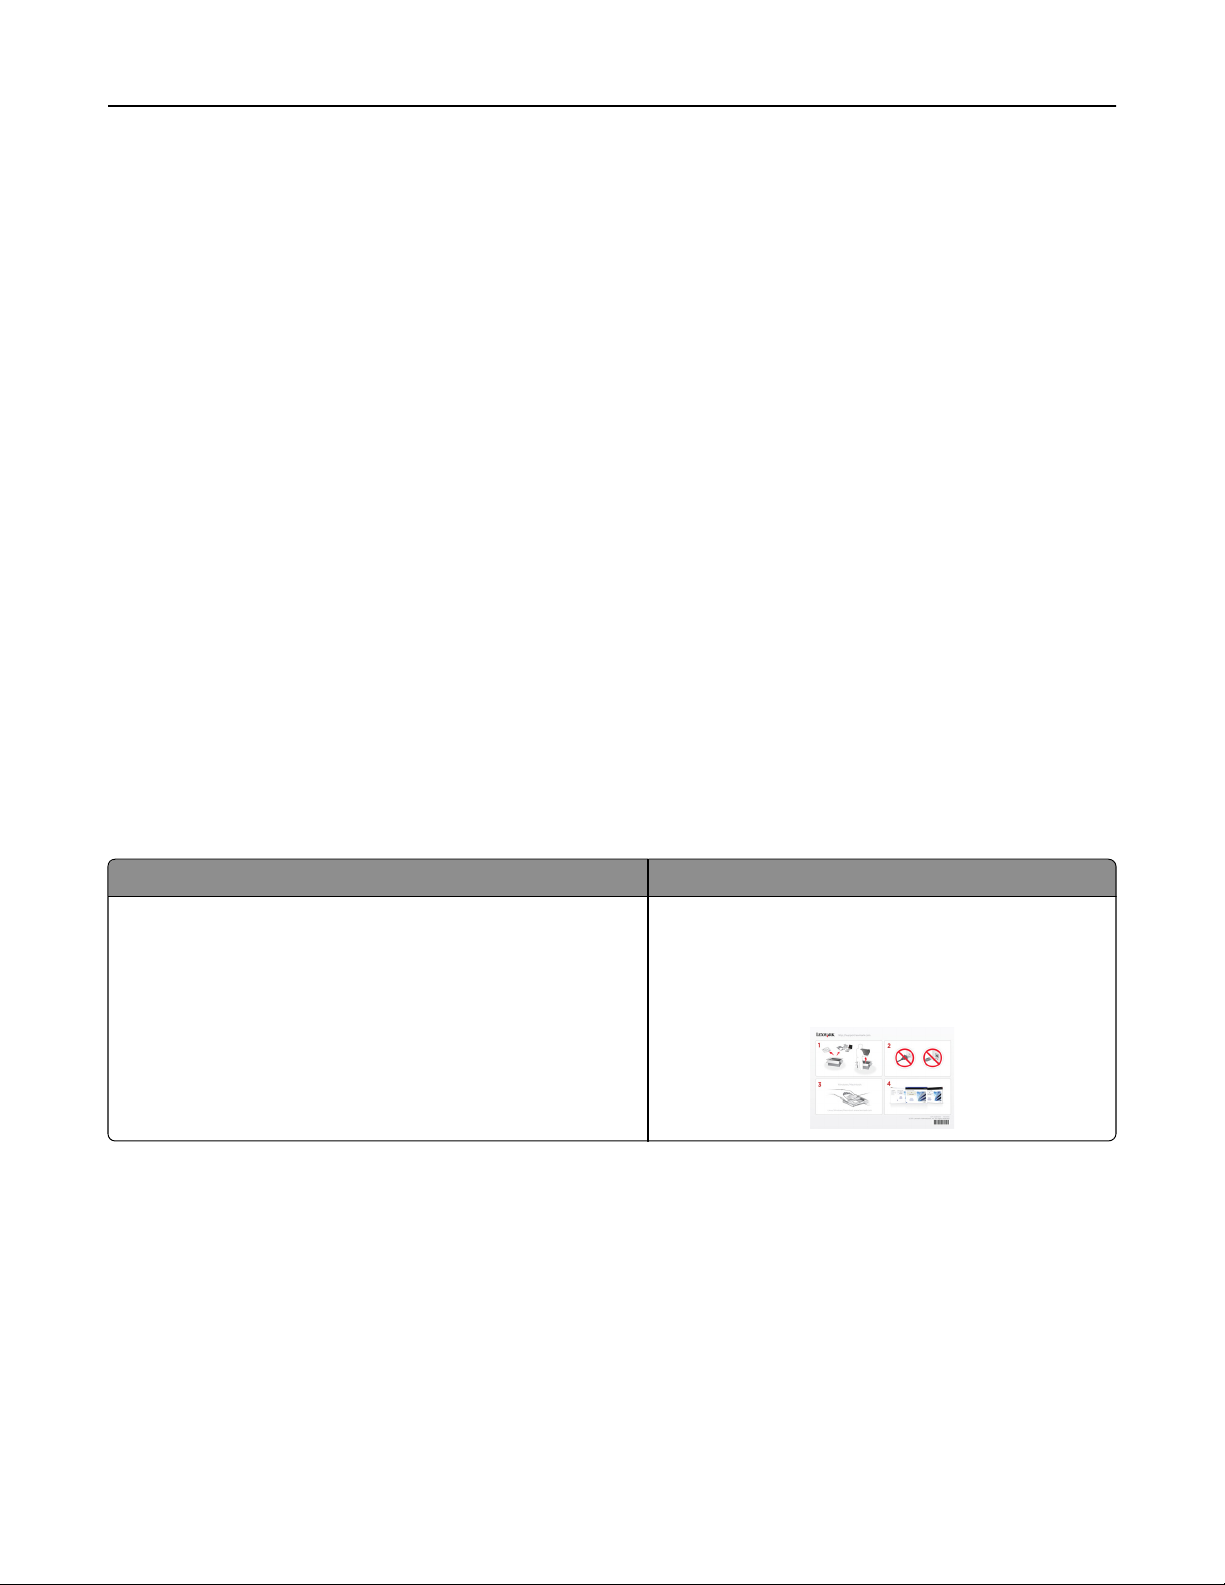
Initial setup instructions:
• Connecting the printer
• Installing the printer software
Setup documentation
The setup documentation came with the printer and is
also available on the Lexmark Web site at
http://support.lexmark.com.
Page 8
About your printer 8
What are you looking for? Find it here
Additional setup and instructions for using the printer:
• Selecting and storing paper and specialty media
• Loading paper
User's Guide
The User's Guide is available on the installation software
CD.
• Performing printing, copying, scanning, and faxing tasks,
depending on your printer model
• Configuring printer settings
• Viewing and printing documents and photos
• Setting up and using printer software
• Setting up and configuring the printer on a network,
depending on your printer model
For updates, check our Web site at
http://support.lexmark.com.
• Caring for and maintaining the printer
• Troubleshooting and solving problems
Creating and customizing printer solutions, depending on your
printer model
Help using the printer software Windows or Mac Help
SmartSolutions User's Guide and Help
Go to http://smartsolutions.lexmark.com. Click HELP to
view basic SmartSolutions information.
Open a printer software program or application, and
then click Help.
?
Click
to view context‑sensitive information.
The latest supplemental information, updates, and online
technical support:
• Troubleshooting hints and tips
• Frequently asked questions
• Documentation
• Driver downloads
• Live chat support
• E‑mail support
Notes:
• The Help installs automatically with the printer
software.
• The printer software is located in the printer
program folder or on the desktop, depending on
your operating system.
Lexmark Support Web site—
http://support.lexmark.com
Note: Select your region, and then select your product
to view the appropriate support site.
Record the following information (located on the store
receipt and on the label inside the printer), and have it
ready when you contact customer support so that they
may serve you faster:
• MAC address number
• Serial number
• Date purchased
• Store where purchased
Note: Lift the scanner cover to see the customer
support label.
Page 9
About your printer 9
What are you looking for? Find it here
Telephone support In the US, call us at:
1‑800‑332‑4120
Monday–Friday (8:00 AM–11:00 PM ET), Saturday
and Sunday (11:00 AM–8:00 PM ET)
Support telephone numbers and hours of operation for
your region or country can be found on the Support Web
site (http://support.lexmark.com) or on the printed
warranty that came with your printer.
Warranty information
• In the US—See the Statement of Limited Warranty
included with this printer, or at
http://support.lexmark.com.
• In other countries or regions—See the printed
warranty that came with your printer.
Note: Your printer may not come with some of these programs or some of the functions of these programs,
depending on the features of the printer that you purchased.
Page 10
About your printer 10
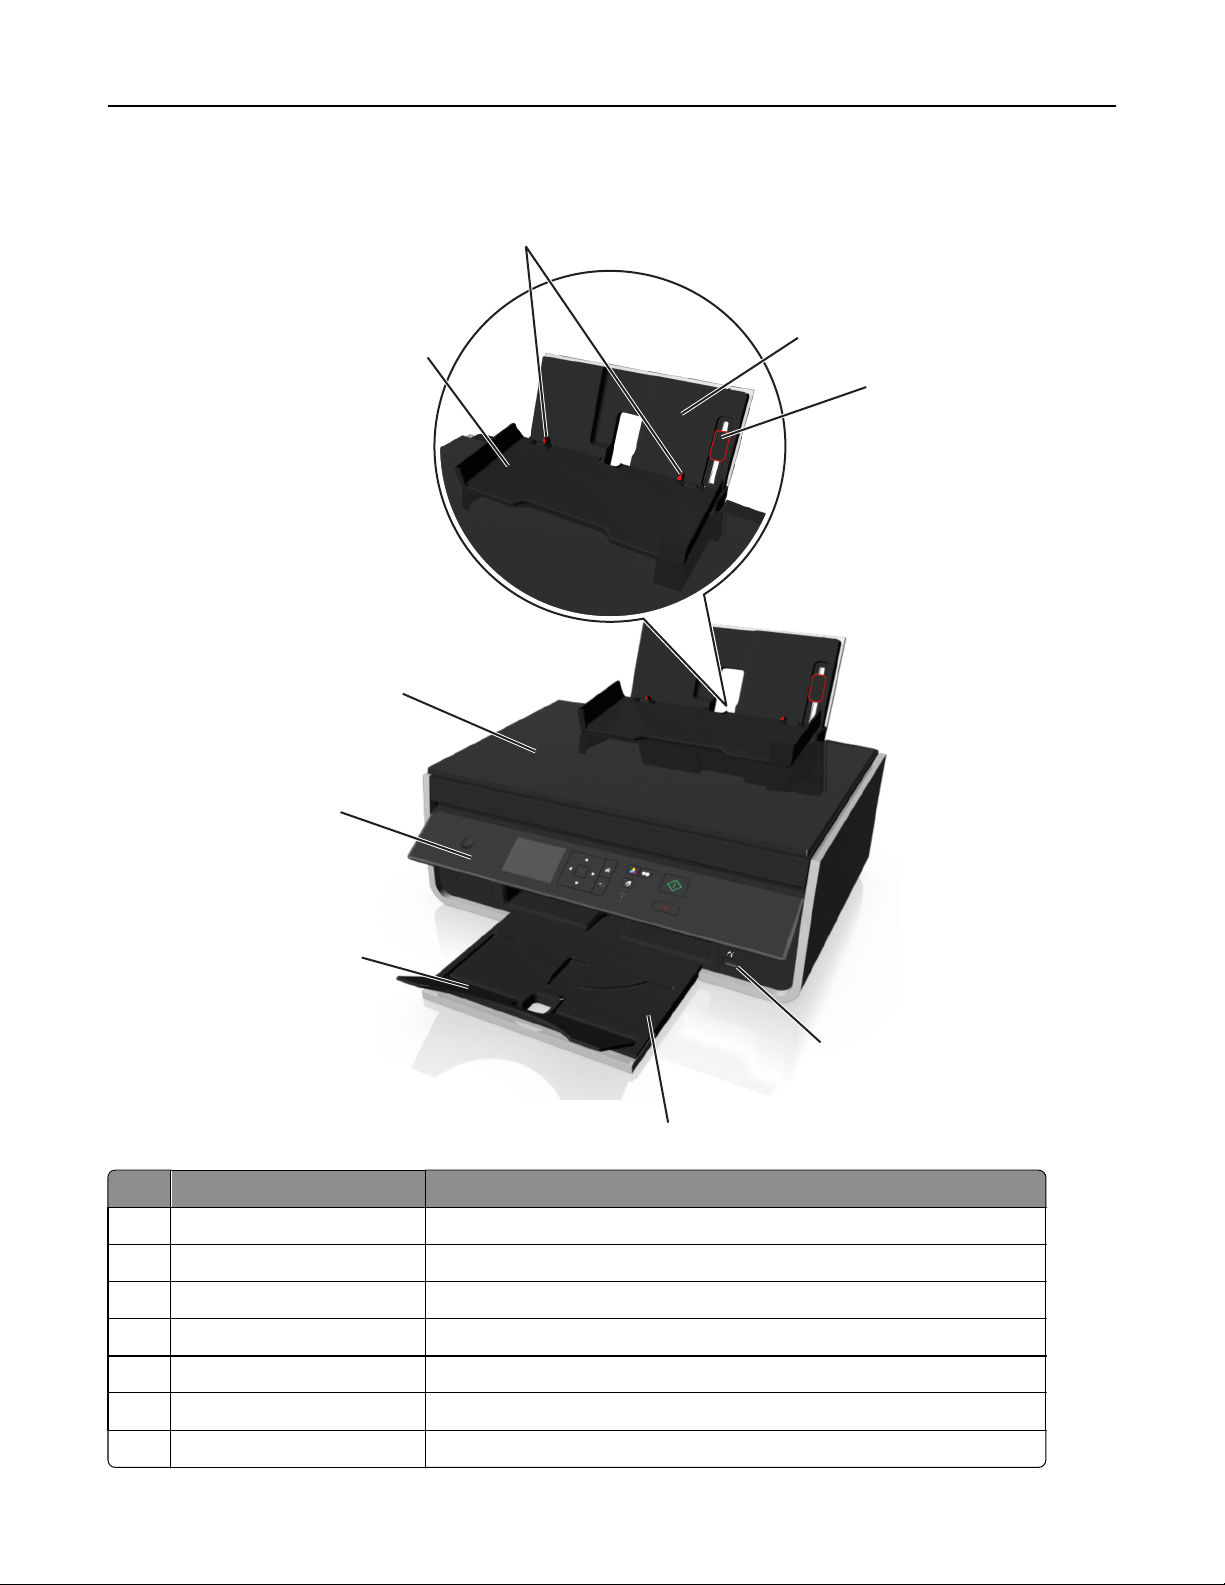
Understanding the parts of the printer
9
8
7
6
1
2
5
3
4
Use the To
1 Paper support Load paper.
2 Paper guide adjustment lever Adjust the paper guides.
3 PictBridge and USB port Connect a PictBridge-enabled digital camera or a flash drive to the printer.
4 Paper exit tray Hold paper as it exits.
5 Tray extension Keep the paper in place as it exits.
6 Printer control panel Operate the printer.
7 Scanner cover Access the scanner glass.
Page 11
About your printer 11
Use the To
8 Paper feed guard Prevent items from falling into the paper slot.
9 Paper guides Keep paper straight when feeding.
10
17
16
15
14
11
12
13
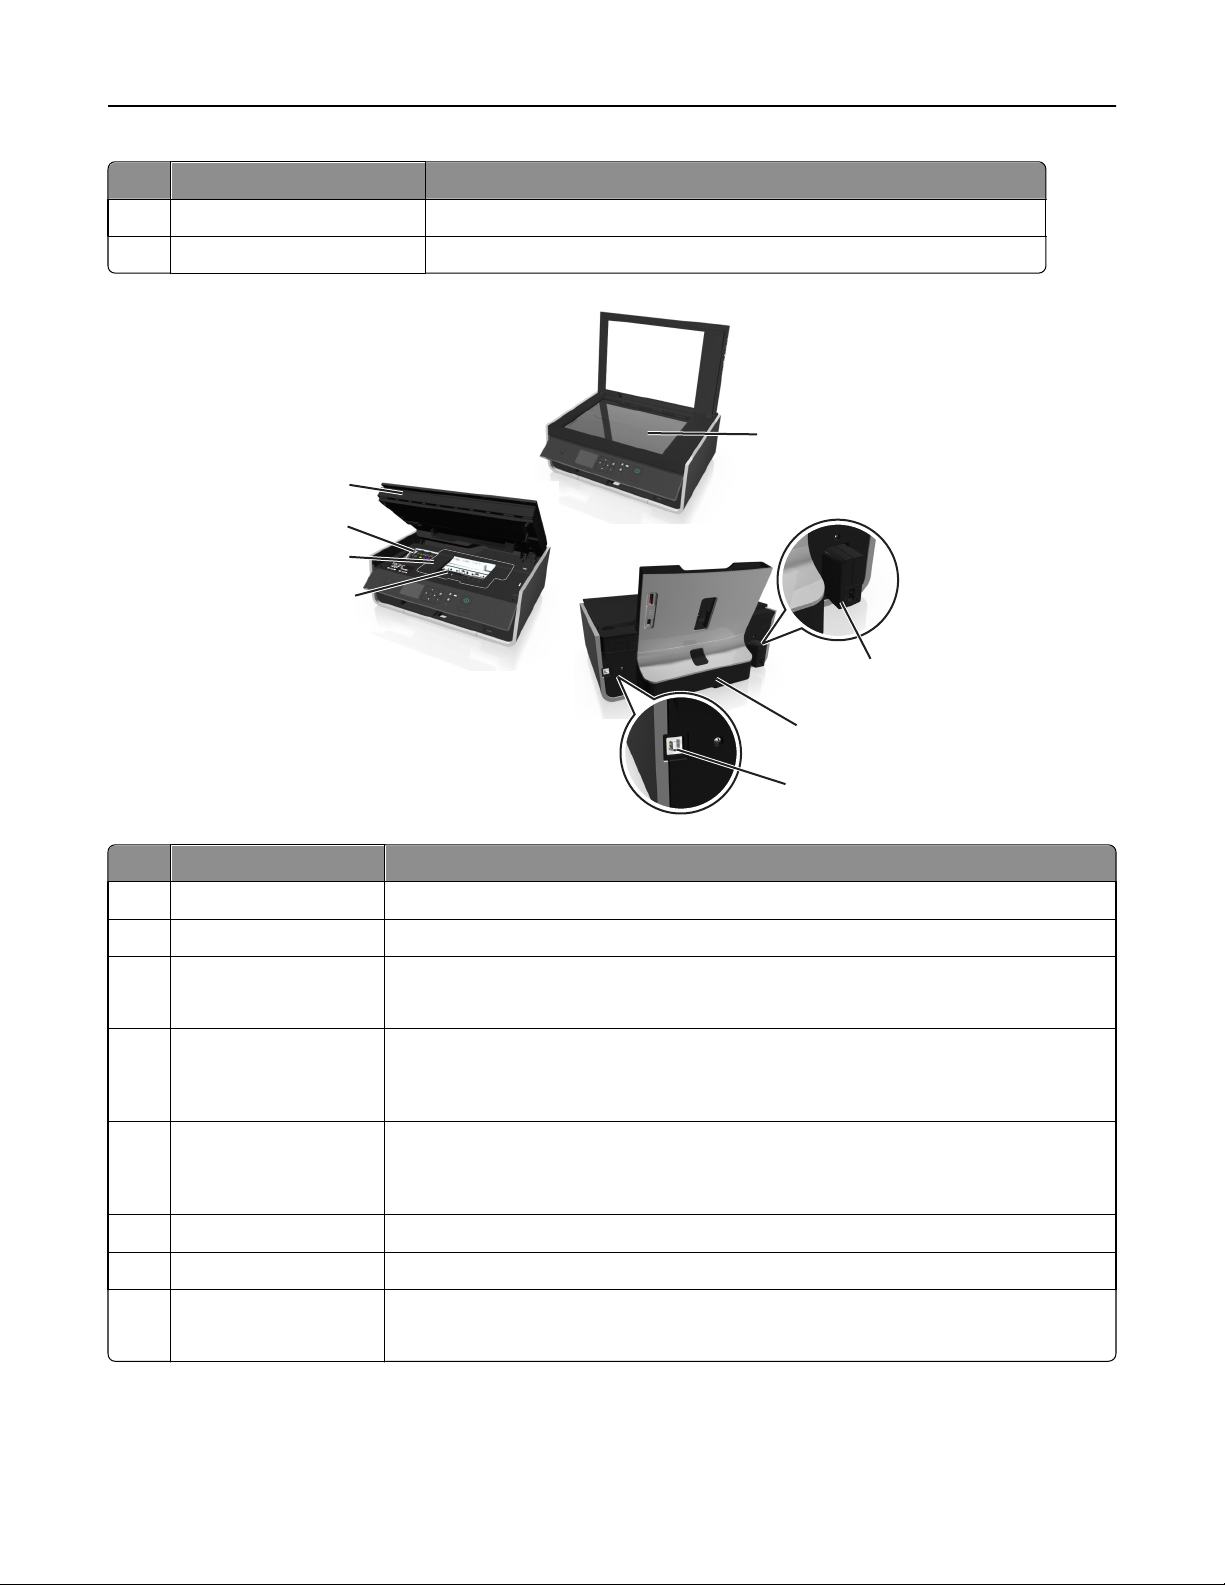
Use the To
10 Scanner glass Scan or copy photos and documents.
11 Power supply with port Connect the printer to the power cord.
12 Duplex unit
• Print on both sides of a sheet of paper.
• Clear paper jams.
13 USB port Connect the printer to a computer using a USB cable.
Warning—Potential Damage: Do not touch the USB port except when plugging in or
removing a USB cable or installation cable.
14 Printhead access area Install the printhead.
Note: The carrier moves to the printhead access area when no printhead is installed in
the printer.
15 Jam clearance cover Access and clear paper jams.
16 Ink cartridge access area Install, replace, or remove ink cartridges.
17 Scanner unit
• Access the ink cartridges and printhead.
• Clear paper jams.
Page 12
Ordering and replacing supplies 12
Ordering and replacing supplies
Ordering ink cartridges
Lexmark S310 Series models (except Lexmark S319)
Item
Black cartridge 150 Not available
High‑yield black cartridge 150XL 150XLA
Yellow color cartridge 150 Not available
High‑yield yellow color cartridge 150XL 150XLA
Cyan color cartridge 150 Not available
High‑yield cyan color cartridge 150XL 150XLA
Magenta color cartridge 150 Not available
High‑yield magenta color cartridge 150XL 150XLA
1
Licensed for a single use only. After use, return this cartridge to Lexmark for remanufacturing, refilling, or recycling.
2
Available only on the Lexmark Web site at www.lexmark.com.
Return Program cartridge
1
Regular cartridge
2
Lexmark S319 models
Item
Black cartridge 160 Not available
High‑yield black cartridge 160XL 160XLA
Return Program cartridge
1
Regular cartridge
2
Yellow color cartridge 160 Not available
High‑yield yellow color cartridge 160XL 160XLA
Cyan color cartridge 160 Not available
High‑yield cyan color cartridge 160XL 160XLA
Magenta color cartridge 160 Not available
High‑yield magenta color cartridge 160XL 160XLA
1
Licensed for a single use only. After use, return this cartridge to Lexmark for remanufacturing, refilling, or recycling.
2
Available only on the Lexmark Web site at www.lexmark.com.
Notes:
• To get more ink, order high‑yield ink cartridges.
• Depending on your country or region, you may get the ink cartridges individually or in multiple packs.
• You can order a mix of standard ink cartridges and high‑yield ink cartridges, depending on your needs.
• For page yield information, visit www.lexmark.com/yields.
• The cartridges used for printing documents can also be used for printing photos.
Page 13
Ordering and replacing supplies 13
• For best results, use only genuine Lexmark ink cartridges.
Using genuine Lexmark ink cartridges
Lexmark printers, ink cartridges, and photo paper are designed to perform together for superior print quality, and our
inks are formulated to work with your printer and help extend the life of your product. We recommend that you use
only genuine Lexmark ink cartridges.
Lexmark's warranty does not cover damage caused by non-Lexmark ink or ink cartridges.
Replacing ink cartridges
Make sure you have a new ink cartridge or cartridges before you begin. You must install new cartridges immediately
after removing the old ones, or the ink remaining in the printhead nozzles may dry out.
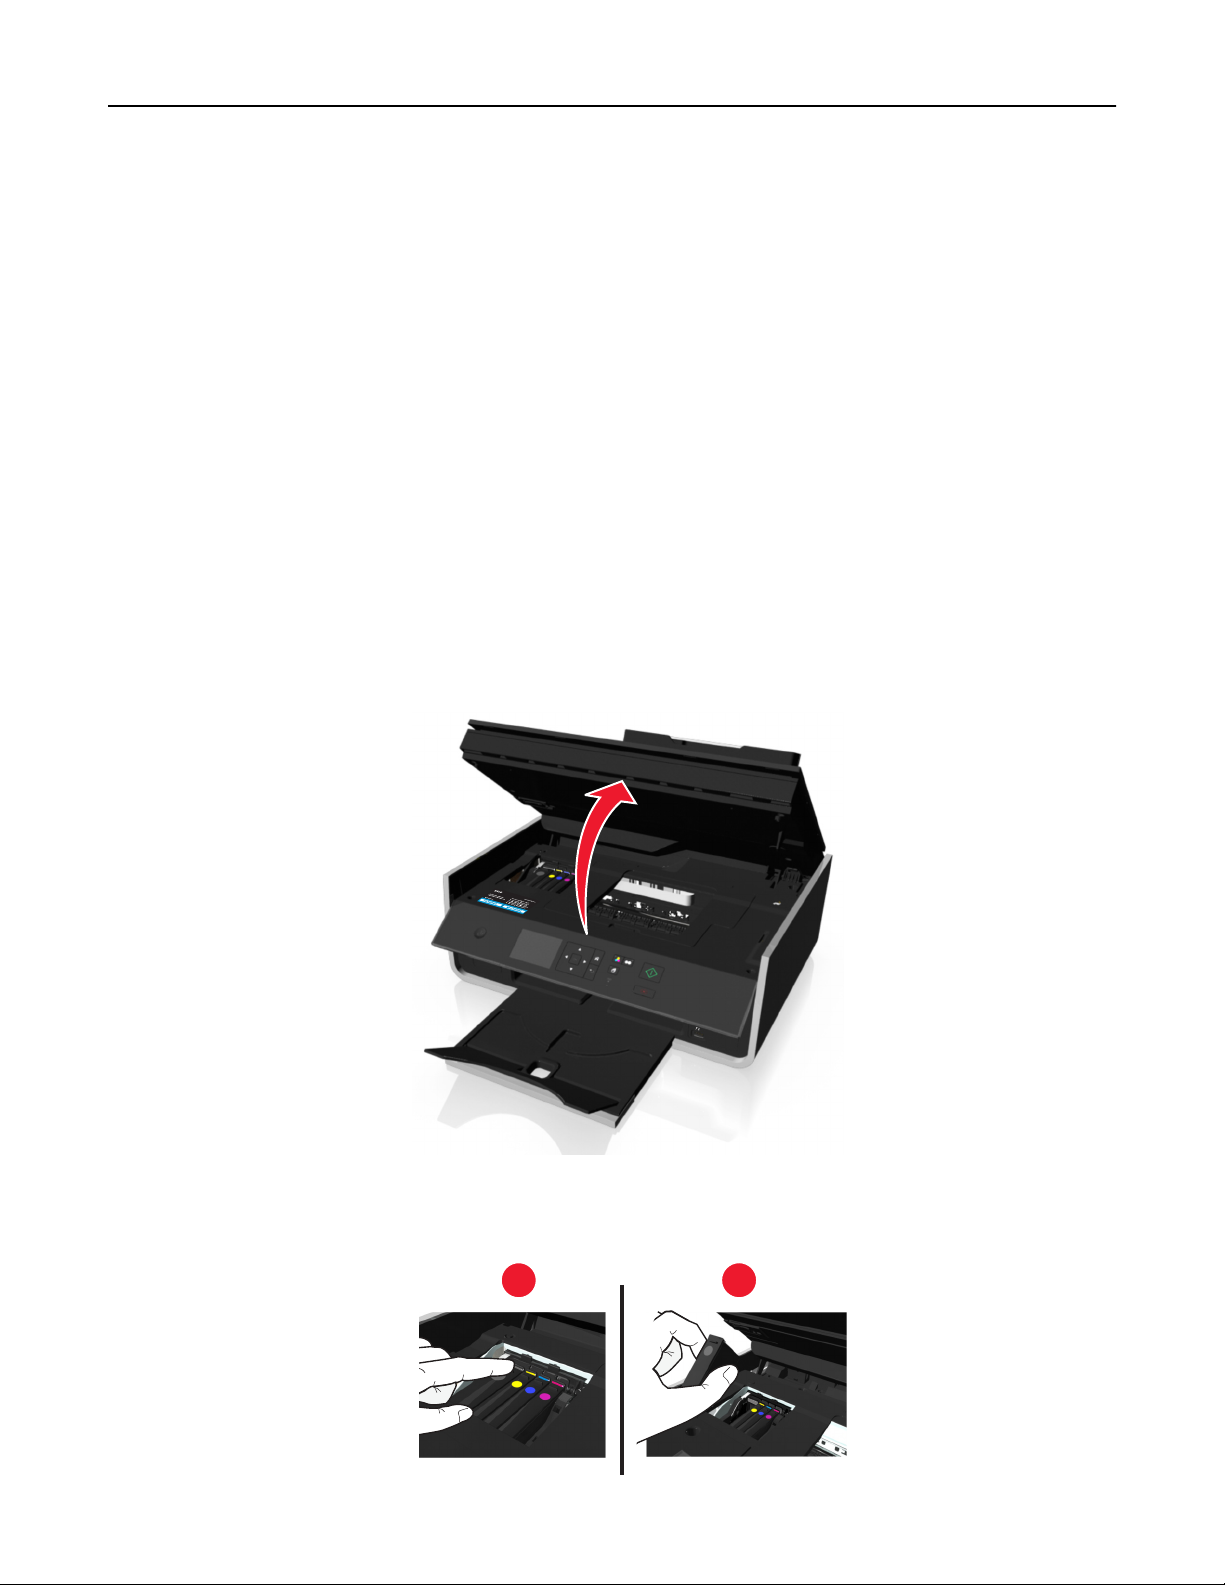
Removing ink cartridges
1 Turn on your printer.
2 Open the printer.
Note: The printhead moves to the cartridge installation position.
3 Press the release tab, and then remove the used ink cartridge or cartridges.
1
2
Page 14
Ordering and replacing supplies 14
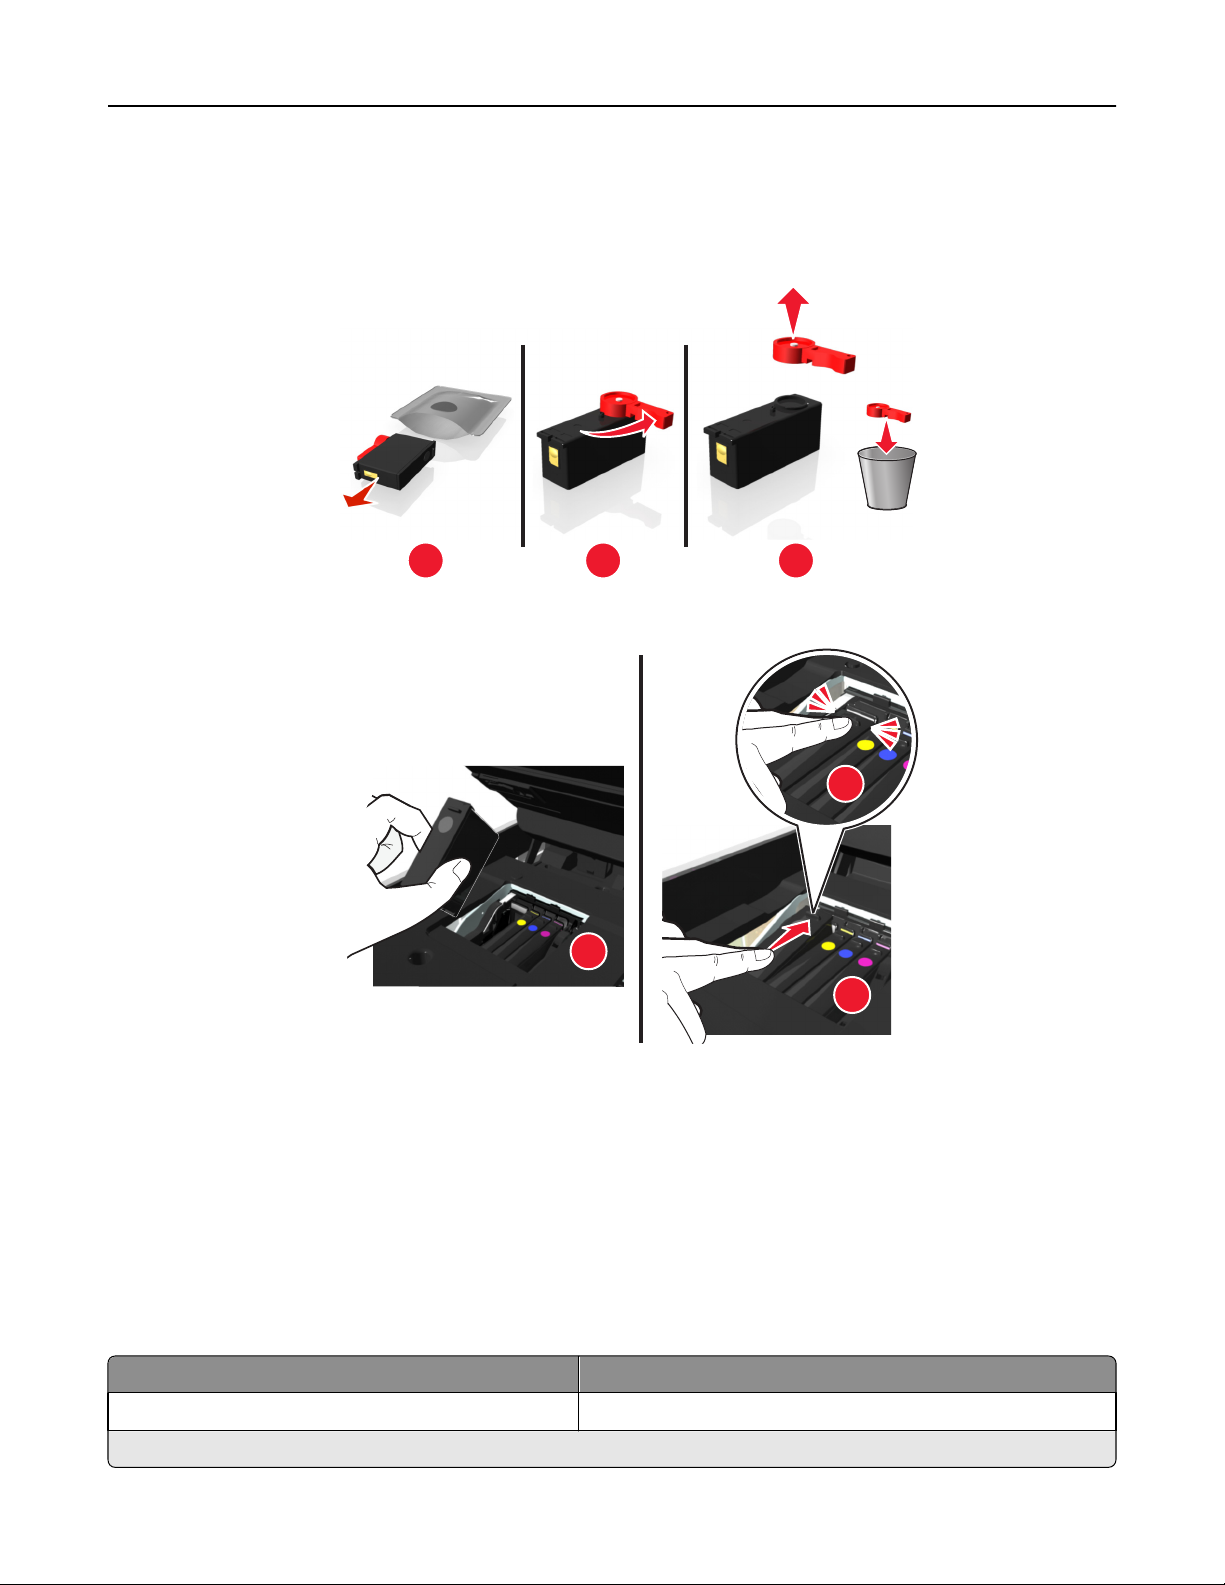
Installing ink cartridges
1 Remove the ink cartridge from the pack, and then remove the protective cap from the ink cartridge.
If your ink cartridge comes with a twist cap, then remove the cap.
1 2 3
2 Insert each ink cartridge. Slide your finger along the ink cartridge until the cartridge clicks into place.
3
1
2
Notes:
• Insert the color cartridges first, and then the black cartridge.
• Insert the new ink cartridges immediately after removing the protective cap to avoid exposing the ink to air.
3 Close the printer.
Ordering paper and other supplies
To order supplies or to locate a dealer near you, visit our Web site at www.lexmark.com.
Item Part Number
USB cable 1021294
For more information, go to www.lexmark.com.
Page 15

Ordering and replacing supplies 15
Paper Paper size
Lexmark Photo Paper
• Letter
• A4
• 4 x 6 in.
• L
Lexmark PerfectFinish Photo Paper
• Letter
• A4
• 4 x 6 in.
• L
Notes:
• Availability may vary by country or region.
• For best results when printing photos or other high-quality images, use Lexmark Photo Paper or Lexmark
PerfectFinish
TM
Photo Paper.
• For more information, go to www.lexmark.com
Recycling Lexmark products
To return Lexmark products for recycling:
1 Visit our Web site at www.lexmark.com/recycle.
2 Find the product type you want to recycle, and then select your country or region from the list.
3 Follow the instructions on the computer screen.
Note: Printer supplies and hardware not listed in a Lexmark collection program may be recycled through your local
recycling center. Contact your local recycling center to determine the items they accept.
Page 16
Using the printer control panel buttons and menus 16
Using the printer control panel buttons and menus
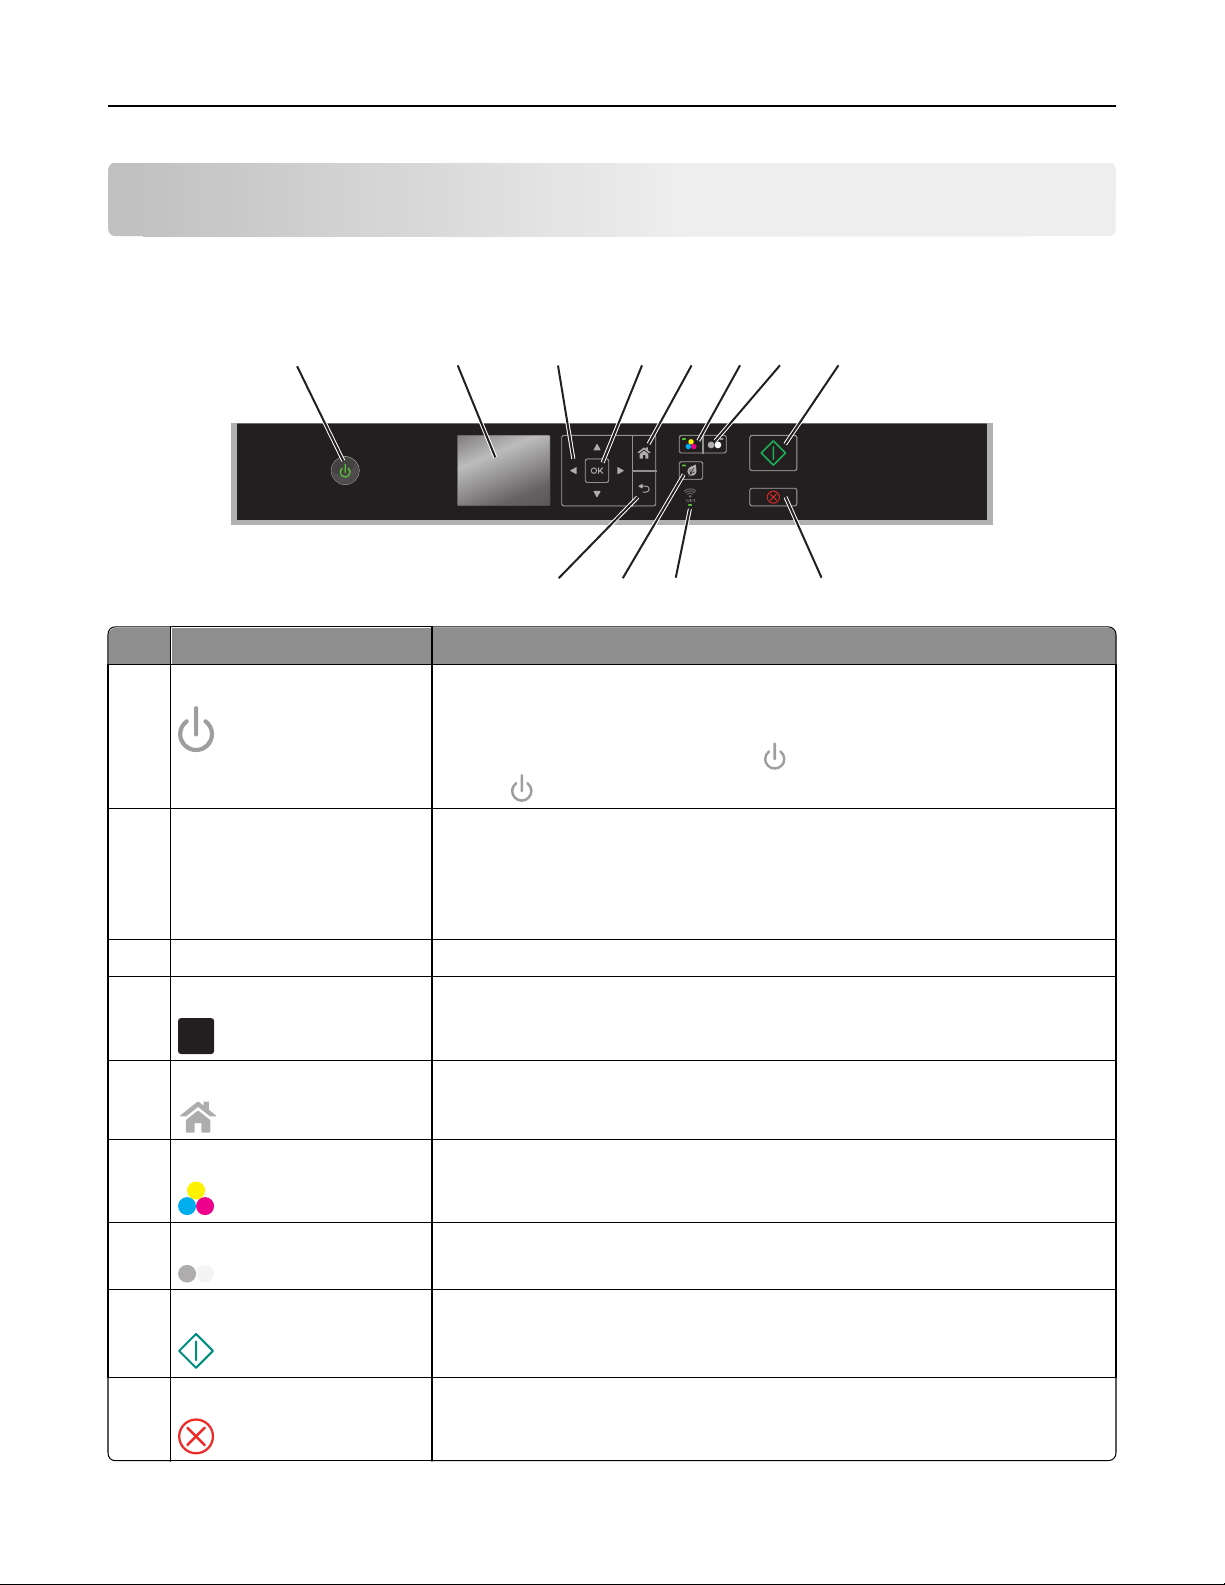
Using the printer control panel
1
Use To
1 Power
2 Display
Note: The display is turned
off in Sleep mode.
2
34567 8
101112
• Turn the printer on and off.
• Switch to Sleep mode.
Note: When the printer is on, press
hold
View:
for three seconds to turn off the printer.
• Printer status
• Messages
• Menus
9
to switch to Sleep mode. Press and
3 Arrow buttons Navigate through menu items that appear on the display.
4 Select
OK
5 Home
6 Color
7 Black
8 Start
9 Cancel
• Select menu options.
• Save settings.
Return to the home screen.
Switch to color mode.
Switch to black‑and‑white mode.
Start a job, depending on which mode is selected.
• Cancel a print, copy, or scan job in progress.
• Clear current settings or error messages, and return to previous settings.
Page 17
Using the printer control panel buttons and menus 17
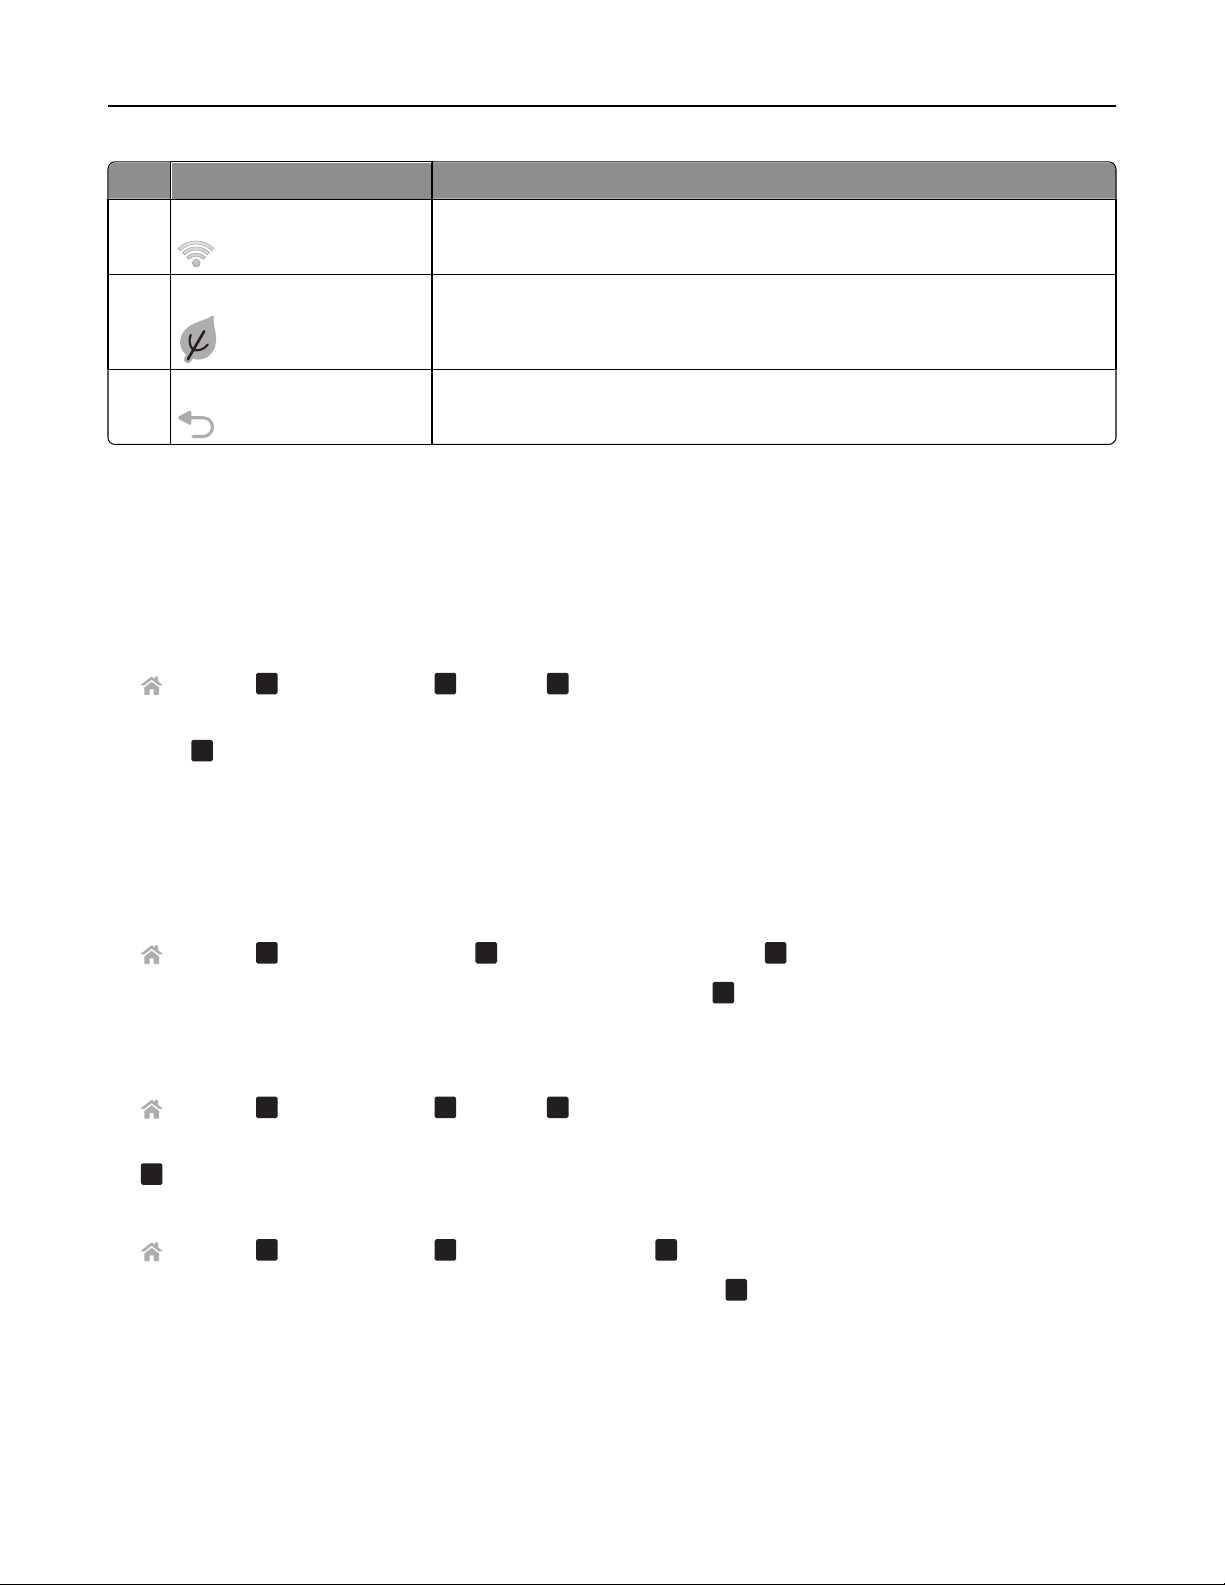
Use To
10 Wi‑Fi indicator
11 Eco‑Mode
Check the wireless status of your printer.
• Change to Sleep mode after the printer is left idle for 10 minutes.
• Reduce the screen brightness.
12 Back
• Return to the previous screen.
• Exit from one menu level to a higher one.
Changing the Sleep timeout
The Sleep timeout is the time it takes for the printer to switch to Sleep mode when the printer is left idle. The Sleep
feature optimizes energy efficiency by reducing the printer power consumption. To save the most energy, select the
lowest Sleep timeout.
1 From the printer control panel, navigate to:
> Setup > OK > Device Setup > OK > Sleep >
2 Press the up or down arrow button to select or use the keypad to enter the value of the Sleep timeout, and then
OK
press
.
OK
Saving paper and energy
To significantly cut paper usage and reduce paper waste, activate duplex printing:
1 From the printer control panel, navigate to:
OK
OK
OK
.
.
> Setup > OK > Print Mode Setup > OK > 2‑Sided Copy, Standalone >
2 Press the up or down arrow button to scroll to On, and then press
To optimize energy efficiency, reduce the Sleep timeout and Screen Brightness:
1 From the printer control panel, navigate to:
> Setup > OK > Device Setup > OK > Sleep >
OK
2 Press the up or down arrow button to select or use the keypad to enter the Sleep timeout value, and then press
OK
.
3 From the printer control panel, navigate to:
> Setup > OK > Device Setup > OK > Screen Brightness >
OK
4 Press the up or down arrow button to scroll to Dim, and then press
Note: If you select 2‑Sided Copy, Standalone, then the printer prints on both sides of the paper (duplex) for
copy and fax jobs, and for printing in Windows and Macintosh, depending on your printer model.
Page 18

Using the printer control panel buttons and menus 18
Restoring factory default settings
Resetting to factory default settings will delete all the printer settings you have previously selected.
1 From the printer control panel, navigate to:
> Setup > OK > Restore Factory Defaults >
OK
2 Press the up or down arrow button to scroll to Restore All Printer Settings, and then press
3 Press the left or right arrow button to scroll to Yes, and then press
OK
.
OK
.
The printer restarts automatically after resetting to factory default settings.
4 When prompted to set the initial settings of your printer, make your selections using the printer control panel
buttons.
Initial Setup Complete appears on the display.
Page 19

Using the printer software 19
Using the printer software
Minimum system requirements
The printer software requires up to 500MB of free disk space.
Supported operating systems
• Microsoft Windows 7 (SP1)
• Microsoft Windows Server 2008 (R2 SP1)
• Microsoft Windows Server 2008 (SP1)
• Microsoft Windows Server 2003 (SP2)
• Microsoft Windows Vista (SP1)
• Microsoft Windows XP (SP3)
• Macintosh Intel OS X version 10.7.0 or later
• Macintosh Intel OS X version 10.6.0 or later
• Macintosh Intel OS X version 10.5.0 or later
• Macintosh Intel OS X version 10.4.4 or later
• Macintosh PowerPC OS X version 10.5.0 or later
• Macintosh PowerPC OS X version 10.4.0 or later
• Ubuntu Linux 11.04, 10.10, 10.04, and 9.04 LTS
• Red Hat Enterprise Linux WS 6, WS 5, and WS 4
• Red Flag Linux Desktop 6.0
• SUSE Linux Enterprise Server 11 and 10
*
*
• SUSE Linux Enterprise Desktop 11 and 10
• Linux openSUSE 11.4, 11.3, and 11.2
• Linpus Linux Desktop 9.6
• Fedora 14
*
*
• Debian GNU/Linux 6.0 and 5.0
• Mint 10 and 9
• PCLinux OS 2010
*
The printer driver for this operating system is available only at http://support.lexmark.com.
*
*
*
*
*
*
*
Using the Windows printer software
Software installed during printer installation
When you set up the printer using the installation software CD, all the necessary software was installed. You may have
chosen to install some additional programs. The following table provides an overview of various software programs
and what they can help you do.
Page 20
Using the printer software 20
If you did not install these additional programs during initial installation, then reinsert the installation software CD, run
the installation software, and then click Advanced Options > Install Additional Software.
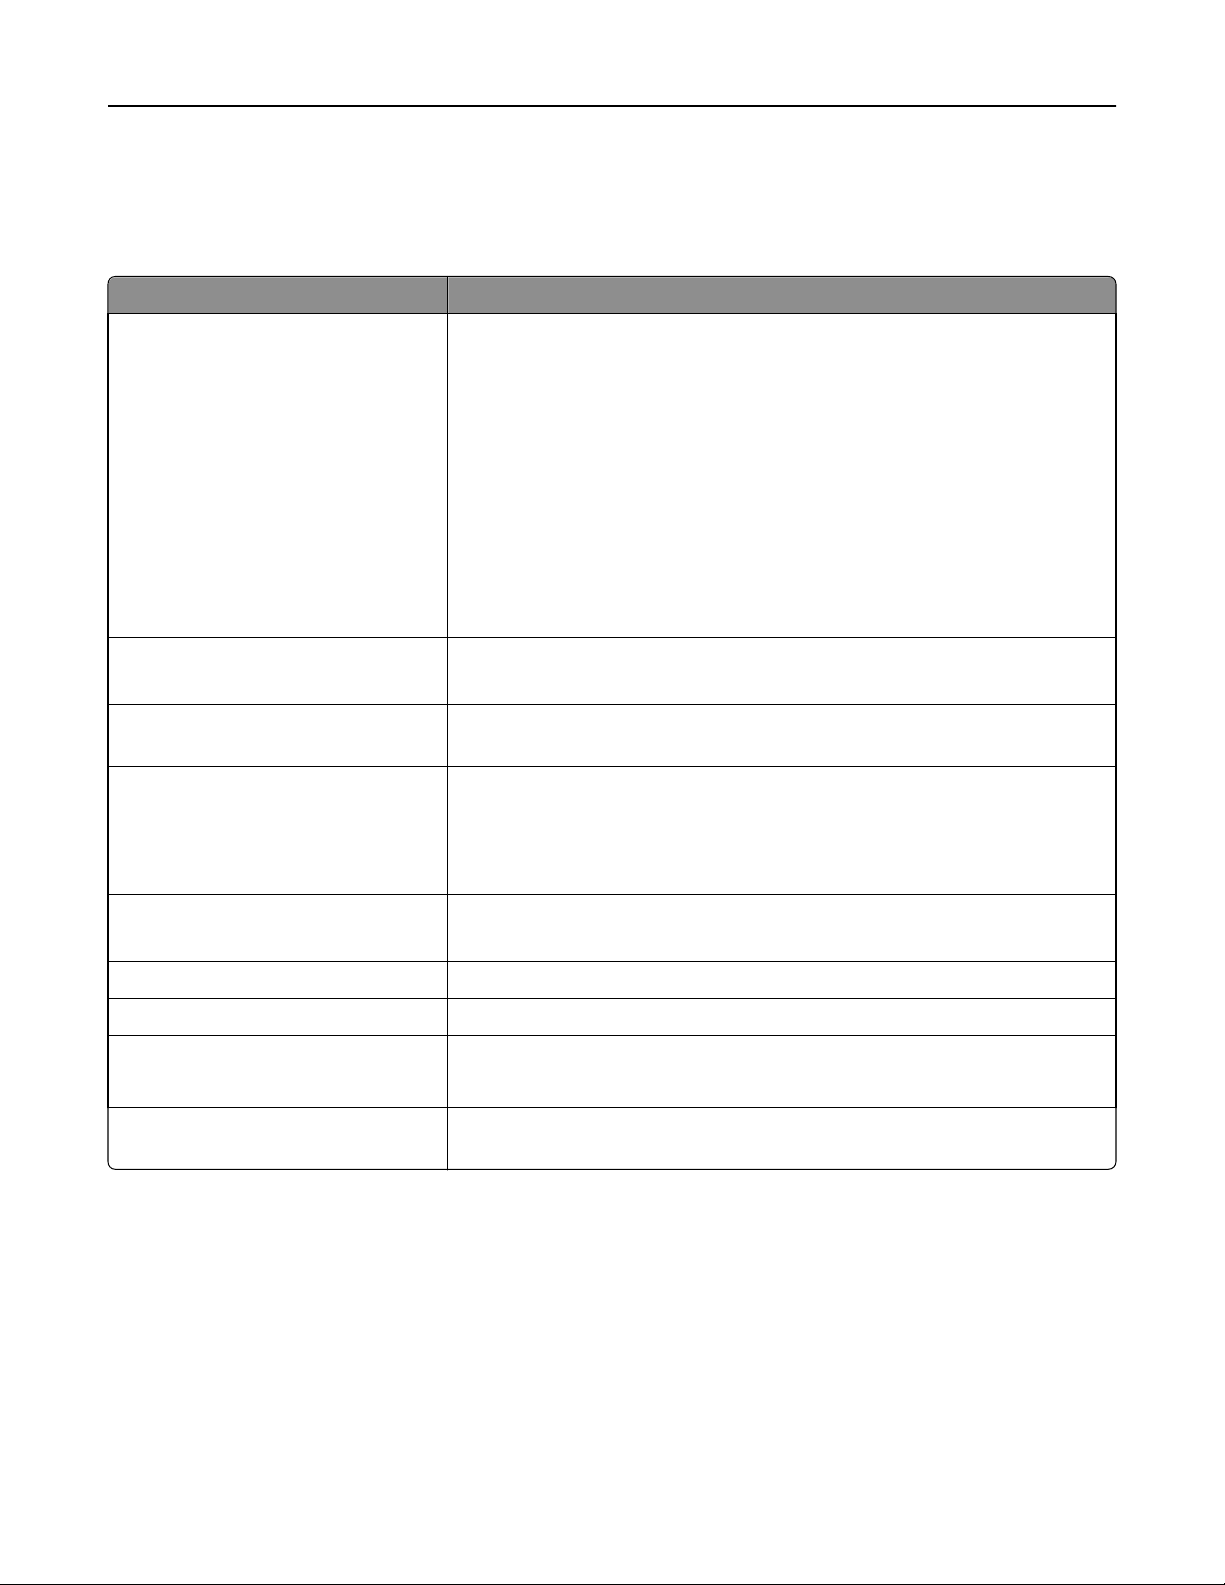
Printer software
Use the To
Lexmark
(referred to as Printer Home)
TM
Printer Home
• Launch applications or programs.
• Scan or e‑mail a photo or document.
• Edit scanned documents.
• Scan documents to PDF.
• Adjust settings for the printer.
• Order supplies.
• Maintain ink cartridges.
• Register the printer.
• Contact technical support.
• Access the User's Guide.
Lexmark Phone Book
(referred to as Phone Book)
Abbyy Sprint OCR Scan a document and produce text that you can edit with a word‑processing
Lexmark Wireless Setup Utility
(referred to as Wireless Setup Utility)
Lexmark Tools for Office
(referred to as Tools for Office)
Printer Setup Utility Configure the fax and e‑mail settings of your printer.
Status Messenger Learn more about the printing problems encountered.
Status Monitor Center
Manage your fax contacts.
program.
• Set up the wireless printer on a wireless network.
• Change the wireless settings of the printer.
Note: This program is installed automatically with the printer software if the
printer has wireless capability.
Access your favorite settings in Microsoft Office 2007.
• Check the supplies status of your printer.
• Order supplies online.
Product Update Receive automatic notifications of updates to your printer software when new
updates are available.
Page 21
Using the printer software 21
Use the To
Printing Preferences When you click File > Print > Properties with a document open, a Printing
Preferences dialog appears. The dialog lets you select options for the print job,
such as the following:
• Select the number of copies to print.
• Print two‑sided copies.
• Select the paper type.
• Add a watermark.
• Enhance images.
• Save settings.
Note: Printing Preferences is installed automatically with the printer software.
Note: Your printer may not come with some of these programs or some of the functions of these programs,
depending on the features of the printer that you purchased.
Using the Macintosh printer software
Launching the Print dialog
Use the Print dialog to adjust the print settings and schedule print jobs.
With a document or photo open, choose File > Print.
Launching an application
1 From the Finder, navigate to:
Applications > select your printer folder
2 Double‑click the application that you want to use.
Use the To
Printer Settings
Shortcuts Speed up usual tasks with your printer.
Wireless Setup
Assistant
• Customize settings for fax jobs.
• Create and edit the Contacts list.
• Configure e‑mail connectivity settings.
• Configure the language, country, date, and time.
Set up the printer on a wireless network.
Note: This application is automatically installed with the printer software if the printer has
wireless capability.
Uninstaller Remove the printer software from your computer.
Notes:
• Your printer may not come with these applications, depending on the features of the printer that you purchased
or the installation type (standard or custom) chosen when you installed the printer.
Page 22

Using the printer software 22
• To take advantage of the full features of your printer, select the custom install option during installation, and
then select all packages listed.
Accessing Web links
Web links are links to predefined Web pages that are saved in the printer folder.
1 From the Finder, navigate to:
Applications > select your printer folder > Web Links
2 Double‑click the Web link that you want to visit.
Use To
Customer Support Contact customer support.
Lexmark Software Updates Download and install the latest printer software.
Lexmark Online Visit the Lexmark Web site.
Order Supplies Online Order ink or supplies.
Printer Registration Register your printer.
Visit Lexmark SmartSolutions
Note: Your printer may not come with these Web links, depending on the features of the printer that you purchased.
• Visit the SmartSolutions Web site.
• Choose your custom solutions.
Finding and installing optional software
For Windows users
1 Click or Start.
2 Click All Programs or Programs, and then select the printer program folder from the list.
3 Navigate to:
Printer Home > select your printer > Support > Online support
4 From the Web site, select your printer and then download the driver.
5 Install additional or optional software.
For Macintosh users
1 From the Finder, navigate to:
Applications > select your printer folder > Web Links > Lexmark Software Updates
2 From the Web site, select your printer and then download the driver.
3 Install additional or optional software.
Page 23

Using the printer software 23
Updating the printer software
For Windows users
1 Click or Start.
2 Click All Programs or Programs, and then select the printer program folder from the list.
3 Select your printer, and then click Product Update.
4 Follow the instructions on the computer screen.
For Macintosh users
1 From the Finder, navigate to:
Applications > select your printer folder > Web Links > Lexmark Software Updates
2 From the Web site, select your printer and then download the driver.
Downloading PCL and PS drivers (Windows only)
Universal Print Drivers (PCL 5 emulation, PCL XL emulation, and PS emulation) can be downloaded from our Web site.
You need to search for your printer model to view compatible drivers.
Reinstalling the printer software
When you set up the printer using the installation software CD, all the necessary software was installed. If you
encountered problems while installing, or if your printer does not appear in the printers folder or as a printer option
when you send a print job, then try uninstalling and reinstalling the printer software.
Uninstalling the printer software
For Windows users
1
Click or Start.
2 Click All Programs or Programs, and then select the printer program folder from the list.
3 Click the uninstaller.
4 Follow the instructions on the computer screen.
5 Once the uninstall process is complete, restart your computer.
For Macintosh users
1
Close all open applications.
2 From the Finder, navigate to:
Applications > select your printer folder
Page 24

Using the printer software 24
3 Double‑click Uninstaller.
4 Follow the instructions on the computer screen.
Installing the printer software
Note: If you installed the printer software on this computer before but need to reinstall the software, then uninstall
the current software first.
For Windows users
1
Close all open software programs.
2 Insert the installation software CD.
If the installation dialog screen does not appear after a minute, then launch the CD manually:
a Click , or click Start and then click Run.
b In the Start Search or Run box, type D:\setup.exe, where D is the letter of your CD or DVD drive.
c Press Enter, or click OK.
3 Click Install, and then follow the instructions on the computer screen.
For Macintosh users
Note: To take advantage of the full features of your printer, select the custom install option, and then select all
packages listed.
1 Close all open applications.
2 Insert the installation software CD.
If the installation dialog does not appear after a minute, then click the CD icon on the desktop.
3 Double-click the software installer package, and then follow the instructions on the computer screen.
Using the Internet
1
Go to the Lexmark Web site at http://support.lexmark.com.
2 Navigate to:
SUPPORT & DOWNLOADS > select your printer > select your operating system
3 Download the driver, and then install the printer software.
Page 25
1
2
Loading paper and original documents 25
Loading paper and original documents
Loading paper
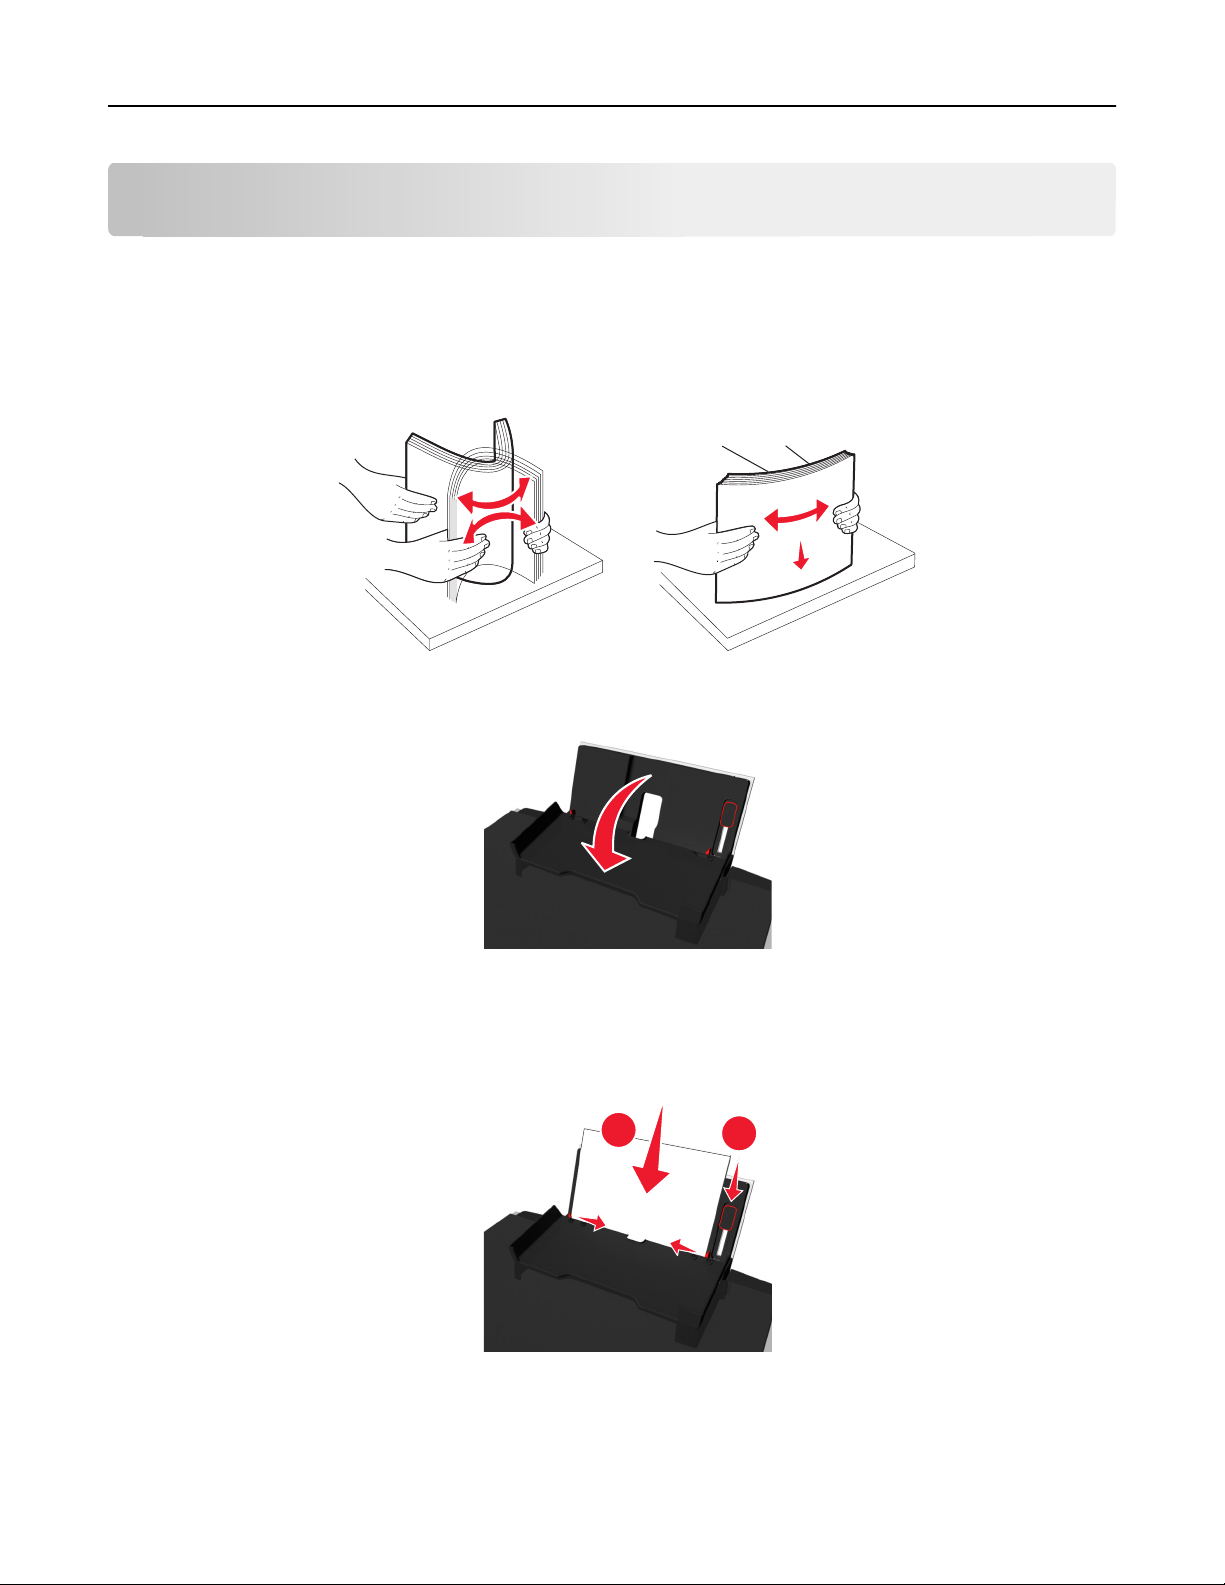
1 Flex the sheets back and forth to loosen them.
Do not fold or crease the paper. Straighten the edges of the stack on a level surface.
2 Open the paper feed guard.
3 Place the paper at the center of the paper support.
Note: Use the indicators on the paper support when loading smaller‑size paper.
4 Adjust the paper guides so they rest against the edges of the paper.
Note: Do not force paper into the printer. The paper should be flat against the paper support, and the edges
should be flush against both paper guides.
Page 26
1
2
Loading paper and original documents 26
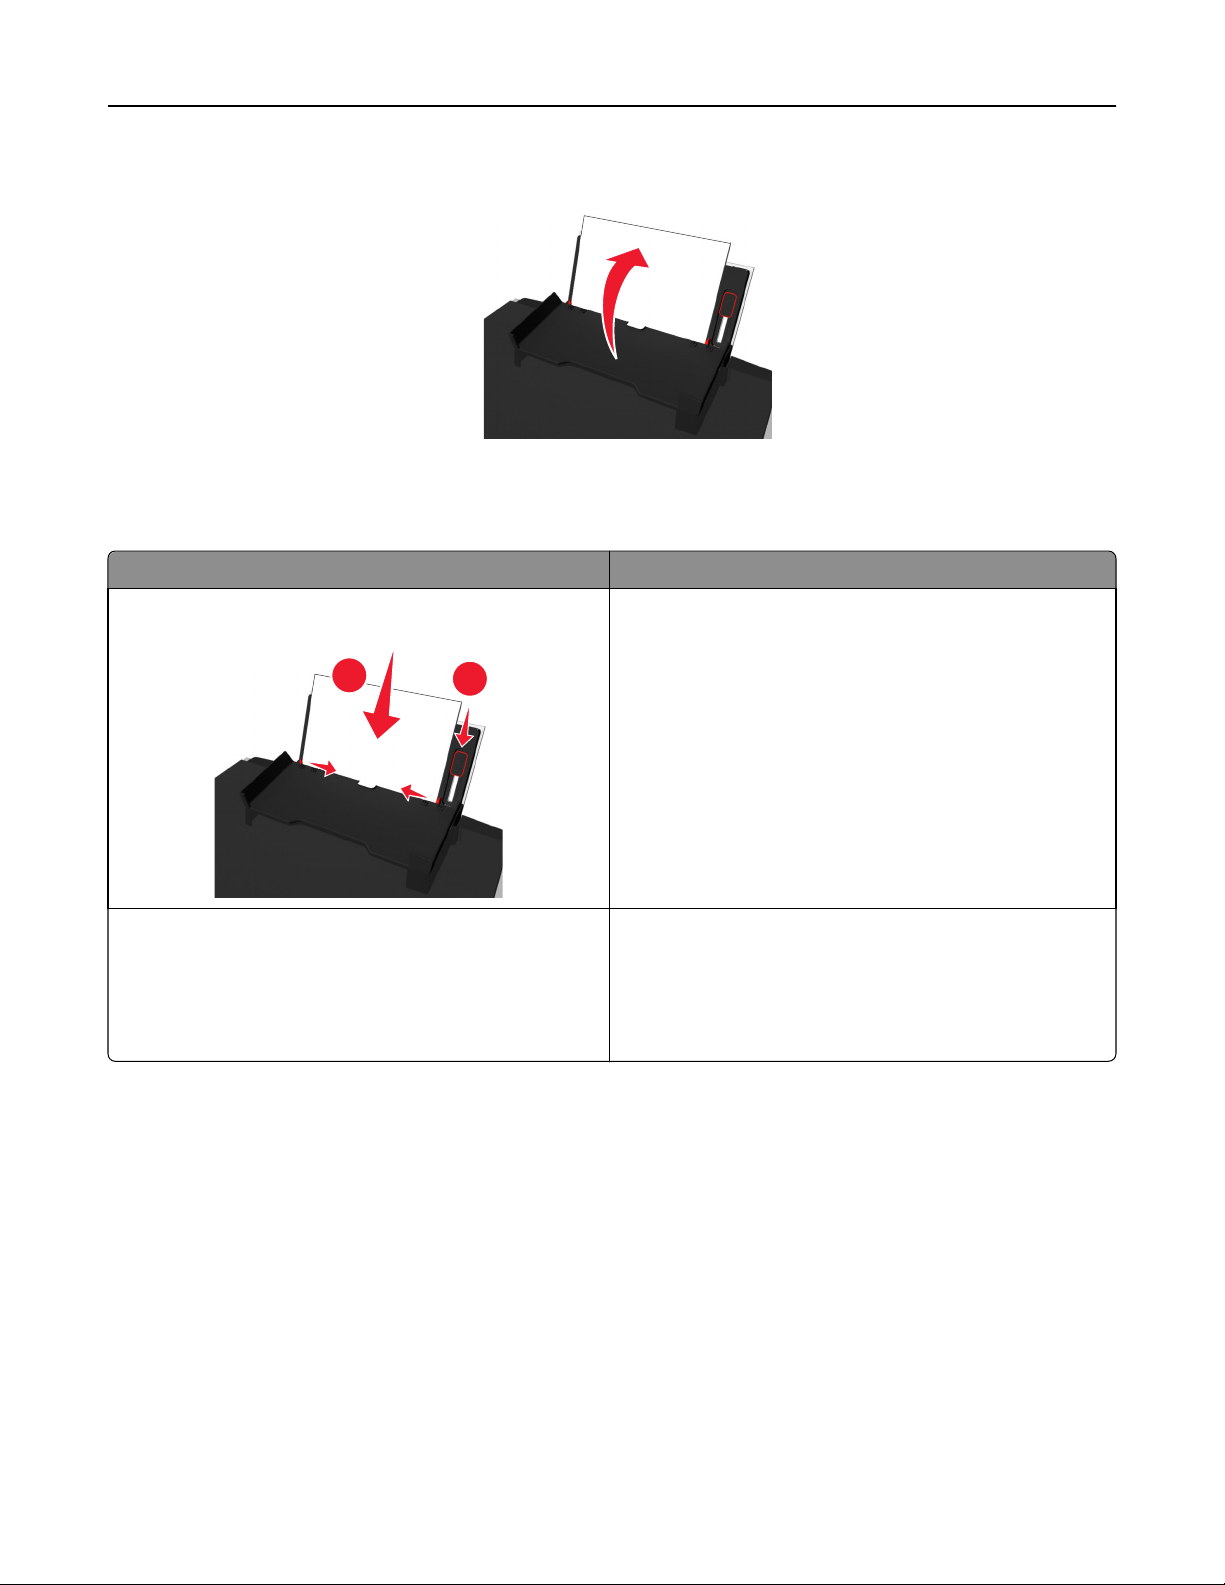
5 Close the paper feed guard.
6 From the printer control panel, select or confirm your paper settings.
Paper and specialty media guidelines
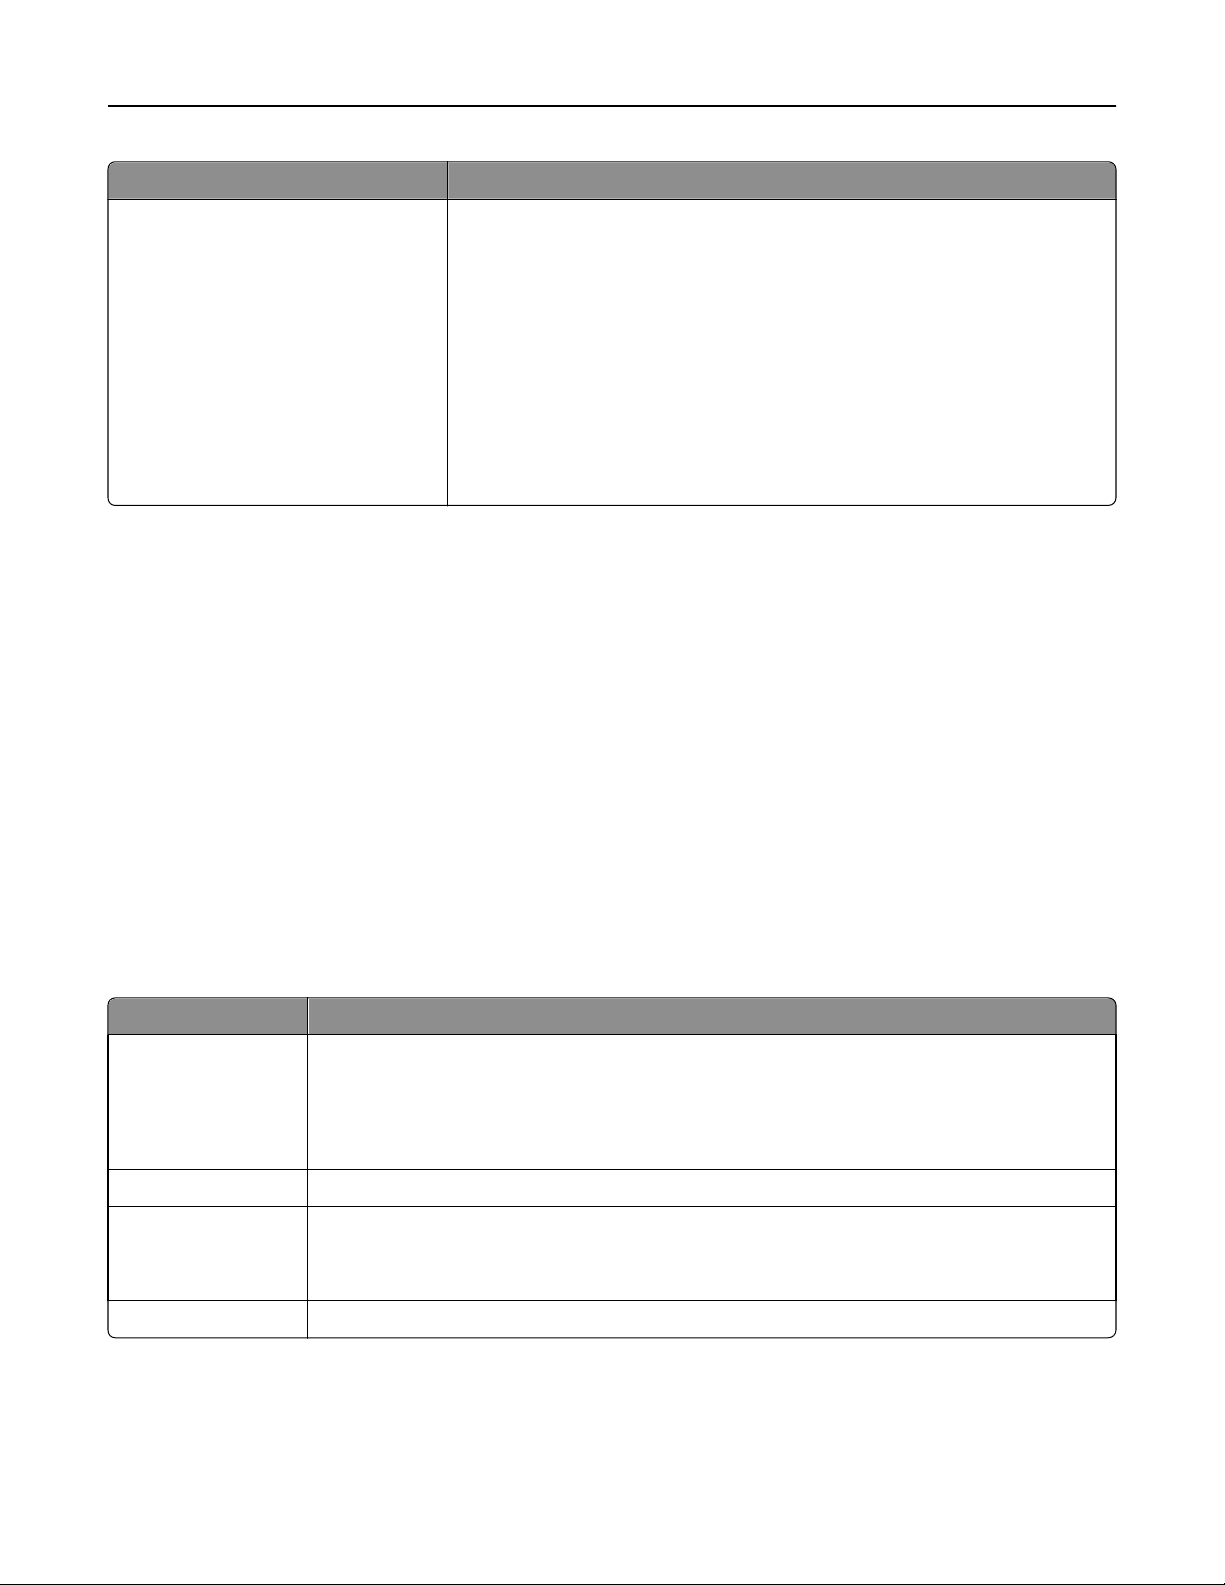
Load up to Make sure that
100 sheets of plain paper
25 sheets of heavyweight matte paper
• The paper guides rest against the edges of the paper.
• You load letterhead paper with the printable side faceup
and the top of the letterhead going into the printer first.
• The printable side of the paper is faceup.
• The paper guides rest against the edges of the paper.
Note: Draft mode is available but is not recommended for
use with expensive paper such as heavyweight matte,
labels, photo cards, and glossy paper.
Page 27
2
1
1
2
2
1
Loading paper and original documents 27
Load up to Make sure that
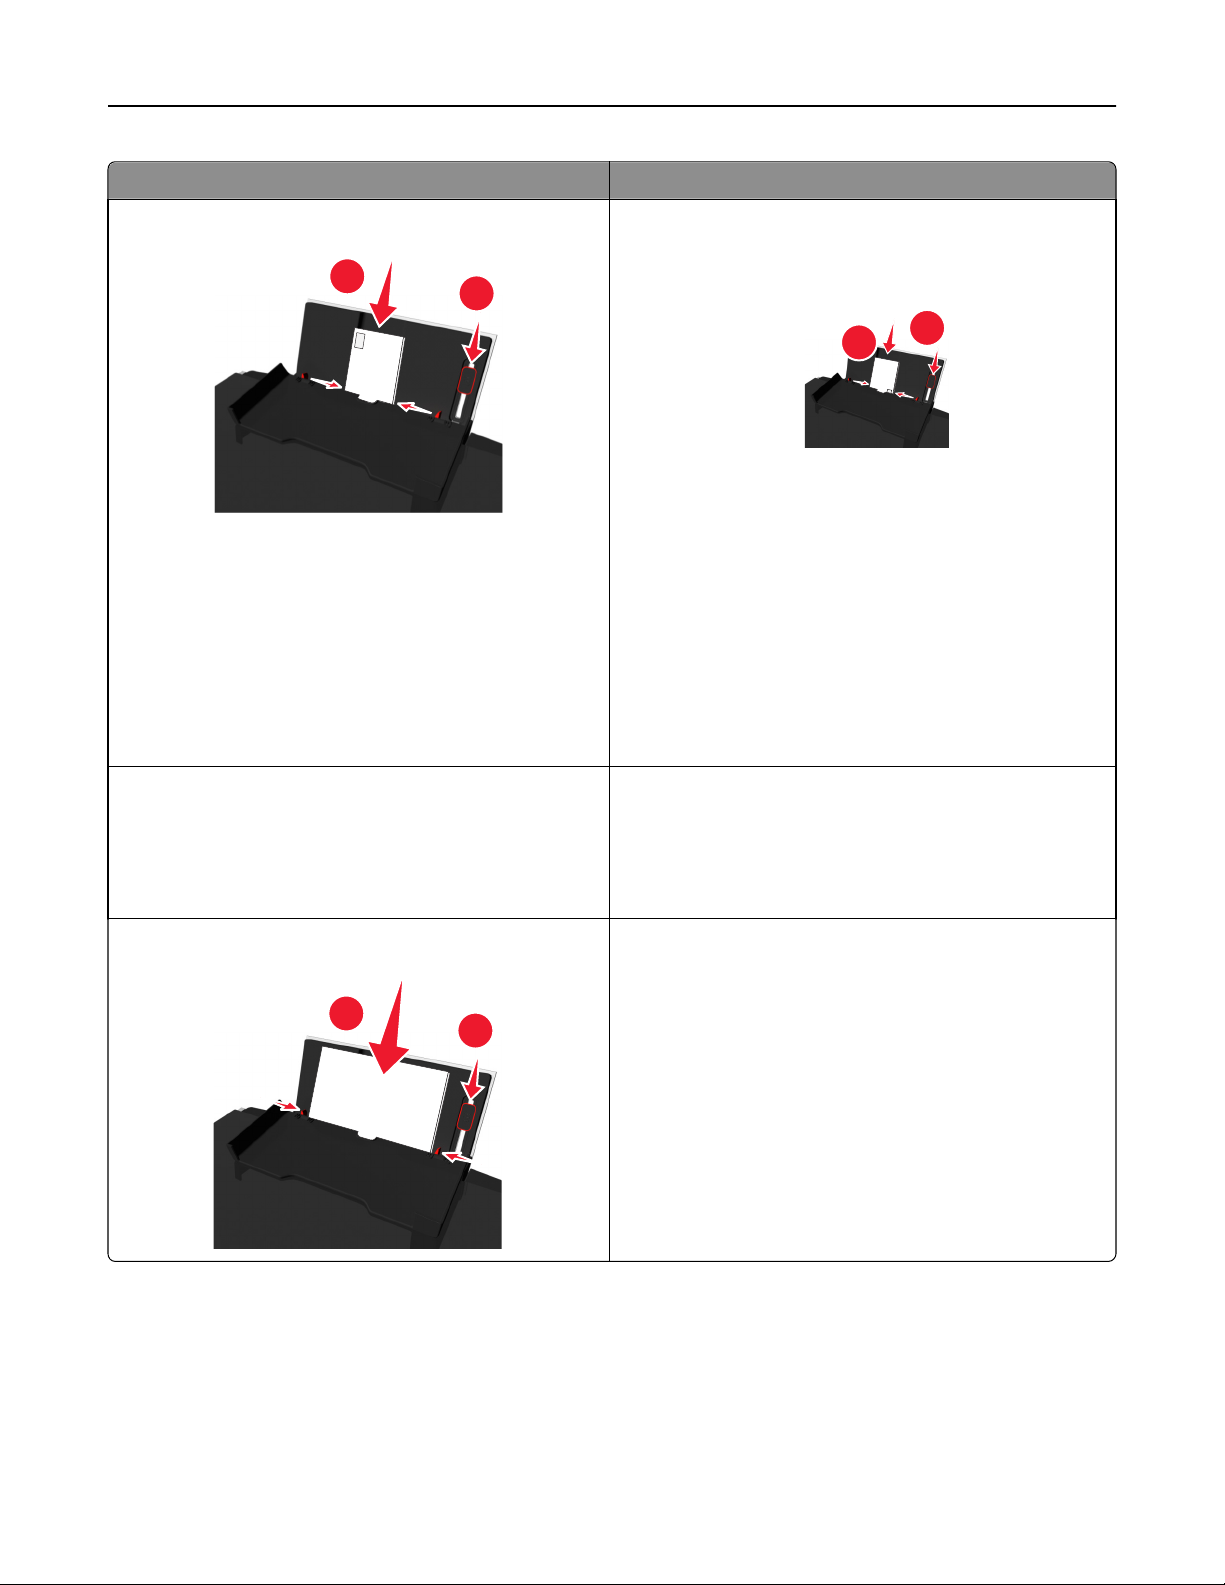
10 envelopes
25 sheets of labels
• The printable side of the envelope is faceup and the flap
is on the left.
• The paper guides rest against the edges of the envelopes.
• You load the envelope in the center of the paper support.
• You select the correct envelope size. Select the next
biggest size if the exact envelope size is not listed.
• You print the envelopes in landscape orientation.
Warning—Potential Damage: Do not use envelopes that
have metal clasps, string ties, or metal folding bars.
Notes:
– Do not load envelopes with holes, perforations,
cutouts, or deep embossing.
– Do not use envelopes that have exposed flap adhesive.
• The printable side of the label is faceup.
• The paper guides rest against the edges of the paper.
Note: Draft mode is available but is not recommended for
use with expensive paper such as heavyweight matte,
labels, photo cards, and glossy paper.
25 greeting cards, index cards, postcards, or photo cards
• The printable side of the card is faceup.
• You load the photo paper in the center of the tray.
• The paper guides rest against the edges of the cards.
Notes:
– For best results, allow photos to dry at least 24 hours
before stacking, displaying, or storing.
– Draft mode is available but is not recommended for use
with expensive paper such as heavyweight matte,
labels, photo cards, and glossy paper.
Page 28
Loading paper and original documents 28
Load up to Make sure that
25 sheets of photo/glossy paper
10 iron‑on transfers
50 transparencies
• The printable or glossy side of the paper is loaded faceup.
If you are not sure which side is printable, then see the
instructions that came with the paper.
• The paper guides rest against the edges of the paper.
• You do not touch or scratch the glossy surface of the
unprinted paper to prevent smudges or marks that may
affect the quality of your prints.
Notes:
– For best results, allow photos to dry at least 24 hours
before stacking, displaying, or storing.
– Draft mode is available but is not recommended for use
with expensive paper such as heavyweight matte,
labels, photo cards, and glossy paper.
• You follow the loading instructions on the iron‑on transfer
packaging.
• The printable side of the transfer is faceup.
• The paper guides rest against the edges of the transfer.
Note: For best results, load transfers one at a time.
• The rough side of the transparencies is faceup.
• The paper guides rest against the edges of the
transparencies.
• You remove any paper backing sheets from the
transparencies before loading.
• You load A4- or letter-size transparencies.
• If the transparencies have a removable strip, then each
strip faces up.
Note: Transparencies require more drying time. Remove
each transparency as it exits, and allow it to dry before
stacking or storing to avoid ink smudging.
Saving paper settings
You can adjust the settings for your print and copy jobs to match the paper size and type you have loaded in the printer.
1 From the printer control panel, press .
2 Adjust the settings as needed:
• If you want to set the paper size, then navigate to:
Setup >
OK
> Paper Setup > OK > Paper Size > OK > select the default paper size >
• If you want to set the paper type, then navigate to:
Setup >
OK
> Paper Setup > OK > Paper Type > OK > select the default paper type >
OK
OK
Page 29
Loading paper and original documents 29
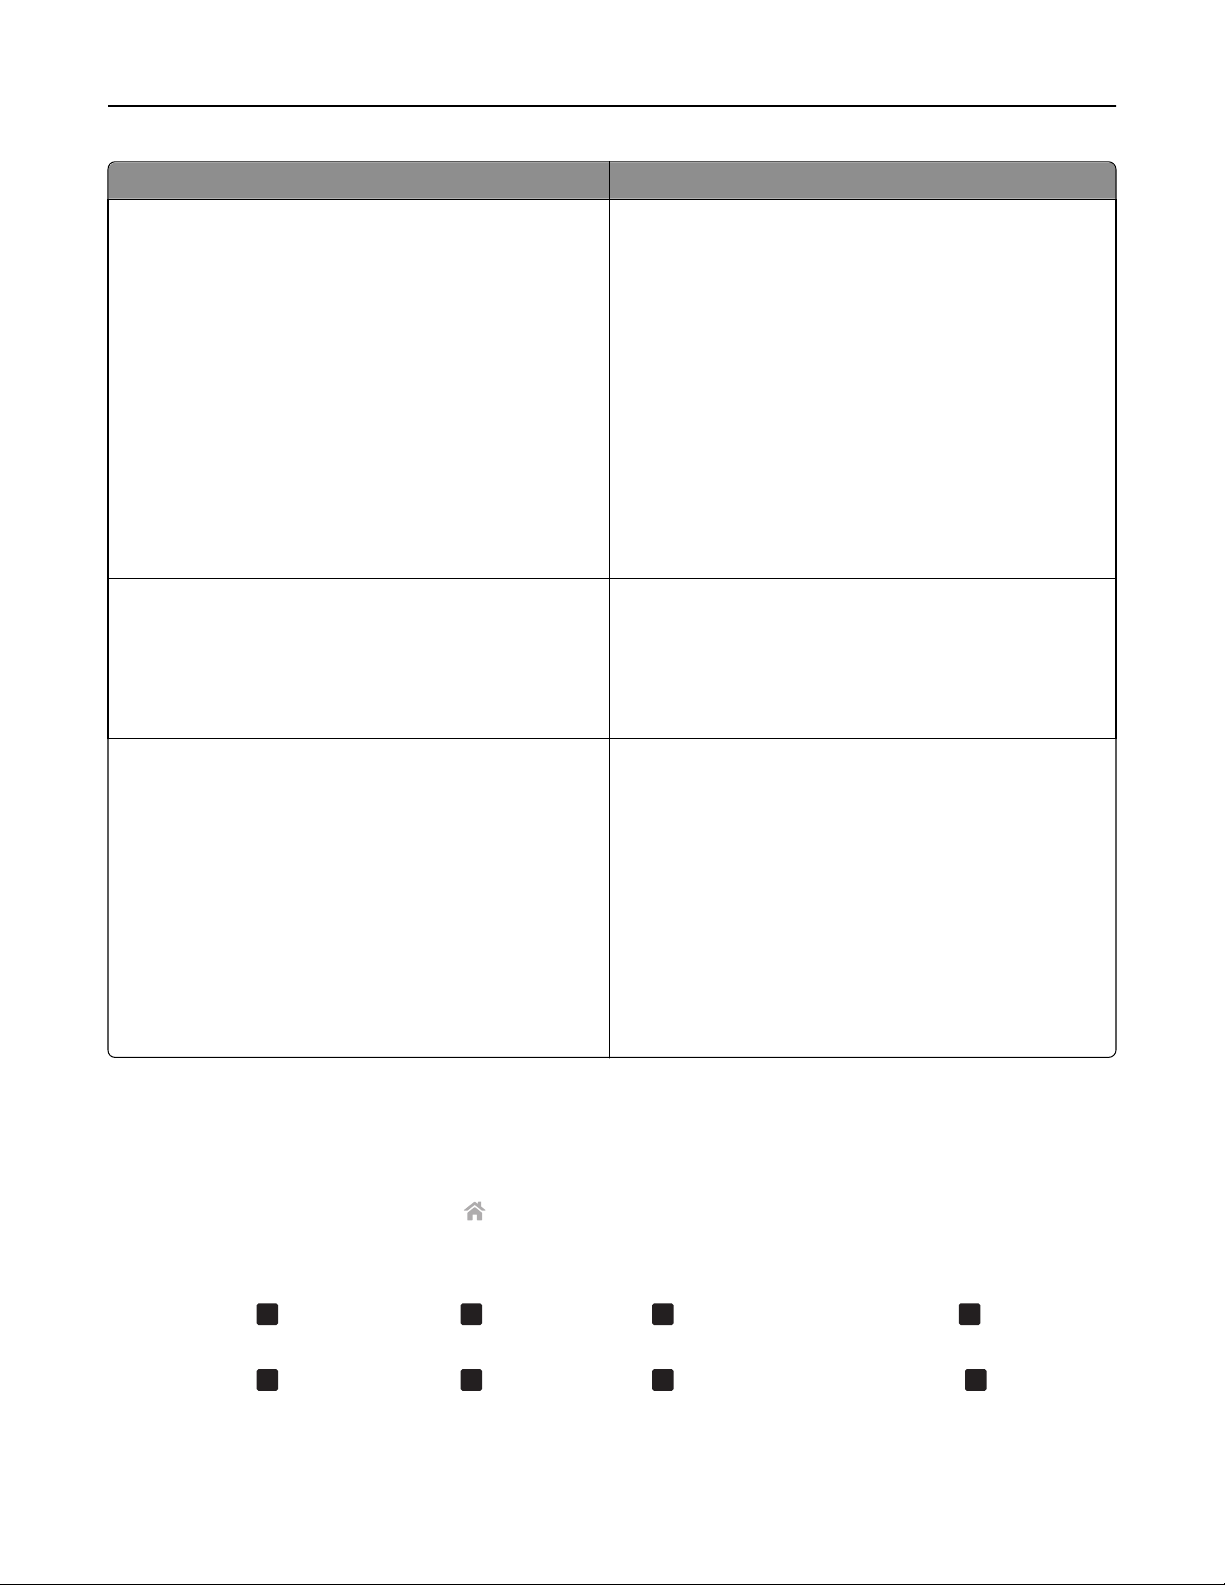
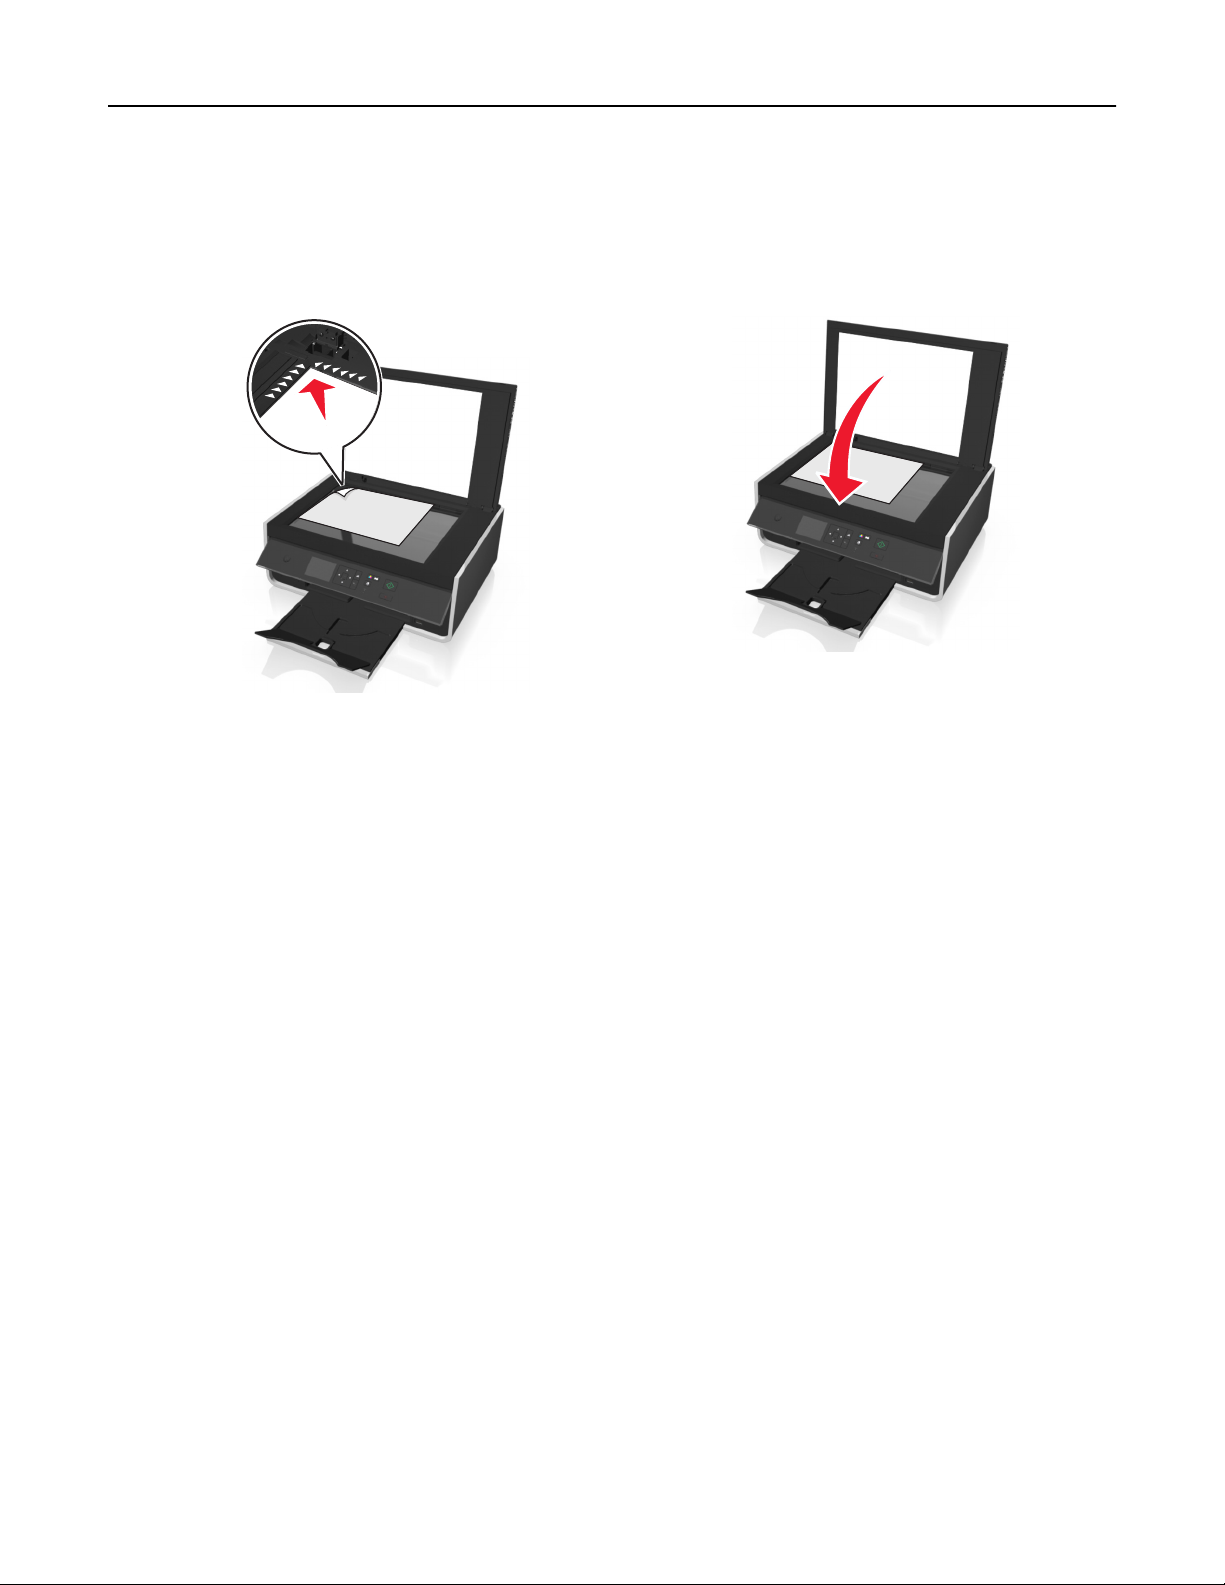
Loading original documents on the scanner glass
1 Open the scanner lid and place the document facedown on the scanner glass.
2 Close the scanner lid.
Page 30

Printing 30
Printing
Tips for printing
• Use the appropriate paper for your print job.
• Select a higher print quality for better prints.
• Make sure there is enough ink in the ink cartridges.
• Remove each sheet as it is printed when printing photos or when working with specialty media.
• Do not touch the duplex latch or latches while actively printing.
Printing basic documents
Printing a document
For Windows users
1
With a document open, click File > Print.
2 Click Properties, Preferences, Options, or Setup.
3 Select the print quality, the number of copies to print, the type of paper to use, and how the pages should print.
4 Click OK to close any printer software dialogs.
5 Click OK or Print.
For Macintosh users
1
With a document open, choose File > Page Setup.
2 From the Page Setup dialog, set the printer, paper size, and orientation.
3 Click OK.
4 From the menu bar, choose File > Print.
5 From the Printer pop‑up menu, choose your printer.
6 From the print options menu, choose the print quality, the number of copies to print, the type of paper to use, and
how the pages should print.
7 Click Print.
Page 31

Printing 31
Collating printed copies
When printing multiple copies of a document, you can choose to print each copy as a set (collated) or to print the copies
as groups of pages (not collated).
Collated Not collated
Notes:
• The collate option is available only when you are printing multiple copies.
• To prevent smudging when printing photos, remove each photo as it exits the printer, and then let it dry before
stacking.
For Windows users
1
With a document open, click File > Print.
2 Click Properties, Preferences, Options, or Setup.
3 Navigate to:
Layout tab > Copies area
4 Enter the number of copies that you want to print, and then select Collate.
5 Click OK to close any printer software dialogs.
6 Click OK or Print.
For Macintosh users
1
With a document open, choose File > Page Setup.
2 From the Page Setup dialog, set the printer, paper size, and orientation.
3 Click OK.
4 From the menu bar, choose File > Print.
5 From the Printer pop‑up menu, choose your printer.
6 From the Copies area, enter the number of copies that you want to print, and then select Collated.
7 Click Print.
Changing the print order of pages
For Windows users
1
With a document open, click File > Print.
2 Click Properties, Preferences, Options, or Setup.
3 Navigate to:
Layout tab > Copies area
Page 32

Printing 32
4 To change the current page order, select the Reverse page order check box.
5 Click OK to close any printer software dialogs.
6 Click OK or Print.
For Macintosh users
1
With a document open, choose File > Page Setup.
2 From the Page Setup dialog, set the printer, paper size, and orientation.
3 Click OK.
4 From the menu bar, choose File > Print.
5 From the Printer pop‑up menu, choose your printer.
6 From the print options pop-up menu, choose Paper Handling.
7 From the Page Order pop‑up menu, choose a page order:
• To print the first page first, choose Normal.
• To print the last page first, choose Reverse.
8 Click Print.
Printing multiple pages on one sheet
For Windows users
1
With a document open, click File > Print.
2 Click Properties, Preferences, Options, or Setup.
3 Navigate to:
Layout tab > Page Layouts area > select Multiple pages per side (N‑Up)
4 Select the number of page images to print on each side.
5 Adjust other settings as needed.
6 Click OK to close any printer software dialogs.
7 Click OK or Print.
For Macintosh users
1
With a document open, choose File > Page Setup.
2 From the Page Setup dialog, set the printer, paper size, and orientation.
3 Click OK.
4 From the menu bar, choose File > Print.
5 From the Printer pop‑up menu, choose your printer.
6 From the print options pop‑up menu, choose Layout.
7 From the Pages per Sheet pop‑up menu, choose the number of page images to print on each page.
Page 33

Printing 33
8 Adjust other settings as needed.
9 Click Print.
Printing on specialty media
Printing envelopes
For Windows users
1
With a document open, click File > Print.
2 Click Properties, Preferences, Options, or Setup.
3 Navigate to:
Paper/Finishing tab > Paper size list > select your envelope size
If no size matches the envelope size, then click Manage Custom Sizes and set a custom size.
4 Navigate to:
Paper type list > select Envelope
5 Navigate to:
Layout tab > Page Orientation area > select an orientation
6 Click OK to close any printer software dialogs.
7 Click OK or Print.
For Macintosh users
1
With a document open, choose File > Page Setup.
2 From the “Format for” pop‑up menu, choose your printer.
3 From the Paper Size pop‑up menu, choose your envelope size.
If no size matches the envelope size, then set a custom size.
4 Select an orientation, and then click OK.
5 From the menu bar, choose File > Print.
6 From the Printer pop‑up menu, choose your printer.
7 Click Print.
Notes:
• Most envelopes use landscape orientation.
• Make sure the same orientation is also selected in the application.
Page 34

Printing 34
Printing on labels
Notes:
• Make sure the top of the label sheet feeds into the printer first.
• Make sure the adhesive on the labels does not extend to within 1 mm of the edge of the label sheet.
• Make sure the paper guide or paper guides rest against the edges of the label sheet.
• Use full label sheets. Partial sheets (with areas exposed by missing labels) may cause labels to peel off during
printing, resulting in a paper jam.
For Windows users
1
With a document open, click File > Print.
2 Click Properties, Preferences, Options, or Setup.
3 Navigate to:
Paper/Finishing tab > Manage Custom Sizes > New
4 Type a name and adjust the settings as needed to create a custom size, and then click OK.
5 Navigate to:
Paper type list > select the created custom type
6 Click OK to close any printer software dialogs.
7 Click OK or Print.
For Macintosh users
1
With a document open, choose File > Page Setup.
2 From the “Format for” pop‑up menu, choose your printer.
3 From the Paper Size pop‑up menu, choose your paper size.
If no paper size matches the label sheet size, then set a custom size.
4 Select an orientation, and then click OK.
5 From the menu bar, choose File > Print.
6 From the Printer pop‑up menu, choose your printer.
7 From the print options pop‑up menu, choose Quality & Media.
8 From the Paper Type pop‑up menu, choose Labels.
9 From the Print Quality menu, choose a print quality other than Quick Print or Draft.
10 Click Print.
Page 35

Printing 35
Printing on custom‑size paper
For Windows users
1
With a document open, click File > Print.
2 Click Properties, Preferences, Options, or Setup.
3 Navigate to:
Paper/Finishing tab > Manage Custom Sizes > New
4 Type a name and adjust the settings as needed to create a custom size, and then click OK.
5 Click Close, and then click OK to close any printer software dialogs.
6 Click OK or Print.
For Macintosh users
1
With a document open, choose File > Page Setup.
2 From the “Format for” pop‑up menu, choose your printer.
3 From the Paper Size pop‑up menu, choose Manage Custom Sizes.
4 Adjust the settings as needed to create a custom size, and then click OK.
5 Click OK.
6 From the menu bar, choose File > Print.
7 From the printer pop‑up menu, choose your printer.
8 Click Print.
Working with photos
Supported file types
• .jpg, .jpeg, .jpe (Joint Photographic Experts Group)
• .tiff, .tif (Tagged Image File Format)
Page 36

Printing 36
Using a flash drive with the printer
Make sure the flash drive contains files that are supported by the printer. For more information, see “Supported file
types” on page 35.
1 Insert a flash drive into the USB port.
E
V
I
R
D
H
S
A
L
F
Notes:
• The flash drive uses the same port that is used for a PictBridge camera cable.
• An adapter may be necessary if your flash drive does not fit directly into the port.
Warning—Potential Damage: Do not touch any cables, any network adapter, any
connector, the memory device, or the printer in the areas shown while actively
printing, reading, or writing from the memory device. A loss of data can occur.
2 Follow the instructions or select from available options on the printer display.
Note: If the printer does not recognize the memory device, then remove and reinsert it.
Printing photos from a flash drive
1 Load photo paper.
2 Insert a flash drive or digital camera set to mass storage mode.
3 Use the up or down arrow button to select a photo printing option, and then press
• Select and Print allows you to choose a layout, the number of photos per page, paper settings, photo
size, photo quality, and to sharpen the quality of graphics.
• Print Photos allows you to print all photos, selected photos by photo range, and print photos using
predefined photo size templates.
OK
.
4 To adjust the print settings, press the up or down arrow button to scroll to the option you want to set, and then
OK
press the left or right arrow button to scroll to the setting you want. If necessary, press
to make a selection.
5 Press .
Note: For best results, allow the prints to dry at least 24 hours before stacking, displaying, or storing.
Page 37

Printing 37
Printing photos from a PictBridge-enabled digital camera
PictBridge is a technology available in most digital cameras that lets you print directly from your digital camera without
using a computer.
1 Insert one end of the USB cable into the camera.
Note: Use only the USB cable that came with the camera.
2 Insert the other end of the cable into the PictBridge port on the front of the printer.
Notes:
• Make sure that the digital camera is set to the correct USB mode. If the camera USB selection is incorrect,
then the camera is detected as a flash drive, or an error message is displayed on the printer control panel.
For more information, see the documentation that came with the camera.
• The printer reads only one memory device at a time.
Warning—Potential Damage: Do not touch any open connector, the memory
device, or the printer in the areas shown while actively printing, reading, or
writing from the memory device. A loss of data can occur.
3 If the PictBridge connection is successful, then the following message appears on the display: Use PictBridge
Device to choose and print photos. Press OK to select printer default
settings.
4 If you want to change the default print settings:
a Press
OK
to access the PictBridge menu.
b Press the arrow buttons to select the paper source, paper setup, photo size, number of photos per page and
OK
print quality. You can also enhance the quality of graphics. Press
each time you make a selection.
Note: The printer will use the default print settings unless you change the print settings from the camera.
5 See the documentation that came with the camera to begin printing.
Note: If you insert the USB cable of the PictBridge‑enabled camera while the printer is performing another job, then
wait for the job to finish before printing from the camera.
Page 38

Printing 38
Printing on both sides of the paper (duplexing)
Printing on both sides of the paper (duplexing) automatically
Notes:
• The automatic duplex unit supports A4‑ and letter‑size paper. It also supports plain, premium plain, ColorLok
certified plain, heavy plain, and letterhead paper types.
• Do not remove the page until printing is finished.
Warning—Potential Damage: Do not touch the duplex latch or latches while actively printing.
For Windows users
1
With a document open, click File > Print.
2 Click Properties, Preferences, Options, or Setup.
3 Navigate to:
Layout tab > Print on Both Sides (Duplex) area > Print on both sides
• Click Long edge for print jobs with pages that are bound along the long edge of the page.
• Click Short edge for print jobs with pages that are bound along the short edge of the page.
4 Click the Paper/Finishing tab, and then select a supported paper type.
5 Click OK to close any printer software dialogs.
6 Click OK or Print.
To return to single-sided printing, repeat steps 1 and 2, and then navigate to:
Layout tab > Print on Both Sides (Duplex) area > Print on one side only
For Macintosh users
1
With a document open, choose File > Page Setup.
2 From the Page Setup dialog, set the printer, paper size, and orientation.
3 Click OK.
4 From the menu bar, choose File > Print.
5 From the Printer pop‑up menu, choose your printer.
6 From the print options pop‑up menu, choose Quality & Media.
7 From the Paper Type pop‑up menu, choose a supported paper type.
8 From the print options pop‑up menu, choose Layout.
Page 39

Printing 39
9 From the Two‑Sided pop‑up menu, choose Long‑Edge binding or Short‑Edge binding.
• For Long‑Edge binding, pages are bound along the long edge of the page (left edge for portrait, top edge for
landscape).
Portrait Landscape
2
1
1
2
• For Short‑Edge binding, pages are bound along the short edge of the page (top edge for portrait, left edge for
landscape).
Portrait Landscape
10 Click Print.
Setting the duplex printing dry time
Using the control panel
1 From the printer control panel, navigate to:
> Setup > OK > Print Mode Setup > OK > Page Dry Time >
2 Press the up or down arrow button to scroll to the dry time setting you want, and then press
Note: The dry time varies depending on the print quality selected for the print job. Select Extended to extend the
dry time for your prints.
OK
OK
.
Using the printer software
For Windows users
1 Click File > Print.
2 Click Properties, Preferences, Options, or Setup.
3 Navigate to:
Layout tab > Print on Both Sides (Duplex) area > select a dry time setting
Note: Under conditions of high humidity, or if the normal drying time does not allow the ink to dry completely,
select Extended.
4 Click OK.
Page 40

Printing 40
For Macintosh users
1 From the Apple menu, navigate to:
System Preferences > Print & Fax > select your printer
2 Navigate to:
Open Print Queue > Printer Setup > Driver tab
or
Printer Setup > Installable Options
3 From the Two‑Sided Printing Dry Time pop‑up menu, choose a dry time setting.
Note: Under conditions of high humidity, or if the normal drying time does not allow the ink to dry completely,
choose Extended.
4 Click OK or Apply Changes.
Managing print jobs
Finding the print queue for your printer
A print queue represents the printer that is connected to your computer. The print queue name is usually the printer
model or the printer nickname assigned when installing or adding the printer.
Note: Several print queues may appear in the list depending on how the printer is connected (USB, Ethernet,
wireless). Make sure you know how your printer is connected to the computer to be able to select the correct print
queue.
For Windows users
1
Open the printers folder.
a Click , or click Start and then click Run.
b In the Start Search or Run box, type control printers.
c Press Enter, or click OK.
2 Find the print queue for your printer (Network or USB).
3 If the print queue is not in the list, then create a new print queue.
For Macintosh users
1
From the Apple menu, navigate to:
System Preferences > Print & Fax > the print queue for your printer
2 If the print queue is not in the list, then create a new print queue.
Page 41

Printing 41
Creating a print queue
For Windows users
1 From the Printer Tasks area, click Add a Printer.
2 Follow the instructions on the computer screen.
For more information, see the documentation that came with your operating system.
For Macintosh users
1 From the Print & Fax area, click +.
2 If necessary, click the Default or Default Browser tab.
3 Select your printer from the list.
Note: Printers connected to the network or locally through a USB cable may have the same default printer
name. If necessary, use the Name field to rename the printer.
4 Click Add.
Setting your printer as the default printer
Your printer should be selected automatically from the Print dialog when you send a print job. If you have to manually
select your printer, then it is not the default printer.
To set the default printer:
For Windows users
1
Click , or click Start and then click Run.
2 In the Start Search or Run box, type control printers.
3 Press Enter, or click OK.
The printers folder opens.
4 Right‑click the printer, and then select Set as Default Printer.
For Macintosh users
1
From the Apple menu, navigate to:
System Preferences > Print & Fax
2 Select the printer from the Default Printer pop‑up menu, or select the printer and click Make Default.
Page 42

Printing 42
Changing the default printing mode
To conserve ink, you can change the default printing mode for all print jobs to Draft or Quick Print. It uses less ink and
is recommended for printing text-only documents. If you need to change to a different print mode to print photos or
other high-quality documents, then you can select a different mode from the Print dialog before sending the print job.
For Windows users
1
With a document open, click File > Print.
2 Click Properties, Preferences, Options, or Setup.
3 Navigate to:
Quality tab > select a print quality > OK
For Macintosh users
1
With a document open, choose File > Print.
2 From the printer pop‑up menu, choose your printer.
3 From the print options pop-up menu, choose Quality & Media.
4 From the Print Quality pop‑up menu, choose a print quality.
5 Click OK.
Pausing print jobs
For Windows users
1
Click , or click Start and then click Run.
2 In the Start Search or Run box, type control printers.
3 Press Enter, or click OK.
The printers folder opens.
4 Right‑click the printer, and then select Open or See what's printing.
5 Pause the print job:
• If you want to pause a particular print job, then right‑click the document name, and then select Pause.
• If you want to pause all print jobs in the queue, then click Printer, and then select Pause Printing.
For Macintosh users
1
Click the printer icon on the Dock.
The print queue dialog appears.
2 Pause the print job:
• If you want to pause a particular print job, then choose the document name, and then click Hold.
• If you want to pause all print jobs in the queue, then click Pause Printer or Stop Jobs.
Page 43

Printing 43
Resuming print jobs
For Windows users
1
Click , or click Start and then click Run.
2 In the Start Search or Run box, type control printers.
3 Press Enter, or click OK.
The printers folder opens.
4 Right‑click the printer, and then select Open or See what's printing.
5 Resume the print job:
• If you want to resume a particular print job, then right‑click the document name, and then select Resume or
Restart.
• If you want to resume all print jobs in the queue, then click Printer, and then clear the selection for Pause
Printing.
For Macintosh users
1
From the Apple menu, navigate to:
System Preferences > Print & Fax > select your printer
2 Click Open Print Queue or Set Up Printers.
The print queue dialog appears.
3 Resume the print job:
• If you want to resume a particular print job, then choose the document name, and then click Resume.
• If you want to resume all print jobs in the queue, then click Resume Printer or Start Jobs.
Canceling print jobs
To cancel a print job from the printer control panel, press . To cancel a print job from the computer, do the following:
For Windows users
1
Click , or click Start and then click Run.
2 In the Start Search or Run box, type control printers.
3 Press Enter, or click OK.
The printers folder opens.
4 Right‑click the printer, and then select Open or See what's printing.
5 Cancel the print job:
• If you want to cancel a particular print job, then right‑click the document name, and then select Cancel.
• If you want to cancel all print jobs in the queue, then click Printer > Cancel All Documents.
Page 44

Printing 44
For Macintosh users
1
Click the printer icon on the Dock.
The print queue dialog appears.
2 Choose the job you want to cancel, and then click Delete.
Printing from a mobile device
What is LexPrint?
LexPrint is a free application that lets you print easily from your iPad, iPhone, or iPod touch using any Lexmark printer
connected to the same wireless network. It lets you print Web pages, photos from the photo album, or photos you
recently captured using the camera of your mobile device, depending on its features. You can also customize print
settings from your mobile device.
Depending on your Lexmark printer model, you may need to download the LexPrint Listener application from our Web
site at www.lexmark.com/lexprint.
Supported printers
LexPrint enables your mobile device to communicate with Lexmark printers found on the same network.
• For select printer models that support Direct Image and Zeroconf or Bonjour, you can print directly from your mobile
device to the printer without using LexPrint Listener. To check if your printer model supports these features, visit
www.lexmark.com/lexprint.
• For other Lexmark printers, your mobile device can send print jobs to your printer as long as the printer software
and LexPrint Listener are installed on the computer where the printer is connected.
Note: The application referred to as Rendezvous in Mac OS X version 10.2 is now called Bonjour by Apple Inc.
Page 45

Copying 45
Copying
Scanner glass
Load the original document facedown at the placement corner.
Note: The Automatic Document Feeder (ADF) is available only in select printer models.
Tips for copying
• Make sure you load the original document or photo facedown on the scanner glass and at the placement corner.
You can load postcards, photos, small item s, transparencies, photo paper, or thin media (such as magazine clippings).
• Close the scanner cover, if possible, to avoid dark edges on the scanned image.
• Make sure the paper exit tray is fully extended.
• When the document to be copied is in place with the settings you want, press to start copying.
Making copies
1 Load paper.
2 Load an original document faceup into the ADF or facedown on the scanner glass.
3 From the printer control panel, navigate to:
> Copy > OK > Copies
4 Press the left or right arrow button to select the number of copies.
5 From the Copy menu screen, press the up or down arrow button to scroll to the option you want to set, and then
OK
press the left or right arrow button to scroll to the setting you want. If necessary, press
6 Select the copy mode:
• Press to switch to color mode.
• Press to switch to black‑and‑white mode.
to make a selection.
Page 46

Copying 46
When you select color or black‑only printing, the light that corresponds to your choice comes on.
7 Press .
Note: The selected copy settings are reset to the factory default after two minutes of printer inactivity.
Copying an ID card
1 Load plain A4‑ or letter‑size paper.
2 From the printer control panel, navigate to:
> Copy > OK > ID Card Copy
3 Press , and then load the front side of the ID card facedown at the placement corner of the scanner glass.
4 Press .
5 When prompted to copy the back side of the ID card, press the left or right arrow button to scroll to Yes, and then
OK
press
6 Load the back side of the ID card facedown at the placement corner of the scanner glass, and then press .
.
Enlarging or reducing images
1 Load paper.
2 Load the original document facedown on the scanner glass.
3 From the printer control panel, navigate to:
> Copy > OK > Scale
4 Press the left or right arrow button to scroll to the Scale setting you want.
Notes:
• If you select Custom %, then press
OK
percent value. Press
to save the setting.
OK
, and then press the left or right arrow button to select a custom
• If you select Borderless, then the printer will reduce or enlarge the document or photo as necessary to print
a borderless copy on the paper size that you selected. For best results with this setting, use photo paper and
set the paper type to Photo.
• If you select Fit to Page, then the printer scales the document or photo proportionately to fit a single page.
5 Press .
Adjusting copy quality
1 Load paper.
2 Load the original document faceup into the ADF or facedown on the scanner glass.
3 From the printer control panel, navigate to:
> Copy > OK > Quality
Page 47

Copying 47
4 Press the left or right arrow button to set the copy quality.
5 Press .
Making a copy lighter or darker
1 Load paper.
2 Load the original document faceup into the ADF or facedown on the scanner glass.
3 From the printer control panel, navigate to:
> Copy > OK > Darkness
4 Press the left or right arrow button to adjust the darkness of your prints.
• Pressing the left arrow button makes the copy lighter.
• Pressing the right arrow button makes the copy darker.
5 Press .
Collating copies using the printer control panel
If you print multiple copies of a document, then you can choose to print each copy as a set (collated) or to print the
copies as groups of pages (not collated).
Collated Not collated
1 Load paper.
2 Load the original document faceup into the ADF or facedown on the scanner glass.
3 From the printer control panel, navigate to:
> Copy > OK > Copies
4 Press the left or right arrow button to select the number of copies.
5 Press the up or down arrow button until Collate appears.
6 Press the left or right arrow button to scroll to On, and then press .
Placing separator sheets between copies
A separator sheet is a sheet of paper placed between pages, copies, or jobs based on the setting selected. This feature
is useful when printing transparencies.
1 Load paper.
2 Load the original document faceup into the ADF or facedown on the scanner glass.
Page 48

Copying 48
3 From the printer control panel, navigate to:
> Copy > OK > Separator Sheets
Note: Collate must be set to On for the separator sheets to be placed between copies. If Collate is set to Off,
then the separator sheets are added at the end of the print job.
4 Press the left or right arrow button to select a separator sheet setting, and then press .
Copying multiple pages on one sheet
You can copy multiple pages on one sheet by printing smaller images of each page. For example, you can condense a
20‑page document into five pages if you use this setting to print four page images per sheet.
1 Load paper.
2 Load the original document faceup into the ADF or facedown on the scanner glass.
3 From the printer control panel, navigate to:
> Copy > OK > Pages per Side
4 Press the left or right arrow button to select the paper orientation and the number of pages that you want to copy
on a sheet of paper. You may print up to four page images on one sheet.
5 Press .
Placing an overlay message on each page
1 Load paper.
2 Load the original document faceup into the ADF or facedown on the scanner glass.
3 From the printer control panel, navigate to:
> Copy > OK > Overlay
4 Press the left or right arrow button to select an overlay setting.
Note: For select printer models with a keypad, use the keypad to enter a custom text overlay, and then press
OK
.
5 Press .
Removing the background of a copy
The Background Removal feature adjusts the amount of background visible on a copy.
1 Load paper.
2 Load the original document faceup into the ADF or facedown on the scanner glass.
3 From the printer control panel, navigate to:
> Copy > OK > Background Removal
Page 49

Copying 49
4 Press the left or right arrow button to select the amount of background removal.
5 Press .
Making a two-sided (duplex) copy
Making a two‑sided (duplex) copy automatically
The automatic duplex unit supports A4‑ and letter‑size paper. If you need to make two‑sided copies using other paper
sizes, then see the instructions for making a two‑sided copy manually.
Note: You cannot make two‑sided copies on envelopes, card stock, or photo paper.
1 Load paper.
2 Load the original document faceup into the ADF or facedown on the scanner glass.
3 From the printer control panel, navigate to:
> Copy > OK > 2‑Sided Copies
4 Press the left or right arrow button to select a two‑sided copying option:
• If you are copying a one‑sided document, then press the arrow buttons to scroll to 1‑sided to 2‑sided.
• If you are copying a two-sided document and using the scanner glass, then press the arrow buttons to scroll to
2‑sided to 2‑sided.
• If you want to specify the page orientation and layout of the original document and the copy, then press the
OK
arrow buttons to scroll to Advanced. Press
reach the Copy menu screen.
Notes:
every time you make a selection, and then press until you
• For long-edged binding, pages are bound along the long edge of the page (left edge for portrait orientation
and top edge for landscape orientation).
• For short-edged binding, pages are bound along the short edge of the page (top edge for portrait orientation
and left edge for landscape orientation).
5 Press , and then follow the instructions on the display.
Making a two‑sided (duplex) copy manually
1 Load paper.
2 Load the original document faceup into the ADF or facedown on the scanner glass.
3 From the printer control panel, navigate to:
> Copy > OK > Copies
4 Press the left or right arrow button to select the number of copies.
5 From the Copy menu screen, press the up or down arrow button to scroll to the option you want to set, and then
press the left or right arrow button to scroll to the setting you want. If necessary, press
OK
to make a selection.
Page 50

Copying 50
6 Select the copy mode:
• Press to switch to color mode.
• Press to switch to black‑and‑white mode.
When you select color or black‑only printing, the light that corresponds to your choice comes on.
7 Press to print on one side of the paper.
8 Load the next page of the document.
• If you are copying a one‑sided document, then load the next page faceup into the ADF or facedown on the
scanner glass.
• If you are copying a two‑sided document, then flip the original document, and then reload it faceup into the
ADF or facedown on the scanner glass.
9 Remove the paper from the paper exit tray, and then reload the paper with the top edge first to print the other
side of the document.
Make sure the printable side of the paper is faceup.
3
2
1
10 Press .
Canceling copy jobs
To cancel a copy job, press , and then press OK.
Scanning stops and the printer returns to the previous menu.
Page 51

Scanning 51
Scanning
Scanner glass
Load the original document facedown at the placement corner.
Note: The Automatic Document Feeder (ADF) is available only in select printer models.
Tips for scanning
• Load the original document facedown on the scanner glass. You can load postcards, photos, small items,
transparencies, photo paper, or thin media (such as magazine clippings).
• Close the scanner cover, if possible, to avoid dark edges on the scanned image.
• Make sure the paper exit tray is fully extended, and the tray extension is flipped out.
• When the document to be scanned is in place with the settings you want, press to start scanning.
Scanning to a local computer
1 Load the original document faceup into the ADF or facedown on the scanner glass.
2 From the printer control panel, navigate to:
> Scan > OK > Computer > USB‑Connected Computer >
The USB‑connected computer will receive the scan by default.
Note: Make sure the scan software is installed on the destination computer.
OK
3 Press the up or down arrow button to scroll to the scan option you want to set, and then press the left or right
arrow button to scroll to the setting you want.
OK
Set the color, quality, original image size, and other scan options. If necessary, press
selection.
each time you make a
4 Press .
Page 52

Scanning 52
Scanning to a network computer
1 Load the original document faceup into the ADF or facedown on the scanner glass.
2 From the printer control panel, navigate to:
> Scan > OK > Computer
3 Press the left or right arrow button to manually select the name of the destination computer, and then press
Notes:
• You may be prompted to enter a PIN if the computer requires it.
• To assign a computer name and a PIN to the computer, see the Help for the printer software associated with
your operating system.
4 Press the up or down arrow button to scroll to the scan option you want to set, and then press the left or right
arrow button to scroll to the setting you want.
OK
Set the color, quality, original image size, and other scan options. If necessary, press
selection.
each time you make a
5 Press .
Note: For Macintosh users, you may need to enable scanning to your computer through Image Capture to scan
documents using a network printer and save the scan output.
Scanning to a flash drive or memory card
Notes:
• Some features are available only in select printer models.
• Make sure your flash drive or memory card is not write‑protected.
OK
.
1 Load the original document faceup into the ADF or facedown on the scanner glass.
2 From the printer control panel navigate to:
> Scan > OK > Memory Device
3 Insert the flash drive or memory card, and then press
Note: The printer reads only one memory device at a time.
OK
.
4 Press the up or down arrow button to scroll to the scan option you want to set, and then press the left or right
arrow button to scroll to the setting you want.
OK
Set the color, quality, original image size, and other scan options. If necessary, press
selection.
each time you make a
5 Press .
Follow the instructions on the printer display.
Page 53

Scanning 53
Scanning photos for editing
For Windows users
1 Load photo or photos facedown on the scanner glass.
2 Click or Start.
3 Click All Programs or Programs, and then select the printer program folder from the list.
4 Navigate to:
Printer Home > select your printer > Scan
• If you want to scan a single photo, or multiple photos as a single image, then select Single photo.
• If you want to scan multiple photos at once and save them as separate images, then select Multiple photos.
Note: Allow at least 1/4 inch of space between photos if you want to scan multiple photos at once and save
them as separate images.
Scanning starts and the scan progress dialog appears.
5 Save the photo or photos, and open them in a photo editing application to edit.
For Macintosh users
1 Load photo or photos facedown on the scanner glass.
2 From the Applications folder in the Finder, launch the application you want to use.
Note: Use any application that supports your printer and lets you work with photos, such as Image Capture.
3 From the list of devices, select your printer.
Note: For information on finding the list of devices, check the documentation that came with the application or
search for Scanning an image in the Search field of the Help menu.
4 Adjust the scan settings as needed.
?
If applicable, click
5 Start the scan job.
6 Save the scanned image, and then edit it using a photo editing application.
on the preview dialog for more information.
Scanning documents for editing
An Optical Character Recognition (OCR) application allows you to edit an original text document that has been scanned.
In order for this to work, you must have an OCR application stored on a local or network computer and you must be
able to select it from the list of applications when you set up the scan.
When selecting settings for the scan, select to scan to the local computer or network computer where the OCR is
installed.
For Windows users
1 Load the original document faceup into the ADF or facedown on the scanner glass.
2 Click or Start.
Page 54

Scanning 54
3 Click All Programs or Programs, and then select the printer program folder from the list.
4 Navigate to:
Printer Home > select your printer > Scan > Document
Scanning starts and the scan progress dialog appears.
5 When the scan is finished, save the document.
The file will be converted into a format that can be edited.
6 Open the document in the appropriate application to edit it.
For Macintosh users
1 Load the original document faceup into the ADF or facedown on the scanner glass.
2 From the Applications folder in the Finder, launch the application you want to use.
Notes:
• Use any application that supports your printer and lets you work with the OCR software, ABBYY FineReader.
• If the OCR software is missing, then insert the installation software CD. Reinstall the printer software using
the custom install option so you can manually select all of the packages listed.
3 From the list of devices, select your printer.
Note: For information on finding the list of devices, check the documentation that came with the application or
search for Scanning an image in the Search field of the Help menu.
4 Adjust the scan settings as needed.
?
If applicable, click
on the preview dialog for more information.
5 Set the OCR software as the scan destination, and then start the scan job.
6 If necessary, select the format to which you want to convert the file.
7 Save the file.
Note: Depending on your settings, the file may open immediately in the appropriate application so you can start
editing.
Scanning directly to e‑mail using the printer software
Make sure you have set up your e‑mail settings before proceeding. For more information, see the section on e‑mailing
in the User’s Guide.
For Windows users
1 Load an original document faceup into the ADF or facedown on the scanner glass.
2 Click or Start.
3 Click All Programs or Programs, and then select the printer program folder from the list.
4 Navigate to:
Printer Home > select your printer > Scan
Page 55

Scanning 55
5 Select Email photo, Email document, or Email PDF.
Note: You can select Email document only if an OCR application is stored on your computer.
Scanning starts and the scan progress dialog appears. When the scan is finished, a new e‑mail message is created
with the scanned document automatically attached.
6 Compose your e‑mail message.
Note: If your e-mail program does not open automatically, then you can scan the document to the computer and
then send it through e-mail as an attachment.
For Macintosh users
1 Load an original document faceup into the ADF or facedown on the scanner glass.
2 From the Applications folder in the Finder, launch the application you want to use.
Note: Use any application that supports both your printer and an e‑mailing option, such as Image Capture.
3 From the list of devices, select your printer.
Note: For information on finding the list of devices, check the documentation that came with the application, or
search for Scanning an image in the Search field of the Help menu.
4 Adjust the scan settings as needed.
?
If applicable, click
on the preview dialog for more information.
5 Set the e‑mail application as the scan destination, and then start the scan job.
6 Compose your e‑mail message.
Scanning to a PDF
For Windows users
1 Load an original document faceup into the ADF or facedown on the scanner glass.
2 Click or Start.
3 Click All Programs or Programs, and then select the printer program folder from the list.
4 Navigate to:
Printer Home > select your printer > Scan > PDF
Scanning starts and the scan progress dialog appears.
5 Save the document as a PDF.
For Macintosh users
1 Load an original document faceup into the ADF or facedown on the scanner glass.
2 From the Applications folder in the Finder, launch the application you want to use.
Note: Use any application that supports your printer.
Page 56

Scanning 56
3 From the list of devices, select your printer.
Note: For information on finding the list of devices, check the documentation that came with the application or
search for Scanning an image in the Search field of the Help menu.
4 Adjust the scan settings as needed.
?
If applicable, click
5 Set the application that supports the PDF format as the scan destination, and then start the scan job.
6 Save the document as a PDF.
on the preview dialog for more information.
Scanning FAQ
How can I improve the quality of a scan?
• Make sure your original documents are in good condition.
• Make sure the application that receives the scanned document is appropriate. For example, if you are scanning a
photo to edit it, then make sure you choose a photo editing application to receive the scan. If you are scanning a
document to edit the text, then make sure you choose an OCR application.
• Use a high resolution.
How do I scan in black and white?
Color is the default for all scans. To scan in black and white, press on the printer control panel.
Why am I being asked for a PIN?
PINs are a security measure used to restrict the scanned information from going into certain locations, or to keep what
is being scanned from being seen or used by others. You may be prompted to enter a PIN if the network computer you
are scanning to requires one.
To learn how PINs get assigned to network computers, see the Help for the printer software associated with your
operating system.
Canceling scan jobs
Press on the printer control panel, or click Cancel on the computer screen.
Page 57

E-mailing 57
E-mailing
Before you can send e-mail, you must first configure the network connection and e-mail settings of your printer.
Setting up the printer to e-mail
Setting up the e-mail function
For Windows users
1
Click or Start.
2 Click All Programs or Programs, and then select the printer program folder from the list.
3 Navigate to:
Printer Home > select your printer > Settings > Set up the printer to e‑mail
The E‑mail Setup Wizard opens.
4 Follow the instructions on the computer screen.
For Macintosh users
1
From the Finder, navigate to:
Applications > select your printer folder > Printer Settings > Email
2 Follow the instructions on the computer screen, and then click Save Settings.
Creating an e‑mail contact list using the computer
For Windows users
1
Click or Start.
2 Click All Programs or Programs, and then select the printer program folder from the list.
3 Navigate to:
Printer Home > select your printer > Fax > Edit contact list > Select from Phone Book
4 From the Phone Book field, choose a phone book.
You can choose any mail client phone book where you store e‑mail addresses.
5 Select the contact that you want to add, and then click Add to or change list to import the contact.
6 Click OK.
For Macintosh users
1
From the Finder, navigate to:
Applications > select your printer folder
2 Double‑click Printer Settings.
Page 58

E-mailing 58
3 Navigate to:
Contacts tab > Individuals tab
4 Click to open the Address Book.
Note: To add contacts, you need to import contacts from the Address Book on your Macintosh computer. If the
contact is not in the Mac Address Book, then first add the contact to the address book and then import it.
5 From the Address Book, click and drag the contacts that you want to add to the Contacts list.
?
For more information, click Help or
to view the help information for the fax software.
Sending e-mail
Scanner glass
Load the original document facedown at the placement corner.
Note: The Automatic Document Feeder (ADF) is available only in select printer models.
Tips for e‑mailing
• Make sure to enter your e‑mail account information and set up the SMTP server before sending an e‑mail.
• Make sure the printer is connected to an Ethernet or wireless network before sending an e‑mail.
If necessary, make sure the network is connected to the Internet for the printer to communicate with the SMTP
server. If the printer cannot connect to the Internet, then contact your system support person.
The printer supports only one active network connection (Ethernet or wireless) at a time.
• Add contacts to your address book. When sending an e‑mail, you can just select contacts from your address book
instead of typing their e‑mail addresses repeatedly.
• Make sure you load the original document or photo facedown on the scanner glass and at the placement corner.
You can load postcards, photos, small item s, transparencies, photo paper, or thin media (such as magazine clippings).
• Close the scanner cover, if possible, to avoid dark edges on the scanned image.
• To send an e‑mail, see “Scanning directly to e‑mail using the printer software” on page 54.
Page 59

E-mailing 59
Canceling an e‑mail
To cancel an e‑mail, press .
Page 60

Networking 60
Networking
Installing the printer on a wireless network
Wireless network compatibility
Your printer contains an IEEE 802.11n wireless print server. Your printer is compatible with IEEE 802.11 b/g/n routers
that are Wi-Fi certified.
Supported network security options
The printer supports three wireless security options: WPA2/WPA, WEP, and no security.
WPA2/WPA
WPA (Wi-Fi Protected Access) and WPA2 (Wi-Fi Protected Access 2) offer stronger wireless network security than WEP.
WPA2 and WPA are similar types of security. WPA2 uses a more complex encryption method and is more secure than
WPA. Both WPA2 and WPA use a series of characters, called the WPA pre‑shared key or passphrase, to protect wireless
networks from unauthorized access.
WPA2/WPA passphrases must be:
• Exactly 64 hexadecimal characters. Hexadecimal characters are A–F, a–f, and 0–9.
or
• From 8 to 63 ASCII characters. ASCII characters are letters, numbers, punctuation, and symbols found on a keyboard.
ASCII characters in a WPA passphrase are case-sensitive.
Every device on the wireless network must use the same WPA passphrase. WPA security is an option only on
infrastructure networks with access points (wireless routers) and network cards that suppo rt WPA. Most newer wireless
network equipment also offer WPA2 security as an option.
Note: If your network uses WPA2 or WPA security, then select WPA Personal when you are prompted to select the
type of security your network uses.
WEP
WEP (Wired Equivalent Privacy) is the most basic and the weakest type of wireless security. WEP security relies on a
series of characters called the WEP key.
Every device on the wireless network must use the same WEP key. WEP security can be used on both ad hoc and
infrastructure networks.
A valid WEP key has:
• Exactly 10 or 26 hexadecimal characters. Hexadecimal characters are A–F, a–f, and 0–9.
or
• Exactly 5 or 13 ASCII characters. ASCII characters are letters, numbers, punctuation, and symbols found on a
keyboard.
Page 61

Networking 61
No Security
It is not recommended to use no security at all on a home wireless network. Using no security means that anyone within
range of your wireless network can use your network resources—including Internet access— if your wireless network
is connected to the Internet. The range of your wireless network may extend far beyond the walls of your home, allowing
access to your network from the street or from your neighbors’ homes.
Printing a network setup page
A network setup page lists the configuration settings of the printer, including the IP address and MAC address of the
printer.
1 Load plain paper.
2 From the printer control panel, navigate to:
> Setup > OK > Network Setup > OK > Print Network Setup Page >
OK
Information you will need to set up the printer on a wireless network
To set up the printer for wireless printing, you need to know:
• The name of your wireless network, which is also known as the SSID (Service Set Identifier)
• If encryption was used to secure your network
• The security key (either a WEP key or WPA/WPA2 passphrase)
To find the WPA/WPA2 passphrase for the wireless network, see the documentation that came with the access
point, see the Web page associated with the access point, or consult your system support person.
If your access point is using WEP security, then the WEP key should be:
• Exactly 10 or 26 hexadecimal characters
or
• Exactly 5 or 13 ASCII characters
If your access point is using WPA or WPA2 security, then the WPA/WPA2 passphrase should be:
• Exactly 64 hexadecimal characters
or
• From 8 to 63 ASCII characters
Notes:
• Hexadecimal characters are A–F, a–f, and 0–9.
• ASCII characters are letters, numbers, and symbols found on a keyboard. ASCII characters in a WPA/WPA2
passphrase are case‑sensitive.
If your wireless network is not using security, then you will not have a security key.
Note: If you do not know the SSID of the network that your computer is connected to, then launch the wireless
utility of the computer network adapter and look for the network name. If you cannot find the SSID or the security
information for your network, then see the documentation that came with the access point, or contact your system
support person.
Page 62

Networking 62
Information you will need during advanced wireless setup
The Wireless Setup Utility does not detect the wireless network SSID for you during advanced wireless setup. You must
know the following information before configuring the wireless printer settings manually:
Wireless Mode
Check your wireless network type:
Infrastructure—All devices on a wireless network communicate with each other through an access point (wireless
router).
Ad‑Hoc—Network devices communicate directly with each other without the use of centralized security or access
point. Ad hoc mode may be available in select models or operating systems only.
Note: Infrastructure is the recommended network configuration because of its faster transfer speeds, better security
options, and ease of configuration.
Network Name (SSID)
This is the identifying name that distinguishes a network from other networks in the area.
Channel
Auto is selected by default and cannot be changed if the network is configured in infrastructure mode.
Notes:
• Ad hoc mode may be available in select models or operating systems only.
• If the network is set up in ad hoc mode, then select the channel that other devices in the network are using.
All devices in an ad hoc network must use the same channel to communicate with each other.
• The printer can communicate on only one wireless network at a time. Configuring the printer for an ad hoc
wireless network will keep it from working on any other wireless network, either ad hoc or infrastructure.
Authentication
Determine if you have an infrastructure or ad hoc setup, and then check the corresponding authentication type.
Note: Some authentication types may be available in select models or operating systems only.
Wireless mode Authentication type
Infrastructure
• Open Mode
• Shared Mode
• WPA Personal
• WPA2‑Personal
• WPA2‑Enterprise
• 802.1X ‑ RADIUS
Ad hoc Open Mode
Encryption
Check the encryption method used on your network.
Note: Some authentication types may be available in select models or operating systems only.
Page 63

Networking 63
Authentication type Encryption method
Open Mode
Shared Mode WEP
WPA Personal TKIP
WPA2‑Personal
WPA2‑Enterprise
802.1X ‑ RADIUS
• None
• WEP
• TKIP
• AES
• TKIP
• AES
• None
• WEP‑DynamicKeys
• WEP‑StaticKeys
• WPA‑TKIP
• WPA‑AES
Installing the printer on a wireless network
Before you install the printer on a wireless network, make sure that:
• Your wireless network is set up and working properly.
• The computer you are using is connected to the same wireless network where you want to set up the printer.
For Windows users
1
Close all open software programs.
2 Insert the installation software CD.
If the installation dialog does not appear after a minute, then launch the CD manually:
a Click , or click Start and then click Run.
b In the Start Search or Run box, type D:\setup.exe, where D is the letter of your CD or DVD drive.
c Press Enter, or click OK.
3 Follow the instructions on the computer screen.
Note: Select Wireless connection when prompted to select a connection type.
For Macintosh users
1
Close all open applications.
2 Insert the installation software CD.
If the installation dialog does not appear after a minute, then click the CD icon on the desktop.
3 Double-click the software installer package, and then follow the instructions on the computer screen.
Note: Select Wireless connection when prompted to select a connection type.
Page 64

Networking 64
Installing the printer on other computers
Once the printer is set up on the wireless network, it can be accessed wirelessly by any other computer on the network.
However, you will need to install the printer driver on every computer that will access it. You do not need to configure
the printer again, although you will need to run the setup software on each computer to install the driver.
For Windows users
1
Close all open software programs.
2 Insert the installation software CD.
If the installation dialog does not appear after a minute, then launch the CD manually:
a Click , or click Start and then click Run.
b In the Start Search or Run box, type D:\setup.exe, where D is the letter of your CD or DVD drive.
c Press Enter, or click OK.
3 Follow the instructions on the computer screen for installing a configured printer on a new computer.
For Macintosh users
1
Close all open applications.
2 Insert the installation software CD.
If the installation dialog does not appear after a minute, then click the CD icon on the desktop.
3 Double-click the software installer package.
4 Select My printer is already set up. I am installing it on a new computer.
5 Click Continue, and then follow the instructions on the computer screen for installing a configured printer on a new
computer.
Determining the printer status using the network indicator light
The Wi‑Fi or Ethernet indicator light shows the network status of the printer.
Notes:
• The network indicator light is located on the printer control panel. The printer may have an Ethernet or a
wireless indicator light, or both, depending on your printer model. To find out if your printer has Ethernet or
wireless capability, see the Quick Reference Guide, or contact your system support person.
• The printer supports one local (USB) connection and one network connection (Ethernet or wireless) at a time. It
is not possible to use both Ethernet and wireless at the same time.
Indicator light Printer status
Off
• The printer is turned off or is powering up.
• The printer is not connected to an Ethernet or a wireless network and is in Sleep mode.
• The printer has not been configured for an Ethernet or a wireless network.
• The printer is configured for an ad hoc connection, but it is not currently communicating with another
ad hoc device.
Page 65

Networking 65
Indicator light Printer status
Blinking green
• The printer has been configured for an Ethernet network, but it cannot establish a connection with the
network.
• The printer is out of the range of the access point (wireless router).
• The printer is trying to communicate with the access point, but the access point is turned off or is not
working properly.
• The access point has been turned off, and then turned back on, and the printer is trying to establish a
connection with the network.
• The wireless settings of the printer may no longer be valid.
Check if the SSID, WEP key or WPA/WPA2 preshared key/passphrase, security type, and IP address that
the printer uses are still correct.
Solid green
• The printer is connected to an Ethernet or a wireless network and is ready for use.
• The printer is connected to your computer or mobile device through an ad hoc connection.
Special wireless installation instructions
The following instructions apply to customers outside of North America who are using a wireless broadband box. Some
examples of these boxes include LiveBox, AliceBox, N9UF Box, FreeBox, and Club Internet.
Before you begin
•
Make sure your box is wireless‑enabled and activated to work on a wireless network. For more information about
configuring the box to work wirelessly, see the documentation that came with your box.
• Make sure your box is turned on and that your computer is on and connected to your wireless network.
Adding the printer to your wireless network
1
Set up your printer for wireless networking using the setup instructions provided.
Stop when you are prompted to select a network.
2 If there is an association/registration button on the back of your box, then press it before selecting a network.
Note: After pressing the association/registration button, you have five minutes to complete the printer
installation.
3 Return to the computer screen.
From the wireless networks list that appears, select your network, and then click Continue.
If your wireless network does not appear in the list:
a Connect to another wireless network.
For Windows users
Click Unlisted Network.
For Macintosh users
Select Other Wireless Network from the list, and then click Continue.
Page 66

Networking 66
b Enter the details about your wireless network.
Note: Your WEP, WPA, or WPA2 key may be obtained from the bottom of the box, the documentation that
came with the box, or from the box Web page. If you have already changed the key for your wireless
network, then use the key you created.
4 Follow the instructions on the computer screen to complete installation.
Assigning a static IP address
The printer will be assigned an IP address automatically through DHCP on most wireless networks.
1 Complete the wireless setup, allowing the printer to receive a DHCP address from a DHCP server on the network.
2 Print a network setup page to see the IP address currently assigned to the printer.
3 Open a Web browser and then type the printer IP address in the address field. Press Enter.
Note: If you are using a proxy server, then temporarily disable it to load the printer Web page correctly.
4 Click Configuration > TCP/IP > Set static IP address.
5 In the Address field, type the IP address you want to assign to the printer, and then click Submit.
To verify, type the static IP address in the Web browser address field, and then press Enter.
For more information, contact your system support person.
Changing wireless settings after installation
To change wireless settings on the printer, such as the configured network and the security key, do the following:
For Windows users
1
Click or Start.
2 Click All Programs or Programs, and then select the printer program folder from the list.
3 Navigate to:
Printer Home > select your printer > Settings tab > Wireless setup utility
4 Follow the instructions on the computer screen.
For Macintosh users
1
From the Applications folder in the Finder, or from the Finder desktop, double-click the printer folder.
2 Double‑click Wireless Setup Assistant.
3 Follow the instructions on the computer screen.
Page 67

Networking 67
Advanced wireless setup
Creating an ad hoc wireless network
You can set up an ad hoc network if you:
• Do not have an access point or wireless router.
• Do not have a wireless network (but do have a wireless network adapter for your computer).
• Want to set up a standalone network between the printer and a computer with a wireless network adapter.
Notes:
• Before you begin, make sure your wireless network adapter is properly attached to your computer and is
working.
• The recommended way to set up your wireless network is to use an access point (wireless router). This network
setup is called infrastructure network.
• If your computer has My WiFi or Wi
For more information, see the documentation that came with your computer.
• The printer can communicate on only one wireless network at a time. Configuring the printer for an ad hoc
wireless network will keep it from working on any other wireless network, either ad hoc or infrastructure.
‑
Fi Direct, then you can create direct connections to your wireless printer.
In Windows Vista or later
1
Click > Control Panel > Network and Internet > Network and Sharing Center.
2 Click Set up a connection or network > Set up a wireless ad‑hoc (computer‑to‑computer) network > Next.
3 Follow the instructions for setting up a wireless ad hoc network.
As part of the setup:
a Create a network name or SSID for the network between the computer and your printer.
b Write down the name of your network. Make sure you copy it exactly, including any capital letters.
c From the Security Type list, select WEP or WPA2‑Personal, and then create a WEP key or WPA/WPA2 pre-shared
key/passphrase.
WEP keys must be:
• Exactly 10 or 26 hexadecimal characters
or
• Exactly 5 or 13 ASCII characters
WPA/WPA2 pre-shared keys/passphrases must be:
• Exactly 64 hexadecimal characters
or
• From 8 to 63 ASCII characters
Notes:
• Hexadecimal characters are A–F, a–f, and 0–9.
• ASCII characters are letters, numbers, and symbols found on a keyboard. ASCII characters in a
WPA/WPA2 pre-shared key/passphrase are case‑sensitive.
d Write down the password for your network. Make sure you copy it exactly, including any capital letters.
Page 68

Networking 68
Windows Vista will enable the ad hoc network for you. It will appear in the “Connect to a network” dialog under
“Available networks,” indicating that the computer is configured for the ad hoc network.
4 Close the Windows Control Panel and any remaining windows.
5 Insert the installation software CD, and then follow the directions for wireless installation.
Note: Do not connect the installation or network cables until instructed to do so by the setup software.
6 When the available networks are displayed, provide the network name and the security information you created.
The installer will configure the printer for use with your computer.
7 Store a copy of your network name and security information in a safe place for future reference.
Note: You may need to reconnect Windows Vista computers to the ad hoc network after restarting.
In Windows XP
1
Click Start > Control Panel > Network and Internet Connections > Network Connections.
2 Right‑click the icon for your wireless network connection.
3 Click Enable, if it appears in the pop‑up menu.
Note: If Disable appears, then your wireless connection is already enabled.
4 Right‑click the Wireless Network Connection icon.
5 Click Properties > Wireless Networks tab.
Note: If the Wireless Networks tab does not appear, then your computer has third‑party software that controls
your wireless settings. You must use that software to set up the ad hoc wireless network. For more information,
see the documentation for the third‑party software.
6 Select the Use Windows to configure my wireless network settings check box.
7 Under Preferred Networks, delete any existing networks.
Select a network, and then click Remove to delete the network from the list.
8 Click Add to create an ad hoc network.
9 In the Network Name (SSID) box, type the name you want to give your wireless network.
10 Write down the network name you chose so you can refer to it when running the wireless setup. Make sure you
copy it exactly, including any capital letters.
11 If Network Authentication appears in the list, then select Open.
12 In the “Data encryption” list, select WEP.
13 If necessary, clear the “The key is provided for me automatically” check box.
14 In the Network Key box, type a WEP key.
15 Write down the WEP key you chose so you can refer to it when running the wireless setup. Make sure you copy it
exactly, including any capital letters.
16 In the “Confirm network key” box, type the same WEP key.
17 Select This is a computer‑to‑computer (ad hoc) network; wireless access points are not used.
18 Click OK twice to close the two open windows.
Page 69

Networking 69
19 It may take a few minutes for your computer to recognize the new settings. To check the status of your network:
a Right‑click the Wireless Network Connections icon.
b Select View Available Wireless Networks.
• If the network is listed but the computer is not connected, then select the ad hoc network, and then click
Connect.
• If the network does not appear, wait a moment, and then click Refresh network list.
20 Insert the installation software CD, and then follow the directions for wireless installation.
Note: Do not connect the installation or network cables until instructed to do so by the setup software.
21 When the available networks are displayed, provide the network name and the security information you created.
The installer will configure the printer for use with your computer.
22 Store a copy of your network name and security information in a safe place for future reference.
For Macintosh users
1
Access the Airport settings:
In Mac OS X version 10.5 or later
From the Apple menu, navigate to:
System Preferences > Network > AirPort
In Mac OS X version 10.4 or earlier
From the Finder, navigate to:
Applications > Internet Connect > AirPort
2 From the Network Name or Network menu, click Create Network.
3 Create a name for the ad hoc network, and then click OK.
Note: Store the network name and password in a safe place for future reference.
Adding a printer to an existing ad hoc wireless network
Note: The printer can communicate on only one wireless network at a time. Configuring the printer for an ad hoc
wireless network will remove it from any other wireless network, either ad hoc or infrastructure, for which it is
configured.
For Windows users
1
Click or Start.
2 Click All Programs or Programs, and then select the printer program folder from the list.
3 Navigate to:
Printer Home > select your printer > Settings tab > Wireless setup utility
4 Follow the instructions on the computer screen.
Note: Windows Vista computers may need to be reconnected to the ad hoc network after restarting.
Page 70

Networking 70
For Macintosh users
1
From the Applications folder in the Finder, or from the Finder desktop, double-click the printer folder.
2 Double‑click Wireless Setup Assistant.
3 Follow the instructions on the computer screen.
Configuring the printer wirelessly using WPS (Windows only)
With Wi‑Fi Protected Setup (WPS), it is easy to add computers or printers to your wireless network because the SSID
and WPA passphrase are automatically detected and configured for you.
1 Make sure your access point (wireless router) supports WPS.
2 Insert the installation software CD and follow the instructions on the computer screen.
Notes:
• If you are using the PIN method to add your printer using WPS, then make sure you type all eight digits when
you are asked to enter your PIN.
• To use WPS to configure the printer wirelessly, all of the devices on your wireless network must support WPS. If
any device on your network does not support WPS, then you must type the SSID and security information when
prompted.
Configuring Wi‑Fi Protected Setup manually
Note: Make sure your access point (wireless router) is Wi‑Fi Protected Setup (WPS) certified. For more information,
see the User’s Guide.
If your printer or device has not yet been configured for wireless connection and you want to configure it using WPS,
then push the WPS button on the wireless router. Wait for the printer control panel to display a message to begin WPS
configuration. There might be a short delay before the message appears. If nothing happens after 30 seconds, then do
one of the following:
USE THE PUSH BUTTON CONFIGURATION (PBC) METHOD
1 From the printer control panel, navigate to:
> Setup > OK > Network Setup > OK > Wireless 802.11b/g/n > OK > Network Connection Setup > OK > Wireless >
OK
> Wi‑Fi Protected Setup > OK > WPS PBC Mode >
OK
2 Follow the instructions on the printer display.
USE THE PERSONAL IDENTIFICATION NUMBER (PIN) METHOD
1 From the printer control panel, navigate to:
> Setup > OK > Network Setup > OK > Wireless 802.11b/g/n > OK > Network Connection Setup > OK > Wireless >
OK
> Wi‑Fi Protected Setup > OK > WPS PIN Mode >
OK
2 Follow the instructions on the printer display.
Page 71

Networking 71
Switching between USB, Ethernet, and wireless connections (Windows only)
You can change the way you access your printer, depending on your needs. The following procedures assume that you
have configured your printer for one type of connection and that the printer drivers are installed on the computer. See
related topics on troubleshooting specific connection types if you encounter difficulties during configuration.
Note: The printer supports one active local connection (USB) and one active network connection (Ethernet or
wireless) at a time. It is not possible to connect the printer to both Ethernet and wireless networks at the same time.
Using the printer wirelessly
Select the connection type that describes how you currently access your printer:
If the printer is currently set up locally (using USB connection)
1 Click or Start.
2 Click All Programs or Programs, and then select the printer program folder from the list.
3 Navigate to:
Printer Home > select your printer > Settings tab > Wireless setup utility
4 Follow the instructions on the computer screen.
Note: There is no need to remove the USB cable connecting the printer to the computer during wireless
configuration.
If the printer is currently set up for Ethernet
1 Unplug the Ethernet cable from the printer.
2 Place the printer close to the computer you want to use to configure the printer for wireless access.
Note: You will need to connect the printer to the computer with a USB cable. Make sure the printer is close
enough to the computer for your USB cable to reach both.
3 Click or Start.
4 Click All Programs or Programs, and then select the printer program folder from the list.
5 Navigate to:
Printer Home > select your printer > Settings tab > Wireless setup utility
6 Follow the instructions on the computer screen.
Using the printer locally (USB)
Select the connection type that describes how you currently access your printer:
If the printer is currently set up for Ethernet
1 Attach a USB cable to the computer and to the printer.
2 Wait a moment for Windows to locate the driver and finish setting up the printer.
3 Select the USB printer. See “Selecting the printer” on page 72.
Page 72

Networking 72
If the printer is currently set up for wireless
1 Attach a USB cable to the computer and to the printer.
2 Wait a moment for Windows to locate the driver and finish setting up the printer.
3 Select the USB printer. See “Selecting the printer” on page 72.
Note: You can continue to use the printer through Ethernet or wireless connection.
Using the printer over an Ethernet network
Select the connection type that describes how you currently access your printer:
If the printer is currently set up for wireless
1 Plug an Ethernet cable into the printer and into an available port on a switch or wall jack.
2 Wait one minute for the Ethernet network adapter to become active and acquire an IP address from the network.
3 Select the Network printer. See “Selecting the printer” on page 72.
Note: The wireless adapter of the printer is disabled while it is connected to an Ethernet network.
If the printer is currently set up locally (using USB connection)
1 Plug an Ethernet cable into the printer and into an available port on a switch or wall jack.
2 Insert the installation software CD into the computer you want to use to configure the printer.
3 Follow the instructions on the computer screen for configuring a printer on an Ethernet network.
4 Select the Network printer. See “Selecting the printer” on page 72.
Note: You will need a USB cable to complete the configuration.
Selecting the printer
1 Open the printers folder.
a Click or Start.
b In the Start Search or Run box, type control printers.
c Press Enter, or click OK.
2 Right‑click the printer you want to use (Network or USB).
3 Select Set as Default Printer from the menu.
4 Close the “Printers” or “Printers and Faxes” window.
Switching between USB, Ethernet, and wireless connections (Macintosh only)
You can change the way you access your printer depending on your needs. The following procedures assume that you
have configured your printer for one type of connection and that the drivers are installed on the computer. See related
topics on troubleshooting specific connection types if you encounter difficulties during configuration.
Note: The printer supports one active local connection (USB) and one active network connection (Ethernet or
wireless) at a time. It is not possible to connect the printer to both Ethernet and wireless networks at the same time.
Page 73

Networking 73
Using the printer wirelessly
Select the connection type that describes how you currently access your printer:
If the printer is currently set up locally (using USB connection)
1 Close all open applications.
2 Insert the installation software CD.
If the installation dialog does not appear after a minute, then click the CD icon on the desktop.
3 Double‑click Lexmark Extras > Lexmark Setup Assistant.
4 Follow the instructions on the computer screen.
Note: There is no need to remove the USB cable connecting the printer to the computer during wireless
configuration.
If the printer is currently set up for Ethernet
1 Unplug the Ethernet cable from the printer.
2 Place the printer close to the computer you want to use to configure the printer for wireless access.
Note: You will need to connect the printer to the computer with a USB cable. Make sure the printer is close
enough to the computer for your USB cable to reach both.
3 Close all open applications.
4 Insert the installation software CD.
If the installation dialog does not appear after a minute, then click the CD icon on the desktop.
5 Double‑click Lexmark Extras > Lexmark Setup Assistant.
6 Follow the instructions on the computer screen.
7 A second print queue will be created. Remove the Ethernet queue if you do not want to switch back to accessing
the printer over an Ethernet connection.
Using the printer locally (USB)
Select the connection type that describes how you currently access your printer:
If the printer is currently set up for Ethernet
1 Firmly plug the square end of the USB cable into the back of the printer.
2 Firmly plug the rectangular end of the USB cable into the USB port of the computer.
3 Add the printer. See “Adding the printer” on page 74.
4 A second print queue will be created. Remove the Ethernet queue if you do not want to switch back to accessing
the printer over an Ethernet connection.
If the printer is currently set up for wireless
1 Attach a USB cable to the computer and to the printer.
2 Add the printer. See “Adding the printer” on page 74.
Page 74

Networking 74
3 A second print queue will be created. Remove the wireless queue if you do not want to switch back to accessing
the printer over a wireless connection.
Using the printer over an Ethernet network
Select the connection type that describes how you currently access your printer:
If the printer is currently set up for wireless
1 Plug an Ethernet cable into the printer and to an available port on a switch or wall jack.
2 Wait a minute for the Ethernet network adapter to become active and acquire an IP address from the network.
3 Add the printer. See “Adding the printer” on page 74.
4 A second print queue will be created. Remove the wireless queue if you do not want to switch back to accessing
the printer over a wireless network.
If the printer is currently set up locally (using USB connection)
1 Plug an Ethernet cable into the printer and to an available port on a switch or wall jack.
2 Insert the installation software CD into the computer you want to use to configure the printer.
3 Follow the instructions on the computer screen.
Note: You will need a USB cable to complete the configuration.
Adding the printer
In Mac OS X version 10.5 or later
1 From the Apple menu, navigate to:
System Preferences > Print & Fax
2 Click +.
3 Click the Default or Default Browser tab, and then select your printer.
4 Click Add.
In Mac OS X version 10.4 or earlier
1 From the Finder, choose Utilities.
2 Double‑click Printer Setup Utility or Print Center.
3 From the Printer List dialog, choose the printer you want to use, and then click Add.
4 From the Printer Browser, select your printer, and then click Add.
Sharing a printer in a Windows environment
1 Prepare the computers to share the printer:
a Make all computers printing to the printer accessible through Network Neighborhood by enabling File and Print
Sharing. See the Windows documentation for instructions on enabling File and Print Sharing.
b Install the printer software on all computers that will print to the printer.
Page 75

Networking 75
2 Identify the printer:
a On the computer that is attached to the printer, open the printers folder:
1 Click , or click Start and then click Run.
2 In the Start Search or Run box, type control printers.
3 Press Enter, or click OK.
b Right‑click the name of your printer.
c Click Sharing or Printer Properties.
d From the Sharing tab, select Share this printer or Shared as.
e Assign a distinctive name, and then click OK.
3 Locate the printer from the remote computer:
Note: The remote computer is the one that is not attached to the printer.
a Open the printers folder:
1 Click , or click Start and then click Run.
2 In the Start Search or Run box, type control printers.
3 Press Enter, or click OK.
b Right‑click the name of your printer.
c Click Properties or Printer properties.
d Click Ports > Add Port > Local Port > New Port.
e Type the Universal Naming Convention (UNC) Port Name, which consists of the server name and the distinctive
printer name that was specified in step 2 on page 75. The name should be in the form \\server\printer.
f Click OK.
g Click Close on the Printer Ports dialog.
h Make sure the new port is selected on the Ports tab, and then click Apply.
i Click OK.
Sharing a printer in a Macintosh environment
1 From the Finder, choose Help > Mac Help.
2 In the Search field, type sharing the printer on a network, and then press return.
3 Select only one of the following:
• Sharing your printer with Mac OS X users—Let other Macintosh computers on the network that use Mac OS X
version 10.4 or later use any printer connected to your Macintosh computer.
• Sharing your printer with Windows users—Let Windows computers on the network use any printer connected
to your Macintosh computer.
4 Follow the instructions on the computer screen.
Note: Windows users should see the Windows documentation for information on adding a network printer
connected to a Macintosh computer.
Page 76

Networking 76
Configuring security
Simple wireless networks require WEP keys or a WPA/WPA2 passphrase, or may not have any security at all.
More‑advanced wireless network security can require one or more certificates and an authentication server. If the
network requires a certificate and you do not have it, fill out the certificate request form provided within the Wireless
Setup Utility and follow your organization's procedures for requesting a certificate for network access.
Following is the list of supported types of wireless network security and their requirements.
WEP
•
WEP key (up to four keys may be required)
• Default WEP Transmit Key (if more than one WEP key is configured, this specifies which one to use)
WPA Personal, WPA2‑Personal or WPA2‑Enterprise
•
Pre‑shared key
• Encryption (AES or TKIP)
EAP‑MD5, MSCHAPv2, or LEAP
•
RADIUS user name
• RADIUS password
PEAP
•
RADIUS user name
• RADIUS password
• CA certificate
EAP‑TLS
•
RADIUS user name
• RADIUS password
• CA certificate
• Signed certificate
EAP‑TTLS
•
appropriate inner authentication
• RADIUS user name
• RADIUS password
• CA certificate
Page 77

Networking 77
Configuring 802.1X Authentication
The information you must complete is dependent on the 802.1X security mechanism you select. Some require user
names, passwords, and/or certificates. If your network contains multiple access points with different modes of
authentication, then you can select and configure more than one authentication mechanism.
1 From the Configure 802.1X Authentication dialog, type the user name and password for the authentication server.
2 Confirm the password, and then check the selected authentication mechanism.
If you have selected Do this
EAP‑MD5, LEAP, or
MSCHAPv2
PEAP or EAP‑TTLS Click Install CA Certificate, and then type the path to the CA certificate, or click Browse to
EAP‑TLS
Proceed to the next step.
locate the certificate file.
a Click Install Signed Certificate, and then type the path to the signed certificate, or click
Browse to locate the certificate file.
b Click Install CA Certificate, and then type the path to the CA certificate, or click Browse
to locate the certificate file.
3 Click OK, and then follow the instructions on the computer screen.
Networking FAQ
What is Wi‑Fi Protected Setup?
Wi‑Fi Protected Setup (WPS) is a simple and secure configuration that allows you to establish a wireless home network
and enable network security without requiring prior knowledge of Wi‑Fi technology. It is no longer necessary to
configure the network name (SSID) and WEP key or WPA passphrase for network devices.
Note: WPS supports only networks that communicate through access points (wireless routers).
The printer supports the following methods in connecting to a wireless network:
• Personal Identification Number (PIN)—A PIN on the printer is entered into the wireless settings of the access point.
• Push Button Configuration (PBC)—Buttons on both the printer and the access point are pushed within a given period
of time.
Look for any of these identifier marks to check if your access point is WPS certified:
You can find these WPS logos on the side, back, or top of your access point.
For more information on accessing the wireless settings and determining the WPS capability of your access point, see
the documentation that came with the access point or contact your system support person.
Page 78

Networking 78
Where do I find my WEP key or WPA/WPA2 passphrase?
• Contact your system support person.
– The person who set up your network usually keeps the WEP key or WPA/WPA2 passphrase.
– If your wireless network was set up by your Internet Service Provider (ISP), then you might find the information
in the documentation they provided.
• See the documentation that came with your access point (wireless router).
If your access point is using the default settings, then you can find the information in the documentation.
• View the security settings on the access point.
1 Open a Web browser, and then type the IP address of the access point in the address field. Press Enter.
Notes:
– To obtain the IP address of the access point, see the documentation that came with it or contact your
system support person.
– If you are using a proxy server, then temporarily disable it to load the Web page correctly.
2 Enter the user name and password for the access point when prompted.
Note: The WEP key or WPA/WPA2 passphrase is not the same as the password for the access point. The
password allows you to access the access point settings. The WEP key or WPA/WPA2 passphrase allows
printers and computers to join your wireless network.
3 Look for the WEP key or WPA/WPA2 passphrase.
What is an SSID?
A Service Set Identifier (SSID) is the name that identifies a wireless network. All devices on the network must know the
SSID of the wireless network, or they will not be able to communicate with each other. Usually, the wireless network
broadcasts the SSID to allow wireless devices in the area to connect to it. Sometimes, the SSID is not broadcast for
security reasons.
If the SSID of your wireless network is not broadcast, then it cannot be detected automatically and will not show up in
the list of available wireless networks. You must enter the network information manually in this situation.
An SSID can contain up to 32 alphanumeric characters. Alp hanumeric characters are a combination of al phabetic (letters
A to Z) and numeric (numbers 0 to 9) characters.
Where do I find my SSID?
• View the settings on the access point (wireless router).
Most access points have a built‑in Web server that can be accessed using a Web browser.
• Check your computer to see if a program was installed with your wireless network adapter.
Many network adapters provide a software application that allows you to view the wireless settings of your
computer, including your SSID.
If you are unable to locate your SSID using either of these methods, then contact your system support person.
Page 79

Networking 79
What is a network?
A network is a collection of devices such as computers, printers, Ethernet hubs, access points, and routers connected
together for communication through cables or through a wireless connection. A network can be wired, wireless, or
designed to have both wired and wireless devices.
How do I find out what type of security my network is using?
• Contact your system support person.
The person who set up your network usually keeps your wireless information.
• See the documentation that came with your access point (wireless router).
• Check the characters of the password that you use to access your wireless network.
If you are not using a password, then choose None or No Security.
Characters Security type
Exactly 10 or 26 hexadecimal characters
or
Exactly 5 or 13 ASCII characters
Exactly 64 hexadecimal characters
or
From 8 to 63 ASCII characters
Notes:
WEP
WPA or WPA2
– Hexadecimal characters are A–F, a–f, and 0–9.
– ASCII characters are letters, numbers, and symbols found on a keyboard. ASCII characters in a WPA/WPA2
passphrase are case‑sensitive.
• View the security settings on the access point.
1 Open a Web browser. Type the IP address of the access point in the address field, and then press Enter.
Notes:
– To obtain the IP address of the access point, see the documentation that came with it, or contact your
system support person.
– If you are using a proxy server, then temporarily disable it to load the Web page correctly.
2 Enter the user name and password for the access point when prompted.
Note: The WEP key or WPA/WPA2 passphrase is not the same as the password for the access point. The
password allows you to access the access point settings. The WEP key or WPA/WPA2 passphrase allows
printers and computers to join your wireless network.
3 Look for the WEP key or WPA/WPA2 passphrase.
How are home networks configured?
For desktop computers, laptops, and printers to communicate with each other over a network, they must be connected
by cables and/or have wireless network adapters built in or installed in them.
Page 80

Networking 80
There are many different ways a network can be set up. Four common examples appear below.
Note: The printers in the following diagrams represent printers with internal print servers built into them so that
they can communicate over a network.
Wireless network examples
Scenario 1: Mixed wired and wireless connections on a network with Internet access
• All computers and printers connect to the network through a router with Ethernet and wireless capabilities.
• Some computers and printers connect wirelessly to the router; others connect over a wired connection.
• The network is connected to the Internet through a DSL or cable modem.
Internet
Scenario 2: Wireless network with Internet access
• All computers and printers connect to the network using a wireless access point or wireless router.
• The wireless access point connects the network to the Internet through a DSL or cable modem.
Internet
Page 81

Networking 81
Scenario 3: Wireless network with no Internet access
• Computers and printers connect to the network using a wireless access point.
• The network has no connection to the Internet.
Scenario 4: Computer connected wirelessly to a printer without Internet access
• A computer is directly connected to a printer without going through a wireless router.
• This configuration is referred to as an ad hoc network.
• The network has no connection to the Internet.
Note: Most computers can connect to only one wireless network at a time. If you access the Internet over a wireless
connection, you will lose Internet access if you are connected to an ad hoc network.
What is a USB cable?
A Universal Serial Bus (USB) cable is primarily used to connect a USB device to a host. Common hosts include computers
and video game consoles. Through the USB port and cable, it is possible to connect computer peripherals such as mouse
devices, keyboards, digital cameras, printers, personal media players, flash drives, and external hard drives. For many
of those devices, USB has become the standard connection method.
Why do I need a USB cable?
When setting up the printer on your wireless network, the printer will need to temporarily connect to a computer using
the USB cable. This temporary connection is used to set up the wireless settings of the printer.
How do I attach the USB cable?
The USB cable attaches to a USB port on the computer and to the square connector on the back of the printer. This
connection allows you to configure the printer for a network or local (USB) installation.
Page 82

Networking 82
The USB port on the computer and on the printer are each marked with .
Note: Do not connect the USB cable until prompted to do.
1 If the USB port at the back of the printer is covered by a sticker, then make sure to remove it.
2 Firmly plug the square end of the USB cable into the back of the printer.
Page 83

Networking 83
3 Firmly plug the rectangular end of the USB cable into the USB port of the computer.
4 Follow the instructions on the computer screen.
How are infrastructure and ad hoc networks different?
Wireless networks can operate in one of two modes: infrastructure or ad hoc.
In infrastructure mode, all devices on a wireless network communicate with each other through an access po int (wireless
router).
In ad hoc mode, a computer with a wireless network adapter communicates directly with a printer equipped with a
wireless print server.
Infrastructure Ad hoc
Characteristics
Communication Through an access point Directly between devices
Security More security options WEP or no security
Range Determined by the range and number
of access points
Speed Usually faster Usually slower
Requirements for all devices
Unique IP address for each device Yes Yes
Mode set to Infrastructure mode Ad hoc mode
Same SSID Yes, including the access point Yes
Same channel Yes, including the access point Yes
Restricted to the range of individual
devices on the network
We recommend setting up a network in infrastructure mode using the installation software CD. Infrastructure mode
provides:
• Increased network security
• Increased reliability
• Faster performance
• Easier setup
Page 84

Networking 84
Finding the signal strength
The signal strength tells you how strongly the computer or printer is receiving the wireless signal from the wireless
network. Poor signal quality could affect connectivity during configuration.
Checking computer connectivity
1
From your computer system tray, click the wireless icon that corresponds to the software managing your wireless
network adapter.
2 Check the signal quality.
Checking printer connectivity
•
From the printer, print a network setup page.
In the Wireless section, look for Quality.
• View the signal strength from the printer control panel.
Navigate to:
> Setup > OK > Network Setup > OK > Wireless 802.11 b/g/n > OK > Network Connection Setup > OK > Wireless >
OK
> View Signal Quality >
OK
To improve signal quality, remove sources of interference or move wireless devices closer to the access point (wireless
router).
How can I improve wireless signal strength?
A common reason wireless printers fail to communicate over a network is poor wireless signal quality. If the signal is
too weak, too distorted, or blocked by an object, it cannot carry information between the access point and the printer.
To determine if the printer is receiving a strong signal from the access point, print a network setup page. The Quality
field indicates the relative strength of the wireless signal the printer is receiving. Drops in signal strength can be
intermittent, however, and although the signal quality appears high, it may drop during certain conditions.
If you think signal strength is a problem between your access point (wireless router) and the printer, then try one or
more of the following:
Notes:
• The solutions below are for infrastructure networks. If you are using an ad hoc network, then adjust the
computer when the solution suggests adjusting the access point.
• Ad hoc networks have a much shorter range than infrastructure networks. Try moving the printer closer to the
computer if they seem to have trouble communicating.
MOVE THE PRINTER CLOSER TO THE ACCESS POINT
If the printer is too far away from the access point, then it will not be able to communicate with other devices on
the network. For most indoor wireless networks, the maximum distance between the access point and the printer
is approximately 100 feet (30 meters). This distance could be longer or shorter, depending upon the layout of the
network and the limitations of the access point.
Page 85

Networking 85
REMOVE OBSTACLES BETWEEN THE ACCESS POINT AND THE PRINTER
The wireless signal from your access point will pass through most objects. Most walls, floors, furniture, and other
objects will not block the wireless signal. However, there are materials that are too dense for the signal to pass
through, such as objects containing metal and concrete. Arrange your printer and access point so that the signal is
not blocked by such objects.
REMOVE SOURCES OF INTERFERENCE
Other types of radio frequencies can cause problems with the wireless signal on your network, resulting to printing
issues that seem to come and go.
• Turn off potential sources of interference where possible.
• Avoid using microwave ovens, cordless phones (but not cellular phones), baby monitors, almost any kitchen
appliance, wireless surveillance equipment, or any appliance containing a motor when printing over your wireless
network.
• If another wireless network is operating in the vicinity, then change the wireless channel on the access point.
• Do not place your access point on a printer or other electronic device. Such devices can also interfere with the
wireless signal.
ARRANGE THE NETWORK TO REDUCE SIGNAL ABSORPTION
Even when the wireless signal is able to pass through an object, it is slightly weakened. If it passes through too many
objects, then it can be significantly weakened. All objects absorb part of the wireless signal when it passes through
them, and certain types of objects absorb enough to cause communications problems. Place your access point as
high in the room as possible to avoid signal absorption.
How can I make sure my computer and printer are connected to the same wireless network?
If the printer is not on the same wireless network as the computer, then you will not be able to print wirelessly. The
SSID of the printer must match the SSID of the computer, if the computer is already connected to the wireless network.
For Windows users
1 Obtain the SSID of the network that the computer is connected to:
a Type the IP address of your access point (wireless router) in the address field of your Web browser.
If you do not know the IP address of the access point:
1 Click , or click Start and then click Run.
2 In the Start Search or Run box, type cmd.
3 Press Enter, or click OK.
4 Type ipconfig, and then press Enter. Check the Wireless Network Connection section:
• The “Default Gateway” entry is typically the access point.
• The IP address appears as four sets of numbers separated by periods, such as 192.168.2.134.
b Type the user name and password of the router when prompted.
c Click OK.
Page 86

Networking 86
d In the Wireless settings section, look for the SSID.
e Write down the SSID.
Note: Make sure you copy it exactly, including any capital letters.
2 Obtain the SSID of the network that the printer is connected to:
a From the printer, print a network setup page.
b In the Wireless section, look for SSID.
3 Compare the SSID of the computer and SSID of the printer.
If the SSIDs are the same, then the computer and the printer are connected to the same wireless network.
If the SSIDs are not the same, then run the utility again to set up the printer on the wireless network used by the
computer.
For Macintosh users with an AirPort base station
In Mac OS X version 10.5 or later
1 From the Apple menu, navigate to:
System Preferences > Network > AirPort
The SSID of the network that the computer is connected to is displayed in the Network Name menu.
2 Write down the SSID.
In Mac OS X version 10.4 or earlier
1 From the Finder, navigate to:
Applications > Internet Connect > AirPort
The SSID of the network that the computer is connected to is displayed in the Network menu.
2 Write down the SSID.
For Macintosh users with an access point
1 Type the IP address of the access point in the address field of your Web browser and continue to step 2.
If you do not know the IP address of the access point, then do the following:
a From the Apple menu, navigate to:
System Preferences > Network > AirPort
b Click Advanced or Configure.
c Click TCP/IP.
The Router entry is typically the access point.
2 Type your user name and password when prompted, and then click OK.
3 In the Wireless settings section, look for the SSID.
4 Write down the SSID, security type, and the WEP key/WPA passphrase (if shown).
Notes:
• Make sure you copy the network information down exactly, including any capital letters.
• Store the SSID and the WEP key or WPA passphrase in a safe place for future reference.
Page 87

Networking 87
Can I use my printer on a USB and a network connection at the same time?
Yes, the printer supports a simultaneous USB and network connection. The printer can be configured in the following
ways:
• Locally attached (connected to a computer using a USB cable)
• Wireless network
• Wireless network and locally attached simultaneously
What is a MAC address?
A Media Access Control (MAC) address is a 48‑bit identifier associated with the hardware of network equipment. The
MAC address may also be called the physical address because it is connected to the hardware of a device instead of its
software. The MAC address is displayed as a hexadecimal number in this format: 01-23-45-67-89-AB.
While it is possible to change the MAC address of a network device, it is not common practice to do so. For this reason,
MAC addresses are considered permanent. IP addresses are easily changed, so MAC addresses are a more reliable
method of identifying a specific device on a network.
Routers with security capabilities may allow filtering of MAC addresses on networks. This allows a managed list of
devices to access the network, identified by their MAC addresses, as well as prevent access from unwanted devices. If
your network uses MAC address filtering, then be sure to add the MAC address of the printer to the list of allowed
devices.
How do I find the MAC address?
Network devices have a unique hardware identification number to distinguish them from other devices on the network.
This is called the MAC (Media Access Control) address. Other devices sometimes use a type of MAC address called
Universally Administered Address (UAA).
When installing the printer on a network, make sure you select the printer with the correct MAC address.
Page 88

Networking 88
The MAC address of the internal print server is a series of letters and numbers.
MAC: XX XX XX XX XX XX
Notes:
• A list of MAC addresses can be set on an access point (wireless router) so that only devices with matching MAC
addresses are allowed to operate on the network. This is called MAC filtering. If MAC filtering is enabled in your
access point and you want to add a printer to your network, then the MAC address of the printer must be
included in the MAC filter list.
• If you are using an AirPort base station, then the MAC address may be referred to as AirPort ID, and MAC
address filtering may be accessed through MAC Address Access Control.
What is an IP address?
An IP address is a unique number used by devices (such as a wireless printer, computer, or wireless access point) on
an IP network to locate and communicate with each other. Devices on an IP network can communicate with each other
only if they have unique and valid IP addresses. A unique IP address means no two devices on the same network have
the same IP address.
An IP address is a group of four numbers separated by periods. An example of an IP address is 192.168.100.110.
What is TCP/IP?
Networks are able to function when computers, printers, and other devices are able to send data to each other, either
through cables or wireless signals. This transfer of data is made possible by sets of data transmission rules called
protocols. A protocol can be thought of as a language that has rules so that participants can effectively communicate
with each other.
Different types of networks use different protocols, but Transmission Control Protocol/Internet Protocol (TCP/IP) is the
most popular. TCP/IP is used to send data over the Internet as well as over most corporate and home networks.
Every device on a network that uses TCP/IP must have an IP address. IP addresses are essentially unique computer
names in a numeric format, used to transfer data around a network. IP addresses allow TCP/IP to confirm requests for,
and receipt of, data by various devices on the network.
How do I locate IP addresses?
For Windows users
1
Click , or click Start and then click Run.
2 In the Start Search or Run box, type cmd.
3 Press Enter, or click OK.
4 Type ipconfig, and then press Enter.
The IP address appears as four sets of numbers separated by periods, such as 192.168.0.100.
Page 89

Networking 89
For Macintosh users
1
From the Apple menu, navigate to:
About This Mac > More Info
2 From the Contents pane, choose Network.
3 If you are connected over a wireless network, then choose AirPort from the Active Services list.
Locating the printer IP address
•
From the printer, print a network setup page.
In the TCP/IP section, look for Address.
• View the printer settings.
From the printer control panel, navigate to:
> Setup > OK > Network Setup > OK > Wireless 802.11 b/g/n > OK > Network Connection Setup > OK > TCP/IP >
OK
> IP Address >
OK
How are IP addresses assigned?
An IP address may be assigned automatically by the network using DHCP. Once the printer is set up on a computer, the
computer sends all print jobs across the network to the printer using this address.
If the IP address is not automatically assigned, you will be asked during wireless setup to manually enter an address
and other network information after selecting your printer from the available list.
What is a key index?
An access point (wireless router) can be configured with as many as four WEP keys. Only one key is used on the network
at a time, however. The keys are numbered, and the number of a key is referred to as its key index. All devices on the
wireless network must be configured to use the same key index when multiple WEP keys are configured on the access
point.
Select the same key index on your printer as you are using on your access point.
What is the difference between Guided and Advanced setup?
Use Guided setup if:
• The printer and the computer communicate on the same wireless network.
• You want the Wireless Setup Utility to automatically detect the network for you.
• You want to connect your printer to the wireless network using Wi‑Fi Protected Setup (WPS).
Use Advanced setup if:
• The printer and the installing computer are not on the same wireless network, or if the computer does not have
wireless access.
• The wireless network requires certificates.
• Enterprise‑level security is employed on the wireless network.
• You know the network SSID and security information and want to enter the information on a single screen.
• The printer will be configured for a remote network.
Page 90

Networking 90
• You know your network information and want to enter it quickly.
• You are configuring a printer for a wireless network that uses 802.1X authentication.
Page 91

Maintaining the printer 91
Maintaining the printer
Maintaining ink cartridges
In addition to the following tasks that you can perform, your printer performs an automatic maintenance cycle every
week if it is plugged into a properly grounded, working electrical outlet. It will briefly come out of Sleep mode or will
temporarily turn on if it is turned off.
Checking ink levels
Using the printer control panel
From the printer control panel, navigate to:
> Setup > OK >Maintenance > OK > Check Ink Levels >
OK
Using the printer software
For Windows users
1 Click or Start.
2 Click All Programs or Programs, and then select the printer program folder from the list.
3 Navigate to:
Printer Home > select your printer > Maintenance tab > Supplies Status
For Macintosh users
1 From the Apple menu, navigate to:
System Preferences > Print & Fax > select your printer
2 Click Options & Supplies or Print Queue.
3 Click Supply Levels.
Aligning the printhead
If the characters or lines on your printed image appear jagged or wavy, then you may need to align the printhead.
1 Load plain paper.
2 From the printer control panel, navigate to:
> Setup > OK >Maintenance > OK > Align Printer >
An alignment page prints.
Note: Do not remove the alignment page until printing is finished.
If you aligned the cartridges to improve print quality, then print your document again. If print quality has not improved,
then clean the printhead nozzles.
OK
Page 92

Maintaining the printer 92
Cleaning the printhead nozzles
If you have not been using the printer for a long period, then you may need to clean the printhead nozzles to improve
the quality of your prints. Keep your printer plugged to a properly grounded, working electrical outlet to allow it to
perform automatic maintenance cycles.
Notes:
• Cleaning the printhead nozzles uses ink, so clean them only when necessary.
• Deep cleaning uses more ink, so try the Clean Printhead option first to save ink.
• If the ink levels are too low, you must replace the ink cartridges before you can clean the printhead nozzles.
1 Load paper.
2 From the printer control panel, navigate to:
> Setup > OK > Maintenance >
3 Press the up or down arrow button to scroll to Clean Printhead or Deep Clean Printhead, and then
OK
press
A cleaning page prints.
.
OK
Cleaning the exterior of the printer
1 Make sure that the printer is turned off and unplugged from the wall outlet.
CAUTION—SHOCK HAZARD: To avoid the risk of electric shock when cleaning the exterior of the printer,
unplug the power cord from the wall outlet and disconnect all cables to the printer before proceeding.
2 Remove all paper from the printer.
3 Dampen a clean, lint‑free cloth with water.
Warning—Potential Damage: Do not use household cleaners or detergents, as they may damage the finish of
the printer.
4 Wipe only the outside of the printer, making sure to remove any ink residue that has accumulated on the paper
exit tray.
Warning—Potential Damage: Using a damp cloth to clean the interior may cause damage to your printer.
5 Make sure the printer is dry before beginning a new print job.
Page 93

Maintaining the printer 93
Cleaning the scanner glass
Clean the scanner glass and other related parts when vertical streaks appear on your printed pages or when you see
marks or smudges on such parts.
1 Dampen a clean, lint‑free cloth with water.
2 Gently wipe clean the backing material (1) and the scanner glass (2).
1
2
Note: Make sure all ink or corrective fluid on the document is dry before placing the document on the scanner glass.
Moving the printer to another location
When moving the printer to another location, follow these precautions:
• Make sure the printer is off and all cables have been disconnected from the printer.
• Any cart used to move the printer must have a surface able to support the full footprint of the printer.
• Make sure the paper exit tray is inserted back into the printer.
• Make sure the printer control panel is in its vertical position.
Press the latch under the printer control panel to release it, and then push the panel back to its shipping position.
1
2
Page 94

Maintaining the printer 94
• Keep the printer in an upright position to prevent the ink from leaking.
• Avoid severe jarring movements.
Page 95

Troubleshooting 95
Troubleshooting
Before you troubleshoot
Use this checklist to solve most printer problems:
• Make sure the power cord is plugged into the printer and into a properly grounded, working electrical outlet.
• Make sure the printer is turned on.
• Make sure the printer is securely connected to the computer, print server, or network access point.
• Check the printer for error messages, and resolve any errors.
• Check for paper jam messages, and clear any jams.
• Check the ink cartridges, and install new cartridges if necessary.
• Turn the printer off, wait about 10 seconds, and then turn the printer back on.
Note: Make sure the printer is not in Sleep mode. Press and hold
for three seconds to turn off the printer.
If Troubleshooting does not solve your problem
Visit our Web site at http://support.lexmark.com to find the following:
• Knowledgebase articles with the latest information and troubleshooting for your printer
• Live online technical support
• Contact numbers for telephone technical support
Setup troubleshooting
• “Incorrect language appears on the display” on page 95
• “Software did not install” on page 96
• “Print job does not print or is missing pages” on page 96
• “Printer is printing blank pages” on page 98
• “Printer is busy or does not respond” on page 98
• “Cannot delete documents from the print queue” on page 99
• “Cannot print through USB” on page 99
Incorrect language appears on the display
If the "Before you troubleshoot" checklist does not solve the problem, then try one or more of the following:
CHANGE THE LANGUAGE USING THE PRINTER MENUS
1 From the printer control panel, navigate to:
> Setup > OK > Device Setup > OK > Language >
2 Press the up or down arrow button to scroll to the language you want, and then press
OK
OK
.
Page 96

Troubleshooting 96
3 To confirm the setting, press the left or right arrow button to scroll to Yes, and then press
OK
.
Software did not install
If you encountered problems while installing, or if your printer does not appear in the list in the printers folder or as a
printer option when sending a print job, then try uninstalling and reinstalling the software.
Before you reinstall the software, do the following:
MAKE SURE THAT YOUR COMPUTER MEETS THE MINIMUM SYSTEM REQUIREMENTS
TEMPORARILY DISABLE SECURITY PROGRAMS IN WINDOWS BEFORE INSTALLING THE SOFTWARE
CHECK THE USB CONNECTION
1 Check the USB cable for any obvious damage. If the cable is damaged, then use a new one.
2 Firmly plug the square end of the USB cable into the back of the printer.
3 Firmly plug the rectangular end of the USB cable into the USB port of the computer.
The USB port is marked with
Note: If you continue to have problems, then try another USB port on the computer. You may have connected to a
defective port.
.
RECONNECT THE PRINTER POWER SUPPLY
1 Turn off the printer.
Note: Make sure the printer is not in Sleep mode. Press and hold
2 Unplug the power cord from the wall outlet, and then pull out the power cord from the power supply.
3 After one minute, reconnect the power cord into the power supply, and then plug the power cord into the wall
outlet.
4 Turn on the printer.
for three seconds to turn off the printer.
Print job does not print or is missing pages
If the "Before you troubleshoot" checklist does not solve the problem, then try one or more of the following:
MAKE SURE THE INK CARTRIDGES ARE INSERTED CORRECTLY
1 Turn the printer on, and then open the printer.
2 Make sure the cartridges are inserted correctly.
The cartridges should click firmly into the matching color slot of the printhead.
3 Close the printer.
Page 97

Troubleshooting 97
SELECT YOUR PRINTER FROM THE PRINT DIALOG BEFORE SENDING THE PRINT JOB
Note: This solution applies to Macintosh users only.
1 With a document open, choose File > Print.
2 From the printer pop-up menu, choose your printer, and then click Print.
If your printer does not appear in the Printer list, then choose Add Printer. From the list of printers in the Default
tab, select your printer, and then click Add.
If your printer does not appear in the list, then try either of the following:
• For a USB-connected printer, remove and then reconnect the USB cable.
• For a printer that is wirelessly connected, see the Wireless troubleshooting section.
MAKE SURE THE PRINT JOB IS NOT PAUSED
MAKE SURE YOUR PRINTER IS SET AS THE DEFAULT PRINTER
RECONNECT THE PRINTER POWER SUPPLY
1 Turn off the printer.
Note: Make sure the printer is not in Sleep mode. Press and hold
2 Unplug the power cord from the wall outlet, and then pull out the power cord from the power supply.
3 After one minute, reconnect the power cord into the power supply, and then plug the power cord into the wall
outlet.
4 Turn on the printer.
for three seconds to turn off the printer.
REMOVE AND RECONNECT THE USB CABLE CONNECTED TO YOUR PRINTER
CHECK THE USB CONNECTION
1 Check the USB cable for any obvious damage. If the cable is damaged, then use a new one.
2 Firmly plug the square end of the USB cable into the back of the printer.
3 Firmly plug the rectangular end of the USB cable into the USB port of the computer.
The USB port is marked with
Note: If you continue to have problems, then try another USB port on the computer. You may have connected to a
defective port.
.
REMOVE AND REINSTALL THE PRINTER SOFTWARE
Page 98

Troubleshooting 98
Printer is printing blank pages
Blank pages may be caused by improperly installed ink cartridges.
REINSTALL THE INK CARTRIDGES AND DEEP CLEAN AND ALIGN THE PRINTHEAD
1 Reinstall the ink cartridges, see “Replacing ink cartridges” on page 13 for more information.
If the cartridges do not seem to fit, then make sure the printhead is properly seated, and then try installing the
cartridges again.
2 Load plain, unmarked paper.
3 From the printer control panel, navigate to:
> Setup > OK > Maintenance >
OK
4 Press the up or down arrow button to scroll to Deep Clean Printhead, and then press
A cleaning page prints.
OK
.
5 Load plain, unmarked paper.
6 From the Maintenance menu screen, press the up or down arrow button to scroll to Align Printer, and
OK
then press
An alignment page prints.
Note: Do not remove the alignment page until printing is finished.
.
Printer is busy or does not respond
If the "Before you troubleshoot" checklist does not solve the problem, then try one or more of the following:
MAKE SURE THE PRINTER IS NOT IN SLEEP MODE
If the power light is blinking on and off slowly, then the printer is in Sleep mode. Press to wake up the printer.
If the printer will not come out of Sleep mode, then reset the power:
1 Unplug the power cord from the wall outlet, and then wait 10 seconds.
2 Insert the power cord into the wall outlet, and then turn on the printer.
If this problem persists, then check our Web site for updates for your printer software or firmware.
RECONNECT THE PRINTER POWER SUPPLY
1 Turn off the printer.
Note: Make sure the printer is not in Sleep mode. Press and hold
2 Unplug the power cord from the wall outlet, and then pull out the power cord from the power supply.
3 After one minute, reconnect the power cord into the power supply, and then plug the power cord into the wall
outlet.
4 Turn on the printer.
for three seconds to turn off the printer.
Page 99

Troubleshooting 99
Cannot delete documents from the print queue
If you have jobs stuck in the print queue and cannot delete them to get other jobs to print, then the computer and
printer may not be communicating.
RESTART THE COMPUTER AND TRY AGAIN
REMOVE AND RECONNECT THE USB CABLE CONNECTED TO YOUR PRINTER
Cannot print through USB
If the "Before you troubleshoot" checklist does not solve the problem, then try one or more of the following:
CHECK THE USB CONNECTION
1 Check the USB cable for any obvious damage. If the cable is damaged, then use a new one.
2 Firmly plug the square end of the USB cable into the back of the printer.
3 Firmly plug the rectangular end of the USB cable into the USB port of the computer.
The USB port is marked with
Note: If you continue to have problems, then try another USB port on the computer. You may have connected to a
defective port.
.
MAKE SURE THE USB PORT IS ENABLED IN WINDOWS
1 Click , or click Start and then click Run.
2 In the Start Search or Run box, type devmgmt.msc.
3 Press Enter, or click OK.
The Device Manager opens.
4 Click the plus sign (+) beside Universal Serial Bus controllers.
If USB Host Controller and USB Root Hub are listed, then the USB port is enabled.
For more information, see the computer documentation.
REMOVE AND REINSTALL THE PRINTER SOFTWARE
Page 100

Troubleshooting 100
Understanding printer messages
Alignment Problem
Try any of the following:
• Check the ink cartridges.
1 Open the printer, and then remove and reinstall the ink cartridges.
2 Load a plain and unmarked A4‑ or letter‑size paper.
The printer will read any markings on used paper, which could cause the alignment error message to reappear.
3 Close the printer.
4 Touch OK or press
• Press to clear the message.
Cannot Collate Job
Try one or more of the following:
• Press
• Press to cancel the current print job.
OK
to continue printing the pages that were saved in the printer memory, and then collate the remainder of
the print job.
OK
to retry, depending on your printer model.
Change to [Size] Paper
Try one or more of the following:
• Load the correct paper size in the paper support, and then press
OK
to continue printing.
• Press to cancel the current job.
Change to [Size] [Type] Paper
Try one or more of the following:
• Load the correct paper size and paper type in the paper support, and then press
• Press to cancel the current job.
OK
to continue printing.
 Loading...