

Page 1
Card Stock & Label Guide
Laser Printers
April 2006
Lexmark and Lexmark with diamond design are trademarks of Lexmark International, Inc.,
registered in the United States and/or other countries.
© 2006 Lexmark International, Inc.
All rights reserved.
740 West New Circle Road
Lexington, Kentucky 40550
www.lexmark.com
Page 2

Edition: April 2006
The following paragraph does not apply to any country where such provisions are inconsistent with local law: LEXMARK
INTERNATIONAL, INC., PROVIDES THIS PUBLICATION “AS IS” WITHOUT WARRANTY OF ANY KIND, EITHER EXPRESS OR
IMPLIED, INCLUDING, BUT NOT LIMITED TO, THE IMPLIED WARRANTIES OF MERCHANTABILITY OR FITNESS FOR A
PARTICULAR PURPOSE. Some states do not allow disclaimer of express or implied warranties in certain transactions; therefore, this
statement may not apply to you.
This publication could include technical inaccuracies or typographical errors. Changes are periodically made to the information herein;
these changes will be incorporated in later editions. Improvements or changes in the products or the programs described may be made
at any time.
Comments about this publication may be addressed to Lexmark International, Inc., Department F95/032-2, 740 West New Circle Road,
Lexington, Kentucky 40550, U.S.A. In the United Kingdom and Eire, send to Lexmark International Ltd., Marketing and Services
Department, Westhorpe House, Westhorpe, Marlow Bucks SL7 3RQ. Lexmark may use or distribute any of the information you supply in
any way it believes appropriate without incurring any obligation to you. To obtain additional copies of publications related to this product,
visit the Lexmark Web site at www.lexmark.com.
References in this publication to products, programs, or services do not imply that the manufacturer intends to make these available in
all countries in which it operates. Any reference to a product, program, or service is not intended to state or imply that only that product,
program, or service may be used. Any functionally equivalent product, program, or service that does not infringe any existing intellectual
property right may be used instead. Evaluation and verification of operation in conjunction with other products, programs, or services,
except those expressly designated by the manufacturer, are the user’s responsibility.
Lexmark and Lexmark with diamond design, MarkVision, Optra, and Prebate are trademarks of Lexmark International, Inc., registered in
the United States and/or other countries. Diamond Fine and WinWriter are trademarks of Lexmark International, Inc.
Other trademarks are the property of their respective owners.
© 2006 Lexmark International, Inc.
All rights reserved.
UNITED STATES GOVERNMENT RIGHTS
This software and any accompanying documentation provided under this agreement are commercial computer software and
documentation developed exclusively at private expense.
2
Page 3

Contents
Overview ............................................................................................................................... 5
General information ............................................................................................................. 6
Paper and label Industry ..................................................................................................................................6
Print volumes ................................................................................................................................................... 6
Print material testing ........................................................................................................................................ 6
Card stock .......................................................................................................................... 10
Weight ............................................................................................................................................................10
Grain orientation ............................................................................................................................................11
Coatings .........................................................................................................................................................12
Offset powders ...............................................................................................................................................13
Labels .................................................................................................................................. 14
Label characteristics ...................................................................................................................................... 14
Printing on labels ...........................................................................................................................................14
Duplexing paper labels .................................................................................................................................. 15
Label components ......................................................................................................................................... 16
Label design guidelines ................................................................................................................................. 18
Printer specifications ........................................................................................................ 23
Lexmark E238, E240, E240n, E340, E342n .................................................................................................. 25
Lexmark C760, C762 .....................................................................................................................................26
Lexmark X644e, X646e .................................................................................................................................30
Lexmark X850, X852e, X854e .......................................................................................................................34
Lexmark C520, C522, C524 .......................................................................................................................... 36
Lexmark C920 ............................................................................................................................................... 39
Lexmark T640, T642, T644 ........................................................................................................................... 41
Lexmark W840 ............................................................................................................................................... 45
Lexmark C912 ............................................................................................................................................... 46
Lexmark C510 ............................................................................................................................................... 48
Lexmark X422 ................................................................................................................................................50
Lexmark X215 ................................................................................................................................................52
Lexmark C720 ............................................................................................................................................... 54
Lexmark C750 ............................................................................................................................................... 56
Lexmark C752 ............................................................................................................................................... 60
Lexmark C910 ............................................................................................................................................... 64
Lexmark E220 ................................................................................................................................................66
Lexmark E320, E322 .....................................................................................................................................67
Contents
3
Page 4

Contents
Lexmark E321, E323 .....................................................................................................................................68
Lexmark E230, E232, E234(n), E330, and E332n ......................................................................................... 69
Lexmark E120 ................................................................................................................................................70
Lexmark T430 ................................................................................................................................................ 71
Lexmark T420 ................................................................................................................................................ 73
Lexmark T520, T522 ......................................................................................................................................76
Lexmark T620, T622 ......................................................................................................................................81
Lexmark T630, T632, T634 ........................................................................................................................... 86
Lexmark W812 ............................................................................................................................................... 91
Lexmark W820 ............................................................................................................................................... 92
Optra C .......................................................................................................................................................... 94
Optra C710 .................................................................................................................................................... 95
Optra Color 1200 ........................................................................................................................................... 97
Optra E310, E312 ..........................................................................................................................................98
Optra E, Ep ....................................................................................................................................................99
Optra Es special media printer .................................................................................................................... 100
Optra K 1220 ............................................................................................................................................... 102
Optra M410, M412 ....................................................................................................................................... 103
Optra N ........................................................................................................................................................ 105
Optra plus, 4039, 4029, 4019, WinWriter 600 printers ................................................................................. 106
Optra S ........................................................................................................................................................110
Optra SC 1275 ............................................................................................................................................. 116
Optra T ......................................................................................................................................................... 117
Optra W810 ................................................................................................................................................. 122
Glossary ............................................................................................................................ 123
Index .................................................................................................................................. 127
Contents
4
Page 5

Overview
Lexmark has many years of experience in successful card stock and label testing and cross education programs with print
material vendors and converters.
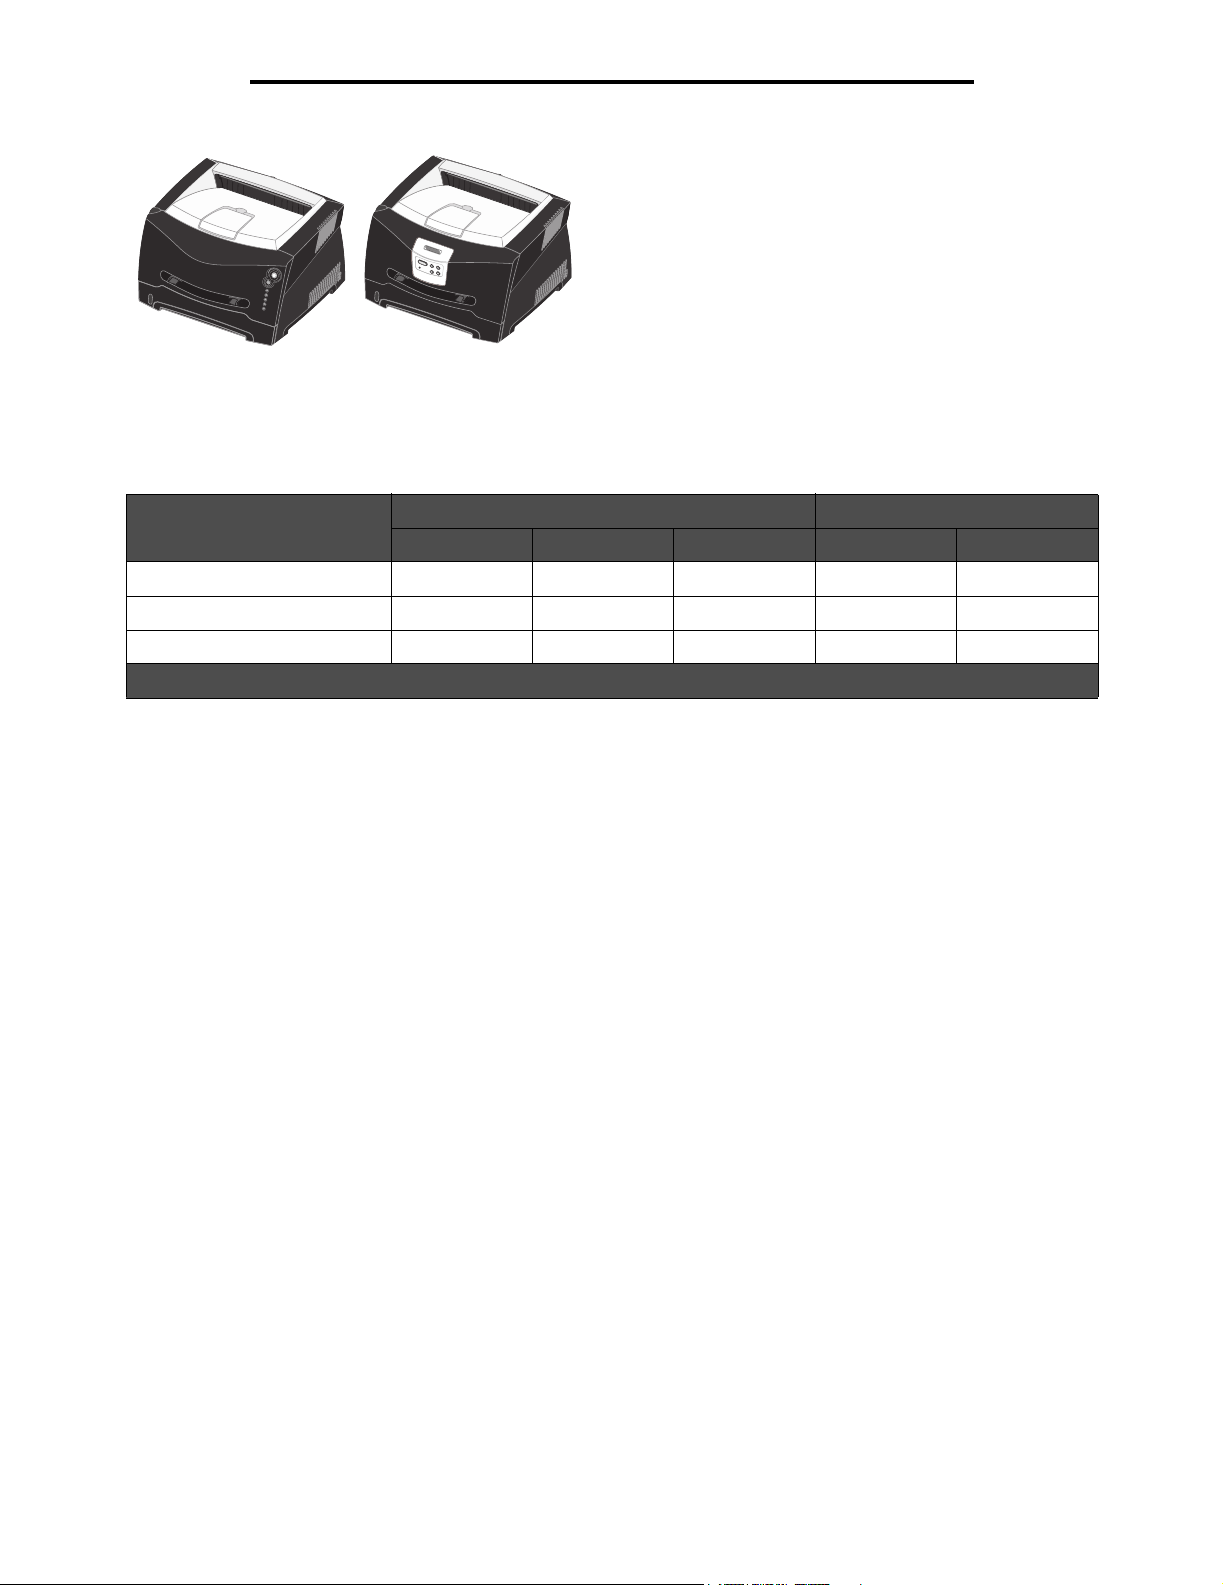
This document provides guidelines to help you select appropriate print materials for the following Lexmark laser printers.
Model series Models
4019 models All
4029 models All
4039 10 plus All
4039 12C All
C series C510, C520, C522, C524, C720, C750, C752, C760, C762, C910, C912, C920
E series E220, E230, E232, E234(n), E238, E320, E321, E322, E323, E330, E332n, E340, E342n
Optra™ models All
T series T420, T430, T520, T522, T620, T622, T630, T632, T634, T640, T642, T644
W series W812, W820, W840
WinWriter™ 600 4035 5W
X series X215, X422, X644e, X644e, X646e, X850, X852e, X854e
The information supplied here supersedes other information relating to card stock and labels included with your printer. See
other printer documentation for detailed information about the paper, envelopes, and transparencies suitable for your
printer.
In addition to printer-specific media recommendations, this document also explains design factors you should consider
when purchasing all types of print materials. The glossary on page 123 defines many industry terms. If you have specific
stock or design questions, talk with your print materials supplier.
See your printer documentation for general printing information and terms. See the printer registration card, information on
the printer CD, or visit our Lexmark Web site at www.lexmark.com/publications for technical assistance contact
numbers.
Always test print materials thoroughly before buying large quantities. Doing so will help you avoid unexpected problems
when you begin regular printing.
Overview
5
Page 6

General information
Paper and label Industry
The paper and label industry includes several different types of businesses: manufacturers, converters, and distributors.
Manufacturers produce the base stock. If the base is for labels, manufacturers may ship it on large rolls or in a cut-sheet
form.
Converters take the base stock and convert it into cut-sheet products. Converters may work from rolls with or without the
adhesive applied, or they may take a base stock and convert it to meet their customers’ specifications.
The conversion process includes, but is not limited to, cutting the stock to size, perforating the stock, die-cutting, and
applying inks and topcoats. Converters work with their customers to convert the base material into a cut-sheet product
designed for use in laser printers.
Distributors generally are the direct link to the customer.
Distributors may work with different converters, and converters may work with different manufacturers, as their needs and
prices change. Most businesses follow accepted industry conventions, but specifications, standards, formulations, and
processes may vary with time or with different companies.
Note: Labels or papers that performed satisfactorily in the past may suddenly create printing problems
because of a change in material or process.
Some large businesses perform all three functions, from manufacturing to distribution. These companies may offer greater
expertise and product consistency than companies that concentrate on one facet of the process.
Print volumes
Printing numerous sheets of card stock or labels in a short period of time can create printing problems. Exclusive printing of
labels, for example, may result in more frequent service calls. Proper printer maintenance helps alleviate these problems.
(Look under “Maintenance procedures” in the index for specific information about maintaining your printer.)
Print material testing
Choosing print materials can seem complex. Unfortunately, it is not possible to write a simple “cookbook” explaining how to
select print materials, because there are too many variables you need to address for each specific application.
Be aware that critical factors at the vendor–such as the physical characteristics of the base stock and the manufacturing
processes–may change over time.
Print materials can significantly affect printer reliability and downtime. Using materials from converters or vendors who are
unfamiliar with laser printing may result in unsatisfactory print quality or other printing problems.
Note: Once you have a successful design, test the print material before placing a large order to avoid costly
mistakes.
Your print materials supplier should be able to help develop your application or solve a problem you have with an existing
application. In addition, Lexmark has worked with several suppliers and has business partners in this field. See the printer
General information
6
Page 7

General information
registration card, information on the printer CD, or visit our Web site at www.lexmark.com\publications for technical
assistance contact numbers.
Design factors
Print materials all have measurable characteristics that you need to consider when selecting or designing forms for your
particular application.
Basis weight
Basis weight is a term used to describe the weight in pounds of 500 sheets of paper (one ream). However, the weight is
determined based on the standard size of the paper, which may not be the purchased size. For example, the standard size
of 20 lb Bond paper is 17 x 22 inches, and a ream of 17 x 22 inch 20 lb Bond paper weighs 20 lbs. If the 17 x 22 inch 20 lb
Bond paper was cut, creating four reams of 8.5 x 11 paper, each ream would be labeled 20 lb Bond paper but would only
weigh 5 lbs.
If the same paper weighed 24 pounds, it would be called 24 lb Bond. The 24 lb Bond paper is thicker, heavier, and more
dense than the 20 lb Bond. Thicker paper means less paper can be placed in a tray, and paper that is heavier and more
dense may cause paper jams or feed reliability problems in some printers. Check the printer media weight table located in
the printer User’s Guide to verify that the paper basis weight being used is acceptable.
Not all basis weights are related to the same standard sheet size: for example; 70 lb material can be lighter than 40 lb
material if it is based on larger base size paper (see the Card stock weights comparison guide on page 11). For a more
consistent way to compare weights, see the metric measurement of grams per square meter (g/m2). The metric
measurement of grams per square meter has been standardized by the International Organization for Standardization
(ISO).
Your printer can accept a wide range of stock weights, but materials either too light or too heavy can cause printing
problems. Heavy and/or thicker materials may not heat quickly enough in the fuser, resulting in poor print quality. They may
also feed less reliably or skew due to their weight or rigidity. Conversely, lighter materials can wrinkle and jam in the printer
due to low beam strength (stiffness).
Depending on the orientation of the stock as it feeds through the printer, you may need to request that heavier materials be
cut grain short or grain long to provide flexibility in paper path turns. See the specifications for each printer for more precise
recommendations.
Dimensions
All printers have print material dimension limitations. See the printer documentation shipped with your printer for details.
You can sometimes redesign forms to overcome these limitations. For example, if you use forms that are shorter than the
minimum length supported by your printer, you may be able to link two forms together when printing multiple forms. An
optional Universally Adjustable Tray designed for the Optra S, Optra T, and Lexmark T printer families prints on a range of
paper sizes including A6 and 3-inch by 5-inch index cards, 3-inch by 7-inch punch cards, and 4-inch by 6-inch postcards.
Environment
Lexmark printers meet or exceed all industry emission regulations and standards. Continuous printing on some papers or
other media may create fumes that are not a problem with occasional printing. Make sure your printer is located in a
well-ventilated area.
Temperature and humidity can have a major impact on printing. Even small changes (such as from day to night) can greatly
affect feed reliability if the print material is just within the range of acceptability.
We recommend that you condition stock while it is still in the original wrapper. To condition stock, store it in the same
environment as the printer for 24 to 48 hours before printing to let the stock stabilize at the new conditions. You may need
to extend this time several days if the storage or transportation environment is very different from the printer environment.
Thick stock may also require a longer conditioning period because of the mass of the material.
Print material testing
7
Page 8

General information
If you remove the wrapper from the stock before you’re ready to load it in the printer, the stock may develop uneven
moisture content that can cause curl. Prior to loading your stock, we recommend that curl not exceed 3 mm (0.125 in.).
Lighter materials, such as paper labels and some integrated forms, are more likely to have printing problems if curl is
present.
Most label manufacturers recommend printing in a temperature range of 18 to 24°C (65 to 75°F) with relative humidity of 40
to 60%. Lexmark printers are designed to operate in a temperature range of 15.5 to 32°C (60 to 90°F) with relative humidity
of 8 to 80%. Printing in an environment outside these recommendations may cause jams, feeding problems, reduced print
quality, and predispensing (peeling) labels.
Inks (preprinted stock)
Preprinted stock introduces semi-liquid and volatile components to the high temperatures and pressure used in the laser
printing process. Preprinted inks and colorations must withstand a fuser temperature up to 225°C (437°F) and pressure up
to 25 psi without contaminating the printer or creating hazardous fumes.
Thermography inks are not recommended. Thermography inks have a waxy feel and the printed image appears raised
above the surface of the print material. These inks can melt and damage the fuser assembly.
Preprinted inks must also be abrasion resistant to reduce ink dust and ink contamination in the printer. If you are printing
over a preprinted area, the ink must be receptive to toner to ensure adequate fusing.
All preprinted inks must be thoroughly dry before using printed materials. However, we do not recommend using offset
powders or other foreign materials to speed drying. Check with your converter, or the manufacturer or vendor of the ink you
plan to use, to determine if the ink is compatible with laser printers that heat the ink to 225°C (437°F).
Perforations and die-cuts
If your form has perforations, the perforation line should stop 1.6 mm (0.06 in.) from each edge of the form to avoid
separating the form in the printer path, resulting in a jam. The location of the perforation affects initial pick strength.
Perforations closer to the edge may increase the number of jams. For pressure-sensitive materials such as labels,
minimize the number of perforations that go through the backing material, or liner, since these can also affect the strength
of the form.
Perforations should be ironed so the print material lies flat, reducing nesting of forms. Edges should be smooth and clean
with no roll-over. Laser-perfs (also known as micro-perfs or data-perfs) provide greater stability and are preferred. These
smaller perforations do not normally nest or create excessive paper dust and debris. Make sure paper chaff and dust
created during the conversion process are removed before packaging.
If perforations tent, or crease at the perforation line, the perfs may break, causing a paper jam. Tenting may increase skew,
cause double sheet-feeding, or smear the toner on the print material before fusing, resulting in poor print quality. To reduce
tenting, use micro-perfs. If the print material is lightly snapped as it moves through the printer, the perforations should hold
without breaking.
Die-cutting is used to create shapes in a label or a card stock design. When designing labels, round all corners to prevent
delamination of the labels, and avoid cuts through the liner (anvil cuts). Back splits and pop-out windows are also not
recommended.
If perforations or die-cuts are part of the design of the print material, ties are recommended. These small uncut areas
(approximately 1.6 mm or 0.06 in.) help stabilize the form and prevent tearing at perforations and die-cuts during printing.
For areas with die-cuts or perforations that create a small end product, or where die-cuts or perforations intersect, ties on
the corners of the design provide added stability. Ties may be located anywhere along perforations or die-cuts. For
pressure-sensitive products, ties help prevent the labels from peeling off the liner while in the printer. Ties cannot, however,
be used to compensate for inadequate release strength of the adhesive in label designs.
Note: For specific perforation and die-cut guidelines for your printer, see the appropriate topic under Printer
specifications on page 23.
Print material testing
8
Page 9

General information
Debossing and embossing
Avoid debossing and embossing materials. Embossing leads to nesting and double sheet feeds, and the fusing process
significantly reduces the height of the raised image. Printing too close to embossments results in poor print quality and poor
fuse grade.
Metallics
We do not recommend using metallics in forms, whether in inks or other materials, due to their conductivity and their ability
to bleed charge. This can interfere with toner transfer and cause poor print quality.
Basic form design
When designing forms, include a non-print area of 8.38 mm (0.33 in.) at the top and bottom of the form and 6.35 mm (0.25
in.) on both sides of the form.
In general, portrait orientation is the preferred layout, especially if you are printing bar codes. If your forms require
landscape orientation, be aware that variations in paper path speed may produce spacing variations when printing bar
codes.
Note: We do not warrant uninterrupted or error-free operation of a product. Warranty service does not
include repair of failures caused by:
• modification or attachments
• accidents or misuse
• unsuitable physical or operating environment
• maintenance by anyone other than Lexmark or a Lexmark authorized servicer
• operation of a product beyond the limit of its duty cycle
• failure to have installed a maintenance kit as specified (if applicable)
• use of printing media outside of Lexmark specifications
• use of other than Lexmark supplies (such as toner cartridges, inkjet cartridges, and ribbons)
• use of other than Lexmark product or component
Print material testing
9
Page 10

Card stock
Card stock is a rigid, stiff material that can have a wide variety of constructions. Orientation of paper fibers (grain direction),
moisture content, thickness, texture, and other properties can significantly impact printing, as can preprinting, perforation,
creasing, and other features common to forms. For example, preprinting introduces semi-liquid, volatile components that
must withstand the high temperatures used in laser printing. Perforation and creasing may cause nesting, or interlocking,
which can cause paper jams and double sheet feeds.
The following sections describe some of the basic characteristics of card stock. In general, we recommend a single-ply
construction of 100% chemically-pulped wood with a vellum finish. Before purchasing large quantities of card stock, make
sure you test samples of the print material in your printer.
Weight
The weight of card stock plays a significant role in the print quality and feed reliability of the stock. Confusion often arises
when specifying the basis weight of a stock; see Basis weight on page 7 for more information. The basis weight is a term
used to describe the weight in pounds of 500 sheets of paper (one ream). Since the sheet size varies from one type of
stock to another, the basis weights are not always easily comparable. For example, an office supply store has 8.5 x 11 size
cover stock (80 lb Bristol) and 8.5 x 11 size card stock (90 lb Index) side by side on the shelf. Both papers are manufactured
by the same company, and a basis weight comparison indicates the card stock (90 lb Index) is heavier than the cover stock
(80 lb Bristol). In this example, the cover stock (80 lb Bristol) is actually heavier than the card stock (90 lb Index).
The reason the cover stock is heavier is because before the two types of paper were cut into 8.5 x 11 size pages, the card
stock was a larger sheet size than the sheet size of the cover stock. When the papers were cut during the manufacturing
process into 8.5 x 11 size pages, more reams (500 sheets) of paper were received from the card stock sheets than from the
cover stock sheets. This makes the weight of the cover stock heavier than the weight of the card stock.
2
It is easier to compare the cover stock metric weight (g/m
weights of the two stocks in the previous example, it is immediately evident that 80 lb Bristol cover stock (176 g/m
heavier than 90 lb Index card stock (163 g/m2).
Not all printers are able to print on cover stock. This is because cover stock is usually thicker and not able to make the turns
in the printer paper path. This causes paper jams and sometimes causes the paper to feed incorrectly. Also, when using a
laser printer, toner is pulled onto the paper through an electrical charge. If the paper is too thick, there may not be enough
voltage to pull the toner on the paper properly and can cause poor print quality.
To determine if your printer is able to print on cover stock, go to Printer specifications on page 23, locate your printer, and
review the supported paper type information. You can also view the supported media in the printer User’s Guide.
) against card stock metric weight (g/m2). If you look at the metric
2
) is
Card stock
10
Page 11

Card stock
Use the following table to compare the weights of various types of card stock.
Card stock weights comparison guide
Basis weight (lbs/ream)
Printing
Bond
Metric
equivalent
2
)
(g/m
75 20 50 – – – 50
90 24 60 – – – –
105 28 70 – – – –
108 29 – 40 – – –
118 31 8 0 – – – –
120 32 – – – 67 74
131 35 90 – – – –
135 36 – 50 – – –
431.8 x
558.8 mm
(17 x 22 in.)
Offset
635 x
965.2 mm
(25 x 38 in.)
Cover
508 x
660.4 mm
(20 x 26 in.)
Bristol
571.5 x
889 mm
(22.5 x 35 in.)
Index
Bristol
647.7 x
774.7 mm
(25.5 x 30.5 in.)
Tag
609.6 x
914.4 mm
(24 x 36 in.)
148 39 100 – – – –
163 43 – 60 – 90 100
176 47 120 65 – – –
199 53 – – 110 110 –
203 54 – – – – 125
Card stock weights may vary ± 5%.
Depending on the printer, material thicker than 0.30 mm (0.012 in.) may present feed reliability problems, and material
thicker than 0.17 mm (0.007 in.) may reduce print quality. Contact your supplier to determine the weight of any card stock
you currently use.
See the individual printer specifications in this document for more information about the card stock weights your printer
supports.
Grain orientation
Grain refers to the alignment of the paper fibers in a sheet of paper. Grain is either grain short, running the width of the
paper, or grain long, running the length of the paper.
The orientation of the grain contributes to the rigidity of card stock and affects feed reliability. The recommended grain
orientation depends on the weight of the stock and whether the printer feeds the stock short-edge first or long-edge first.
For lighter card stocks, grain long is recommended to reduce potential curl problems. Curl may decrease the ability of the
form to move reliably through the printer.
Most printers feed paper short-edge first. If your printer supports larger paper sizes, such as 11x17 in. or A3, it may feed
some paper sizes long-edge first. See your printer documentation for more information.
Grain orientation
11
Page 12

For materials fed short edge first:
Card stock
Grain short is recommended for stock heavier
than 135 g/m2
Feed
direction
Grain
direction
For materials fed long edge first:
Grain long is recommended for stock heavier
than 135 g/m2
Feed
direction
Grain long is recommended for stock lighter
than 135 g/m2
Feed
direction
Grain
direction
Grain short is recommended for stock lighter
than 135 g/m2
Feed
direction
Grain
direction
See the individual printer specifications in this document for more information about the recommended grain direction for
card stock you use with your printer.
Grain
direction
Coatings
Surface texture and coatings on card stock significantly affect toner adhesion (fuse grade), print quality, and feed reliability.
We recommend a vellum finish for the best printing performance. We do not recommend glossy coatings and slick surfaces
or surfaces that mimic laid finishes (glossy paper, not glossy card stock, is acceptable for some printers). Paper
smoothness also affects print quality. If the paper is too rough, the toner does not fuse to the paper properly; if the paper is
too smooth, it can affect feed reliability. We recommend smoothness to be between 100 and 400 Sheffield points (150 to
250 is optimal). Using media higher than 300 Sheffield could result in printing degradation.
Coatings
12
Page 13

Card stock
Offset powders
We do not recommend using offset powders or other foreign materials to speed drying. Offset powders are used by print
shops to prevent printed pages from sticking together. Powder is usually sprayed on the printed page right before it reaches
the stacker on the offset printing press. This powder provides an intermediate layer between two sheets of paper,
preventing ink transferring from one sheet to another.
Offset powders
13
Page 14

Labels
Labels (also called pressure-sensitive materials) are multi-ply materials consisting of a “sandwich” of various combinations
of face sheets (printable stock), adhesives, and removable protective backings (liners). The multiple layers can result in
thick, difficult-to-handle materials.
Labels are among the most difficult print materials for any printer to reliably feed and print. The heat, pressure, and paper
paths required by laser printers create a particularly difficult environment for printing labels. Temperatures near 225°C
(437°F) [temperatures vary between printers; check the section for your specific printer] and pressures to 25 psi can be
necessary for the fusing process. Heavy label stock can absorb heat, which in turn affects toner adhesion and print quality
and causes problems such as delamination.
Note: To prevent labels peeling off or delaminating, make sure the release strength of the labels you use is
sufficient to withstand the temperature and pressure extremes generated during printing.
Label characteristics
The materials used to construct labels have a wide range of properties that can affect printing. In addition to volatile
components in adhesive, volatiles are also in some label materials. We recommend that volatile emissions from the label,
up to 160°C (320°F), should be a minimal amount. These low boiling point volatiles can produce emissions when they are
heated in the fuse,r and they can potentially produce vapors which can cause damage to the printer. Preprinted inks can
also cause printer contamination, and may be present on one or both sides of the label sheet.
Observing recommended label design guidelines can minimize contamination as well as prevent other critical problems,
such as labels peeling off and causing jams in the printer, or the label or adhesive melting if the sheet stops in the fuser
during a paper jam.
Review label designs with a converter or vendor who is knowledgeable about labels and laser printer characteristics to
ensure you use labels suitable for your application.
Note: Before purchasing large quantities of labels, make sure you extensively test the labels with your
printer.
Printing on labels
Use full label sheets only. Partial sheets (with areas exposed by missing labels) can cause labels to peel off during printing,
resulting in a paper jam. Partial sheets can also contaminate your printer and cartridge with adhesive and can void the
printer and cartridge service warranties.
Do not feed labels through the printer more than once. Doing so may result in adhesive contamination to the cartridge and
other components.
Depending on your printer model and the number of labels you print, printing labels may require special printer
maintenance. (Look under “printer maintenance” in the index of your User’s Guide, publications CD, or Software and
Documentation CD for specific information about maintaining your printer.)
If you print large quantities of labels or other glossy print media on a Lexmark™ C750 or C752, replace the fuser housing
with a web oiler field upgrade kit (P/N 12G6307 for a 115 V printer, P/N 12G6308 for a 220 V printer).
Labels
14
Page 15

Labels
Duplexing paper labels
Due to the special construction of labels, they are not typically duplexed. However, if certain design, construction, and
usage guidelines are followed, you can print on both sides of the label sheet successfully.
When developing a paper label for duplexing, the converter should ensure the label design protects against contamination
or buildup. Contamination adversely affects paper feeding and causes paper jams in the printer.
We recommend labels used for duplexing have a non-adhesive border around the label area. In addition, make sure the
release strength is sufficient to withstand temperatures of 225°C (437°F) and pressures to 25 psi. This is particularly
important with a duplex application since the label is subjected to these extremes twice. Use label ties whenever possible.
These small uncut areas (approximately 1.6 mm or 0.06 in.) help stabilize the label sheet and prevent tearing at
perforations and die-cuts during printing. In addition, using ties helps prevent the labels from predispensing in the printer.
The slits and cuts in the labels expose the adhesives to the printer. For best results when duplexing labels, position the
label sheet so the slits and cuts are not aligned with the ribs in the duplex or redrive areas of the printer. (Figure 1 and
Figure 2 on page 16 illustrate the rib locations for the Optra S and the Optra T, respectively.) This eliminates any contact
points between the label adhesive and the printer, thereby preventing any adhesive contamination in the printer.
Other steps to ensure optimal printing include orienting the label in the tray so the label end is fed into the printer first and
using long grain paper. Long grain paper tends to feed more reliably than short grain paper, which tends to curl more easily.
As with any industry, product changes and improvements are constantly being developed. Therefore, if a converter
develops a short grain sheet for use with duplexed labels, test the sheet to make sure it performs satisfactorily. We
recommend testing any material with your application and printer before purchasing large quantities.
To use the duplex label application, you must install a special fuser wiper.
Printer Fuser wiper part number
S1855, T612, T614, T520, and T522 99A1082
T620 and T622 18A1467
T630, T632 and T634 56P2109
T64x, X644e, and X646e 40X2666
The wiper makes it possible to print on both sides of paper labels specifically designed for duplexing. In addition, you can
use the wiper to simplex paper labels and duplex paper in the same printer. When ordering a new cartridge, be sure to
order the cartridge that includes the correct fuser wiper.
20 mm
21 mm
27 mm
22 mm
15.5 mm
21.5 mm
28 mm
26 mm
17 mm
15 mm
Reference
plate
Figure 1. Optra S rib locations (rib width = 2mm)
Duplexing paper labels
15
Page 16

Labels
16 mm
11 mm
15 mm
13 mm
16 mm
17 mm
Figure 2. Optra T and Lexmark T rib locations (rib width = 2mm)
26 mm
18 mm
12 mm
20 mm
15 mm
12 mm
4.02 mm
Reference
Plate
Label components
Labels are composed of three basic parts: the liner, the adhesive, and the face sheet. Labels may also have topcoats that
affect printing. Choosing appropriate materials for each of these label components will help ensure reliable printing.
Liners
The liner, also known as the carrier or backing, is the material onto which the label is attached. The liner carries the label
through the printer and directly affects feed reliability. Liner weights and construction vary based on the printable face stock
used. (See Face sheet (printable stock) on page 17.) Tissue-backed, plain bond, or bond-like, porous, lay-flat liners are
preferred. Liners constructed for use in high speed laser printers (50 or more pages per minute) may not produce
acceptable results.
A liner should bend easily and snap back to its original flat state when released. If the form remains bent, it may cause
paper jams or damage to the edge of the sheet, particularly in earlier printer models using a corner buckler rather than an
auto compensator to separate the sheets. The following table shows which printers use a corner buckler and which use an
auto compensator.
Note: If your printer is not listed here, contact your Lexmark representative to verify which method your
printer uses to separate sheets of labels.
Printers using a corner buckler Printers using an auto compensator
• 4019, 4029, 4039, 4049
• Lexmark E220, E320, E321, E322, E323, T420,
W820, X422
• Optra 12L, 12R, Lxi, Lx, Rx
• Optra R+, Rt+, Lx+, Lxi+
• Optra C, Optra Color 1200, Optra N
• Optra M410, M412, W810
• C910, C912, C920
Some liner materials used in pressure-sensitive constructions are called label papers. Label papers are either M.F.
(machine finish) or E.F. (English finish) papers that are calendered, supercalendered, or coated on one side. Machine
• Lexmark E230, E232, E234(n), E330, E332n, C510,
C750, C752, T520, T522, T620, T622, T630, T632, T634,
T640, T642, T644, X215
• Optra S 1250, S 1650, S 2450
• Optra S 1255, S 1625, S 1855, S 2455
• Optra Se 3455
• Optra T610(n), T612(n), T614(n), T616(n)
Label components
16
Page 17

Labels
finishes have varying degrees of surface smoothness. The smoothness is determined by the number of times the paper
passes through the rollers (wet or dry) during manufacturing. An English finish is uncoated and low gloss in appearance.
Label papers may also be used as the face sheet for pressure-sensitive paper products, such as the materials used in dual
web forms construction.
Supercalendering produces high gloss surfaces that may be slick. Some supercalendered liners are difficult for printers to
pick and feed reliably. We do not recommend using supercalendered liners designed for high-speed laser printers (50 or
more pages per minute).
Some pressure-sensitive constructions use Kraft liners or bleached Kraft liners. Kraft liners are made from sulfate pulp and
are M.F. or M.G. (machine glazed). Most machine glazed papers have a high gloss appearance. High gloss, glazed
surfaces may increase skew and are more difficult for the printer feed mechanism to handle reliably. Some Kraft liners may
produce acceptable results; however, we strongly recommend extensive testing of pressure-sensitive constructions using
Kraft liners.
Tissue-backed or plain bond liners reduce toner contamination inside the printer and improve feed performance. Slick, nonporous liners are harder to feed and increase toner buildup in the fuser and on the backup roll. Rough backings, on the
other hand, can increase paper path friction, which can cause skew and paper jams. The face material of the liner needs to
have a melt temperature that can also withstand the fuser temperatures of nearly 225°C (437°F). Since there is a stripped
area of a maximum of 3 mm, this can expose the face material to these temperatures and could cause melting or
contamination in the fuser.
Excessive paper dust or chaff associated with the liner may affect print quality. If a liner material produces excessive paper
dust or chaff during the conversion process, some of this debris may be packaged with the material and end up in the
printer. Liner materials that produce excessive paper dust or chaff as they feed through the printer may also affect print
quality.
Your forms supplier can provide additional information on liners.
Adhesives
There are three basic types of label adhesives: removable, permanent, and semi-permanent (cold temp). All types, with
proper design, can be used with your printer. Acrylic-based adhesives are generally preferred for cut sheet label printers.
The major adhesive-related printing problem is printer and cartridge contamination. The adhesives are semi-liquid and may
contain volatile components. If the sheet jams in the fuser, the adhesive can melt, thereby contaminating parts of the printer
or releasing fumes. To avoid exposing adhesive to the paper path guides, drive rollers, charge roller, photoconductor drum,
transfer roller, and detack fingers, use full label sheets.
Zone coating means placing the adhesive only where needed. Paper labels and integrated forms typically use zone
coating. In addition, a non-adhesive border of 1 mm (0.04 in.) around the outside edge of the label sheet generates good
results. Check with your adhesive manufacturer or forms supplier for more information about designing labels for your
printer.
A stripped edge matrix along the outer border of the stock, combined with adhesive that does not ooze, helps prevent
adhesive contamination. This design requires a stiffer backing material to prevent damage when the sheet is aligned on the
reference edge. Generally, vinyl and polyester labels are well-suited for this design. Paper and dual web designs may
require testing to determine which backing produces good results. (See Label design guidelines on page 18 for more
information on matrices.)
Make sure the release strength is adequate so labels stay attached to the liner and do not peel off in the printer. Adhesives
must be able to withstand pressures to 25 psi and fuser temperatures of 225°C (437°F) without delaminating, creating
hazardous fumes, or oozing around edges of labels, perforations, or die-cuts. Shear strength should be strong enough to
prevent adhesive stringers. Contact your forms supplier for additional information.
Face sheet (printable stock)
Paper, vinyl, and polyester are the most common materials used for printable stock. Your forms supplier can provide
information on whether the printable stock you want to use can withstand temperatures of 225°C (437°F) [temperatures
Label components
17
Page 18

Labels
vary between printers; check the section for your specific printer] and pressures to 25 psi. Carefully test the stock to ensure
it functions satisfactorily with your printer.
Topcoats
Topcoats for non-paper labels may be either water based or solvent based. Avoid topcoats containing chemicals that emit
hazardous fumes when heated or exposed to pressure. Topcoats affect the print quality, feed reliability, and adhesion of
toner to the face sheet. Topcoats must be able to withstand temperatures up to 225°C (437°F) [temperatures vary between
printers; check the section for your specific printer] and pressures up to 25 psi for 100 milliseconds to prevent fuser
damage.
Water-based topcoats tend to be more conductive than solvent-based topcoats and are more difficult to fuse. With some
water-based topcoats and heavy liners, the fuse grade may fall below acceptable levels. Solvent-based topcoats tend to be
lower in conductivity than water-based topcoats. With some solvent-based topcoats, fuse grade is within acceptable levels
when heavier liners are used.
Print quality may degrade when using topcoats on labels with heavier liners. Using a lighter liner may reduce the
appearance of splatter. Test forms carefully with your printer to be sure the topcoat used performs acceptably for your
application.
Label design guidelines
Labels with a stripped edge matrix have the area around the outer edge of the cut sheet removed. Labels with a total strip
matrix have the unneeded portion of the die-cut stock around the labels (including a portion between the labels) removed to
make it easier to peel the labels from the backing.
Butt cut labels are cut flush to one another, with no extra area between them. Avoid using butt cut labels without a stripped
edge matrix.
Die-cut labels are cut with a non-print area between each label. For best results, do not print within 2.3 mm (0.090 in.) of
the edge of the label, of the perforations, or of the die-cuts of the label.
If you are using a butt cut or die-cut label, make sure adhesive contamination does not occur. Labels use varying levels and
types of adhesive, as well as a variety of liner materials and face stocks. Adhesive can ooze with all label stocks. Make
sure die-cuts are free of adhesive stringers. Zone coating or pattern adhesive with a 1 mm (0.04 in.) or larger non-adhesive
border provides the greatest protection from adhesive contamination.
If zone coating is not used, we recommend a stripped edge matrix. The stripped edge matrix varies with the type of face
stock, liner, and adhesive materials. See the following table for stripped edge matrix guidelines. Measurements may vary
±0.5 mm.
Stripped edge matrix guidelines
Total weight
Face type
1
Paper
(Cut Sheet or
Dual Web)
Vinyl 265—300 g/m
Polyester
and other face
materials
1
Use a non-oozing adhesive.
2
Must be 1.6 mm (0.0625 in.) in some circumstances. See Vinyl and polyester labels on page 22.
of label
140—180 g/m
Varies 3.0 mm (0.125 in.)
2
2
Edge matrix
removal
1.6 mm (0.0625 in.)
1.6 mm (0.0625 in.)
3.0 mm (0.125 in.)
2.4 mm (0.094 in.)
2.4 mm (0.094 in.)
Location of strip
215.9 mm (8.5 in.) at leading edge
279.4 mm (11.0 in.) at driver edge
2
2
215.9 mm (8.5 in.) at leading edge
279.4 mm (11.0 in.) at driver edge
215.9 mm (8.5 in.) at leading edge
279.4 mm (11.0 in.) at driver edge
Label design guidelines
18
Page 19

Labels
Using cut sheet labels with adhesive applied to the edge of the sheet will contaminate your printer and your cartridge and
could void your printer and cartridge warranties.
When using pressure-sensitive materials without zone coating, choose butt cut labels without any stringers and with a
stripped edge matrix. If a total strip matrix is in the design for the final product, print before removing the matrix. If the matrix
must be removed before printing, round all corners and make sure adhesive is not exposed.
Figure 3 on page 19 illustrates a recommended label design for Optra plus printers as well as the 4039, 4029, and 4019
laser printers. The Non-print area may vary, depending on the printer model.
Figure 4 on page 20 illustrates a recommended label design for Optra S, Optra T, and Lexmark T laser printers, which use
a different paper picking mechanism.
Leading edge
8.5 in.
215.9 mm
0.094 in.
2.4 mm
Liner edge
Stripped edge
0.125 in.
3 mm
Driver edge
11 i n .
279.4 mm
0.06 in.
1.6 mm
Perforation end
Liner edge
waste strip 6.35 mm (0.25 in.)
waste strip
0.25 in.
6.35 mm
0.5 in.
12.7 mm
0.25 in.
6.35 mm
Non-print area
0.33 in.
8.38 mm
Top perforation
0.33 in.
8.38 mm
Non-print area
Non-print area Non-print area
(Not drawn to scale)
Figure 3. Design guidelines, vinyl label for Optra plus, 4039, 4029, and 4019
printers
Label design guidelines
19
Page 20

0.094 in.
2.4 mm
Labels
Leading edge
8.5 in.
215.9 mm
Liner edge
Stripped edge
0.125 in.
3 mm
Driver Edge
11 i n .
279.4 mm
0.06 in.
1.6 mm
Perforation end
Liner edge
0.25 in.
6.35 mm
0.79 in.
20 mm
0.25 in.
6.35 mm
Non-print area
0.33 in.
8.38 mm
Top perforation
0.33 in.
8.38 mm
Non-print area
Non-print area Non-print area
(Not drawn to scale)
Figure 4. Design guidelines, vinyl label for Optra S, Optra T, and Lexmark T
printers
Cut sheet paper labels
Generally, cut sheet paper labels work well with your printer. Coating or sizing to make the paper liquid-resistant decreases
toner adhesion and increases the risk of toner contaminating the fuser. At a minimum, paper labels should be equivalent in
weight and rigidity to a 20 lb xerographic, bond paper.
Label design guidelines
20
Page 21

Labels
Dual web forms
Constructing dual web forms involves joining together rolls of two different materials (usually pressure-sensitive paper and
bond paper) and then converting to a cut sheet product. This construction requires a stripped edge matrix. The liner must
be rigid enough to withstand the pick force of the printer.
The two materials must be thin enough for the sheet to lie flat in the paper tray. Orient the form in the tray so that the
pressure-sensitive area feeds into the printer first. The form should have no adhesive exposed in the overlay area or
anywhere along the front or back of the form. We recommend designing a non-adhesive strip with a minimum width of
1 mm (0.04 in.) along the edges of the overlay.
To help prevent material from slipping in the fuser, we recommend knurling, which roughens up the exposed silicon area at
the glue joint.
See Figure 5 on page 21 for an illustration of the recommended dual web form design. The Non-print area may vary,
depending on the printer model.
The face sheet of a dual web form is usually a paper pressure-sensitive product; therefore, the guidelines for paper labels
are applicable to dual web forms.
Leading edge
(8.5 in.)
Liner edge
Stripped edge
0.0625 in.
1.6 mm
Reference edge
(11 in.)
0.0625 in.
1.6 mm
0.25 in.
6.35 mm
Non-print area
Pressure-sensitive
Paper
(Not drawn to scale)
Non-print area
0.33 in.
8.38 mm
Overlay
Figure 5. Design guidelines, dual web form
Label design guidelines
21
Page 22

Labels
Vinyl and polyester labels
Vinyl labels work well within specified design parameters. Vinyls are heat-sensitive, so the liners need to be thick enough to
absorb excess heat and prevent melting. A total strip matrix may cause adhesive contamination. Thin liners or weak pull
strength may lead to labels peeling off the form inside the printer, which will require printer servicing. See Figure 3 on
page 19 for an illustration of a vinyl label design for Optra plus printers and Figure 4 on page 20 for Optra S, Optra T, and
Lexmark T printers.
As illustrated on page 20, a leading and trailing edge stripped area is recommended to be a maximum of 3 mm. This area
is recommended to prevent adhesive being close to the edge, which can contaminate your printer. Certain materials used
in label construction, which have liner face melt temperatures lower than the fuser temperature, may require the leading
and trailing edge stripped areas to be 1.6 mm maximum due to feeding problems. It is preferred that the liner face be
constructed with material that can withstand our fuser temperatures, which eliminates the need for changing the stripped
areas from 3 mm to 1.6 mm. If a 1.6 mm stripped area is used, it is very important that the 1.6 mm tolerance be held tightly.
With a stripped area of less than 1.6 mm, it is highly possible that adhesive contamination will occur.
Vinyls are non-absorbing, which leads to toner build-up in the fuser that requires special maintenance. See “maintenance
procedures” in the index for specific information about maintaining your printer. Vinyls may require a topcoat to ensure good
toner adhesion.
Polyester labels are less heat-sensitive but are also non-absorbing. Backings for polyester labels can be thinner, but
requirements for coatings and cleaning are similar to vinyl labels.
It is recommended that when you run vinyl labels, you install a special oil fuser cleaner, P/N 99A0725 or 40X2665. When
you order a new cartridge, be sure to order the cartridge that will include the correct fuser cleaner.
Integrated forms
To create integrated forms, the converter uses hot melt adhesives to apply the label adhesive and liner to a base material
(generally paper). Oil bleed, recognizable by a discolored face sheet, can be a problem with these forms. Oil may also
migrate from the top of the liner to the back surface of the liner while it is on the roll, before the conversion process takes
place. The forms created from this material may then be slick, and the pick mechanism of your printer may be unable to
successfully move all the sheets from the tray into the printer. Jamming and misfeeds increase when oil is present on the
back of the liner.
The adhesive on these forms is commonly patterned on two or four sides (that is, the forms have a non-adhesive border on
either two or four edges). We recommend designing a 1 mm (0.04 in.) non-adhesive border (zone coated) on all four sides.
When printing on integrated forms with a long grain base material, orient the form in the tray so the paper portion of the
form feeds into the printer first. Orient the pressure-sensitive portion of the form toward the portrait left edge. For integrated
forms with a short grain base material, orient the form in the tray so the pressure-sensitive portion feeds into the printer first.
Due to the unique construction of integrated forms, you may experience stacking problems in the output bin. Test some
forms before purchasing large quantities. Contact your Lexmark marketing representative if you experience stacking
problems with these forms.
Label design guidelines
22
Page 23
Printer specifications
To locate your printer, select one of the links in the Models column or go to the page number.
Model series Models
C series Lexmark C510 on page 48
E series Lexmark E120 on page 70
Optra series Optra C on page 94
Lexmark C520, C522, C524 on page 36
Lexmark C720 on page 54
Lexmark C750 on page 56
Lexmark C752 on page 60
Lexmark C760, C762 on page 26
Lexmark C910 on page 64
Lexmark C912 on page 46
Lexmark C920 on page 39
Optra C on page 94
Optra C710 on page 95
Lexmark E220 on page 66
Lexmark E230, E232, E234(n), E330, and E332n on page 69
Lexmark E238, E240, E240n, E340, E342n on page 25
Lexmark E320, E322 on page 67
Lexmark E321, E323 on page 68
Optra E310, E312 on page 98
Optra E, Ep on page 99
Optra Es special media printer on page 100
Optra C710 on page 95
Optra Color 1200 on page 97
Optra E310, E312 on page 98
Optra E, Ep on page 99
Optra Es special media printer on page 100
Optra K 1220 on page 102
Optra M410, M412 on page 103
Optra N on page 105
Optra plus, 4039, 4029, 4019, WinWriter 600 printers on page 106
Optra S on page 110
Optra SC 1275 on page 116
Optra T on page 117
Optra W810 on page 122
T series Lexmark T430 on page 71
Lexmark T420 on page 73
Lexmark T520, T522 on page 76
Lexmark T620, T622,
Lexmark T630, T632, T634 on page 86
Lexmark T640, T642, T644 on page 41
Optra T on page 117
W series Optra W810 on page 122
Lexmark W812 on page 91
Lexmark W820 on page 92
Lexmark W840 on page 45
Printer specifications
23
Page 24

Printer specifications
Model series Models
WinWriter™ 600 Optra plus, 4039, 4029, 4019, WinWriter 600 printers on page 106
X series Lexmark X215 on page 52
Lexmark X422 on page 50
Lexmark X644e, X646e on page 30
Lexmark X850, X852e, X854e on page 34
Printer specifications
24
Page 25
Printer specifications
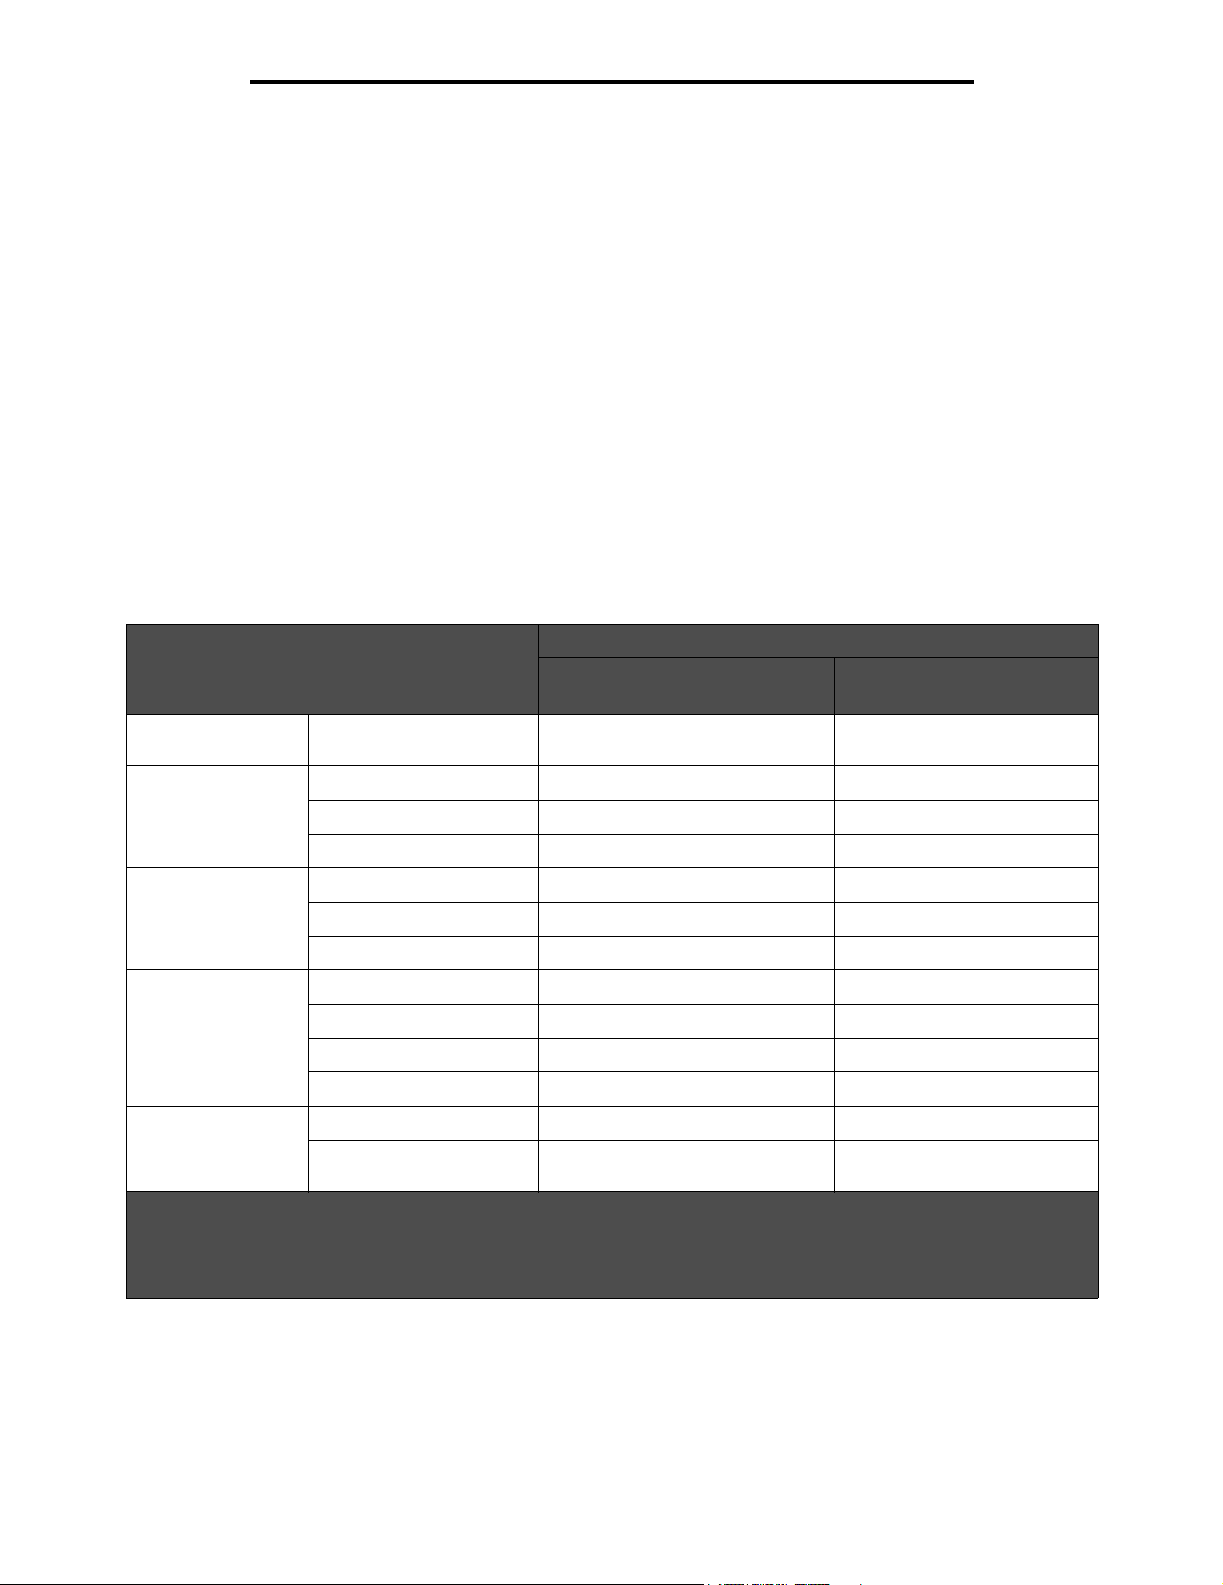
Lexmark E238, E240, E240n, E340, E342n
Limit label printing to occasional use of paper office labels
designed for laser printers. We do not recommend using vinyl
or polyester labels.
The printer supports paper and label stock from 60—90 g/m
and index card stock up to 43 lb (163 g/m2). You can load up to
E238, E240, E240n
The following table lists the maximum basis weights supported by Tray 1, Tray 2, and the manual sheet feeder.
E340, E342n
Lexmark E238, E240, E240n, E340, E342n: Overview of card stock and label support
Paper source
Tray 1 – – – 163 g/m
Tray 2 – – – 163 g/m
Manual Feed 163 g/m
Note: The E238 printer does not support a second drawer option.
Index Bristol Tag Cover Paper Vinyl
2
50 label sheets in tray 1. Card stock must be sent through the
manual feeder one sheet at a time.
Card Stock Labels
2
–
2
–
163 g/m
2
– 163 g/m2 –
2
For paper and transparency specifications, refer to the printer publications CD.
Media specifications
Labels Width: 89 to 216 mm (3.5 to 8.5)
Length: 210 to 356 mm (8.27 to 14 in.)
Weight: Up to 163 g/m2 (43 lb)
Thickness: Up to 0.25 mm (0.01 in.)
Smoothness: 100 to 400* Sheffield
* 150—250 Sheffield is optimal. Using media higher than 300 Sheffield could result in printing degradation.
2
Card stock Weight: From 120 to 163 g/m
From 75 to 163 g/m
Note: To minimize curl, use the rear exit when printing on card stock and labels.
Index Bristol (16—90 lb)
2
Tag (50—100 lb)
Maintenance procedures
If the print quality begins to degrade when printing sheets of labels, we suggest you:
Print 5 sheets of paper, wait approximately 5 seconds, then print 5 more sheets of paper.
To maintain printer feeding reliability, repeat this cleaning process every time you replace the print cartridge, or more often
with some media. Failure to follow maintenance procedures could cause jamming, poor print quality, feeding problems, and
fuser problems.
Lexmark E238, E240, E240n, E340, E342n
25
Page 26

Printer specifications
Lexmark C760, C762
The Lexmark C760 and C762 prints on many labels designed for use with
laser printers.
The following table lists the maximum basis weights supported by the trays
and the multipurpose feeder. More detailed specifications appear on the
following pages.
Note: The optional 2000-sheet drawer supports paper only.
Lexmark C760 and C762: Overview of card stock and label support
Card stock Labels
Paper source
Tray 1 163 g/m
500-sheet drawer 163 g/m
Multipurpose feeder 163 g/m
1
Vinyl labels are supported only when printing environment and media are 20—32.2°C (68—90°F).
2
The skew performance of heavy vinyl labels may be enhanced by feeding from an optional 500 sheet drawer if
placement of the image is critical.
Index Bristol Tag Cover Paper Vinyl
2
2
2
163 g/m
163 g/m
163 g/m
2
2
2
176 g/m
176 g/m
176 g/m
2
2
2
180 g/m
180 g/m
199 g/m2 260 g/m
2
2
300 g/m2
300 g/m2
1, 2
2
For paper and transparency specifications, refer to the printer publications CD.
The following table indicates the paper sizes each tray supports
Media specifications
Labels Thickness: 0.102 to 0.305 mm (0.004 to 0.012 in.)
Smoothness: 100 to 400* Sheffield
* 150—250 Sheffield is optimal. Using media higher than 300 Sheffield could result in printing degradation.
Standard trays
The Lexmark C760 and C762 paper feeding mechanism uses advanced technology that enhances feeding reliability. The
Lexmark C760 and C762 trays, which hold approximately 500 sheets of 20 lb (75 g/m
supported media.
2
) bond paper, reliably feed all
Pick roller technology
The Lexmark C760 and C762 uses an auto compensator to pick the media rather than the corner buckler system used by
earlier printer models.
The Lexmark C760 and C762 trays have two rollers that touch the media in two places (see Figure 11 on page 61). Avoid
placing deep perforations in these areas since the media may nest, causing multiple sheet feeds. Perforations that could
cause nesting and tenting should fall outside the 0.31—1.05 in. area on the leading edge of the media. (This is different from
the 0.50 in. we recommend leaving at the top of the form for printers with a corner buckler system.) You may want to use
micro-perfs to avoid nesting problems. See Perforations and die-cuts on page 8 for more information.
Lexmark C760, C762
26
Page 27

1.05 in.
Printer specifications
Pick roller location
0.31 in.
1.34 in.
1.93 in.
4.84 in.
5.43 in.
Direction of feed
Figure 6. Location of pick rollers
Lexmark C760, C762
27
Page 28
Printer specifications
Labels are one of the most difficult print materials for laser printers. A fuser equipped with a web oiler may be required for
label applications to optimize feed reliability. Contact your local service representative for ordering information.
When printing on labels:
• Using the printer operator panel, set the Paper Type to Labels in the Paper Menu. For vinyl and other heavy
labels, set the Labels Weight (under the Paper Weight menu) to Heavy, and set the Labels Texture (under the
Paper Texture menu) to Smooth.
• Do not load labels together with paper or transparencies in the same paper tray. Combining print materials can
cause feeding problems.
• Use full label sheets. Partial sheets may cause labels to peel off during printing, resulting in a paper jam. Adhesive
material may contaminate your printer. It could also void your printer and cartridge warranties.
When feeding labels, the number of labels per sheet can affect registration more than basis weight. Typically, the more
labels per sheet, the better the registration.
When printing on card stock:
• Set the Paper Type to Card Stock in the Paper Menu.
• Do not use card stock that is creased. It may cause paper jams.
Print material specifications
Range or maximum weight supported
500-sheet tray and
Print material
3
Paper
(grain direction1)
Card stock
(grain Long
1
)
Xerographic or
business paper
Index Bristol 163 g/m2 (90 lb) 163 g/m2 (90 lb)
Tag 163 g/m
Cover 176 g/m
Card stock
(grain Short
1
)
Index Bristol 199 g/m2 (110 lb) 199 g/m2 (110 lb)
Tag 203 g/m
Cover 216 g/m
Labels Paper 180 g/m
Dual-web paper 180 g/m
4
Vinyl
Polyester 220 g/m
Integrated forms Pressure-sensitive area
2
Paper base (grain long) 75 to 135 g/m
optional 500-sheet drawer
60 to 176 g/m
2
(16 to 47 lb bond)
2
(100 lb) 163 g/m2 (100 lb)
2
(65 lb) 176 g/m2 (65 lb)
2
(125 lb) 203 g/m2 (125 lb)
2
(80 lb) 216 g/m2 (80 lb)
2
(48 lb bond) 199 g/m2 (53 lb bond)
2
(48 lb bond) 199 g/m2 (53 lb bond)
300 g/m2 (92 lb liner) 260 g/m2 (78 lb liner)
2
(59 lb bond) 220 g/m2 (59 lb bond)
140 to 175 g/m
2
2
(20 to 36 lb bond)
1
See Grain direction on page 63 for specific recommendations.
2
Pressure-sensitive area must enter the printer first.
3
Paper less than 75 g/m2 is supported only when the relative humidity is less than 60% and is not supported in duplex.
4
Vinyl labels are supported only when printing environment and media are 20—32°C (68—90°F).
Multipurpose feeder
60 to 176 g/m
2
(16 to 47 lb bond)
140 to 175 g/m
75 to 135 g/m
2
2
(20 to 36 lb bond)
Lexmark C760, C762
28
Page 29

Printer specifications
Grain direction
Grain refers to the alignment of the paper fibers in a sheet of paper. Grain is either grain long, running the length of the
paper, or grain short, running the width of the paper.
For 60 to 135 g/m2 (16 to 36 lb bond) paper, we recommend grain long stock. For papers heavier than 135 g/m2, grain short
is preferred.
Maintenance procedures
If the print quality begins to degrade when printing sheets of vinyl labels, we suggest you follow the three cleaning steps
below:
1 Print 5 sheets of paper.
2 Wait approximately 5 seconds.
3 Print 5 more sheets of paper.
To maintain printer feeding reliability, repeat this cleaning process every time you replace the black print cartridge, more
often with some media. Failure to follow maintenance procedures could cause jamming, poor print quality, feeding
problems, and fuser problems.
Troubleshooting
The following table provides solutions for some common card stock and label problems. See your printer documentation for
more troubleshooting information.
Solutions to printing problems
Problem Solution
Print on heavy stock is blurred or
out of focus.
Toner rubs off the page. Make sure the Paper Type setting is appropriate for your print material.
Printing shows voids. Change the Paper Type to Plain Paper.
If you print large quantities of labels or other glossy print media, replace the fuser housing with a web oiler (P/N 56P1555
for a 115 V printer or P/N 56P1556 for a 220 V printer).
Make sure the Paper Type setting is appropriate for your print material. (Card stock in
excess of 203 g/m [54 lb bond] may not produce acceptable print results.)
Print 5 sheets of paper, wait approximately 5 seconds, and then print 5 more sheets of
paper to remove any toner that may have accumulated.
2
Use a lighter weight stock. (The material being used exceeds 300 g/m
Print 5 sheets of paper, wait approximately 5 seconds, and then print 5 more sheets of
paper to remove any toner that may have accumulated.
Print 5 sheets of paper, wait approximately 5 seconds, and then print 5 more sheets of
paper to remove any toner that may have accumulated.
).
Lexmark C760, C762
29
Page 30

Printer specifications
Lexmark X644e, X646e
The Lexmark X644e and X646e print on many labels designed for use with
laser printers.
The following table lists the maximum basis weights supported by the trays
and the multipurpose feeder. More detailed specifications appear on the
following pages.
Note: Scanning large quantities of labels is not recommended.
Lexmark X644e and X646e: Overview of card stock and label support
Card stock Labels
Grain
Paper source
direction
Integrated tray (grain long)
(grain short)
Optional 250sheet drawer
Optional 500sheet drawer
Multipurpose
2
feeder
1
Printing labels on the X644e and X646e, require a special label fuser cleaner that prevents duplexing.
(grain long)
(grain short)
(grain long)
(grain short)
(grain long)
(grain short)
Index
Bristol
163 g/m
199 g/m
120 g/m
163 g/m
163 g/m
199 g/m
120 g/m
163 g/m
2
2
2
2
2
2
2
2
Tag Cover Paper
163 g/m
203 g/m
120 g/m
163 g/m
163 g/m
203 g/m
120 g/m
163 g/m
2
2
2
2
2
2
2
2
176 g/m
216 g/m
135 g/m
176 g/m
176 g/m
216 g/m
135 g/m
176 g/m
2
2
2
2
2
2
2
2
Dual-web
paper
180 g/m2180 g/m2220 g/m2300 g/m2
163 g/m2 163 g/m2220 g/m2260 g/m
180 g/m2180 g/m2220 g/m2300 g/m2
163 g/m2 163 g/m2220 g/m2260 g/m
1
Polyester Vinyl
It is recommended that when you run vinyl labels, you install a special oil fuser cleaner, P/N 40X2665. When you order
a new label cartridge, order the X644H01A high yield return print cartridge or X644X01A extra high yield print cartridge.
It is possible to duplex certain labels that have been specifically designed for this application. To duplex labels, consult
the Lexmark “Converter Lists” to see which converters have successfully developed this type of label, and you must
install a special fuser wiper. The wax wiper that is used with the X644e and X646e is P/N 40X2666 (Cartridges
designed for duplex label printing contain two wax wipers. Change the wax wiper at the halfway point of your normal
cartridge usage to provide additional cleaning and optimize performance.)
2
Due to label design characteristics, unacceptable feeding may be experienced from the multipurpose feeder.
2
2
Media specifications
Labels Thickness: 0.102 to 0.305 mm (0.004 to 0.012 in.)
Smoothness: 100 to 400* Sheffield
* 150—250 Sheffield is optimal. Using media higher than 300 Sheffield could result in printing degradation.
Card stock Weight: Up to 199 g/m
Up to 203 g/m
2
Index Bristol (90 lb)
2
Tag (100 lb)
Lexmark X644e, X646e
30
Page 31

Printer specifications
Standard trays and special trays
The Lexmark X644e and X646e paper feeding mechanism uses advanced technology that enhances feeding reliability.
The standard Lexmark X644e, and X646e trays hold 250 or 500 sheets of bond paper and reliably feeds all media tested
according to the guidelines specified under Dimensions on page 7.
For those difficult-to-print sizes, such as 3-inch x 5-inch index cards, Lexmark offers a variety of special media trays and
drawers.
Note: Optional 250-sheet Universally Adjustable Trays can be used to print forms with a minimum length of
5 inches when installed either in the integral tray location or in a 250-sheet drawer under a 250-sheet
integral tray. Less than 7 inches is not supported from a 400-sheet universally adjustable tray..
Standard and special trays
Source Part number
250-Sheet Mild Special Media Tray 20G1237
250-Sheet Aggressive Special Media Tray 20G1230
250-Sheet Mild Special Media Drawer 20G1236
250-Sheet Aggressive Special Media Drawer 20G1229
250-Sheet Universally Adjustable Tray 20G1224
250-Sheet Universally Adjustable Drawer 20G1223
500-Sheet Mild Special Media Tray 20G1240
500-Sheet Mild Special Media Tray + Drawer 20G1239
500-Sheet Aggressive Special Media Tray 20G1227
500-Sheet Aggressive Special Media Tray + Drawer 20G1226
400-Sheet Universally Adjustable Tray 20G1217
400-Sheet Universally Adjustable Tray + Drawer 20G1218
Lexmark X644e, X646e
31
Page 32

Printer specifications
Pick roller technology
The Lexmark X644e and X646e printers use an auto compensator to pick the media from the tray. The auto compensator
has two rollers that touch the media (see Figure 14 on page 88). Avoid placing deep perforations in these areas since the
media may nest, causing multiple sheet feeds. Perforations that could cause nesting and tenting should fall outside the
0.3—0.79 in. area on the leading edge of the media. (This is different from the 0.50 in. we recommend leaving at the top of
the form for printers with a corner buckler system.) You may want to use micro-perfs to avoid nesting problems. See
Perforations and die-cuts on page 8 for more information.
Pick roller location
0.31 in.
0.79 in.
1.34 in.
1.93 in.
4.84 in.
5.43 in.
Direction of Feed
Figure 7. Location of pick rollers
Label printing
Labels are one of the most difficult print materials for laser printers. A special fuser cleaner should be used for label
applications to optimize feed reliability. See your printer documentation for information on ordering additional label fuser
cleaners.
When printing on labels:
• Set the Paper Type to Labels in the Paper Menu. For vinyl and other heavy labels, set the Paper Type to Vinyl
Labels.
Note: When Paper Type is set to Vinyl Labels, the printer reduces the printing speed to ensure acceptable
printing.
• Do not load labels together with paper or transparencies in the same paper tray. Combining print materials can
cause feeding problems.
• Use full label sheets. Partial sheets may cause labels to peel off during printing, resulting in a paper jam. Adhesive
material may contaminate your printer. It could also void your printer and cartridge warranties.
Lexmark X644e, X646e
32
Page 33

Printer specifications
When feeding labels, the number of labels per sheet can affect registration more than basis weight. Typically, the more
labels per sheet, the better the registration.
When printing on card stock:
• Set the Paper Type to Card Stock in the Paper Menu.
• Do not use card stock that is creased. It may cause paper jams.
Grain direction
Grain refers to the alignment of the paper fibers in a sheet of paper. Grain is either grain long, running the length of the
paper, or grain short, running the width of the paper.
For 60 to 135 g/m2 paper, we recommend grain long stock. For papers heavier than 135 g/m2, grain short is preferred. For
the multipurpose feeder, we recommend 60 to 135 g/m2 paper, grain long. If you feed papers heavier than 135 g/m2 from
the multipurpose feeder, grain short is preferred. For more information about grain direction, see Grain orientation on
page 11.
Maintenance procedures
If the print quality begins to degrade when printing sheets of vinyl labels, we suggest you follow the three cleaning steps
below:
1 Print 5 sheets of paper.
2 Wait approximately 5 seconds.
3 Print 5 more sheets of paper.
To maintain printer feeding reliability, repeat this cleaning process every time you replace the print cartridge, more often
with some media. Failure to follow maintenance procedures could cause jamming, poor print quality, feeding problems, and
fuser problems.
Troubleshooting
The following table provides solutions for some common card stock and label problems. See your printer documentation for
more troubleshooting information.
Solutions to printing problems
Problem Solution
Print on heavy stock is
blurred or out of focus.
Toner rubs off the page. Make sure the Paper Type setting is appropriate for your print material.
Make sure the Paper Type, Paper Weight, and Paper Texture settings are appropriate for
your print material. (Card stock in excess of 203 g/m
results.)
Print 5 sheets of paper, wait approximately 5 seconds, and then print 5 more sheets of
paper to remove any toner that may have accumulated.
Use a lighter weight stock. (The material being used exceeds 300 g/m
2
may not produce acceptable print
2
.)
Print 5 sheets of paper, wait approximately 5 seconds, and then print 5 more sheets of
paper to remove any toner that may have accumulated.
Printing shows voids. Change the Paper Type to Plain Paper.
Print 5 sheets of paper, wait approximately 5 seconds, and then print 5 more sheets of
paper to remove any toner that may have accumulated.
Lexmark X644e, X646e
33
Page 34

Printer specifications
Lexmark X850, X852e, X854e
The Lexmark X850, X852e, and X854e prints on many labels designed for
use with laser printers.
The following table lists the maximum basis weights supported by the trays
and the multipurpose feeder. More detailed specifications appear on the
following pages.
Note: Scanning large quantities of labels is not recommended.
Lexmark X850, X852e, and X854e: Overview of card stock support
Card Stock
Paper Source
500-sheet trays (grain long) 163 g/m
500-sheet trays (grain short) 199 g/m
Manual bypass feeder (grain long) Up to 163 g/m
Manual bypass feeder (grain short)
Manual bypass feeder* Up to 163 g/m
Index Bristol Tag Cover
2
163 g/m2 176 g/m
2
2
2
203 g/m2
Up to 163 g/m2 216 g/m2
Up to 163 g/m
2
2
–
Lexmark X850, X852e, and X854e: Overview of label support
Print media source
Label type
Paper
Paper tray 1 and 2 Manual bypass feeder*
9
9 - indicates support X - indicates no support
9
Media specifications
Labels Width: 210 to 216 mm (8.3 to 8.5 in.)
Length: 279 to 297 mm (11 to 11.7 in.)
Weight: Up to 163 g/m2
Thickness: Up to 0.25 mm (0.01 in.)
Smoothness: 100 to 400* Sheffield
* 150—250 Sheffield is optimal. Using media higher than 300 Sheffield could result in printing degradation.
Card stock Weight: Up to 163 g/m2
Lexmark X850, X852e, X854e
34
Page 35

Printer specifications
Use only materials recommended for use with laser printers.
To prevent specialty media sheets from sticking together, remove each sheet from the output bin as it is printed.
When printing on labels:
• Set the Paper Type to Labels from the printer driver.
• Use standard size products (either A4 or Letter).
• Do not use label sheets with a slick backing material.
• Do not print within 1 mm (0.040 in.) of the die cut.
• Use full label sheets. Partial sheets may cause labels to peel off during printing, resulting in a paper jam. Partial
sheets will also contaminate your printer and your cartridge with adhesive, and could void your printer and
cartridge warranties.
• Use labels that can withstand temperatures of 180°C (356°F) without sealing, excessive curling, wrinkling, or
releasing hazardous emissions.
• Verify that your label adhesive material can tolerate a fusing temperature of 180°C (356°F) for 0.1 second.
• Use labels that can withstand pressure of 25 pounds per square inch (psi).
• Do not print within 1 mm (0.040 in.) of the edge of the label, of the perforations, or between die-cuts of the label.
• Do not use label sheets that have adhesive to the edge of the sheet. We recommend zone coating of the adhesive
at least 1 mm (0.040 in.) away from edges. Adhesive material will contaminate your printer and could void your
warranty.
• If zone coating of the adhesive is not possible, a 3 mm (0.125 in.) strip should be removed on the leading and
driver edge, and a non-oozing adhesive should be used.
• Remove a 3 mm (0.125 in.) strip from the leading edge to prevent labels from peeling inside the printer.
• Portrait orientation is preferred, especially when printing bar codes.
• Do not use labels that have exposed adhesive.
• Do not use labels that are separating from the backing sheet or are wrinkled, bubbled, or otherwise damaged.
• Do not load a sheet of labels through the machine more than once.
• Load labels into the manual bypass feeder with the recommended print side faceup and the top edge going in first.
When printing on card stock:
• Set the Paper Type to Card Stock from the printer driver.
• Do not use preprinted card stock manufactured with chemicals that may contaminate the printer. Preprinting
introduces semi-liquid and volatile components into the printer.
• Do not use card stock that is creased. It may cause paper jams.
• We recommend the use of grain short card stock.
• Load card stock into the manual bypass feeder with the recommended print side faceup and the top edge going in
first.
Lexmark X850, X852e, X854e
35
Page 36

Printer specifications
Lexmark C520, C522, C524
Limit label printing to occasional use of paper office labels
designed for laser printers. The Lexmark C520, C522, and
C524 does not support vinyl or polyester labels.
The Lexmark C520, C522, and C524 supports stocks up to
43 lb (163 g/m
the manual feed slot, and the multipurpose feeder. Labels are
supported only from the multipurpose feeder and the manual
feed slot.
Tray 1 supports approximately 120 sheets of card stock and
tray 2 supports approximately 250 sheets of card stock. The
C520, C522
C524
multipurpose feeder supports approximately 50 sheets of card
stock or labels and the manual feed slot supports accepts
single sheets only. The following table lists the maximum basis
weights supported by the multipurpose feeder.
Lexmark C520, C522, and C524: Overview of card stock and label support
Card stock
(grain long/grain short) Labels*
2
). Card stock is supported from Tray 1, Tray 2,
Paper source
Tray 1 (standard tray) 120 g/m
Tray 2 (optional tray) 120 g/m
Multipurpose feeder
Index Bristol Ta g Cover Paper
120 g/m
2
/163 g/m
2
/163 g/m
2
/163 g/m
2
120 g/m2/163 g/m
2
120 g/m2/163 g/m
2
120 g/m2/163 g/m
2
135 g/m2/176 g/m
2
135 g/m2/176 g/m
2
135 g/m2/176 g/m
2
2
2
Manual feed slot
* Vinyl labels are not supported.
Media specifications
Labels Width: 105 to 216 mm (4.1 to 8.5 in.)
Length: 220 to 297 mm (8.7 to 11.7 in.)
Weight: 120 to 163 g/m2 (32 to 43 lb)
Thickness: 0.13 to 0.20 mm (0.005 to 0.008 in.)
Smoothness: 100 to 400 Sheffield*
*150—250 Sheffield is optimal. Using media higher than 300 Sheffield could result in printing degradation.
2
Card Stock Weight: Up to 163 g/m
Up to 163 g/m
Cover Stock Weight: Up to 176 g/m
Index Bristol (90 lb)
2
Tag (100 lb)
2
–
–
135 g/m
For more information on the supported media sizes, see the printer User’s Guide on the publications CD.
Lexmark C520, C522, C524
36
Page 37

Printer specifications
Pick roller technology
The Lexmark C520, C522, and C524 paper feeding mechanism uses advanced technology that enhances feeding
reliability. The Lexmark C520, C522, and C524 trays reliably feed all supported media.
The Lexmark C520, C522, and C524 uses an auto compensator to pick the media rather than the corner buckler system
used by earlier printer models.
The Lexmark C760 and C762 trays have two rollers that touch the media in two places (see Figure 11 on page 61). Avoid
placing deep perforations in these areas since the media may nest, causing multiple sheet feeds. Perforations that could
cause nesting and tenting should fall outside the 0.31—1.05 in. area on the leading edge of the media. (This is different from
the 0.50 in. we recommend leaving at the top of the form for printers with a corner buckler system.) You may want to use
micro-perfs to avoid nesting problems. See Perforations and die-cuts on page 8 for more information.
Pick roller location
0.31 in.
1.05 in.
1.93 in.
4.84 in.
5.43 in.
Direction of feed
Figure 8. Location of pick rollers
1.34 in.
Lexmark C520, C522, C524
37
Page 38

Printer specifications
When printing on labels:
• Use only paper labels. Do not use vinyl labels.
• Only use label sheets that have no gaps between the labels.
Acceptable labels
• Recommended labels are Avery 5260.
• From the operator panel or from MarkVision™ Professional, set the Paper Type to Labels.
• Do not print a large number of labels continuously.
• Do not use labels that have coating or sizing applied to make the labels liquid-resistant.
• Do not use labels that have exposed adhesive on the label sheets.
When printing on card stock:
• We recommend using Springhill Index Plus 90 lb card stock.
• For the best print quality, always set the Paper Type to Card Stock.
Unacceptable labels
Lexmark C520, C522, C524
38
Page 39

Printer specifications
Lexmark C920
Limit label printing to occasional use of paper office labels designed for
laser printers. We do not recommend using vinyl or polyester labels.
The Lexmark C920 supports stocks up to 216 g/m2.
The following table lists the maximum basis weights supported by the
standard tray and the multipurpose feeder.
Lexmark C920: Overview of card stock and label support
Card stock Labels
Paper source
Standard tray – 180 g/m
Multipurpose feeder 216 g/m
Index Bristol Paper Vinyl
2
180 g/m
2
2
–
300 g/m
2
Media specifications
Labels Width: 210 to 216 mm (8.3 to 8.5 in.)
Length: 279 to 297 mm (11 to 11.7 in.)
Weight: 180 g/m
Thickness: 0.13 to 0.20 mm (0.005 to 0.008 in.)
Smoothness: 100 to 400 Sheffield*
*150—250 Sheffield is optimal. Using media higher than 300 Sheffield could result in printing degradation.
Card stock Weight: Up to 216 g/m2
2
Lexmark C920
39
Page 40

Printer specifications
When printing on labels:
• Only use label sheets that have no gaps between the labels.
Acceptable labels
• Set the Paper Type to Labels in the Paper Menu.
• Do not print a large number of labels continuously.
• Do not use labels that have coating or sizing applied to make the labels liquid-resistant.
• Do not use labels that have exposed adhesive on the label sheets.
• We recommend using Avery paper labels.
When printing on card stock:
• We recommend using Springhill Index Plus 90 lb card stock.
• For the best print quality, always set the Paper Type to Card Stock in the Paper Menu.
Unacceptable labels
Banner Paper
Lexmark offers 11.69 x 36 in (286.4 x 914mm) banner paper (part number 12A7940). For 11.69 x 48 in
(286.4 x 1219.2mm) banner paper, Lexmark recommends contacting a local paper provider/converter to inquire about
availability and pricing for banner paper.
For best results, Lexmark recommends using banner paper (11.69 x 48 in) from Hammermill Laser Print 24 lb, 94
brightness, radiant white, acid free.
Rough, highly textured, limp, or pre-curled papers will result in lower print quality and more frequent paper feed failures.
Lexmark C920
40
Page 41

Printer specifications
Lexmark T640, T642, T644
The Lexmark T640, T642, and T644 print on many labels designed for use with laser
printers.
The following table lists the maximum basis weights supported by the trays and the
multipurpose feeder. More detailed specifications appear on the following pages.
Lexmark T640, T642, T644: Overview of card stock and label support
Card stock Labels
Grain
Paper source
direction
Integrated tray (grain long)
(grain short)
Optional 250sheet drawer
Optional 500sheet drawer
Multipurpose
2
feeder
1
Printing labels on the T640, T642, and T644 require a special label fuser cleaner that prevents duplexing.
(grain long)
(grain short)
(grain long)
(grain short)
(grain long)
(grain short)
Index
Bristol Ta g Cover Paper
163 g/m
199 g/m
120 g/m
163 g/m
163 g/m
199 g/m
120 g/m
163 g/m
2
2
2
2
2
2
2
2
163 g/m
203 g/m
120 g/m
163 g/m
163 g/m
203 g/m
120 g/m
163 g/m
2
2
2
2
2
2
2
2
176 g/m
216 g/m
135 g/m
176 g/m
176 g/m
216 g/m
135 g/m
176 g/m
2
180 g/m2180 g/m2220 g/m2300 g/m2
2
2
163 g/m2 163 g/m2220 g/m2260 g/m
2
2
180 g/m2180 g/m2220 g/m2300 g/m2
2
2
163 g/m2 163 g/m2220 g/m2260 g/m
2
Dual-web
paper Polyester Vinyl
1
It is recommended that when you run vinyl labels, you install a special oil fuser cleaner, P/N 40X2665. When you order
a new cartridge, be sure to order the cartridge that will include the correct fuser cleaner.
It is possible to duplex certain labels that have been specifically designed for this application. To duplex labels, consult
the Lexmark “Converter Lists” to see which converters have successfully developed this type of label, and you must
install a special fuser wiper. The wax wiper that is used with the T640, T642, and T644 is P/N 40X2666 (Cartridges
designed for duplex label printing contain two wax wipers. Change the wax wiper at the halfway point of your normal
cartridge usage to provide additional cleaning and optimize performance.)
2
Due to label design characteristics, unacceptable feeding may be experienced from the multipurpose feeder.
Media specifications
2
2
Labels Thickness: 0.102 to 0.305 mm (0.004 to 0.012 in.)
Smoothness: 100 to 400* Sheffield
* 150—250 Sheffield is optimal. Using media higher than 300 Sheffield could result in printing degradation.
2
Card stock Weight: Up to 199 g/m
Up to 203 g/m
Index Bristol (90 lb)
2
Tag (100 lb)
Lexmark T640, T642, T644
41
Page 42

Printer specifications
Standard trays and special trays
The Lexmark T640, T642, and T644 paper feeding mechanism uses advanced technology that enhances feeding reliability.
The standard Lexmark T640, T642, and T644 tray holds 250 or 500 sheets of bond paper and reliably feeds all media
tested according to the guidelines specified under Dimensions on page 7.
For those difficult-to-print sizes, such as 3-inch x 5-inch index cards, Lexmark offers a variety of special media trays and
drawers.
Note: Optional 250-sheet Universally Adjustable Trays can be used to print forms with a minimum length of
5 inches when installed either in the integral tray location or in a 250-sheet drawer under a 250-sheet
integral tray. Less than 7 inches is not supported from a 400-sheet universally adjustable tray.
Standard and special trays
Source Part number
250-Sheet Mild Special Media Tray 20G1237
250-Sheet Aggressive Special Media Tray 20G1230
250-Sheet Mild Special Media Drawer 20G1236
250-Sheet Aggressive Special Media Drawer 20G1229
250-Sheet Universally Adjustable Tray 20G1224
250-Sheet Universally Adjustable Drawer 20G1223
500-Sheet Mild Special Media Tray 20G1240
500-Sheet Mild Special Media Tray + Drawer 20G1239
500-Sheet Aggressive Special Media Tray 20G1227
500-Sheet Aggressive Special Media Tray + Drawer 20G1226
400-Sheet Universally Adjustable Tray 20G1217
400-Sheet Universally Adjustable Tray + Drawer 20G1218
Lexmark T640, T642, T644
42
Page 43

Printer specifications
Pick roller technology
The Lexmark T640, T642, and T644 printers use an auto compensator to pick the media from the tray. The auto
compensator has two rollers that touch the media (see Figure 14 on page 88). Avoid placing deep perforations in these
areas since the media may nest, causing multiple sheet feeds. Perforations that could cause nesting and tenting should fall
outside the 0.3—0.79 in. area on the leading edge of the media. (This is different from the 0.50 in. we recommend leaving at
the top of the form for printers with a corner buckler system.) You may want to use micro-perfs to avoid nesting problems.
See Perforations and die-cuts on page 8 for more information.
Pick roller location
0.31 in.
0.79 in.
1.34 in.
1.93 in.
4.84 in.
5.43 in.
Direction of feed
Figure 9. Location of pick rollers
Label printing
Labels are one of the most difficult print materials for laser printers. A special fuser cleaner should be used for label
applications to optimize feed reliability. See your printer documentation for information on ordering additional label fuser
cleaners.
When printing on labels:
• Set the Paper Type to Labels in the Paper Menu. For vinyl and other heavy labels, set the Paper Type to Vinyl
Labels.
Note: When Paper Type is set to Vinyl Labels, the printer reduces the printing speed to ensure acceptable
printing.
• Do not load labels together with paper or transparencies in the same paper tray. Combining print materials can
cause feeding problems.
• Use full label sheets. Partial sheets may cause labels to peel off during printing, resulting in a paper jam. Adhesive
material may contaminate your printer. It could also void your printer and cartridge warranties.
Lexmark T640, T642, T644
43
Page 44

Printer specifications
When feeding labels, the number of labels per sheet can affect registration more than basis weight. Typically, the more
labels per sheet, the better the registration.
When printing on card stock:
• Set the Paper Type to Card Stock in the Paper Menu.
• Do not use card stock that is creased. It may cause paper jams.
Grain direction
Grain refers to the alignment of the paper fibers in a sheet of paper. Grain is either grain long, running the length of the
paper, or grain short, running the width of the paper.
For 60 to 135 g/m2 paper, we recommend grain long stock. For papers heavier than 135 g/m2, grain short is preferred. For
the multipurpose feeder, we recommend 60 to 135 g/m2 paper, grain long. If you feed papers heavier than 135 g/m2 from
the multipurpose feeder, grain short is preferred. For More information about grain direction, see Grain orientation on
page 11.
Maintenance procedures
If the print quality begins to degrade when printing sheets of vinyl labels, we suggest you follow the three cleaning steps
below:
1 Print 5 sheets of paper.
2 Wait approximately 5 seconds.
3 Print 5 more sheets of paper.
To maintain printer feeding reliability, repeat this cleaning process every time you replace the print cartridge, more often
with some media. Failure to follow maintenance procedures could cause jamming, poor print quality, feeding problems, and
fuser problems.
Troubleshooting
The following table provides solutions for some common card stock and label problems. See your printer documentation for
more troubleshooting information.
Solutions to printing problems
Problem Solution
Print on heavy stock is
blurred or out of focus.
Toner rubs off the page. Make sure the Paper Type setting is appropriate for your print material.
Make sure the Paper Type, Paper Weight, and Paper Texture settings are appropriate for
your print material. (Card stock in excess of 203 g/m
results.)
Print 5 sheets of paper, wait approximately 5 seconds, and then print 5 more sheets of
paper to remove any toner that may have accumulated.
Use a lighter weight stock. (The material being used exceeds 300 g/m
2
may not produce acceptable print
2
.)
Print 5 sheets of paper, wait approximately 5 seconds, and then print 5 more sheets of
paper to remove any toner that may have accumulated.
Printing shows voids. Change the Paper Type to Plain Paper.
Print 5 sheets of paper, wait approximately 5 seconds, and then print 5 more sheets of
paper to remove any toner that may have accumulated.
Lexmark T640, T642, T644
44
Page 45

Printer specifications
Lexmark W840
Limit label printing to occasional use of A4 or letter size paper office labels
designed for laser printers. We do not recommend using vinyl or polyester
labels.
The Lexmark W840 supports stocks up to 216 g/m2. Always feed labels and
card stock from trays 1, 2, or 3.
The following table lists the maximum basis weights supported by the trays
and the multipurpose feeder.
Lexmark W840: Overview of card stock and label support
Trays 1 Trays 2, 3 Multipurpose feeder
Labels 105 g/m
Card stock 105 g/m
Media specifications
2
2
216 g/m
216 g/m
2
2
216 g/m
216 g/m
2
2
Labels Width: 210 to 216 mm (8.3 to 8.5 in.)
Length: 279 to 356 mm (11 to 11.7 in.)
Weight: 120 to 128 g/m2
Thickness: 0.13 to 0.20 mm (0.005 to 0.008 in.)
Smoothness: 100 to 400 Sheffield*
* 150—250 Sheffield is optimal. Using media higher than 300 Sheffield could result in printing degradation.
Card stock Width: 210 to 216 mm (8.3 to 8.5 in.)
Length: 279 to 356 mm (11 to 11.7 in.)
Weight: Up to 216 g/m
When printing on labels:
• Set the Paper Type to Labels in the Paper Menu.
• Do not use label sheets with a slick backing material.
• Do not print within 1 mm (0.04 in.) of the die cut, the edge of the label or the perforations, or between the die cuts.
• Use full label sheets. Partial sheets may cause labels to peel off during printing, resulting in a paper jam.
• Do not use label sheets that have adhesive to the edge of the sheet. We recommend zone coating of the adhesive
at least 1 mm (0.04 in.) away from the edges. Adhesive material may contaminate your printer and could void your
warranty.
When printing on card stock:
• Set the Paper Type to Card Stock.
• Do not use card stock that is creased. It may cause paper jams.
• We recommend the use of grain long card stock.
2
Lexmark W840
45
Page 46

Printer specifications
Lexmark C912
Limit label printing to occasional use of paper office labels designed for
laser printers. We do not recommend using vinyl or polyester labels.
The Lexmark C912 supports stocks up to 216 g/m2.
The following table lists the maximum basis weights supported by the
standard tray and the multipurpose feeder.
Lexmark C912: Overview of card stock and label support
Card stock Labels
Paper source
Standard tray – 180 g/m
Multipurpose feeder 216 g/m
Index Bristol Paper Vinyl
2
180 g/m
2
2
–
300 g/m
2
Media Specifications
Labels Width: 210 to 216 mm (8.3 to 8.5 in.)
Length: 279 to 297 mm (11 to 11.7 in.)
Weight: 180 g/m2
Thickness: 0.13 to 0.20 mm (0.005 to 0.008 in.)
Smoothness: 100 to 400 Sheffield*
*150—250 Sheffield is optimal. Using media higher than 300 Sheffield could result in printing degradation.
2
Card stock Weight: Up to 216 g/m
For paper and transparency specifications, refer to the printer publications CD.
Lexmark C912
46
Page 47

Printer specifications
When printing on labels:
• Only use label sheets that have no gaps between the labels.
Acceptable labels
• From the operator panel or from MarkVision™ Professional, set the Paper Type to Labels in the Paper Menu.
• Do not print a large number of labels continuously.
• Do not use labels that have coating or sizing applied to make the labels liquid-resistant.
• Do not use labels that have exposed adhesive on the label sheets.
• We recommend using Avery paper labels.
When printing on vinyl labels:
• From the operator panel or from MarkVision Professional, set the Paper Type to Card Stock in the Paper Menu.
Set the CardStock Weight (under the Paper Weight menu) to Heavy.
• Download the vinyl file, vinyl8ppm.npa, from our FTP site and send it to the printer (copy the file to the printer
port).
When printing on card stock:
• We recommend using Springhill Index Plus 90 lb card stock.
• For the best print quality, always set the Paper Type to Card Stock in the Paper Menu.
Unacceptable labels
Banner Paper
Lexmark offers 11.69 x 36 in (286.4x914mm) banner paper (part number 12A7940). For 11.69 x 48 in (286.4x1219.2mm)
banner paper, Lexmark recommends contacting a local paper provider/converter to inquire about availability and pricing for
banner paper.
For best results, Lexmark recommends using banner paper (11.69 x 48 in) from Hammermill Laser Print 24 lb, 94
brightness, radiant white, acid free.
Rough, highly textured, limp, or pre-curled papers will result in lower print quality and more frequent paper feed failures.
Lexmark C912
47
Page 48

Printer specifications
Lexmark C510
Limit label printing to occasional use of paper office labels designed for
laser printers. The Lexmark C510 does not support vinyl or polyester labels.
The Lexmark C510 supports stocks up to 163 g/m2. Feed labels from the
standard tray only, which holds up to 80 sheets of labels or up to 120 sheets
of card stock.
The following table lists the maximum basis weights supported by the
multipurpose feeder.
Lexmark C510: Overview of card stock and label support
Card stock Labels
Paper source
Tray 1 (standard tray) 163 g/m
Tray 2 (optional tray) 163 g/m
Multipurpose feeder 163 g/m
Index Bristol Tag Cover Paper Vinyl
2
2
2
163 g/m
163 g/m
163 g/m
2
2
2
176 g/m
176 g/m
176 g/m
2
2
2
––
––
131 g/m
2
–
Media specifications
Labels Width: 105 to 216 mm (4.1 to 8.5 in.)
Length: 220 to 297 mm (8.7 to 11.7 in.)
2
Weight: 120 to 163 g/m
Thickness: 0.13 to 0.20 mm (0.005 to 0.008 in.)
Smoothness: 100 to 400 Sheffield*
*150—250 Sheffield is optimal. Using media higher than 300 Sheffield could result in printing degradation.
Card stock Weight: Up to 163 g/m
Up to 163 g/m
Cover stock Weight: Up to 176 g/m
2
Index Bristol (90 lb)
2
Tag (100 lb)
2
(65 lb)
Lexmark C510
48
Page 49

Printer specifications
When printing on labels:
• Only feed labels from Tray 1.
• Use only paper labels. Do not use vinyl labels.
• Only use label sheets that have no gaps between the labels.
Acceptable labels
• Recommended labels are Avery 5260.
• From the operator panel or from MarkVision Professional, set the Paper Type to Labels.
• Do not print a large number of labels continuously.
• Do not use labels that have coating or sizing applied to make the labels liquid-resistant.
• Do not use labels that have exposed adhesive on the label sheets.
When printing on card stock:
• Only feed card stock from Tray 1.
• We recommend using Springhill Index Plus 90 lb card stock.
• For the best print quality, always set the Paper Type to Card Stock.
Unacceptable labels
Lexmark C510
49
Page 50

Printer specifications
Lexmark X422
The Lexmark X422 prints on many labels designed for use with laser
printers.
Card stock and labels must be fed one sheet at a time through the manual
bypass feeder.
The following table lists the maximum basis weights supported by the
manual bypass feeder.
Note:Scanning large quantities of labels is not recommended.
Lexmark X422: Overview of card stock support
Paper source Card stock Paper labels
Tray 1 (standard) 60—90 g/m
Multipurpose feeder 60—199 g/m
Use only materials recommended for use with laser printers.
To prevent specialty media sheets from sticking together, remove each sheet from the output bin as it is printed.
When printing on labels:
• Set the Paper Type to Labels from the printer driver.
• Use standard size products (either A4 or Letter).
• Do not use label sheets with a slick backing material.
• Do not print within 1 mm (0.040 in.) of the die cut.
• Use full label sheets. Partial sheets may cause labels to peel off during printing, resulting in a paper jam. Partial
sheets will also contaminate your printer and your cartridge with adhesive, and could void your printer and
cartridge warranties.
• Use labels that can withstand temperatures of 180°C (356°F) without sealing, excessive curling, wrinkling, or
releasing hazardous emissions.
• Verify that your label adhesive material can tolerate a fusing temperature of 180°C (356°F) for 0.1 second.
• Use labels that can withstand pressure of 25 pounds per square inch (psi).
• Do not print within 1 mm (0.040 in.) of the edge of the label, of the perforations, or between die-cuts of the label.
• Do not use label sheets that have adhesive to the edge of the sheet. We recommend zone coating of the adhesive
at least 1 mm (0.040 in.) away from edges. Adhesive material will contaminate your printer and could void your
warranty.
• If zone coating of the adhesive is not possible, a 3 mm (0.125 in.) strip should be removed on the leading and
driver edge, and a non-oozing adhesive should be used.
• Remove a 3 mm (0.125 in.) strip from the leading edge to prevent labels from peeling inside the printer.
• Portrait orientation is preferred, especially when printing bar codes.
• Do not use labels that have exposed adhesive.
• Do not use labels that are separating from the backing sheet or are wrinkled, bubbled, or otherwise damaged.
• Do not load a sheet of labels through the machine more than once.
• Load labels into the manual bypass feeder with the recommended print side faceup and the top edge going in first.
When printing on card stock:
2
2
60—90 g/m2
60—199 g/m2
Lexmark X422
50
Page 51

Printer specifications
• Set the Paper Type to Card Stock from the printer driver.
• Do not use preprinted card stock manufactured with chemicals that may contaminate the printer. Preprinting
introduces semi-liquid and volatile components into the printer.
• Do not use card stock that is creased. It may cause paper jams.
• We recommend the use of grain short card stock.
• Load card stock into the manual bypass feeder with the recommended print side faceup and the top edge going in
first.
Lexmark X422
51
Page 52

Printer specifications
Lexmark X215
The Lexmark X215 prints on many labels designed for use with laser
printers.
Card stock and labels must be fed one sheet at a time through the manual
bypass feeder.
The following table lists the maximum basis weights supported by the
manual bypass feeder.
Lexmark X215: Overview of card stock support
Paper source
Manual bypass feeder* Up to 163 g/m
Index Bristol Tag Cover
Card stock
2
(90 lb) Up to 163 g/m2 (100 lb) –
* Card stock can only be fed from the manual bypass feeder.
Lexmark X215: Overview of label support
Print media source
Label type
Paper
Integrated X
Dual web
Vinyl X X
9 - indicates support X - indicates no support
* Labels can only be fed from the manual bypass feeder.
For paper and transparency specifications, see the Lexmark X215 User’s Guide.
Paper tray Manual bypass feeder*
X
9
X
XX
Media specifications
Labels Width: 210 to 216 mm (8.3 to 8.5 in.)
Length: 279 to 297 mm (11 to 11.7 in.)
Weight: Up to 163 g/m
2
(43 lb bond)
Thickness: Up to 0.25 mm (0.01 in.)
Smoothness: 100 to 400* Sheffield
* 150—250 Sheffield is optimal. Using media higher than 300 Sheffield could result in printing degradation.
Lexmark X215
52
Page 53

Media specifications
Printer specifications
Card stock Weight: Up to 163 g/m
Up to 163 g/m
Use only materials recommended for use with laser printers.
To prevent specialty media sheets from sticking together, remove each sheet from the output bin as it is printed.
When printing on labels:
• Set the Paper Type to Labels from the printer driver.
• Use standard size products (either A4 or Letter).
• Do not use label sheets with a slick backing material.
• Do not print within 1 mm (0.040 in.) of the die cut.
• Use full label sheets. Partial sheets may cause labels to peel off during printing, resulting in a paper jam. Partial
sheets will also contaminate your printer and your cartridge with adhesive, and could void your printer and
cartridge warranties.
• Use labels that can withstand temperatures of 180°C (356°F) without sealing, excessive curling, wrinkling, or
releasing hazardous emissions.
• Verify that your label adhesive material can tolerate a fusing temperature of 180°C (356°F) for 0.1 second.
• Use labels that can withstand pressure of 25 pounds per square inch (psi).
• Do not print within 1 mm (0.040 in.) of the edge of the label, of the perforations, or between die-cuts of the label.
• Do not use label sheets that have adhesive to the edge of the sheet. We recommend zone coating of the adhesive
at least 1 mm (0.040 in.) away from edges. Adhesive material will contaminate your printer and could void your
warranty.
• If zone coating of the adhesive is not possible, a 3 mm (0.125 in.) strip should be removed on the leading and
driver edge, and a non-oozing adhesive should be used.
• Remove a 3 mm (0.125 in.) strip from the leading edge to prevent labels from peeling inside the printer.
• Portrait orientation is preferred, especially when printing bar codes.
• Do not use labels that have exposed adhesive.
• Do not use labels that are separating from the backing sheet or are wrinkled, bubbled, or otherwise damaged.
• Do not load a sheet of labels through the machine more than once.
• Load labels into the manual bypass feeder with the recommended print side faceup and the top edge going in first.
When printing on card stock:
• Set the Paper Type to Card Stock from the printer driver.
• Do not use preprinted card stock manufactured with chemicals that may contaminate the printer. Preprinting
introduces semi-liquid and volatile components into the printer.
• Do not use card stock that is creased. It may cause paper jams.
• We recommend the use of grain short card stock.
• Load card stock into the manual bypass feeder with the recommended print side faceup and the top edge going in
first.
2
Index Bristol (90 lb)
2
Tag (100 lb)
Lexmark X215
53
Page 54

Printer specifications
Lexmark C720
Limit label printing to occasional use of paper office labels designed for
laser printers. The Lexmark C720 does not support vinyl or polyester labels.
The Lexmark C720 supports stocks up to 43 lb (163 g/m2). Feed labels from
the standard tray only, which holds up to 80 sheets of labels or up to 120
sheets of card stock.
The following table lists the maximum basis weights supported by the
multipurpose feeder.
Lexmark C720: Overview of card stock and label support
Card stock Labels
Paper source
Tray 1 (standard tray) 163 g/m
Index Bristol Tag Cover Paper Vinyl
2
163 g/m
2
– 163 g/m
2
–
For paper and transparency specifications, see the printer User’s Guide.
Media specifications
Labels Width: 105 to 216 mm (4.1 to 8.5 in.)
Length: 220 to 297 mm (8.7 to 11.7 in.)
2
Weight: 120 to 163 g/m
Thickness: 0.13 to 0.20 mm (0.005 to 0.008 in.)
Smoothness: 100 to 400 Sheffield*
*150—250 Sheffield is optimal. Using media higher than 300 Sheffield could result in printing degradation.
Card stock Weight: Up to 163 g/m
Up to 163 g/m
(32 to 43 lb)
2
Index Bristol (90 lb)
2
Tag (100 lb)
Lexmark C720
54
Page 55

Printer specifications
When printing on labels:
• Only feed labels from Tray 1.
• Use only paper labels. Do not use vinyl labels.
• Only use label sheets that have no gaps between the labels.
Acceptable labels
• Recommended labels are Avery 5260.
• From the operator panel or from MarkVision Professional, set the Paper Type to Labels.
• Do not print a large number of labels continuously.
• Do not use labels that have coating or sizing applied to make the labels liquid-resistant.
• Do not use labels that have exposed adhesive on the label sheets.
When printing on card stock:
• Only feed card stock from Tray 1.
• We recommend using Springhill Index Plus 90 lb card stock.
• For the best print quality, always set the Paper Type to Card Stock.
Unacceptable labels
Lexmark C720
55
Page 56

Printer specifications
Lexmark C750
The Lexmark C750 prints on many labels designed for use with laser
printers.
The following table lists the maximum basis weights supported by the trays
and the multipurpose feeder. More detailed specifications appear on the
following pages.
Note: The optional 2000-sheet drawer supports paper only.
Lexmark C750: Overview of card stock and label support
Card stock Labels
Paper source
Tray 1 163 g/m
500-sheet drawer 163 g/m
Multipurpose feeder 163 g/m
1
Vinyl labels are supported only when printing environment and media are 20—32.2°C (68—90°F).
2
The skew performance of heavy vinyl labels may be enhanced by feeding from an optional 500 sheet drawer if
placement of the image is critical.
Index Bristol Tag Cover Paper Vinyl
2
2
2
163 g/m
163 g/m
163 g/m
2
2
2
176 g/m
176 g/m
176 g/m
2
2
2
180 g/m
180 g/m
199 g/m2 260 g/m
2
2
300 g/m2
300 g/m2
1, 2
2
For paper and transparency specifications, see the Lexmark C750 Publications CD.
The following table indicates the paper sizes each tray supports.
Paper source specifications for all media
Standard sizes
(width x length)
Source
Standard tray
500-sheet drawer
Multipurpose feeder 148 x 210 mm
Minimum Maximum Minimum Maximum
148 x 210 mm
(5.83 x 8.27 in.)
(5.83 x 8.27 in.)
215.9 x 355.6 mm
(8.5 x 14 in.)
215.9 x 355.6 mm
(8.5 x 14 in.)
139.7 x 210 mm
(5.5 x 8.27 in.)
69.85 x 127 mm
(2.75 in. x 5 in.)
If you load paper that is narrower than 148 mm (5.83 in.) in the multipurpose feeder (for example, 3x5-inch index
cards), set the MP Feeder Size menu item to Universal.
Universal sizes
(width x length)
215.9 x 355.6 mm
(8.5 in. x 14 in.)
229 x 355.6 mm
(9.01 x 14 in.)
Lexmark C750
56
Page 57

Printer specifications
Media specifications
Labels Thickness: 0.102 to 0.305 mm (0.004 to 0.012 in.)
Smoothness: 100 to 400* Sheffield
* 150—250 Sheffield is optimal. Using media higher than 300 Sheffield could result in printing degradation.
Standard trays and special media trays
The Lexmark C750 paper feeding mechanism uses advanced technology that enhances feeding reliability. The Lexmark
C750 trays, which hold approximately 500 sheets of 75 g/m
2
bond paper, reliably feed all supported media.
Pick roller technology
Like the Optra S and Optra T, the Lexmark C750 printer uses an auto compensator to pick the media rather than the corner
buckler system used by earlier printer models.
The Lexmark C750 trays have two rollers that touch the media in two places (see Figure 10 on page 57). Avoid placing
deep perforations in these areas since the media may nest, causing multiple sheet feeds. Perforations that could cause
nesting and tenting should fall outside the 0.31—1.05 in. area on the leading edge of the media. (This is different from the
0.50 in. we recommend leaving at the top of the form for printers with a corner buckler system.) You may want to use microperfs to avoid nesting problems. See Perforations and die-cuts on page 8 for more information.
Pick roller location
0.31 in.
1.05 in.
1.34 in.
1.93 in.
4.84 in.
5.43 in.
Direction of feed
Figure 10. Location of pick rollers
Lexmark C750
57
Page 58

Printer specifications
Labels are one of the most difficult print materials for laser printers. A fuser equipped with a web oiler may be required for
label applications to optimize feed reliability. Contact your local service representative for ordering information.
When printing on labels:
• Using the printer operator panel, set the Paper Type to Labels in the Paper Menu. For vinyl and other heavy
labels, set the Labels Weight (under the Paper Weight menu) to Heavy, and set the Labels Texture (under the
Paper Texture menu) to Smooth.
• Do not load labels together with paper or transparencies in the same paper tray. Combining print materials can
cause feeding problems.
• Use full label sheets. Partial sheets may cause labels to peel off during printing, resulting in a paper jam. Adhesive
material may contaminate your printer. It could also void your printer and cartridge warranties.
When feeding labels, the number of labels per sheet can affect registration more than basis weight. Typically, the more
labels per sheet, the better the registration.
When printing on card stock:
• Set the Paper Type to Card Stock in the Paper Menu.
• Do not use card stock that is creased. It may cause paper jams.
Print Material specifications
Range or maximum weight supported
500-sheet tray and
Print material
3
Paper
(grain direction1)
Card Stock
(grain Long
1
)
Xerographic or
business paper
Index Bristol 163 g/m2 (90 lb) 163 g/m2 (90 lb)
Tag 163 g/m
Cover 176 g/m
Card Stock
(grain Short
1
)
Index Bristol 199 g/m2 (110 lb) 199 g/m2 (110 lb)
Tag 203 g/m
Cover 216 g/m
Labels Paper 180 g/m
Dual-web paper 180 g/m
4
Vinyl
Polyester 220 g/m
Integrated forms Pressure-sensitive area
2
Paper base (grain long) 75 to 135 g/m
1
See Grain direction on page 59 for specific recommendations.
2
Pressure-sensitive area must enter the printer first.
3
Paper less than 75 g/m2 is supported only when the relative humidity is less than 60% and is not supported in duplex.
4
Vinyl labels are supported only when printing environment and media are 20—32°C (68—90°F).
optional 500-sheet drawer Multipurpose feeder
60 to 176 g/m
2
(16 to 47 lb bond)
2
(100 lb) 163 g/m2 (100 lb)
2
(65 lb) 176 g/m2 (65 lb)
2
(125 lb) 203 g/m2 (125 lb)
2
(80 lb) 216 g/m2 (80 lb)
2
(48 lb bond) 199 g/m2 (53 lb bond)
2
(48 lb bond) 199 g/m2 (53 lb bond)
60 to 176 g/m
(16 to 47 lb bond)
2
300 g/m2 (92 lb liner) 260 g/m2 (78 lb liner)
2
(59 lb bond) 220 g/m2 (59 lb bond)
140 to 175 g/m
2
2
(20 to 36 lb bond)
140 to 175 g/m
75 to 135 g/m
(20 to 36 lb bond)
2
2
Lexmark C750
58
Page 59

Printer specifications
Grain direction
Grain refers to the alignment of the paper fibers in a sheet of paper. Grain is either grain long, running the length of the
paper, or grain short, running the width of the paper.
For 60 to 135 g/m2 paper, we recommend grain long stock. For papers heavier than 135 g/m2 (36 lb bond), grain short is
preferred.
Maintenance procedures
If the print quality begins to degrade when printing sheets of vinyl labels, we suggest you follow the three cleaning steps
below:
1 Print 5 sheets of paper.
2 Wait approximately 5 seconds.
3 Print 5 more sheets of paper.
To maintain printer feeding reliability, repeat this cleaning process every time you replace the black print cartridge, more
often with some media. Failure to follow maintenance procedures could cause jamming, poor print quality, feeding
problems, and fuser problems.
Troubleshooting
The following table provides solutions for some common card stock and label problems. See your printer documentation for
more troubleshooting information.
Solutions to printing problems
Problem Solution
Print on heavy stock is blurred or
out of focus.
Toner rubs off the page. Make sure the Paper Type setting is appropriate for your print material.
Printing shows voids. Change the Paper Type to Plain Paper.
If you print large quantities of labels or other glossy print media, replace the fuser housing with a web oiler field upgrade kit
(P/N 12G6307 for a 115 V printer, P/N 12G6308 for a 220 V printer).
Make sure the Paper Type setting is appropriate for your print material. (Card stock in
excess of 203 g/m [54 lb bond] may not produce acceptable print results.)
Print 5 sheets of paper, wait approximately 5 seconds, and then print 5 more sheets of
paper to remove any toner that may have accumulated.
2
Use a lighter weight stock. (The material being used exceeds 300 g/m
Print 5 sheets of paper, wait approximately 5 seconds, and then print 5 more sheets of
paper to remove any toner that may have accumulated.
Print 5 sheets of paper, wait approximately 5 seconds, and then print 5 more sheets of
paper to remove any toner that may have accumulated.
).
Lexmark C750
59
Page 60

Printer specifications
Lexmark C752
The Lexmark C752 prints on many labels designed for use with laser
printers.
The following table lists the maximum basis weights supported by the trays
and the multipurpose feeder. More detailed specifications appear on the
following pages.
Note: The optional 2000-sheet drawer supports paper only.
Lexmark C752: Overview of card stock and label support
Card stock Labels
Paper source
Tray 1 163 g/m
500-sheet drawer 163 g/m
Multipurpose feeder 163 g/m
1
Vinyl labels are supported only when printing environment and media are 20—32.2°C (68—90°F).
2
The skew performance of heavy vinyl labels may be enhanced by feeding from an optional 500 sheet drawer if
placement of the image is critical.
Index Bristol Tag Cover Paper Vinyl
2
2
2
163 g/m
163 g/m
163 g/m
2
2
2
176 g/m
176 g/m
176 g/m
2
2
2
180 g/m
180 g/m
199 g/m2 260 g/m
2
2
300 g/m2
300 g/m2
1, 2
2
For paper and transparency specifications, see the Lexmark C752 Publications CD.
The following table indicates the paper sizes each tray supports.
Paper source specifications for all media
Standard sizes
(width x length)
Source
Standard tray
500-sheet drawer
Multipurpose feeder 148 x 210 mm
Minimum Maximum Minimum Maximum
148 x 210 mm
(5.83 x 8.27 in.)
(5.83 x 8.27 in.)
215.9 x 355.6 mm
(8.5 x 14 in.)
215.9 x 355.6 mm
(8.5 x 14 in.)
139.7 x 210 mm
(5.5 x 8.27 in.)
69.85 x 127 mm
(2.75 in. x 5 in.)
If you load paper that is narrower than 148 mm (5.83 in.) in the multipurpose feeder (for example, 3x5-inch index
cards), set the MP Feeder Size menu item to Universal.
Universal sizes
(width x length)
215.9 x 355.6 mm
(8.5 in. x 14 in.)
229 x 355.6 mm
(9.01 x 14 in.)
Lexmark C752
60
Page 61

Printer specifications
Media specifications
Labels Thickness: 0.102 to 0.305 mm (0.004 to 0.012 in.)
Smoothness: 100 to 400* Sheffield
* 150—250 Sheffield is optimal. Using media higher than 300 Sheffield could result in printing degradation.
Standard trays and special media trays
The Lexmark C752 paper feeding mechanism uses advanced technology that enhances feeding reliability. The Lexmark
C752 trays, which hold approximately 500 sheets of 75 g/m
2
bond paper, reliably feed all supported media.
Pick roller technology
The Lexmark C752 uses an auto compensator to pick the media rather than the corner buckler system used by earlier
printer models.
The Lexmark C752 trays have two rollers that touch the media in two places (see Figure 11 on page 61). Avoid placing
deep perforations in these areas since the media may nest, causing multiple sheet feeds. Perforations that could cause
nesting and tenting should fall outside the 0.31—1.05 in. area on the leading edge of the media. (This is different from the
0.50 in. we recommend leaving at the top of the form for printers with a corner buckler system.) You may want to use microperfs to avoid nesting problems. See Perforations and die-cuts on page 8 for more information.
Pick roller location
0.31 in.
1.05 in.
1.34 in.
1.93 in.
4.84 in.
5.43 in.
Direction of feed
Figure 11. Location of pick rollers
Lexmark C752
61
Page 62

Printer specifications
Labels are one of the most difficult print materials for laser printers. A fuser equipped with a web oiler may be required for
label applications to optimize feed reliability. Contact your local service representative for ordering information.
When printing on labels:
• Using the printer operator panel, set the Paper Type to Labels in the Paper Menu. For vinyl and other heavy
labels, set the Labels Weight (under the Paper Weight menu) to Heavy, and set the Labels Texture (under the
Paper Texture menu) to Smooth.
• Do not load labels together with paper or transparencies in the same paper tray. Combining print materials can
cause feeding problems.
• Use full label sheets. Partial sheets may cause labels to peel off during printing, resulting in a paper jam. Adhesive
material may contaminate your printer. It could also void your printer and cartridge warranties.
When feeding labels, the number of labels per sheet can affect registration more than basis weight. Typically, the more
labels per sheet, the better the registration.
When printing on card stock:
• Set the Paper Type to Card Stock in the Paper Menu.
• Do not use card stock that is creased. It may cause paper jams.
Print material specifications
Range or maximum weight supported
500-sheet tray and
Print material
3
Paper
(grain direction1)
Card stock
(grain long
1
)
Xerographic or
business paper
Index Bristol 163 g/m2 (90 lb) 163 g/m2 (90 lb)
Tag 163 g/m
Cover 176 g/m
Card stock
(grain short
1
)
Index Bristol 199 g/m2 (110 lb) 199 g/m2 (110 lb)
Tag 203 g/m
Cover 216 g/m
Labels Paper 180 g/m
Dual-web paper 180 g/m
4
Vinyl
Polyester 220 g/m
Integrated forms Pressure-sensitive area
2
Paper base (grain long) 75 to 135 g/m
1
See Grain direction on page 63 for specific recommendations.
2
Pressure-sensitive area must enter the printer first.
3
Paper less than 75 g/m2 is supported only when the relative humidity is less than 60% and is not supported in duplex.
4
Vinyl labels are supported only when printing environment and media are 20—32°C (68—90°F).
optional 500-sheet drawer Multipurpose feeder
60 to 176 g/m
2
(16 to 47 lb bond)
2
(100 lb) 163 g/m2 (100 lb)
2
(65 lb) 176 g/m2 (65 lb)
2
(125 lb) 203 g/m2 (125 lb)
2
(80 lb) 216 g/m2 (80 lb)
2
(48 lb bond) 199 g/m2 (53 lb bond)
2
(48 lb bond) 199 g/m2 (53 lb bond)
60 to 176 g/m
(16 to 47 lb bond)
2
300 g/m2 (92 lb liner) 260 g/m2 (78 lb liner)
2
(59 lb bond) 220 g/m2 (59 lb bond)
140 to 175 g/m
2
2
(20 to 36 lb bond)
140 to 175 g/m
75 to 135 g/m
(20 to 36 lb bond)
2
2
Lexmark C752
62
Page 63

Printer specifications
Grain direction
Grain refers to the alignment of the paper fibers in a sheet of paper. Grain is either grain long, running the length of the
paper, or grain short, running the width of the paper.
For 60 to 135 g/m2 paper, we recommend grain long stock. For papers heavier than 135 g/m2 (36 lb bond), grain short is
preferred.
Maintenance procedures
If the print quality begins to degrade when printing sheets of vinyl labels, we suggest you follow the three cleaning steps
below:
1 Print 5 sheets of paper.
2 Wait approximately 5 seconds.
3 Print 5 more sheets of paper.
To maintain printer feeding reliability, repeat this cleaning process every time you replace the black print cartridge, more
often with some media. Failure to follow maintenance procedures could cause jamming, poor print quality, feeding
problems, and fuser problems.
Troubleshooting
The following table provides solutions for some common card stock and label problems. See your printer documentation for
more troubleshooting information.
Solutions to printing problems
Problem Solution
Print on heavy stock is blurred or
out of focus.
Toner rubs off the page. Make sure the Paper Type setting is appropriate for your print material.
Printing shows voids. Change the Paper Type to Plain Paper.
If you print large quantities of labels or other glossy print media, replace the fuser housing with a web oiler (P/N 56P1555
for a 115 V printer or P/N 56P1556 for a 220 V printer).
Make sure the Paper Type setting is appropriate for your print material. (Card stock in
excess of 203 g/m
Print 5 sheets of paper, wait approximately 5 seconds, and then print 5 more sheets of
paper to remove any toner that may have accumulated.
Use a lighter weight stock. (The material being used exceeds 300 g/m
Print 5 sheets of paper, wait approximately 5 seconds, and then print 5 more sheets of
paper to remove any toner that may have accumulated.
Print 5 sheets of paper, wait approximately 5 seconds, and then print 5 more sheets of
paper to remove any toner that may have accumulated.
2
[54 lb bond] may not produce acceptable print results.)
2
).
Lexmark C752
63
Page 64

Printer specifications
Lexmark C910
Limit label printing to occasional use of paper office labels designed for
laser printers. We do not recommend using vinyl or polyester labels.
The Lexmark C910 supports stocks up to 90 lb (163 g/m2).
The following table lists the maximum basis weights supported by the heavy
media tray and the multipurpose feeder.
Lexmark C910: Overview of card stock and label support
Card stock Labels
Paper source
Heavy media tray – – – 180 g/m
Multipurpose feeder 163 g/m
Index Bristol Tag Cover Paper Vinyl
2
163 g/m
2
– 180 g/m2 –
2
–
For paper and transparency specifications, see the Lexmark C910 Publications CD.
Media specifications
Labels Width: 210 to 216 mm (8.3 to 8.5 in.)
Length: 279 to 297 mm (11 to 11.7 in.)
Weight: 120 to 180 g/m2 (32 to 43 lb)
Thickness: 0.13 to 0.20 mm (0.005 to 0.008 in.)
Smoothness: 100 to 400 Sheffield*
*150—250 Sheffield is optimal. Using media higher than 300 Sheffield could result in printing degradation.
2
Card stock Weight: Up to 163 g/m
Up to 163 g/m
Index Bristol (90 lb)
2
Tag (100 lb)
Lexmark C910
64
Page 65

Printer specifications
When printing on labels:
• Only use label sheets that have no gaps between the labels.
Acceptable labels
• From the operator panel or from MarkVision Professional, set the Paper Type to Labels in the Paper Menu.
• Do not print a large number of labels continuously.
• Do not use labels that have coating or sizing applied to make the labels liquid-resistant.
• Do not use labels that have exposed adhesive on the label sheets.
• We recommend using Avery paper labels.
When printing on card stock:
• We recommend using Springhill Index Plus 90 lb card stock.
• For the best print quality, always set the Paper Type to Card Stock in the Paper Menu.
Unacceptable labels
Lexmark C910
65
Page 66

Printer specifications
Lexmark E220
Limit label printing to occasional use of paper office labels designed for
laser printers. We do not recommend using vinyl or polyester labels.
The Lexmark E220 supports stocks up to 43 lb (163 g/m2). The automatic
paper feeder can hold up to 10 sheets of card stock or labels.
The following table lists the maximum basis weights supported by Tray 1
and the manual sheet feeder. More detailed specifications appear on the
following page.
Lexmark E220: Overview of card stock and label support
Card stock Labels
Paper source
Tray 1 163 g/m
Manual feed 163 g/m
For paper and transparency specifications, see the Lexmark E220 Publications CD.
Index Bristol Tag Cover Paper Vinyl
2
2
163 g/m
163 g/m
2
2
– 163 g/m2 –
– 163 g/m2 –
Media specifications
Labels Width: 210 to 216 mm (8.3 to 8.5 in.)
Length: 279 to 297 mm (11 to 11.7 in.)
Weight: Up to 163 g/m2 (43 lb)
Thickness: Up to 0.25 mm (0.01 in.)
Smoothness: 100 to 400* Sheffield
* 150—250 Sheffield is optimal. Using media higher than 300 Sheffield could result in printing degradation.
2
Card stock Weight: Up to 163 g/m
Up to 163 g/m
Note: To minimize curl, use the top exit when printing on card stock and labels.
Index Bristol (90 lb)
2
Tag (100 lb)
Maintenance procedures
If the print quality begins to degrade when printing sheets of labels, we suggest you follow the three cleaning steps below:
1 Print 5 sheets of paper.
2 Wait approximately 5 seconds.
3 Print 5 more sheets of paper.
To maintain printer feeding reliability, repeat this cleaning process every time you replace the print cartridge, more often
with some media. Failure to follow maintenance procedures could cause jamming, poor print quality, feeding problems, and
fuser problems.
Lexmark E220
66
Page 67

Printer specifications
Lexmark E320, E322
Limit label printing to occasional use of paper office labels designed for
laser printers. We do not recommend using vinyl or polyester labels.
The Lexmark E320 and Lexmark E322 support stocks up to
43 lb (163 g/m2). The automatic paper feeder can hold up to 10 sheets of
card stock or labels.
The following table lists the maximum basis weights supported by Tray 1
and the manual sheet feeder. More detailed specifications appear on the
following page.
Lexmark E320, E322: Overview of card stock and label support
Card stock Labels
Paper source
Tray 1 163 g/m
Manual feed 163 g/m
Index Bristol Tag Cover Paper Vinyl
2
2
163 g/m
163 g/m
2
2
– 163 g/m2 –
– 163 g/m2 –
For paper and transparency specifications, see the Lexmark E320/E322 Publications CD.
Media specifications
Labels Width: 210 to 216 mm (8.3 to 8.5 in.)
Length: 279 to 297 mm (11 to 11.7 in.)
2
Weight: Up to 163 g/m
Thickness: Up to 0.25 mm (0.01 in.)
Smoothness: 100 to 400* Sheffield
* 150—250 Sheffield is optimal. Using media higher than 300 Sheffield could result in printing degradation.
Card stock Weight: Up to 163 g/m
Up to 163 g/m
Note: To minimize curl, use the top exit when printing on card stock and labels.
(43 lb)
2
Index Bristol (90 lb)
2
Tag (100 lb)
Maintenance procedures
If the print quality begins to degrade when printing sheets of labels, we suggest you follow the three cleaning steps below:
1 Print 5 sheets of paper.
2 Wait approximately 5 seconds.
3 Print 5 more sheets of paper.
To maintain printer feeding reliability, repeat this cleaning process every time you replace the print cartridge, more often
with some media. Failure to follow maintenance procedures could cause jamming, poor print quality, feeding problems, and
fuser problems.
Lexmark E320, E322
67
Page 68

Printer specifications
Lexmark E321, E323
Limit label printing to occasional use of paper office labels designed for
laser printers. We do not recommend using vinyl or polyester labels.
The Lexmark E321 and Lexmark E323 support stocks up to
43 lb (163 g/m2). The automatic paper feeder can hold up to 10 sheets of
card stock or labels.
The following table lists the maximum basis weights supported by Tray 1
and the manual sheet feeder. More detailed specifications appear on the
following page.
Lexmark E321, E323: Overview of Card Stock and Label Support
Card Stock Labels
Paper Source
Tray 1 163 g/m
Manual Feed 163 g/m
Index Bristol Tag Cover Paper Vinyl
2
2
163 g/m
163 g/m
2
2
– 163 g/m2 –
– 163 g/m2 –
For paper and transparency specifications, see the Lexmark E321/E323 Publications CD.
Media specifications
Labels Width: 210 to 216 mm (8.3 to 8.5 in.)
Length: 279 to 297 mm (11 to 11.7 in.)
2
Weight: Up to 163 g/m
Thickness: Up to 0.25 mm (0.01 in.)
Smoothness: 100 to 400* Sheffield
* 150—250 Sheffield is optimal. Using media higher than 300 Sheffield could result in printing degradation.
Card stock Weight: Up to 163 g/m
Up to 163 g/m
Note: To minimize curl, use the top exit when printing on card stock and labels.
(43 lb)
2
Index Bristol (90 lb)
2
Tag (100 lb)
Maintenance procedures
If the print quality begins to degrade when printing sheets of labels, we suggest you follow the three cleaning steps below:
1 Print 5 sheets of paper.
2 Wait approximately 5 seconds.
3 Print 5 more sheets of paper.
To maintain printer feeding reliability, repeat this cleaning process every time you replace the print cartridge, more often
with some media. Failure to follow maintenance procedures could cause jamming, poor print quality, feeding problems, and
fuser problems.
Lexmark E321, E323
68
Page 69

Printer specifications
Lexmark E230, E232, E234(n), E330, and E332n
Limit label printing to occasional use of paper office labels designed for
laser printers. We do not recommend using vinyl or polyester labels.
The Lexmark E230, E232, E234(n), E330, and E332 support stocks up to
43 lb (163 g/m
paper labels.
The following table lists the maximum basis weights supported by Tray 1
and the manual sheet feeder. More detailed specifications appear on the
following page.
Lexmark E230, E232, E234(n), E330, E332n: Overview of card stock and label support
Paper source
Tray 1 – – – 163 g/m
Manual feed 163 g/m
Index Bristol Tag Cover Paper Vinyl
2
163 g/m
2
). The automatic paper feeder can hold up to 50 sheets of
Card stock Labels
2
–
2
– 163 g/m2 –
For paper and transparency specifications, see the Lexmark E230/E232/E234(n)/E330/E332n Publications CDs.
Media specifications
Labels Width: 210 to 216 mm (8.3 to 8.5 in.)
Length: 279 to 297 mm (11 to 11.7 in.)
2
Weight: Up to 163 g/m
Thickness: Up to 0.25 mm (0.01 in.)
Smoothness: 100 to 400* Sheffield
* 150—250 Sheffield is optimal. Using media higher than 300 Sheffield could result in printing degradation.
Card stock Weight: Up to 163 g/m
Up to 163 g/m
Note: To minimize curl, use the rear exit when printing on card stock and labels.
(43 lb)
2
Index Bristol (90 lb)
2
Tag (100 lb)
Maintenance procedures
If the print quality begins to degrade when printing sheets of labels, we suggest you follow the three cleaning steps below:
1 Print 5 sheets of paper.
2 Wait approximately 5 seconds.
3 Print 5 more sheets of paper.
To maintain printer feeding reliability, repeat this cleaning process every time you replace the print cartridge, more often
with some media. Failure to follow maintenance procedures could cause jamming, poor print quality, feeding problems, and
fuser problems.
Lexmark E230, E232, E234(n), E330, and E332n
69
Page 70

Printer specifications
Lexmark E120
Limit label printing to occasional use of paper office labels designed for laser
printers. We do not recommend using vinyl or polyester labels.
The Lexmark E120 supports stocks up to 43 lb (163 g/m2). The automatic
paper feeder can hold up to 10 sheets of card stock or labels.
The following table lists the maximum basis weights supported by Tray 1 and
the manual sheet feeder. More detailed specifications appear on the following
page.
Lexmark E120: Overview of card stock and label support
Card stock Labels
Paper source
Tray 1 135—163 g/m
Manual feed 135—163 g/m
For paper and transparency specifications, see the Lexmark E220 Publications CD.
Index Bristol Paper Vinyl
2
(up to 90 lb) 60—163 g/m2 (16—43 lb) –
2
(up to 90 lb) 60—163 g/m2 (16—43 lb) –
Media specifications
Labels Width: 210 to 216 mm (8.3 to 8.5 in.)
Length: 279 to 297 mm (11 to 11.7 in.)
Weight: Up to 163 g/m2 (43 lb)
Thickness: Up to 0.25 mm (0.01 in.)
Smoothness: 100 to 400* Sheffield
* 150—250 Sheffield is optimal. Using media higher than 300 Sheffield could result in printing degradation.
2
Card stock Weight: Up to 163 g/m
Up to 163 g/m
Note: To minimize curl, use the top exit when printing on card stock and labels.
Index Bristol (90 lb)
2
Tag (100 lb)
Maintenance procedures
If the print quality begins to degrade when printing sheets of labels, we suggest you follow the three cleaning steps below:
1 Print 5 sheets of paper.
2 Wait approximately 5 seconds.
3 Print 5 more sheets of paper.
To maintain printer feeding reliability, repeat this cleaning process every time you replace the print cartridge, more often
with some media. Failure to follow maintenance procedures could cause jamming, poor print quality, feeding problems, and
fuser problems.
Lexmark E120
70
Page 71

Printer specifications
Lexmark T430
The Lexmark T430 prints on paper office labels designed for laser printers.
Limit label printing to occasional use. We do not recommend using vinyl or
polyester labels.
The Lexmark T430 supports stocks from 60 to 163 g/m2 (16-43 lb). The
multipurpose feeder can feed up to 30 sheets of dual-web or integrated labels
and 10 sheets of card stock.
The following table lists the maximum basis weights supported by Tray 1 and
the multipurpose feeder.
Lexmark T430: Overview of card stock support
Paper source Index Bristol Ta g Cover
Tray 1 –––
Multipurpose Feeder* 60 to 163 g/m2 (16—43 lb) –
* Card stock can only be fed from the multipurpose feeder and must always exit to the rear output bin.
Lexmark T430: Overview of label support
Label type Standard tray Multipurpose feeder Optional trays
Paper X
Integrated X
Dual web X
9 - indicates support X - indicates no support
Warning: Do not place over 100 label sheets in the standard tray or over 30 label sheets in the multipurpose feeder.
Feeding labels from print media sources that are not supported may damage your printer.
9
9
9
X
X
X
Media specifications
Labels Width: 76.2 to 216 mm (3.0 to 8.5 in.)
Length: 127 to 355.6 mm (5 to 14 in.)
Weight: Up to 199 g/m2 (53 lb)
Thickness: Up to 0.25 mm (0.01 in.)
Smoothness: 100 to 400* Sheffield
* 150 - 250 Sheffield is optimal. Using media higher than 300 Sheffield could result in printing degradation.
2
Card stock Weight: Up to 163 g/m
Up to 163 g/m
Index Bristol (90 lb)
2
Tag (100 lb)
Note: Always use the rear exit when printing on card stock. To minimize curl, use the rear exit when printing on labels.
Lexmark T430
71
Page 72

Printer specifications
When printing on labels:
• Set the Paper Type to Labels from the printer driver, the Local Printer Setup Utility, or MarkVision.
• Do not load labels together with paper or transparencies in the same paper source.
• Do not use label sheets with a slick backing material.
• Do not print within 1 mm (0.040 in.) of the die cut.
• Use full label sheets. Partial sheets may cause labels to peel off during printing, resulting in a paper jam. Partial
sheets will also contaminate your printer and your cartridge with adhesive, and could void your printer and
cartridge warranties.
• Use labels that can withstand temperatures of 205°C (401°F) without sealing, excessive curling, wrinkling, or
releasing hazardous emissions.
• Use labels that can withstand pressure of 25 pounds per square inch (psi).
• Do not print within 1 mm (0.040 in.) of the edge of the label, of the perforations, or between die-cuts of the label.
• Do not use label sheets that have adhesive to the edge of the sheet. We recommend zone coating of the adhesive
at least 1 mm (0.040 in.) away from edges. Adhesive material will contaminate your printer and could void your
warranty.
• If zone coating of the adhesive is not possible, a non-oozing adhesive should be used. Unlike other printers, do
not remove the leading or driver edge.
• Test any perferated card stock or paper before purchasing large quantities. The perferation locations may impact
printer reliability
• Portrait orientation is preferred, especially when printing bar codes.
• Do not use labels that have exposed adhesive.
• For the multipurpose feeder, load labels with the recommended print side faceup and the top edge going in first.
For the tray, load labels with the recommended print side face down.
When printing on card stock:
• Set the Paper Type to Card Stock from the printer driver, the Local Printer Setup Utility, or MarkVision.
• Do not use preprinted card stock manufactured with chemicals that may contaminate the printer. Preprinting
introduces semi-liquid and volatile components into the printer.
• Do not use card stock that is creased. It may cause paper jams.
• We recommend the use of grain short card stock.
• Load card stock with the recommended print side faceup and the top edge going in first.
Maintenance procedures
When any of the following conditions occur:
• after continuously printing approximately 10,000 pages of labels or card stock
• the print cartridge is replaced
• the print quality begins to degrade
we suggest you follow the three cleaning steps below to maintain printer feeding reliability:
1 Print 5 sheets of paper.
2 Wait approximately 5 seconds.
3 Print 5 more sheets of paper.
To maintain printer feeding reliability, repeat this cleaning process every time you replace the print cartridge, more often
with some media. Failure to follow maintenance procedures could cause jamming, poor print quality, feeding problems, and
fuser problems.
Lexmark T430
72
Page 73

Printer specifications
Lexmark T420
The Lexmark T420 prints on many labels designed for use with laser
printers.
The Lexmark T420 supports stocks up to 60-199 g/m2 (16-53 lb). The
standard tray is designed to handle 100 sheets of heavy labels, but its
capacity may be reduced due to the thickness of some labels. The
multipurpose feeder can feed up to 30 sheets of dual-web or integrated
labels and 10 sheets of card stock.
The following table lists the maximum basis weights supported by Tray 1
and the multipurpose feeder.
Lexmark T420: Overview of card stock support
Card stock
Paper source
Tray 1 – – –
Multipurpose feeder * 60—199 g/m
* Card stock can only be fed from the multipurpose feeder and must always exit to the rear output bin.
Index Bristol Ta g Cover
2
(16—53 lb) –
Lexmark T420: Overview of Label Support
Print media source
Label type
Paper
Integrated X
Dual web
Vinyl X X X
Note: Do not place over 100 label sheets in the standard tray or over 30 label sheets in the multipurpose feeder.
Feeding labels from print media sources that are not supported may damage your printer.
For paper and transparency specifications, see the Lexmark T420 Publications CD.
Standard tray Multipurpose feeder Optional trays
9
XX
9
99
9 - indicates support X - indicates no support
X
X
Lexmark T420
73
Page 74

Printer specifications
Media specifications
Labels Width: 76.2 to 216 mm (3.0 to 8.5 in.)
Length: 127 to 355.6 mm (5 to 14 in.)
Weight: Up to 199 g/m2 (53 lb)
Thickness: Up to 0.25 mm (0.01 in.)
Smoothness: 100 to 400* Sheffield
* 150—250 Sheffield is optimal. Using media higher than 300 Sheffield could result in printing degradation.
2
Card stock Weight: Up to 163 g/m
Up to 163 g/m
Note: Always use the rear exit when printing on card stock. To minimize curl, use the rear exit when printing on labels.
When printing on labels:
• Set the Paper Type to Labels from the printer driver, the Local Printer Setup Utility, or MarkVision.
• Do not load labels together with paper or transparencies in the same paper source.
• Do not use label sheets with a slick backing material.
• Do not print within 1 mm (0.040 in.) of the die cut.
• Use full label sheets. Partial sheets may cause labels to peel off during printing, resulting in a paper jam. Partial
sheets will also contaminate the printer and the cartridge with adhesive, and could void the printer and cartridge
warranties.
• Use labels that can withstand temperatures of 205°C (401°F) without sealing, excessive curling, wrinkling, or
releasing hazardous emissions.
• Use labels that can withstand pressure of 25 pounds per square inch (psi).
• Do not print within 1 mm (0.040 in.) of the edge of the label, of the perforations, or between die-cuts of the label.
• Do not use labels that have adhesive to the edge of the sheet. We recommend zone coating of the adhesive at
least 1 mm (0.040 in.) from the edges. Adhesive material will contaminate the printer and could void the warranty.
• If zone coating of the adhesive is not possible, a 3 mm (0.125 in.) strip should be removed on the leading and
driver edge, and a non-oozing adhesive should be used.
• Remove a 3 mm (0.125 in.) strip from the leading edge to prevent labels from peeling inside the printer.
• Portrait orientation is preferred, especially when printing bar codes.
• Do not use labels that have exposed adhesive.
• For the multipurpose feeder, load labels with the recommended print side faceup and the top edge going in first.
For the tray, load labels with the recommended print side face down.
Index Bristol (90 lb)
2
Tag (100 lb)
Lexmark T420
74
Page 75

Printer specifications
When printing on card stock:
• Set the Paper Type to Card Stock from the printer driver, the Local Printer Setup Utility, or MarkVision.
• Do not use preprinted card stock manufactured with chemicals that may contaminate the printer. Preprinting
introduces semi-liquid and volatile components into the printer.
• Do not use card stock that is creased. It may cause paper jams.
• We recommend the use of grain short card stock.
• Load card stock with the recommended print side faceup and the top edge going in first.
Maintenance procedures
When any of the following conditions occur:
• after continuously printing approximately 10,000 pages of labels or card stock
• the print cartridge is replaced
• the print quality begins to degrade
we suggest you follow the three cleaning steps below to maintain printer feeding reliability:
1 Print 5 sheets of paper.
2 Wait approximately 5 seconds.
3 Print 5 more sheets of paper.
To maintain printer feeding reliability, repeat this cleaning process every time you replace the print cartridge, more often
with some media. Failure to follow maintenance procedures could cause jamming, poor print quality, feeding problems, and
fuser problems.
Lexmark T420
75
Page 76

Printer specifications
Lexmark T520, T522
The Lexmark T520 and T522 print on many labels designed for use with laser
printers.
The following table lists the maximum basis weights supported by the trays and
the multipurpose feeder. More detailed specifications appear on the following
pages.
Lexmark T520, T522: Overview of card stock and label support
Index
Paper source
Bristol Tag Cover Paper
Integrated tray 199 g/m
Optional 250-sheet drawer 163 g/m
Card stock
1
Dual-web
paper Polyester Vinyl
2
203 g/m2 216 g/m2 180 g/m2180 g/m2220 g/m2300 g/m2
2
163 g/m2 176 g/m2 163 g/m2 163 g/m2220 g/m2260 g/m
Labels
2
Optional 500-sheet drawer 199 g/m2 203 g/m2 216 g/m2 180 g/m2180 g/m2220 g/m2300 g/m2
Multipurpose feeder
1
Grain short.
2
Printing labels on the T520, T522 requires a special label fuser cleaner that prevents duplexing.
3
163 g/m2 163 g/m2 176 g/m2 163 g/m2 163 g/m2220 g/m2260 g/m
It is recommended that when you run vinyl labels, you install a special oil fuser cleaner, P/N 99A0725. When you order
a new cartridge, be sure to order the cartridge that will include the correct fuser cleaner.
It is possible to duplex certain labels that have been specifically designed for this application.To duplex labels, consult
the Lexmark “Converter Lists” to see which converters have successfully developed this type of label and you must
install a special fuser wiper. The wax wiper that is used with the T520 and T522 is P/N 99A1082.
3
Due to label design characteristics, unacceptable feeding may be experienced from the multipurpose feeder.
For paper and transparency specifications, see the printer publications CD.
The following table indicates the paper sizes each tray supports.
Paper Source specifications for all media
Standard sizes (width x length) Universal sizes (width x length)
Source
Standard tray,
250-sheet drawer,
500-sheet drawer
Minimum Maximum Minimum Maximum
148 x 210 mm
(5.83 x 8.27 in.)
215.9 x 355.6 mm
(8.5 x 14 in.)
139.7 x 210 mm
(5.5 x 8.27 in.)
215.9 x 355.6 mm
(8.5 in. x 14 in.)
2
2
Multipurpose feeder 148 x 210 mm
(5.83 x 8.27 in.)
215.9 x 355.6 mm
(8.5 x 14 in.)
69.85 x 127 mm
(2.75 in. x 5 in.)
229 x 355.6 mm
(9.01 x 14 in.)
If you load paper that is narrower than 148 mm (5.83 in.) in the multipurpose feeder (for example, 3x5-inch index
cards), set the MP Feeder Size menu item to Universal.
Lexmark T520, T522
76
Page 77

Printer specifications
Media specifications
Labels Thickness: 0.102 to 0.305 mm (0.004 to 0.012 in.)
Smoothness: 100 to 400* Sheffield
* 150—250 Sheffield is optimal. Using media higher than 300 Sheffield could result in printing degradation.
Card stock Weight: Up to 199 g/m2 Index Bristol (90 lb)
2
Up to 203 g/m
Tag (100 lb)
Standard trays and special media trays
The Lexmark T520 and T522 paper feeding mechanism uses advanced technology that enhances feeding reliability. The
standard Lexmark T520 and T522 tray, which holds 250 or 500 sheets of 20 lb xerographic paper, reliably feeds all media
tested according to the guidelines specified under Dimensions on page 7.
For those difficult-to-print sizes, such as 3-inch x 5-inch index cards, Lexmark offers a variety of special media trays and
drawers.
Note: Optional 250-sheet Universally Adjustable Trays can be used to print forms with a minimum length of
5 inches using a T520, when installed either in the integral tray location or in a 250-sheet drawer
under a 250-sheet integral tray. Optional 250-sheet Universally Adjustable Trays support forms with
a minimum length of 7 inches on a T522. Optional 400-sheet Universally Adjustable Trays support
forms with a minimum length of 7 inches on both the T520 and T522.
Special media options
Source Part number
250-Sheet Special Media Tray 11K1572
250-Sheet Special Media Drawer 11K1573
250-Sheet Universally Adjustable Tray 11K1574
250-Sheet Universally Adjustable Drawer 11K1878
500-Sheet Special Media Tray 11K1921
500-Sheet Special Media Tray + Drawer 11K1922
400-Sheet Universally Adjustable Tray 11K1941
400-Sheet Universally Adjustable Tray + Drawer 11K1942
Lexmark T520, T522
77
Page 78

Printer specifications
Pick Roller Technology
The Lexmark T520 and T522 printers use an auto compensator to pick the media rather than the corner buckler system
used by earlier printer models.
The Lexmark T520 and T522 trays have two rollers that touch the media in two places (see Figure 12 on page 78). Avoid
placing deep perforations in these areas since the media may nest, causing multiple sheet feeds. Perforations that could
cause nesting and tenting should fall outside the 0.31—0.79 in. area on the leading edge of the media. (This is different from
the 0.50 in. we recommend leaving at the top of the form for printers with a corner buckler system.) You may want to use
micro-perfs to avoid nesting problems. See Perforations and die-cuts on page 8 for more information.
Pick roller location
0.31 in.
0.79 in.
1.34 in.
1.93 in.
4.84 in.
5.43 in.
Direction of feed
Figure 12. Location of pick rollers
Labels are one of the most difficult print materials for laser printers. A special fuser cleaner should be used for label
applications to optimize feed reliability. See your printer documentation for information on ordering additional label fuser
cleaners.
When printing on labels:
• Using the printer operator panel, set the Paper Type to Labels in the Paper Menu. For vinyl and other heavy
labels, set the Labels Weight (under the Paper Weight menu) to Heavy, and set the Labels Texture (under the
Paper Texture menu) to Smooth.
• Do not load labels together with paper or transparencies in the same paper tray. Combining print materials can
cause feeding problems.
• Use full label sheets. Partial sheets may cause labels to peel off during printing, resulting in a paper jam. Adhesive
material may contaminate your printer. It could also void your printer and cartridge warranties.
When feeding labels, the number of labels per sheet can affect registration more than basis weight. Typically, the more
labels per sheet, the better the registration.
Lexmark T520, T522
78
Page 79

Printer specifications
When printing on card stock:
• Set the Paper Type to Card Stock in the Paper Menu.
• Do not use card stock that is creased. It may cause paper jams.
Print material specifications
Range or maximum weight supported
Integrated tray and optional 500-
Print material
Paper
(grain direction
Card Stock
(grain direction
1
Xerographic or
)
business paper
Index Bristol 199 g/m2 (110 lb) 163 g/m2 (90 lb)
1
)
Tag 203 g/m
60 to 176 g/m
(16 to 47 lb bond)
Cover 216 g/m
Labels Paper 180 g/m
Dual-web paper 180 g/m
Vinyl 300 g/m
Polyester 220 g/m
2
Integrated forms Pressure sensitive area
140 to 175 g/m
Paper base(grain long) 75 to 135 g/m
sheet drawer
2
2
(125 lb) 163 g/m2 (100 lb)
2
(80 lb) 176 g/m2 (65 lb)
2
(48 lb bond) 163 g/m2 (43 lb bond)
2
(48 lb bond) 163 g/m2 (43 lb bond)
2
(92 lb liner) 260 g/m2 (78 lb liner)
2
(59 lb bond) 220 g/m2 (59 lb bond)
2
2
(20 to 36 lb bond)
1
See Grain direction on page 79 for specific recommendations.
2
Pressure-sensitive area must enter the printer first for grain short paper.
3
Due to label design characteristics, unacceptable feeding may be experienced from the multipurpose feeder.
Multipurpose feeder3 and
optional 250-sheet drawer
60 to 135 g/m
(16 to 36 lb bond)
140 to 175 g/m
75 to 135 g/m
(20 to 36 lb bond)
Grain direction
2
2
2
Grain refers to the alignment of the paper fibers in a sheet of paper. Grain is either grain long, running the length of the
paper, or grain short, running the width of the paper.
For 60 to 135 g/m2 paper, we recommend grain long stock. For papers heavier than 135 g/m2, grain short is preferred. For
the multipurpose feeder, we recommend 60 to 135 g/m
2
paper, grain long. If you feed papers heavier than 135 g/m2 from
the multipurpose feeder, grain short is preferred.
Maintenance procedures
If the print quality begins to degrade when printing sheets of vinyl labels, we suggest you follow the three cleaning steps
below:
1 Print 5 sheets of paper.
2 Wait approximately 5 seconds.
3 Print 5 more sheets of paper.
To maintain printer feeding reliability, repeat this cleaning process every time you replace the print cartridge, more often
with some media. Failure to follow maintenance procedures could cause jamming, poor print quality, feeding problems, and
fuser problems.
Lexmark T520, T522
79
Page 80

Printer specifications
Troubleshooting
The following table provides solutions for some common card stock and label problems. See your printer documentation for
more troubleshooting information.
Solutions to printing problems
Problem Solution
Print on heavy stock is blurred or
out of focus.
Toner rubs off the page. Make sure the Paper Type setting is appropriate for your print material.
Printing shows voids. Change the Paper Type to Plain Paper.
Make sure the Paper Type setting is appropriate for your print material. (Card stock in
excess of 203 g/m
Print 5 sheets of paper, wait approximately 5 seconds, print 5 more sheets of paper to
remove any toner that may have accumulated.
Use a lighter weight stock. (The material being used exceeds 300 g/m
Print 5 sheets of paper, wait approximately 5 seconds, print 5 more sheets of paper to
remove any toner that may have accumulated.
Print 5 sheets of paper, wait approximately 5 seconds, print 5 more sheets of paper to
remove any toner that may have accumulated.
2
[54 lb bond] may not produce acceptable print results.)
2
).
Lexmark T520, T522
80
Page 81

Printer specifications
Lexmark T620, T622
The Lexmark T620 and T622 print on many labels designed for use with laser
printers.
The following table lists the maximum basis weights supported by the trays and
the multipurpose feeder. More detailed specifications appear on the following
pages.
Lexmark T620, T622: Overview of card stock and label support
Card stock
Index
Paper source
Integrated tray 199 g/m
Optional 250-sheet drawer 163 g/m
Optional 500-sheet drawer 199 g/m
Multipurpose feeder
1
Grain short.
2
Printing labels on the T620 and T622 requires a special label fuser cleaner that prevents duplexing.
4
Bristol
163 g/m
2
2
2
2
203 g/m
163 g/m
203 g/m
163 g/m
1
Tag Cover Paper
2
2
2
2
216 g/m
176 g/m
216 g/m
176 g/m
2
180 g/m
2
163 g/m2 163 g/m
2
180 g/m
2
163 g/m2 163 g/m
2
2
Dual-web
paper
180 g/m
180 g/m
2
Labels
Polyester Vinyl
2
220 g/m
2
220 g/m
2
220 g/m
2
220 g/m
2
2
2
2
300 g/m2
260 g/m
300 g/m2
260 g/m
It is recommended that when you run vinyl labels, you install a special oil fuser cleaner, P/N 99A0725. When you order
a new cartridge, be sure to order the cartridge that will include the correct fuser cleaner.
It is possible to duplex certain labels that have been specifically designed for this application.To duplex labels, consult
the Lexmark “Converter Lists” to see which converters have successfully developed this type of label, and you must
install a special fuser wiper. The wax wiper that is used with the T620 and T622 is P/N 18A1467.
3
The Lexmark T622 does not support vinyl media.
4
Due to label design characteristics, unacceptable feeding may be experienced from the multipurpose feeder.
For paper and transparency specifications, see the publications CD.
The following table indicates the paper sizes each tray supports.
Paper source specifications for all media
3
2
2
Source
Standard tray,
250-sheet drawer,
Standard sizes
(width x length)
Minimum Maximum Minimum Maximum
148 x 210 mm
(5.83 x 8.27 in.)
215.9 x 355.6 mm
(8.5 x 14 in.)
139.7 x 210 mm
(5.5 x 8.27 in.)
Universal sizes
(width x length)
215.9 x 355.6 mm
(8.5 in. x 14 in.)
500-sheet drawer
Multipurpose feeder 148 x 210 mm
(5.83 x 8.27 in.)
215.9 x 355.6 mm
(8.5 x 14 in.)
69.85 x 127 mm
(2.75 in. x 5 in.)
229 x 355.6 mm
(9.01 x 14 in.)
If you load paper that is narrower than 148 mm (5.83 in.) in the multipurpose feeder (for example, 3x5-inch index
cards), set the MP Feeder Size menu item to Universal.
Lexmark T620, T622
81
Page 82

Printer specifications
Media specifications
Labels Thickness: 0.102 to 0.305 mm (0.004 to 0.012 in.)
Smoothness: 100 to 400* Sheffield
* 150—250 Sheffield is optimal. Using media higher than 300 Sheffield could result in printing degradation.
Card stock Weight: Up to 199 g/m2 Index Bristol (90 lb)
2
Up to 203 g/m
Tag (100 lb)
Standard trays and special media trays
The Lexmark T620 and T622 paper feeding mechanism uses advanced technology that enhances feeding reliability. The
standard Lexmark T620 and T622 tray, which holds 500 sheets of bond paper, reliably feeds all media tested according to
the guidelines specified under Dimensions on page 7.
For those difficult-to-print sizes, such as 3-inch x 7-inch forms, Lexmark offers a variety of special media trays and drawers.
Note: Optional 250-sheet Universally Adjustable Trays support forms with a minimum length of 7 inches on
both the T620 and T622. Optional 400-sheet Universally Adjustable Trays support forms with a
minimum length of 7 inches on both the T620 and T622.
Special Media Options
Source Part number
250-Sheet Special Media Tray 11K1572
250-Sheet Special Media Drawer 11K1573
250-Sheet Universally Adjustable Tray 11K1574
250-Sheet Universally Adjustable Drawer 11K1878
500-Sheet Special Media Tray 11K1921
500-Sheet Special Media Tray + Drawer 11K1922
400-Sheet Universally Adjustable Tray 11K1941
400-Sheet Universally Adjustable Tray + Drawer 11K1942
Lexmark T620, T622
82
Page 83

Printer specifications
Pick roller technology
The Lexmark T620 and T622 printers use an auto compensator to pick the media rather than the corner buckler system
used by earlier printer models.
The Lexmark T620 and T622 trays have two rollers that touch the media in two places (see Figure 13 on page 83). Avoid
placing deep perforations in these areas since the media may nest, causing multiple sheet feeds. Perforations that could
cause nesting and tenting should fall outside the 0.31— 0.79 in. area on the leading edge of the media. (This is different
from the 0.50 in. we recommend leaving at the top of the form for printers with a corner buckler system.) You may want to
use micro-perfs to avoid nesting problems. See Perforations and die-cuts on page 8 for more information.
Pick roller location
0.31 in.
0.79 in.
1.34 in.
1.93 in.
4.84 in.
5.43 in.
Direction of feed
Figure 13. Location of pick rollers
Labels are one of the most difficult print materials for laser printers. A special fuser cleaner should be used for label
applications to optimize feed reliability. See your printer documentation for information on ordering additional label fuser
cleaners.
When printing on labels:
• Using the printer operator panel, set the Paper Type to Labels in the Paper Menu. For vinyl and other heavy
labels, set the Labels Weight (under the Paper Weight menu) to Heavy, and set the Labels Texture (under the
Paper Texture menu) to Smooth.
• Do not load labels together with paper or transparencies in the same paper tray. Combining print materials can
cause feeding problems.
• Use full label sheets. Partial sheets may cause labels to peel off during printing, resulting in a paper jam. Adhesive
material may contaminate your printer. It could also void your printer and cartridge warranties.
Note: The Lexmark T622 does not support vinyl labels.
Lexmark T620, T622
83
Page 84

Printer specifications
When feeding labels, the number of labels per sheet can affect registration more than basis weight. Typically, the more
labels per sheet, the better the registration.
When printing on card stock:
• Set the Paper Type to Card Stock in the Paper Menu.
• Do not use card stock that is creased. It may cause paper jams.
Print material specifications
Range or maximum weight supported
250-sheet and
Print Material
Paper
(grain Long)
Card stock
(grain long
1
)
Xerographic or
business paper
60 to 176 g/m
(16 to 47 lb bond)
Index Bristol 163 g/m2 (90 lb) 120 g/m2 (67 lb)
Tag 163 g/m
Cover 176 g/m
Card stock
(grain short
1
)
Index Bristol 199 g/m2 (110 lb) 163 g/m2 (90 lb)
Tag 203 g/m
Cover 216 g/m
Labels Paper 180 g/m
Dual-Web Paper 180 g/m
Vinyl
3
300 g/m2 (92 lb liner) 260 g/m2 (78 lb liner)
Polyester 220 g/m
Integrated forms Pressure sensitive area
2
Paper base
(grain long)
1
See Grain direction on page 84 for specific recommendations.
2
Pressure-sensitive area must enter the printer first for grain short paper.
3
The Lexmark T622 does not support vinyl labels.
4
Due to label design characteristics, unacceptable feeding may be experienced from the multipurpose feeder.
140 to 175 g/m
75 to 135 g/m
(20 to 36 lb bond)
500-sheet trays
2
2
(100 lb) 120 g/m2 (74 lb)
2
(65 lb) 135 g/m2 (50 lb)
2
(125 lb) 163 g/m2 (100 lb)
2
(80 lb) 176 g/m2 (65 lb)
2
(48 lb bond) 163 g/m2 (43 lb bond)
2
(48 lb bond) 163 g/m2 (43 lb bond)
2
(59 lb bond) 220 g/m2 (59 lb bond)
2
2
Multipurpose feeder4 and
optional 250-sheet drawer
60 to 135 g/m
2
(16 to 36 lb bond)
140 to 175 g/m
75 to 135 g/m
2
2
(20 to 36 lb bond)
Grain direction
Grain refers to the alignment of the paper fibers in a sheet of paper. Grain is either grain long, running the length of the
paper, or grain short, running the width of the paper.
For 60 to 135 g/m2 (16 to 36 lb bond) paper, we recommend grain long stock. For papers heavier than 135 g/m2 (36 lb
bond), grain short is preferred. For the multipurpose feeder, we recommend 60 to 135 g/m
long. If you feed papers heavier than 135 g/m
2
(36 lb bond) from the multipurpose feeder, grain short is preferred.
Lexmark T620, T622
84
2
(16 to 36 lb bond) paper, grain
Page 85

Printer specifications
Maintenance procedures
If the print quality begins to degrade when printing sheets of vinyl labels, we suggest you follow the three cleaning steps
below:
1 Print 5 sheets of paper.
2 Wait approximately 5 seconds.
3 Print 5 more sheets of paper.
To maintain printer feeding reliability, repeat this cleaning process every time you replace the print cartridge, more often
with some media. Failure to follow maintenance procedures could cause jamming, poor print quality, feeding problems, and
fuser problems.
Troubleshooting
The following table provides solutions for some common card stock and label problems. See your printer documentation for
more troubleshooting information.
Solutions to printing problems
Problem Solution
Print on heavy stock is
blurred or out of focus.
Make sure the Paper Type setting is appropriate for your print material. (Card stock in
excess of 203 g/m
2
[54 lb bond] may not produce acceptable print results.)
Print 5 sheets of paper, wait approximately 5 seconds, print 5 more sheets of paper to
remove any toner that may have accumulated.
Toner rubs off the page. Make sure the Paper Type setting is appropriate for your print material.
Use a lighter weight stock. (The material being used exceeds 300 g/m
Print 5 sheets of paper, wait approximately 5 seconds, print 5 more sheets of paper to
remove any toner that may have accumulated.
Printing shows voids. Change the Paper Type to Plain Paper.
Print 5 sheets of paper, wait approximately 5 seconds, print 5 more sheets of paper to
remove any toner that may have accumulated.
2
).
Lexmark T620, T622
85
Page 86

Printer specifications
Lexmark T630, T632, T634
The Lexmark T630, T632, and T634 print on many labels designed
for use with laser printers.
The following table lists the maximum basis weights supported by
the trays and the multipurpose feeder. More detailed specifications
appear on the following pages.
Lexmark T630, T632, T634: Overview of card stock and label support
Index
Paper source
Bristol Tag Cover Paper
Integrated tray 199 g/m
Optional 250-sheet drawer 163 g/m
Card stock
1
Dual-web
paper Polyester Vinyl
2
203 g/m2 216 g/m2 180 g/m2180 g/m2220 g/m2300 g/m2
2
163 g/m2 176 g/m2 163 g/m2 163 g/m2220 g/m2260 g/m
Labels
2
Optional 500-sheet drawer 199 g/m2 203 g/m2 216 g/m2 180 g/m2180 g/m2220 g/m2300 g/m2
Multipurpose feeder
1
Grain short.
2
Printing labels on the T630, T632 and T634 require a special label fuser cleaner that prevents duplexing.
3
163 g/m2 163 g/m2 176 g/m2 163 g/m2 163 g/m2220 g/m2260 g/m
It is recommended that when you run vinyl labels, you install a special oil fuser cleaner, P/N 56P1415. When you order
a new cartridge, be sure to order the cartridge that will include the correct fuser cleaner.
It is possible to duplex certain labels that have been specifically designed for this application.To duplex labels, consult
the Lexmark “Converter Lists” to see which converters have successfully developed this type of label, and you must
install a special fuser wiper. The wax wiper that is used with the T630, T632, and T634 is P/N 56P2109. (Cartridges
designed for duplex label printing contain two wax wipers. Change the wax wiper at the halfway point of your normal
cartridge usage to provide additional cleaning and optimize performance.)
3
Due to label design characteristics, unacceptable feeding may be experienced from the multipurpose feeder.
For paper and transparency specifications, see the publications CD.
The following table indicates the paper sizes each tray supports.
Paper source specifications for all media
2
2
Source
Standard tray,
250-sheet drawer,
Standard sizes
(width x length)
Minimum Maximum Minimum Maximum
148 x 210 mm
(5.83 x 8.27 in.)
215.9 x 355.6 mm
(8.5 x 14 in.)
139.7 x 210 mm
(5.5 x 8.27 in.)
Universal sizes
(width x length)
215.9 x 355.6 mm
(8.5 x 14 in.)
500-sheet drawer
Multipurpose feeder 148 x 210 mm
(5.83 x 8.27 in.)
215.9 x 355.6 mm
(8.5 x 14 in.)
69.85 x 127 mm
(2.75 x 5 in.)
229 x 355.6 mm
(9.01 x 14 in.)
If you load paper that is narrower than 148 mm (5.83 in.) in the multipurpose feeder (for example, 3x5-inch index
cards), set the MP Feeder Size menu item to Universal.
Lexmark T630, T632, T634
86
Page 87

Printer specifications
Media specifications
Labels Thickness: 0.102 to 0.305 mm (0.004 to 0.012 in.)
Smoothness: 100 to 400* Sheffield
* 150—250 Sheffield is optimal. Using media higher than 300 Sheffield could result in printing degradation.
Card stock Weight: Up to 199 g/m2 Index Bristol (90 lb)
2
Up to 203 g/m
Tag (100 lb)
Standard trays and special media trays
The Lexmark T630, T632, and T634 paper feeding mechanism uses advanced technology that enhances feeding reliability.
The standard Lexmark T630, T632, and T634 tray, which holds 250 or 500 sheets of bond paper, reliably feeds all media
tested according to the guidelines specified under Dimensions on page 7.
For those difficult-to-print sizes, such as 3-inch x 5-inch index cards, Lexmark offers a variety of special media trays and
drawers.
Note: Optional 250-sheet Universally Adjustable Trays can be used to print forms with a minimum length of
5 inches using a T630 when installed either in the integral tray location or in a 250-sheet drawer under
a 250-sheet integral tray. Optional 250-sheet Universally Adjustable Trays support forms with a
minimum length of 7 inches on a T632. Optional 400-sheet Universally Adjustable Trays support
forms with a minimum length of 7 inches on the T630, T632 and T634.
Special media options
Source Part number
250-Sheet Special Media Tray 11K1572
250-Sheet Special Media Drawer 11K1573
250-Sheet Universally Adjustable Tray 11K1574
250-Sheet Universally Adjustable Drawer 11K1878
500-Sheet Special Media Tray 11K1921
500-Sheet Special Media Tray + Drawer 11K1922
400-Sheet Universally Adjustable Tray 11K1941
400-Sheet Universally Adjustable Tray + Drawer 11K1942
* No longer available from Lexmark
Lexmark T630, T632, T634
87
Page 88

Printer specifications
Pick roller technology
Like the Optra S and Optra T, the Lexmark T52x, T62x, and T63x family of printers use an auto compensator to pick the
media rather than the corner buckler system used by earlier printer models.
The Lexmark T630, T632 and T634 trays have two rollers that touch the media in two places (see Figure 14 on page 88).
Avoid placing deep perforations in these areas since the media may nest, causing multiple sheet feeds. Perforations that
could cause nesting and tenting should fall outside the 0.3—0.79 in. area on the leading edge of the media. (This is different
from the 0.50 in. we recommend leaving at the top of the form for printers with a corner buckler system.) You may want to
use micro-perfs to avoid nesting problems. See Perforations and die-cuts on page 8 for more information.
Pick roller location
0.31 in.
0.79 in.
1.34 in.
1.93 in.
4.84 in.
5.43 in.
Direction of feed
Figure 14. Location of pick rollers
Lexmark T630, T632, T634
88
Page 89

Printer specifications
Label printing
Labels are one of the most difficult print materials for laser printers. A special fuser cleaner should be used for label
applications to optimize feed reliability. See your printer documentation for information on ordering label fuser cleaners.
When printing on labels:
• Using the printer operator panel, set the Paper Type to Labels in the Paper Menu. For vinyl and other heavy
labels, set the Labels Weight (under the Paper Weight menu) to Heavy, and set the Labels Texture (under the
Paper Texture menu) to Smooth.
Note: When Paper Type is set to Labels, and Labels Weight is set to Heavy, the printer reduces the printing
speed to 30 ppm, to ensure acceptable printing.
• Do not load labels together with paper or transparencies in the same paper tray. Combining print materials can
cause feeding problems.
• Use full label sheets. Partial sheets may cause labels to peel off during printing, resulting in a paper jam. Adhesive
material may contaminate your printer. It could also void your printer and cartridge warranties.
When feeding labels, the number of labels per sheet can affect registration more than basis weight. Typically, the more
labels per sheet, the better the registration.
When printing on card stock:
• Set the Paper Type to Card Stock in the Paper Menu.
• Do not use card stock that is creased. It may cause paper jams.
Print material specifications
Range or maximum weight supported
250-sheet and
Print material
Paper
(grain Long)
Card stock
(grain long
1
)
Xerographic or
business paper
60 to 176 g/m
(16 to 47 lb bond)
Index Bristol 163 g/m2 (90 lb) 120 g/m2 (67 lb)
Tag 163 g/m
Cover 176 g/m
Card stock
(grain short
1
)
Index Bristol 199 g/m2 (110 lb) 163 g/m2 (90 lb)
Tag 203 g/m
Cover 216 g/m
Labels Paper 180 g/m
Dual-Web Paper 180 g/m
Vinyl
3
300 g/m2 (92 lb liner) 260 g/m2 (78 lb liner)
Polyester 220 g/m
2
Integrated forms Pressure-sensitive area
140 to 175 g/m
Paper base (grain long) 75 to 135 g/m
500-sheet trays
2
2
(100 lb) 120 g/m2 (74 lb)
2
(65 lb) 135 g/m2 (50 lb)
2
(125 lb) 163 g/m2 (100 lb)
2
(80 lb) 176 g/m2 (65 lb)
2
(48 lb bond) 163 g/m2 (43 lb bond)
2
(48 lb bond) 163 g/m2 (43 lb bond)
2
(59 lb bond) 220 g/m2 (59 lb bond)
2
2
(20 to 36 lb bond)
1
See Grain direction on page 90 for specific recommendations.
2
Pressure-sensitive area must enter the printer first for grain short paper.
3
Due to label design characteristics, unacceptable feeding may be experienced from the multipurpose feeder.
Multipurpose feeder3 and
optional 250-sheet drawer
60 to 135 g/m
2
(16 to 36 lb bond)
140 to 175 g/m
75 to 135 g/m
2
(20 to 36 lb bond)
2
Lexmark T630, T632, T634
89
Page 90

Printer specifications
Grain direction
Grain refers to the alignment of the paper fibers in a sheet of paper. Grain is either grain long, running the length of the
paper, or grain short, running the width of the paper.
For 60 to 135 g/m2 (16 to 36 lb bond) paper, we recommend grain long stock. For papers heavier than 135 g/m2 (36 lb
bond), grain short is preferred. For the multipurpose feeder, we recommend 60 to 135 g/m2 (16 to 36 lb bond) paper, grain
long. If you feed papers heavier than 135 g/m
2
(36 lb bond) from the multipurpose feeder, grain short is preferred.
Maintenance procedures
If the print quality begins to degrade when printing sheets of vinyl labels, we suggest you follow the three cleaning steps
below:
1 Print 5 sheets of paper.
2 Wait approximately 5 seconds.
3 Print 5 more sheets of paper.
To maintain printer feeding reliability, repeat this cleaning process every time you replace the print cartridge, more often
with some media. Failure to follow maintenance procedures could cause jamming, poor print quality, feeding problems, and
fuser problems.
Troubleshooting
The following table provides solutions for some common card stock and label problems. See your printer documentation for
more troubleshooting information.
Solutions to printing problems
Problem Solution
Print on heavy stock is
blurred or out of focus.
Toner rubs off the page. Make sure the Paper Type setting is appropriate for your print material.
Printing shows voids. Change the Paper Type to Plain Paper.
Make sure the Paper Type, Paper Weight, and Paper Texture settings are appropriate for
your print material. (Card stock in excess of 203 g/m
acceptable print results.)
Print 5 sheets of paper, wait approximately 5 seconds, and then print 5 more sheets of
paper to remove any toner that may have accumulated.
Use a lighter weight stock. (The material being used exceeds 300 g/m
Print 5 sheets of paper, wait approximately 5 seconds, and then print 5 more sheets of
paper to remove any toner that may have accumulated.
Print 5 sheets of paper, wait approximately 5 seconds, and then print 5 more sheets of
paper to remove any toner that may have accumulated.
2
[54 lb bond] may not produce
2
.)
Lexmark T630, T632, T634
90
Page 91

Printer specifications
Lexmark W812
The Lexmark W812 prints on many labels designed for use with laser
printers.
The following table lists the maximum basis weights supported by the trays
and the multipurpose feeder.
Lexmark W812: Overview of card stock and label support
Card stock Labels
Paper source
Index Bristol Tag Cover Paper Vinyl
250-sheet tray 1* – – – – –
Multipurpose feeder 111 g/m
250 sheet option * 111 g/m
2
2
123 g/m
123 g/m
2
2
74 g/m
74 g/m
2
2
200 g/m
200 g/m
2
2
500 sheet option – – – – –
* The standard 250-sheet tray (tray 1) does not support card stock or labels.
For paper and transparency specifications, see the publication CD that came with your printer.
Media specifications
Labels Width—Multipurpose feeder: 87 to 297 mm (3.43 to 11.69 in.)
Length—Multipurpose feeder: 98 to 508 mm (3.86 to 20 in.)
Width & Length—Optional 250-sheet trays: Standard sizes: A3, A4, A5, JIS B4, JIS B5,
Weight: 64 to 200 g/m
Thickness: 0.13 to 0.20 mm (0.005 to 0.008 in.)
Smoothness: 100 to 400 Sheffield*
* 150—250 Sheffield is optimal. Using media higher than 300 Sheffield could result in printing degradation.
letter, legal, 8.5x13, 11x17
2
–
–
Card stock Width: 210 to 216 mm (8.3 to 8.5 in.)
Length: 279 to 356 mm (11 to 11.7 in.)
Weight: Up to 163 g/m
2
Lexmark W812
91
Page 92

Printer specifications
Lexmark W820
Limit label printing to occasional use of A4 or letter size paper office labels
designed for laser printers. We do not recommend using vinyl or polyester
labels.
The Lexmark W820 supports stocks up to 163 g/m2. Always feed labels and
card stock from trays 1, 2, or 3 each of which can hold up to 250 sheets of
labels or card stock.
The following table lists the maximum basis weights supported by the trays
and the multipurpose feeder.
Lexmark W820: Overview of card stock and label support
Trays 1 Trays 2, 3 Trays 4, 5 Multipurpose Feeder
Media types Paper, Bond,
Card stock, Labels,
Transparencies
Weight 60—163 g/m
2
Paper, Bond,
Card stock, Labels
60—163 g/m
2
Paper, Bond Paper, Bond,
60—105 g/m
2
Card stock, Labels,
Transparencies,
Envelopes
120 to 128 g/m
2
For paper and transparency specifications, see the printer publications CD.
Media specifications
Labels Width: 210 to 216 mm (8.3 to 8.5 in.)
Length: 279 to 356 mm (11 to 11.7 in.)
2
Weight: 120 to 128 g/m
Thickness: 0.13 to 0.20 mm (0.005 to 0.008 in.)
Smoothness: 100 to 400 Sheffield*
* 150—250 Sheffield is optimal. Using media higher than 300 Sheffield could result in printing degradation.
Card stock Width: 210 to 216 mm (8.3 to 8.5 in.)
Length: 279 to 356 mm (11 to 11.7 in.)
Weight: Up to 163 g/m
2
Lexmark W820
92
Page 93

Printer specifications
When printing on labels:
• Set the Paper Type to Labels in the Paper Menu.
• Do not use label sheets with a slick backing material.
• Do not print within 1 mm (0.04 in.) of the die cut, the edge of the label or the perforations, or between the die cuts.
• Use full label sheets. Partial sheets may cause labels to peel off during printing, resulting in a paper jam.
• Do not use label sheets that have adhesive to the edge of the sheet. We recommend zone coating of the adhesive
at least 1 mm (0.04 in.) away from the edges. Adhesive material may contaminate your printer and could void your
warranty.
When printing on card stock:
• Set the Paper Type to Card Stock.
• Do not use card stock that is creased. It may cause paper jams.
• We recommend the use of grain long card stock.
Lexmark W820
93
Page 94

Printer specifications
Optra C
We do not recommend using card stock or labels with this printer.
Card stock and labels are not supported from any of the paper trays.
For paper and transparency specifications, see the printer User’s Guide.
Optra C
94
Page 95

Printer specifications
Optra C710
Limit label printing to occasional use of paper office labels designed for laser
printers. We do not recommend using vinyl or polyester labels.
The Optra C710 supports stocks up to 90 lb (163 g/m2). Feed labels from the
multipurpose feeder only, which holds up to 30 sheets of card stock or labels.
The following table lists the maximum basis weights supported by the
multipurpose feeder.
Optra C710: Overview of card stock and label support
Card stock Labels
Paper source
Multipurpose feeder 163 g/m
For paper and transparency specifications, see the printer User’s Guide.
Index Bristol Tag Cover Paper Vinyl
2
163 g/m
2
– 163 g/m2 –
Media specifications
Labels Width: 210 to 216 mm (8.3 to 8.5 in.)
Length: 279 to 297 mm (11 to 11.7 in.)
Weight: 120 to 163 g/m2 (32 to 43 lb)
Thickness: 0.13 to 0.20 mm (0.005 to 0.008 in.)
Smoothness: 100 to 400 Sheffield*
*150—250 Sheffield is optimal. Using media higher than 300 Sheffield could result in printing degradation.
2
Card stock Weight: Up to 163 g/m
Up to 163 g/m
Index Bristol (90 lb)
2
Tag (100 lb)
Optra C710
95
Page 96

Printer specifications
When printing on labels:
• Only use label sheets that have no gaps between the labels.
Acceptable labels
• From the operator panel or from MarkVision Professional, set the Paper Type to Labels.
• Do not print a large number of labels continuously.
• Do not use labels that have coating or sizing applied to make the labels liquid-resistant.
• Do not use labels that have exposed adhesive on the label sheets.
When printing on card stock:
• We recommend using Springhill Index Plus 90 lb card stock.
• For the best print quality, always set the Paper Type to Card Stock.
Unacceptable labels
Optra C710
96
Page 97

Printer specifications
Optra Color 1200
Limit label printing to occasional use of paper office labels designed for
laser printers. We do not recommend using vinyl or polyester labels.
The Optra Color 1200 supports stock up to 43 lb (163 g/m2).
Always feed labels and card stock from the multipurpose feeder. The
multipurpose feeder holds up to 50 sheets of labels or card stock.
The following table lists the maximum basis weights supported by the
multipurpose feeder.
Optra Color 1200: Overview of card stock and label support
Card stock Labels
Paper source
Multipurpose feeder 163 g/m
For paper and transparency specifications, see the printer User’s Guide.
Index Bristol Tag Cover Paper Vinyl
2
163 g/m
2
– 135 g/m2 –
Media specifications
Labels Width: 210 to 216 mm (8.3 to 8.5 in.)
Length: 279 to 356 mm (11 to 14 in.)
2
g/m
2
Tag (100 lb)
Weight: 60 to 135 g/m
Card stock Weight Up to 163 g/m2 Index Bristol (90 lb)
Up to 163
Optra Color 1200
97
Page 98

Printer specifications
Optra E310, E312
Limit label printing to occasional use of paper office labels designed for
laser printers. We do not recommend using vinyl or polyester labels.
The Optra E310 and Optra E312 support stocks up to 43 lb (163 g/m2). The
automatic paper feeder can hold up to 10 sheets of card stock or labels.
The following table lists the maximum basis weights supported by the
automatic paper feeder and the multipurpose feeder.
Optra E310, E312: Overview of card stock and label support
Card Stock Labels
Paper Source
Automatic Paper Feeder 163 g/m
Manual Sheet Feeder 163 g/m
For paper and transparency specifications, see the printer User’s Guide.
Index Bristol Tag Cover Paper Vinyl
2
2
163 g/m
163 g/m
2
2
– 163 g/m2 –
– 163 g/m2 –
Media specifications
Labels Width: 210 to 216 mm (8.3 to 8.5 in.)
Length: 279 to 297 mm (11 to 11.7 in.)
Weight: Up to 163 g/m2 (43 lb)
Thickness: Up to 0.25 mm (0.01 in.)
Smoothness: 100 to 400* Sheffield
* 150—250 Sheffield is optimal. Using media higher than 300 Sheffield could result in printing degradation.
2
Card stock Weight: Up to 163 g/m
Up to 163 g/m
Note: Always use the front exit when printing on card stock. To minimize curl, use the front exit when printing on labels.
Index Bristol (90 lb)
2
Tag (100 lb)
Maintenance procedures
If the print quality begins to degrade when printing sheets of labels, we suggest you follow the three cleaning steps below:
1 Print 5 sheets of paper.
2 Wait approximately 5 seconds.
3 Print 5 more sheets of paper.
To maintain printer feeding reliability, repeat this cleaning process every time you replace the print cartridge, more often
with some media. Failure to follow maintenance procedures could cause jamming, poor print quality, feeding problems, and
fuser problems.
Optra E310, E312
98
Page 99

Printer specifications
Optra E, Ep
Limit label printing to occasional use of paper office labels designed for
laser printers. We do not recommend using vinyl or polyester labels.
The Optra E and Optra Ep support stocks up to 43 lb (163 g/m2). Tray 1 can
hold up to 10 sheets of card stock or labels.
The following table lists the maximum basis weights supported by tray 1 and
the manual feed slot.
Optra E and Ep: Overview of card stock and label support
Card stock Labels
Paper source
Tray 1 163 g/m
Manual feed slot 163 g/m
For paper and transparency specifications, see the printer User’s Guide.
Index Bristol Tag Cover Paper Vinyl
2
2
163 g/m
163 g/m
2
2
– 150 g/m
– 150 g/m
2
2
–
–
Media specifications
Labels Width: 210 to 216 mm (8.3 to 8.5 in.)
Length: 279 to 297 mm (11 to 11.7 in.)
Weight: 120 to 150 g/m2 (32 to 39 lb)
Thickness: 0.13 to 0.25 mm (0.005 to 0.01 in.)
Smoothness: 100 to 400 Sheffield*
* 150—250 Sheffield is optimal. Using media higher than 300 Sheffield could result in printing degradation.
Card stock Weight: Up to 163 g/m2 Index Bristol (90 lb)
Up to 163 g/m
2
Tag (100 lb)
Maintenance procedures
If the print quality begins to degrade when printing sheets of vinyl labels, we suggest you follow the three cleaning steps
below:
1 Print 5 sheets of paper.
2 Wait approximately 5 seconds.
3 Print 5 more sheets of paper.
To maintain printer feeding reliability, repeat this cleaning process every time you replace the print cartridge, more often
with some media. Failure to follow maintenance procedures could cause jamming, poor print quality, feeding problems, and
fuser problems.
Optra E, Ep
99
Page 100

Printer specifications
Optra Es special media printer
The Optra Es printer has highly precise print registration and excellent
feeding reliability. It was designed to handle a wide range of paper and card
stock weights, as well as continuous printing of labels.
The following table lists the maximum basis weights supported by tray 1 and
the manual feed slot. More detailed specifications appear on the following
pages.
Optra Es: Overview of card stock and label support
Card stock Labels
Paper source
Tray 1 199 g/m
Manual feed slot 199 g/m
Index Bristol Tag Cover Paper Vinyl
2
2
163 g/m
163 g/m
2
2
176 g/m
176 g/m
2
2
180 g/m
180 g/m
2
2
300 g/m
300 g/m
2
2
For paper and transparency specifications, see the printer User’s Guide.
Selecting and loading media
When you select the correct Paper Type (Normal, Rough Paper, Card Stock, Transparency, Labels) from MarkVision
Professional, your printer automatically optimizes print quality and toner adhesion.
Feed labels, card stock, transparencies, and envelopes from tray 1 or the manual feed slot. Reserve tray 2 for 20—24 lb
bond paper. Do not load labels together with other media in the same paper tray; combining different print media can cause
feeding problems. To avoid curl, do not leave labels in the tray overnight.
When feeding labels from tray 1, push the label lever to the left. When printing on other media, push the lever to the right.
To improve feed reliability, flex the print media before placing it in the paper tray.
Optra Es special media printer
100
 Loading...