

Page 1

Help guide
Quick Reference pages
Other Quick Reference pages available include:
Help guide
Page 1 of 1
• Color quality guide
• Printing guide
• Connection guide
• Print media guide
• Clearing jams guide
• Print quality guide
• Repetitive defects guide
• Supplies guide
• Moving guide
Setup Guide
The Setup Guide provides information about setting up the printer and its options.
Publications CD / User’s Reference
The publications CD contai ns a User’s Ref erence, which provides information abou t loading paper , clearing error
messages, ordering and replacing supplies, installing maintenance kits, and troubleshooting. It also provides
general information for administrators.
The information on the publi cations CD is also available on Lexmark’s Web site at
www.lexmark.com/publications.
Drivers CD
The drivers CD contains the nece ssary printer drivers to get your printer up and running.
It may also contain printer utili ties, screen fonts , and additional documentation.
Lexmark’s Web site
Visit Lexmark’s Web site at www.lexmark.com for updated printer drivers, utilities, and other printer
documentation.
Page 2

Connection guide
Page 1 of 14
Connection guide
Follow these st eps to properly connect your printer to
your computer or network system:
1 Connect the cables and power cor d on
page 1.
2 Install drivers for local printing on page 3.
3 Verify printer setup on page 8.
4 Configure for TCP/IP on page 9.
5 Install driver s for network pri nting on page 10
Connect the cables and power cord
Attaching a local cable
USB cable
A USB port is standard on all models. Windo ws 98 SE,
Windows Me, Windows 2000, Windows XP, and
Windows Server 2003 operating systems support
USB connections. Some UNIX, Linux, and Macintosh
computers also support USB connections. Refer to
your computer oper ating system documentation to see
if your system supports USB.
To attach the printer to a computer:
1 Connect the printer to the computer using a USB
cable. Be sure to match the USB symbol on the
cable to the USB symbol on the printer.
2 Plug one end of the printer power cord into the
socket at the back of the printer and the other
end into a properly grounded outlet.
3 Turn on your printer.
After the printer completes its internal tests, the
Ready message indicates that the printer is
ready to receive job s. If you see a message
other than Ready on the display, refer to the
publications CD for instructions on clearing the
message.
4 Go on to Install drivers for local printing on
page 3.
Page 3

Connection guide
Page 2 of 14
Parallel cable
A parallel port is standard on the base model and is
available on an option card for all network models.
Refer to the printer’ s Setup Guide f or more inf ormation.
If you install an option al Parallel Interface Card to a
network model or network duplex model, you need a
1284 A-C parallel cable.
1 Connect the printer to the computer using a
1284 A-C parallel cable.
2 Plug one end of the printer power cord into the
socket at the back of the printer and the other
end into a properly grounded outlet.
Serial cable
If you have installed an optional Serial Inter face Card,
you can locally attach the printer with a serial cable.
With serial printing, data is transferred one bit at a
time. Although serial printing is usually slower than
parallel printing, it is the pref erred option when ther e is
a great deal of distance between your printer and
computer or a parallel interface is not available.
A serial port requires a compatible serial cable that
supports RS-232 connections.
1 Connect the printer to the computer using a
serial cable.
2 Plug one end of the printer power cord into the
socket at the back of the printer and the other
end into a properly grounded outlet.
Attaching a network cable
You can attach your printer to a network using
standard network cables.
Ethernet cable
A 10BaseT/100BaseTx F ast Ethernet port is standard
on the network model.
To attach the printer to a network:
1 Make sure the printer is turned off and
unplugged.
2 Connect the printer to a LAN drop or hub using
standard cabling that is compat ible with your
network. The printer automatically adjusts for
the network speed.
3 Plug one end of the printer power cord into the
socket at the back of the printer and the other
end into a properly grounded outlet.
Note: If you install ed an optional 2000-sheet
drawer, plug the printer power jumper
cord into the back of the drawer , and then
plug the drawer’s cord into a properly
grounded outlet.
4 Turn on your printer.
After the printer completes its internal tests, the
Ready message indicates that the printer is
ready to receive jobs.
If you see a message other than Ready on the
display, refer to the publications CD for
instructions on clearing the message.
5 Turn on your computer and any other
peripherals.
6 Continue with Verify printer setup on page 8.
Other network options
Fiber optic and wireless network options may also be
avail a ble for y our printer. To view the cabling for other
network options, launc h the driver s CD and clic k View
Documentation. Look for information about MarkNet
Print Servers.
Page 4
Install drivers for local printing
A local printer is a printer attached to your computer
using a USB or parallel cab le. If your printer is attached
to a network, instead of your computer, skip this step
and go on to Verify printer setup on page 8.
A printer driver is software that lets your computer
communicate with your printer. The procedure to
install drivers depends on the operating system you
are using.
Note: For Windo ws operating systems, you can
skip the hardware wizard and use the
drivers CD to install your printer drivers.
Launch the CD and follow the
instructi on s to in st a ll p rinter software.
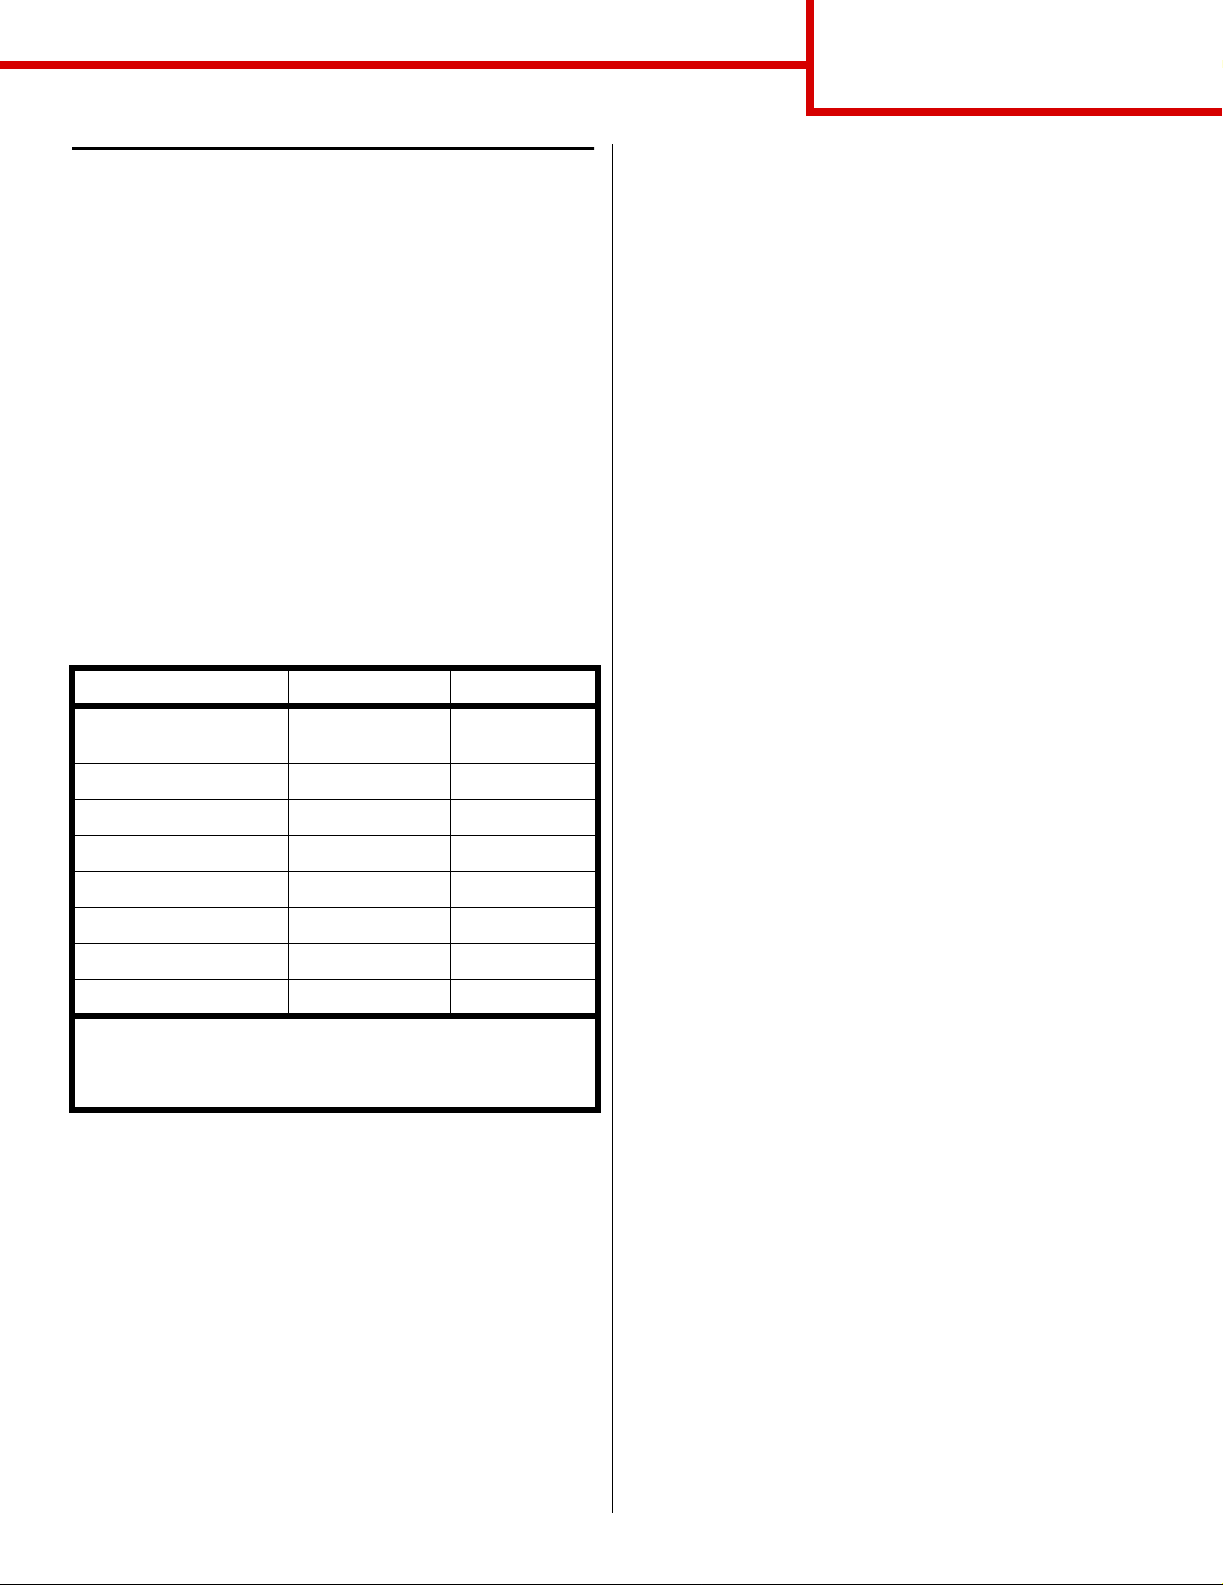
Select your operating system and cable from the
follo wing table to find driver instal lation instructions.
Operating System Cable Go to page...
Windows XP;
Windows S erver 2003
Windows 2000 USB
Windows Me USB
Windows 98 USB
Windows NT 4.x Parallel only 5
Windows 95 Parallel only 6
Macintosh USB only 6
UNIX/Linux USB or Parallel 7
* If you attach a USB printer cable while your printer and
computer are turned on, the Windows hardware wizard
launches immediately. Find the instructions for your operatin g
system and use them to answer the plug and play screens.
USB* or Parallel 3
*
or Parallel 4
*
or Parallel 4
*
or Parallel 5
Connection guide
Page 3 of 14
Windows
In addition to the following driver installation
instructions, you may need to refer to the
documentation that shipped with y our computer and
your Windows software.
Before you inst all
Some versions of Windows software ma y already hav e
a system printer driver for this printer included. This
may mean that install ation will seem automatic in later
versions of Windows. System drivers work well for
simple printing, but the y contain less f unctionality t han
our enhanced custom driver.
Note: Installing a cust om driver will not replace
the system driver. A separate printer
object will be created and appear in the
Printers folder.
To obtain all the features of the c ustom driver, y ou wi ll
need to install the custom printer driver using the
drivers CD that shipped with the printer.
Using Windows XP or Windows Server 2003
with USB or parallel cable
When the Found New Hardware Wizard screen
appears:
1 Insert the drivers CD. If the CD auto launches,
exit the CD. Click Next.
Note: Business versions of Windows XP
require that you have administrative
access in order to install printer drivers
on your computer.
2 Browse to the locati on of the printer driver on the
drivers CD:
D:\drivers\win_2000\
3 Click Next.
4 Disregard the next two messages and click
Continue Anyway. Your printer has been
thoroughly tested and is compatible with
Windows XP and Windows Server 2003. The
wizard copies all of the necessary files and
installs the printer driver.
5 Click Finish when the software is installed.
6 Print a test page to verify printer setup
Page 5

Connection guide
Page 4 of 14
Using Windows 2000 with USB or parallel cable
When the Found New Hardware Wizard screen
appears:
1 Insert the drivers CD. If the CD auto launches,
exit the CD. Click Next.
Note: You need administrative access in order
to install printer drivers on your
computer.
2 Select Search for a suitable driver, and then
click Next.
3 Select only Specify a location, and then cl ick
Next.
4 Browse to the loc ation of the printer driver on the
drivers CD:
D:\Drivers\Win_2000\
5 Click Open, and then click OK.
6 Click Next to install th e driver that is di splay ed. It
is okay to di sre gard the message t hat the driv er
is not digitally signed.
7 Click Finish when the software is installed.
8 Print a test page to verify printer setup.
Using Windows Me with USB or parallel cable
You must install both a USB port driver and an
enhanced custom print driver.
When the Found New Hardware Wizard screen
appears:
1 Insert the drivers CD. If the CD auto launches,
exit the CD. Click Next.
2 Select Automatic search for the best driver
(recommended), and then click Next. The
wizard searches f or a USB port driver. The name
of it will be similar to your printer name.
3 After the USB port driver is found, click Finish.
4 Select Automatic search for the best driver
(recommended), and then click Next. The
wizard now searches for a printer driver.
5 Select your printer and driver from the list, and
then click OK. Make sure you se lect the driv er in
the correct language you want to use.
D:\Drivers\WIN_9X\<LANGUAGE>
6 After the printer driver is installed, click Finish.
7 Use the default printer name or type a unique
name for your printer, and then click Next.
8 Click Yes (recommended), and then click
Finish to print a test page.
9 After the test page prints, click Yes to close the
window.
10 Click Finish to complete the installation and
close the wizard. You are now ready to print.
Page 6

Connection guide
Page 5 of 14
Using Windows 98 with a USB or parallel cable
You must install both a USB port driver and an
enhanced custom print driver.
Note: Depending on the software and printers
already installed on y our c omputer, your
screens may vary from those in the
instructions.
When the Add New Hardware Wizar d screen appears:
1 Insert the drivers CD, and then click Next. If the
CD auto launches, e xit the CD.
2 Select Search for the best driver for your
device (recommended), and then click Next.
3 Select only CD- ROM drive, and then clic k Next.
4 After the wizard finds the USB port driver, click
Next.
5 After the USB port driver is installed, click
Finish.
6 Click Next.
Using Windows NT with a parallel cable
The easiest wa y to install a driver is to use the
drivers CD that shipped with your printer.
Note: USB support is not available for
Windows NT operating systems.
1 Insert the drivers CD.
2 Click Install Printer and Software.
Note: You need administrative access in order
to install printer drivers on your
computer.
3 Click Printer.
4 Click Agree to accept the license agreement.
5 Select Quick Install and then click Next.
6 Select the port you want to us e , and then sel ect
the printer you are installing.
7 Click Finish to complete the install ation. You are
now ready to print.
7 Select Searc h for the best driver
(Recommended), and then click Next.
8 Select Specify a location.
9 Browse to the loc ation of the printer driver on the
drivers CD:
D:\Drivers\WIN_9X\<language>
10 Click OK.
11 After the printer driver is found, click Next.
12 Use the default printer name or type a unique
name for your printer, and then click Next.
13 Select Yes to print a test page, and then click
Finish. All the necessary files are installed on
your computer.
14 After the test page prints, click Yes to close the
message window.
15 Click Finish to complete the installation. You
are now ready to print.
Page 7

Connection guide
Page 6 of 14
Using Windows 95 with a parallel cable
When the Update Device Driver Wizard screen
appears:
1 Insert the drivers CD. If the CD auto launches,
exit the CD.
If a system-compatible driv er is found on your
operating system, the Wizard installs it.
If no compatible system driver is found on your
operating system, click Other Locations.
Note: USB support is not available for
Windows 95 operating systems.
2 Browse to the loc ation of the printer driver on the
drivers CD:
D:\drivers\win_9x\english
3 Click OK.
4 Click Finish. The Add Printer Wizard screen
appears.
Macintosh
Macintosh OS 8.6 or higher is required for USB
printing. In order to print locally to a USB-attached
printer you must create a desktop printer icon
(Macintosh 8.6-9.x) or create a queue in Print Center
(Macintosh OS X).
Creating a desktop printer icon
(Macintosh 8.6-9.x)
1 Install a printer P o stScript Printer Description
(PPD) file on your computer.
a Insert the drivers CD.
b Double-click Classic, and then double-click
the installer package for your printer.
Note: A PPD file provides detailed
information about the capabili ties of a
printer to your Macintosh computer.
c Choose the language you want to use and
click OK.
5 Use the default printer name or type a unique
name for your printer, and then click Next.
6 Click Yes to print a test page.
7 Click Finish. A test page is sent to the printer
once the driver files ar e copied to your computer .
You are now ready to print.
d Click Accept after you read the license
agreement.
e Click Continue after you finish with the
Readme file.
f Choose a default paper size.
g On the Easy Install screen, click Install. All
the necessary files are installed on your
computer.
h Click Quit when installation is complete.
2 Do one of the following:
Macintosh 8.6 - 9.0: Open Apple LaserWriter.
Macintosh 9.1 - 9.x: Open Applications, and
then click Utilities.
3 Double-click Desktop Printer Utility.
4 Select Printer (USB), and then click
OK.
5 In the USB Printer Selection section, click
Change.
If your printer does not appear in the USB Printer
Selection list, make sure the USB cable is
properly connected and the printer is turned on.
6 Select the name of your printer, and then click
OK. Your printer appears in the original Printer
(USB) window.
Page 8

Connection guide
Page 7 of 14
7 In the PostScript Prin te r Descripti o n (PPD) File
section, click Auto Setup. Make sure your
printer PPD now matches your printer.
8 Click Create, and then Save.
9 Specify a printer name, and then click Save
.
Your printer is now saved as a desktop printer.
Creating a queue in Print Center (Macintosh OS X)
1 Install a printer PostScript Printer Description
(PPD) file on your computer.
a Insert the drivers CD.
b Double-click Mac OS X, and then double-
click the install er package for your printer.
Note: A PPD file provides detailed
information about the capabili ties of a
printer to your Macintosh computer.
c On the Authorization screen, choose Click
the lock to make changes.
d Enter your password, and then click OK.
UNIX/Linux
Local printing is supported on many UNIX and Linux
platforms, such as Sun Solaris and Red Hat.
Some printer driver packages are available on the
drivers CD. The User’s Guide in each package gives
detailed instructions f o r inst alling and using printers in
UNIX and Linux environments.
All the printer driver packages support local printing
using a parallel connection. The driver package for
Sun Solaris supports USB connections to Sun Ray
appliances and Sun workstations.
e Click Continue on the Welcome screen and
again after your finish with the Readme file.
f Click Agree to accept the license agr eement.
g Select a Destination, and then click
Continue.
h On the Easy Install screen, click Install. All
the necessary files are installed on your
computer.
i Click Close when installation is complete.
2 Open the Finder, click Applications, and then
click Utilities.
3 Double-click Print Center.
4 Do one of the following:
– If your USB-attached printer appears in the
Printer List, you can quit Print Center. A queue
has been created for your printer.
– If your USB-attached printer does not appear in
the Printer List, make sure the USB cable is
properly connected and the printer is turned on.
After the printer appears in the Printer List, you
can quit Print Center.
Page 9

V erify printer setup
Printing a menu settings page
Print a menu settings page to re view the def ault printer
settings and to verify t hat printer options are installed
correctly.
Note: For more information about using the
printer operator panel and changing
menu settings, refer to the publications
CD.
1 Make sure the printer is on.
2 Press
press
3 Press
press
The message Printing Menus appears on the
display.
4 V erify that the options y ou installed are correct ly
listed under “Installed Features.”
If an option you installed is not listed, turn the
printer off, unplug the power cord, and reinstall
the option.
Menu until you see Utilities Menu, and then
Select.
Menu until you see Print Menus, and then
Select to print the page.
Connection guide
Page 8 of 14
Printing a network setup page
If the printer is attached to a network, print a network
setup page to verify t he network connection. This page
also provides important information that helps you
configure for network printing.
Note: If an optional MarkNet print server is
installed, you see Print Net1 Setup on
the display.
1 Make sure the pr inter is on.
2 Press
press
3 Press Menu unti l you see Print Net Setup, and
then press
and the printer returns to Ready status.
4 Check the first section on the net work setup
page and confirm that Status is “Connected.”
If Status is “Not Connected,” your LAN drop may
not be active or your network cable may be
malfunctioning. Consult your network support
person for a solution, and then print another
network setup page to verify that you are
connected to your network.
Menu until you see Utilities Menu, and then
Select.
Select. The network setup page prints
5 Verify the amount of memory installed is
correctly listed under “Printer Information.”
6 V e rify that the pape r trays are configured f or the
sizes and types of paper you loaded.
Page 10

Connection guide
Page 9 of 14
Configure for TCP/IP
If you have TCP/IP available on your network, we
recommend that you assign an IP address to the
printer.
Assigning a printer IP address
If your network is using DHCP, an IP address is
automatically assigned after you connect the network
cable to the printer.
1 Print a network setup page.
2 Look for the add ress under the “TCP/IP” heading
on the network setup page.
3 Go to Verify pr inter setup on page 8 and begin
with step 2.
Note: You can find instructions for other
methods of setting the IP address in the
online documentation on the drivers CD
that shipped with your printer. Launch
the CD, and then click View
Documentation Network Pri n ter
Install.
If your network is not using DHCP, then you must
manually assign an IP address to the printer.
4 Press
Select.
5 Press
then press
6 Change the address by pressing
Menu until you se e TCP/IP, and then pr ess
Menu until you see Set IP Address, and
Select.
Menu to
increase or decrease each number . Press
to move to the next segment. Press
Select when
you are finished.
The message
7 Press
Menu until you see Set IP Netmask, and
then press
Saved appears briefly.
Select.
8 Repeat step 6 to set the IP Netmask.
9 Press
then press
Menu until you see Set IP Gateway, and
Select.
10 Repeat step 6 to set the IP Gateway.
11 When you are finished, press
Go to return the
printer to the Ready state.
Verifying the IP settings
1 Print another network setup page. Look under
the “TCP/IP” heading and make sure the IP
address, netmask, and gateway are what you
expected.
Select
One of the easiest ways is to use the operator panel:
1 Press
then press
2 Press
then press
Menu until you see Network Menu, and
Select.
Menu until you see Standard Network, and
Select.
Standard Network appears if you purchased a
printer with a network port on the printer system
board. If you have a MarkNet™ print server
installed in the opti on card slot, y ou see Network
Option 1.
3 Press
Network 1 Setup), and then press
Menu until you see Std Net Setup (or
Select.
2 Ping the printer and verify that it responds . For
example, at a command prompt on a network
computer , type “ping” follo wed by the new printer
IP address (for example, 192.168.0.11):
ping xxx.xxx.xxx.xxx
If the printer is active on t he network, you should
receive a reply.
Page 11
Install drivers for network printing
After you have assigned and verified the TCP/IP
settings, y ou are ready to install the printer drivers on
each network computer.
Operating System Go to page...
Windows 10
Macintosh 13
UNIX/Linux 14
NetWare 14
Windows
In Windows environments, network printers can be
configured for direct printing or shared printing. Both
network printing methods require the installation of a
printer driver and the c reation of a netwo rk printer port.
Supported printer drivers
• Windows system printer driver
Connection guide
Page 10 of 14
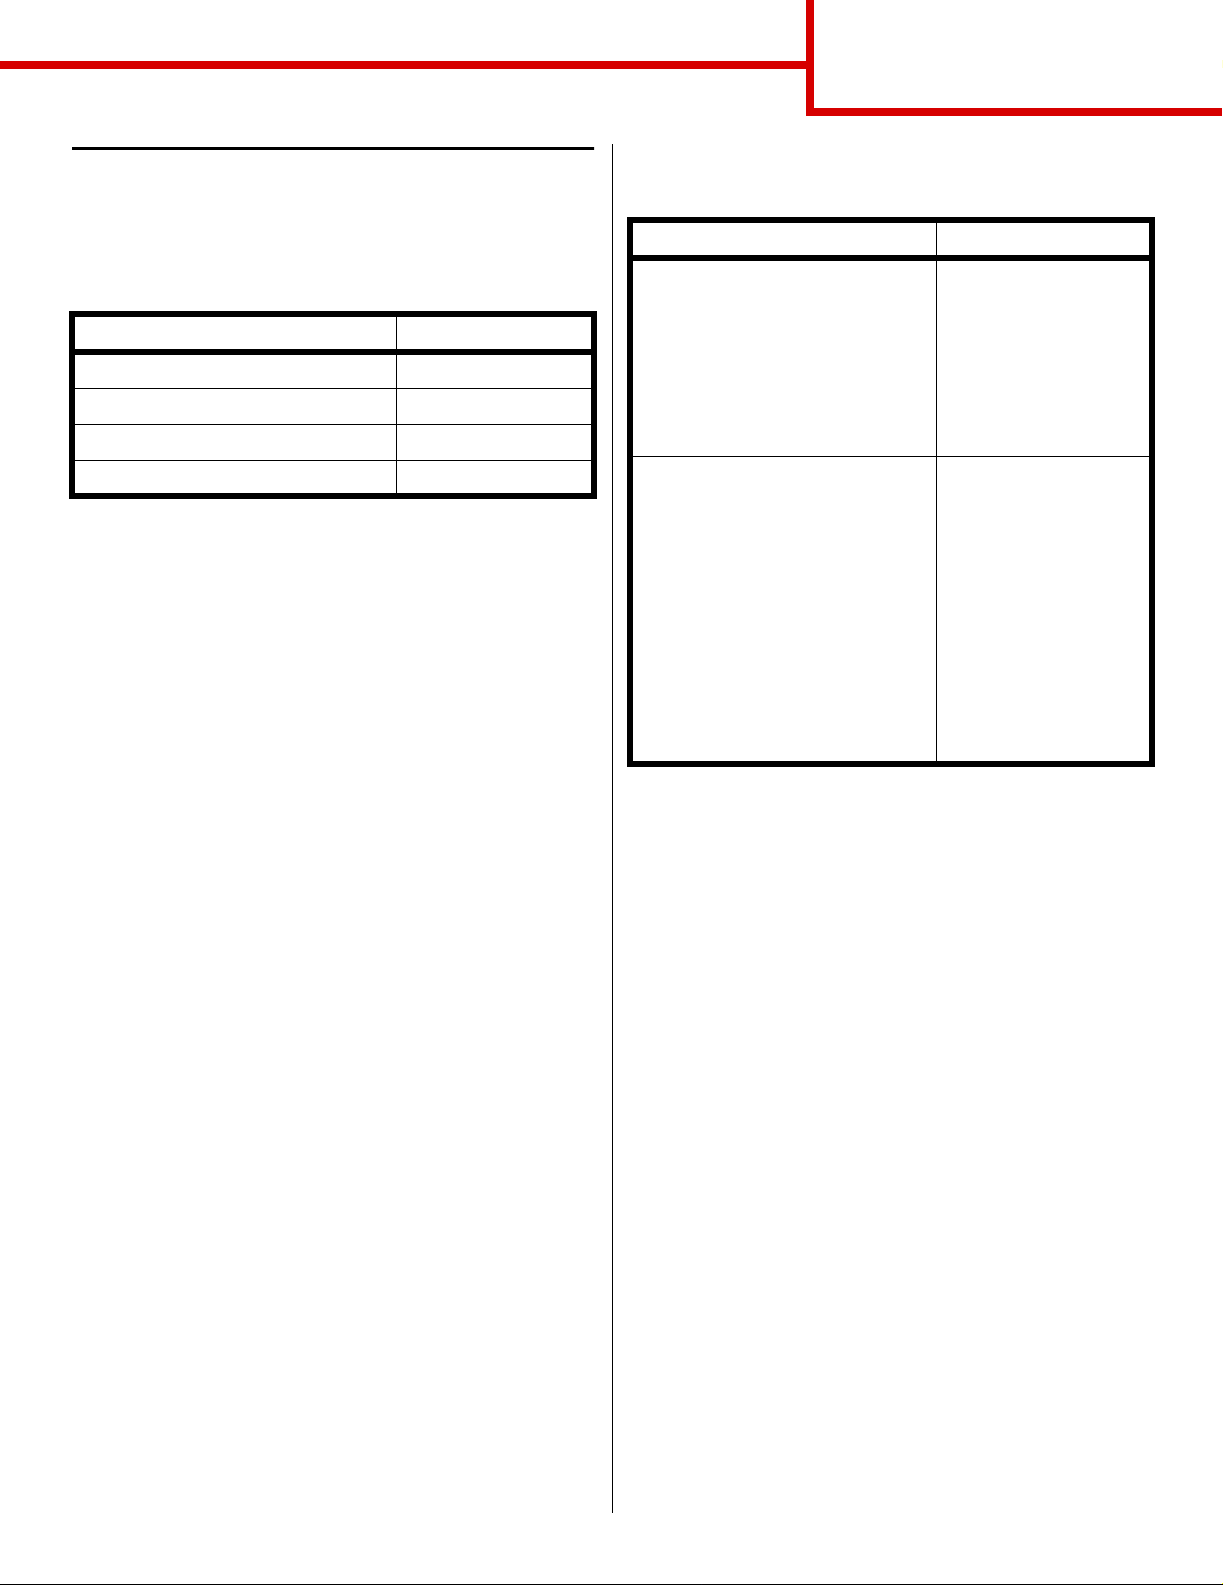
Follow the steps for your printing configuration and
operating system to configure your network printer:
Printing configuration Operating system
Direct
• Printer is conn ected dire ctly
to the network using a
network cable, such as
Ethernet.
• Printer drivers are typically
installed on each network
computer.
Shared
• Printer is connected to one
of the computers on the
network usin g a loc al cab le ,
such as USB.
• Printer drivers are installed
on the computer attached to
the printer.
• During driver installation,
the printer is set up to be
“shared” so that other
network computers can
print to it.
Windows 95/98/Me,
Windows NT 4.0,
Windows 2000,
Windows XP, or
Windows Server 2003
Windows NT 4.0,
Windows 2000,
Windows XP, or
Windows Server 2003
• Custom printer driver
System drivers are built into Windows operating
systems. Custom drivers are available on the drivers
CD.
Supported network printer ports
• Microsoft IP port—Windows NT 4.0,
Windows 2000, Windows XP, and
Windows Server 2003
• Printer network ports—Windows 95/98/Me,
Windows NT 4.0, Windows 2000, Windows XP,
and Windows Server 2003
For basic printer f unctionality, you can install a system
printer driver and use a system network printer port,
such as an LPR or a Standard TCP/IP port. The
system printer driver and port let you maintain a
consistent user inter face f or use wit h all the printers on
your network. However, using a custom printer driver
and network port provides enhanced functionality,
such as printer status alerts.
Page 12

Connection guide
Page 11 of 14
Direct printing using Windows 95/98/Me,
Windows NT 4.0, Windows 2000, Windows XP , and
Windows Server 2003
To install a custom printer driver and network port:
1 Launch the drivers CD.
2 Click Install Printer and Software.
3 Click Printer.
4 Click Agree to accept the license agreement.
5 Select Quick install, and then click Next.
6 Click Create new port.
7 Click Add Port.
8 Select TCP/IP Network Port, and then click
Add.
9 Enter the information to create the port.
a Assign a logical port name.
This can be any name that you ass ociate with
the printer , such as Color1-lab4. After the
port is created, this name appears in the lis t of
avail able ports on the Method of Connection
screen.
Note: If you don’t kno w the IP address, print a
network setup page and look under the
TCP/IP heading. For help, see Printing
a network setup page on page 8.
b Enter the IP address in the text box.
c Click Add Port.
10 Click Done until you return to the Method of
Connection screen.
Shared printing using Windows NT 4.0,
Windows 2000, Windows XP, and
Windows Server 2003
After connecting your printer to a Windows NT 4.0,
Windows 2000, Windows XP, or
Windows Server 2003 computer (which will act as a
server), follow these steps to configure your network
printer for shared printing:
Step 1: Install a custom printer driver
1 Launch the drivers CD.
2 Click Install Printer and Software.
3 Click Printer.
4 Click Agree to accept the license agreement.
5 Select Quick install, and then click Next.
6 Select the desired port from the list, and then
select the model and manuf a cturer (if availabl e)
of the printer you want to install.
7 Click Finish to complete the installation.
8 Print a test page to verify printer installation.
Step 2: Share the printer on the network
1 Click Start Settings Printers.
2 Select the printer you just created.
3 Click File Sharing.
4 Check the Shared check box, and then enter a
name in the Shared Name text box.
5 In the Alternate Drivers section, select the
operating systems of al l the netw ork clien ts that
will print to the printer.
11 Select the newly-created port from the list, and
then select the model and manufacturer (if
available) of the printer you want to install.
12 Click Finish to complete the installation.
13 Print a test page to verify printer installation.
6 Click OK.
Note: If you are missing file s, you may be
prompted to provide the server operating
system CD.
7 Check the f ollowing to make sure t he printer was
successfully shared.
• The printer object in the Printers folder now
has a shared indicator. For example, in
Windows NT 4.0, a hand appears under the
printer object.
• Browse Network Neighborhood. Find the
host name of the server and look for the
shared name you assigned to the printer.
Page 13

Connection guide
Page 12 of 14
Step 3: Install the printer driver (or subset) on
network cli ents
Using the point and print method
Note: This method is usually the best use of
system resources. The server handles
driver modifications and the print job
processing. This lets network clients
return to applications much f aster.
With this method, a subset of driver information is
copied from the server to the client computer. This is
just enough information to send a print job to the
printer.
1 On the Windows desktop of the cl ient computer,
double-click Network Neighborhood.
2 Locate the host name of the server computer,
and then double-click the host name.
3 Right-click the shared printer name, and then
click Install.
4 Wait a few minutes for the driver information to
be copied from the server computer to the cli ent
computer, and for a new printer object to be
added to the Printers folder. The time this tak es
varies based on netwo rk traffic and other f actors.
5 Close Network Neighborhood.
6 Print a test page to verify printer installat ion.
Using the peer-to-peer method
With this method, the printer driv er is f ully insta lled o n
each client computer. Network clients retain contr ol of
driver modifications. The client computer handles the
print job processing.
1 Click Start Settings Printers.
2 Click Add Printer to launch the Add Printer
wizard.
3 Click Network Print Server.
4 Select the network printer from the Shared
printers list. If the printer is not listed, enter the
path of the printer in the text box.
The path will look similar to the fo llowing:
\\<server host name>\<shared
printer name>
Note: If this is a new printer, you may be
prompted to install a printer driver. If no
system driver is available, th en you will
need to provide a path to available
drivers.
The server host name is the name of the server
computer that identifies it to the network. The
shared printer name is the name assigned
during the server installation process.
5 Click OK.
6 Select whether you want this printer to be the
default printer for the client, and then clic k
Finish.
7 Print a test page to verify printer installation.
Page 14

Connection guide
Page 13 of 14
Macintosh
Note: A PostScript Printer Description (PPD)
file provides detailed information about
the capabilities of a printer to your UNIX
or Macintosh computers.
T o print to a net work printer, each Mac intosh user must
install a custom PostScript Printer Description (PPD)
file and either create a deskt op printer on the computer
(Mac OS 8.6 to 9.x) or create a print queue in Print
Center (Mac OS X). Follow the instructions for your
operating system.
Mac OS 8.6 to 9.x
Step 1: Install a custom PPD file
Note: Installing the custom PPD is required
only if this is the fir st time the p rinter has
been set up. If the printer w as pre viously
installed, go on to Step 2: Create a
desktop printer.
1 Insert the drivers CD into your CD-ROM driv e.
2 Double-click Classic.
Mac OS X version 10.1.2 and later
Step 1: Install a custom PPD file
1 Insert the drivers CD into your CD-ROM drive.
2 Click Mac OS X <language>.
For example, Mac OS X English.
3 Double-click the installer icon for your printer to
run the installer.
Step 2: Create a print queue in Print Center
1 Click Applications Utilities Print Center.
2 Click Add Printer.
3 Choose AppleTalk as your method of
connection.
4 If you have a routed network, select the zone
from the list. If you don’t kno w which zone to
select, look on the Network Setup page under
AppleTalk for Zone.
5 Select the new printer from the list, and then
click Add.
3 Double-click the Installer icon.
4 Select the language of your operating system,
and then click OK.
5 Click Install to install the PPD file for your printer .
Step 2: Create a desktop printer
1 In the Chooser, select the LaserWriter 8 driver.
2 If you have a routed network, select the defaul t
zone from the list. If you don’t know which zone
to select, look on the Network Setup page under
AppleTalk for Zone.
3 Select the new printer from the list.
4 If you don’t know which printer to select, look on
the Network Setup page under the AppleTalk
heading to find the default name of the printer.
5 Click Create.
6 Make sure there is an icon next to the printer
name in the Chooser.
Note: If you don’t know which printer to select,
look on the Network Setup page under
the AppleTalk heading to find the default
name of the printer.
6 Verify printer installation (see Verify printer
installation).
Verify printer installation
1 Click Applications TextEdit.
2 Choose File Print Summary. The Summary
window shows the PPD install ed for y our printer.
• If the PPD file displayed in the Summary
window is correct for your printer, printer
setup is complete.
• If the PPD file displayed in the Summary
window is not correct for your printer, delete
the print queue from Print Center and repeat
“Step 1: Install a custom PPD file” on
page 13.
7 Close the Chooser window.
8 Verify printer installation (see Verify printer
installation).
Page 15

UNIX/Linux
Your printer supports both UNIX and Linux network
environments.
For the latest information about installing a network
printer in a UNIX or Linux environment , click View
Documentation on the drivers CD.
NetWare
Your printer supports both Novell Di stributed Print
Services (NDPS) and regular queue-based NetWare
environments . For the latest inf o rmation about
installing a network printer in a NetW are en viron ment,
launch the drivers CD and click View Documentat ion.
Connection guide
Page 14 of 14
Page 16

Printing guide
Page 1 of 2
Printing guide
Get the most out of your printer by properly loading the
trays and s etting the types and si zes. Ne ver mix medi a
types within a tray.
Load paper or other print media
To help prevent jams:
• Flex all stacks of print media back and forth to
loosen them, and then fan them before loading.
Do not fold or crease the print media. Str aighten
the edges of the stack on a level surface.
• Do not exceed the maximum stack height.
Overfilling may cause jams.
• Never remove paper trays whi le a print job i s
printing. It could damage the tray or the printer.
Loading 500-sheet trays
1 Remove the tray.
2 Squeeze the front guide lever and slide the guide
to the front of the tray.
6 Squeeze the front guide lever and sl ide the guide
until it firmly touches the stack of paper.
7 Reinstall the tray.
8 If you are loading a different type of media than
was previously loaded in the tray, change the
Paper Type setting for that tray on the operator
panel. See “Set Paper Type and Paper Siz e ” on
page 2.
Loading the multipurpose feeder
1 Open the multipurpose feeder.
2 Squeeze the paper
guide lever and
slide the guide all
the way toward the
front of the printer.
3 Flex the sheets
back and forth to
loosen them, and
then fan them.
3 Squeeze the side guide lever and sli de the guide
to the correct position f o r the siz e paper y ou are
loading.
4 Flex the sheets back and forth to loosen them,
and then fan them.
5 Place the paper against the back left corner of
the tray, print side down.
4 Arrange the stack
of print media
correctly for the
size, ty pe, and print
method you are using.
5 Place the print media, print side up, along the left
side of the mult ipurpose feeder , an d then push it
in as far as it will easily go. Do not force the
media.
6 Squeeze the paper guide lever and slide the
guide until it lightly touches the si de of the stac k.
7 If you are loading a different type of media than
was previously loaded in the tray, change the
Paper Type setting for that tray on the operator
panel. See “Set Paper Type and Paper Siz e ” on
page 2.
Page 17

Printing guide
Page 2 of 2
Loading other input options
For information about loading other input options, refer to the publications CD that came with the printer.
Set Paper Type and Paper Size
If you have set Paper Type and Paper Size to the correct values , any tra ys containing the same type and si ze of
paper are automatically linked by the printer.
Note: If the type of the media you are loading is the same as the media previ ously loaded, you do not need
to change the Paper Type setting.
To change a Paper Type or Paper Size setting:
1 Press Menu until you see Paper Menu, and then press Select.
2 Press Menu until you see Paper Type (or Paper Size), and then press Select.
Tray 1 Type (or Tray 1 Size) appears on the second line of the display.
3 Press Select if y ou want to change the T r ay 1 Type (or Tray 1 Size) setting or press Menu to scroll t o another
source.
4 Press Menu to scroll through a list of possible paper types (or sizes).
5 When you see the correct paper type (or size), press Select to save the setting as the default.
6 Press Go to return the printer to the Ready state.
Printing on specialty media (transparencies, labels, etc.)
Follo w these instructions when you want to print on media such as transparencies, card stock, glossy paper,
labels, or envelopes.
1 Load the print media as specified for the tr ay you are using. See “Load paper or other print media” on
page 1 for help.
2 From the printer’s operator panel, set the Paper Type and Paper Siz e according to the print media you
loaded. See Set Paper Type and Paper Size for help.
3 From the computer’ s sof twar e applicat ion, set the paper type , siz e , and sour ce accor ding to t he media y ou
loaded.
a In your word processor, spreadsheet, browser, or other application, select File Print.
b Click Properties (or Options, Printer, or Setup, depending on the application) to view the printer
driver settings.
c Select the tray containing the specialty media from the Form Source list box.
d Select your media type (transparencies, envelopes, and so on) from the Media Type list box.
e Select the size of the specialt y med ia from the Form Type list box.
f Click OK, and then send your print job as usual.
For more information about paper sizes, types, and weights, see the Print Media Guide p a ge.
Page 18

Print media guide
Page 1 of 2
Print media guide
The printer supports the following standa rd print media sizes . The Univ e rsal setting l ets y ou select cust om sizes
up to the maximum specified.
Print media Source
Plain paper
Grain long:
60–74.9 g/m
Grain long:
75–176 g/m
Card stock
Upper limit, grain long:
Index Bristol: 163 g/m
Tag: 163g/m
Cover: 176 g/m
Upper limit, grain short:
Index Bristol: 199 g/m
Tag: 203g/m
Cover: 216 g/m
1, 2
2
(16–19.9 lb bond)
2
(20–47 lb bond)
2
2
2
2
2
2
2
Transparency
161–169 g/m2 (43–45 lb bond)
(90 lb)
(100 lb)
(65 lb)
(110 lb)
(125 lb)
(80 lb)
500
2000
MPF
500
MPF
500
7
8
9
MPF
Glossy paper
Gloss Book, grain long:
88–176 g/m
Gloss Cover, grain long:
162–176 g/m
2
(60–120 lb book)
2
(60–65 lb cover)
Labels
Paper: 3180 g/m2 (48 lb bond)
Dual-Web:
Polyester: 220 g/m
Vinyl:
3
180 g/m2 (48 lb bond)
3, 4
300 g/m2 (92 lb bond)
2
(59 lb bond)
Integrated forms (labels)
Pressure sensitive area:
140–175 g/m
Paper base (grain long):
75–135 g/m
Envelope
60–105 g/m
1
Paper less than 75 g/m2 (20 lb) is limited to simplex only
at less than 60% relative humidity and is not supported
in duplex. The duplex option supports the same weights
and types as the printer except for paper 60-74.9g/m
(16-19.9 lb) grain long bond, A5 cardstock, envelopes,
transparencies, vinyl labels, and polyester labels.
2
For 60–176 g/m2 (16–65 lb) paper, grain long fibers are
recommended. For papers heavier than 176 g/m
(65 lb), grain short is preferred.
2
2
(20–36 lb bond)
6
2
(16–28 lb bond)
500
2000
MPF
500
MPF
5
500
MPF
MPF
7¾ Envelope (3.875 x 7.5 in.) DL Envelope (110 x 220 mm)
9 Envelope (3.875 x 8.9 in.) C5 Envelope (162 x 229 mm)
10 Envelope (4.12 x 9.5 in.) B5 Envelope (176 250 mm)
Other Envelope (98.4 x 162 mm to 176 x 250 mm)
2
A4
(210 x 297 mm)
A5
(148 x 210 mm)
JIS B5
(182 x 257 mm)
Statement
(5.5 x 8.5 in.)
Letter
(8.5 x 11 in.)
Folio
(8.5 x 13 in.)
Legal
(8.5 x 14 in.)
Executive
(7.25 x 10.5 in.)
Universal
(5.5 x 8.27 in.
to 8.5 x 14 in.)
Universal
(2.75 x 5 in.
••••••••• •
••• • ••
•••••••••••
••••••••• •
•••••••••••
• •
• •
••••••••• •
••• • ••
•••••••••••
••••••••• •
•••••••••••
••••••••• •
•••••••••••
3
Multipurpose feeder weights differ:
• Paper: 199 g/m
• Dual-Web: 199 g/m
2
• Vinyl: 260 g/m
4
Vinyl labels are supported only when
printing environments and media are
20–32.2°C (68–90°F).
5
Pressure sensitive area must enter the
printer first.
2
(53 lb)
2
(53 lb)
2
(78 lb liner)
6
Sulfite, wood-free, or up to 100%cotton
bond.
• 100% cotton content maximum weight is
• 28 lb bond envelopes are limited to 25%
7
500-sheet tray
8
2000-sheet tray
2
(24 lb) bond.
90 g/m
cotton content.
9
Multipurpose feeder
to 9.01 x 14 in.)
Universal
(5.83 x 7.17 in.
to 8.5 x 14 in.)
Page 19

Print media guide
Page 2 of 2
Storing paper
Use the following guidelines to avoid pape r feeding problems and uneven print quality.
• Store paper in an environment where the temperature is approximately 21°C (70°F) and the relative
humidity is 40%.
• Store cartons of paper on a pallet or shelf rather than directly on the floor.
• If you store indi vidual pac k ages of paper out of the original c arton, make sure th ey rest on a flat s urf a ce so
the edges do not buckl e or curl.
• Do not place anything on top of paper packages.
Avoiding paper jams
The followi ng hints can help you avoid paper jams:
• Do not remov e paper tra ys while a job i s printing. W ait for a Load Tray <x> or Ready message before you
remove the tray.
• Use only recommended paper .
• Do not load wrinkled, creased, or damp paper.
• Flex, fan, and straighten paper before you load it.
• Do not overload the trays or the multipurpose feeder. Make sure the stack height does not exceed the
maximum height indicated.
• Push all trays firmly into the printer after loading them.
• Make sure the guides in the trays are properly positioned for the size paper you have loaded.
• Do not send jobs to staple, hole punch, or offset for transparencies, labels, or card stock.
• We recommend that tr anspar encies, labels, card stoc k, and e nvelopes not be sent to t he opt ional mailbox
or optional finisher. These specialty media types should be sent to the standard bin.
• If an optional finisher or mailbox is attached to your printer, make sure the printer and option are correctly
aligned. Refer to the Setup Guide that came with your printer or option for alignment instructions.
• Make sure all cables that connect the high capacity feeder or finisher to the printer are cor rectly attached.
Refer to the Setup Guide for more information.
• If a jam should occur, clear the entire paper path.
Page 20

Color quality guide
Page 1 of 6
Color quality guide
This Color Quality guide is intended to help users understand how operat ions availa ble on the printer can be used
to adjust and customize color output. A brief description of the purpose and operation of the functions av ailable
that affect color output is provided. Additionally, some helpful suggestions are provided on how to use these
functions to produce desirab le color output and to solv e certain color related problems commonly e xperienced by
users.
Color Menu
Selections av ailab le in the Color Menu pr ovide the user with multi ple options t hat can adjust col or characteristi cs
of the printer.
Note: Values marked by an a sterisk (*) are the factory default settings. Values selected in the printer’s
PostScript™ or PCL™ drivers for Windows will override printer settings.
Menu item Purpose Values
Print Mode
Color
Correction
Print
Resolution
Toner
Darkness
To determine whether files are
printed in a monochrome grayscale
or in color.
To adjust the printed color to better
match the colors of other output
devices or standard color systems.
To define the number of dots printed
per inch (dp i) .
T o lighten or darken printed output, or
conserve toner.
Note: Setting Toner Darkness to
values of 1, 2, or 3 is only effective
when using the PostScript driver.
Color*
Black & White
Auto* Applies different color conversion tables to each
object on the printed page depending upon the
type of object and how the color for each object
is specified.
Off No color correction is implemented.
Manual Lets you customize the color conversion tables
applied to each object on the printed page
depending upon the type of object and how the
color for each object is specified. Customization
is performed using the selections available
under the Manual Color menu item.
2400 IQ* Default setting.
1200 dpi Provides the highest resolution output which
generates preferable output for certain images
and graphics. This setting also provides
increased gloss.
5 If Print Mode is Black & White, a setting of 5
increases toner density and darkness to all print
jobs (PCL or PostScript). If Print Mode is Color,
a setting of 5 is the same as 4.
4* Default toner darkness setting.
3 Reduction in toner consumption.
2 Further reduction in toner consumption.
1 Maximum reduction in toner consumption.
Page 21

Menu item Purpose Values
Color quality guide
Page 2 of 6
Color
Balance
Color
Samples
To provide users with the ability to
make subtle color adjustments to
printed output by increasing or
decreasing the amount of toner being
used for each color plane individually.
Note: This function is only applied to
files printed using the PostScript
driver.
To assist users in selecting colors to
be printed. Users can print color
samples pages for each of the RGB
and CMYK color conversion tables
used in the printer.
The color samples pages consist of a
series of colored boxes along with the
RGB or CMYK combination that
creates the color observed for each
particular box. These pages can be
useful in helping users decide which
RGB or CMYK combinations to use
in their software applications to
create the desired printed color
output.
Cyan -5, -4, -3, -2, -1, 0*, 1, 2, 3, 4, 5
Magenta
Yellow
Black
Reset
Defaults
sRGB
Display
sRGB Vivid Prints RGB samp le s u sing sR G B Vivid color
Off–RGB Prints RGB samples using Off (or no) color
Vivid Prints RGB samples using Vivid color
US CMYK Prints CMYK samples using US CMYK color
Euro CMYK Prints CMYK samples using Euro CMYK color
Off–CMYK Prints CMYK samples using Off (or no) color
• -5 is maximum decrease
• 5 is maximum increase
Sets values for Cyan, Magenta, Yellow, and
Black to 0 (zero).
Prints RGB samples using sRGB Display color
conversion tables.
conversion tables.
conversion tables.
conversion tables.
conversion tables.
conversion tables.
conversion tables.
Manual Color
To let users customize the RGB or
CMYK color conversions applied to
each object on the printed page.
Color conversion of the data
specified using RGB combinations
can be customized based on object
type (text, graphics, or image).
Vivid CMYK Prints CMYK samples using Vivid CMYK color
conversion tables.
RGB Image • sRGB Display*: Applies a color conversion
table to produce output that approximates the
colors displayed on a computer monitor.
• sRGB Vivid: Increases color saturation for
the sRGB Display color conversion table.
Preferred for business graphics and text.
•Off: No color conversion is implemented.
• Vivid: Applies a color conversion table that
produces brighter, more saturated colors.
RGB Text • sRGB Display
RGB
Graphics
CMYK • US CMYK*: Applies a color conversion table
• sRGB Vivid*
•Off
• Vivid
to approximate SWOP color output.
•EuroCMYK: Applies color conversion table
to approximate EuroScale color output.
• Vivid CMYK: Increases color saturation for
the US CMYK color conversion table.
•Off: No color conversion is implemented.
Page 22

Menu item Purpose Values
Color quality guide
Page 3 of 6
Color Adjust
Color Saver
To manually recalibrate the color
conversion tables, adjusting for
variations in output that can occur as
a result of changing conditions, such
as room temperature or humidity.
To conserve toner. If selected, this
setting will override Toner Darkness
settings.
No selections exist for this operation.
Pressing Select initiates this operation.
On Applies a lower Toner Darkness level.
Toner Darkness setting is ignored.
Off* Prints using Toner Darkness setting.
Solving color quality problems
This section is intended to help answer some basic color-related questions and to describe how some of the
features provided in the Color Menu can be used to solve typi cal color problems.
Note: You should also read the quick reference page entitled “Solving Print Quality Problems,” which
provides solutions f or common print quality problems , some of which may aff ect the col or quality of
the printed output.
Frequently asked questions (FAQ) about color printing
What is RGB color?
Red, green, and b lue light c an be added together in various amounts to produce a large range of colors observed
in nature. For example, red and green light can be combined to create yellow light. Televisions and computer
monitors create colors in thi s manner. RGB color is a method of describing color s by indicating the amount of red,
green, and blue light needed to reproduce a particular color.
What is CMYK color?
Cyan, magenta, yellow, and black inks or toners can be printed in various amounts to produce a large range of
colors observed in nature. For example, cyan and yellow can be combined to create green. Printing presses,
inkjet printers and color l aser printer s create c olo rs i n this man ner. CMYK color is a method of describi ng color s
by indicating the amount of cyan, magenta, yellow, and black needed to reproduce a particular color.
How is color specified in a document to be printed?
Software applicati ons typically specify document color us ing RGB or CMYK color combinations. Additionally , t hey
commonly let users modify t he color of each object i n a document. Since the proc edures to modify colors will vary
depending upon the application, refer to the software application's Help section for instruction.
How does the printer know what color to print?
When a user prints a document, information describing the type and color of each object in the document is sent
to the printer. The co lor information is passed through color con version tables that translate the color into
appropriate amounts of cyan, magent a, y el lo w, and black toner needed to produce the desir ed col or. The object
type information lets different color conversion tables be used for different types of objects. For example, it is
possible to apply one type of color conversion table to text while applying a diff erent color conversion table to
photographic images.
Page 23

Color quality guide
Page 4 of 6
Should I use the PostScript or PCL driver for the best color? What driver settings should I use for the
best color?
The PostScript drive r is strongly recommended f or best color quality. The default settings in the P ostScript driver
will provide preferred color quality for the majority of printouts.
Why doesn't the printed color match the color I see on my computer screen?
The color conv e rsion ta b les used in Auto Color Correction mode generally approximate t he colors of a standard
computer monitor. However, because of technology differences that exist between printers and monitors there
are many colors that can be generated on a computer screen that cannot be physically reproduced on a color
laser printer. Color match can also be affected by monitor variations and lighting conditions. Please read the
response to the question “How can I match a particular color (such as a color in a corporate logo)?” on page 5
for recommendation s on h o w the printer' s Col or Samples pages ma y be us eful i n solvi ng certain color matching
problems.
The printed page appears tinted. Can I slightly adjust the color?
Sometimes a user may consider printed pages to appear ti nted (f or exa mple, e v erything printed seems to be too
red). This can be caused by en vironmental co nditions , paper type , lighting cond itions, or simply user pref er ence.
In these instances , Colo r Balance ma y be used to create more preferable col or . Color Balan ce provides the user
with the ability to make subtle adj ustments to the amount of toner being used in each color plane. Selecting
positive (or negative) values for cyan, magenta, yel low and black under the Color Balance menu will slightly
increase (or decrease) the amou nt of toner used for the chosen color. For example if a user believes the overall
printed page to be too red, then decreases to both magent a and yellow could pot entially improv e color preference .
Is it possible to increase the gloss in the printed output?
Additional gloss can be obtained by printing using the 1200 dpi Print Resolution setting.
My color transparencies seem dark when projected. Is there anything I can do to improve the color?
This problem most commonly occurs when proj ecting transparencies with reflecti ve overhead proj ectors. To
obtain the highest projected color quali ty, transmissive overhead projectors are recommended. If a reflective
projector must be used, then adjusting Toner Darkness settings to 1, 2 or 3 will lighten the transpar ency.
What is Manual Color Correction?
The color conversion tables applied to each object on the printed page when using the default Auto Color
Correction setting will gener at e preferred color f or the maj ority of documents . Occasionall y a user may desire to
apply a different col or tab le mapping. This customization i s accomplished using the Man ual Color men u and the
Manual Color Correction setting.
Manual Color Correction appl ies t he RGB a nd CMYK color con version table mapp ings as defi ned in th e Man ual
Color menu. Users may select any of four different color conversion tables available for RGB object s
(sRGB Display, sRGB Vivid, Vivid, and Off) and any of four different color conversion tables availabl e for CMYK
objects (US CMYK, Euro CMYK, Vivid CMYK, and Off).
Note: The Manual Color Correction setting will not be useful if the software application does not specify
colors with RGB or CMYK combinations, or in certain situations where the softwa re application or
the computer's operating system adjusts the colors specified in the application through color
management.
Page 24

Color quality guide
Page 5 of 6
How can I match a particular color (such as a color in a corporate logo)?
Occasionally users ha ve a need for the printed color of a particular object to closely match a specific color of
interest. A typical example of this situation is when a user is trying to match the color of a corporate logo. While
instances can occur in which the printer cannot exactly reproduce the desired color, users should be able to
identify adequate color matches for the majority of cases. The Color Samples menu items can provi de useful
information in helping to solve this particular type of color matching problem.
The eight Color Samples options correspond t o colo r con version tables in the printer. Selecting any of the Color
Samples options will generate a multi -page printout consisting of hundreds of colored bo xes. Either a CMYK or
RGB combination will be located on each box depending upon the table selected. The observed color of each
box is the result obtained by passing the CMYK or RGB combination labeled on the box through the selected
color conversion table.
The user can scan the color samples pages and identify the box whose color is t he closest to the desired color.
The color combination labeled on the box can then be used for modifying the color of the object in a software
application. The softwa re application's Help section should provide instructions for modifying an object' s color.
Manual Color Correc tion may be necessary to utilize the s elec ted col or con version table for the particular object.
Which Color Samples pages to use for a particular color matching prob lem depends upon the Color Correction
setting being used (A uto , Off , or Manu al), the typ e of object being printed (te xt, g raphics , or images), and ho w the
color of the object is specified in the software application (RGB or CMYK combinations). The following table
identifies which Color Samples pages to use:
Color specification of
object being printed
RGB Text Auto sRGB Vivid
CMYK Text Auto US CMYK
Classification of
object being printed
Graphic Auto sRGB Vivid
Image Auto sRGB Display
Printer Color
Correction setting
Off Off - RGB
Manual Manual Color RGB Text Setting
Off Off - RGB
Manual Manual Color RGB Graphics Setting
Off Off - RGB
Manual Manual Color RGB Image Setting
Off Off - CMYK
Color Samples pages to print
and use for color matching
Manual Manual Color CMYK Text Setting
Graphic Auto US CMYK
Off Off - CMYK
Manual Manual Color CMYK Graphics Setting
Image Auto US CMYK
Off Off - CMYK
Manual Manual Color CMYK Image Setting
Page 25

Color quality guide
Page 6 of 6
Note: The Color Samples pages are not useful if the software application does not specify colors with
RGB or CMYK combinations. Additionally, certain situations exist where the software appl ication or
the computer's operating system will adjust the RGB or CMYK combinations specified in the
application through color management. In such a situation, the resulting printed color may not be
exactly as would be expected based on the Color Samples pages.
Page 26

Print quality guide
Page 1 of 4
Print quality guide
You can solve many print quality problems by replacing a supply or maintenance item that has reached the end
of its intended life. Check the operator panel for a message about a printer consumable .
Use the follow ing table to find solutions to print quality problems.
Symptom Cause Solution
Repeating defects
Color
misregistration
ABCDEABCDE
ABCDE
ABCDE
Either the print cartridges are defective,
the image transfer unit and transfer
roller are defective, or the fuser is
defective.
Color has shifted outside of the
appropriate area or has been
superimposed over another color area.
Marks occur repeatedly only in one
color and multiple times on a page:
• Replace the cartridge if the defects
occur every:
– 47.0mm (1.85in)
– 96.0mm (3.78in)
• Check the first transfer bellcranks
and springs or Replace the image
transfer unit if the defects occur
every 101.0 mm (3.98 in)
Marks occur down the page
repeatedly in all colors:
• Replace the transfer roll if the defects
occur every 59.7 mm (2.35 in)
• Replace the fuser if the if the defects
occur every 148.0 mm (5.83 in)
Marks occur on every third or sixth
page in any color:
• Replace the image transfer unit.
Top to Bottom or Left to Right:
1 Re-seat the cartridges by removing
them from the printer and then
reinserti ng them .
2 If you still have the problem, refer to
the Color Alignment section under
the Utilities Menu.
White or colored
line
ABCDE
ABCDE
ABCDE
Either the print cartridges are defective,
the image transfer unit and transfer
roller are defective, or the fuser is
defective.
1 Replace the color print cartridge
causing the line.
2 If you still have the problem, replace
the image transfer unit and transfer
roller.
3 If you still have the problem, replace
the fuser.
Page 27

Print quality guide
Page 2 of 4
Symptom Cause Solution
Streaked
horizontal lines
Streaked vertical
lines
Print irregularities
ABCDE
ABCDE
ABCDE
ABCDE
ABCDE
ABCDE
ABCDE
ABCDE
ABCDE
The print cartridges , th e t r an sfer rolle r,
image transfer unit, or fuser may be
defective, empty, or worn.
• T oner is smeared be fore fu sing to the
paper.
• The print cartridge is defective.
• Paper has absorbed moisture due to
high humidity.
• You are using paper that does not
meet the printer specifications.
• The image transfer unit and transfer
roller are worn or defective.
• The fuser is worn or defective.
Replace th e print cartridge, the transf er
roller, the image transfer unit, or fuser
as needed.
• If paper is stiff, try feeding from
another tray.
• Replace the color print cartridge
causing the streaks.
• Load paper from a fresh package in
the paper tray.
• Avoid textured paper with rough
finishes.
• Make sure the printer’s paper type
setting matches the type of paper
you are using.
• Replace the image transfer unit and
transfer roller.
• Replace the fuser.
Print too light
Print too dark
Transparency print quality is
poor
(Print has inappropriate light or dark
spots, toner is smeared, horizontal or
vertical light bands appear, or color
does not project.)
• The Toner Darkness setting is too
light.
• You are using paper that does not
meet the printer specifications.
• The print cartridges are low on toner.
• The print cartridges are defective or
have been installed in more than one
printer.
• The Toner Darkness setting is too
dark.
• The print cartridges are defective.
• You are using transparencies that do
not meet the printer specifications.
• The Paper Type setting for the tray
you are using is set to something
other than transparency.
• Select a different Toner Darkness
setting from the printer driver before
sending the job to print.
• Perform a Color Adjust in the Utilities
Menu.
• Load paper from a new package.
• Avoid textured paper with rough
finishes.
• Make sure the paper you load in the
trays is not damp.
• Replace the print cartridges.
• Select a different Toner Darkness
setting from the printer driver before
sending the job to print.
• Replace the print cartridges.
• Use only transparencies
recommended by the printer’s
manufacturer.
• Make sure the Paper Type setting is
set to transparency.
Page 28

Print quality guide
Page 3 of 4
Symptom Cause Solution
Toner specks
Toner rubs off the paper easily
when you handle the sheets.
Gray
background
ABCDE
ABCDE
ABCDE
• The print cartridges are defective.
• The transfer roller is worn or
defective.
• The image transfer unit is worn or
defective.
• The fuser is worn or defective.
• Toner is in the paper path.
• The Texture setting is wrong for the
type of paper or specialty media you
are using.
• The Weight setting is wrong for the
type of paper or specialty media you
are using.
• The fuser is worn or defective.
• The Toner Darkness setting is too
dark.
• The print cartridges are defective.
• Replace the print cartridges.
• Replace the transfer roller.
• Replace the image transfer unit.
• Replace the fuser.
• Call for service.
• Change Paper Texture from Normal
to Smooth or Rough.
• Change Paper Weight from Plain to
CardStock (or other appropriate
weight).
• Replace the fuser.
• Select a different Toner Darkness
setting from the printer driver before
sending the job to print.
• Replace the print cartridges.
Uneven pri n t
density
ABCDE
ABCDE
ABCDE
Ghost Images
ABCDE
ABCDE
ABCDE
ABCDE
Clipped images
(Some of the print is cut off on the
sides, top, or bottom of the paper.)
• The print cartridges are defective.
• The transfer roller is worn or
defective.
• The image transfer unit is worn or
defective.
Toner level is low in the print cartridges. • Make sure the Paper Type setting is
Guides in the selected tray are set for a
different size paper than what is loaded
in the tray.
• Replace the print cartridges.
• Replace the transfer roller.
• Replace the image transfer unit.
correct for the paper or specialty
media you are using.
• Replace the print cartridges.
Move the guides in the tray to the
proper positions for the size loaded.
Page 29

Print quality guide
Page 4 of 4
Symptom Cause Solution
Incorrect margins
Skewed print
(Print is inappropriately slanted.)
Blank pages
Solid color pages
The paper curls badly once it
prints and exits to a bin.
• Guides in the selected tray are set for
a different size paper than what is
loaded in the tray.
• Auto size sensing is set to off, but
you loaded a different size paper in a
tray. For example, you inserted A4
size paper into the selected tray but
did not set the Paper Size to A4.
Guides in the selected tray are not in
the correct position for the paper size
loaded in the tray.
• An incorrect media type is loaded in
the tray being printed from or the
Paper Type setting does not match
the type of media loaded in the tray.
• The print cartridges are defective or
empty.
• The transfer roller is defective.
• The image transfer unit is defective.
• The print cartridges are defective.
• Your printer requires servicing.
• The Texture setting is wrong for the
type of paper or specialty media you
are using.
• The paper has been stored in a high
humidity environment.
• Move the guides in the tray to the
proper positions for the size loaded.
• Set the Paper Size to A4.
Move the guides in the tray to the
proper positions for the size loaded.
• Load the correct type media for your
print job or make sure the Paper
Type setting is correct for the paper
or specialty media you are using.
• Replace the print cartridges.
• Replace the transfer roller.
• Replace the image transfer unit.
• Replace the print cartridges.
• Call for service.
• Change Paper Texture from Rough
to Normal or Smooth or change the
type of paper you are using to match
the Texture setting.
• Store the paper at less than 40%
relative humidity (indoors with heat
and air conditioning) in accordance
with the storing paper section of the
print media guide.
Page 30

Repetitive defects guide
Match a set of repeating
defects on a print job to
the marks on the one of
the vertical lines. The line
that best matches the
defects on the print job
indicates which particular
part is causing the defect.
Repetitive defects guide
Page 1 of 1
Change cartridge
47.0 mm
(1.85 in)
Change cartridge
For example, the
distance between
these two marks
represents a
repeating defect
that occurs every
96.0 mm, which
means the print
cartridge is the
component that
needs replacing.
Change fuser
148.0 mm
(5.827 in)
Change ITU transfer roll
59.7 mm
(2.35 in)
96.0 mm
(3.78 in)
Change ITU
101.0 mm
(3.976 in)
Page 31

Clearing jams guide
Access doors and trays
The followi ng illustrations show areas in the printer where jams can occur.
Area A
Multipurpose feeder
200 Paper Jam
250 Paper Jam
Area B
Left access door (beside Tray 1)
200 Paper Jam
Clearing jams guide
Page 1 of 6
Areas 1–6
Finisher
28<x> Paper Jam
Area C
Paper input options:
500-sheet drawer or 2000-sheet drawer
24<x> Paper Jam
Area D
Front access door
201 Paper Jam
Area T1
Standard tray (Tray 1)
200 Paper Jam
Area E
Duplex mechanism
230 Paper Jam
Area T<x>
Paper input options:
500-sheet drawer or 2000-sheet drawer
24<x> Paper Jam
Area M
Mailbox or output expander
27<x> Paper Jam
Area L
Upper right access door (redrive area)
201 Paper Jam
202 Paper Jam
Area K
Lower right access door (fuser area)
201 Paper Jam
202 Paper Jam
Area J
Duplex tray
230 Paper Jam
Page 32

Understanding jam messages
Always clear the entire paper path when you receive
any jam message.
Paper jam message Check Areas... What to do…
Clearing jams guide
Page 2 of 6
200 Paper Jam
(Tray 1)
201 Paper Jam
(Fuser area)
202 Paper Jam
(Fuser area)
230 Paper Jam
(Duplex area)
24<x> Paper Jam
(Trays 2–4)
250 Paper Jam
(Multipurpose feeder)
27<x> Paper Jam
(Mailbox or output
expander)
28<x> Paper Jam
(Finisher)
A, B, T1 Follow the instructions for clearing Area A, Area B, and Ar ea T1.
D, K, L Follow the instructions for clearing Area D, Area K, and Area L.
If the jam message persists, paper may be caught in the fuser. See Clearing
fuser jams for instructions.
K, L Follow the instructions for clearing Area K and Area L.
If the jam message persists, paper may be caught in the fuser. See Clearing
fuser jams for instructions.
E, J Follow the instructions for clearing Area E and Area J.
C, T<x> Follow the instructions for clearing Area C and Area T<x>.
A Follow the instructions for clearing Area A.
M Follow the instructions for Clearing mailbox or output expander jams
(Area M).
1, 2, 3, 4, 5, 6 Follow the instructions for Clearing finisher jams (Areas 1–6).
Clearing the entire paper path
When a paper jam occurs, the printer stops operating
and displays
certain printer areas.
After you hav e cl eared the f o llowi ng areas, mak e sure
all printer cover s, doors, and tr ays are closed, and then
press Go to resume print in g .
2xx Paper Jam and a message to clear
Area A
1 If you are using t he multipurpose fee der, release
the levers on each side of the feeder to open it
flat.
2 Remove any jams and return the feeder to its
working position.
Page 33

Clearing jams guide
Page 3 of 6
Area B
1 Open the left access door.
2 Pull down the lever until it stops.
3 Remove the jam.
4 Return the lever to its upright position.
5 Close the door.
Area C
1 If you have one or more optional 500-sheet
drawers:
a Open the 500-sheet draw er access door. Hold
the door down while removing jams.
2 If you have an optional 2000-sheet drawer:
a Open the 2000-sheet draw er access door . Pull
the jam down and out of the rollers.
b Close the door.
Area D
1 Open the front access door.
2 Hold down the lever in the upper left co rner.
Remove jams in the rollers under the image
transfe r unit.
Note: Make sure the entire paper stack is
loaded correctly and pushed all the way
down into the tray.
b Close the door.
Note: Unfused toner may be present.
Page 34

Clearing jams guide
Page 4 of 6
Area T1
1 If clearing Area B did not clear your jam, then
carefully open tray 1. Remove any jams.
Note: Make sure the paper is pushed all the
way down into the tray.
2 Close tray 1.
Area E
1 Pull the duple x mechanism completely out. Look
inside and remove any paper caught in the
rollers. Also, look up inside, as some jams may
be above the roll ers.
Area T<x>
1 If you cannot clear al l the 500-sheet dra wer jams
from Area C:
a Carefully open tra ys 2 thr ough 4 (all 500- sheet
trays) and remove jams.
Note: Make sure the paper is pushed all the
way down into the tray.
b Close trays 2 through 4.
2 If you cannot clear the 2000-sheet drawer jam
from Area C:
a Open the 2000-sheet drawer.
2 Reinstall the duplex mechanism in the printer.
b Remove any jams, and then close the
2000-sheet drawer.
Area J
1 Remove the duplex tray.
2 Remove any jams and then reinstall the tray.
Page 35

Clearing jams guide
Page 5 of 6
Area K
1 Open the lower right access door.
2 Remove any jams, and then close the door.
Area L
1 Open the upper right access door.
Clearing mailbox or output expander jams (Area M)
1 Open the rear door of the 5-bin mailbox.
2 Remove jams from the rollers and then close the
door.
2 Pull the jam straight out, and then close the door .
Page 36

Clearing jams guide
Page 6 of 6
Clearing fuser jams
1 Clear the paper path. If the jam error message
persists, go on to step 2.
2 Open both the upper right and the lower right
access doors (Areas K and L).
Caution: The fuser assembly may be hot. Let i t
cool before continuing.
3 Pull down the latches. They slide toward the
center to release the fuser.
6 Lift up the fuser roller cover and remov e the jam.
7 Close the fuser roller cover.
8 Snap the housing back onto the fuser.
9 In s e rt the fus e r b ack into th e printer.
10 Slide the latches out, and then pull up to
refasten them.
11 Close the doors.
Clearing image transfer unit jams
4 Pull the fuser out of the printer, and set it on a
clean, flat surf ace.
5 Unsnap the housing and set it aside.
Refer to the User’s Reference located on the
publications CD for information about clearing this
type of jam.
Clearing finisher jams (Areas 1–6)
Refer to the Finisher Setup & User’s Guide for
instructions on clearing finisher jams.
If you still need help
1 Turn the printer off and then back on.
2 Contact your administrator or Help desk if you
need more assistance.
Page 37

Supplies guide
Page 1 of 1
Supplies guide
The following tables list the part numbers for ordering ne w print cartridges, toner w aste containers, fusers, or
image transfer units (ITU).
Print cartridges
Visit Lexmark’s Web site at www.lexmark.com for print cartridge ordering information.
The following is a list of cartridges you can order:
• Black print cartridge
• Cyan print cartridge
• Magenta print cartridge
• Yellow print cartridge
• Black high yield print cartridge
• Cyan high yield print cartridge
• Magenta high yield print cartridge
• Yellow high yield print cartridge
• Black Return Program print car tridge
• Cyan Return Program print cartridge
• Magenta Return Program print cartridge
• Yellow Return Program print cartridge
• Black high yield Return Program print cartridge
• Cyan high yield Return Program print cartridge
• Magenta high yield Return Program print cartridge
• Yellow high yield Return Program print cartridge
Toner waste container
To order a new toner waste container, order part number 10B3100.
Fuser or ITU
Refer to the part number listed on the fuser or ITU for the appropriate reordering number for these items.
Page 38

Moving guide
Page 1 of 1
Moving guide
Follo w these gui delines to move the printer within the office or to prepare the printer for shipment.
Warning: Follow these guidelines to avoid injuring yourself or damaging the printer.
• Always use at least two people to lift the printer.
• Always turn off the printer using the power switch.
• Disconnect all cords and cables from the printer before attempting to move the printer.
• Fai lure to repackage the printer properly for shipment can result in damage to the printer not cover ed by
the printer's warranty.
• Damage to the printer caused by improper moving is not covered by the printer's warranty.
Moving the printer within the office
The printer can be safely moved from one location within an office to another following these precautions:
• The printer must remain in an upright position.
• Any cart used to move the printer should have a surface able to support the full footprint of the printer.
• Severe jarring movements may cause damage to the printer and must be avoided.
Preparing the printer for shipment
To transport the printer by vehicle or by commercial carrier, the printer must be repackaged for shipment using
the proper packaging. The printer package must be securely fast ened to its pallet. Do not use a shipping or
transport method that requires the printer to be shipped without a p allet. The printer mu st stay upright throughout
the shipment. If y ou do not have all the original pac kagi ng, cont act your local service representative to order t he
repackaging. Additional instructions for repackaging the printer are provided in the repackaging Kit.
 Loading...