

Page 1

Printing
Removing memory and option cards
These instructions can help you remov e memory or option cards. Use the f ollowi ng illustration
to locate the connector for the card you want to remove.
1
Paper handling
Maintenance
Troubleshooting
Administration
Index
Option card
connector
Hard disk connector
Firmware card
connector
Memory and flash memory card connectors
www.lexmark.com
Lexmark C750
Page 2
Printing
Removing memory and option cards
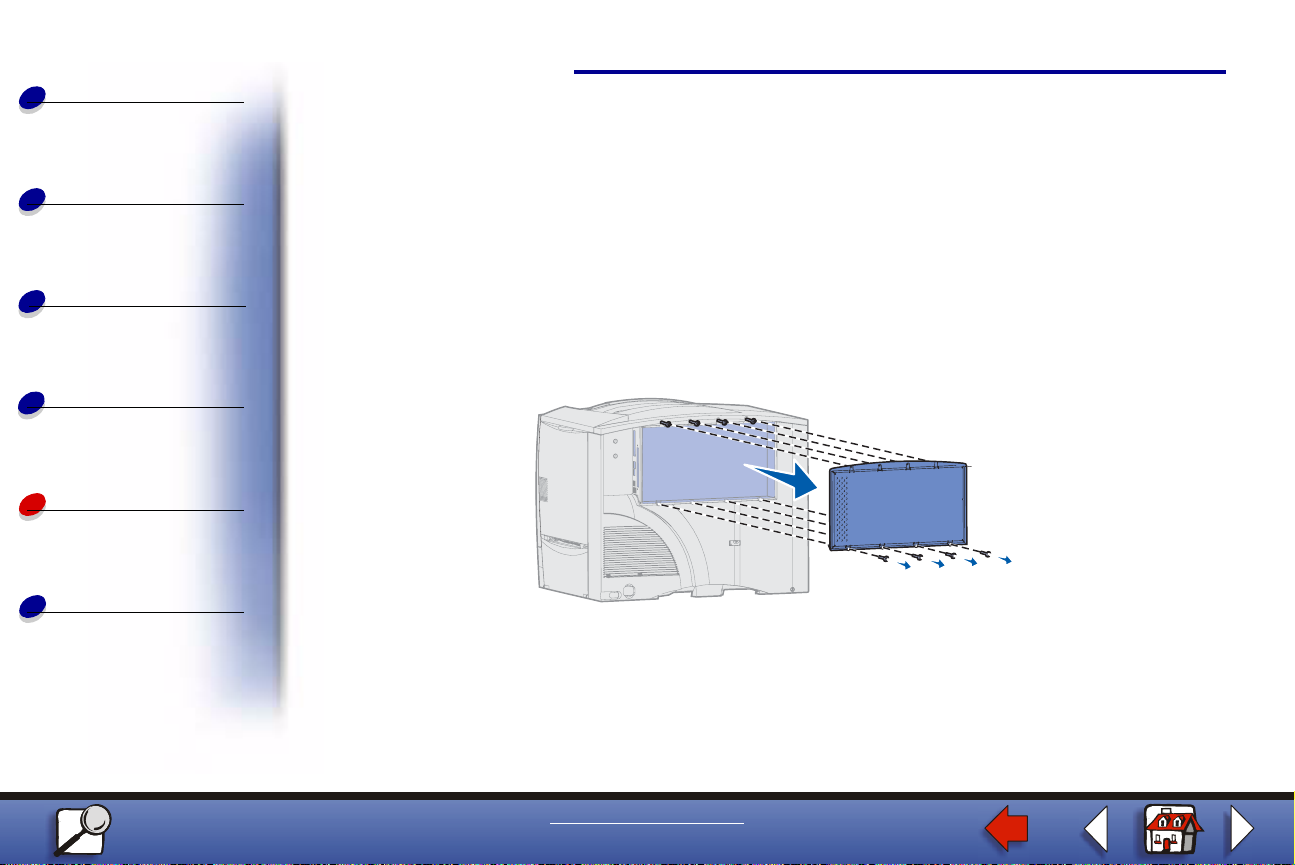
Accessing the prin te r sy stem board
2
Paper handling
Maintenance
Troubleshooting
Administration
Index
1 Turn th e printer off.
2 Unplug the printer power cord.
3 Disconnect all cables from the back of the printer.
4 Locate the access cover on the back of the printer.
5 Loosen the four screws at the top of the access cov er, but do not remove the screws
completely.
6 Remove the four screws at the bottom of the cover.
7 Slide the cover down to remove it.
www.lexmark.com
Lexmark C750
Page 3

Printing
Removing memory and option cards
Removing memory cards
3
Paper handling
Maintenance
Troubleshooting
Administration
Index
Complete the following steps to remove printer memory or flash memory cards.
Warning: Printer memory and flash memory cards are easily damaged by static
electricity. Touch something metal on the printer before you touch a
memory card.
1 Remove the system board acces s cover. See Accessing the printer system board.
2 Locate the memory card you want to remove.
www.lexmark.com
Lexmark C750
Page 4

Printing
Paper handling
Maintenance
Troubleshooting
Removing memory and option cards
3 Push open the latches on both ends of the connector aw ay from the card.
4 Pull the card straight out of the connector.
4
Administration
Index
5 Place the card in its original pac kagi ng, or wr ap t he car d in paper an d sto re it i n a box.
6 Reinstall the system board access cover. See Reinstalling the system board
access cover.
www.lexmark.com
Lexmark C750
Page 5

Printing
Removing memory and option cards
Removing an option card
5
Paper handling
Maintenance
Troubleshooting
Administration
Index
Complete the following steps to remove an internal print server, Tri-Port Adapter, Infrared
Adapter, Coax/Twinax Adapter, or USB/Parallel Interface Card.
Warning: Option cards are easily damaged by static electricity. Touch something
metal on the printer before you touch an option card.
1 Remove the system board acces s cover. See Accessing the printer system board.
2 Locate the option card.
3 Remove the screw that secures the card to the system board connect o r slot.
www.lexmark.com
Lexmark C750
Page 6

Printing
Paper handling
Maintenance
Removing memory and option cards
4 Gently pull the card out of the connector.
5 If you saved the metal plate that covers the connector slot and you do not plan to
insert another card, attach the plate:
a Slide the clip side of the plate in first, making sure the clip end covers the groove
on the system board.
b Use the screw to secure the other end of the metal plate to the system board.
6 Place the card in its original pac kagi ng, or wr ap t he car d in paper an d sto re it i n a box.
6
Troubleshooting
Administration
Index
7 Replace the system board access cover. See Reinstalling the system board
access cover.
Removing a hard disk
Complete the fo llowing steps to remove a hard disk. If an option card has been installed, you
must remove it before removing the firmware card. See Removing an option card.
Warning: Hard disks are easily damaged b y stat ic elect ricity. Touch something metal
on the printer before y ou touch a disk.
1 Remove the system board acces s cover. See Accessing the printer system board.
2 Locate the hard disk.
www.lexmark.com
Lexmark C750
Page 7

Printing
Paper handling
Maintenance
Troubleshooting
Removing memory and option cards
3 Gently pull the three posts on the hard disk mounting plate out of the holes on the
system board.
7
Administration
Index
4 Gently pull the ribbon cable connector out of the connector on the system board.
5 Place the disk in its original packaging, or wrap the disk in paper and store it in a box .
6 Replace the system board access cover. See Reinstalling the system board
access cover.
www.lexmark.com
Lexmark C750
Page 8

Printing
Removing memory and option cards
Removing a firmware card
8
Paper handling
Maintenance
Troubleshooting
Administration
Index
Complete the foll o wing st eps t o remo ve a firmware card. If an opt ion c ard h as been inst alled,
you must remove it before removing the firmware card. See Removing an option card.
Warning: Optional firmware cards are easily damaged by static electricity. Touch
something metal on the printer before you touch an optional firmware card.
1 Remove the system board acces s cover. See Accessing the printer system board.
2 Grasp the firmware card gently and pull it str a ight out in one motion. Do not pull one
side and then the other .
3 Place the card in its original pac kagi ng, or wr ap t he car d in paper an d sto re it i n a box.
www.lexmark.com
Lexmark C750
Page 9

Printing
Paper handling
Maintenance
Troubleshooting
Administration
Index
Removing memory and option cards
4 Replace the system board access cover. See Reinstalling the system board
access cover.
Reinstalling the system board access cover
1 Align the slots at the top of the access cover with the screws near the top of the
printer.
2 Slide the cover up under the top cover lip as far as it will go, and then tighten the
screws at the top of the cover.
9
www.lexmark.com
Lexmark C750
Page 10

Printing
Paper handling
Maintenance
Troubleshooting
Administration
Index
Removing memory and option cards
3 Insert and tighten the four screws to the bottom of the cover.
4 Reconnect all cables on the bac k of the printer.
5 Plug in the printer power cord.
6 Turn the printer on. ▲
10
www.lexmark.com
Lexmark C750
 Loading...