

Page 1
1
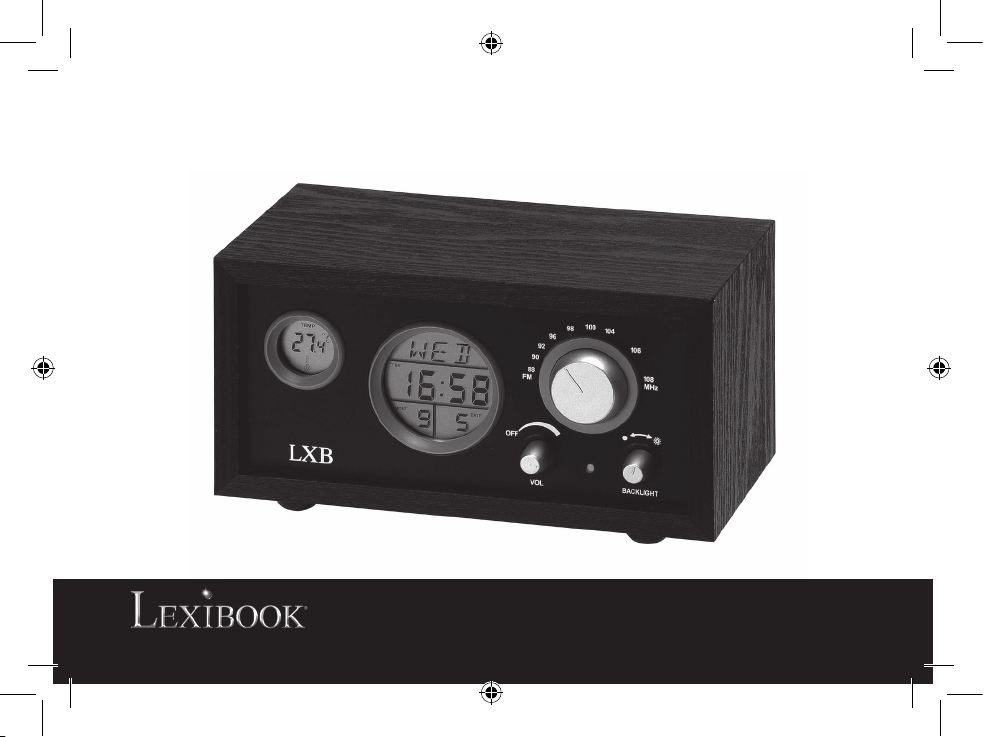
D R 9 0 0
Radio Clock
Page 2
2
3
ENGLISH 4 - 6
FRANÇAIS 7 - 9
ESPAÑOL 10 - 12
PORTUGUÊS 13 - 15
ITALIANO 16 - 18
DEUTSCH 19 - 21
NEDERLANDS 22 - 24
Page 3

3
Fig.A
1
2
3
10 12
4
5
6
7
8
11
9
1
2
Fig.B
Fig.C
Page 4
4
5
PRODUCT OVERV I E W
(See Fig.A)
1. Volume knob – radio on/off button
- Turn the volume knob clockwise to switch on the radio.
- Scroll the volume wheel to increase or decrease the
sound volume.
2. Channel button
Turn to change the radio frequency.
3. Backlight switch
Use the backlight switch to turn on and turn off the
backlight function.
(See Fig.B)
4. MODE button
Under Normal mode, press MODE to go from one mode to
another as follows:
Normal mode 12Hr/24Hr mode Alarm mode
Birthday Reminder mode Timer mode
5. SET button
- Under Normal mode, press SET to toggle between
Centigrade and Fahrenheit temperature display.
- Under Alarm mode, you can use SET together with
and to set the alarm time and the alarm music. There
are 7 world famous songs and 2 different “beep” sounds
to be selected. Press SET to set the alarm clock, when
the alarm sounds, the Alarm Music will play for one
minute. If snooze function is enabled, the Alarm Music will
sound totally four times, one time every three minutes.
- Under Birthday Reminder mode, you can press SET
together with and to adjust the date and time of
birthday reminder, then press SET to close birthday
reminder function. When the chosen time arrives, the
song will be played for ve minutes.
- Under Timer mode, use SET to set the time at which
you wish the unit to count down from. The maximum
time is 23 hours, 59 minutes and 59 seconds. When the
time set arrives at “0:00 00”, the alarm will sound for one
minute, and “0:00 00” will also ash continuously.
6. button
- Press this button to decrease a setting.
- Under Normal status, press to open or close the
music function. When opening this mode, 7 different
popular songs will be played continuously.
7. button
- Press this button to increase a setting.
- Under Normal mode, press to activate or deactivate
the Snooze function.
8. RESET button
If abnormal conditions occur when the batteries are
installed, please press RESET.
9. DC plug (DC adaptor not included)
Power supply DC 4.5V input 230V AC 50Hz 4W output
DC4.5V 300ma Centre+
10. Battery block (batteries not included)
11. Antenna
12. Speaker
Note: For all the above status, if the button is not pressed
for one minute, the unit will automatically return to Normal
mode.
(See Fig. C)
1. Temperature display
2. Time and date display
Install two AG13 batteries and two AA batteries (not
included) in the battery block at the back of the unit.
- When turning on the power for the rst time, the normal
time displayed is 12:00.
- Under Normal mode, press MODE to enter 12Hr/24Hr
mode. Then press SET and use and to set
separately the date, time, hour, minute, year, month and
day as follows:
Hour Minute Year Month Day Exit
- Range: from 2000 to 2099 for year, 1 to 12 for month,1 to
31 for day,1 to 12 or 0 to 23 for hour,0 to 59 for minute.
- Second gets reset to zero when adjusting hour or minute.
- When setting date, week (from MON to SUN) will change
accordingly.
Note: The unit automatically exits from setting and
displays current time and date if any button is not
pressed for one minute.
ENGLISH
Page 5

5
SCREEN LAYOUT
(See Fig. C)
1. Temperature display
2. Time and date display
GETTING STA R T E D
Install two AG13 batteries and two AA batteries (not
included) in the battery block at the back of the unit.
TIME SETTING
- When turning on the power for the rst time, the normal
time displayed is 12:00.
- Under Normal mode, press MODE to enter 12Hr/24Hr
mode. Then press SET and use and to set
separately the date, time, hour, minute, year, month and
day as follows:
Hour Minute Year Month Day Exit
- Range: from 2000 to 2099 for year, 1 to 12 for month,1 to
31 for day,1 to 12 or 0 to 23 for hour,0 to 59 for minute.
- Second gets reset to zero when adjusting hour or minute.
- When setting date, week (from MON to SUN) will change
accordingly.
Note: The unit automatically exits from setting and
displays current time and date if any button is not
pressed for one minute.
ALARM CLOCK SETTING
- Under Normal mode, press MODE two times to enter
Alarm Mode.
- Under Alarm Clock mode, press SET to enter the alarm
setting. Use and to set separately the hour, minute
and music as follows:
Hour Minute Music Exit
- At the preset alarm time, the alarm will sound for one
minute if snooze mode is off. Press any button to stop the
alarm. If Snooze function is enabled, the alarm will sound
a total of four times, one time every three minutes and
each time lasting for one minute.
- When the Snooze alarm sounds, you can press any
button to switch off the alarm, but the snooze sign will
still ash until 4 cycles of rings are nished or the alarm
is cancelled.
- You can press MODE to cancel the snooze function
(i.e. the sign stops ashing). The snooze sign will
disappear if you press .
ENGLISH
BIRTHDAY REMINDER SETTING
- Under normal status, press MODE to enter Birthday
Reminder mode.
- Under Birthday Reminder mode, press SET and use
and to set the date and time .These settings can be
performed separately as follows:
Hour Minute Year Month Exit Close
- When the selected date and time arrive, the song
“Happy Birthday” will be played for ve minutes.
Note: The unit automatically exits from setting and
displays current time and date if any button is not
pressed for one minute.
Page 6
6
7
- Under Normal mode, press MODE to enter Timer mode.
- Under Timer mode, press SET to enter setting, and use
and to set separately hour and minute as follows:
Hour Minute Start Timing Close
- Range: 0 to 23 for hour and 0 to 59 for minute.
- Start Timing: On the screen displaying the temperature,
seconds will descend from 00 to 59, so will the current
minute and hour.
- When timing arrives at 0:00: the alarm will sound for
one minute.
Note: The unit automatically exits from setting and
displays current time and date if any button is not
pressed for one minute.
Shows current ambient temperature. Under Normal mode,
press SET to display the temperature in Centigrade or
Fahrenheit.
Environmental Protection
Unwanted electrical appliances can be recycled and should not
be discarded along with regular household waste! Please actively
support the conservation of resources and help protect the
environment by returning this appliance to a collection centre
(if available).
ENGLISH
TIMER MODE SETTING
TEMPERAT U R E F U N C T I O N
MUSIC MODE
Under Normal mode, press to open or close the Music
mode. When opening Music mode, 7 different popular
songs can be played continuously.
BACKLIGHT FUNCTION
Under Normal status, use the backlight knob to switch on
and switch off the backlight.
RADIO FUNCTION SETTING
- Turn the volume control knob to switch on or switch off
the radio and adjust the volume.
- Use the channel button to choose your favorite radio
station on the FM band.
- Power indicator will light up when switching on the radio.
- When listening to the radio, you can adjust the length of
the antenna for best quality sound.
WA R R A N T Y
NOTE: Please keep this instruction manual, it contains important information.
This product is covered by our two-year warranty. To make use of the warranty or
the after-sales service, please contact your retailer and supply proof of purchase.
Our warranty covers material or installation-related defects attributable to the
manufacturer, with the exception of wear caused by failure to respect the
instructions for use or any unauthorised work on the equipment (such as
dismantling, exposure to heat or damp, etc.).
LEXIBOOK UK ltd,
Unit 10 Peterseld Industrial Estate,
Bedford Road, Peterseld, Hampshire,
GU32 3QA, United Kingdom,
Freephone helpline: 0808 100 3015,
http://www.lexibook.com
Page 7
7
FRANÇAIS
PRÉSENTAT I O N D U P R O D U I T
(Voir g. A)
1. Molette du volume - allumer/éteindre la radio
- Allumez la radio en tournant la molette du volume dans le
sens des aiguilles d’une montre.
- Faites rouler la molette du volume pour augmenter ou
diminuer le son du volume.
2. Sélecteur de stations
Sélectionnez votre station préférée en utilisant le sélecteur
de stations entre FM 88-108MHz.
3. Interrupteur retro-éclairage
Utilisez l’interrupteur lumière pour activer ou désactiver la
fonction rétro-éclairage.
(Voir g. B)
4. Touche MODE
En mode «NORMAL» (le mode «NORMAL» est le mode
par défaut), appuyez pour permuter entre les différents
modes du radio réveil DR900 comme suit:
Mode « NORMAL » Mode «12Hr/24Hr»
Mode « ALARME » Mode « ANNIVERSAIRE »
Mode « COMPTE À REBOURS ».
5. Touche SET
- En mode « NORMAL », appuyez pour choisir l’unité de
température : Celsius ou Fahrenheit.
- En mode « ALARME », appuyez pour régler l’heure de
réveil et choisir la musique d’alarme (vous avez le choix
entre 7 morceaux de musiques et 2 sonneries d’alarme).
Le morceau de musique sera joué pendant 1 minute si la
fonction « SNOOZE » est désactivée et 4 fois si la
fonction « SNOOZE » est activée, ceci une fois toute les
3 minutes.
- En mode « ANNIVERSAIRE », appuyez sur le bouton
pour régler la date souhaitée. Appuyez une nouvelle fois
pour sortir du mode (quand la date programmée
arrivera, la musique sera jouée pendant 5 minutes).
- En mode « COMPTE À REBOURS », appuyez pour
régler le décompte de temps désiré. Appuyez une
nouvelle fois pour lancer le décompte. Quand le temps
programmé arrive à zéro, la sonnerie retentit pendant
1 mn. Appuyez pour sortir du mode.
6. Touche
- Appuyez pour diminuer un réglage.
- En mode « NORMAL », appuyez sur la touche èche
du bas pour activer le mode musique (dans ce cas, 7
morceaux de musique seront joués en continu).
7. Touche
- Appuyez pour augmenter un réglage.
- En mode « NORMAL », appuyez sur la touche èche
du haut pour activer ou désactiver la fonction
« répétition d’alarme » (snooze).
8. Touche de réinitialisation
En cas de mauvais fonctionnement du produit, pressez la
touche de réinitialisation (utilisez un outil n et pointu).
9. Entrée adaptateur secteur (adaptateur secteur non fourni)
Alimentation DC 4.5V input 230V AC 50Hz 4W output
DC4.5V 300ma Centre+
10. Compartiment à piles (piles non fournies)
11. Antenne FM
12. Haut-parleur
Note : Pour toutes ces fonctions, si aucune commande
n’est effectuée pendant 1 mn, l’appareil retourne
automatiquement en mode « NORMAL ».
Page 8
8
9
(Voir g. C)
1. Afchage de la temperature
2. Afchage de l’heure et de la date
- Installez 2 piles AG13 et 2 piles 1,5V LR06 ou AA (non
fournies) dans le compartiment à piles situé à l’arrière
de l’appareil.
- À la première mise en service l’heure afchée est 12:00.
- En mode « NORMAL », appuyez sur la touche MODE
pour entrer en mode«12Hr/24Hr», puis appuyez sur la
touche SET et utilisez les touches et pour régler
la date et l’heure comme suit :
Heure Minute Année Mois Jour Sortie
- Programmation possible de l’année jusqu’en 2099, de1 à
12 pour le mois, de 1 à 31 pour le jour, de1 à 12 ou 0 à
23 (si vous avez choisi le mode 24H) pour l’heure, de 0 à
59 pour les minutes.
- Les secondes repartent automatiquement de zéro à la n
du réglage de l’heure et des minutes.
- En réglant la date, les jours changent automatiquement.
MON = LUNDI, TUE = MARDI, WED = MERCREDI,
THU = JEUDI, FRI =VENDREDI, SAT = SAMEDI,
SUN = DIMANCHE.
Note: si aucune commande n’est effectuée pendant
1 mn, l’appareil retourne automatiquement en mode
« NORMAL ».
- En mode « NORMAL », appuyez 2 fois sur la touche
MODE pour entrer en mode « ALARME».
- En mode « ALARME», appuyez sur la touche SET pour
programmer l’heure de réveil. Utilisez les touches èche
du haut et èche du bas pour entrer séparément les
heures, les minutes et le choix de la musique comme
suit :
Heure Minutes Musique Sortie du mode alarme
Note : le morceau de musique sera joué pendant 1 minute
si la fonction « répétition d’alarme » est désactivée, et 4
fois si la fonction « répétition d’alarme » est activée, ceci
une fois toute les 3 minutes.
- Appuyez sur n’importe quelle touche pour interrompre
la musique, toutefois, en mode «répétition d’alarme», le
cycle de 4 fois continuera sauf si vous désactivez l’alarme.
- Appuyez sur la touche MODE pour arrêter le mode
« répétition d’alarme »: l’indicateur cesse de clignoter
à l’écran. La fonction sera désactivée en appuyant sur la
touche .
FRANÇAIS
AFFICHAGE
PRÉPARAT I O N
RÉGLAGE DE L’ H E U R E
RÉGLAGE DE L’ A L A R M E
RÉGLAGE DU MODE «ANNIVERSAIRE»
- En mode « NORMAL », appuyez sur la touche MODE
pour entrer en mode « ANNIVERSAIRE ».
- En mode « ANNIVERSAIRE », appuyez sur la touche
SET pour entrer la date et l’heure souhaitées en utilisant
les touches et . Effectuez séparément ces entrées
comme suit :
Heure Minute Année Mois Sortie Fermeture du mode
Note : Quand la date réglée arrive, la chanson « Joyeux
Anniversaire » est jouée pendant 5 mn.
Note :
Si aucune commande n’est effectuée pendant 1 mn,
l’appareil retourne automatiquement en mode « NORMAL ».
Page 9
9
FRANÇAIS
RÉGLAGE DU MODE «COMPTE À REBOURS»
FONCTION TEMPÉRATURE
MODE MUSIQUE
FONCTION RÉTRO-ÉCLAIRAGE
RÉGLAGE DE LA R A D I O
GARANTIE
- En mode « NORMAL », appuyez sur la touche MODE
pour entrer en mode « COMPTE À REBOURS ».
- En mode « COMPTE À REBOURS », appuyez sur la
touche SET pour régler séparément les heures et les
minutes et utilisez les touches et comme suit :
Heures Minutes Départ du décompte Sortie du mode
Note : Sélection possible de 0 à 23 pour les heures et de
0 à 59 pour les minutes.
- Quand le temps est écoulé, l’alarme retentit pendant
1 mn.
Note : si aucune commande n’est effectuée pendant
1 mn, l’appareil retourne automatiquement en mode
« NORMAL ».
- Cette fonction afche la température ambiante.
- En mode « NORMAL », appuyez sur la touche SET pour
choisir l’unité de mesure: Celsius ou Fahrenheit.
En mode « NORMAL », appuyez sur la touche pour
sélectionner ou désélectionner le mode Musique.
Note : si ce mode est choisi, 7 musiques différentes
seront jouées à la suite.
Cette fonction peut être activée ou désactivée avec
l’interrupteur situé en façade de l’appareil.
- Allumez la radio et réglez le volume selon votre désir. Le
témoin lumineux s’éclaire quand la radio est en fonction.
- Sélectionnez votre station préférée en utilisant le
sélecteur de stations entre FM 88-108MHz
- Vous pouvez régler l’orientation et la longueur de
l’antenne pour une réception optimale.
Ce produit est couvert par notre garantie de deux ans. Pour toute mise en œuvre
de la garantie ou de service après-vente, vous devez vous adresser à votre
revendeur muni de votre preuve d’achat. Notre garantie couvre les vices de
matériel ou de montage imputables au constructeur à l’exclusion de toute
détérioration provenant du non-respect de la notice d’utilisation ou de toute
intervention intempestive sur l’article (telle que démontage, exposition à la
chaleur ou à l’humidité…). Note : Veuillez garder ce mode d’emploi, il contient
d’importantes informations. Le contenu de ce mode d’emploi peut changer sans
préavis. Aucune partie de ce mode d’emploi ne doit être reproduite sans le
consentement écrit du fabricant.
LEXIBOOK S.A, 2, avenue de Scandinavie,
91953 Courtaboeuf Cedex France
Assistance technique : 0892 23 27 26 (0,34 € TTC/Min),
www.lexibook.com
Informations sur la protection de l’environnement
Tout appareil électrique usé est une matière recyclable et ne devrait
pas faire partie des ordures ménagères! Nous vous demandons de
bien vouloir nous soutenir en contribuant activement au ménagement
des ressources et à la protection de l’environnement en déposant cet
appareil dans sites de collecte (si existants).
Page 10

10
11
ESPAÑOL
DESCRIPCIÓN DE LA U N I D A D
(Ver Fig. A).
1. Control del volumen - botón encender/apagar la radio
- Gire el control de volumen en sentido horario para
encender la radio.
- Gire la rueda de volumen para aumentar o disminuir el
volumen.
2. Botón de canales
Gírelo para cambiar de emisora.
3. Interruptor de iluminación
Utilice el interruptor de iluminación para activar o
desactivar la función de iluminación de la pantalla.
(Ver Fig. B)
4. Botón MODE
En modo normal, pulse el botón MODE para pasar de un
modo a otro mediante la siguiente secuencia:
Modo normal Modo alarma Modo recordatorio de
cumpleaños Modo temporizador
5. Botón SET
- En modo normal, pulse el botón SET para cambiar entre
grados Celsius y grados Fahrenheit la unidad de
temperatura.
- En modo Alarma, puede utilizar el botón SET junto con
y para ajustar la hora y la música de la alarma.
Se puede seleccionar entre 7 canciones mundialmente
famosas y 2 sonidos de pitido diferentes. Pulse el botón
SET para ajustar la hora de la alarma; cuando suene la
alarma, se oirá la música de alarma durante un minuto. Si
está activada la función snooze, la música de alarma
sonará un total de 4 veces, a intervalos de tres minutos.
- En el modo recordatorio de cumpleaños, puede pulsar el
botón SET junto con y para ajustar la fecha y hora del
recordatorio, y pulse luego el botón SET para salir del
modo de ajuste de recordatorio de cumpleaños. Cuando
llegue el momento seleccionado, se oirá la canción
durante 5 minutos.
- En modo temporizador, utilice el botón SET para
establecer el tiempo inicial para la cuenta hacia abajo.
El tiempo máximo que puede ponerse es 23 horas,
59 minutos y 59 segundos. Cuanto el tiempo llegue a
“00:00 00”, sonará la alarma durante un minuto y los
dígitos “00:00 00” parpadearán.
6. Botón
- Pulse este botón para disminuir un valor durante un
ajuste.
- En modo normal, pulse para abrir o cerrar la función
de música.
- Al acceder a este modo, se escucharán 7 canciones
populares repetidamente.
7. Botón
- Pulse este botón para aumentar un valor durante un
ajuste.
- En modo normal, pulse para activar o desactivar la
función snooze.
8. Botón RESET
Si se produce alguna circunstancia anormal cuando
están colocadas las pilas, pulse el botón RESET.
9. Conector DC (adaptador CC no incluido)
Alimentación elétrica DC 4.5V input 230V AC 50Hz 4W
output DC4.5V 300ma Centre+
10. Compartimentos de las pilas (pilas no incluidas)
11. Antena
12. Altavoz
NOTA: Para todos los casos anteriores, si transcurre
un minuto sin que se pulse el botón, la unidad volverá
automáticamente al modo normal.
Coloque dos pilas AG13 y 2 pilas AA (no incluidas) en los
compartimentos de las pilas, en la parte posterior de la
unidad.
- Al encender la unidad por primera vez, se mostrará la
hora 12:00.
- En modo normal, pulse el botón MODE para acceder al
modo 12h/24h.
- Pulse luego el botón SET y use los botones y para
ajustar por separado la fecha, horas, minutos, año, mes
y día según esta secuencia:
Hora Minutos
- Intervalos: de 2000 a 2099 para año, 1 a 12 para mes,
1 a 31 para día, 1 a 12 ó 0 a 23 para hora, 0 a 59 para
minutos.
- Los segundos se ponen a cero cuando se ajustan la
hora o los minutos.
- Al ajustar la fecha, el día de la semana, de MON
(LUNES) a SUN (DOMINGO), cambiará
consecuentemente.
NOTA: Si durante un minuto no se pulsa ningún botón,
la unidad sale automáticamente del modo de ajuste y
muestra la hora y fecha actual.
DISPOSICIÓN DE LA PANTALLA
PREPARACIÓN DE LA UNIDAD
Page 11
11
ESPAÑOL
(Véase Fig. C).
1. Visualización de la temperatura
2. Visualización de hora y fecha
Coloque dos pilas AG13 y 2 pilas AA (no incluidas) en los
compartimentos de las pilas, en la parte posterior de la
unidad.
- Al encender la unidad por primera vez, se mostrará la
hora 12:00.
- En modo normal, pulse el botón MODE para acceder al
modo 12h/24h.
- Pulse luego el botón SET y use los botones y para
ajustar por separado la fecha, horas, minutos, año, mes
y día según esta secuencia:
Hora Minutos Año Mes Día Salir
- Intervalos: de 2000 a 2099 para año, 1 a 12 para mes,
1 a 31 para día, 1 a 12 ó 0 a 23 para hora, 0 a 59 para
minutos.
- Los segundos se ponen a cero cuando se ajustan la
hora o los minutos.
- Al ajustar la fecha, el día de la semana, de MON
(LUNES) a SUN (DOMINGO), cambiará
consecuentemente.
NOTA: Si durante un minuto no se pulsa ningún botón,
la unidad sale automáticamente del modo de ajuste y
muestra la hora y fecha actual.
- En modo normal, pulse el botón MODE dos veces para
acceder al modo de Alarma.
- En modo de Alarma, pulse el botón SET para acceder al
modo de ajuste de la alarma.
- Utilice y para ajustar por separado la hora, los
minutos y la música para la alarma según esta secuencia:
Hora Minutos Música Salir
- A la hora establecida para la alarma, esta sonará durante un
minuto si la función snooze está desactivada. Pulse cualquier
botón para detener la alarma. Si la función snooze está
activada, la alarma sonará cuatro veces en total, a intervalos
de tres minutos y durante un minuto cada vez.
- Cuando suene la alarma y esté la función snooze activada,
puede pulsar cualquier botón para silenciar la alarma, pero el
símbolo snooze parpadeará en la pantalla hasta que se realicen
los 4 ciclos de alarma o la alarma se cancele.
- Puede pulsar el botón MODE para cancelar la función snooze
(i.e. el símbolo de snooze dejará de parpadear). El símbolo
snooze desaparecerá si pulsa .
DISPOSICIÓN DE LA PANTALLA
PREPARACIÓN DE LA UNIDAD
AJUSTE DE LA H O R A
AJUSTE DE LA H O R A DE LA A L A R M A
MODO DE A J U S T E D E L T E M P O R I Z A D O R
- En modo normal, pulse el botón MODE para acceder al
modo de Recordatorio de Cumpleaños.
- En modo Recordatorio de Cumpleaños, pulse SET y
utilice y para ajustar la fecha y la hora. Estos ajustes
pueden realizarse por separado de la siguiente manera:
Hora Minutos Año Mes Salir Cerrar
- Cuando llegue el momento seleccionado, se oirá la
música “Feliz cumpleaños” durante 5 minutos.
NOTA: Si durante un minuto no se pulsa ningún botón,
la unidad sale automáticamente del modo de ajuste y
muestra la hora y fecha actual.
Page 12

12
13
ESPAÑOL
MODO DE A J U S T E D E L T E M P O R I Z A D O R
FUNCIÓN DE TEMPERATURA
MODO MÚSICA
FUNCIÓN DE ILUMINACIÓN DE LA PANTALLA
AJUSTE DE LA F U N C I Ó N D E R A D I O
GARANTÍA
- En modo normal, pulse el botón MODE para acceder al
modo de Temporizador.
- En modo Temporizador, pulse el botón SET para acceder
al modo de ajuste, y utilice y para ajustar por
separado las horas y los minutos de la siguiente manera:
Hora Minutos Comenzar cuenta Cerrar
- Intervalos: 0 a 23 para horas y 0 a 59 para minutos.
- Comenzar cuenta: En la pantalla que muestra la
temperatura, se mostrará la cuenta hacia abajo en horas,
minutos y segundos.
- Cuando el tiempo llegue a 00:00: La alarma sonará
durante un minuto.
NOTA: Si durante un minuto no se pulsa ningún botón,
la unidad sale automáticamente del modo de ajuste y
muestra la hora y fecha actual.
Muestra la temperatura ambiente actual. En modo normal,
pulse el botón SET para cambiar entre grados Celsius y
grados Fahrenheit la unidad de temperatura.
- En modo normal, pulse para acceder o salir de la
función de música.
- Al acceder a esta función, se escucharán 7 canciones
populares repetidamente en forma circular.
En modo normal, utilice el mando de iluminación para
apagar y encender la iluminación de la pantalla.
- Gire el control de volumen para encender o apagar la
radio y para ajustar el volumen.
- Utilice el botón de canales para seleccionar su emisora
de radio favorita en la banda de FM.
- El indicador de encendido se iluminará al encender la
radio.
- Mientras escucha la radio, puede ajustar la longitud de la
antena para obtener la mejor calidad de sonido.
Este producto está cubierto por nuestra garantía de dos años. Para hacer uso de
esta garantía o del servicio post-venta, debe de dirigirse al lugar de compra
provisto con la prueba de haber realizado la misma. Nuestra garantía cubre
los vicios de material o del montaje imputable al fabricante con la exclusión de
cualquier deterioro proveniente del no respeto del modo de uso o de la
intervención inadecuada sobre el artículo (tales como desmontaje, exposición al
calor o a la humedad…). Se recomienda conservar el embalaje para cualquier
referencia futura. Guarde este manual de instrucciones en un lugar seguro, ya
que contiene información importante. El contenido de este manual está sujeto a
cambios sin previo aviso. No podrá reproducirse ninguna parte de este manual,
en ninguna forma, sin la previa autorización por escrito del fabricante.
Lexibook Ibérica S.L,
C/ de las Hileras 4, 4° dpcho 14,
28013 Madrid, España
Servicio consumidores: 91 548 89 32,
http://www.lexibook.com
Advertencia para la protección del medio ambiente
¡Los aparatos eléctricos desechados son reciclables y no deben ser
eliminados en la basura doméstica! Por ello pedimos que nos ayude
a contribuir activamente en el ahorro de recursos y en la protección
del medio ambiente entregando este aparato en los centros de
colección (si existen).
Consulte a Imagem A
1. Botão do volume – botão de ligar/desligar o rádio
- Rode o botão do volume no sentido dos ponteiros do
relógio para ligar o rádio.
- Rode o botão do volume para aumentar ou diminuir o
volume do som.
2. Botão do canal
Rode o botão para mudar a frequência de rádio.
3. Interruptor da luz de fundo
Use o interruptor da luz de fundo para ligar e desligar a
função da luz de fundo.
Consulte a Imagem B
4. Botão MODE
No modo Normal, prima o botão MODE para alternar entre
modos do seguinte modo:
Modo Normal Modo de 12Hr/24Hrl
Modo do Despertadorl Modo de Lembrança de Aniversáriol
Modo do Temporizador
5. Botão SET
- No modo Normal, prima o botão SET para alternar
entre a apresentação da temperatura em graus Celsius e
Fahrenheit.
- No modo de Despertador, pode usar o botão SET
juntamente com e para acertar as horas do
despertador e a música do despertador. Existem 7
músicas mundialmente famosas e dois sons “beep”
diferentes que pode escolher. Prima o botão SET para
acertar o relógio do despertador. Quando o despertador
tocar, a música do despertador toca durante um minuto.
Se a função “snooze” estiver ligada, a música do
despertador toca por completo quatro vezes, uma vez a
cada três minutos.
Page 13

13
DADOS GERAIS DO PRODUTO
Consulte a Imagem A
1. Botão do volume – botão de ligar/desligar o rádio
- Rode o botão do volume no sentido dos ponteiros do
relógio para ligar o rádio.
- Rode o botão do volume para aumentar ou diminuir o
volume do som.
2. Botão do canal
Rode o botão para mudar a frequência de rádio.
3. Interruptor da luz de fundo
Use o interruptor da luz de fundo para ligar e desligar a
função da luz de fundo.
Consulte a Imagem B
4. Botão MODE
No modo Normal, prima o botão MODE para alternar entre
modos do seguinte modo:
Modo Normal Modo de 12Hr/24Hrl
Modo do Despertadorl Modo de Lembrança de Aniversáriol
Modo do Temporizador
5. Botão SET
- No modo Normal, prima o botão SET para alternar
entre a apresentação da temperatura em graus Celsius e
Fahrenheit.
- No modo de Despertador, pode usar o botão SET
juntamente com e para acertar as horas do
despertador e a música do despertador. Existem 7
músicas mundialmente famosas e dois sons “beep”
diferentes que pode escolher. Prima o botão SET para
acertar o relógio do despertador. Quando o despertador
tocar, a música do despertador toca durante um minuto.
Se a função “snooze” estiver ligada, a música do
despertador toca por completo quatro vezes, uma vez a
cada três minutos.
- No modo de Lembrança de Aniversário, pode premir o
botão SET juntamente com e para ajustar a data e
as horas da lembrança de aniversário. De seguida,
prima o botão SET para desligar a função de lembrança
de aniversário. Quando chegar à hora escolhida, a
música é tocada durante cinco minutos.
- No modo do Temporizador, use o botão SET para
acertar as horas que deseja que a unidade conte para
trás. O tempo máximo são 23 horas, 59 minutos e
59 segundos. Quando o tempo escolhido chegar a
“0:00 00”, o alarme toca durante um minuto e
“0:00 00” pisca continuamente.
6. Botão
- Prima este botão para diminuir os acertos ou congurações.
- No estado Normal, prima para abrir ou fechar a
função da música. Quando abrir este modo, 7 músicas
populares diferentes tocam continuamente.
7. Botão
- Prima este botão para aumentar os acertos ou congurações.
- No modo Normal, prima para activar ou desactivar a
função “Snooze”.
8. Botão RESET
Se ocorrerem condições anormais quando coloca as pilhas,
prima o botão RESET.
9. Ficha DC (adaptador DC não incluído)
Alimentação DC 4.5V input 230V AC 50Hz 4W output
DC4.5V 300ma Centre+
10. Bloco das pilhas (pilhas não incluídas)
11. Antena
12. Altifalante
NOTA: Para todos os estados apresentados acima, se não
premir o botão durante um minuto, a unidade volta
automaticamente ao modo Normal.
PORTUGUÊS
Page 14

14
15
PORTUGUÊS
Consulte a Imagem C
1. Apresentação da temperatura
2. Apresentação das horas e da data
Coloque duas pilhas AG13 e duas pilhas AA (não
incluídas) no bloco das pilhas, na parte traseira da
unidade.
- Quando ligar a energia pela primeira vez, a hora normal
apresentada é 12:00.
- No modo Normal, prima o botão MODE para entrar no
modo 12Hr/24Hr. De seguida, prima o botão SET e use
os botões e para acertar separadamente a data,
horas, minutos, ano, mês e dia, do seguinte modo:
Horas Minutos Ano Mês Dia Sair
- Alcance: De 2000 a 2099 para o ano, 1 a 12 para o mês,
1 a 31 para o dia, 1 a 12 ou 0 a 23 para as horas, 0 a
59 para os minutos.
- Os segundos começam em zero quando acertar as
horas ou os minutos.
- Quando acertar a data, a semana (de MON a SUN)
muda conformemente.
NOTA: A unidade sai automaticamente dos acertos e
apresenta as horas e a data actuais se não premir
qualquer botão durante um minuto.
- No modo Normal, prima o botão MODE duas vezes para
entrar no modo do Despertador.
- No modo do Relógio do Despertador, prima o botão SET
para entrar no acerto do despertador. Use os botões
e para acertar separadamente as horas, minutos e
a música, do seguinte modo:
Hora Minutos Música Sair
- Na hora do despertador predenida, o despertador toca
durante um minuto, caso a função “snooze” esteja
desligada. Prima qualquer botão para desligar o
despertador. Se a função “snooze” estiver ligada, o
despertador toca um total de quatro vezes, uma vez por
cada três minutos e cada uma das vezes dura um minuto.
- Quando o despertador com “snooze” tocar, pode premir
qualquer botão para desligar o despertador, mas o sinal
do “snooze” permanece a piscar, até que 4 ciclos de anéis
terminem, ou o despertador seja cancelado.
- Pode premir o botão MODE para cancelar a função
“snooze” (neste caso, o sinal deixa de piscar). O sinal do
“snooze” desaparece se premir .
ESTRUTURA D O E C R Ã
INICIAR
ACERTO D A S H O R A S
ACERTO DO RELÓGIO DO DESPERTADOR
CONFIGURAÇÃO DA LEMBRANÇA DE ANIVERSÁRIO
- No modo normal, prima o botão MODE para entrar no
modo de Lembrança de Aniversário.
- No modo de Lembrança de Aniversário, prima o botão
SET e use os botões e para acertar a data e as
horas. Estes acertos podem ser efectuados
separadamente do seguinte modo:
Horas Minutos Ano Mês Sair Fechar
- Quanto chegar à data e hora escolhida, a música
“Parabéns” é tocada durante cinco minutos.
NOTA: A unidade sai automaticamente das congurações
e apresenta a data e a hora actuais se não premir
qualquer botão durante um minuto.
Page 15

15
PORTUGUÊS
CONFIGURAÇÃO DO MODO DO TEMPORIZADOR
FUNÇÃO DA T E M P E R ATURA
MODO DE MÚSICA
FUNÇÃO DA L U Z D E F U N D O
CONFIGURAÇÃO DA FUNÇÃO DE RÁDIO
GARANTIA
- No modo Normal, prima o botão MODE para entrar no
modo do Temporizador.
- No modo do Temporizador, prima o botão SET para
entrar nas congurações e use os botões e para
acertar separadamente as horas e os minutos do
seguinte modo:
Horas Minutos
Iniciar o Temporizador Sair
- O alcance vai das 0 às 23 horas e de 0 aos 59 minutos.
- Iniciar o Temporizador: No ecrã que apresenta a
temperatura, os segundos começam a descer de 00 a
59, bem como as horas e os minutos actuais.
- Quando o temporizador chegar a 0:00: O alarme toca
durante um minuto.
NOTA: A unidade sai automaticamente das congurações
e apresenta a hora e a data actuais se não premir
qualquer botão durante um minuto.
Apresenta a temperatura ambiente actual. No modo
Normal, prima o botão SET para ver a temperatura em
graus Celsius ou Fahrenheit.
No modo Normal, prima o botão para abrir ou fechar o
modo de Música. Quando abrir o modo de Música, pode
reproduzir 7 músicas populares diferentes, circularmente.
No estado Normal, use o botão da luz de fundo para ligar
e desligar a luz de fundo.
- Rode o botão do controlo do volume para ligar ou
desligar o rádio e para ajustar o volume.
- Use o botão do canal para escolher a sua estação de
rádio preferida na banda FM.
- O indicador da alimentação acende quando ligar o rádio.
- Quando estiver a ouvir rádio, pode ajustar o tamanho da
antena, para obter uma melhor qualidade de som.
Este produto está coberto pela nossa garantia de dois anos. Para qualquer
reclamação de garantia ou serviço após venda, é favor contactar o seu
fornecedor local com a sua prova de compra. A nossa garantia cobre todos os
defeitos de fabrico ou de montagem imputáveis ao fabricante mas não cobre a
deterioração pelo não respeito do Manual de Instruções ou mau manuseamento
do produto (tal como exposição ao calor ou humidade ou desmantelamento
do produto). Recomenda-se que guarde a caixa para uma futura referência.
Guarde este manual de instruções num local seguro, pois contém informações
importantes. O conteúdo deste manual está sujeito a alterações sem aviso.
Nenhuma parte deste manual pode ser reproduzida de nenhuma maneira sem o
consentimento expresso por escrito do fabricante.
LEXIBOOK Electronica Lda,
Quinta dos Loios,
Praceta José Domingos dos Santos,
6B-8ª, 2835-343 Lavradio-Barre, Portugal
Apoio Técnico: 212 06 1 348,
http://www.lexibook.com
Indicações para a protecção do meio ambiente
Aparelhos eléctricos antigos são materiais que não pertencem ao
lixo doméstico! Por isso pedimos para que nos apoie, contribuindo
activamente na poupança de recursos e na protecção do ambiente
ao entregar este aparelho nos pontos de recolha, caso existam.
Page 16

16
17
PANORAMICA DEL P R O D O T T O
Vedi (Fig. A)
1. Manopola volume – tasto di accensione/spegnimento
radio (on/off)
- Girare la manopola del volume in senso orario per
accendere la radio.
- Far scorrere la rotella del volume per aumentare o
diminuire il volume del suono.
2. Tasto canale
Girare questo comando per cambiare la frequenza radio.
3. Interruttore retroilluminazione
Servirsi dell’interruttore di retroilluminazione per accendere
e spegnere la relativa funzione.
(Vedi Fig. B)
4. Tasto MODE
In modalità Normale, premere il tasto MODE per passare da
una modalità all’altra come segue:
Modalità normale Modalità 12/24h Modalità sveglia
Modalità promemoria compleanno Modalità timer
5. Tasto SET
- In modalità normale, premere il tasto SET per commutare
tra la visualizzazione a display della temperatura in gradi
Centigradi e in gradi Fahrenheit.
- In modalità Alarm (sveglia), si può utilizzare il tasto SET
insieme a e per impostare l’ora della sveglia (Alarm
Time) e la musica (Alarm Music). Vi sono a disposizione
7 canzoni famose in tutto il mondo e 2 diversi “cicalini” tra
cui scegliere. Premere il tasto SET per impostare la
sveglia; quando la sveglia suona, la musica suonerà per
un minuto. Se è stata attivata la funzione snooze, la
musica della sveglia suonerà in tutto quattro volte, una
volta ogni tre minuti.
- In modalità Promemoria compleanno, si può premere il
tasto SET contemporaneamente a e per regolare la
data e l’ora del promemoria compleanno, quindi premere
il tasto SET per chiudere la funzione. Quando giunge
l’ora prescelta, la canzone verrà suonata per cinque minuti.
- In modalità Timer, servirsi del tasto SET per impostare
l’ora a partire dalla quale si desidera che l’apparecchio
inizi il conto alla rovescia. Il tempo massimo è di 23 ore,
59 minuti e 59 secondi. Quando il tempo impostato
arriva a “0:00 00”, la sveglia suonerà per un minuto e
“0:00 00” lampeggerà in maniera ininterrotta.
6. Tasto
- Premere questo tasto per diminuire un valore congurato.
- In condizione normale, premere per aprire o chiudere
la funzione musica. Quando si apre questa modalità,
7 diverse canzoni famose verranno suonate in maniera
ininterrotta.
7. Tasto
- Premere questo tasto per aumentare un valore congurato.
- In modalità normale, premere per attivare o
disattivare la funzione Snooze.
8. Tasto RESET
Se si dovessero vericare condizioni anormali quando le
batterie sono installate, premere il tasto RESET.
9. Presa CC (adattatore CC non in dotazione)
Alimentazione DC 4.5V input 230V AC 50Hz 4W output
DC4.5V 300ma Centre+
10. Blocco batteria (batterie non in dotazione)
11. Antenna
12. Casse
NOTA BENE: per tutte le condizioni di cui sopra, se il
tasto non viene premuto per un minuto, l’apparecchio
tornerà automaticamente alla modalità normale.
Inserire due batterie AG13 e due batterie AA (non in
dotazione) nel blocco batterie posto sul retro
dell’apparecchio.
- Quando si accende l’alimentazione per la prima volta,
l’ora normale visualizzata sono le 12:00.
- In modalità normale, premere il tasto Mode per entrare
in modalità 12/24h. Quindi, premere il tasto SET e
servirsi di e per congurare separatamente la data,
l’ora, i minuti, l’anno, il mese e il giorno come segue:
Ora Minuti Anno Mese Giorno Uscita
- Gamma: dal 2000 al 2099 per l’anno, da 1 a 12 per i
mesi, da 1 a 31 per i giorni, da 1 a 12 o da 0 a 23 per le
ore, da 0 a 59 per i minuti.
- I secondi vengono azzerati quando si regolano l’ora o i
minuti.
- Quando si imposta la data, il giorno della settimana
(da LUN a DOM) cambieranno di conseguenza.
NOTA BENE: l’apparecchio esce automaticamente dalla
modalità di congurazione e visualizza a display l’ora e la
data attuali nel caso in cui nessun tasto venga premuto
per un minuto.
LAYOUT DELLO SCHERMO
CONFIGURAZIONE DELL’ O R A
ITALIANO
Page 17

17
(Vedi Fig. C)
1. Display temperatura
2. Display ora e data
Inserire due batterie AG13 e due batterie AA (non in
dotazione) nel blocco batterie posto sul retro
dell’apparecchio.
- Quando si accende l’alimentazione per la prima volta,
l’ora normale visualizzata sono le 12:00.
- In modalità normale, premere il tasto Mode per entrare
in modalità 12/24h. Quindi, premere il tasto SET e
servirsi di e per congurare separatamente la data,
l’ora, i minuti, l’anno, il mese e il giorno come segue:
Ora Minuti Anno Mese Giorno Uscita
- Gamma: dal 2000 al 2099 per l’anno, da 1 a 12 per i
mesi, da 1 a 31 per i giorni, da 1 a 12 o da 0 a 23 per le
ore, da 0 a 59 per i minuti.
- I secondi vengono azzerati quando si regolano l’ora o i
minuti.
- Quando si imposta la data, il giorno della settimana
(da LUN a DOM) cambieranno di conseguenza.
NOTA BENE: l’apparecchio esce automaticamente dalla
modalità di congurazione e visualizza a display l’ora e la
data attuali nel caso in cui nessun tasto venga premuto
per un minuto.
- In modalità normale, premere due volte il tasto MODE per
entrare in modalità sveglia (Alarm).
- In modalità sveglia (Alarm Clock), premere il tasto SET
per impostare l’ora della sveglia. Servirsi dei tasti e
per impostare separatamente ora, minuti e musica come
segue:
Ora Minuti Musica
Uscita
- All’ora impostata, la sveglia suonerà per un minuto se la
modalità snooze è disattiva. Premere un tasto qualsiasi
per spegnere la sveglia. Se la funzione Snooze è attiva, la
sveglia suonerà per un totale di quattro volte, una volta ogni
tre minuti e ogni volta per la durata di un minuto.
- Quando suona la sveglia in funzione Snooze, si può premere
qualsiasi tasto per spegnere la sveglia, ma il segno snooze
continuerà a lampeggiare no a quando il ciclo di 4 squilli
non verrà completato o la sveglia non verrà cancellata.
- Si può premere il tasto MODE per cancellare la funzione
snooze (ossia il segno smette di lampeggiare). Il simbolo
snooze scomparirà se si preme .
LAYOUT DELLO SCHERMO
PRIMI PASSI
CONFIGURAZIONE DELL’ O R A
IMPOSTAZIONE DELLA SVEGLIA
IMPOSTAZIONE PROMEMORIA COMPLEANNO
- In modalità normale, premere il tasto MODE per entrare in
modalità Promemoria compleanno.
- In modalità Promemoria compleanno, premere SET e servirsi
dei tasti
e
per impostare la data e l’ora. Queste
impostazioni possono essere effettuate separatamente come
segue:
Ora Minuti Anno Mese Uscita Chiudi
- Quando arrivano la data e l’ora selezionate, la canzone
“Happy Birthday” verrà riprodotta per cinque minuti.
NOTA BENE: l’apparecchio esce automaticamente dalla
modalità impostazioni e visualizza a display l’ora e la data
correnti se non vengono premuti tasti per un minuto.
ITALIANO
Page 18

18
19
MODALITÀ DI IMPOSTAZIONE TIMER
FUNZIONE TEMPERATURA
MODALITÀ MUSICA
FUNZIONE RETROILLUMINAZIONE
IMPOSTAZIONE FUNZIONE RADIO
GARANZIA
- In modalità normale, premere il tasto MODE per entrare
in modalità Timer.
- In modalità Timer, premere il tasto SET per entrare nelle
impostazioni e servirsi di e per impostare ora e
minuti separatamente come segue:
Ora Minuti Inizia cronometraggio Chiudi
- Gamma: da 0 a 23 per l’ora e da 0 a 59 per i minuti.
- Avvia cronometro: sulla schermata in cui appare la
temperatura, i secondi trascorreranno da 00 a 59, così
come i minuti e le ore.
- Quando il cronometro arriva a 0:00: una suoneria
squillerà per un minuto.
NOTA BENE: l’apparecchio esce automaticamente
dall’impostazione e visualizza l’ora e la data correnti se
non vengono premuti tasti per un minuto.
Mostra la temperatura ambiente attuale. In modalità
normale, premere il tasto SET per visualizzare a display la
temperatura in gradi Centigradi o Fahrenheit.
- In modalità normale, premere per aprire o chiudere
- la modalità Musica. Quando si apre la modalità Musica,
possono essere riprodotte 7 famose canzoni in maniera
ininterrotta.
In condizione normale, servirsi della manopola di
retroilluminazione per accendere e spegnere la
retroilluminazione.
- Girare la manopola di regolazione del volume per
accendere o spegnere la radio e per regolare il volume.
- Servirsi del tasto canali per scegliere la stazione radio
preferita sulla banda FM.
- L’indicatore di alimentazione si accenderà quando si
accende la radio.
- Quando si ascolta la radio, si può regolare la lunghezza
dell’antenna per ottenere la migliore qualità sonora.
Questo prodotto è coperto dalla nostra garanzia di due anni. Per usufruire della
garanzia o del servizio post-vendita, rivolgersi al rivenditore muniti della relativa
prova d’acquisto. La garanzia copre i difetti del materiale o del montaggio
imputabili al costruttore, a esclusione dei danni dovuti all’inosservanza del
manuale d’uso o a ogni intervento improprio sul prodotto (smontaggio,
esposizione al calore o all’umidità…). NOTA: conservare il presente libretto
d’istruzioni in quanto contiene informazioni importanti. Si raccomanda di
conservare la confezione per qualsiasi riferimento futuro. I contenuti di questo
manuale sono soggetti a cambiamenti senza obbligo di preavviso. È proibita la
riproduzione completa o parziale e con ogni mezzo di questo manuale, senza
l’espresso consenso scritto del produttore.
Lexibook Italia S.r.l,
Via Eustachi, 45, 20129 Milano, Italia
Servizio consumatori : 022040 4959
(Prezzo di una chiamata locale),
http://www.lexibook.com
Avvertenze per la tutela dell’ambiente
Gli apparecchi elettrici vecchi sono materiali pregiati, non rientrano
nei normali riuti domestici! Preghiamo quindi i gentili clienti di
contribuire alla salvaguardia dell’ambiente e delle risorse e di
consegnare il presente apparecchio ai centri di raccolta competenti,
qualora siano presenti sul territorio.
ITALIANO
Page 19

19
PRODUKTÜBERSICHT
(s. Abb. A)
1. Lautstärke-Regler – Radio EIN/AUS-Knopf
- Drehen Sie den Lautstärke-Drehknopf im Uhrzeigersinn,
um das Radio einzuschalten.
- Drehen Sie den Lautstärke-Drehknopf, um die Lautstärke
zu reduzieren oder zu erhöhen.
2. Sender-Drehknopf
Drehen Sie den Drehknopf, um die Radiofrequenz zu
ändern.
3. Schalter für die Hintergrundbeleuchtung
Schalten Sie mit diesem Schalter die
Hintergrundbeleuchtung ein oder aus.
(s. Abb. B)
4. MODE– Taste
Wenn Sie sich im Normal-Modus benden, drücken Sie
die MODE-Taste, um wie folgt von einem Modus in den
nächsten zu gehen:
Normal-Modus 12h/24h- Modus Wecker-Modus
Geburtstagsalarm-Modus Timer-Modus
5. SET-Taste
- Drücken Sie im Normal-Modus die SET-Taste, um in der
Temperaturanzeige zwischen Grad Celsius und
Fahrenheit hin-und herzuschalten.
- Drücken Sie im Wecker-Modus die SET-Taste zusammen
mit den und Tasten, um die Weckzeit und Weckmusik
einzustellen. Sie können aus sieben weltberühmten Hits
und zwei verschiedenen Pieptönen auswählen. Drücken
Sie die SET-Taste, um den Wecker zu stellen. Wenn der
Weckalarm ertönt, spielt die Weckmusik für eine Minute.
Wenn die Schlummer-Funktion aktiviert ist, wird alle drei
Minuten die Weckmusik wiederholt. Insgesamt wird die
Weckmusik viermal gespielt.
- Drücken Sie im Geburtstagsalarm-Modus die SET-Taste
zusammen mit den und Tasten, um Datum und Zeit
für den Geburtstagsalarm einzustellen. Drücken Sie
dann die SET-Taste, um die Geburtstagsalarm-Funktion
zu schließen. Zum gewählten Zeitpunkt wird die
Geburtstagsmusik fünf Minuten lang gespielt.
- Drücken Sie im Timer-Modus die SET-Taste, um die
Zeit für den Countdown einzustellen. Die maximale
Countdown-Zeit beträgt 23 Stunden, 59 Minuten und
59 Sekunden. Wenn der Countdown bei „00:00:00“
angekommen ist, ertönt der Wecker für eine Minute und
die Anzeige „00:00:00“ blinkt fortlaufend auf.
6. Taste
- Drücken Sie diese Taste, um einen Einstellungswert
zu verringern.
- Drücken Sie im Normal-Modus die Taste, um die
Musik-Funktion zu öffnen oder zu schließen. Wenn Sie
diesen Modus öffnen, werden sieben beliebte Songs
fortlaufend gespielt.
7. Taste
- Drücken Sie diese Taste, um einen Einstellungswert zu
vergrößern.
- Drücken Sie im Normal-Modus die Taste, um die
Schlummer-Funktion zu aktivieren oder zu deaktivieren.
8. RESET-Taste
Sollte es zu Funktionsstörungen kommen, wenn die
Batterien eingelegt sind, drücken Sie bitte die RESET-Taste.
9. DC-Stecker (GS-Akkus nicht inklusive)
Leistung DC 4.5V input 230V AC 50Hz 4W output
DC4.5V 300ma Centre+
10. Batteriefach (Batterien nicht inklusive)
11. Antenne
12. Lautsprecher
HINWEIS: Für alle oben beschriebenen Funktionen gilt:
wenn eine Minute lang keine Taste gedrückt wird, kehrt
das Gerät automatisch in den Normal-Modus zurück.
DEUTSCH
Page 20

20
21
DEUTSCH
(s. Abb. C)
1. Temperatur-Anzeige
2. Zeit und Datum-Anzeige
Legen Sie zwei AG13 Batterien und zwei „AA” Batterien
(nicht enthalten) in das Batteriefach an der Rückseite des
Gerätes.
- Wenn Sie das Gerät zum ersten Mal einschalten, wird
die Zeit 12:00 angezeigt.
- Drücken Sie im Normal-Modus die MODE-Taste, um in
den 12h/24h-Modus zu gelangen. Drücken Sie dann die
SET-Taste und benutzen Sie die und Tasten, um
wie folgt Zeit und Datum (Stunde, Minute, Jahr, Monat,
Tag) separat einzustellen:
Stunde Minute Jahr Monat Tag Beenden
- Bereich: von 2000 bis 2099 für Jahr, 1 bis 12 für Monat,
1 bis 31 für Tag, 1 bis 12 oder 0 bis 23 für Stunde, 0 bis
59 für Minute.
- Die Sekunden werden auf Null zurückgestellt, wenn die
Stunden oder Minuten eingestellt werden.
- Wenn Sie das Datum einstellen, ändert sich die Woche
(von Montag bis Sonntag) entsprechend.
HINWEIS: Das Gerät verlässt automatisch den
Einstellmodus und zeigt die aktuelle Zeit und das aktuelle
Datum an, wenn eine Minute lang keine der Tasten
gedrückt wird.
- Drücken Sie im Wecker-Modus die SET-Taste, um die
Weckzeit einzustellen. Benutzen Sie die und Tasten,
um wie folgt Stunden, Minuten und Weckmusik separat
einzustellen:
Stunde Minute Musik Beenden
- Zur eingestellten Weckzeit ertönt der Weckalarm für eine
Minute lang, wenn die Schlummer-Funktion ausgeschaltet
ist. Drücken Sie eine beliebige Taste, um den Weckalarm
zu unterbrechen. Wenn die Schlummer-Funktion aktiviert
ist, ertönt der Weckalarm einmal alle drei Minuten und jedes
Mal für eine Minute lang. Insgesamt ertönt der Weckalarm
viermal.
- Wenn der Schlummer-Weckalarm ertönt, können Sie eine
beliebige Taste drücken, um den Weckalarm zu
unterbrechen. Das Schlummer-Symbol blinkt jedoch
solange auf, bis vier Weckalarm-Durchläufe beendet sind
oder der Wecker ausgeschaltet wird.
- Sie können die MODE-Taste drücken, um die
Schlummer-Funktion zu deaktivieren (das Symbol hört auf
zu blinken). Das Schlummer-Symbol verschwindet, wenn
Sie die Taste drücken.
DISPLAY
INBETRIEBNAHME
EINSTELLEN DER ZEIT
EINSTELLEN DES GEBURTSTAGSALARMS
- Drücken Sie im Normal-Modus die MODE-Taste, um in
den Geburtstagsalarm-Modus zu gelangen.
- Drücken Sie im Geburtstagsalarm-Modus die SET-Taste
und benutzen Sie die und Tasten, um das Datum
und die Zeit einzustellen. Die Einstellungen können
separat wie folgt vorgenommen werden :
Stunde Minute Jahr Monat Beende Schließen
- Zum gewählten Zeitpunkt erklingt für fünf Minuten lang
das Lied „Happy Birthday“.
HINWEIS: Das Gerät verlässt automatisch den
Einstell-Modus und zeigt die aktuelle Zeit und das aktuelle
Datum an, wenn eine Minute lang keine der Tasten
gedrückt wird.
STELLEN DES WECKERS
- Drücken Sie im Normal-Modus die MODE-Taste
zweimal, um in den Wecker-Modus zu gelangen.
Page 21

21
DEUTSCH
EINSTELLEN DES TIMERS
TEMPERATUR-FUNKTION
MUSIK-MODUS
HINTERGRUNDBELEUCHTUNG
EINSTELLEN DER RADIO-FUNKTION
GARANTIE
- Drücken Sie im Normal-Modus die MODE-Taste, um in
den Timer-Modus zu gelangen.
- Drücken Sie im Timer-Modus die SET-Taste und
benutzen Sie die und Tasten, um wie folgt die
Stunden und Minuten separat einzustellen :
Stunde Minute Timer starten Schließen
- Bereich: 0 bis 23 für Stunde und 0 bis 59 für Minute.
- Timer starten: Auf dem Display mit der Temperatur Anzeige wird der Countdown der Sekunden von 00 bis
59 angezeigt, ebenso wie die aktuelle Minute und Stunde.
- Wenn der Countdown bei 0:00 angekommen ist, ertönt
ein Signalton für eine Minute lang.
HINWEIS: Das Gerät verlässt automatisch den
Einstell-Modus und zeigt die aktuelle Zeit und das aktuelle
Datum an, wenn eine Minute lang keine der Tasten
gedrückt wird.
Diese Funktion zeigt die aktuelle Raumtemperatur an.
Drücken Sie im Normal-Modus die SET-Taste, um die
Temperatur in Grad Celsius oder Fahrenheit anzuzeigen.
Drücken Sie im Normal-Modus die Taste, um den
Musik-Modus zu öffnen oder zu schließen. Wenn Sie
den Musik-Modus öffnen, werden sieben beliebte Songs
fortlaufend gespielt.
Benutzen Sie im Normal-Modus den Schalter für die
Hintergrundbeleuchtung, um die Hintergrundbeleuchtung
ein- oder auszuschalten.
- Drehen Sie den Lautstärkeregler, um das Radio ein-oder
auszuschalten und die Lautstärke zu regulieren.
- Benutzen Sie den Sender-Drehknopf, um Ihren
Lieblings-Radiosender auf dem FM-Band einzustellen.
- Die Ein/Aus-Status-Anzeige leuchtet auf, wenn das
Radio eingeschaltet wird.
- Wenn Sie das Radio eingeschaltet haben, können Sie
die Länge der Antenne justieren, um die beste
Empfangsqualität zu erhalten.
Die Garantiezeit für dieses Gerät beläuft sich auf 2 Jahre. Um die Garantie
oder den Kundendienst in Anspruch zu nehmen, setzen Sie sich bitte mit Ihrem
Händler oder Lieferanten in Verbindung oder senden Sie das Gerät an die unten
angegebene Adresse ein. Fügen Sie Ihren Kaufbeleg bei. Unsere Garantie
bezieht sich auf Material- und Verarbeitungsfehler des Herstellers, nicht jedoch
auf Verschleiß, Nichteinhaltung der Anleitungen, unautorisierte Arbeiten am Gerät
und dessen Bestandteilen (Demontage, Hitze, Dampf usw.).
Hinweis: Wir empfehlen, dass Sie die Originalverpackung für spätere Zwecke
aufbewahren. Bewahren Sie diese Bedienungsanleitung an einem sicheren Ort
auf, da sie wichtige Informationen enthält. Haftungsausschluss Wir verbessern
unsere Produkte, deren Farben und Produktdetails ständig, daher kann Ihr
Produkt leicht von der Abbildung auf der Verpackung abweichen.
http://www.lexibook.com
Hinweise zum Umweltschutz
Elektronische Geräte können aufbereitet werden und dürfen nicht im
Haushaltsmüll entsorgt werden. Bitte unterstützen Sie die
Wiederaufbereitung und schützen Sie die Umwelt, indem Sie
Altgeräte entsprechend der Umweltschutzbestimmungen entsorgen
bzw.
Page 22

22
23
PRODUCTO V E R Z I C H T
(Zie Fig.A)
1. Volumeknop – radio aan/uit knop
- Draai de volumeknop in de richting van de klok om de
radio aan te zetten.
- Draai de volumeknop om het volume te verhogen of te
verlagen.
2. Kanaalinstelling
Draai aan deze knop om de frequentie van de radio te
wijzigen.
3. Schermverlichting
Gebruik deze schakelaar om de schermverlichting aan of
uit te zetten.
(Zie Fig.B)
4. MODE knop
In de Normale modus drukt u op de MODE-knop om naar
één van de volgende instellingen over te schakelen:
Normal modus 12Uur/24Uur modus Alarm modus
Verjaardag-herinnering modus Terugtelalarm
5. SET knop
- In de Normal-modus drukt u op de SET-knop om over te
schakelen tussen weergave van de temperatuur in
graden Celsius en Fahrenheit.
- In de Alarm modus gebruikt u de SET-knop tegelijkertijd
met en om de tijd van de wekker en de wekkermuziek
in te stellen. U kunt kiezen tussen 7 wereldberoemde
melodieën en 2 verschillende pieptonen. Druk op de
SET-knop om de wekker in te stelen. Als de wekker gaat
zal de melodie één minuut lang afgespeeld worden. Als de
sluimerfunctie ingeschakeld is, zal de wekkermuziek in
totaal vier keer afgespeeld worden, iedere keer drie
minuten.
- In de Verjaardag-herinneringsmodus kunt u de
SET-knop tegelijkertijd met en indrukken om de
datum en de tijd van de herinnering in te stellen. Druk
nogmaals op de SET-knop om de herinneringsfunctie uit
te zetten. Als de ingestelde tijd bereikt wordt zal de
gekozen melodie vijf minuten lang afgespeeld worden.
- In de Timer-modus (terugtelalarm) gebruikt u de
SET-knop om een tijd in te stellen waarvandaan
teruggeteld wordt. De maximale tijd is 23 uur,
59 minuten en 59 seconden. Als de tijd bij
“0:00 00” aankomt zal het gekozen alarm één minuut
afgespeeld worden en zal “0:00 00” gaan knipperen.
6. - knop
- Druk op deze knop om de waarde van een instelling te
verlagen.
- In de Normal-modus drukt u op om de muziekfunctie
aan of uit te zetten. Als deze modus aan staat worden
7 verschillende populaire melodieën achtereenvolgens
afgespeeld.
7. - knop
- Druk op deze knop om de waarde van een instelling te
verhogen.
- In de Normal-modus drukt u op om de Sluimerfunctie
te activeren of te deactiveren.
8. RESET-knop
Als bij het installeren van de batterijen een fout optreedt,
kunt u met de RESET-knop de waarden opnieuw instellen.
9. DC-stekker (DC-adapter niet bijgeleverd)
Stroomvoorziening DC 4.5V input 230V AC 50Hz 4W
output DC4.5V 300ma Centre+
10. Batterijblok (batterijen niet bijgeleverd)
11. Antenne
12. Luidspreker
OPMERKING: In alle bovenstaande standen zal het
apparaat automatisch terugkeren naar Normal-modus,
als een minuut geen enkele knop ingedrukt wordt .
Installeer twee AG13 batterijen en twee AA batterijen (niet
bijgeleverd) in het batterijblok aan de achterkant van het
apparaat.
- Als het apparaat voor de eerste keer ingeschakeld wordt
toont de klok 12:00.
- In de Normal-modus drukt u op de Mode-knop om over
te schakelen tussen 12Uur/24Uur-modus. Druk op de
SET-knop en gebruik en om de datum, tijd, uren,
minuten, jaren, maanden en dagen als volgt in te stellen:
Uren Minuten Jaar Maand Dag Uit
- Bereik: van 2000 tot 2099 voor de jaren, 1 tot 12 voor
maanden,1 tot 31 voor dagen,1 tot 12 of 0 tot 23 voor de
uren, 0 tot 59 voor de minuten.
- De seconden worden automatisch op nul teruggezet bij
het instellen van de uren of minuten.
- Bij het instellen van de datum worden de weekdagen
(van MON tot SUN) automatisch aangepast.
OPMERKING: Het apparaat verlaat automatisch de
instellingen als één minuut lang geen knop ingedrukt
wordt.
NEDERLANDS
Page 23

23
(Zie Fig. C)
1. Temperatuurweergave
2. Tijd- en datumweergave
Installeer twee AG13 batterijen en twee AA batterijen (niet
bijgeleverd) in het batterijblok aan de achterkant van het
apparaat.
- Als het apparaat voor de eerste keer ingeschakeld wordt
toont de klok 12:00.
- In de Normal-modus drukt u op de Mode-knop om over
te schakelen tussen 12Uur/24Uur-modus. Druk op de
SET-knop en gebruik en om de datum, tijd, uren,
minuten, jaren, maanden en dagen als volgt in te stellen:
Uren Minuten Jaar Maand Dag Uit
- Bereik: van 2000 tot 2099 voor de jaren, 1 tot 12 voor
maanden,1 tot 31 voor dagen,1 tot 12 of 0 tot 23 voor de
uren, 0 tot 59 voor de minuten.
- De seconden worden automatisch op nul teruggezet bij
het instellen van de uren of minuten.
- Bij het instellen van de datum worden de weekdagen
(van MON tot SUN) automatisch aangepast.
OPMERKING: Het apparaat verlaat automatisch de
instellingen als één minuut lang geen knop ingedrukt
wordt.
- In de Normal-modus drukt u twee keer op de MODE-knop
om in de wekkerstand te komen.
- In de Alarm Clock (wekker)-modus drukt u op de
SET-knop om de wekker in te stellen. Gebruik en om
de uren, minuten en de muziek als volgt in te stellen:
Uren Minuten Muziek Uit
- Op de ingestelde tijd zal de wekker een minuut klinken,
als de sluimerfunctie uit staat. Druk op een willekeurige
knop om het alarm uit te zetten. Als de sluimerfunctie aan
staat zal het alarm in totaal vier keer afgaan, drie keer
drie minuten en de laatste keer één minuut.
- Als het sluimeralarm afgaat kunt u op een knop drukken
om het alarm om te schakelen, maar het sluimersignaal
zal blijven knipperen totdat de 4 wekcycli afgerond zijn,
of tot het alarm uitgeschakeld wordt.
- U kunt op de MODE-knop drukken om de sluimerfunctie
uit te schakelen (d.w.z. het signaal houdt op te
knipperen). Het sluimersignaal zal verdwijnen als u
indrukt.
SCHERMINDELING
VOOR HET GEBRUIK
TIJDINSTELLING
WEKKERINSTELLING
INSTELLING VOOR HET ONTHOUDEN
VAN VERJAARDAGEN
- In de normale status drukt op de MODE-knop om de modus
voor het herinneren van verjaardagen in te schakelen.
- In deze modus drukt u op de SET-knop en de en
knoppen om de datum en de tijd in te stellen. Deze
instellingen kunnen afzonderlijk ingesteld worden als volgt:
Uren Minuten Jaar Maand Uit Afsluiten
- Als de ingestelde datum en tijd bereikt wordt, wordt de
melodie “Happy Birthday” vijf minuten lang afgespeeld.
OPMERKING: Het apparaat verlaat de instelling en zal de
huidige tijd en datum weergeven als één minuut lang geen
knoppen ingedrukt worden.
NEDERLANDS
Page 24

24
INSTELLING TERUGTELALARM
TEMPERATUURFUNCTIE
MUZIEKMODUS
VERLICHTINGSFUNCTIE
RADIOFUNCTIE-INSTELLING
GARANTIE
- In de Normal-modus, druk op de MODE-knop om het
terugtelalarm in te stellen.
- In de Timer-modus (terugtelalarm), druk op de SET-knop
om de uren en de minuten achtereenvolgens met de
en -knoppen in te stellen.
Uren Minuten Begin terugtellen Afsluiten
- Bereik: 0 tot 23 voor uren en 0 tot 59 voor minuten.
- Begin terugtellen. Op het gedeelte van het scherm waar
de temperatuur getoond wordt zullen de seconden
beginnen terug te tellen van 00 tot 59, evenals de
minuten en de uren.
- Als het terugtelalarm bij 0:00 aankomt, zal het alarm
een minuut afgaan.
OPMERKING: Het apparaat zal automatisch de
instellingstand verlaten en de huidige tijd en datum tonen,
als een minuut geen enkele knop ingedrukt wordt.
Toont de huidige kamertemperatuur. In de Normal-modus,
druk op de SET-knop om over te schakelen tussen graden
Celsius of Fahrenheit.
In de Normal-modus drukt u op om de muziekmodus
aan of uit te zetten. Als de muziekmodus aan staat worden
7 bekende melodieën achtereenvolgens afgespeeld.
In de Normale status gebruikt u de verlichtingsknop om de
verlichting van het scherm aan of uit zetten.
- Draai aan de volumecontroleknop om over de radio aan
of uit te zetten, en het volume te wijzigen.
- Gebruik de kanaalinstellingsknop om uw favoriete
radiostation op de FM-band te kiezen.
- Het aan/uit lampje zal gaan branden als de radio aan
staat.
- Terwijl u naar de radio luistert kunt u de antenne langer
of korter maken voor de beste ontvangst.
Dit product heeft een garantie van 2 jaar. Om de garantie of naverkoopdienst te
gebruiken, gelieve contact op te nemen met je verkoper met een aankoopbewijs
of zend het toestel terug naar ondervermeld adres met een aankoopbewijs.
Onze garantie dekt schade aan materialen of installatie-betreffende schade met
betrekking tot de fabrikant, met uitzondering van slijtage veroorzaakt door het niet
navolgen van de richtlijnen voor het gebruik van dit toestel of door
niet-geautoriseerde herstellingen aan het toestel (zoals demontage, blootstelling
aan hitte of vochtigheid, enz.). Opmerking: Het is aangeraden alle
verpakkingsmaterialen te bewaren als referentiemateriaal voor later. Bewaar deze
gebruikshandleiding op een veilige plaats daar het belangrijke informatie bevat.
Omwille van ons voortdurend streven naar verbetering, is het mogelijk dat kleuren
en details van het product lichtjes verschillen van deze die op de verpakking zijn
afgebeeld.
http://www.lexibook.com
Milieubescherming
Niet langer bruikbare electrische apparaten kunnen gerecycleerd
worden en mogen niet weggegooid worden met het gewone huisvuil!
Gelieve actief de bescherming van bronnen te ondersteunen en deel
te nemen in de bescherming van het milieu door dit toestel terug te
zenden naar een verzamelcentrum (indien aanwezig).
NEDERLANDS
©2007 LEXIBOOK® IM code: DR900IM0417
 Loading...