

Page 1
Levo Retailer Technical Guide
MY2017
Page 2

2
Levo Retailer Technical Guide
TABLE OF CONTENTS
Requirements & Recommendations ............................................................................................................................ 3
Tools & Service Parts Inventory at a Glance .................................................................................................................................................................................. 3
Required Tools ........................................................................................................................................................................................................................................4
Recommended Tools ............................................................................................................................................................................................................................6
Recommended Service Parts Inventory ........................................................................................................................................................................................ 7
Optional Service Parts Inventory .................................................................................................................................................................................................... 10
Build, Setup, & Maintenance ....................................................................................................................................... 13
New Bike Build Checklist .................................................................................................................................................................................................................. 13
Setup Checklist for Test Rides, Demos, and Sale s................................................................................................................................................................... 14
First Ride Tips ........................................................................................................................................................................................................................................ 15
Maintenance Details - Bicycle ..........................................................................................................................................................................................................16
Maintenance Details - Motor ............................................................................................................................................................................................................16
Unlocking or De-restricting the Motor ........................................................................................................................................................................................... 16
Glossary ........................................................................................................................................................................ 17
Troubleshooting & Diagnosis Guide - Fundamentals ................................................................................................ 19
Troubleshooting & Diagnosis Guide - Performance Issues ....................................................................................... 21
Symptom Category - Noise .............................................................................................................................................................................................................. 21
Symptom Category - Control .......................................................................................................................................................................................................... 22
Symptom Category - Communications ........................................................................................................................................................................................23
Symptom Category - Expectations ............................................................................................................................................................................................... 24
Troubleshooting & Diagnosis Guide - Function Issues ............................................................................................. 25
Diagnose Hardware Using Visual Inspection ............................................................................................................................................................................. 25
Diagnose System Connection Using the Mission Control App ........................................................................................................................................... 25
Diagnose Motor Harness & Plug Connections Using Substitute Components ............................................................................................................. 26
Warranty ....................................................................................................................................................................... 27
Introduction
This guide provides important technical information and recommendations about Specialized Levo bicycles. It is for use by USA
Authorized Specialized Retailers only. If you have any questions please contact Retail Care at 1-800-722-4423.
Please consult the Service Site at service.specialized.com or linked from B2B for any updates to this and any other technical
documents before starting work. The Service Site is always has the latest technical information.
Available Resources
This guide is intended to be used in conjunction with other Specialized resources:
• Levo Owner's Manual - The Levo Owner's Manual has information useful to retailers as well as riders.
• Rider/Retail Care Rep - The Rider/Retail Care teams have hands-on experience in riding, customizing, and servicing Levos. They
often can provide assistance or advice that comes from personal experience.
• SBCU and SBCU.com - Check with SBCU for Turbo and Levo content currently offered. Visit SBCU.com often for product
specific videos, tutorials, and quizzes.
• Service Site - The Service Site is the central location for all technical documents, Technical Bulletins, service procedures,
manuals, product service item information, and software resources. Information on the Service Site is frequently updated. Please
check frequently to ensure you are using the latest information available.
• The Service Site can be accessed directly at service.specialized.com or linked through the B2B site.
Page 3

3
Levo Retailer Technical Guide
Requirements & Recommendations
This section outlines the various tools and service parts inventory retailers will need to invest in to be able to provide professional
level support to Levo riders. Levo support at retail means retailers will be able to perform the following activities with confidence and
expertise:
• Execute all firmware and hardware updates
• Quickly and accurately diagnose and resolve issues
• Demonstrate working knowledge of Levo bikes and show how their expertise contributes to the Turbo Ride Experience
• Communicate ride and maintenance details to Levo riders in a knowledgeable manner
Tools & Service Parts Inventory at a Glance
REQUIRED TOOLS
• Turbo PC Connect and Diagnostic Tool (version 4.2 or later) : 989E-5610
• 98916-5646 : Levo Diagnosis Tool adapter
• 3" 2-jaw pulley and gear puller
• Brose cap puller tool : S175300006
• Smartphone or tablet : Android or iOS
• Octalink/Isis bottom bracket tool : Shimano® TL-UN98, Park BBT-18, or equivalent
RECOMMENDED TOOLS
• Counterweighted or powered repair stand
• Handlebar/stem mounted phone holder
RECOMMENDED SERVICE PARTS INVENTORY
• Magnet holder including magnet plate, anodized black : S166800012, recommended inventory 2-3
• Motor-to-battery harness : S176800002, recommended inventory 1
• Speed Sensor : S16680018, recommended inventory 1-2
• Chainring Steel, 104 BCD: S161400009, recommended inventory 1
• Amazinger 2.0 derailleur hanger : S162600002
• Battery mounting thru axle : S166800004, recommended inventory 2
• Battery : 98916-5617, recommended inventory 1-2
• Battery pin w/o hardware : S166800005, recommended inventory 3
• Battery rock guard w/o hardware: S169900019, recommended inventory 3
• Bolt kit for battery : S170500004, recommended inventory 1
OPTIONAL SERVICE PARTS INVENTORY
• Bearing kit, Levo FSR : S160600004
• Bolt kit for Levo FSR : S160500007
• Crank, custom alloy arm for MTB, 165 mm : S161600013
• Crank, custom alloy arm for MTB, 170 mm : S161600015
• Spider, Levo Fat, 104 BCD : S161600017
• Spider, 104 BCD : S161600018
• Chain guide Fat : S161200002
• Chain guide 29 and 6Fattie : S161200001
• Chain stay protector mastic tape Levo Fat : S166900002
• Chain stay protector mastic tape Levo Hardtail : S166900004
• Chain stay protector FSR : S166900003
Page 4
4
Levo Retailer Technical Guide
Requirements & Recommendations
Required Tools
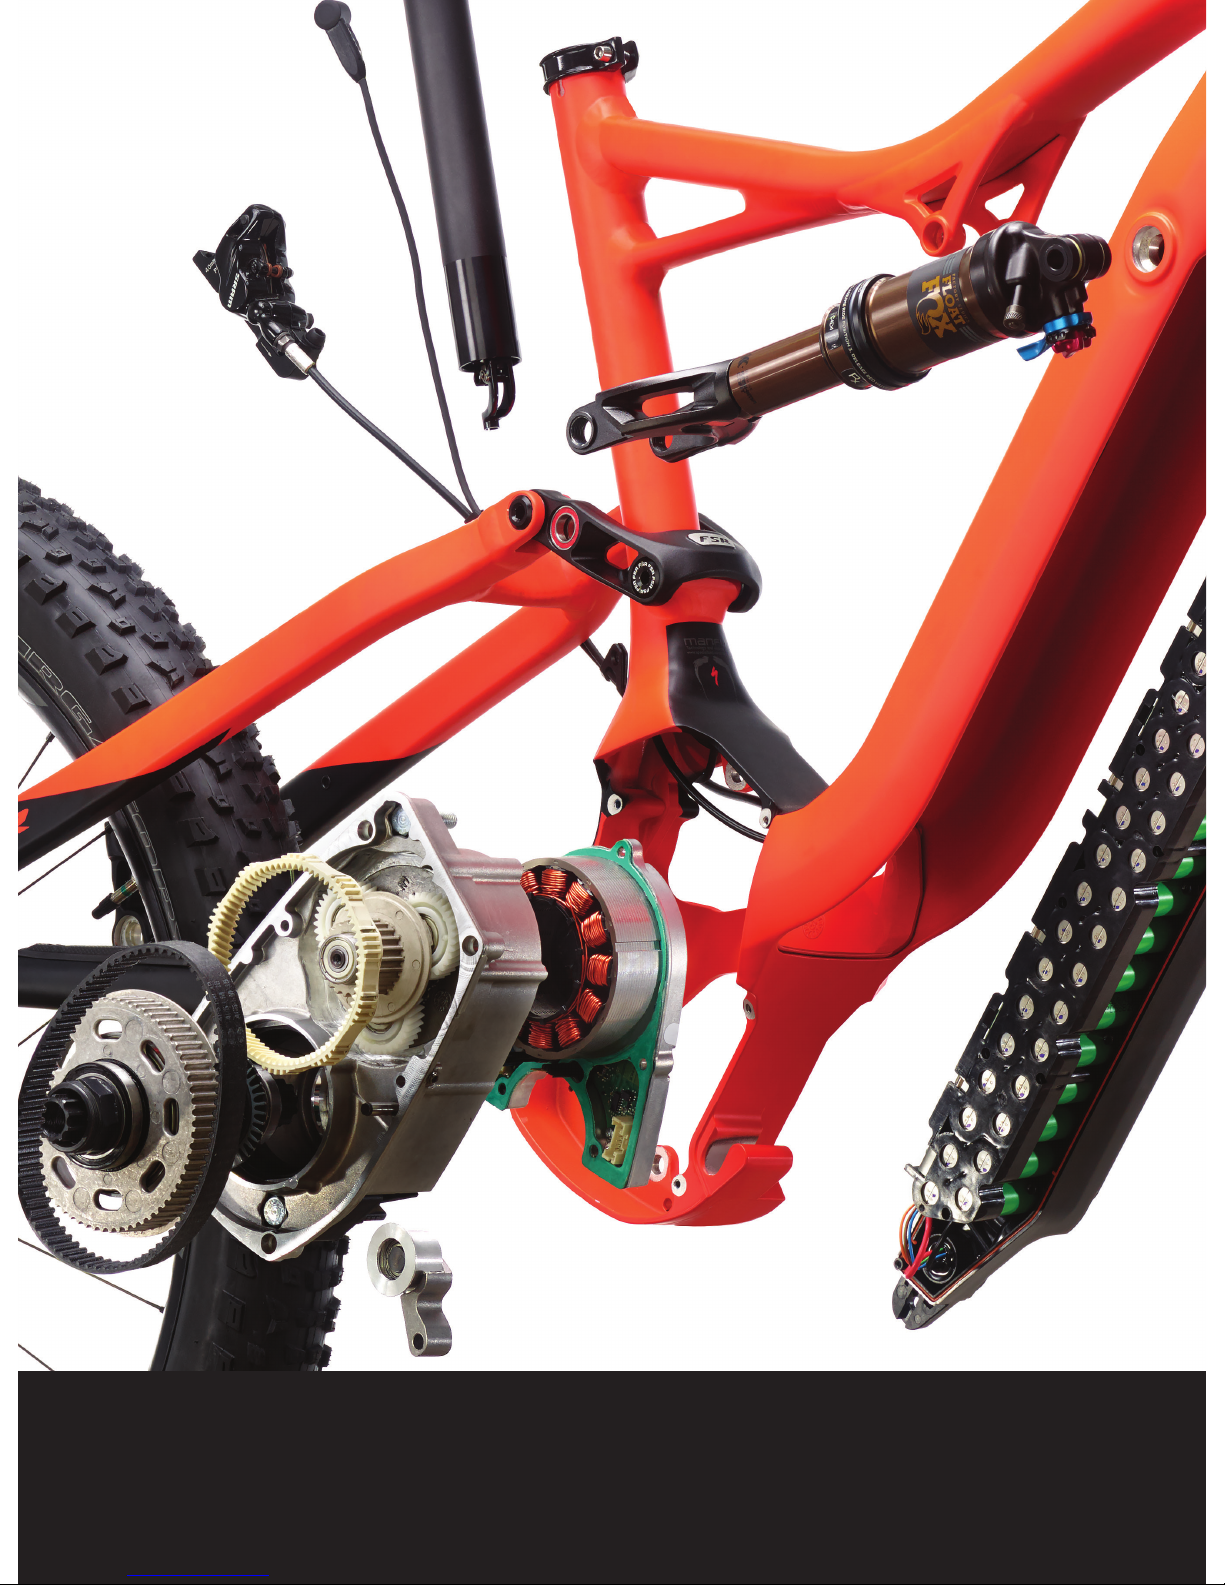
Turbo PC Connect and Diagnostic Tool,
version 4.2 or later : 989E-5610
This is an updated version of the existing Turbo PC Connector
(aka Turbo Diagnostic Tool). This tool is used exclusively to
update the Levo system firmware of the motor and battery.
All system diagnosis can be performed electronically with the
Mission Control App or manually with the diagnosis techniques
outlined in the Troubleshooting Guide section of this guide.
To update the motor firmware, the Levo Diagnosis Tool Adapter must
be used in conjunction with Turbo PC Connect and Diagnostic Tool.
Note: previous versions of the Turbo PC Connect and
Diagnostic Tool will only update the battery firmware. The
previous versions will not update the motor firmware.
Levo Diagnosis Tool Adapter : 98916-5646
The adapter must be used with the Turbo PC Connect
and Diagnosis Tool to update the motor firmware. In
addition, the battery must be connected to the motor
while the Turbo PC Connect performs the update.
3" 2-jaw pulley and gear puller
These tools are typically available at auto parts and/or hardware stores.
The ends of the jaws must be thin enough to fit between the chainring
spider and motor cover. The force required to pull the spider is low.
Therefore, if the ends of the jaws need to be modified or ground
down to fit between the spider and motor, that is acceptable.
Page 5
5
Levo Retailer Technical Guide
Requirements & Recommendations
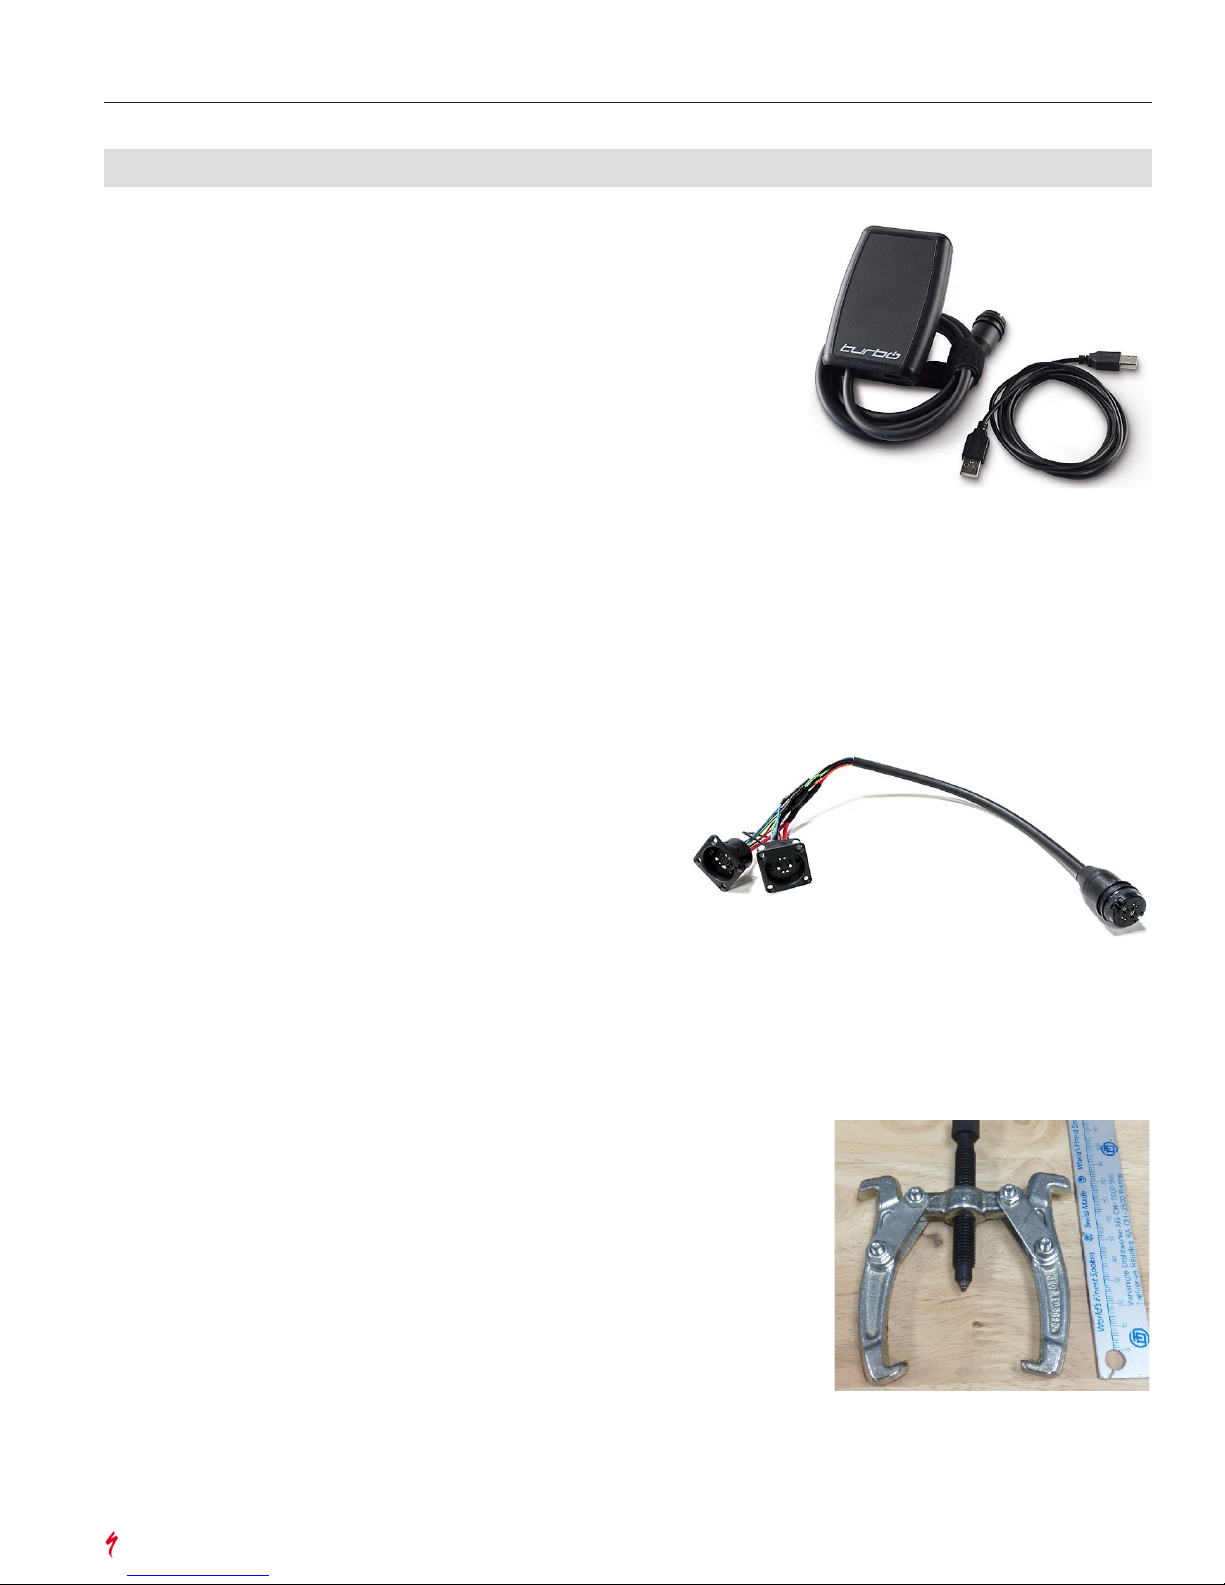
Brose spindle cover : S175300006
This tool holds the threaded plunger of the gear puller stable.
It applies force to the driver when the spider is pressed on
which helps to prevent damage to the torque sensor.
Smartphone or tablet : Android or iOS
System requirements: Android 4.3 (Jellybean) or later, iOS 8.1 or later.
All Levo system diagnosis and user customization is
performed through the Mission Control App. Unlike the Turbo,
system diagnosis and user customization is not possible
through the Turbo PC Connect and Diagnostic Tool.
Octalink/Isis bottom bracket tool
Use Shimano®® TL-UN98, Park BBT-18, or
an equivalent bottom bracket tool.
This tool is used to tighten or loosen the spider lockring.
Page 6

6
Levo Retailer Technical Guide
Requirements & Recommendations
Recommended Tools
Counterweighted or powered repair stand
EVT E-Z Lift and Park PRS-33 Powered Lift Stand are two
options for counterweighted or powered repair stands.
While these stands are expensive, they are a worth the investment.
E-bikes are considerably heavier than standard bicycles. A
counterweighted or powered stand minimizes the physical
effort required to position the bike and reduces the potential
for injury to retailer staff when they lift the bike. The bikes can
be easily maneuvered in the stand which reduces the potential
for damage to the bike while showcasing to Levo riders a level
of professionalism that inspires confidence in the retailer.
Handlebar/stem mounted phone holder
Hondo Garage Perfect Squeeze, Ram Mounts, and Rokform Mounts
are three options for handlebar/stem mounted phone holders.
Remember, all Levo system based diagnosis and user
customization is performed through the Mission Control App.
The best diagnostic method is to use the app's real time data
display while riding the bike. Using a handlebar or stem mounted
phone holder allows the mechanic to ride safely, with both hands
on the handlebar, and view the app at the same time to compare
the motor performance with respect to speed and rider input.
Page 7
7
Levo Retailer Technical Guide
Requirements & Recommendations
Recommended Service Parts Inventory
This section outlines a small inventory of critical replacement parts that a retailer should keep in stock to help diagnose issues effectively
and efficiently. Diagnosis of a Levo drive system issue typically requires the replacement of various components of the system with
known functional parts to determine which components are functional or non-functional through a process of elimination. It is much
like finding a creak in a bike. A small inventory of parts will save considerable time and money on ordering and shipping replacement
parts individually for diagnosis purposes. In addition, some components are wear items that a Levo retailer will want to have in stock to
perform service for their customers.
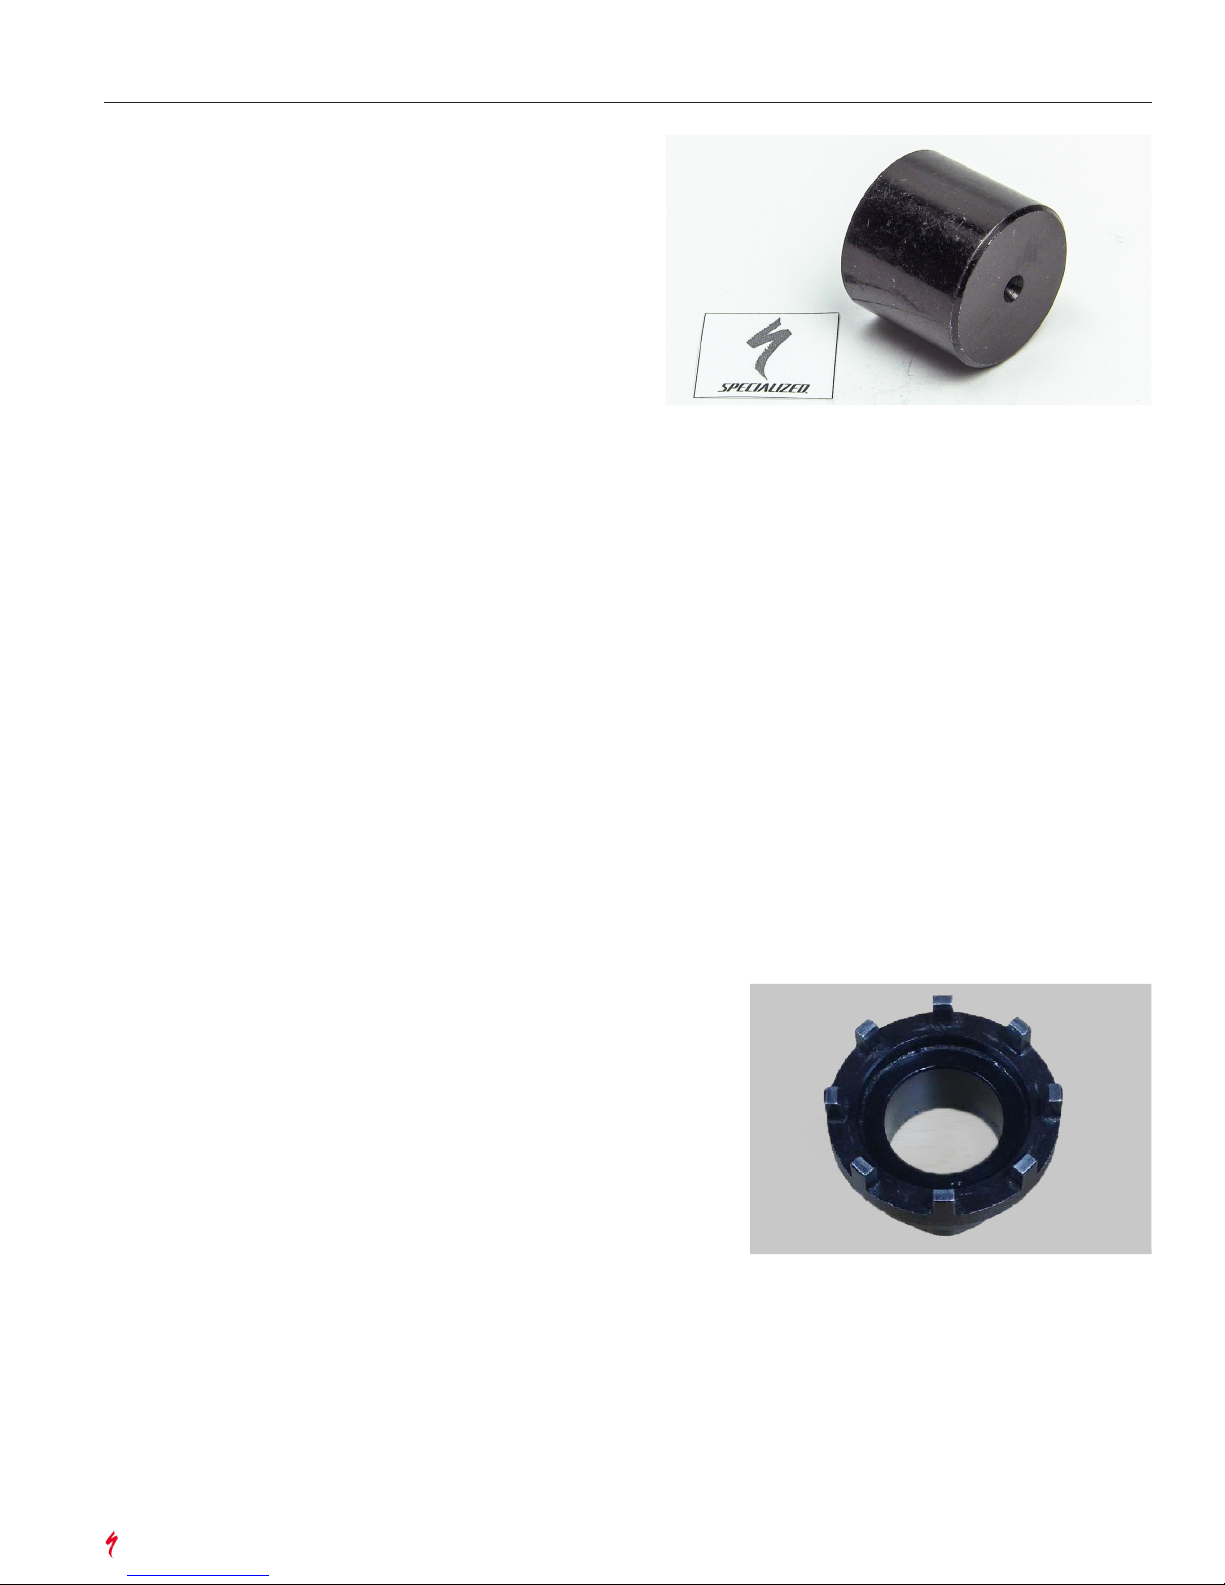
Magnet holder including magnet plate,
anodized black : S166800012
The drive system must recognize the bike is in motion before
it can activate the motor. Motion is detected when the magnet
mounted on the rear brake rotor passes a reed switch in the
speed sensor. The speed sensor then sends a signal to activate
the motor. The motor will not provide power if the magnet is not
attached to the rotor. Riders with multiple wheel sets will need
a magnet on each wheel that is used with the Levo or the rider
will need to transfer the magnet to the other rear wheel rotor.
Recommended inventory: 2-3
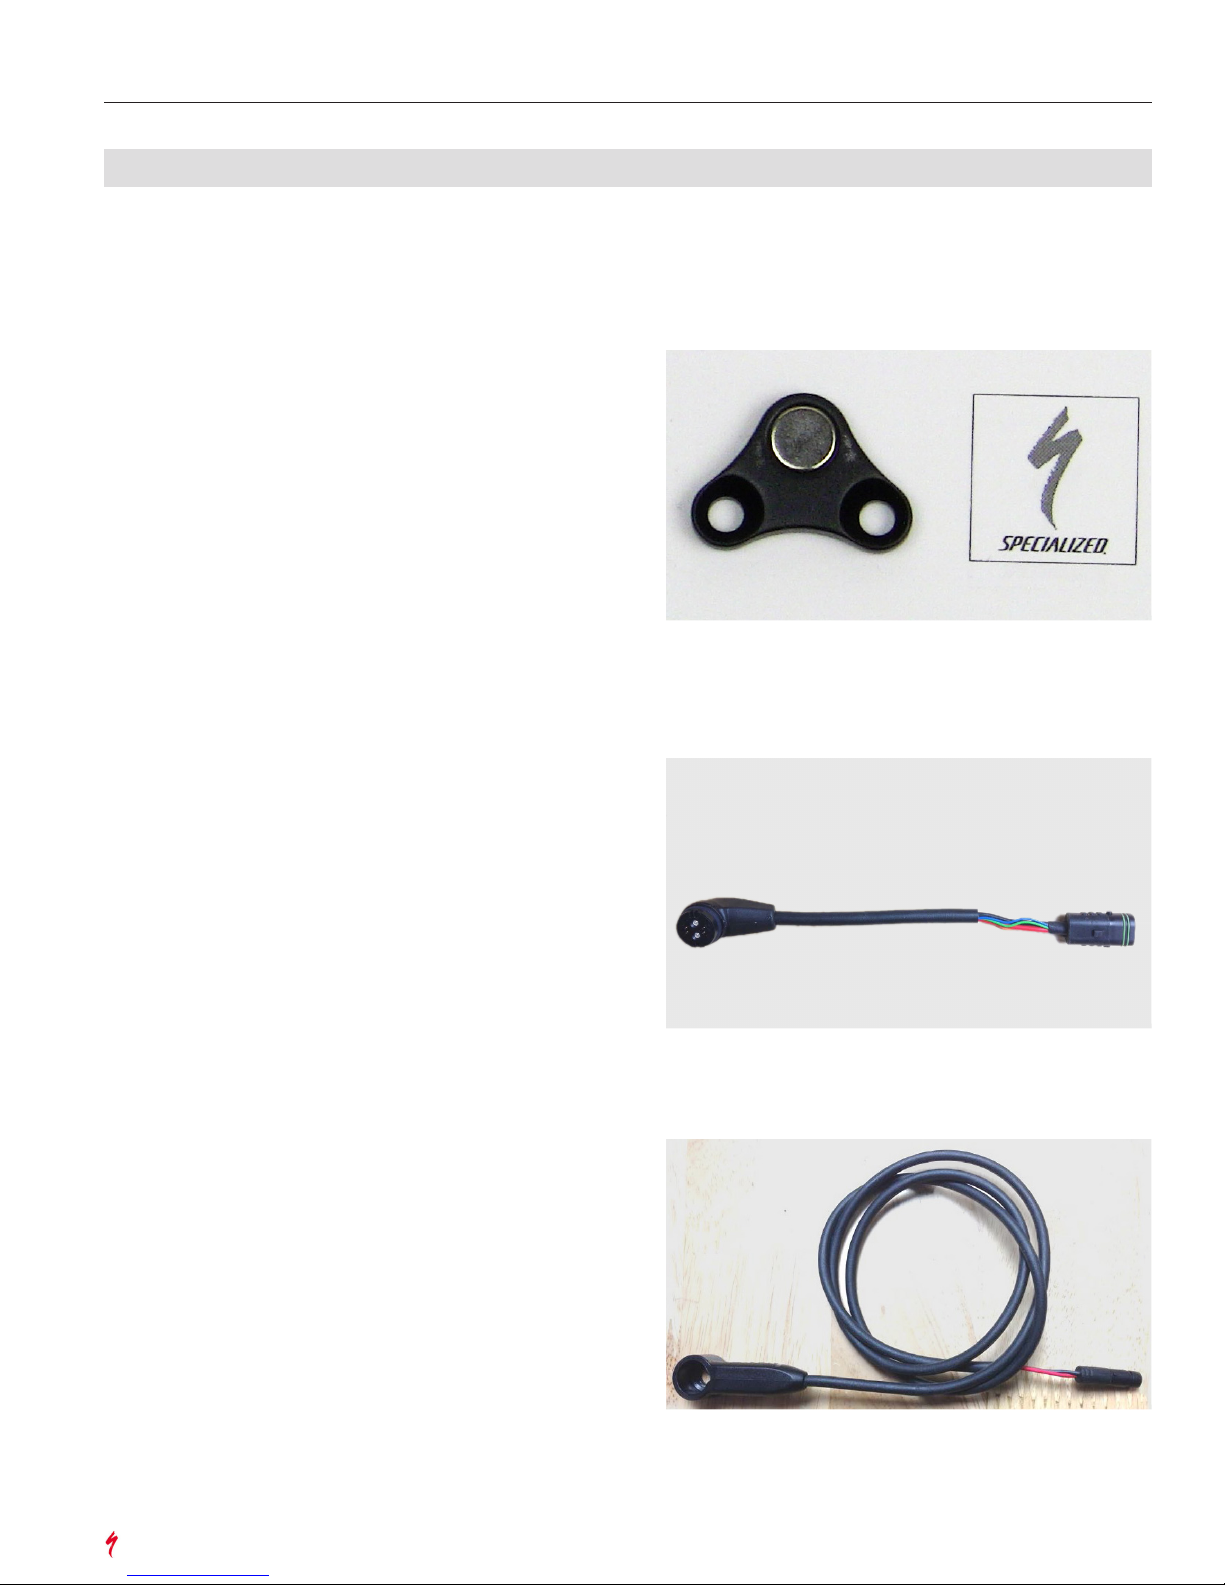
Motor-to-battery harness : S176800002
Specification change - S176800002 replaces S166800008
and is backward compatible. S176800002 is a longer harness
length of 180 mm versus the original 165 mm length.
Riders who frequently unplug the battery from the system will
wear out the connector which will require replacement.
Remember, to diagnose system issues, various parts,
including wire harnesses, must be replaced with a known
functional part to eliminate it as a source of the issue.
Recommended inventory: 1
Speed Sensor : S166800018
The speed sensor, much like a traditional cycle computer, is a
wire with a reed switch at the end. While a reed switch rarely
fails, if it does, or if a rider damages the speed sensor, the motor
will not receive a signal to activate and will not operate.
Recommended inventory: 1-2
Page 8

8
Levo Retailer Technical Guide
Requirements & Recommendations
Chainring steel, 104 BCD : S161400009
This is a 104 mm BCD chainring made specifically for Levo by Praxis
Works. There are two features that make the chainring ideal for Levo:
• It is made of steel for durability.
• It has internal threads for the chainring bolts which eliminates
the need for backing nuts. If the chainring had backing nuts,
the spider would have to be removed to install the chainring.
While standard 104 mm BCD chainrings are compatible with the
Levo spider, performance could be compromised because:
• Most standard chainrings are made of aluminum and
will wear more quickly than a steel chainring.
• Most standard chainrings do not have internal
threads for the chainring bolts so the spider
must be removed to install the chainring.
• Use of a chainring larger than the stock 32T may inhibit climbing
and make larger gears less useful because the larger gears will
be difficult to engage until the speed is above the speed limiter
(i.e. the speed is above the limit where the motor is required to
turn off).
Refer to the First Ride Tips later in this guide for climbing tips.
Max chainring: 36T with chain guide; 38T without chain guide
Recommended inventory: 1
Amazinger 2.0 Derailleur Hanger : S162600002
A straight, aligned derailleur hanger is more critical to shift
performance on a Levo bicycle versus a traditional bicycle because
the motor applies more torque through the rear of the bike. Any
misalignment of the derailleur hanger can cause shifting issues.
Retailers should encourage Levo riders to purchase a spare hanger
and keep it on hand in case the hanger is bent during a ride.
Battery mounting thru axle : S166800004
Levo riders who frequently remove the battery from the bike to
charge the system will most likely need to replace the thru axle
because of increased wear, damage, and/or loss of the axle.
Recommended inventory: 2
Page 9
9
Levo Retailer Technical Guide
Requirements & Recommendations
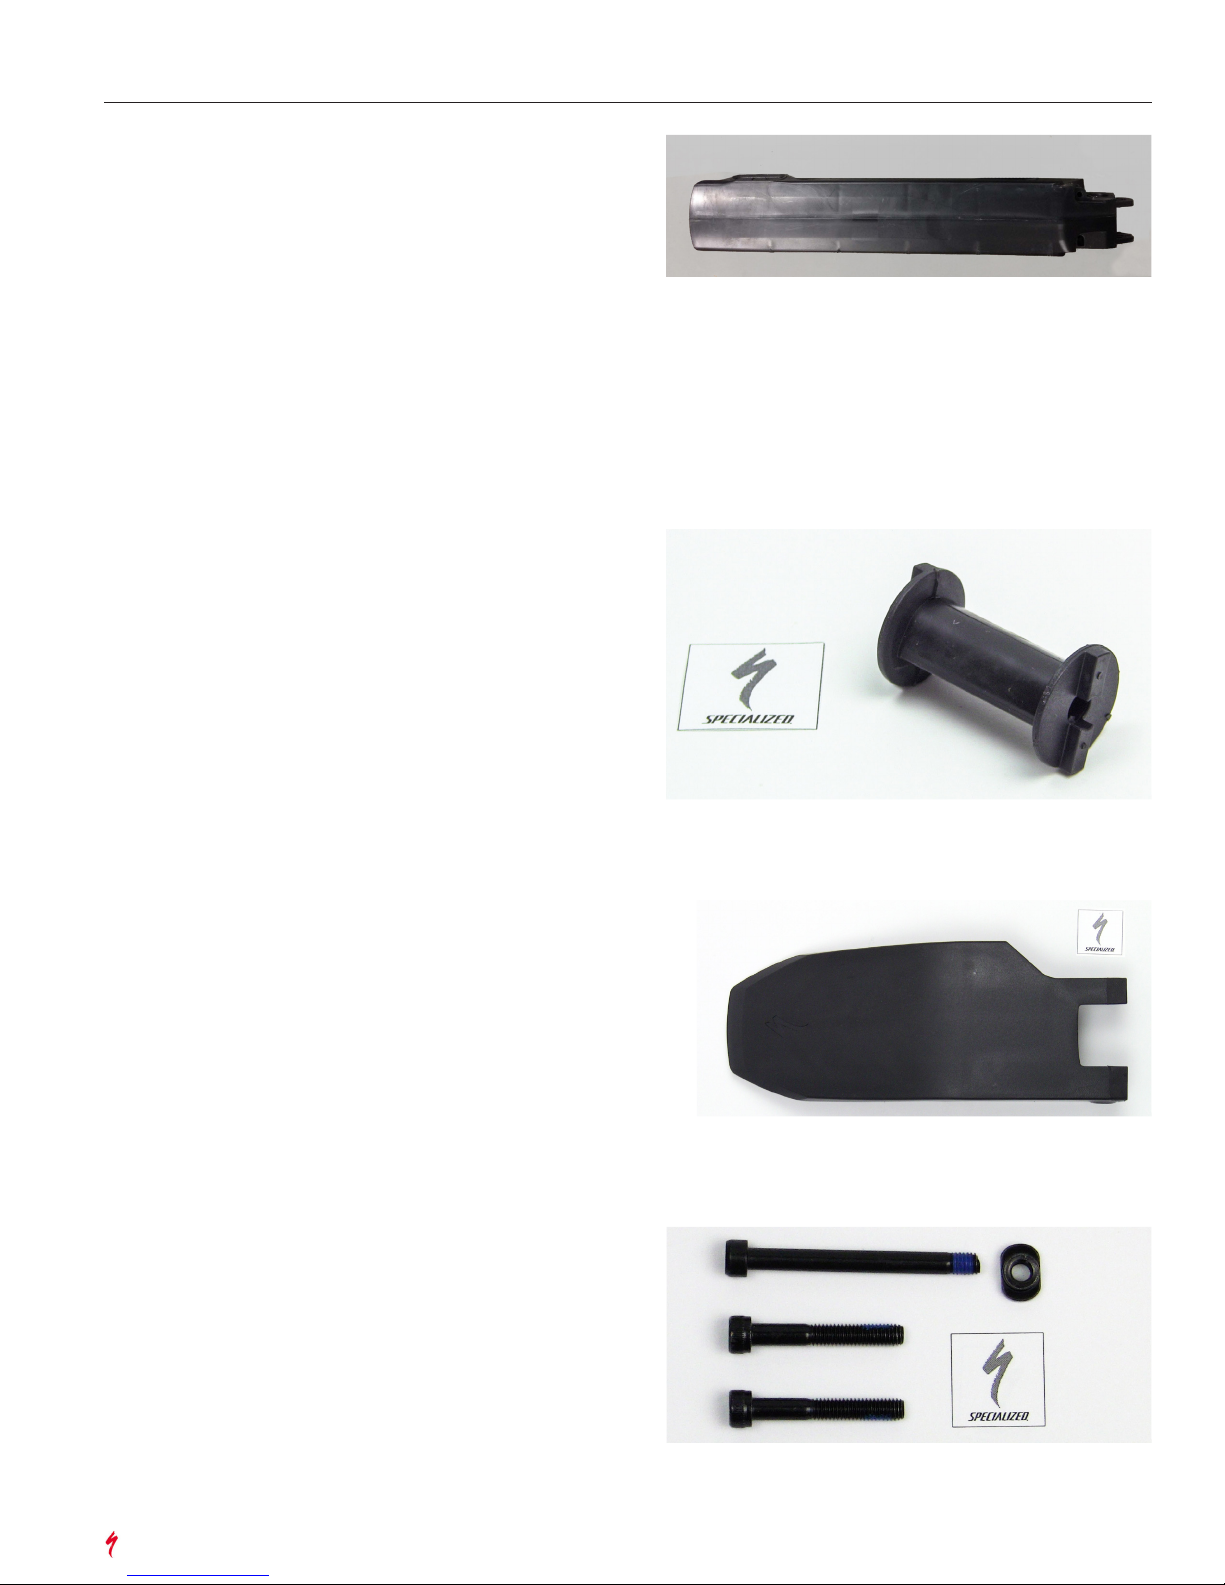
Battery : 98916-5616
The MY16 Aftermarket Levo battery is only
offered in a 504 Wh capacity.
The battery requires the additional service item
SKUs that follow for installation and use.
Recommended inventory: 1-2
Battery pin w/o hardware : S166800005
Recommended inventory: 3
Battery rock guard w/o hardware : S169900019
Recommended inventory: 3 (in locations with loose rocky trails)
Bolt kit for battery : S170500004
Recommended inventory: 1
Page 10

10
Levo Retailer Technical Guide
Requirements & Recommendations
Optional Service Parts Inventory
This section outlines optional replacement parts that a retailer might choose to keep in stock.
Bearing kit, Levo FSR : S160600004
Bolt kit for Levo FSR : S160500007
Crank, custom alloy arm for MTB, 165 mm : S161600013
Crank, custom alloy arm for MTB, 170 mm : S161600015
Crank, custom alloy arm for Levo Fat, 170 mm : S161600016
Page 11

11
Levo Retailer Technical Guide
Requirements & Recommendations
Spider, Levo Fat, 104 BCD : S161600017
Spider, 104 BCD : S161600018
Chain guide Fat : S161200002
Chain guide 29 and 6Fattie : S161200001
Page 12

12
Levo Retailer Technical Guide
Requirements & Recommendations
Chain stay protector mastic tape Levo Fat : S166900002
Chain stay protector mastic tape Levo Hardtail : S166900004
Chain stay protector FSR : S166900003
Page 13

13
Levo Retailer Technical Guide
Build, Setup, & Maintenance
This section outlines the specific Levo components that have unique build, setup, and maintenance requirements. When a new Levo
bike is built or prepared for a test ride, demo, or sale, please pay attention to the following items to ensure rider safety and optimal
performance of the bike.
New Bike Build Checklist
Confirm that the rear derailleur hanger is straight
A straight and aligned derailleur hanger is more critical to shift
performance on a Levo bicycle versus a traditional bicycle.
Remove the right crankarm and confirm that the spider
lockring is tight
Hold the chainring with a chain whip or apply the rear brake
with the chain in the small cog, then tighten the lockring until
it bottoms out. The lockring is a standard right hand thread.
Confirm that the crankarms are tight
The crankarms are visually identical but can be identified
by the "R" and "L" on the back. Confirm the crankarms
are on the correct side of the bike and tight.
Confirm that the chain guide is properly adjusted
All Levo bikes: remove the stainless steel shim between
the guide and the motor cover unless there is contact
between the outer guide face and chain.
FSR Levo bikes: compress the suspension to make sure the
chain just rubs the guide when the chain is in the lowest gear.
Hardtail Levo bikes: adjust the guide so that the chain nearly
rubs the guide when the chain is in the lowest gear.
Confirm that the motor operates properly
Test ride the bike to verify the drive system is functional.
Page 14

14
Levo Retailer Technical Guide
Build, Setup, & Maintenance
Setup Checklist for Test Rides, Demos, and Sales
Adjust the saddle height
Levo bikes do not have room inside the frame to accommodate
cable slack. As a result, the Command Post cable must be pulled
from or pushed into the front of the bike when the saddle height
is adjusted. To adjust the saddle height complete these steps:
1. Remove the battery.
2. Unclip the Command Post cable from
the downtube cable guides.
3. Adjust the Command Post cable as the saddle height is adjusted.
4. Have the rider check the saddle height by test riding the
bike with the battery removed and the system off.
Note: there is no additional pedal resistance in the
drive system when the motor is not activated.
Adjust the suspension
Suspension setup on a Levo bike is nearly the same as a traditional
bike. The primary difference is that it is necessary to account for
the additional weight of the drive system - which is located on the
frame and is considered a sprung mass above the suspension.
The increase in weight requires an increase in spring rate for both
the front and rear suspension. In addition, the rebound damping
settings should change to reflect the increase in spring rates.
When a bike is set up using the standard Static Suspension
Process, the need to increase the suspension spring rate is not
obvious; however, it is necessary. For example, when a rider
switches from a traditional bike like an Enduro with a RockShox
Pike set at 80 psi and 5 clicks from full slow (FFS) to a similarly
equipped Levo, the rider will likely set the Pike at 85-90 psi and
3-4 clicks FFS to achieve the same ride response and feel.
Adjust the tire pressure (6Fattie)
Many riders who ride 2-2.5" width tires gauge tire pressure by
squeezing the tire by hand. For Levo bikes this method typically
results in under inflated tires. The extra weight of the Levo bike
requires higher pressure and the wider 3" tires have enough
volume that a pressure change as little as 1 psi results in a
noticeable change of performance. To help riders consistently set
their tires properly, start riders with 16-18 psi in the front tire and
18-20 psi in the rear tire (depending on rider weight). Be sure to
stock, sell, and consistently use a quality tire pressure gauge.
Page 15

15
Levo Retailer Technical Guide
Build, Setup, & Maintenance
First Ride Tips
Whether a first time Levo rider is on a test ride, demo, or post-purchase ride, the following tips will help a new Levo rider quickly learn
the capabilities of the system and get more out of the first ride experience. Remember, Levo motor support is available in three different
drive settings: Turbo Mode, which provides 100% support while pedaling; Trail Mode, which provides 50% support while pedaling; and
Eco Mode, which provides 20% support while pedaling. The factory default mode for the Levo motor is Trail Mode.
Be sure to inform the rider which mode the motor is set in so know what to expect while pedaling and give them the additional tips
below:
Shift before you need to
Pedal at a higher cadence than you are used to
Continue to pedal on climbs to allow the motor to do most
of the work
The motor will automatically shut off if it does not receive a signal,
generated when the magnet passes the speed sensor, after 0.2
seconds. This is roughly equivalent to 6 ft (2 m) of trail and can
easily occur on slow cadence climbs or from a 'mashing' style
of pedaling. Encourage riders to pedal at a higher cadence.
Remember, in order for the motor to activate and provide
power, the system must recognize the bike is moving which is
accomplished when the magnet passes the speed sensor.
In addition, the higher bottom bracket height and shorter crankarms
on the Levo allow the rider to pedal over more obstacles.
Use lower power settings on loose and/or technical terrain
Higher power can result in wheel spin, loss
of traction, and trail damage.
Use a lower saddle position on technical climbs
An efficient climbing position (i.e. saddle height) is not necessary
when the motor is activated on a climb. A lower saddle
position allows the rider to maximize control of the bike.
Page 16

16
Levo Retailer Technical Guide
Build, Setup, & Maintenance
Maintenance Details - Bicycle
Maintenance for the Levo system is similar to a traditional bike. Much like a traditional bike, there are some components that are
sealed that do not require routine maintenance. However, the Levo system does have some components that require more frequent
maintenance due to the increase in distance traveled that causes faster wear. In addition, because of the higher cost of some
components, it is important to perform maintenance routinely to extend the life of the parts.
• Always turn the battery off and disconnect the charger prior to cleaning the bicycle. Leave the battery attached to the bicycle when
cleaning the bicycle; the battery prevents water from contacting electrical interfaces.
• Do not use a pressure washer to clean the bicycle. The use of a pressure washer on the bearings or near the area of the chainring/
spider area will cause premature wear of the bearings and will void the warranty.
• To clean the battery, remove the battery from the bicycle.
• Do not allow water to contact electrical components.
• Routinely check that the rear derailleur hanger is straight and aligned.
• Encourage Levo riders to frequently replace the chain. A worn chain will increase wear on the drivetrain, particularly the cassette.
• The following wear items will wear more quickly on a Levo bike because the rider will travel a further distance in a shorter amount
of time: drivetrain components, including the chain, cassette, and chainring; brake pads; tires; and suspension components.
• Suspension service should be sold pro-actively, particularly for Levo bikes because they typically have increased mileage over
traditional bikes.
Maintenance Details - Motor
• Do not use a pressure washer to clean the bicycle. The use of a pressure washer on the bearings or near the area of
the chainring/spider area will cause premature wear of the bearings and will void the warranty.
• The Levo motor bearings are high quality and have been tested to several thousand miles. When maintained properly they should
last for several years.
• The Levo motor is a non-servicable component. Damage to the Levo motor bearings requires replacement of the entire motor unit.
The most frequent cause of damage to the motor bearings is the use of a high pressure washer to clean the motor. This damage is
not covered by warranty. Replacement cost of the Levo motor unit is in excess of $1000 USD.
Unlocking or De-restricting the Motor
Unlocking or de-restricting the Levo motor, by any means including software or hardware modification, is not permitted
and will void the warranty.
Page 17

17
Levo Retailer Technical Guide
Glossary
This section provides the definition of some common technical terms used in e-bike systems.
Battery Management System (BMS)
The computer software that monitors the function of the Levo Drive System. The BMS, in conjunction with a fusible link,
prevents damage to the Drive System when any system anomaly is detected.
How it works
The BMS will restrict electric power to the Drive System when the motor and/or battery experience these temperature
conditions:
motor - warm
battery - warm (while riding)
battery - warm (while charging)
battery - cold (while charging)
The BMS will shut-off electric power to the Drive System when the motor and/or battery experience these temperature
conditions:
motor - hot
battery - hot (while riding)
battery - drawing too much current (while riding or charging)
battery - voltage imbalance (while riding or charging)
Capacity (Wh)
The total amount of energy a battery can store. A Watt-hour is the measure of electrical energy capacity that relates power and
time. For example: a battery listed as 460 Wh capacity means that when it is drained from 100% SoC to 0% in one hour, it will
supply 460 W of power. Similarly, a 504 Wh battery will supply 504 W in one hour.
A battery with a larger capacity will provide:
• Longer range per charge, just like a larger gas tank in a car would provide longer range.
• Longer overall battery life; the larger capacity means fewer charge cycles over the lifetime of the battery.
• Longer charge times, just like a larger gas tank in a car would take longer to fill.
• Higher cost; larger capacity batteries cost more.
The 460 W battery is the OE specification for all Levo models except the Expert and S-Works.
The 504 W battery is the OE specification for the Expert and S-Works Levo models. It is also available in AM applications and
for warranty.
Charge Cycle
When the battery level is used from 100% charge (full charge) to 0% charge (depletion) then charged from 0% to 100%.
If the battery level is used from 100% to 50% and is then charged back up to 100% this is only a half charge cycle. Note: a
charge cycle is not counted as every time the bike is plugged into the charger.
Drive System
The components of a Turbo bike that make it an electric pedal-assist bicycle. For Levo, the Drive System is comprised of five
components: the motor; battery; motor to battery wiring harness; speed sensor; and speed sensor magnet.
How it works
For the drive system to operate, all five components must be connected and function properly. If any of the components is not
connected or malfunctions the system will not operate.
Page 18

18
Levo Retailer Technical Guide
Glossary
Lithium-Ion (Li-ion)
Modern battery technology that is used in all Specialized Turbo bikes. These are the same type of batteries that are used in
modern computers, phones, electric cars, and many other electric powered consumer products. For marketing purposes, some
companies may use terms such as: Li-po; Lithium Polymer; or Lithium Cobalt to make the batteries sound more technologically
advanced. They are, in fact, all types of Lithium-ion cells.
Some of the key advantages of Li-ion batteries include:
• They do not suffer from 'memory effect'. Li-ion batteries can be charged from any level of charge present; they do not have
to be depleted before charging. Older battery technologies such as Nickel cadmium (NiCad) and Nickel Metal Hydride
(NiMH) had to be depleted before charging or they would 'remember' the smaller capacity if only partially discharged before
charging.
• They offer a large capacity (range) at a low weight.
• There are many reputable manufacturers to choose from.
Maximum Power
The maximum amount of power a motor is capable (or allowed) to put out. The maximum power can be significantly more than
the nominal power. However, the motor and/or motor system will not be able to sustain the maximum power for long without
overheating.
Unit of Power: Watts (W); 748 W = 1 hp
Nominal Power
The amount of power the motor provides under normal operating conditions without generating excess heat. Typically, the
nominal power is used by government agencies as a way to categorize e-bikes.
Unit of Power: Watts (W); 748 W = 1 hp
State of Charge (SoC)
The percentage of total energy stored in the battery that is available to the rider.
Note: the charge amount the rider can access is between 0-100%. Theoretically, Li-ion batteries can be charged more and run
down further than the BMS allows, but at the risk of a significantly shortened battery life.
State of Health (SoH)
The percentage of total energy the battery can store compared to its capacity when new. Li-ion batteries gradually lose a small
amount of energy capacity with every charge cycle, which decreases the battery's range over time.
Note: while the SoH gradually decreases over time, the SoC refers to the percentage of available energy, which will always
show as 0-100%. The output performance of the battery remains the same, but its capacity and therefore range, decreases
over time. The BMS in the Turbo family of bikes is designed to maintain a very high SoC for a long time.
User Interface (UI)
The means of communications between the rider and bike. While technically this would include the sensor in the motor we
usually use this term for the motor assist and power controls, as well as any display.
Page 19

19
Levo Retailer Technical Guide
Troubleshooting & Diagnosis Guide Fundamentals
This section outlines the basic process for troubleshooting and diagnosing drive system issues for all Specialized Levo bikes. The Levo
system is simple compared to other ebikes. It has six easily replaceable components: the motor, battery, wiring harness, speed sensor,
magnet, and charger.
The basic troubleshooting process entails that you:
• Get a description of the issue from the rider
• Determine if the issue is function or performance related
• Diagnose the issue
• Call Retail Care for additional support
The following provides a more detailed look at each step in the process.
Get a Description
Get a full description of the symptoms, riding conditions, and typical maintenance and care practices from the rider. Ask probing
questions about what the rider experienced, such as: what was the situation when the issue occurred, what were the riding conditions,
how was the bike maintained, and were any changes made to bike including changing components not related to the drive system.
Some common symptoms, riding conditions, and maintenance habits to ask about and listen for include:
Symptoms Riding Conditions Maintenance and Care
Noise, grinding
Noise, squeaking
Noise, clunking
Looseness
Decrease in power
Changes in performance
Intermittent power
Reduced range
No power
Does not turn on
Beeping from battery
Messages on app
Communication problems with app/other
device
Ambient temperature and weather
Macro terrain - mountainous, rolling, flat,
straight, twisty, etc
Micro terrain - soil type, soil moisture,
rocks, roots, dusty, etc
Riding style - stand & hammer vs. sit &
spin, accelerate hard or easy, attack climbs
and descents
Length of ride
Charge level at start and finish
Rider defined settings
Mode setting
Bike transport method - ridden to trail, roof
rack, back of pickup/tailgate pad, kept in
car, battery removed or installed etc
Charged to full capacity immediately after
every ride
Stored after a long ride
Stored for extended times
Ambient temperature - charging
Ambient temperature - storage
Cleaning methods - garden hose, bucket
and brush, pressure washer, not usually
washed
Drive system changes or additions - motor,
battery, harness, magnet, speed sensor,
charger
Any other component changes - drivetrain,
tire size/type, wheels, brakes, connected
devices, trailers
Determine the Issue
All Levo drive system faults or errors are either performance or function related issues. To resolve either type requires a different
approach.
PERFORMANCE
Performance issues are defined as when the system works but not to the rider's expectations. The information gathered in the Get a
Description process will help expedite the diagnosis of performance issues especially if a Rider Care consultation is required.
FUNCTION
Function issues are defined as when the system does not work. For example, if the battery turns on but no power is transmitted to the
wheel. This type of issue is most often due to one single component that is faulty, damaged, or missing. It can also be the result of a bad
connection between components. It is rare for more than one component or connection to be faulty at the same time.
The core elements of functional issue diagnosis are: visual inspection of components, using the Mission Control App, and substituting
components.
Page 20

20
Levo Retailer Technical Guide
Troubleshooting & Diagnosis Guide Fundamentals
Diagnose the Issue
Prior to diagnosing any issue, performance or functional, the system to meet the following Conditions of Operation for the motor to
activate:
CONDITIONS OF OPERATION
• The battery must be charged and turned on
• The battery must be connected to the motor
• The motor must be operational
• The speed sensor must be connected
• The magnet must be installed on the rear wheel
• The rider defined settings must allow power via the Mission Control app
• The rider must apply torque to the cranks
• The bike speed must be greater than zero but less than 20 mph (US & Canada), 25 km/h (elsewhere)
PERFORMANCE DIAGNOSIS
The best approach to diagnose a performance issue is to:
• Categorize the issue
• Understand the rider's expectations
• Understand the situation that resulted in the perceived issue
• Attempt to correlate the rider's perception with data based values from the Mission Control App
• Test ride the bike with known good components installed as a comparison.
Again, the insights from the Get a Description process will provide valuable information on how the rider's input to the bike impacts the
issue.
Detailed information about common performance issues and how address them are found in the next section Troubleshooting &
Diagnosis - Performance Issues.
FUNCTION DIAGNOSIS
Function issues or faults are typically due to a single component that is damaged, defective, or is not properly connected. Review the
rider's responses from the Get a Description process and adhere to the Conditions of Operation while you perform:
• Visual inspection - check the connections and components that are visible before removing any of them.
• Check connectivity with the Mission Control App - specific types of data are transmitted to the app if there is a proper connection.
• Substitute components connected to the motor - removal of the left crankarm and motor covers allows access to the entire drive
system.
Detailed information about common function issues and how address them are found in the next section Troubleshooting & Diagnosis -
Function Issues.
Call Retail Care
Your Retail Care representative will be able to help with issues that are unique or not easily solved. You Retail Care rep will be able to
provide technical information, consult with other Specialized subject matter experts on your behalf, and get you the solution or parts you
need to get the rider back on the trail. Remember that the entire drive system is made up of only six components and that they are all
easily replaceable. It is in everyone' best interest to keep a rider on their Levo, or get them back on it as quickly as possible.
Page 21

21
Levo Retailer Technical Guide
Troubleshooting & Diagnosis Guide Performance Issues
Symptom Category - Noise
Type of
Noise
Conditions & Checks Typical Cause How to Address
Grinding Occurs at all speeds
Tactile
Felt when turning motor by hand
with bike in stand
Outer bearing wear and/or
damage
Abuse
Use of pressure washer,
especially on the drive side
Replace the motor unit (typically not
covered under warranty).
Work with Retail Care rep for potential
"crash replacement" pricing of motor.
Educate the rider on proper bike washing
habits. The rider can continue to use the
bike until there is excessive bearing play.
Squeaking Occurs at all speeds Dry belt, found on early motors SBC Service center can address in the
Summer 2017 (CE and US).
Possible warranty resolution, send to Retail
Care for evaluation.
Felt when turning motor by hand
with bike in stand
Bearing failure/seize
Use of pressure washer,
especially on the drive side
Replace motor unit (typically not covered
under warranty).
During extreme effort the motor
produces a loud squeak then
shuts off
The over torque protection is
engaged. This happens when the
rear wheel suddenly stops while
the rider and motor are providing
full effort.
Not typically a fault or defect as the system
is designed to perform this way to protect
the motor. The motor should return to
normal operation after restarting the bike.
Clicking/clunking Occurs intermittently during
specific conditions such as:
• Acceleration
• Hard efforts
• Rapid changes from pedaling
to coasting
Loose spider and spider lockring
Remove, grease, and tighten to 70 N•m.
Motor cover bolts over tightened Remove, clean, prep, then reinstall bolts:
• Clean bolts thoroughly
• Apply light grease under bolt heads
• Apply blue thread lock to bolt threads (i.e.
Loctite 242®)
• Clean the edges of the motor cover and
frame
• Install the cover bolts and tighten to
1.5 N•m, do not overtighten
Motor covers have edge
contamination
Remove the motor covers (does not require
crank removal)
Clean the edges of the motor cover and
frame
Lightly roughen the motor cover edges with
a 100-180 grit emery cloth or equivalent.
Prep and install the cover bolts.
Improper motor mount fastener
torque
Loosen, then gradually tighten the bolts in
an across-the-motor sequence to 23 N•m.
Do not over tighten.
Loose belt in motor, occasionally
found on some early motors
SBC Service center can address in the
Summer 2017 (CE and US).
Axial play in spindle Contact Retail Care
Variable Motor sounds change during a
single ride
Different demands during a
ride will result in different motor
sounds
General, as opposed to specific, motor
noise is not typically problematic nor
covered by warranty.
Motors that do create excessive noise can
be covered under warranty on a case-bycase basis by contacting Retail Care.
Motor sounds change over the
life of motor
Motors generally get louder as
they age
Motor sounds change in
response to heat
Motors generally get louder as
they generate heat internally
Page 22

22
Levo Retailer Technical Guide
Troubleshooting & Diagnosis Guide Performance Issues
Symptom Category - Control
Symptom Conditions Typical Cause How to Address
Intermittent
power
Motor shuts off even while the
bike is moving and the rider is
pedaling
Loose or damaged motor or
speed sensor connectors
Inspect/replace the harness and/or speed
sensor as necessary.
Bikes that had a motor replaced
in 2016 require a firmware update
Update battery firmware to 2.12.1 (504 Wh
battery) or 4.12.1 (460 Wh battery)
Motor shuts off while climbing a
steep hill
Typically happens when a rider is
pedaling with a slow (mashing)
cadence. The slow cadence
and wheel speed causes the
drive system to shut off power.
The motor will stop power if it
does not receive a signal after .2
seconds.
The motor typically provides
power again once the cadence
and wheel speed increase.
Educate the rider on how to get the best
climbing performance from the Levo:
• Shift earlier than necessary
• Pedal at a higher cadence than normal by
using lower/easier gears
• Continue to pedal on climbs to engage the
motor
• Use shorter cranks for better pedal
clearance
• Use a lower saddle position
No motor assist after a ride
delay and the battery turned off
The battery automatically turns
off after ten minutes without rider
or speed input
Educate riders about this feature, it is
common to all Turbo and Levo bikes.
Inability to
change mode
Motor feels like it is in Turbo
mode even when the mode is
changed to Trail or Eco
Faulty data connection between
the battery and motor.
This will cause the Mission
Control App to not display bike
data even though the motor
works (the motor only requires +
and - to function)
Verify that no motor or ride data transmits
to the Mission Control App
Inspect the female data terminals - the five
small connectors adjacent to two power
terminals - in the harness/motor plug. If the
data terminals are spread too wide, use a
sharp pick or similar tool to push them back
into place.
Inspect the male data pins on the motor
plug end of the harness. If they are bent
they can be carefully bent back into place.
If any pins are broken or visibly shorter than
the other the harness should be replaced.
Page 23

23
Levo Retailer Technical Guide
Troubleshooting & Diagnosis Guide Performance Issues
Symptom Category - Communications
Symptom Conditions Typical Cause How to Address
App does not
connect to bike
Unable to connect the Mission
Control App to the bike
Bluetooth is not turned on Refer to the Mission Control App
instructions manual.
The bike is already actively
connected to another device
In the Settings > My Bike menu of the app,
delete all other Turbo/Levo bikes. This
action only removes the pairing, it does not
delete any saved ride data.
If other Turbo/Levo bikes are near by, move
away from them (i.e. move to another room
or go in/outside) to pair the device.
Note: the BT/ANT+ module stays on for 2
hours after the battery is shut off.
The communication module in
the battery is defective
Contact Retail Care, the battery is not
servicable.
App does not
display bike data
App connects to bike but no
data is transmitted
Faulty data connection between
the battery and the motor.
This will cause the Mission
Control App to not display bike
data even though the motor
works (motor only requires + and
- to function).
Verify that no motor or ride data transmits
to the Mission Control App
Inspect the female data terminals (the five
small connectors adjacent to two power
terminals) in the harness/motor plug. If the
data terminals are spread too wide, use a
sharp pick or similar tool to push them back
into place.
Inspect the male data pins on the motor
plug end of the harness. If they are bent
they can be carefully bent back into place.
If any of the pins are broken or visibly
shorter than the other the harness should
be replaced.
Inspect the battery/harness connection for
debris or damage
Page 24

24
Levo Retailer Technical Guide
Troubleshooting & Diagnosis Guide Performance Issues
Symptom Category - Expectations
Symptom Conditions Typical Cause How to Address
Power is less
than expected
Bike feels like it does not have
adequate power
Rider defined settings were
changed; this is very common in
test ride and demo scenarios
Connect with the Mission Control App and
tap "Restore Defaults" in the Tune menu.
In the Let's Ride > Start > Live Data menu
of the app, observe the Motor Power field
while riding to verify that the motor power
reaches at least 530 W.
The motor has the incorrect
firmware parameters (US &
Canada)
In the Let's Ride > Start > Live Data menu
of the app, observe the Motor Power field
while riding to verify that the motor power is
provided up to 20 mph (32 km/h).
The motor is restricting power
due to heat. This occurs in
conditions such as:
• High ambient temperatures
(summer)
• Long sustained climbs > 1000 ft
(300 m)
• Bike is used in Turbo mode and
max motor current is at 100%
• Motor temperature protection is
engaged
• High load/demand placed on
bike such as a trailer, pack, etc
In the Diagnose > Motor menu of the app,
view the motor temperature. Power is
reduced around 175° F (80° C).
Update the motor firmware to 4.0.1 (early
2017). Contact Retail Care if temperature
related power restriction continues after the
motor firmware update.
Range is less
than expected
Bike does not travel the
expected distance
Cold ambient temperatures Charge/store the battery inside at room
temperature.
If driving to a trail head, keep the battery
inside a heated vehicle.
The battery typically generates enough heat
during a ride to maintain its temperature.
Tire selection and pressure Tires have a huge impact on rolling
resistance. A significant decrease in range
has been observed due to different tire
compounds and casing.
Rider variation The difference between rider weight, gear
selection, travel mode selection, and cargo
load create a significant impact to the range
of the battery. Verify by providing the rider
with a different, but same capacity, battery
to try on their bike.
Battery charge calibration Instruct the rider to fully charge the battery
after 2-3 cycles then let it rest for at least 2
hours after reaching full charge.
Battery state of health In the Diagnose > Battery menu of the app,
view the battery State of Health.
It is normal for the SoH to decrease a few
percent within the first few years. However,
a reduction below 75% within 2 years or
300 charge cycles qualifies for a warranty
replacement.
Page 25

25
Levo Retailer Technical Guide
Troubleshooting & Diagnosis Guide Function Issues
Diagnose Hardware Using Visual Inspection
Component to
Check
What to Look for Additional Checks/Information
Battery Is the battery charged? Try a different battery and check the charger.
Does the battery turn on normally? Try a different battery. Check for beeping/blinking LEDs.
Is there any debris in the plug receptacle? Ask about bike washing methods. Educate the rider to
keep the harness plugged in when washing.
Is there any physical or burn damage to the
plug receptacle?
Ask about crashes, transport methods, and if the battery
has been dropped.
Harness Is the harness plug fully engaged in the
battery?
Check for debris or damage. Ask about bike washing
methods.
Does the plug readily and easily engage the
battery?
Check the length and position of the harness, does it feel
like it has to be pulled into place?
Is there any physical damage to the plug? Ask about crashes and transport methods.
Is there any evidence of arcing/corrosion in
the power terminals?
Ask about charging and unplugging habits, does the rider
turn the battery off prior to unplugging it?
Speed Sensor Is there any visible damage to the wire? Ask about riding conditions, crashes, look for debris etc.
Is the reed switch firmly attached to the left
rear dropout?
Check the bolt on the speed sensor; the end is fastened to
the dropout with a single M5x0.8 mm screw.
Speed Sensor Magnet Is the magnet assembly attached to the rear
hub with two brake rotor bolts?
Ask about any component changes: wheels, brakes, etc.
The magnet is required for the motor to operate.
Diagnose System Connection Using the Mission Control App
App Menu to
Check
What to Look for Additional Checks/Information
Diagnose > Motor Are there any alerts? Contact Retail Care if there are any error/alert flags.
Are all of the motor data fields complete? If the Serial Number, Hardware, or Firmware fields are
blank, there is no data connection to the motor.
If blank, possible causes include: no data connection
(harness or plug damage) or internal motor fault.
Tune Are any of the rider defined settings set to
the lower end of the range?
If Turbo/Trail/Eco mode settings are set to the low end
of range, it requires much more rider input power to gain
motor assist. It may be difficult to distinguish between the
increase in rider effort required - which may not be enough
to start the motor -and the motor not working.
If the Max Motor Current is set to the lower end of range
the motor will not supply maximum power - as low as
100 w.
Let's Ride > Start > Data
Field Display
Do any of these fields = 0 when riding and
pedaling?
• Speed
• Cadence
• Rider Power
• Motor Power
If Speed = 0 but Cadence and Rider Power ≠ 0 then
the motor is transmitting data to the battery but is not
registering forward motion. Check the speed sensor and/
or magnet.
If Cadence and Rider Power = 0 possible causes are: no
connection to the battery or an internal motor fault.
Motor power should = 0 when the bike is not moving or
the speed exceeds 20 mph (US & Canada) or 25 km/h
(elsewhere).
Page 26

26
Levo Retailer Technical Guide
Troubleshooting & Diagnosis Guide Function Issues
Diagnose Motor Harness & Plug Connections Using Substitute Components
To diagnose motor harness and plug connections, you must remove the left crankarm and left side motor cover. You must also have
spare components, that are known to be in working order, to determine by process of elimination which connections are malfunctioning.
Some connection issues can be repaired by hand, other issues require harness replacement.
Component to
Check
What to Look for Additional Checks/Information
Harness Is there any external damage to the motor
connector?
External damage from previous maintenance/service or
when initially assembled can cause internal damage in the
connector.
Are any of the pins in the motor connector
bent, uneven, or damaged?
If the internal connectors are slightly bent they can be
carefully bent back into place. If they are folded, broken, or
shorter than the others the harness should be replaced.
Is it difficult to reach the battery terminal with
the harness?
Check the position of the harness anchor and move it if
possible. If the harness anchor cannot be adjusted without
placing more stress on the motor connector, measure the
length between plugs. If the distance is 165 mm, replace
the harness with a 180 mm length version.
Does a replacement harness address the
issue?
Speed Sensor Is there any external damage to the speed
sensor connector?
If the plastic plug housing is cracked or damaged, replace
the entire sensor.
Are either of the pins in the speed sensor
connector bent, uneven, or damaged?
If the pins are slightly bent, they may be carefully bent back
into place. Otherwise the speed sensor should be replaced.
Does a replacement speed sensor address
the issue?
Motor Is there any external damage to the
connector housing on the motor?
Look for external damage to the plastic connector housing.
Damage can keep the plugs from full engagement.
Do any of the internal terminals appear to be
damaged or more open than the others?
Female terminals inside the motor connector housing can
be carefully compressed with a sharp pick.
Are any of the blind plugs missing? Ask about service/warranty history. The blind plugs are
included on new bikes but not on replacement motors. Use
in wet conditions without the blind plugs can allow water
entry.
Is there evidence of burning/melting on any
of the blind plugs?
The HMI blind plug has jumpers and a capacitor and is
necessary on the Levo. It is keyed internally to fit in only
one direction but can be forced into place the wrong way.
This can cause the capacitor to burn out and can also
cause internal damage to the motor.
Page 27

27
Levo Retailer Technical Guide
Warranty
For complete warranty provisions, please refer to www.specialized.com.
The warranty for Levo is essentially the same as our full-suspension mountain bikes with the addition of the Turbo drive system terms.
Since this type of bike is new to many retailers, this section will provide some clarification and perspective on Turbo Family warranty
terms. See the following pages for the complete Specialized Limited Warranty Policy as it is provided.
Turbo Family Warranty - Generally The Same As Other Specialized Bicycles
The warranty for all components that do not make up the drive system is identical to our other bicycles. As stated in the official warranty
document:
Lifetime (for original owner):
• Frame and rigid fork
Five years:
• Chainstays and seatstays on full suspension bikes
Two years:
• Suspension components:
- Suspension related equipment (pivots, bushings, shock units, suspension forks, shock links, fasteners)
- Suspension attachment points
• Paint/finish
• Components (i.e. saddle, wheels, drivetrain, brakes, seat post, Command Post, crankset, handlebar and stem, baskets, racks)
Turbo Drive System Warranty
The warranty for the drive system is specifically laid out:
Two years:
• Motor
• Cable connectors
• Remote
• User interface
Two years or 300 charge cycles:
• Battery will be at or above 75% State of Health (aka Charge Capacity)
Note that everything that voids the warranty on traditional bikes will void the warranty on a Turbo Family bike. Modification of any of
the components (whether through physical modification or modifying the code), abuse, misuse, and transfer of ownership all void the
warranty terms.
Please Read And Understand The Warranty
Many of the components on a Turbo Family bike are considerably more expensive than on a traditional bicycle. Clearly explaining the
warranty to your riders protects them and your shop from avoidable and expensive mistakes.
Some (but not all) actions that riders and retailers should avoid:
• Using a pressure washer on and around the motor unit and electronics
• Hacking or modifying the system to circumvent the speed limit
• Storing batteries in fully (or nearly fully) discharged state
• Charging batteries in hot or cold temperature extremes
• Unplugging batteries with systems turned on
• Using chargers or other equipment or components from other manufacturers
• Using accessories intended for e-bikes from other manufacturers
Page 28

28
Levo Retailer Technical Guide
Warranty
Understand Some Turbo Family Components Wear Differently
Some riders will experience what they consider to be “accelerated wear” and will attribute this to the additional weight and power of the
Turbo Family bike. The reality is that wear is function of distance rather than time, and on a Turbo or Levo riders will typically cover 2550% more ground per ride.
The best way to address this is to pro-actively promote regular maintenance and service intervals. Since this is a new platform with new
technologies the typical rider objections are easier to overcome, especially if communicated as a way to protect the rider’s investment in
the equipment and ride experience.
Examples of maintenance services to actively promote:
• Suspension air spring services: 1-3 per year
• Suspension damper services: 1-2 per year
• Chain replacement: 2-5 per year
• Derailleur Hanger Alignment: monthly
• Brake caliper clean and bleed: annually
• Command Post basic service: 1-3 per year
• Wheel tension and true check: monthly
• Motor belt replacement: 9500 miles/15000km
These services have value to the rider if they are pro-actively sold as ways to maintain the Turbo or Levo ride experience, not just the bike
itself.
Rider Best Practices
Help your riders with the little actions that prolong the life of the bike and provide the best ride experience:
Turn off the battery before unplugging and charging Shift earlier than on a traditional bike
Charge the battery to 50-60% for long term storage Ease up on pedaling power when shifting
Charge the battery at room temperature Spin lower gears on technical climbs
Store the battery at room temperature Lower the Command Post slightly on technical climbs
Transport the battery in a vehicle in sub-freezing temperatures Use a tire pressure gauge (especially with 6Fattie tires)
Do not use high-pressure water or solvents around the motor/
crank area
Remove the battery and feed the Command Post cable when
adjusting saddle height
Wash the bike with the battery installed and with the harness
plugged in. Since the connection is waterproof, washing the
bike with the harness plugged in minimizes the chance of
contamination in the contacts.
Page 29

29
Levo Retailer Technical Guide
This Limited Warranty is a voluntary manufacturer’s warranty. Your rights under this Limited Warranty are in addition to your legal rights
as a consumer.
Specialized bicycles are sold exclusively through our network of Authorized Specialized Dealers. Specialized Bicycle Components,
Inc. provides each original retail purchaser of a new Specialized bicycle or frameset a limited warranty against defect in materials and
workmanship as follows:
LIFETIME
• Frames and forks on complete bicycles and framesets for the lifetime of the original owner (excluding parts and components to
which two year or five year periods apply, as set out below).
• Frames and forks on complete Turbo bicycles for the lifetime of the original owner (excluding parts and components to which two
year or five year periods apply, as set out below).
2 YEARS
• Suspension attachment points, suspension related equipment (including pivot points, bushings, shock units, front suspension
forks, chain stays and seat stays, shock links, fasteners) for two (2) years from the date of the original purchase.
• Chain stays and seat stays on full suspension bicycles sold after 2008 will be covered under this limited warranty for five (5) years
from the date of the original purchase.
• Paint/finish, components attached to the bicycle/frameset such as saddle, front suspension forks, wheels, drive train, brakes, seat
post, Command Post, crank-set, handlebar and stem, baskets, racks, or any suspension related parts or components for two (2)
years from the date of the original purchase.
• Turbo components and lighting (excluding standard wear items as listed below), Turbo motor, battery (or at least 75% capacity
after 300 charge cycles), and Turbo electronics (remote, cable connectors, User Interface) for two (2) years from the date of the
original purchase.
Some branded equipment and co-branded suspension equipment may have additional warranty coverage offered by the specific
manufacturer. Please check in your owner’s manual pack for information regarding these warranties or check with your authorized
Specialized dealer for details.
TERMS OF LIMITED WARRANTY
This warranty applies to Model Year 2013 and newer Turbos and to all Model Year 2014 and newer model bicycles and covers only
Specialized branded products. Any other original component or part will be covered by the stated warranty of the original manufacturer.
The Limited Warranty is conditional upon the bicycle being operated under normal conditions and use, and properly maintained.
Specialized recommends that you register your bicycle with Specialized before a warranty claim may be processed. Even if registration
is not required to take advantage of the Specialized Limited Warranty, Specialized encourages you to register your bicycle to allow
Specialized to provide you better service in the future.
To exercise the rights under this Limited Warranty, the bicycle or frameset must be presented to an Authorized Specialized Dealer on
the same continent (Asia, Africa, North America, South America, Antarctica, Europe, or Australia) on which the bicycle was purchased,
together with a written proof of purchase which identifies the bicycle or frameset by serial number.
Only Authorized Specialized Dealers are authorized to perform warranty service under this Limited Warranty. Should the bicycle,
frameset, or any part be determined by Specialized to be covered by this Limited Warranty, it will be repaired or replaced, at
Specialized’s sole option. If your bicycle or frameset is a Specialized Edition (limited edition bicycle or frameset), be aware that an exact
warranty replacement may not be possible.
The original owner shall pay all labor charges connected with the repair or replacement of all parts. Under no circumstances does this
Limited Warranty include the cost of travel or shipment to and from an Authorized Specialized Dealer. Such costs, if any, shall be borne
by the original owner.
Every Specialized bicycle and frameset has a useful product life cycle. Nonstandard use, including without limitation, use in competitive
events, jumping, aggressive riding, riding with heavy loads, can dramatically shorten the useful product life cycle of a Specialized bicycle
or frameset. In addition, exposure of the product to humid, warm, ocean conditions and/or exposure to salinity (whether from salt water,
sweat, salinity in the air) is likely to cause corrosion of the product and will shorten the product life cycle. You are advised to clean your
product regularly to avoid such corrosion.
SPECIALIZED BICYCLE COMPONENTS
LIMITED WARRANTY POLICY FOR BICYCLES
Page 30

30
Levo Retailer Technical Guide
ALL SPECIALIZED BICYCLES AND FRAMESETS SHOULD BE PERIODICALLY CHECKED BY AN AUTHORIZED SPECIALIZED
DEALER for indicators of stress, potential problems, inappropriate use, or abuse.
This Limited Warranty applies only to the original owner and is not transferable. This Limited Warranty does not apply to:
• Normal wear and tear. Wear and tear parts (as listed below) are subject to damage as a result of normal use, failure to service
according to Specialized’s recommendations and/or riding or installation in conditions or applications other than recommended.
• Corrosion.
• Damage or failure due to accident, collision, crash, misuse, abuse, or neglect.
• Improper assembly or installation.
• Improper alteration or installation of components, parts or accessories not originally intended for or compatible with the
Specialized bicycle as sold.
• Failure to perform maintenance or service at appropriate intervals per manufacturer manual and instructions and supported by
records of such maintenance.
• Non-genuine Specialized products including without limitation counterfeit products.
• Specialized bicycles not purchased new from an authorized Specialized dealer.
WEAR AND TEAR PARTS
Aero bar pads Disc brake rotors Saddle cover
Air sealing o-rings Dust seals Shifter, brake cables & casings
Bearing races Foam rings Shifter grips
Bearings Free hubs Spokes
Bottom-out pads Glide rings Sprockets
Brake pads Handlebar grips & grip tape Stripped threads/bolts
Bushings Mouth port & hydration accessories Tires
Cassettes Pawls Tools
Chains Rear shock mounting hardware & main seals Transmission gears
Coating on stanchion,shock body Rubber moving parts Wheel braking surfaces
For Model Year 2013 and older model Specialized bicycles, please consult your owner’s manual or contact Specialized or an Authorized
Specialized Dealer for the applicable warranty.
THIS IS A FULL AND COMPLETE STATEMENT OF SPECIALIZED’S LIMITED WARRANTY. SPECIALIZED DOES NOT
AUTHORIZE OR ALLOW ANYONE, INCLUDING ITS AUTHORIZED DEALERS, TO EXTEND ANY OTHER WARRANTIES,
EXPRESS OR IMPLIED, FOR OR ON BEHALF OF SPECIALIZED. NO OTHER REPRESENTATION, AND NO STATEMENT
OF ANYONE BUT SPECIALIZED, INCLUDING A DEMONSTRATION OF ANY KIND BY ANYONE, SHALL CREATE ANY
WARRANTY REGARDING THIS BICYCLE OR FRAMESET. IT IS AGREED THAT SPECIALIZED’S LIABILITY UNDER THIS
LIMITED WARRANTY SHALL TO THE FULLEST EXTENT PERMITTED BY LAW BE NO GREATER THAN THE AMOUNT OF THE
ORIGINAL PURCHASE PRICE AND IN NO EVENT SHALL SPECIALIZED BE LIABLE FOR INCIDENTAL OR CONSEQUENTIAL
DAMAGES, LOSSES THAT WERE NOT FORESEEABLE TO SPECIALIZED AT THE DATE OF THIS LIMITED WARRANTY,
LOSSES NOT CAUSED BY BREACH OF THIS LIMITED WARRANTY BY SPECIALIZED, BUSINESS LOSSES OR LOSSES TO
NONCONSUMERS. THIS LIMITATION OF LIABILITY DOES NOT EXCLUDE LIABILITY FOR DEATH OR PERSONAL INJURY
CAUSED BY SPECIALIZED’S NEGLIGENCE.
This warranty gives you specific legal rights, and you may also have other rights which vary from country to country. If any provision is
found unenforceable, only that provision shall be stricken and all others shall apply. Some states do not allow limitation on how long an
implied warranty lasts, so the above limitation may not apply to you. Some states or countries do not allow the exclusion or limitation of
incidental or consequential damages, so the above limitation or exclusion may not apply to you.
For questions concerning warranty issues, customers can contact Specialized at Specialized Customer Service, 15130 Concord Circle,
Morgan Hill, California 95037 or by calling Specialized Customer Service at 877.808.8154.
SPECIALIZED BICYCLE COMPONENTS
15130 Concord Circle, Morgan Hill, CA 95037 (408) 779-6229
0000009968_WA R4, 10/14
This document is subject to change without notice.
Visit www.specialized.com for the latest information.
Feedback: techdocs@specialized.com
Page 31

31
Levo Retailer Technical Guide
Page 32

SPECIALIZED BICYCLE COMPONENTS
15130 Concord Circle, Morgan HIll, CA 95037
408-779-6229
0000082782_RG_R1, 02/17
 Loading...