

Page 1

ThinkPadX260HardwareMaintenanceManual
Page 2

Note:Beforeusingthisinformationandtheproductitsupports,besuretoreadthegeneralinformation
underAppendixA“Notices”onpage91.
FirstEdition(December2015)
©CopyrightLenovo2015.
LIMITEDANDRESTRICTEDRIGHTSNOTICE:IfdataorsoftwareisdeliveredpursuantaGeneralServicesAdministration
“GSA”contract,use,reproduction,ordisclosureissubjecttorestrictionssetforthinContractNo.GS-35F-05925.
Page 3

Contents
Aboutthismanual...........iii
Chapter1.Safetyinformation.....1
Generalsafety...............1
Electricalsafety..............1
Safetyinspectionguide...........2
Handlingdevicesthataresensitivetoelectrostatic
discharge.................3
Groundingrequirements...........4
Safetynotices(multilingualtranslations).....4
Chapter2.Importantservice
information..............19
StrategyforreplacingFRUs.........19
Strategyforreplacingaharddiskdriveora
solid-statedrive............19
Importantnoticeforreplacingasystem
board................20
Howtouseerrormessage........20
StrategyforreplacingFRUsforCTO,special-bid,
andstandardmodels............20
Productdefinition............20
FRUidentification............20
Chapter3.Generalcheckout.....23
Whattodofirst..............23
Checkoutguide..............24
LenovoSolutionCenter.........24
Quicktestprograms...........24
UEFIdiagnosticprogram.........25
Bootablediagnosticprograms.......25
Powersystemcheckout...........26
Checkingtheacpoweradapter......26
Checkingoperationalcharging......27
Checkingtheremovablebattery......27
Checkingthecoin-cellbattery.......28
Chapter4.Relatedservice
information..............29
Restoringthefactorycontentsbyusingthe
productRecoveryDiscSet..........29
RecoveryoverviewfortheWindows10operating
system..................30
Resettingyourcomputer.........30
Usingadvancedstartupoptions......30
RecoveringyouroperatingsystemifWindows
10failstostart.............30
CreatingandusingarecoveryUSBdrive..31
Passwords................31
Power-onpassword...........31
Harddiskpassword...........32
Supervisorpassword..........33
Powermanagement............33
Screenblankmode(fortheWindows7
operatingsystemonly)..........33
Sleepmode..............33
Hibernationmode...........34
Symptom-to-FRUindex...........34
Numericerrorcodes..........35
Errormessages............36
Beepsymptoms............36
No-beepsymptoms...........37
LCD-relatedsymptoms.........37
Intermittentproblems..........37
Undeterminedproblems.........38
Chapter5.Statusindicators.....39
Chapter6.Functionkeysand
combinations.............41
Chapter7.Locations.........43
Locatingcomputercontrols,connectors,and
indicators.................43
Frontview...............43
Left-sideview.............44
Bottomview..............44
LocatingFRUsandCRUs..........44
MajorFRUs..............46
LCDFRUs..............48
Miscellaneousparts...........48
Connectorandcableguide........49
LookingupFRUinformation.........53
Chapter8.FRUreplacement
notices................55
Screwnotices...............55
Retainingserialnumbers...........56
Restoringtheserialnumberofthesystem
unit.................56
RetainingtheUUID...........57
ReadingorwritingtheECAinformation...57
Chapter9.Removingorreplacinga
FRU..................59
Generalguidelines.............59
Beforeservicingthecomputer........60
©CopyrightLenovo2015
i
Page 4

Disablingthebuilt-inbattery.......60
Removingthemicro-SIM-cardtray.....60
1010Removablebattery...........61
1020Basecoverassembly..........62
1030Built-inbattery............63
1040Memorymodule............64
1050Internalstoragedriveanddrivecable...65
1060Wireless-LANcard...........67
1070Wireless-WANcard(availableonsome
models).................68
1080Thermalfanassembly.........69
1090dc-incableassembly..........71
1100Systemboard.............72
1110Coin-cellbattery............75
1120Speakerassembly...........76
1130Smart-cardreaderassembly(availableon
somemodels)...............77
1140LCDunit...............79
1150Power-buttoncard...........81
1160Keyboardassembly..........82
2010LCDbezel..............84
2020LCDhinges,LCDpanel,andLCDcable..84
2030Camera/microphonemoduleandcamera
cable(availableonsomemodels).......86
2040Wireless-LAN/Wireless-WANantenna
assemblyandLCDrear-coverassembly....88
AppendixA.Notices..........91
Trademarks................92
AppendixB.Abbreviationand
acronymtable.............93
iiThinkPadX260HardwareMaintenanceManual
Page 5

Aboutthismanual
ThismanualcontainsserviceandreferenceinformationforthefollowingThinkPad
ThinkPadX260
Usethismanualalongwiththeadvanceddiagnosticteststotroubleshootproblems.
Important:ThismanualisintendedonlyfortrainedservicetechnicianswhoarefamiliarwithThinkPad
products.Usethismanualalongwiththeadvanceddiagnosticteststotroubleshootproblemseffectively.
BeforeservicingaThinkPadproduct,besuretoreadalltheinformationunderChapter1“Safetyinformation”
onpage1
andChapter2“Importantserviceinformation”onpage19.
Machinetypes(MT):20F5and20F6
®
products.
©CopyrightLenovo2015
iii
Page 6

ivThinkPadX260HardwareMaintenanceManual
Page 7

Chapter1.Safetyinformation
Thischapterpresentsfollowingsafetyinformationthatyouneedtobefamiliarwithbeforeyouservicea
ThinkPadnotebookcomputer.
•“Generalsafety”onpage1
•“Electricalsafety”onpage1
•“Safetyinspectionguide”onpage2
•“Handlingdevicesthataresensitivetoelectrostaticdischarge”onpage3
•“Groundingrequirements”onpage4
•“Safetynotices(multilingualtranslations)”onpage4
Generalsafety
Followtheserulestoensuregeneralsafety:
•Observegoodhousekeepingintheareaofthemachinesduringandaftermaintenance.
•Whenliftinganyheavyobject:
1.Makesurethatyoucanstandsafelywithoutslipping.
2.Distributetheweightoftheobjectequallybetweenyourfeet.
3.Useaslowliftingforce.Nevermovesuddenlyortwistwhenyouattempttolift.
4.Liftbystandingorbypushingupwithyourlegmuscles;thisactionremovesthestrainfromthe
musclesinyourback.Donotattempttoliftanyobjectthatweighsmorethan16kg(35lb)orthat
youthinkistooheavyforyou.
•Donotperformanyactionthatcauseshazardstothecustomer,orthatmakestheequipmentunsafe.
•Beforeyoustartthemachine,makesurethatotherservicetechniciansandthecustomer'spersonnelare
notinahazardousposition.
•Placeremovedcoversandotherpartsinasafeplace,awayfromallpersonnel,whileyouareservicing
themachine.
•Keepyourtoolcaseawayfromwalkareassothatotherpeoplewillnottripoverit.
•Donotwearlooseclothingthatcanbetrappedinthemovingpartsofamachine.Makesurethatyour
sleevesarefastenedorrolledupaboveyourelbows.Ifyourhairislong,fastenit.
•Inserttheendsofyournecktieorscarfinsideclothingorfastenitwithanonconductiveclip,about8
centimeters(3inches)fromtheend.
•Donotwearjewelry,chains,metal-frameeyeglasses,ormetalfastenersforyourclothing.
Attention:Metalobjectsaregoodelectricalconductors.
•Wearsafetyglasseswhenyouarehammering,drilling,soldering,cuttingwire,attachingsprings,using
solvents,orworkinginanyotherconditionsthatmightbehazardoustoyoureyes.
•Afterservice,reinstallallsafetyshields,guards,labels,andgroundwires.Replaceanysafetydevice
thatiswornordefective.
•Reinstallallcoverscorrectlybeforereturningthemachinetothecustomer.
•Fanlouversonthemachinehelptopreventoverheatingofinternalcomponents.Donotobstructfan
louversorcoverthemwithlabelsorstickers.
Electricalsafety
Observethefollowingruleswhenworkingonelectricalequipment.
Important:Useonlyapprovedtoolsandtestequipment.Somehandtoolshavehandlescoveredwithasoft
materialthatdoesnotinsulateyouwhenworkingwithliveelectricalcurrents.Manycustomershave,near
theirequipment,rubberfloormatsthatcontainsmallconductivefiberstodecreaseelectrostaticdischarges.
Donotusethistypeofmattoprotectyourselffromelectricalshock.
©CopyrightLenovo2015
1
Page 8

•Findtheroomemergencypower-off(EPO)switch,disconnectingswitch,orelectricaloutlet.Ifanelectrical
accidentoccurs,youcanthenoperatetheswitchorunplugthepowercordquickly.
•Donotworkaloneunderhazardousconditionsornearequipmentthathashazardousvoltages.
•Disconnectallpowerbefore:
–Performingamechanicalinspection
–Workingnearpowersupplies
–Removingorinstallingmainunits
•Beforeyoustarttoworkonthemachine,unplugthepowercord.Ifyoucannotunplugit,askthecustomer
topower-offthewallboxthatsuppliespowertothemachine,andtolockthewallboxintheoffposition.
•Ifyouneedtoworkonamachinethathasexposedelectricalcircuits,observethefollowingprecautions:
–Ensurethatanotherperson,familiarwiththepower-offcontrols,isnearyou.
Attention:Anotherpersonmustbetheretoswitchoffthepower,ifnecessary.
–Useonlyonehandwhenworkingwithpowered-onelectricalequipment;keeptheotherhandinyour
pocketorbehindyourback.
Attention:Anelectricalshockcanoccuronlywhenthereisacompletecircuit.Byobservingtheabove
rule,youmaypreventacurrentfrompassingthroughyourbody.
–Whenusingtesters,setthecontrolscorrectlyandusetheapprovedprobeleadsandaccessoriesfor
thattester.
–Standonsuitablerubbermats(obtainedlocally,ifnecessary)toinsulateyoufromgroundssuchas
metalfloorstripsandmachineframes.
Observethespecialsafetyprecautionswhenyouworkwithveryhighvoltages;Instructionsforthese
precautionsareinthesafetysectionsofmaintenanceinformation.Useextremecarewhenmeasuring
highvoltages.
•Regularlyinspectandmaintainyourelectricalhandtoolsforsafeoperationalcondition.
•Donotusewornorbrokentoolsandtesters.
•Neverassumethatpowerhasbeendisconnectedfromacircuit.First,checkthatithasbeenpoweredoff.
•Alwayslookcarefullyforpossiblehazardsinyourworkarea.Examplesofthesehazardsaremoistfloors,
nongroundedpowerextensioncables,powersurges,andmissingsafetygrounds.
•Donottouchliveelectricalcircuitswiththereflectivesurfaceofaplasticdentalmirror.Thesurfaceis
conductive;suchtouchingcancausepersonalinjuryandmachinedamage.
•Donotservicethefollowingpartswiththepoweronwhentheyareremovedfromtheirnormaloperating
placesinamachine:
–Powersupplyunits
–Pumps
–Blowersandfans
–Motorgenerators
–Similarunitsaslistedabove
Thispracticeensurescorrectgroundingoftheunits.
•Ifanelectricalaccidentoccurs:
–Usecaution;donotbecomeavictimyourself.
–Switchoffpower.
–Sendanotherpersontogetmedicalaid.
Safetyinspectionguide
Thepurposeofthisinspectionguideistoassistyouinidentifyingpotentiallyunsafeconditions.Aseach
machinewasdesignedandbuilt,requiredsafetyitemswereinstalledtoprotectusersandservicetechnicians
frominjury.Thisguideaddressesonlythoseitems.Y oushouldusegoodjudgmenttoidentifypotential
safetyhazardsduetoattachmentofnon- ThinkPadfeaturesoroptionsnotcoveredbythisinspectionguide.
Ifanyunsafeconditionsarepresent,youmustdeterminehowserioustheapparenthazardcouldbeand
whetheryoucancontinuewithoutfirstcorrectingtheproblem.
2ThinkPadX260HardwareMaintenanceManual
Page 9

Considertheseconditionsandthesafetyhazardstheypresent:
•Electricalhazards,especiallyprimarypower(primaryvoltageontheframecancauseseriousorfatal
electricalshock)
•Explosivehazards,suchasadamagedCRTfaceorabulgingcapacitor
•Mechanicalhazards,suchaslooseormissinghardware
Todeterminewhetherthereareanypotentiallyunsafeconditions,usethefollowingchecklistatthebeginning
ofeveryservicetask.Beginthecheckswiththepoweroff,andthepowercorddisconnected.
Checklist:
1.Checkexteriorcoversfordamage(loose,broken,orsharpedges).
2.Poweroffthecomputer.Disconnectthepowercord.
3.Checkthepowercordfor:
a.Athird-wiregroundconnectoringoodcondition.Useametertomeasurethird-wireground
continuityfor0.1ohmorlessbetweentheexternalgroundpinandtheframeground.
b.Thepowercordshouldbetheauthorizedtypespecifiedforyourcomputer.Goto:
http://www.lenovo.com/serviceparts-lookup
c.Insulationmustnotbefrayedorworn.
4.Checkforcrackedorbulgingbatteries.
5.Removethecover.
6.Checkforanyobviousnon- ThinkPadalterations.Usegoodjudgmentastothesafetyofany
non-ThinkPadalterations.
7.Checkinsidetheunitforanyobviousunsafeconditions,suchasmetalfilings,contamination,wateror
otherliquids,orsignsoffireorsmokedamage.
8.Checkforworn,frayed,orpinchedcables.
9.Checkthatthepower-supplycoverfasteners(screwsorrivets)havenotbeenremovedortamperedwith.
Handlingdevicesthataresensitivetoelectrostaticdischarge
Anycomputerpartcontainingtransistorsorintegratedcircuits(ICs)shouldbeconsideredsensitiveto
electrostaticdischarge(ESD).ESDdamagecanoccurwhenthereisadifferenceinchargebetweenobjects.
ProtectagainstESDdamagebyequalizingthechargesothatthemachine,thepart,theworkmat,andthe
personhandlingthepartareallatthesamecharge.
Notes:
1.Useproduct-specificESDprocedureswhentheyexceedtherequirementsnotedhere.
2.MakesurethattheESDprotectivedevicesyouusehavebeencertified(ISO9000)asfullyeffective.
WhenhandlingESD-sensitiveparts:
•Keepthepartsinprotectivepackagesuntiltheyareinsertedintotheproduct.
•Avoidcontactwithotherpeople.
•Wearagroundedwriststrapagainstyourskintoeliminatestaticonyourbody.
•Preventthepartfromtouchingyourclothing.Mostclothingisinsulativeandretainsachargeeven
whenyouarewearingawriststrap.
•Useagroundedworkmattoprovideastatic-freeworksurface.Thematisespeciallyusefulwhen
handlingESD-sensitivedevices.
•Selectagroundingsystem,suchasthoselistedbelow,toprovideprotectionthatmeetsthespecific
servicerequirement.
Note:TheuseofagroundingsystemtoguardagainstESDdamageisdesirablebutnotnecessary.
–AttachtheESDgroundcliptoanyframeground,groundbraid,orgreen-wireground.
Chapter1.Safetyinformation3
Page 10
–Whenworkingonadouble-insulatedorbattery-operatedsystem,useanESDcommongroundor
referencepoint.Y oucanusecoaxorconnector-outsideshellsonthesesystems.
–Usetheroundgroundprongoftheacplugonac-operatedcomputers.
Groundingrequirements
Electricalgroundingofthecomputerisrequiredforoperatorsafetyandcorrectsystemfunction.Proper
groundingoftheelectricaloutletcanbeverifiedbyacertifiedelectrician.
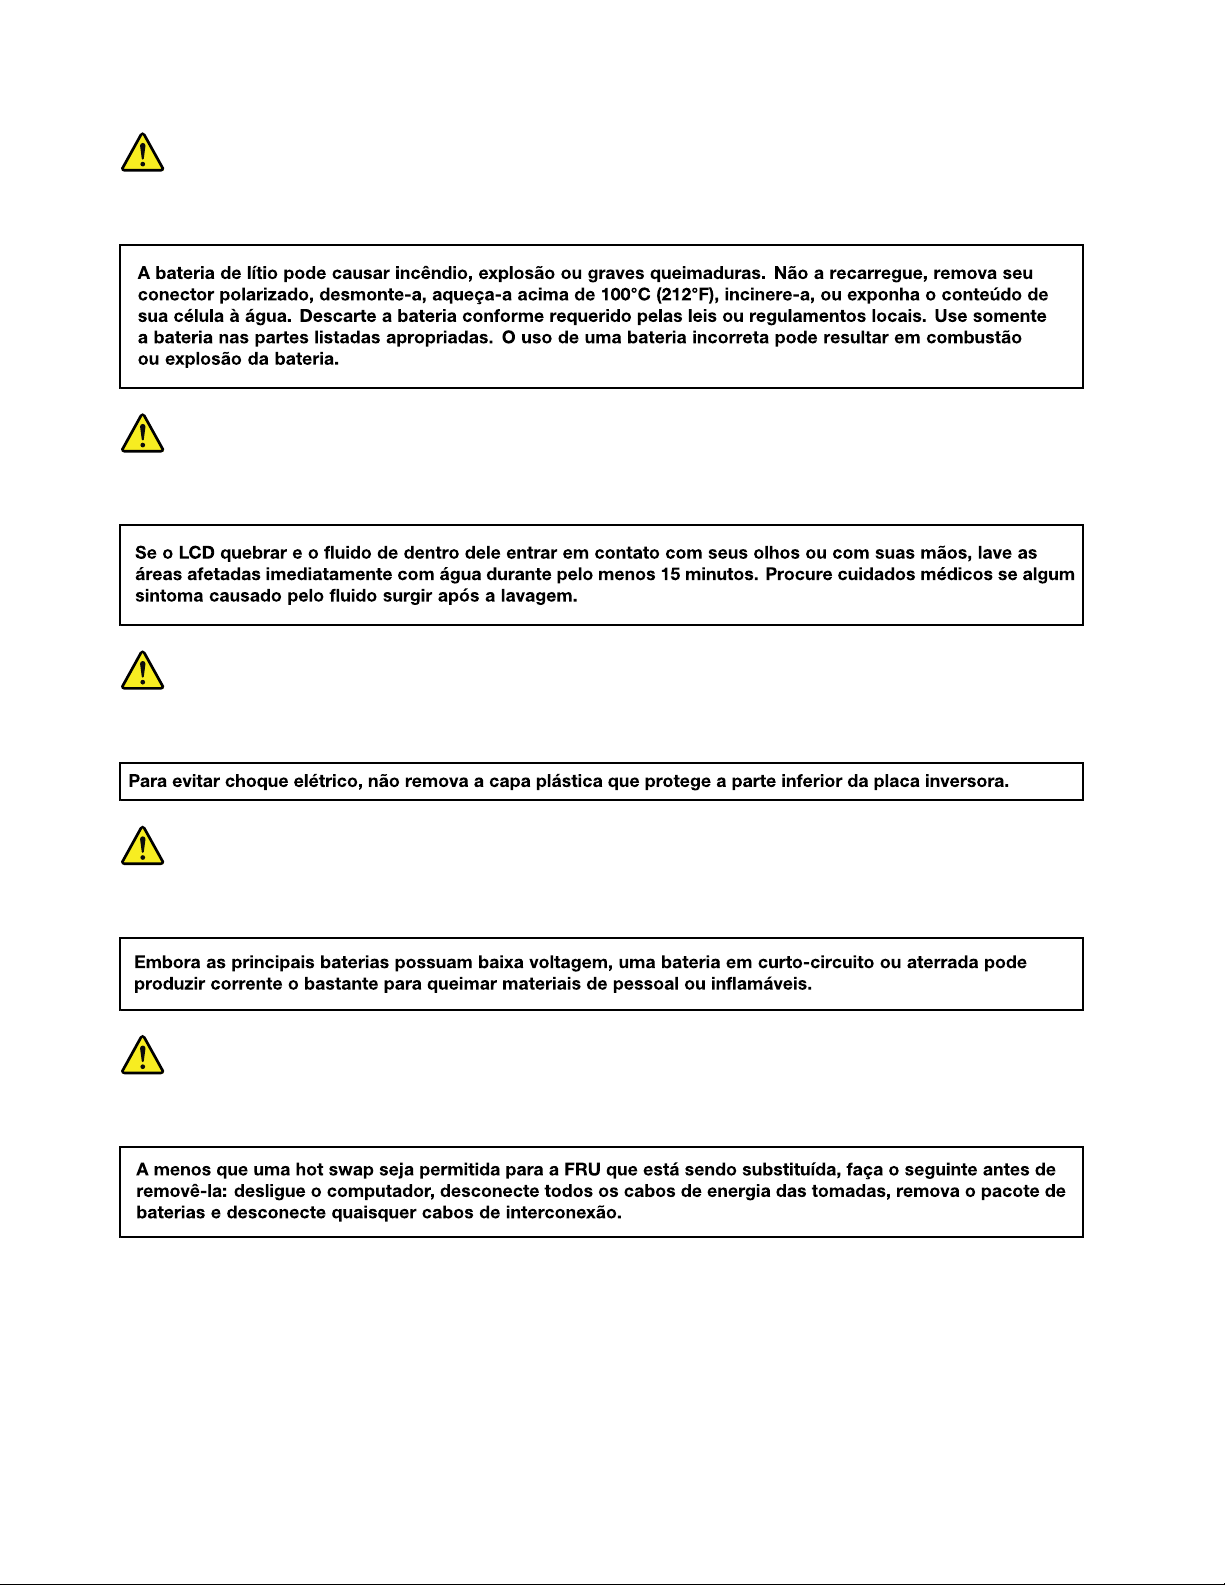
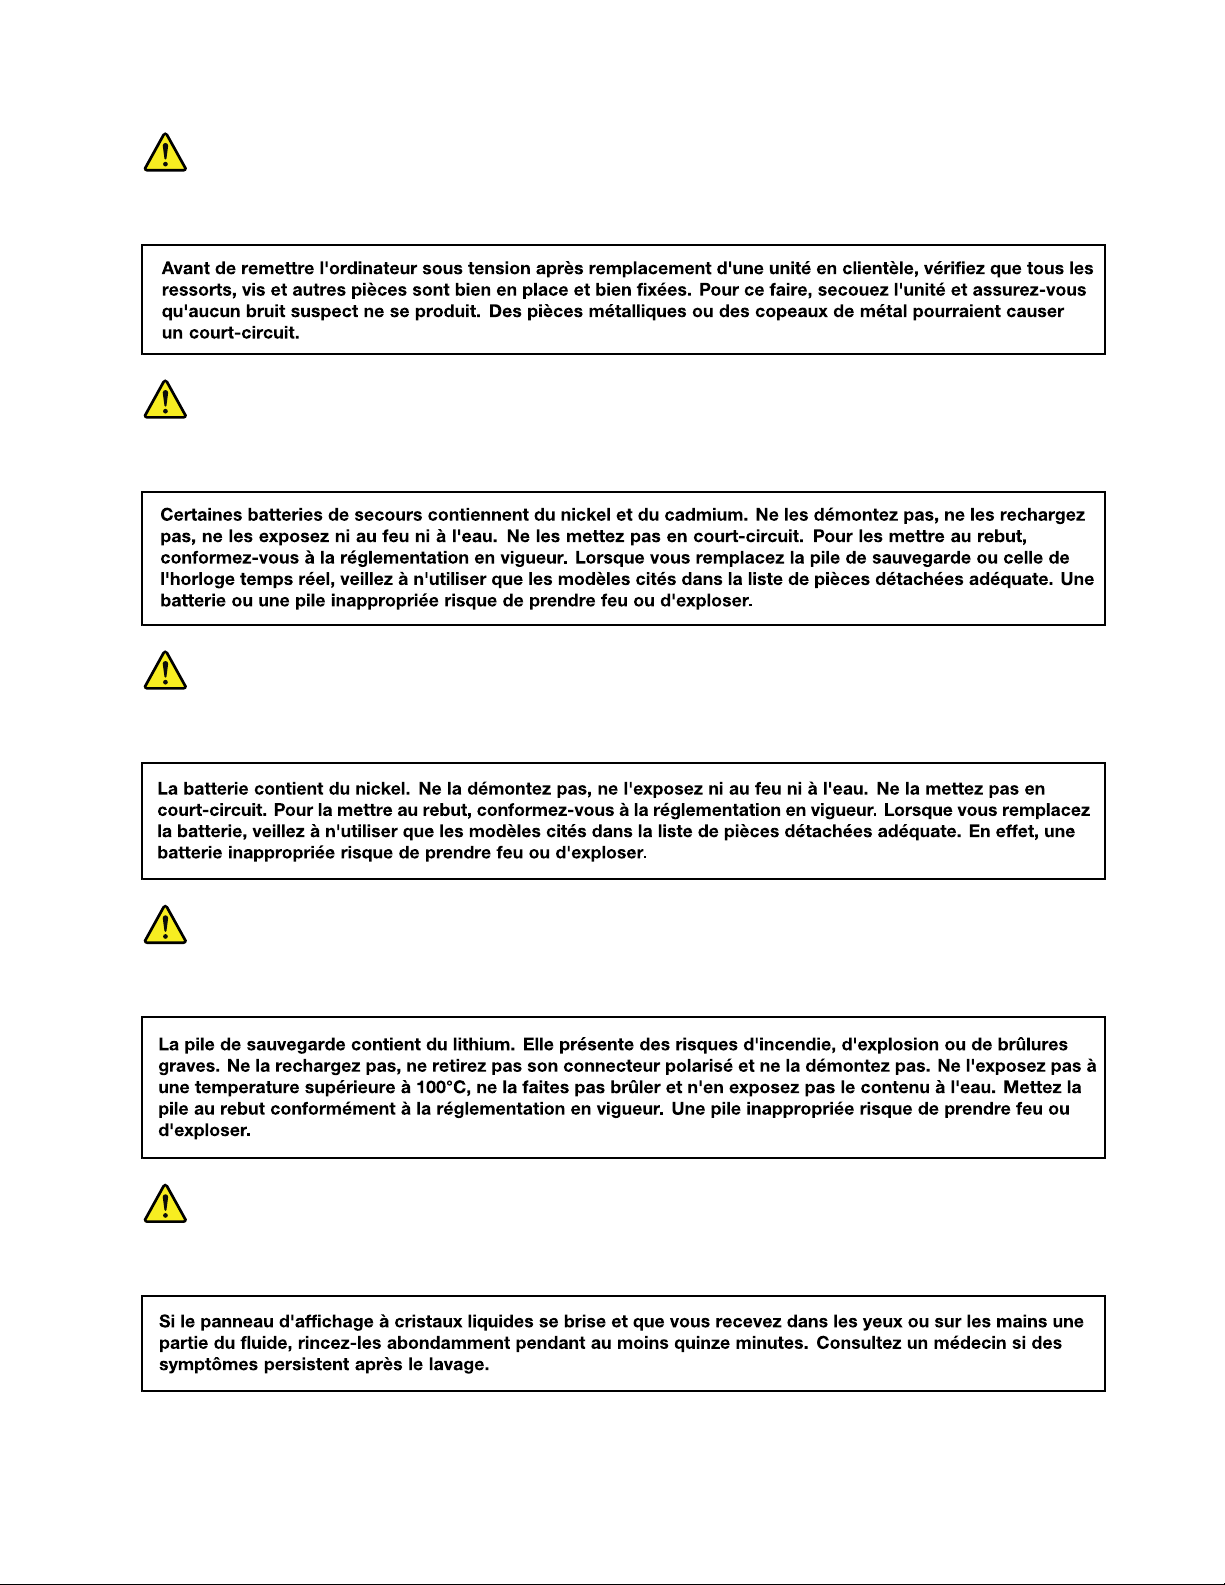
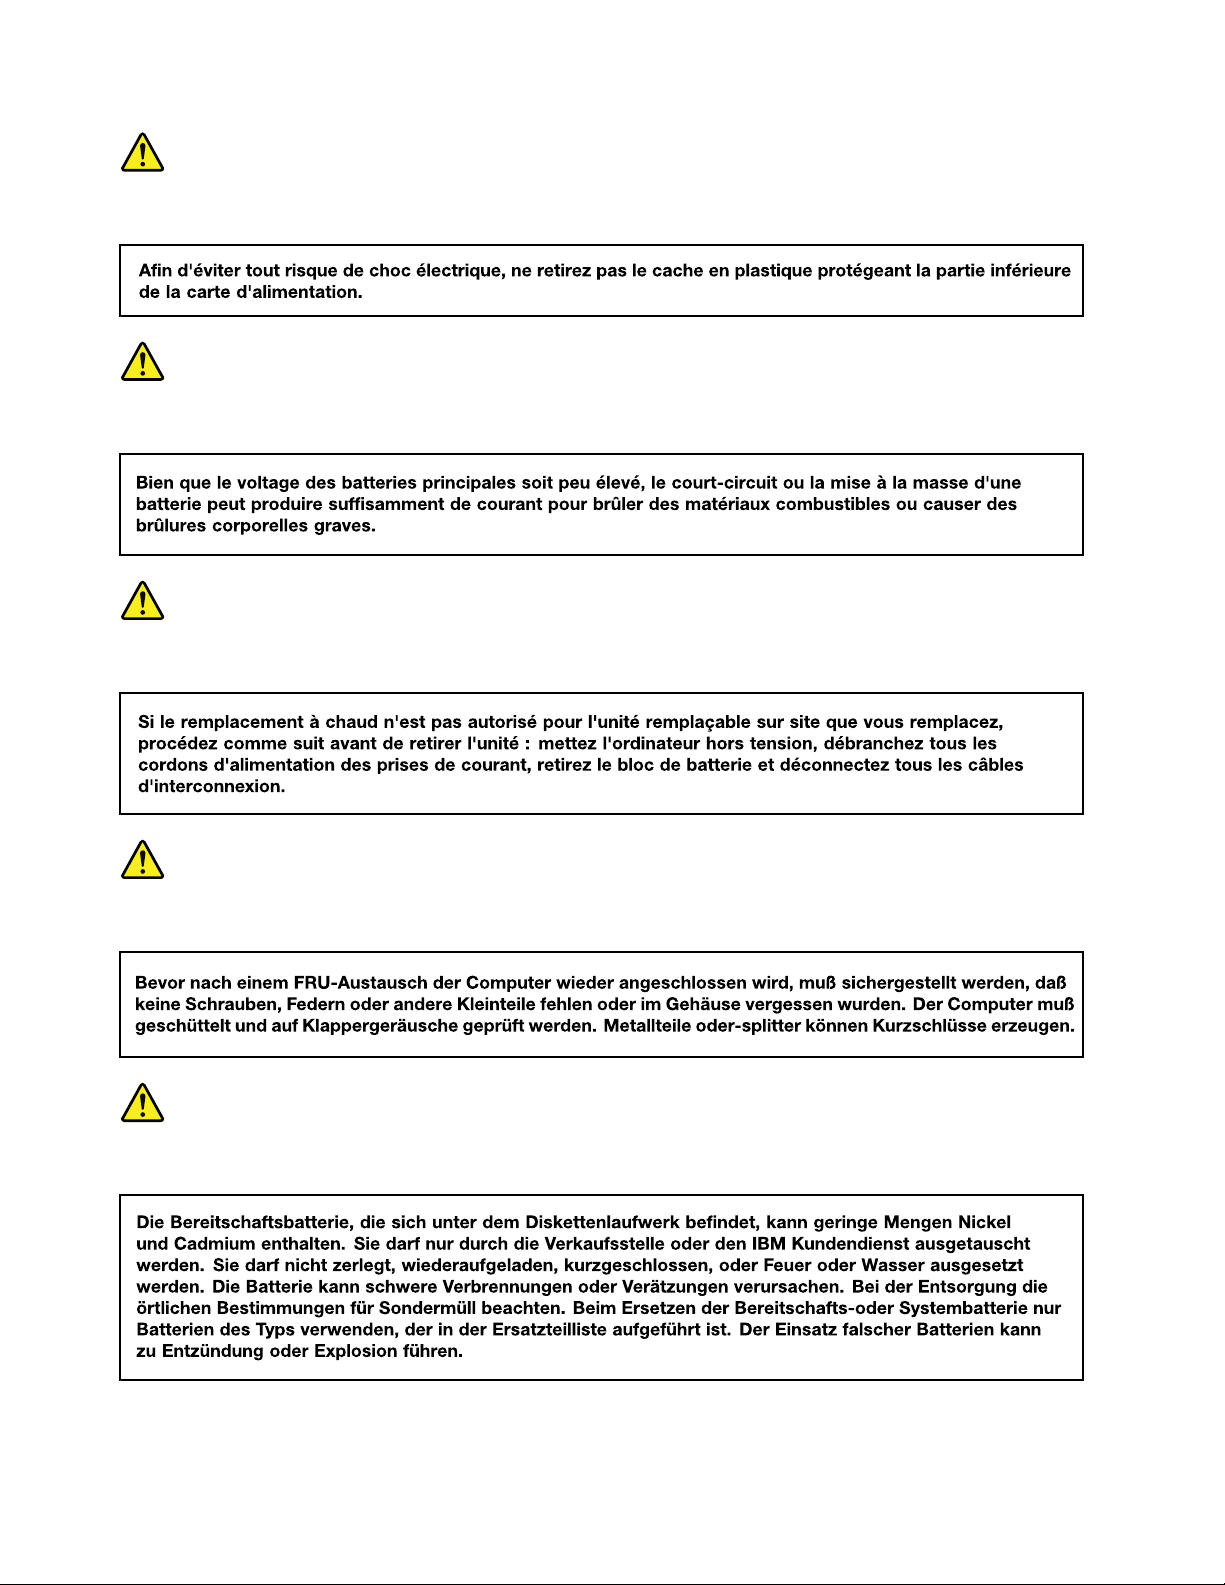
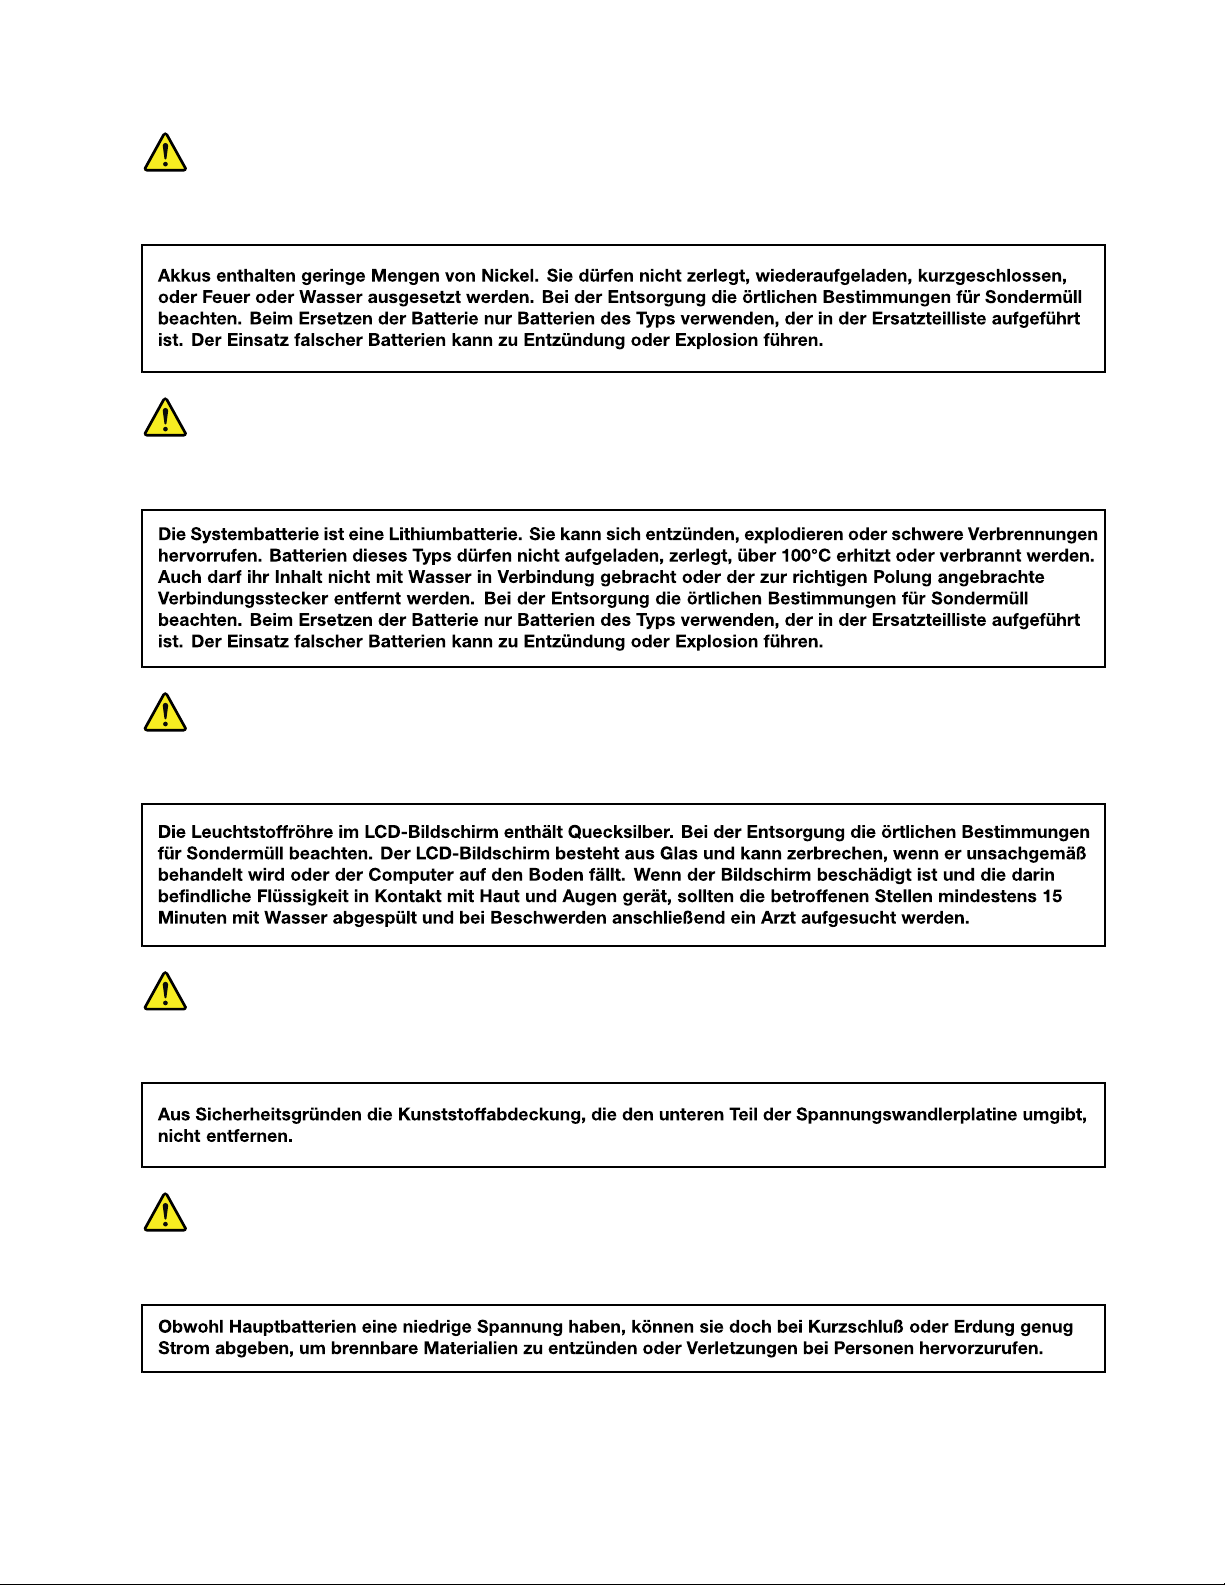
Safetynotices(multilingualtranslations)
Thesafetynoticesinthissectionareprovidedinthefollowinglanguages:
•English
•Arabic
•BrazilianPortuguese
•French
•German
•Hebrew
•Japanese
•Korean
•Spanish
•T raditionalChinese
DANGER
DANGER
DANGER
4ThinkPadX260HardwareMaintenanceManual
Page 11
DANGER
DANGER
DANGER
DANGER
DANGER
Chapter1.Safetyinformation5
Page 12
6ThinkPadX260HardwareMaintenanceManual
Page 13
PERIGO
PERIGO
PERIGO
Chapter1.Safetyinformation7
Page 14
PERIGO
PERIGO
PERIGO
PERIGO
PERIGO
8ThinkPadX260HardwareMaintenanceManual
Page 15
DANGER
DANGER
DANGER
DANGER
DANGER
Chapter1.Safetyinformation9
Page 16
DANGER
DANGER
DANGER
VORSICHT
VORSICHT
10ThinkPadX260HardwareMaintenanceManual
Page 17
VORSICHT
VORSICHT
VORSICHT
VORSICHT
VORSICHT
Chapter1.Safetyinformation11
Page 18
VORSICHT
12ThinkPadX260HardwareMaintenanceManual
Page 19
Chapter1.Safetyinformation13
Page 20
14ThinkPadX260HardwareMaintenanceManual
Page 21
Chapter1.Safetyinformation15
Page 22
16ThinkPadX260HardwareMaintenanceManual
Page 23
Chapter1.Safetyinformation17
Page 24
18ThinkPadX260HardwareMaintenanceManual
Page 25

Chapter2.Importantserviceinformation
Thischapterintroducesfollowingimportantserviceinformationthatappliestoallmachinetypessupported
bythismanual:
•“StrategyforreplacingFRUs”onpage19
–“Strategyforreplacingaharddiskdriveorasolid-statedrive”onpage19
–“Importantnoticeforreplacingasystemboard”onpage20
–“Howtouseerrormessage”onpage20
•“StrategyforreplacingFRUsforCTO,special-bid,andstandardmodels”onpage20
–“Productdefinition”onpage20
–“FRUidentification”onpage20
Important:
•AdvisecustomerstocontacttheLenovo
obtainingorinstallinganysoftwarefixes,drivers,andUEFIBIOSdownloads.Telephonenumbersfor
LenovoSupportareavailableat:
http://www.lenovo.com/support/phone
•SystemDisassembly/ReassemblyvideosthatshowtheFRUremovalsorreplacementsfortheLenovo
authorizedservicetechniciansareavailableinthefollowingsupportsite:
http://www.lenovoservicetraining.com/ion/
®
CustomerSupportCenteriftheyneedanyassistancein
StrategyforreplacingFRUs
Beforereplacingparts:
Ensurethatallsoftwarefixes,drivers,andUEFIBIOSdownloadsareinstalledbeforereplacinganyFRUs
listedinthismanual.
Afterasystemboardisreplaced,ensurethatthelatestUEFIBIOSisloadedtothesystemboardbefore
completingtheserviceaction.
Todownloadsoftwarefixes,drivers,andUEFIBIOS,gotohttp://www.lenovo.com/ThinkPadDriversand
followtheinstructionsonthescreen.
UsethefollowingstrategytopreventunnecessaryexpenseforreplacingandservicingFRUs:
•IfyouareinstructedtoreplaceaFRUbutthereplacementdoesnotcorrecttheproblem,reinstallthe
originalFRUbeforeyoucontinue.
•Somecomputershavebothaprocessorboardandasystemboard.Ifyouareinstructedtoreplaceeither
theprocessorboardorthesystemboard,andreplacingoneofthemdoesnotcorrecttheproblem,
reinstallthatboard,andthenreplacetheotherone.
•IfanadapteroradeviceconsistsofmorethanoneFRU,anyoftheFRUsmaybethecauseoftheerror.
Beforereplacingtheadapterordevice,removetheFRUs,onebyone,toseeifthesymptomschange.
ReplaceonlytheFRUthatchangedthesymptoms.
Strategyforreplacingaharddiskdriveorasolid-statedrive
Alwaystrytorunalow-levelformatbeforereplacingaharddiskdriveorasolid-statedrive.Thiswillcause
allcustomerdataonthedrivetobelost.Besurethatthecustomerhasacurrentbackupofthedata
beforedoingthistask.
Attention:Thedrivestartupsequenceinthecomputeryouareservicingmayhavebeenchanged.Be
extremelycarefulduringwriteoperationssuchascopying,saving,orformatting.Ifyouselectanincorrect
drive,dataorprogramscanbeoverwritten.
©CopyrightLenovo2015
19
Page 26

Importantnoticeforreplacingasystemboard
Somecomponentsmountedonasystemboardareverysensitive.Improperhandlingofasystemboardcan
causedamagetothosecomponents,andmaycauseasystemmalfunction.
Attention:Whenhandlingasystemboard:
•Donotdropasystemboardorapplyanyexcessiveforcetoit.
•Avoidroughhandlingofanykind.
•AvoidbendingasystemboardandhardpushingtopreventcrackingateachBGA(BallGridArray)chipset.
Howtouseerrormessage
Usetheerrorcodesdisplayedonthescreentodiagnosefailures.Ifmorethanoneerrorcodeisdisplayed,
beginthediagnosiswiththefirsterrorcode.Whatevercausesthefirsterrorcodemayalsocausefalseerror
codes.Ifnoerrorcodeisdisplayed,seewhethertheerrorsymptomislistedintheSymptom-to-FRU
Indexforthecomputeryouareservicing.
StrategyforreplacingFRUsforCTO,special-bid,andstandardmodels
ThistopicprovidesinformationaboutthemodeltypesandFRUidentification.
Productdefinition
Thistopicintroducesdifferentmodeltypesandhowtoidentifyeachtype.
DynamicConfigureToOrder(CTO)model
ThismodelprovidestheabilityforacustomertoconfigureaLenovosolutionfromaWebsite,andhavethis
configurationsenttofulfillment,whereitisbuiltandshippeddirectlytothecustomer.Themachinelabeland
eSupportwillloadtheseproductsasthe4-characterMT ,4-charactermodel,and2-charactercountrycode.
Themodelis“CTO1”andthedefaultcountrycodeis“WW”(example:20AACTO1WW).
Special-bidmodel
ThismodelisauniqueconfigurationthathasbeennegotiatedbetweenLenovoandthecustomer.Aunique
MTMconsistsofa4-characterMT ,a4-charactermodel,andanumeric2-charactercountrycodeisprovided
tothecustomertoplaceorders(example:20AA000955).Thecountrycodeassignedisnumericanddoes
notdesignateaspecificcountryorregion.ThecustommodelfactsheetfortheMTMindicateswhichcountry
thespecial-bidMTMissetupfor.Special-bidofferingisnotgenerallyannounced.
Standardmodel
Standardmodels(fixedconfiguration)areannouncedandofferedtoallcustomers.TheMTMportionofthe
machinelabelconsistsofa4-characterMT,a4-charactermodel,andanalphabetic2-charactercountry
code.Thecountrycodeassignedisalphabeticandrepresentsadesignatedcountryorregion(example:
20AA0009UK).
FRUidentification
UseLenovoeSupporttoidentifymajorFRUs,FRUpartnumbers,andFRUdescriptionsforaproductat
anMT-serialnumberlevel.ExamplesofmajorFRUsareharddiskdrive,systemboard,andliquidcrystal
display(LCD).
ToidentifythemajorFRUsforaproduct,dothefollowing:
1.Gotohttp://support.lenovo.com/ibasepartslookup.
2.TypetheMachineTypeandSerialNumberinthecorrespondingfields.
3.ClickSubmit.
20ThinkPadX260HardwareMaintenanceManual
Page 27

eSupportalsocanbeusedtoviewthegeneralFRUlistforaproduct.TheFRUlistisagenerallistof
componentsanddoesnotcontainspecificmodelinformation.
TogetthegeneralFRUlistforaproduct,dothefollowing:
1.Gotohttp://www.lenovo.com/support.
2.Followtheinstructionsonthescreentoselectaproduct.
3.ClicktheProduct&Partstab.
4.SelectSystemServicePartstoviewageneralFRUlist.
Chapter2.Importantserviceinformation21
Page 28

22ThinkPadX260HardwareMaintenanceManual
Page 29

Chapter3.Generalcheckout
Thischaptercontainsthefollowingtopics:
•“Whattodofirst”onpage23
•“Checkoutguide”onpage24
–“LenovoSolutionCenter”onpage24
–“Quicktestprograms”onpage24
–“UEFIdiagnosticprogram”onpage25
–“Bootablediagnosticprograms”onpage25
•“Powersystemcheckout”onpage26
Beforeyougotothecheckoutguide,besuretoreadthefollowingimportantnotes.
Importantnotes:
•Onlycertifiedtrainedpersonnelshouldservicethecomputer.
•BeforereplacinganyFRU,readtheentirepageonremovingandreplacingFRUs.
•WhenyoureplaceFRUs,itisrecommendedusenewnylon-coatedscrews.
•Beextremelycarefulduringsuchwriteoperationsascopying,saving,orformatting.Thesequence
ofthedrivesinthecomputerthatyouareservicingmighthavebeenaltered.Ifyouselectanincorrect
drive,dataorprogramsmightbeoverwritten.
•ReplaceaFRUonlywithanotherFRUofthecorrectmodel.WhenyoureplaceaFRU,ensurethatthe
modelofthemachineandtheFRUpartnumberarecorrectbyreferringtotheWebsite:
http://www.lenovo.com/serviceparts-lookup
•AFRUshouldnotbereplacedbecauseofasingle,unreproduciblefailure.Singlefailurescanoccur
foravarietyofreasonsthathavenothingtodowithahardwaredefect,suchascosmicradiation,
electrostaticdischarge,orsoftwareerrors.ConsiderreplacingaFRUonlywhenaproblemrecurs.Ifyou
suspectthataFRUisdefective,cleartheerrorlogandrunthetestagain.Iftheerrordoesnotrecur,do
notreplacetheFRU.
•BecarefulnottoreplaceanondefectiveFRU.
Whattodofirst
WhenyoureturnaFRU,youmustincludethefollowinginformationinthepartsexchangeformorparts
returnformthatyouattachtoit:
1.Nameandphonenumberofservicetechnician
2.Dateofservice
3.Dateonwhichthemachinefailed
4.Dateofpurchase
5.Failuresymptoms,errorcodesappearingonthedisplay,andbeepsymptoms
6.ProcedureindexandpagenumberinwhichthefailingFRUwasdetected
7.FailingFRUnameandpartnumber
8.Machinetype,modelnumber,andserialnumber
9.Customer'snameandaddress
Note:Duringthewarrantyperiod,thecustomermayberesponsibleforrepaircostsifthecomputerdamage
wascausedbymisuse,accident,modification,unsuitablephysicaloroperatingenvironment,orimproper
maintenancebythecustomer.Followingisalistofsomecommonitemsthatarenotcoveredunderwarranty
andsomesymptomsthatmightindicatethatthesystemwassubjectedtostressbeyondnormaluse.
©CopyrightLenovo2015
23
Page 30

Beforecheckingproblemswiththecomputer,determinewhetherthedamageiscoveredunderthewarranty
byreferringtothefollowinglist:
Thefollowingarenotcoveredunderwarranty:
•LCDpanelcrackedfromtheapplicationofexcessiveforceorfrombeingdropped
•Scratched(cosmetic)parts
•Distortion,deformation,ordiscolorationofthecosmeticparts
•Plasticparts,latches,pins,orconnectorsthathavebeencrackedorbrokenbyexcessiveforce
•Damagecausedbyliquidspilledintothesystem
•DamagecausedbytheimproperinsertionofaPCcardortheinstallationofanincompatiblecard
•Fusesblownbyattachmentofanonsupporteddevice
•Forgottencomputerpassword(makingthecomputerunusable)
•Stickykeyscausedbyspillingaliquidontothekeyboard
•Useofanincorrectacpoweradapteronlaptopproducts
Thefollowingsymptomsmightindicatedamagecausedbynonwarrantedactivities:
•Missingpartsmightbeasymptomofunauthorizedserviceormodification.
•Checkforobviousdamagetoaharddiskdrive.Ifthespindleofaharddiskdrivebecomesnoisy,thehard
diskdrivemighthavebeendroppedorsubjecttoexcessiveforce.
Checkoutguide
UsethefollowingproceduresasaguideinidentifyingandcorrectingproblemswiththeThinkPadnotebook
computers.
Note:ThediagnostictestsareintendedtotestonlyThinkPadproducts.Theuseofnon- ThinkPadproducts,
prototypecards,ormodifiedoptionscanleadtofalseindicationsoferrorsandinvalidsystemresponses.
1.Identifythefailingsymptomsinasmuchdetailaspossible.
2.Verifythesymptoms.T rytore-createthefailurebyrunningthediagnostictestorbyrepeatingthe
operation.
LenovoSolutionCenter
TheLenovoSolutionCenterprogramenablesyoutotroubleshootandresolvecomputerproblems.It
combinesdiagnostictests,systeminformationcollection,securitystatus,andsupportinformation,along
withhintsandtipsformaximumsystemperformance.
TheLenovoSolutionCenterprogramisavailablefordownloadat:
http://www.lenovo.com/diags
ToruntheLenovoSolutionCenterprogram,gotoControlPanel,clickSystemandSecurity➙Lenovo-
SystemHealthandDiagnostics,andthenfollowtheinstructionsonthescreen.
FormoreinformationabouttheLenovoSolutionCenterprogram,refertothehelpinformationsystem
oftheprogram.
Quicktestprograms
Runquicktestprogramstotroubleshootandresolvecomputerproblems,especiallywhenthecomputer
doesnothavetheLenovoSolutionCenterprograminstalled.
Lenovoprovidesthefollowingquicktestprograms:
•LenovoHardDriveQuickTest:Usethisprogramtotroubleshootandresolveinternalstorageproblems.
•LenovoMemoryQuickT est:Usethisprogramtotroubleshootandresolvememorymoduleproblems.
24ThinkPadX260HardwareMaintenanceManual
Page 31

Thequicktestprogramsareapplicableonthefollowingoperatingsystems:
•Microsoft
®
Windows
®
10
•MicrosoftWindows8.1
•MicrosoftWindows8
•MicrosoftWindows7
•MicrosoftWindowsXP
•MicrosoftWindowsServer
®
2003
•MicrosoftWindowsServer2008
Todownloadandinstallaquicktestprogram,gotohttp://www.lenovo.com/diags,andfollowtheinstructions
ontheWebsite.
Torunatestusingquicktestprogram,dothefollowing:
1.GototheC:\SWTOOLS\ldiagdirectory.
2.Double-clickthegui_lsc_lite.exefile.
3.WhentheUserAccountControlwindowopens,clickYes.
4.Selectthedeviceclasstobetested.
5.Selectthedevicestobetested.
6.Selectthetesttobeperformed.
7.Followtheinstructionsonthescreentostartthetest.Whenaproblemisdetected,information
messagesaredisplayed.Refertothemessagestotroubleshoottheproblem.
UEFIdiagnosticprogram
AUEFIdiagnosticprogramispreinstalledonthecomputer.Itenablesyoutotestmemorymodulesand
internalstoragedevices,viewsysteminformation,andcheckandrecoverbadsectorsoninternalstorage
devices.
ToruntheUEFIdiagnosticprogram,dothefollowing:
1.Turnonthecomputer.Ifthecomputercannotbeturnedon,goto“Powersystemcheckout”onpage26,
andcheckthepowersources.Ifanerrorcodeisdisplayed,goto“Symptom-to-FRUindex”onpage34
forerrorcodedescriptionsandtroubleshootinghints.
2.Whenthelogoscreenisdisplayed,repeatedlypressandreleasetheF10key.Themainscreenofthe
UEFIdiagnosticprogramisdisplayed.
3.Followtheinstructionsonthescreentousethediagnosticprogram.
Bootablediagnosticprograms
IfthecomputeryouareservicingisnotinstalledwiththeUEFIdiagnosticprogram,youcandownloada
bootablediagnosticprogramfromtheLenovoSupportWebsite.Thebootablediagnosticprogramsenable
youtotestcomputermemoryandinternalstoragedevices,viewsysteminformation,andcheckandrecover
theinternalstoragedevices.Tousethebootablediagnosticprograms,youcancreateabootablediagnostic
mediumonaUSBdeviceorCD.
Tocreateabootablediagnosticmedium,dothefollowing:
1.Gotohttp://www.lenovo.com/diags.
2.ClickLenovoBootableDiagnostics.
3.FollowtheinstructionsontheWebsitetocreateabootablediagnosticmediumonaUSBdeviceorCD.
Tousethediagnosticmediumyouhavecreated,dooneofthefollowing:
•IfyouhavecreatedthebootablediagnosticmediumonaUSBdevice,dothefollowing:
Chapter3.Generalcheckout25
Page 32

1.AttachtheUSBdevicetothecomputer.
2.Turnonthecomputer.Ifthecomputercannotbeturnedon,goto“Powersystemcheckout”onpage
26,andcheckthepowersources.Ifanerrorcodeisdisplayed,goto“Symptom-to-FRUindex”on
page34
3.Whenthelogoscreenisdisplayed,repeatedlypressandreleasetheF12key.WhentheBootMenu
windowopens,releasetheF12key.
4.UsethearrowkeystoselectUSBHDDandthenpressEnter.Thediagnosticprogramwillbe
launchedautomatically.
5.Followtheinstructionsonthescreentousethediagnosticprogram.
•IfyouhavecreatedthebootablediagnosticmediumonaCD,dothefollowing:
1.Turnonthecomputer.Ifthecomputercannotbeturnedon,goto“Powersystemcheckout”onpage
26,andcheckthepowersources.Ifanerrorcodeisdisplayed,goto“Symptom-to-FRUindex”on
page34
2.InserttheCDintotheexternalopticaldrive.
3.Restartthecomputer.
4.Whenthelogoscreenisdisplayed,repeatedlypressandreleasetheF12key.WhentheBootMenu
windowopens,releasetheF12key.
5.UsethearrowkeystoselectATAPICDx(x:0,1,...)andthenpressEnter.Thediagnosticprogram
willbelaunchedautomatically.
6.Followtheinstructionsonthescreentousethediagnosticprogram.
forerrorcodedescriptionsandtroubleshootinghints.
forerrorcodedescriptionsandtroubleshootinghints.
Powersystemcheckout
Toverifyifthebatteriesandthepoweradapterarefunctional,dothefollowing:
1.Turnoffthecomputer.
2.Connecttheacpoweradapter.
3.Turnonthecomputer.Ifthecomputercanbeturnedon,itmeansthateitherthebatteryortheac
poweradapterisfunctional.
4.Insertastraightenedpaperclipintotheemergencyresetholetoresetthecomputer.Ifthecomputeris
stillpoweredon,itmeansthattheacpoweradapterisfunctional.
5.Turnoffthecomputer.
6.Disconnecttheacpoweradapterandturnonthecomputer.Ifthecomputercanbeturnedon,it
meansthatthebatteryisfunctional.
Ifyoususpectthatthepowerproblemiscausedbyaspecificpowerdevice,refertotheappropriate
checkoutiteminthefollowinglist:
•“Checkingtheacpoweradapter”onpage26
•“Checkingoperationalcharging”onpage27
•“Checkingthecoin-cellbattery”onpage28
Checkingtheacpoweradapter
Youareherebecausethecomputerfailsonlywhentheacpoweradapterisused.
•Ifthesystem-statusindicator(theindicatorintheThinkPadlogoortheindicatorinthecenterofthepower
button)doesnotblinkthreetimeswhenanacpowersourceisconnected,checkthepowercordoftheac
poweradapterforcorrectcontinuityandinstallation.
•Ifthecomputerdoesnotchargeduringoperation,goto“Checkingoperationalcharging”onpage27
.
Tochecktheacpoweradapter,dothefollowing:
1.Unplugtheacpoweradaptercablefromthecomputer.
2.Measuretheoutputvoltageattheplugoftheacpoweradaptercable.
26ThinkPadX260HardwareMaintenanceManual
Page 33

Pin
(20V)
1
3
2
1+20
20
3
Voltage(Vdc)
Ground
Note:Outputvoltageofpin2oftheacpoweradaptermightdifferfromtheoneyouareservicing.
3.Ifthevoltageisnotcorrect,replacetheacpoweradapter.
4.Ifthevoltageisacceptable,replacethesystemboard.
Note:Noisefromtheacpoweradapterdoesnotalwaysindicateadefect.
Checkingoperationalcharging
Tocheckwhetherthebatterieschargeproperlyduringoperation,dothefollowing:
1.Dischargethebatteriesuntiltheremainingbatterypowerislessthan50%.
2.Connectthecomputertoacpowertochargethebatteries.IfthebatterystatusiconintheWindows
notificationareaindicatesthatthebatteriesarenotcharging,removethebatteriesandletthemreturn
toroomtemperature.
3.Reinstallthebatteries.Ifthebatteriesarestillnotcharging,replacethebatteries.
4.Checkthebatterystatusiconagain.Ifthesameerrorstillexists,replacethesystemboard.
Checkingtheremovablebattery
ThissystemsupportsonlybatteriesspeciallydesignedforthisspecificsystemandmanufacturedbyLenovo
oranauthorizedbuilder.Thesystemdoesnotsupportunauthorizedbatteriesorbatteriesdesignedforother
systems.Ifanunauthorizedbatteryorabatterydesignedforanothersystemisinstalled,thesystemwill
notcharge.
Attention:Lenovohasnoresponsibilityfortheperformanceorsafetyofunauthorizedbatteries,and
providesnowarrantiesforfailuresordamagearisingoutoftheiruse.
Moveyourpointertothebattery-statusiconintheWindowsnotificationareatocheckthebatterystatus.
Thebattery-statusicondisplaysthepercentageofbatterypowerremainingandhowlongyoucanuse
yourcomputerbeforeyoumustchargethebattery.
Note:Ifthebatterybecomeshot,itmaynotbeabletocharge.Removeitfromthecomputerandleaveitat
roomtemperatureforawhile.Afteritcoolsdown,reinstallandrechargeit.
Tocheckthebattery,dothefollowing:
1.Poweroffthecomputer.
2.Removethebatteryandmeasurethevoltagebetweenbatteryterminals1(+)and7(-).Seethefollowing
figure:
Chapter3.Generalcheckout27
Page 34

Terminal
1(+)
2(+)
3
4
5
6(-)
7(-)
1,2+0to+12.6
6,7
Voltage(Vdc)
Ground(-)
3.Ifthevoltageislessthan+11.0Vdc,thebatteryhasbeendischarged.
Ifthevoltageisstilllessthan+11.0Vdcafterrecharging,replacethebattery.
4.Ifthevoltageismorethan+11.0Vdc,measuretheresistancebetweenbatteryterminals5and7.The
resistancemustbe4to30KΩ.Iftheresistanceisnotcorrect,replacethebattery.Iftheresistance
iscorrect,replacethesystemboard.
Checkingthecoin-cellbattery
Tocheckthecoin-cellbattery,dothefollowing:
1.Disablethebuilt-inbattery.See“Disablingthebuilt-inbattery”onpage60.
2.Removethecoin-cellbattery.See“1110Coin-cellbattery”onpage75.
3.Measurethevoltageofthecoin-cellbattery.
Wire
Red+2.5to+3.2
Black
Voltage(Vdc)
Ground
•Ifthevoltageiscorrect,replacethesystemboard.
•Ifthevoltageisnotcorrect,replacethecoin-cellbattery.
•Ifthecoin-cellbatterydischargesquicklyafterreplacement,replacethesystemboard.
28ThinkPadX260HardwareMaintenanceManual
Page 35

Chapter4.Relatedserviceinformation
Thischaptercontainsthefollowingtopics:
•“RestoringthefactorycontentsbyusingtheproductRecoveryDiscSet”onpage29
•“RecoveryoverviewfortheWindows10operatingsystem”onpage30
•“Passwords”onpage31
•“Powermanagement”onpage33
•“Symptom-to-FRUindex”onpage34
ServiceWebsite:Whenthelatestmaintenancedisketteandthesystemprogramservicediskettebecome
available,theywillbepostedon:
http://www.lenovo.com/support
RestoringthefactorycontentsbyusingtheproductRecoveryDiscSet
Whenthemainstoragedeviceisreplacedbecauseofafailure,noproductrecoveryprogramisonthenew
drive.Inthiscase,thecustomermustusetheRecoveryDiscSettorecoverthecomputer.Orderthe
RecoveryDiscSetandthedriveatthesametimesothatthecustomercanrestorethecomputertothe
factorydefaultsettingsbyusingtheRecoveryDiscSetafterthenewdriveisinstalled.Forinformationabout
whichdiscstoorder,gotohttp://www.lenovo.com/serviceparts-lookup.
Dependingonthemodel,thenumberofrecoverydiscsincludedintheRecoveryDiscSetdiffers.Torestore
thefactorycontentsbyusingtheproductRecoveryDiscSet,dothefollowing:
Notes:
•Duringtherecoveryprocess,alldataonthedrivewillbedeleted.Ifpossible,copyanyimportantdata
orpersonalfilesthatyouwanttokeepontoremovablemediaoranetworkdrivebeforeyoustartthe
recoveryprocess.
•Therecoveryprocesstakesonetotwohourstocomplete.Thelengthoftimedependsonthemethodyou
use.IfyouuseproductRecoveryDiscSet,therecoveryprocesstakesabouttwohours.
1.ConnectanexternalCD/DVDdrive.
2.MaketheCD/DVDdrivethefirststartupdeviceinthestartupsequenceusingthefollowingprocedure:
a.OpentheThinkPadSetupprogramandselectStartup➙Boot.
b.SelecttheCD/DVDdriveasthe1stBootDevice.
3.InsertthebootablerecoverydiscintotheCD/DVDdrive.
4.StartthecomputerfromtheexternalCD/DVDdrive.
5.Whenpromoted,selectyourlanguageandclickNext.
6.Readthelicenseandacceptthetermsandconditions.Thenfollowtheinstructionsonthescreen.
7.IftheRecoveryDiscSetcontainsaSupplementalRecoveryDisc,insertitwhenpromptedandclickYes.
Note:NotallRecoveryDiscSetscomewithaSupplementalRecoveryDisc.IfthereisaSupplemental
RecoveryDisc,itwillbeclearlymarkedassuch.
8.Whenallofthedatahasbeencopiedfromthelastdiscinthesetandhasbeenprocessed,remove
theexternalCD/DVDdriveandrestartthecomputer.Followtheinstructionsonthescreentofinish
therecovery.
Note:Therestoftherecoveryprocessisfullyautomatedandnoactionfromyouisrequired.The
computerwillrestartintotheMicrosoftWindowsdesktopseveraltimesandyoumightexperience
periodswhennoactivityisapparentonthescreenforseveralminutesatatime.Thisisnormal.
©CopyrightLenovo2015
29
Page 36

9.Whentherecoveryprocesscompletes,theWelcometoMicrosoftWindowsscreenisdisplayed.Follow
theinstructionsonthescreentocompletetheWindowssetup.
10.AfteryouhavecompletedtheWindowssetup,youmightwanttorestoretheoriginalstartupsequence.
StarttheThinkPadSetupprogramandthenpressF9torestorethedefaultsettings.PressF10tosave
changesandexittheThinkPadSetupprogram.
Note:Afterrestoringadrivetothefactorydefaultsettings,youmightneedtoreinstallsomedevicedrivers.
RecoveryoverviewfortheWindows10operatingsystem
TheWindowsrecoveryprogramsenableyoutoresetyourcomputeroruseadvancedstartupoptions.
ItisrecommendedthatyoucreatearecoveryUSBdriveasearlyaspossible.StoretherecoveryUSBdrive
asabackuporreplacementfortheWindowsrecoveryprograms.
Formoreinformation,see“CreatingandusingarecoveryUSBdrive”onpage31
.
Resettingyourcomputer
Ifyourcomputerdoesnotperformwell,youmightconsiderresettingyourcomputer.Intheresettingprocess,
youcanchoosetokeepyourfilesorremovethem,andthenreinstalltheWindowsoperatingsystem.
Toresetyourcomputer,dothefollowing:
Note:Thegraphicaluserinterface(GUI)itemsoftheoperatingsystemmightchangewithoutnotice.
1.OpentheStartmenuandthenclickSettings.IfSettingsisnotdisplayed,clickAllappstodisplayall
programs,andthenclickSettings➙Update&security➙Recovery.
2.IntheResetthisPCsection,clickGetstarted.
3.Followtheinstructionsonthescreentoresetyourcomputer.
Usingadvancedstartupoptions
Withadvancedstartupoptions,youcanchangethefirmwaresettingsofthecomputer,changethestartup
settingsoftheWindowsoperatingsystem,startthecomputerfromanexternaldevice,orrestorethe
Windowsoperatingsystemfromasystemimage.
Touseadvancedstartupoptions,dothefollowing:
Note:TheGUIitemsoftheoperatingsystemmightchangewithoutnotice.
1.OpentheStartmenuandthenclickSettings.IfSettingsisnotdisplayed,clickAllappstodisplayall
programs,andthenclickSettings➙Update&security➙Recovery.
2.IntheAdvancedstartupsection,clickRestartnow➙Troubleshoot➙Advancedoptions.
3.Selectadesiredstartupoptionandfollowtheinstructionsonthescreen.
RecoveringyouroperatingsystemifWindows10failstostart
TheWindowsrecoveryenvironmentonyourcomputeriscapableofoperatingindependentlyfromthe
Windows10operatingsystem.Thisenablesyoutorecoverorrepairtheoperatingsystemevenifthe
Windows10operatingsystemfailstostart.
Aftertwoconsecutivefailedbootattempts,theWindowsrecoveryenvironmentstartsautomatically.Then
youcanchooserepairandrecoveryoptionsbyfollowingtheinstructionsonthescreen.
Note:Ensurethatyourcomputerisconnectedtoacpowerduringtherecoveryprocess.
30ThinkPadX260HardwareMaintenanceManual
Page 37

CreatingandusingarecoveryUSBdrive
YoucancreatearecoveryUSBdriveasabackupfortheWindowsrecoveryprograms.Withtherecovery
USBdrive,youcantroubleshootandfixtheproblemsevenifthepreinstalledWindowsrecoveryprograms
aredamaged.
CreatingarecoveryUSBdrive
TheUSBdrivethatyouusetocreatetherecoveryUSBdrivemustbeatleast16GBofstorage.Theactual
USBcapacitythatisrequireddependsonthesizeoftherecoveryimage.
Attention:ThecreationprocessdeletesanythingstoredontheUSBdrive.T oavoiddataloss,makea
backupcopyofallthedatathatyouwanttokeep.
TocreatearecoveryUSBdrive,dothefollowing:
Note:Ensurethatyourcomputerisconnectedtoacpowerduringthefollowingprocess.
1.ConnectaproperUSBdrive(atleast16GBofstorage).
2.Typerecoveryinthesearchboxonthetaskbar.ThenclickCreatearecoverydrive.
3.ClickYesintheUserAccountControlwindowtoallowtheRecoveryMediaCreatorprogramtostart.
4.IntheRecoveryDrivewindow,followtheon-screeninstructionstocreatearecoveryUSBdrive.
UsingtherecoveryUSBdrive
Ifyoucannotstartyourcomputer,usetherecoveryUSBdrivetorecoveryourcomputer.
TousearecoveryUSBdrive,dothefollowing:
Note:Ensurethatyourcomputerisconnectedtoacpower.
1.ConnecttherecoveryUSBdrivetothecomputer.
2.Turnonorrestartthecomputer.BeforetheWindowsoperatingsystemstarts,repeatedlypresstheF12
key.TheBootMenuwindowopens.
3.SelecttherecoveryUSBdriveasthebootdevice.
4.Selectapreferredkeyboardlayout.
5.ClickTroubleshoottodisplaytheoptionalrecoverysolutions.
6.Selectacorrespondingrecoverysolutionaccordingtoyoursituation.Thenfollowtheinstructionson
thescreentocompletetheprocess.
Passwords
AsmanyasthreepasswordsmaybeneededforanyThinkPadnotebookcomputer:thepower-onpassword,
theharddiskpassword,andthesupervisorpassword.
Ifanyofthesepasswordshasbeenset,apromptforitwillbedisplayedonthescreenwheneverthe
computeristurnedon.Thecomputerdoesnotstartuntilthepasswordisentered.
Note:Ifonlyasupervisorpasswordisset,thepasswordpromptwillnotbedisplayedwhentheoperating
systemisstarted.
Power-onpassword
Apower-onpasswordprotectsthesystemfrombeingpoweredonbyanunauthorizedperson.The
passwordmustbeenteredbeforeanoperatingsystemcanbestarted.
Chapter4.Relatedserviceinformation31
Page 38

Toremovethepower-onpassword,dothefollowing:
•Ifnosupervisorpasswordhasbeenset,dothefollowingtoremovethepower-onpassword:
1.Turnoffthecomputer.
2.Removethebuilt-inbatteries.Forinstructionsonhowtoremovethebattery,see“1030Built-in
battery”onpage63
3.Removethecoin-cellbattery.Forinstructionsonhowtoremovethecoin-cellbattery,see“1110
Coin-cellbattery”onpage75
4.Reinstallthecoin-cellbattery.Forinstructionsonhowtoinstallthecoin-cellbattery,see“1110
Coin-cellbattery”onpage75.
5.Reinstallthebuilt-inbatteries.Forinstructionsonhowtoinstallthebattery,see“1030Built-in
battery”onpage63.
6.TurnonthecomputerandwaituntilthePOSTends.AfterthePOSTends,thepasswordprompt
doesnotappear.Thepower-onpasswordhasbeenremoved.
•Ifasupervisorpasswordhasbeensetandisknowntotheservicetechnician,dothefollowingtoremove
thepower-onpassword:
1.Turnonthecomputer.
2.Whenthelogoscreenisdisplayed,immediatelypressF1.T ypethesupervisorpasswordtoenter
theThinkPadSetupprogram.
3.SelectSecurity.
4.SelectPassword.
5.SelectPower-OnPassword.
6.TypethecurrentsupervisorpasswordintheEnterCurrentPasswordfield.ThenleavetheEnter
NewPasswordfieldblank,andpressEntertwice.
7.IntheChangeshavebeensavedwindow,pressEnter.
8.PressF10tosavechangesandexittheThinkPadSetupprogram.
.
.Waitforafewseconds.
Harddiskpassword
Therearetwokindsofharddiskpasswords:
•Userharddiskpassword-fortheuser
•Masterharddiskpassword-forthesystemadministrator,whocanuseittogetaccesstotheharddisk
eveniftheuserhaschangedtheuserharddiskpassword
Note:Therearetwomodesfortheharddiskpassword:UseronlyandMaster+User.TheMaster+User
moderequirestwoharddiskpasswords;thesystemadministratorentersbothinthesameoperation.The
systemadministratorthenprovidestheuserharddiskpasswordtothesystemuser.
Attention:Iftheuserharddiskpasswordhasbeenforgotten,checkwhetheramasterharddiskpassword
hasbeenset.Ifithas,itcanbeusedforaccesstotheharddiskdrive.Ifnomasterharddiskpasswordis
available,neitherLenovonorLenovoauthorizedservicetechniciansprovideanyservicestoreseteither
theuserorthemasterharddiskpassword,ortorecoverdatafromtheharddiskdrive.T oputthesystem
backtooperationalstatus,theonlyLenovoandLenovo-authorizedservicesolutionwouldbetoreplacethe
harddiskdrivewithascheduledfee.
Toremoveauserharddiskpasswordthathasbeenforgotten,whenthesupervisorpasswordandmaster
harddiskpasswordareknown,dothefollowing:
1.Turnonthecomputer.
2.Whenthelogoscreenisdisplayed,immediatelypressF1.
32ThinkPadX260HardwareMaintenanceManual
Page 39

3.Whentheuserharddiskpasswordiconisdisplayedonthescreen,pressF1.Themasterharddisk
passwordiconisdisplayed.Enterthemasterharddiskpassword.
4.Whenthesupervisorpasswordiconisdisplayed,enterthesupervisorpasswordtoentertheThinkPad
Setupprogram.
5.SelectSecurity.
6.SelectPassword.
7.SelectHard-diskxpassword,wherexistheletteroftheharddiskdrive.Apop-upwindowopens.
8.SelectMasterharddiskpassword.
9.TypethecurrentmasterharddiskpasswordintheEnterCurrentPasswordfield.ThenleavetheEnter
NewPasswordfieldblank,andpressEntertwice.
10.PressF10tosavechangesandexittheThinkPadSetupprogram.Theuserharddiskpasswordandthe
masterharddiskpasswordhavebeenremoved.
Supervisorpassword
AsupervisorpasswordprotectsthesysteminformationstoredintheThinkPadSetup.Theusermustenter
thesupervisorpasswordinordertogetaccesstotheThinkPadSetupandchangethesystemconfiguration.
Attention:Ifthesupervisorpasswordhasbeenforgottenandcannotbemadeavailabletotheservice
technician,thereisnoserviceproceduretoresetthepassword.Thesystemboardmustbereplacedfor
ascheduledfee.
Powermanagement
Toreducepowerconsumption,thecomputerhasthreepowermanagementmodes:screenblank,sleep,
andhibernation.
Screenblankmode(fortheWindows7operatingsystemonly)
Ifthetimesetonthe“Turnoffmonitor”timerintheoperatingsystemexpires,theLCDbacklightturnsoff.
Toputthecomputerintoscreenblankmode,dothefollowing:
1.Right-clickthebatterygaugeonthetaskbar.
2.SelectPoweroffdisplay.
Toendscreenblankmodeandresumenormaloperation,pressanykey.
Sleepmode
Whenthecomputerenterssleepmode,thefollowingeventsoccurinadditiontowhatoccursinscreen
blankmode:
•TheLCDispoweredoff.
•Theharddiskdriveorsolid-statedriveispoweredoff.
•Themicroprocessorstops.
Toputyourcomputerintosleepmode,dothefollowing:
•ForWindows7:OpentheStartmenu,clickthearrownexttotheShutdownbutton,andthenclick
Sleepfromthemenudisplayed.
•ForWindows10:OpentheStartmenu,click
Power,andthenclickSleep.
Chapter4.Relatedserviceinformation33
Page 40

Incertaincircumstances,thecomputergoesintosleepmodeautomatically:
•Afteraperiodofinactivityspecifiedinpowerplansettings
•Whenthebatterypowerislow
Tocausethecomputertoreturnfromsleepmodeandresumeoperation,dooneofthefollowing:
•PresstheFnkey.
•OpentheLCDcover.
•T urnonthepowerbutton.
Hibernationmode
Inhibernationmode,thefollowingoccurs:
•Thesystemstatus,RAM,VRAM,andsetupdataarestoredontheharddiskdriveorsolid-statedrive.
•Thesystemispoweredoff.
Ifyouhavedefinedoneofthefollowingactionsastheeventthatcausesthesystemtogointohibernation
mode,performthataction.
•Closingthelid.
•Pressingthepowerbutton.
Also,thecomputergoesintohibernationmodeautomaticallyafteraperiodofinactivityspecifiedinpower
plansettings.
Whenthepoweristurnedon,thecomputerreturnsfromhibernationmodeandresumesoperation.The
hibernationfileinthebootrecordontheharddiskdriveorsolid-statedriveisread,andsystemstatusis
restoredfromtheharddiskdriveorsolid-statedrive.
Symptom-to-FRUindex
Thissectioncontainsfollowinginformation:
•“Numericerrorcodes”onpage35
•“Errormessages”onpage36
•“Beepsymptoms”onpage36
•“No-beepsymptoms”onpage37
•“LCD-relatedsymptoms”onpage37
•“Intermittentproblems”onpage37
•“Undeterminedproblems”onpage38
Thesymptom-to-FRUindexinthissectionlistssymptomsanderrorsandtheirpossiblecauses.Themost
likelycauseislistedfirst,inboldfacetype.
Note:DotheFRUreplacementorotheractionsinthesequenceshowninthecolumnheaded“FRUor
action,insequence. ”IfreplacingaFRUdoesnotsolvetheproblem,puttheoriginalpartbackinthe
computer.DonotreplaceanondefectiveFRU.
Thisindexcanalsohelpyoudetermine,duringregularservicing,whatFRUsarelikelytoneedtobe
replacednext.
AnumericerrorisdisplayedforeacherrordetectedinPOSTorsystemoperation.Inthedisplays,ncan
beanynumber.
Ifnonumericcodeisdisplayed,checkthenarrativedescriptionsofsymptoms.Ifthesymptomisnot
describedthere,goto“Intermittentproblems”onpage37
34ThinkPadX260HardwareMaintenanceManual
.
Page 41

Note:ForadevicenotsupportedbydiagnosticcodesintheThinkPadnotebookcomputers,seethe
manualforthatdevice.
Numericerrorcodes
Symptomorerror
0177
BadSVPdata,stopPOSTtask—Thechecksumofthe
supervisorpasswordintheEEPROMisnotcorrect.
0183
BadCRCofSecuritySettingsinEFIVariable.Enterthe
ThinkPadSetupprogram.–ThechecksumoftheSecurity
settingsintheEFIVariableisnotcorrect.
0187
EAIAdataaccesserror—TheaccesstoEEPROMisfailed.
0188
InvalidRFIDSerializationInformationArea.
0189
InvalidRFIDconfigurationinformationarea—The
EEPROMchecksumisnotcorrect.
0190
Criticallow-batteryerror
0191
SystemSecurity—InvalidRemoteChangerequested.
0199
SystemSecurity—Securitypasswordretrycount
exceeded.
0270
RealTimeClockError.
0271
CheckDateandTimesettings.
1802
Unauthorizednetworkcardispluggedin—Turnoffand
removethenetworkcard.
1820
Morethanoneexternalfingerprintreaderisattached.
Poweroffandremoveallbutthereaderthatyousetup
withinyourmainoperatingsystem.
2100
DetectionerroronHDD0(MainHDD)
2110
ReaderroronHDD0(MainHDD)
2200
MachineTypeandSerialNumberareinvalid.
2201
MachineUUIDisinvalid
FRUoraction,insequence
Replacethesystemboard.
1.RuntheThinkPadSetupprogram.Thesettings
willbecorrectedautomatically.Thensavethe
currentsettingsbypressingF10.
2.Replacethesystemboard.
Replacethesystemboard.
Replacethesystemboard.
Replacethesystemboard.
1.Chargethebattery.
2.Replacethebattery.
1.RuntheThinkPadSetupprogram,andthensave
currentsettingbypressingF10.
2.Replacethesystemboard.
1.RuntheThinkPadSetupprogram.Theretrycount
willbereset.Thensavethecurrentsettingsby
pressingF10.
2.Replacethesystemboard.
SystemRealTimeClockisnotfunctional.Havethe
computerserviced.
Neitherthedatenorthetimeissetinthecomputer .
Setthedateandtime,usingThinkPadSetup.
1.Removenetworkcard.
2.Replacethesystemboard.
Removeallbutthereaderthatyousetupforthe
authentication.
1.Reseattheharddiskdrive.
2.Replacethemainharddiskdrive.
3.Replacethesystemboard.
1.Reseattheharddiskdrive.
2.Replacethemainharddiskdrive.
3.Replacethesystemboard.
Replacethesystemboard.
Replacethesystemboard.
Chapter4.Relatedserviceinformation35
Page 42

Errormessages
Symptomorerror
Fanerror.1.Replacethefan.
Thermalsensingerror.Replacethesystemboard.
TheSystemUEFIVariableStorageisnearlyfull.
FRUoraction,insequence
2.Applythermalgrease.
3.Replacethesystemboard.
Note:Thiserrorindicatesthattheoperatingsystem
orapplicationscannotcreate,modify,ordeletedata
inthenon-volatilesystemUEFIvariablestoragedueto
insufficientstoragespaceafterPOST.
Thenon-volatilesystemUEFIvariablestorageisused
bytheUEFIBIOSandbytheoperatingsystemor
applications.Thiserroroccurswhentheoperatingsystem
orapplicationsstorelargeamountsofdatainthevariable
storage.AlldataneededforPOST ,suchasBIOSsetup
settings,chipsetorplatformconfigurationdata,arestored
inaseparateUEFIvariablestorage.
Solution:EnterThinkPadSetup.Adialogaskstheuser
forconfirmationtocleanupthestorage.Iftheuser
selects“Yes” ,alldatathatwerecreatedbytheoperating
systemorapplicationsaredeletedexceptglobalvariables
definedbytheUnifiedExtensibleFirmwareInterface
Specification.Iftheuserselects“No”,alldataiskept,but
theoperatingsystemorapplicationswillnotbeableto
create,modify,ordeletedatainthestorage.
Ifthiserrorhappensataservicecenter,Lenovoauthorized
servicepersonnelwillcleanupthenon-volatilesystem
UEFIvariablestorageusingtheabovesolution.
Beepsymptoms
SymptomorerrorSolution
Oneshortbeep,pause,threeshortbeeps,pause,three
moreshortbeeps,pause,andoneshortbeep(1-3-3-1
beeps)
OnelongandtwoshortbeepsVideoproblem.Shutdownthecomputerimmediatelyand
Threeshortbeeps,pause,oneshortbeep,pause,one
shortbeep,pause,andthreemoreshortbeeps(3-1-1-3
beeps)
Fourcyclesoffourshortbeeps
Fiveshortbeeps
Fiveshortbeeps,pause,fivemoreshortbeeps,and
pause
Memoryproblem.Shutdownthecomputerimmediately
andhavethecomputerserviced.
havethecomputerserviced.
PCIresourceproblem.Shutdownthecomputer
immediatelyandhavethecomputerserviced.
TCG*-compliantfunctionality-relatedproblem(mightbe
theTPMinitializationfailure).Shutdownthecomputer
immediatelyandhavethecomputerserviced.
*TCGistheabbreviationforTrustedComputingGroup.
Systemboardproblem.Shutdownthecomputer
immediatelyandhavethecomputerserviced.
TCG-compliantfunctionality-relatedproblem(might
betheBIOScodevalidationfailure).Shutdownthe
computerimmediatelyandhavethecomputerserviced.
36ThinkPadX260HardwareMaintenanceManual
Page 43

No-beepsymptoms
Symptomorerror
Nobeep,system-statusindicatoron,LCDblank,andno
POST.
Nobeep,system-statusindicatoron,andLCDblank
duringPOST.
Thepower-onpasswordpromptappears.Apower-onpasswordorasupervisorpasswordisset.
Thehard-diskpasswordpromptappears.Aharddiskpasswordisset.T ypethepasswordand
FRUoraction,insequence
1.Ensurethateveryconnectorisconnectedtightly
andcorrectly.
2.Reseatmemorymodule.
3.Replacethesystemboard.
1.Reseatmemorymodule.
2.Replacethesystemboard.
TypethepasswordandpressEnter.
pressEnter.
LCD-relatedsymptoms
Important:TheTFTLCDforthenotebookcomputercontainsmanythin-filmtransistors(TFTs).The
presenceofasmallnumberofdotsthataremissing,discolored,oralwayslightedischaracteristicofTFT
LCDtechnology,butexcessivepixelproblemscancauseviewingconcerns.IftheLCDyouareservicinghas
twoorlessvisibledefectivepixels,itshouldnotbeconsideredfaulty.However,iftheLCDhasthreeormore
visibledefectivepixels,itwillbedeemedasdefectivebyLenovoanditshouldbereplaced.
Notes:
•ThispolicyappliestoallThinkPadnotebookcomputerspurchasedonJanuary1,2008orlater.
•LenovowillnotprovidewarrantyreplacementiftheLCDiswithinspecificationsbecausewecannot
guaranteethatanyreplacementLCDwillhavezeropixeldefects.
•OnepixelconsistsofR,G,Bsub-pixels.
Symptomorerror
Nobeep,system-statusindicatoron,andablankLCD
duringPOST.
•LCDbacklightnotworking.
•LCDtoodark.
•LCDbrightnesscannotbeadjusted.
•LCDcontrastcannotbeadjusted.
•LCDscreenunreadable.
•Charactersmissingpixels.
•Screenabnormal.
•Wrongcolordisplayed.
HorizontalorverticallinesdisplayedonLCD.ReplacetheLCDassembly.
FRUoraction,insequence
Replacethesystemboard.
1.ReseattheLCDconnectors.
2.ReplacetheLCDassembly.
3.Replacethesystemboard.
1.Seeimportantnotefor“LCD-relatedsymptoms.”
2.ReseatallLCDconnectors.
3.ReplacetheLCDassembly.
4.Replacethesystemboard.
Intermittentproblems
Intermittentsystemhangproblemscanbeduetoavarietyofcausesthathavenothingtodowithahardware
defect,suchascosmicradiation,electrostaticdischarge,orsoftwareerrors.FRUreplacementshouldbe
consideredonlywhenaproblemrecurs.
Whenanalyzinganintermittentproblem,dothefollowing:
1.Runthediagnostictestforthesystemboardinloopmodeatleast10times.
2.Ifnoerrorisdetected,donotreplaceanyFRUs.
Chapter4.Relatedserviceinformation37
Page 44

3.Ifanyerrorisdetected,replacetheFRUshownbytheFRUcode.Rerunthetesttoverifythatno
moreerrorsexist.
Undeterminedproblems
Ifthediagnostictestsdidnotidentifytheadapterordevicethathasfailed,ifwrongdevicesareinstalled,
orifthesystemsimplyisnotoperating,followtheseprocedurestoisolatethefailingFRU(donotisolate
FRUsthathavenodefects).
Verifythatallattacheddevicesaresupportedbythecomputer.
Verifythatthepowersupplybeingusedatthetimeofthefailureisoperatingcorrectly.See“Powersystem
checkout”onpage26.
1.Turnoffthecomputer.
2.VisuallycheckeachFRUfordamage.ReplaceanydamagedFRU.
3.Removeordisconnectallofthefollowingdevices:
a.Non-ThinkPaddevices
b.Printer,mouse,andotherexternaldevices
c.batteries
d.Internalstoragedrive
e.Externaldiskettedriveoropticaldrive
f.Memorymodule
g.M.2cards
4.Turnonthecomputer.
5.Determinewhethertheproblemhasbeensolved.
6.Iftheproblemdoesnotrecur,reconnecttheremoveddevicesoneatatimeuntilyoufindthefailingFRU.
7.Iftheproblemremains,replacethefollowingFRUsoneatatime(donotreplaceanondefectiveFRU):
a.Systemboard
b.LCDassembly
38ThinkPadX260HardwareMaintenanceManual
Page 45

Chapter5.Statusindicators
S
D
F1 F4
Fn
1 2 3
5
6
4
Thischapterhelpsyoulocateandidentifythevariousstatusindicatorsonyourcomputer.
IndicatorIndicatorbehavioranddescription
1FnLockindicator
2Speaker-muteindicatorOn:Thespeakersaremuted.
3Microphone-mute
indicator
4Camera-statusindicatorOn:Thecameraisinuse.
56System-status
indicators
©CopyrightLenovo2015
•Off:TheFnLockfunctionisdisabled.Toinitiatethespecialfunctionprintedasan
icononeachkey,pressthefunctionkeydirectly.T oinputF1-F12,presstheFn
keyandthecorrespondingfunctionkey.
•On:TheFnLockfunctionisenabled.T oinputF1-F12,pressthefunctionkeys
directly.Toinitiatethespecialfunctionprintedasanicononeachkey,presstheFn
keyandthecorrespondingfunctionkey.
On:Themicrophonesaremuted.
•Blinkingthreetimes:Thecomputerisinitiallyconnectedtopower.
•On:Thecomputerisinuse.
•Off:Thecomputerisofforinhibernationmode.
•Slow-blinking:Thecomputerisinsleepmode.
•Fast-blinking:Thecomputerisenteringsleeporhibernationmode.
39
Page 46

40ThinkPadX260HardwareMaintenanceManual
Page 47

Chapter6.Functionkeysandcombinations
Thefollowingtabledescribesthefunctionsoffunctionkeysandkeycombinations.
Functionkeysand
keycombinations
Description
Mutesorunmutesthespeakers.
Ifyoumutethesoundandturnoffyourcomputer,thesoundwillremainmutedwhenyou
turnonyourcomputeragain.T oturnonthesound,pressthevolume-downkeyor
volume-upkey.
Decreasesthespeakervolume.
Increasesthespeakervolume.
Mutesorunmutesthemicrophones.
Darkensthecomputerdisplay.
Brightensthecomputerdisplay.
Managestheexternaldisplays.
Enablesordisablesthewirelessfeatures.
•ForWindows7:OpensControlPanel.
•ForWindows10:OpenstheSettingswindow.
•ForWindows7:OpensWindowsSearch.
•ForWindows10:OpenstheCortana
Viewsalltheprogramsthatyouhaveopened.
®
searchbox.
+
©CopyrightLenovo2015
•ForWindows7:OpensComputer.
•ForWindows10:Viewsalltheprograms.
YoucanconfiguretheFnkeyandfunctionkeysintheKeyboardPropertieswindowby
doingthefollowing:
1.GotoControlPanel.ChangetheviewofControlPanelfromCategorytoLargeicons
orSmallicons.
2.ClickKeyboard.IntheKeyboardPropertieswindow,clicktheThinkPadF1-F12keysor
Fnandfunctionkeystab.
3.Selecttheoptionofyourpreference:
PressFn+EsctoenableordisabletheFnLockfunction.
•WhentheFnLockfunctionisdisabled:TheFnLockindicatorisoff.Toinitiatethespecial
functionprintedasanicononeachkey,pressthefunctionkeydirectly.T oinputF1-F12,
presstheFnkeyandthecorrespondingfunctionkey.
•WhentheFnLockfunctionisenabled:TheFnLockindicatorturnson.ToinputF1-F12,
pressthefunctionkeysdirectly.Toinitiatethespecialfunctionprintedasanicononeach
key,presstheFnkeyandthecorrespondingfunctionkey.
41
Page 48

Functionkeysand
keycombinations
Fn+SpacebarControlsthekeyboardbacklight.
Fn+B
Fn+P
Fn+SHasthesamefunctionastheSysRqkeyonaconventionalkeyboard.
Fn+K
Fn+End
Fn+4Putsyourcomputerintosleepmode.Toreturntonormaloperation,presstheFnkeyonly.
Description
Therearethreemodesforthekeyboardbacklight:Off,Low,andHigh.PressFn+Spacebarto
changethemodeofthekeyboardbacklight.
HasthesamefunctionastheBreakkeyonaconventionalkeyboard.
HasthesamefunctionasthePausekeyonaconventionalkeyboard.
HasthesamefunctionastheScrLKkeyonaconventionalkeyboard.
HasthesamefunctionastheInsertkeyonaconventionalkeyboard.
42ThinkPadX260HardwareMaintenanceManual
Page 49

Chapter7.Locations
2
1
2
3
10
11
12
13
SD
5
6
7
8
9
4
Thischapterintroducesthelocationsofthehardwarecomponentsonyourcomputer.
Locatingcomputercontrols,connectors,andindicators
Thistopicintroducesthelocationsofthecomputercontrols,connectors,andindicators.
Frontview
1Camera(availableonsomemodels)2Microphones(availableonsomemodels)
3Powerbutton
5Ethernetconnector
7Media-cardslot
9Audioconnector
11T rackPoint
13T rackPointbuttons
©CopyrightLenovo2015
®
pointingstick12T rackpad
4Security-lockslot
6Micro-SIM-cardtray(availableonsomemodels)
8AlwaysOnUSB3.0connector
10Fingerprintreader(availableonsomemodels)
43
Page 50

Left-sideview
3
2
1
4
5
6
1
2
3
4
4
1Powerconnector2Fanlouvers
3HDMI™connector
5USB3.0connectors6Smart-cardreaderslot(availableonsomemodels)
Bottomview
1Emergency-resethole2Removablebattery
3Dockingstationconnector
LocatingFRUsandCRUs
4MiniDisplayPort
4Speakers
®
connector
Thistopicintroducesthefollowingserviceparts:
•“MajorFRUs”onpage46
44ThinkPadX260HardwareMaintenanceManual
Page 51

•“LCDFRUs”onpage48
•“Miscellaneousparts”onpage48
Notes:
•EachFRUisavailableforalltypesormodels,unlessotherwisespecified.
•CRUstatementforcustomers:
Youcanresolvesomeproblemswithyourproductwithareplacementpartyoucaninstallyourself,calleda
“CustomerReplaceableUnit”or“CRU.”SomeCRUsaredesignatedasself-serviceCRUsandothersare
designatedasoptional-serviceCRUs.Installationofself-serviceCRUsisyourresponsibility.Foroptional-service
CRUs,youcaneitherinstalltheCRUyourselforyoucanrequestthataServiceProviderinstalltheCRUaccording
tothewarrantyserviceforyourproduct.IfyouintendoninstallingtheCRU,LenovowillshiptheCRUtoyou.CRU
informationandreplacementinstructionsareshippedwithyourproductandareavailablefromLenovoatanytime
uponrequest.Y oucanfindalistofCRUsforyourproductinthisHardwareMaintenanceManual.Anelectronic
versionofthismanualcanbefoundathttp://www.lenovo.com/support.ClickGuides&Manualsandthenfollow
theon-screeninstructionstofindthemanualforyourproduct.Y oumightberequiredtoreturnthedefectivepart
thatisreplacedbytheCRU.Whenreturnisrequired:(1)returninstructions,aprepaidshippinglabel,anda
containerwillbeincludedwiththereplacementCRU;and(2)youmightbechargedforthereplacementCRUif
LenovodoesnotreceivethedefectiveCRUwithinthirty(30)daysofyourreceiptofthereplacementCRU.Seeyour
LenovoLimitedWarrantydocumentationforfulldetails.
ThinkPadcomputerscontainthefollowingtypesofCRUs:
–Self-serviceCRUs:TheseCRUsunplugorareheldbynomorethantwoscrews.Examplesofthesetypesof
CRUsincludetheacpoweradapterandpowercord.Otherself-serviceCRUsdependingonproductdesign
mightincludethememorymodule,wirelesscard,keyboard,andpalmrestwithfingerprintreaderandtrackpad.
–Optional-serviceCRUs:TheseCRUsareisolatedpartswithinthecomputerthatareconcealedbyanaccess
panelthatistypicallysecuredbymorethantwoscrews.Oncetheaccesspanelisremoved,thespecific
CRUisvisible.
Chapter7.Locations45
Page 52

MajorFRUs
24
25
26
27
23
22
21
19
20
1
2
3
4
5
6
7
8
9
10
11
12
c
d
e
b
a
13
18
17
16
14
15
No.FRUdescriptions
1
LCDunit(see“LCDFRUs”onpage48)
2
KeyboardspacerNoNo
3
Keyboardbezelassembly(withorwithoutfingerprintreader)
4
Power-buttoncardNoNo
5
Micro-SIM-cardtray(availableonsomemodels)
6
Systemboard
Self-service
CRU
NoNo
NoNo
NoNo
NoNo
Optional-service
CRU
46ThinkPadX260HardwareMaintenanceManual
Page 53

No.FRUdescriptions
7
Wireless-LANcardY esNo
8
Wireless-WANcard(availableonsomemodels)
9
Speakerassembly
10
Internalstoragedrive(harddiskdriveorsolid-statedrive)
11
Internal-storage-drivecableNoYes
12
RemovablebatteryYesNo
13
BasecoverassemblyYesNo
14
LenovofactoryrecoveryUSBkey
15
Lenovorecoverydiscset
16
PowercordYesNo
17
acpoweradapterYesNo
18
Smart-cardreader(availableonsomemodels)
19
Flexibleprintedcircuits(FPC)forsmart-cardreader(available
*
*
Self-service
CRU
YesNo
NoNo
YesNo
NoNo
NoNo
NoNo
NoNo
Optional-service
CRU
onsomemodels)
20
Built-inbatteryNoNo
21
Coin-cellbattery
22
MemorymoduleYesNo
23
Thermalfanassembly
24
FPCfortrackpad(withorwithoutfingerprintreader)
25
dc-incableassemblyNoYes
26
KeyboardNoNo
27
TrackPointcapNoNo
a–e
Miscellaneousparts(see“Miscellaneousparts”onpage48)
NoNo
NoNo
NoNo
NoNo
Note:TheLenovofactoryrecoveryUSBkey14andtheLenovorecoverydiscset15areusedtorestorethe
MicrosoftWindowsoperatingsystem.Theymightnotcomewiththecomputer,andausermightorderthemfrom
http://www.lenovo.com/lenovorecovery,thoughadditionalshippingandhandlingfeesmightapply.
Chapter7.Locations47
Page 54

LCDFRUs
1
3
4
2
7
6
5
8
No.FRUdescriptions
1
LCDbezel
2
Camera/microphonemodule
3
Cameracable
4
Wireless-LAN/WANantennaassembly(withthewireless-WAN
Self-service
CRU
NoNo
NoNo
NoNo
NoNo
Optional-service
CRU
antennaassemblyavailableonsomemodels)
5
LCDrear-coverassembly
6
LCDcable
7
LCDpanel
8
LCDhinges
NoNo
NoNo
NoNo
NoNo
Miscellaneousparts
FRUdescriptions
Systemmiscellaneouskit:
•bAntennacableguide
•cBracketfortheinternal-storage-drivecable
•Microphonerubberforcameramodel
•Microphonerubberfornon-cameramodel
Screwandtapekit:
•Screwforhinges,M2.5*L2.2(8)
48ThinkPadX260HardwareMaintenanceManual
Self-serviceCRUOptional-service
CRU
NoNo
NoNo
Page 55

FRUdescriptions
23
25
17
1 2 3 4 5 6 7 8 9 10 11
12
13
14
15
16
18
19
2021
22
26
24
Self-serviceCRUOptional-service
CRU
•Screw,M2*L2(4)
•Screw,M2*L2.7(24)
•Screw,M2.5*4,flathead(4)
•Screw,M2*L4(18)
•Stepscrew,M2*L2.3(8)
•Screw,M2.5*L4,flathead(4)
•Screw,M2*L3.2(4)
•Screw,M2*L3.5,silver,smallhead(18)
•Illustrationsheetforantenna
•Tapeforfixingcable
aHingebracket(availableinthekeyboardbezelassemblykit)
dSmart-card-readerbracket(availableinthekeyboardbezelassemblykit)
edc-inbracket(availableinthekeyboardbezelassemblykit)
NoNo
NoNo
NoNo
Connectorandcableguide
ThissectionprovidesinformationtohelpLenovo-authorizedservicetechniciansidentifyconnectorsand
cablesforreplacementpurpose.T ovieweachFRUandtheexplodedillustrationofthecomputer,see“Major
FRUs”onpage46and“LCDFRUs”onpage48.
Note:Dependingonthecomputermodel,someconnectorsorcablesmightnotbeavailable.
Systemboardconnectorsandcables
No.
1
2
36
4
5
7
8
9
Connector/location
Memorymoduleslot(internal)
Coin-cellbatteryconnector(internal)Coin-cellbatterywithcable
Keyboardconnectors(internal)
Smart-card-readerconnector(internal)FPCforsmart-cardreader,connectingthe
Speakerconnector(internal)Speakerassemblywithcable
Trackpadconnector(internal)FPCfortrackpad,connectingthetrackpadtothe
Built-in-batteryconnector(internal)
Wireless-LANcardslot(internal)
Internalcable
None,withthememorymoduledirectlyconnecting
tothesystemboard
Keyboardassemblywithcables
smart-cardreadertothesystemboard
systemboard
Built-inbatteryassemblywithcable
None,withthewireless-LANcarddirectlyconnecting
tothesystemboard
Chapter7.Locations49
Page 56

No.
1
10
Connector/location
Internal-storage-driveconnector(internal)
Internalcable
Internal-storage-drivecable,connectingtheinternal
storagedrivetothesystemboard
11
Wireless-WANcardslot(internal)
None,withthewireless-WANcarddirectlyconnecting
tothesystemboard
12
13
14
15
16
17
Audioconnector(rightside)
AlwaysOnUSB3.0connector(rightside)
Micro-SIM-cardreader(rightside)
Media-cardreader(rightside)
Ethernetconnector(rightside)
Camera/microphonemoduleconnector(internal)Cameracable,connectingthecamera/microphone
None.Integrated.
None.Integrated.
None.Integrated.
None.Integrated.
None.Integrated.
module,thepower-buttoncard,andtheThinkPad
logoLED(ontheA-cover)tothesystemboard
18
Removable-batteryconnector(internal)
None,withtheremovablebatterydirectlyconnecting
tothesystemboard
19
20
Dockingstationconnector(bottom)
LCDconnector(internal)LCDcable,connectingtheLCDunittothesystem
None.Integrated.
board
21
22
23
24
2526
acpowerconnector(leftside)
Thermalfanconnector(internal)
HDMIconnector(leftside)
MiniDisplayPortconnector(leftside)
USB3.0connectors(leftside)
None.Integrated.
Thermalfanassemblywithcable
None.Integrated.
None.Integrated.
None.Integrated.
Camera/microphonemoduleconnectorandcable
No.
1
Connector/location
Camera/microphonemoduleconnector(internal)Cameracable,connectingthecamera/microphone
Internalcable
module,thepower-buttoncard,andtheThinkPad
logoLED(ontheA-cover)tothesystemboard
50ThinkPadX260HardwareMaintenanceManual
Page 57

Keyboardbezelassemblyconnectorandcable
1
1
No.
1
Connector/location
Trackpadconnector(internal)FPCfortrackpad,connectingthetrackpadtothe
Smart-cardreaderconnectorandcable
No.
1
Connector/location
Smart-cardreaderconnector(internal)FPCforsmart-cardreader,connectingthesmart-card
Internalcable
systemboard
Internalcable
readertothesystemboard
Chapter7.Locations51
Page 58

Wireless-LANcardconnectorsandcables
1 2
1 2
No.
1
2
Connector/location
Wireless-LANantennaconnector(internal)Wireless-LANantennaassemblywithcable(gray),
Wireless-LANantennaconnector(internal)Wireless-LANantennaassemblywithcable(black),
Wireless-WANcardconnectorsandcables
Internalcable
connectingthemainwireless-LANantennatothe
wireless-LANcard
connectingtheauxiliarywireless-LANantennatothe
wireless-LANcard
No.
1
2
52ThinkPadX260HardwareMaintenanceManual
Connector/location
Internalcable
Wireless-WANantennaconnector(internal)Wireless-WANantennaassemblywithcable(orange),
connectingthemainwireless-WANantennatothe
wireless-WANcard
Wireless-WANantennaconnector(internal)Wireless-WANantennaassemblywithcable(blue),
connectingtheauxiliarywireless-WANantennato
thewireless-WANcard
Page 59

Power-buttoncardconnectorandcable
1
No.
1
Connector/location
Power-buttoncardconnector(internal)Cameracable,connectingthepower-buttoncardto
Internalcable
thesystemboard,theThinkPadlogoLED(onthe
A-cover),andthecamera/microphonemodule
LookingupFRUinformation
FordetailedFRUinformation,includingpartnumbers,descriptions,andsubstitutionpartnumbers,goto:
http://www.lenovo.com/serviceparts-lookup
Chapter7.Locations53
Page 60

54ThinkPadX260HardwareMaintenanceManual
Page 61

Chapter8.FRUreplacementnotices
90degreesmore
(Cross-section)
Thischapterpresentsnoticesrelatedtoremovingandreplacingparts.Readthischaptercarefullybefore
replacinganyFRU.
CRUstatementforcustomers:
Youcanresolvesomeproblemswithyourproductwithareplacementpartyoucaninstallyourself,called
a“CustomerReplaceableUnit”or“CRU.”SomeCRUsaredesignatedasself-serviceCRUsandothers
aredesignatedasoptional-serviceCRUs.Installationofself-serviceCRUsisyourresponsibility.For
optional-serviceCRUs,youcaneitherinstalltheCRUyourselforyoucanrequestthataServiceProvider
installtheCRUaccordingtothewarrantyserviceforyourproduct.IfyouintendoninstallingtheCRU,
LenovowillshiptheCRUtoyou.CRUinformationandreplacementinstructionsareshippedwithyour
productandareavailablefromLenovoatanytimeuponrequest.Y oucanfindalistofCRUsforyour
productinthisHardwareMaintenanceManual.Anelectronicversionofthismanualcanbefoundat
http://www.lenovo.com/support.ClickGuides&Manualsandthenfollowtheon-screeninstructionstofind
themanualforyourproduct.Y oumightberequiredtoreturnthedefectivepartthatisreplacedbytheCRU.
Whenreturnisrequired:(1)returninstructions,aprepaidshippinglabel,andacontainerwillbeincluded
withthereplacementCRU;and(2)youmightbechargedforthereplacementCRUifLenovodoesnot
receivethedefectiveCRUwithinthirty(30)daysofyourreceiptofthereplacementCRU.SeeyourLenovo
LimitedWarrantydocumentationforfulldetails.
Screwnotices
Loosescrewscancauseareliabilityproblem.IntheThinkPadnotebookcomputer,thisproblemisaddressed
withspecialnylon-coatedscrewsthathavethefollowingcharacteristics:
•Theymaintaintightconnections.
•Theydonoteasilycomeloose,evenwithshockorvibration.
•Theyarehardertotighten.
Dothefollowingwhenyouservicethismachine:
•Keepthescrewkitinyourtoolbag.Forthepartnumberofthescrewkit,goto:
http://www.lenovo.com/serviceparts-lookup
•Itisrecommendedtousenewscrews.
•Itisrecommendedtouseeachscrewonlyonce.
Tightenscrewsasfollows:
•Plastictoplastic
Turnanadditional90degreesafterthescrewheadtouchesthesurfaceoftheplasticpart.
•Logiccardtoplastic
Turnanadditional180degreesafterthescrewheadtouchesthesurfaceofthelogiccard.
©CopyrightLenovo2015
55
Page 62

180degreesmore
(Cross-section)
Notes:
•Ensurethatyouusethecorrectscrew.Itisrecommendedtousenewscrewsforreplacements.Ifyou
haveatorquescrewdriver,tightenallscrewsfirmlytothetorquespecifiedinthescrewinformation
tableforeachstep.
•Ensurethattorquescrewdriversarecalibratedcorrectlyfollowingcountryspecifications.
Retainingserialnumbers
Thissectionincludesthefollowingdescriptions:
•“Restoringtheserialnumberofthesystemunit”onpage56
•“RetainingtheUUID”onpage57
Restoringtheserialnumberofthesystemunit
Whenthecomputerwasmanufactured,theEEPROMonthesystemboardwasloadedwiththeserial
numbersofthesystemandallmajorcomponents.Thesenumbersneedtoremainthesamethroughout
thelifeofthecomputer.
Ifyoureplacethesystemboard,youmustrestoretheserialnumberofthesystemunittoitsoriginalvalue.
Theserialnumberofthesystemunitiswrittenonthelabelattachedtothebottomofthecomputer.
Ifyoucannotfindtheserialnumberofthesystemunitonthebottomofthecomputer,trythefollowing
methodtogetthenumber:
Note:Beforeyouperformtheoperation,ensurethattheUEFI/LegacysettingwithintheStartupmenuin
theThinkPadSetupprogramissettoUEFIOnly.
1.ConnectaUSBmemorykeytothecomputer.
2.Gotohttp://www.lenovo.com/maintenanceutilitiesandfollowtheinstructionsonthescreentocreatea
MaintenanceKey.
Note:OnlyanauthorizedLenovoservicetechniciancanaccesstheaboveWebsite.
3.Restartthecomputer.
4.Whenthelogoisdisplayed,pressEsc.TheThinkPadConfigInformationUpdateUtilityinterfaceis
displayed.
5.Type1underEntertheactiondesiredandpressEnter.TheThinkPadSerialNumberUpdateUtilityfor
AssetIDscreenisdisplayed.
6.Type2underEntertheactiondesiredandpressEnter.Theserialnumberofeachdeviceinyour
computerisdisplayed;theserialnumberofthesystemunitislistedasfollows:
20-Serialnumber
7.Recordtheserialnumberofthesystemunit.
Afteryoureplacethesystemboard,dothefollowingtorestoretheserialnumberofthesystemunit:
1.ConnecttheMaintenanceKeytothecomputer.
56ThinkPadX260HardwareMaintenanceManual
Page 63

2.Whenthelogoisdisplayed,pressEsc.TheThinkPadConfigInformationUpdateUtilityinterfaceis
displayed.
3.Type1underEntertheactiondesiredandpressEnter.TheThinkPadSerialNumberUpdateUtilityfor
AssetIDscreenisdisplayed.
4.Type1underEntertheactiondesiredandpressEnter.Thenfollowtheinstructionsonthescreen
torestoretheserialnumberofthesystemunit.
RetainingtheUUID
TheUniversallyUniqueIdentifier(UUID)isa128-bitnumberuniquelyassignedtoyourcomputerat
productionandstoredintheEEPROMofyoursystemboard.
ThealgorithmthatgeneratesthenumberisdesignedtoprovideuniqueIDsuntiltheyearA.D.3400.Notwo
computersintheworldhavethesamenumber.
Whenyoureplacethesystemboard,performthefollowingstepstocreateanewUUIDforthesystem
boardifthesystemboarddoesnothaveaUUID:
Note:Beforeyouperformtheoperation,ensurethattheUEFI/LegacysettingwithintheStartupmenuin
theThinkPadSetupprogramissettoUEFIOnly.
1.ConnectaUSBmemorykeytothecomputer.
2.Gotohttp://www.lenovo.com/maintenanceutilitiesandfollowtheinstructionsonthescreentocreatea
Maintenancekey.
Note:OnlyanauthorizedLenovoservicetechniciancanaccesstheaboveWebsite.
3.Restartthecomputer.
4.Whenthelogoscreenisdisplayed,pressEsc.TheThinkPadConfigInformationUpdateUtilityinterface
isdisplayed.
5.Type2underEntertheactiondesiredandpressEnter.TheAutoUUIDgenerationutilityinterfaceis
displayed.
6.TypeyunderChangeUUID.OK?[Y/N]andpressEnter.AnewUUIDiscreatedandwritten.Ifa
validUUIDalreadyexists,itisnotoverwritten.
ReadingorwritingtheECAinformation
InformationonEngineeringChangeAnnouncements(ECA)isstoredintheEEPROMofthesystemboard.
TheelectronicstorageofthisinformationsimplifiestheproceduretocheckiftheECAhasbeenpreviously
appliedtoamachine.ThemachinedoesnotneedtobedisassembledtocheckfortheECAapplication.
TocheckwhatECAshavebeenpreviouslyappliedtothemachine,usetheECAInformationRead/Write
functionontheLENOVOThinkPadHardwareMaintenanceDisketteorMaintenanceKey.
1.InsertthelatestversionofLENOVOThinkPadHardwareMaintenanceDisketteorMaintenanceKey,
andthenrestartthecomputer.
2.Fromthemainmenu,select6.SetECAInformation.
3.ToreadtheECAinformation,select2.ReadECA/reworknumberfromEEPROMandfollowthe
instructionsonthescreen.Toreadtheboxbuilddate,select5.ReadboxbuilddatefromEEPROM,
andfollowtheinstructiononthescreen.
AfteranECAhasbeenappliedtothemachine,theEEPROMmustbeupdatedtoreflecttheECA's
application.UsethelatestversionofLENOVOThinkPadHardwareMaintenanceDisketteorMaintenance
KeytoupdatetheEEPROM.
Note:OnlytheECAnumberisstoredintheEEPROM.ThemachinetypeoftheECAisassumedtobethe
sameasthemachinetypeofthemachinethathadtheECAappliedtoit.
Chapter8.FRUreplacementnotices57
Page 64

1.InsertthelatestversionofLENOVOThinkPadHardwareMaintenanceDisketteorMaintenanceKey,
andthenrestartthecomputer.
2.Fromthemainmenu,select6.SetECAInformation.
3.TowritetheECAinformation,select1.WriteECA/reworknumberfromEEPROM,andfollowthe
instructionsonthescreen.T owritetheboxbuilddate,select4.WriteboxbuilddatefromEEPROM,
andfollowtheinstructiononthescreen.
Ifthesystemboardisbeingreplaced,trytoreadtheECAinformationfromtheoldsystemboardandtransfer
theinformationtothenewsystem.Ifthesystemboardisinoperable,thiswillnotbepossible.
58ThinkPadX260HardwareMaintenanceManual
Page 65

Chapter9.RemovingorreplacingaFRU
ThischapterprovidesinstructionsonhowtoremoveorreplaceaFRU.
CRUstatementforcustomers:
Youcanresolvesomeproblemswithyourproductwithareplacementpartyoucaninstallyourself,called
a“CustomerReplaceableUnit”or“CRU.”SomeCRUsaredesignatedasself-serviceCRUsandothers
aredesignatedasoptional-serviceCRUs.Installationofself-serviceCRUsisyourresponsibility.For
optional-serviceCRUs,youcaneitherinstalltheCRUyourselforyoucanrequestthataServiceProvider
installtheCRUaccordingtothewarrantyserviceforyourproduct.IfyouintendoninstallingtheCRU,
LenovowillshiptheCRUtoyou.CRUinformationandreplacementinstructionsareshippedwithyour
productandareavailablefromLenovoatanytimeuponrequest.YoucanfindalistofCRUsforyourproduct
inthisHardwareMaintenanceManual.Anelectronicversionofthismanualisavailablefordownloadingat
http://www.lenovo.com/support.Y oumightberequiredtoreturnthedefectiveCRU.Whenreturnisrequired:
(1)returninstructions,aprepaidshippinglabel,andacontainerwillbeincludedwiththereplacement
CRU;and(2)youmightbechargedforthereplacementCRUifLenovodoesnotreceivethedefective
partwithinthirty(30)daysofyourreceiptofthereplacementCRU.SeeyourLenovoLimitedWarranty
documentationforfulldetails.
Generalguidelines
WhenremovingorreplacingaFRU,besuretoobservethefollowinggeneralguidelines:
1.Donottrytoserviceanycomputerunlessyouhavebeentrainedandcertified.Anuntrainedpersonruns
theriskofdamagingparts.
2.BeforereplacinganyFRU,reviewChapter8“FRUreplacementnotices”onpage55.
3.BeginbyremovinganyFRUsthathavetoberemovedbeforereplacingthefailingFRU.AnysuchFRUs
arelistedatthebeginningofeachFRUreplacementsection.Removethemintheorderinwhichthey
arelisted.
4.FollowthecorrectsequenceinthestepsforremovingaFRU,asgiveninthedrawingsbythenumbers
insquarecallouts.
5.Whenturningascrew,turnitinthedirectionasgivenbythearrowinthedrawing.
6.WhenremovingaFRU,moveitinthedirectionasgivenbythearrowinthedrawing.
7.ToputthenewFRUinplace,reversetheremovalprocedureandfollowanynotesthatpertainto
replacement.
8.WhenreplacingaFRU,usethecorrectscrewsasshowninthereplacementprocedures.
DANGER
BeforeremovinganyFRU,turnoffthecomputer ,unplugallpowercordsfromelectricaloutlets,
removethebattery,andthendisconnectanyinterconnectingcables.
Attention:
•AfterreplacingaFRU,donotturnonthecomputeruntilyouhavemadesurethatallscrews,springs,and
othersmallpartsareinplaceandnonearelooseinsidethecomputer.Verifythisbyshakingthecomputer
gentlyandlisteningforrattlingsounds.Metallicpartsormetalflakescancauseelectricalshortcircuits.
•Thesystemboardissensitiveto,andcanbedamagedby,electrostaticdischarge(ESD).Beforetouching
it,establishpersonalgroundingbytouchingagroundpointwithonehandorbyusinganelectrostatic
dischargestrap.
©CopyrightLenovo2015
59
Page 66

Beforeservicingthecomputer
1
2
3
Carefullyreadthistopicbeforeservicingthecomputer.
Disablingthebuilt-inbattery
BeforereplacinganyFRU,ensurethatyouhavedisabledthebuilt-inbatterybydoingthefollowing:
1.Turnoffthecomputeranddisconnecttheacpoweradapterandallcablesfromthecomputer.
2.Turnonthecomputer.Whenthelogoscreenisdisplayed,pressF1continuouslytoentertheThinkPad
Setupprogram.
3.SelectConfig➙Power.ThePowersubmenuisdisplayed.
4.SelectDisablebuilt-inbattery.
5.ClickYesintheSetupWarningwindow,andthenthecomputerturnsoffautomatically.Waitthreeto
fiveminutestoletthecomputercool.
Thebatterywillbeautomaticallyenabledwhentheacpoweradapterisreconnectedtothecomputer.
Removingthemicro-SIM-cardtray
Beforeyoustarttheservicing,removeinstalledmicro-SIMcard(ordummymicro-SIMcard)andthe
micro-SIM-cardtrayfromthecomputer.
Afteryoufinishtheservicing,ensurethatyouinstallthemicro-SIM-cardtraywiththemicro-SIMcard
backintothecomputer.
60ThinkPadX260HardwareMaintenanceManual
Page 67

1010Removablebattery
2
1
1
4
3
2
Importantnoticeforreplacingaremovablebattery
Attention:Lenovohasnoresponsibilityfortheperformanceorsafetyofunauthorizedbatteries,and
providesnowarrantiesforfailuresordamagearisingoutoftheiruse.
TheLenovoSolutionCenterprogramprovidesanautomaticbatterydiagnostictestthatdeterminesifthe
batteryisdefective.AbatteryFRUshouldnotbereplacedunlessthisdiagnostictestshowsthatthebattery
isdefective.Theonlyexceptiontothisisifthebatteryisphysicallydamagedoracustomerisreportinga
possiblesafetyissue.
IftheLenovoSolutionCenterprogramisnotinstalledonthecomputer,thecustomershoulddownloadand
installtheprogramtodiagnosethebattery,beforegettinganon-physicallydamagedbatteryreplaced.Note
thatthereplacementofaphysicallydamagedbatteryisnotcoveredbythewarranty.
Removalstepsoftheremovablebattery
DANGER
Useonlytheauthorizedbatteryspecifiedforyourcomputer.Anyotherbatterycouldigniteor
explode.
Chapter9.RemovingorreplacingaFRU61
Page 68

1020Basecoverassembly
1
3
2
2
2
2
2
2
2
2
2
2
2
2
2
2
2
2
Foraccess,removethisFRU:
•“1010Removablebattery”onpage61
Note:Dependingonthemodel,yourcomputermightlookslightlydifferentfromtheillustrationsinthistopic.
Removalstepsofthebasecoverassembly
Applyinglabelstothebasecoverassembly
ThenewbasecoverFRUisshippedwithakitcontaininglabelsofseveralkinds.Applythoselabelswhen
youreplacethebasecover.Forthelabelsthatarenotshippedwiththenewbasecover,peelthemfromthe
oldbasecover,andadherethemtothenewone.
62ThinkPadX260HardwareMaintenanceManual
Page 69

Thefollowingillustrationshowsthelocationofeachlabel.
1
3 4
2
13
14
15
5
6789101112
1GEOlabel2S/Nlabel
3T aiwanWWANlabel4Assettag
5GenuineMicrosoftlabel(forWindows10)6CertificateofAuthentication(COA)label(forWindows
7)
7Indonesiapostellabel
9Indonesiaratinglabel10IsraelHomologationlabel
11BrazilAnatellabel
13BISlabel14ChinaGEOlabel
15IMEIlabel
8MCMClabelforMalaysia
12ICASAlabel
1030Built-inbattery
Foraccess,removetheseFRUsinorder:
•“1010Removablebattery”onpage61
•“1020Basecoverassembly”onpage62
Importantnoticesforreplacingabattery
Attention:Lenovohasnoresponsibilityfortheperformanceorsafetyofunauthorizedbatteries,and
providesnowarrantiesforfailuresordamagearisingoutoftheiruse.
TheLenovoSolutionCenterprogramprovidesanautomaticbatterydiagnostictestthatdeterminesifthe
batteryisdefective.AbatteryFRUshouldnotbereplacedunlessthisdiagnostictestshowsthatthebattery
isdefective.Theonlyexceptiontothisisifthebatteryisphysicallydamagedoracustomerisreportinga
possiblesafetyissue.
IftheLenovoSolutionCenterprogramisnotinstalledonthecomputer,thecustomershoulddownloadand
installtheprogramtodiagnosethebattery,beforegettinganon-physicallydamagedbatteryreplaced.Note
thatthereplacementofaphysicallydamagedbatteryisnotcoveredbythewarranty.
Chapter9.RemovingorreplacingaFRU63
Page 70

DANGER
2
1
1
1
3
Useonlytheauthorizedbatteryspecifiedforyourcomputer.Anyotherbatterycouldigniteor
explode.
Removalstepsofthebuilt-inbattery
Todisconnectthebatteryconnectorinstep2,useonefingertoslightlyholdtheconnector.Thenusethe
otherhandtoholdthebatterycableandpullitouthorizontally.
Attention:Whenconnectingthebatterycable,alignthebatterycablewiththebatteryconnectorfirst.
Theninsertthebatterycablestraightintothebatteryconnectorhorizontally.Otherwise,thebatterycable
mightbedamaged.
StepScrew(quantity)Color
1
1040Memorymodule
Foraccess,removetheseFRUsinorder:
M2×3mm,small-head,nylon-coated(3)Silver
Torque
0.181Nm
(1.85kgf-cm)
•“1010Removablebattery”onpage61
•“1020Basecoverassembly”onpage62
64ThinkPadX260HardwareMaintenanceManual
Page 71

Removalstepsofthememorymodule
2
1
1
Wheninstalling:
Insertthenotchedendofthememorymoduleintothememoryslotatanangleofabout20degrees.Press
thememorymoduleinfirmly,andpivotitdownwarduntilitsnapsintoplace.Ensurethatthememory
moduleisfirmlyseatedintheslotanddoesnotmoveeasily.
1050Internalstoragedriveanddrivecable
Foraccess,removetheseFRUsinorder:
•“1010Removablebattery”onpage61
•“1020Basecoverassembly”onpage62
Attention:
•Donotdroptheinternalstoragedriveorapplyanyphysicalshocktoit.Theinternalstoragedriveis
sensitivetophysicalshock.Improperhandlingcancausedamageandpermanentlossofdata.
•Beforeremovingtheinternalstoragedrive,havetheusermakeabackupcopyofalltheinformation
onitifpossible.
•Neverremovetheinternalstoragedrivewhilethesystemisoperatingorinsuspendmode.
Chapter9.RemovingorreplacingaFRU65
Page 72

Removalstepsoftheinternalstoragedriveanddrivecable
1
2
1
3
4
StepScrew(quantity)Color
1
2
M2×4mm,flat-head,nylon-coated(1)
M2×2.7mm,flat-head,nylon-coated(1)
Torque
Black0.181Nm
(1.85kgf-cm)
Black0.181Nm
(1.85kgf-cm)
66ThinkPadX260HardwareMaintenanceManual
Page 73

5
6
7
7
7
7
Wheninstalling:
Ensurethattheinternalstoragedriveisfirmlyattached.
1060Wireless-LANcard
Foraccess,removetheseFRUsinorder:
•“1010Removablebattery”onpage61
•“1020Basecoverassembly”onpage62
Chapter9.RemovingorreplacingaFRU67
Page 74

Removalstepsofthewireless-LANcard
2
1
1
1
3
Instep1,disconnecttheconnectorsbyusingtheremovaltoolfortheantennaRFconnectororpickoffthe
connectorsinthedirectionasshownbyusingyourfingers.
StepScrew(quantity)Color
2
Wheninstalling:
Plugthegraycableintothemainconnectorandtheblackcableintotheauxiliaryconnectoronthecard.
M2×2.7mm,flat-head,nylon-coated(1)
Black0.181Nm
Torque
(1.85kgf-cm)
1070Wireless-WANcard(availableonsomemodels)
Foraccess,removetheseFRUsinorder:
•“1010Removablebattery”onpage61
•“1020Basecoverassembly”onpage62
68ThinkPadX260HardwareMaintenanceManual
Page 75

Removalstepsofthewireless-WANcard
2
1
1
1
1
3
StepScrew(quantity)Color
2
M2×2.7mm,flat-head,nylon-coated(1)
1080Thermalfanassembly
Foraccess,removetheseFRUsinorder:
•“1010Removablebattery”onpage61
•“1020Basecoverassembly”onpage62
Torque
Black0.181Nm
(1.85kgf-cm)
Chapter9.RemovingorreplacingaFRU69
Page 76

Removalstepsofthethermalfanassembly
2
3
1b
1c
1a
1d
4
5
1.Loosenthescrews1inascendingalphabeticalorder(atod)asillustrated.
2.Releasethecablesfromthecableholderonthethermalfanassembly.
3.Removethethermalfanassembly.
70ThinkPadX260HardwareMaintenanceManual
Page 77

Wheninstalling:
a
•Alwayswearfingerstallswhenhandlingthethermalfanassembly.Donottouchorholdanypartofthe
thermalfanassemblywithbarefingers.
•Beforeyouattachthethermalfanassemblytothecomputer,applythermalgrease,atanamountof0.2
grams,onthepartmarked
ainthefollowingillustration.Eithertoomuchortoolessapplicationofgrease
cancauseathermalproblemduetoimperfectcontactwithacomponent.Ifathermalfanassemblyneeds
tobereused,removeandreapplythermalgrease.
•Donottouchthethermalgrease.
•Donotpress,touch,orrotatethefanimpeller.
•Donottouchthefaninlethole.
•Donottwistorpullthecableofthethermalfanassembly.
•Donotapplypressureonthetopandbottomcoversofthethermalfanassembly.
•Donotpresstheheatpipe.Holdbothsidesoftheheatpipeifyouneedtotakethethermalfanassembly.
•Donotshakeordropthethermalfanassembly.
•Ensurethatthefanconnectorisattachedfirmly.
•Replacethethermalfanassemblyifyouobservethefollowing:
–Thecoverofthethermalfanassemblyisdeformedordamaged.
–Thereisabnormalnoiseduringrotation.
1090dc-incableassembly
Foraccess,removetheseFRUsinorder:
•“1010Removablebattery”onpage61
•“1020Basecoverassembly”onpage62
Chapter9.RemovingorreplacingaFRU71
Page 78

Removalstepsofthedc-incableassembly
2
3
1
4
StepScrew(quantity)Color
2
M2×4mm,flat-head,nylon-coated(1)
1100Systemboard
Importantnoticesforhandlingthesystemboard
Torque
Black0.181Nm
(1.85kgf-cm)
Whenhandlingthesystemboard,observethefollowing:
•Thesystemboardhasanaccelerometer,whichcanbebrokenwhenseveralthousandsofG-forces
areapplied.
Note:Droppingasystemboardfromaheightofaslittleas15cm(6inches)sothatitfallsflatonahard
benchcansubjecttheaccelerometertoasmuchas6000G'sofshock.
•Becarefulnottodropthesystemboardonabenchtopthathasahardsurface,suchasmetal,wood,or
composite.
•Avoidroughhandlingofanykind.
•Ateverypointintheprocess,besurenottodroporstackthesystemboard.
72ThinkPadX260HardwareMaintenanceManual
Page 79

•Ifyouputasystemboarddown,besuretoputitonlyonapaddedsurfacesuchasanESDmatora
1
1
2
corrugatedconductivematerial.
Foraccess,removetheseFRUsinorder:
•“1010Removablebattery”onpage61
•“1020Basecoverassembly”onpage62
•“1030Built-inbattery”onpage63
•“1040Memorymodule”onpage64
•“1050Internalstoragedriveanddrivecable”onpage65
•“1060Wireless-LANcard”onpage67
•“1070Wireless-WANcard(availableonsomemodels)”onpage68
•“1080Thermalfanassembly”onpage69
Removalstepsofthesystemboard
StepScrew(quantity)Color
1
M2×2.3mm,bighead,nylon-coated(2)
Torque
Black0.181Nm
(1.85kgf-cm)
Chapter9.RemovingorreplacingaFRU73
Page 80

5
4
3
6
8
9
10
7
11
12
13
13
14
14
14
14
13
13
13
15
74ThinkPadX260HardwareMaintenanceManual
Page 81

17
16
16
18
StepScrew(quantity)Color
a
16
17
M2×4mm,flat-head,nylon-coated(2)
M2×3mm,flat-head,nylon-coated(1)
Black0.181Nm
Black0.181Nm
Torque
(1.85kgf-cm)
(1.85kgf-cm)
Wheninstalling:
Ensurethattheconnectorsareattachedfirmly.
Thefollowingcomponentsolderedonthetopsideofthesystemboardisextremelysensitive.Whenyou
servicethesystemboard,avoidanykindofroughhandling.
aMicroprocessor
1110Coin-cellbattery
Foraccess,removetheseFRUsinorder:
•“1010Removablebattery”onpage61
•“1020Basecoverassembly”onpage62
•“1030Built-inbattery”onpage63
•“1040Memorymodule”onpage64
•“1050Internalstoragedriveanddrivecable”onpage65
•“1060Wireless-LANcard”onpage67
•“1070Wireless-WANcard(availableonsomemodels)”onpage68
•“1080Thermalfanassembly”onpage69
•“1100Systemboard”onpage72
Chapter9.RemovingorreplacingaFRU75
Page 82

DANGER
1
Useonlytheauthorizedbatteryspecifiedforyourcomputer.Anyotherbatterycouldigniteor
explode.
Removalstepsofthecoin-cellbattery
Wheninstalling:
Ensurethatthecoin-cellbatteryconnectorisattachedfirmly.
1120Speakerassembly
Foraccess,removetheseFRUsinorder:
•“1010Removablebattery”onpage61
•“1020Basecoverassembly”onpage62
•“1030Built-inbattery”onpage63
•“1040Memorymodule”onpage64
•“1050Internalstoragedriveanddrivecable”onpage65
•“1060Wireless-LANcard”onpage67
•“1070Wireless-WANcard(availableonsomemodels)”onpage68
•“1080Thermalfanassembly”onpage69
•“1100Systemboard”onpage72
76ThinkPadX260HardwareMaintenanceManual
Page 83

Removalstepsofthespeakerassembly
1
1
2
2
StepScrew(quantity)Color
1
M2×2.3mm,bighead,nylon-coated(2)
Wheninstalling:
Ensurethattheconnectorisattachedfirmly.
1130Smart-cardreaderassembly(availableonsomemodels)
Foraccess,removetheseFRUsinorder:
•“1010Removablebattery”onpage61
•“1020Basecoverassembly”onpage62
•“1030Built-inbattery”onpage63
•“1040Memorymodule”onpage64
•“1050Internalstoragedriveanddrivecable”onpage65
•“1060Wireless-LANcard”onpage67
•“1070Wireless-WANcard(availableonsomemodels)”onpage68
•“1080Thermalfanassembly”onpage69
•“1100Systemboard”onpage72
•“1120Speakerassembly”onpage76
Torque
Black0.181Nm
(1.85kgf-cm)
Chapter9.RemovingorreplacingaFRU77
Page 84

Removalstepsofthesmart-cardreaderassembly
2
3
1
1
4
5
StepScrew(quantity)Color
1
M2×3mm,flat-head,nylon-coated(2)Silver
Torque
0.181Nm
(1.85kgf-cm)
Wheninstalling:
Ensurethattheconnectorisattachedfirmly.
78ThinkPadX260HardwareMaintenanceManual
Page 85

1140LCDunit
1
2
3
4
4
5
5
5
6
7
8
9
Foraccess,removetheseFRUsinorder:
•“1010Removablebattery”onpage61
•“1020Basecoverassembly”onpage62
RemovalstepsoftheLCDunit
Chapter9.RemovingorreplacingaFRU79
Page 86

10
10
10
10
10
10
StepScrew(quantity)Color
7
11
7
12
13
13
10
M2×4mm,flat-head,nylon-coated(6)Silver
Torque
0.181Nm
(1.85kgf-cm)
80ThinkPadX260HardwareMaintenanceManual
Page 87

7
14
Wheninstalling:
•Ensurethattheconnectorsareattachedfirmly.
•Ensurethatyoucorrectlyrouteandsecurethecables.
Attention:Whenyouroutethecables,ensurethattheyarenotsubjecttoanytension.T ensioncouldcause
thecablestobedamagedbythecableguides,orawiretobebroken.
1150Power-buttoncard
Foraccess,removetheseFRUsinorder:
•“1010Removablebattery”onpage61
•“1020Basecoverassembly”onpage62
•“1030Built-inbattery”onpage63
•“1040Memorymodule”onpage64
•“1050Internalstoragedriveanddrivecable”onpage65
•“1060Wireless-LANcard”onpage67
•“1070Wireless-WANcard(availableonsomemodels)”onpage68
•“1080Thermalfanassembly”onpage69
•“1100Systemboard”onpage72
Chapter9.RemovingorreplacingaFRU81
Page 88

Removalstepsofthepower-buttoncard
1
2
3
1
2
4
StepScrew(quantity)Color
1
2
M2.5×4mm,flat-head,nylon-coated(2)
M2×2.7mm,flat-head,nylon-coated(2)
Wheninstalling:
Ensurethattheconnectorisattachedfirmly.
Torque
Black0.181Nm
(1.85kgf-cm)
Black0.181Nm
(1.85kgf-cm)
1160Keyboardassembly
Foraccess,removetheseFRUsinorder:
•“1010Removablebattery”onpage61
•“1020Basecoverassembly”onpage62
•“1030Built-inbattery”onpage63
•“1040Memorymodule”onpage64
•“1050Internalstoragedriveanddrivecable”onpage65
•“1060Wireless-LANcard”onpage67
•“1070Wireless-WANcard(availableonsomemodels)”onpage68
•“1080Thermalfanassembly”onpage69
•“1100Systemboard”onpage72
•“1110Coin-cellbattery”onpage75
82ThinkPadX260HardwareMaintenanceManual
Page 89

•“1120Speakerassembly”onpage76
1
1
1
2
1
1
6
5
4
3
3
7
•“1140LCDunit”onpage79
Removalstepsofthekeyboardassembly
StepScrew(quantity)Color
1
M2×4mm,flat-head,nylon-coated(5)
Torque
Black0.181Nm
(1.85kgf-cm)
Chapter9.RemovingorreplacingaFRU83
Page 90

9
9
8
8
8
8
10
StepScrew(quantity)Color
1
1
1
1
1
1
1
1
8
9
M2×2.7mm,flat-head,nylon-coated(4)
M2×3mm,flat-head,nylon-coated(2)
2010LCDbezel
Foraccess,removetheseFRUsinorder:
•“1010Removablebattery”onpage61
•“1020Basecoverassembly”onpage62
•“1140LCDunit”onpage79
RemovalstepsoftheLCDbezel
Torque
Black0.181Nm
(1.85kgf-cm)
Black0.181Nm
(1.85kgf-cm)
2020LCDhinges,LCDpanel,andLCDcable
Foraccess,removetheseFRUsinorder:
84ThinkPadX260HardwareMaintenanceManual
Page 91

•“1010Removablebattery”onpage61
1
1
1
1
2
2
•“1020Basecoverassembly”onpage62
•“1140LCDunit”onpage79
•“2010LCDbezel”onpage84
RemovalstepsoftheLCDhinges
StepScrew(quantity)Color
1
M2.5×2.2mm,big-head,nylon-coated(4)
Torque
Black0.181Nm
(1.85kgf-cm)
Chapter9.RemovingorreplacingaFRU85
Page 92

RemovalstepsoftheLCDpanelandLCDcable
1
3
5
4
0
2
Wheninstalling:EnsurethattheLCDconnectorisattachedfirmly.
2030Camera/microphonemoduleandcameracable(availableonsome models)
Foraccess,removetheseFRUsinorder:
•“1010Removablebattery”onpage61
•“1020Basecoverassembly”onpage62
•“1140LCDunit”onpage79
•“2010LCDbezel”onpage84
•“2020LCDhinges,LCDpanel,andLCDcable”onpage84
86ThinkPadX260HardwareMaintenanceManual
Page 93

Removalstepsofthecamera/microphonemoduleandcameracable
1
2
Chapter9.RemovingorreplacingaFRU87
Page 94

3
3
4
4
4
4
5
5
2040Wireless-LAN/Wireless-WANantennaassemblyandLCDrear-cover assembly
Foraccess,removetheseFRUsinorder:
•“1010Removablebattery”onpage61
•“1020Basecoverassembly”onpage62
•“1140LCDunit”onpage79
•“2010LCDbezel”onpage84
•“2020LCDhinges,LCDpanel,andLCDcable”onpage84
•“2030Camera/microphonemoduleandcameracable(availableonsomemodels)”onpage86
88ThinkPadX260HardwareMaintenanceManual
Page 95

Removalstepsofthewireless-LAN/Wireless-WANantennaassembly
1
1
1
1
2
2
2
2
2
2
2
2
3
3
Chapter9.RemovingorreplacingaFRU89
Page 96

Cablerouting:
b c da
Whenyouinstalltheantennaassemblyandcameracable,routethecameracableinthecableholder
andtheantennacableoutsidethecableholder.
Antennalocations:
aWireless-LANauxiliaryantenna(black)bWireless-WANauxiliaryantenna(blue,availableon
somemodels)
cWireless-WANmainantenna(orange,availableon
somemodels)
dWireless-LANmainantenna(gray)
90ThinkPadX260HardwareMaintenanceManual
Page 97

AppendixA.Notices
Lenovomaynotoffertheproducts,services,orfeaturesdiscussedinthisdocumentinallcountries.Consult
yourlocalLenovorepresentativeforinformationontheproductsandservicescurrentlyavailableinyour
area.AnyreferencetoaLenovoproduct,program,orserviceisnotintendedtostateorimplythatonlythat
Lenovoproduct,program,orservicemaybeused.Anyfunctionallyequivalentproduct,program,orservice
thatdoesnotinfringeanyLenovointellectualpropertyrightmaybeusedinstead.However,itistheuser’s
responsibilitytoevaluateandverifytheoperationofanyotherproduct,program,orservice.
Lenovomayhavepatentsorpendingpatentapplicationscoveringsubjectmatterdescribedinthis
document.Thefurnishingofthisdocumentdoesnotgiveyouanylicensetothesepatents.Y oucansend
licenseinquiries,inwriting,to:
Lenovo(UnitedStates),Inc.
1009ThinkPlace-BuildingOne
Morrisville,NC27560
U.S.A.
Attention:LenovoDirectorofLicensing
LENOVOPROVIDESTHISPUBLICA TION“ ASIS”WITHOUTWARRANTYOFANYKIND,EITHEREXPRESS
ORIMPLIED,INCLUDING,BUTNOTLIMITEDTO,THEIMPLIEDWARRANTIESOFNON-INFRINGEMENT ,
MERCHANTABILITYORFITNESSFORAPARTICULARPURPOSE.Somejurisdictionsdonotallow
disclaimerofexpressorimpliedwarrantiesincertaintransactions,therefore,thisstatementmaynotapply
toyou.
Thisinformationcouldincludetechnicalinaccuraciesortypographicalerrors.Changesareperiodically
madetotheinformationherein;thesechangeswillbeincorporatedinneweditionsofthepublication.
Lenovomaymakeimprovementsand/orchangesintheproduct(s)and/ortheprogram(s)describedinthis
publicationatanytimewithoutnotice.
Theproductsdescribedinthisdocumentarenotintendedforuseinimplantationorotherlifesupport
applicationswheremalfunctionmayresultininjuryordeathtopersons.Theinformationcontainedinthis
documentdoesnotaffectorchangeLenovoproductspecificationsorwarranties.Nothinginthisdocument
shalloperateasanexpressorimpliedlicenseorindemnityundertheintellectualpropertyrightsofLenovo
orthirdparties.Allinformationcontainedinthisdocumentwasobtainedinspecificenvironmentsandis
presentedasanillustration.Theresultobtainedinotheroperatingenvironmentsmayvary.
Lenovomayuseordistributeanyoftheinformationyousupplyinanywayitbelievesappropriatewithout
incurringanyobligationtoyou.
Anyreferencesinthispublicationtonon-LenovoWebsitesareprovidedforconvenienceonlyanddonotin
anymannerserveasanendorsementofthoseWebsites.ThematerialsatthoseWebsitesarenotpartof
thematerialsforthisLenovoproduct,anduseofthoseWebsitesisatyourownrisk.
Anyperformancedatacontainedhereinwasdeterminedinacontrolledenvironment.Therefore,theresult
obtainedinotheroperatingenvironmentsmayvarysignificantly.Somemeasurementsmayhavebeen
madeondevelopment-levelsystemsandthereisnoguaranteethatthesemeasurementswillbethesame
ongenerallyavailablesystems.Furthermore,somemeasurementsmayhavebeenestimatedthrough
extrapolation.Actualresultsmayvary.Usersofthisdocumentshouldverifytheapplicabledatafortheir
specificenvironment.
©CopyrightLenovo2015
91
Page 98

Trademarks
ThefollowingtermsaretrademarksofLenovointheUnitedStates,othercountriesorboth:
Lenovo
Lenovologo
ThinkPad
ThinkPadlogo
TrackPoint
MiniDisplayPort(mDP)isaTrademarkoftheVideoElectronicsStandardsAssociation.
Microsoft,Windows,WindowsServer,andCortanaaretrademarksoftheMicrosoftgroupofcompanies.
Othercompany,product,orservicenamesmaybethetrademarksorservicemarksofothers.
92ThinkPadX260HardwareMaintenanceManual
Page 99

AppendixB.Abbreviationandacronymtable
Thefollowingtablelistssomeabbreviationsandacronymsthatmightbeusedinthismanual.
AbbreviationTerm
3G
BGABallGridArray
BIOSbasicinput/outputsystem
CMOS
COACertificateofAuthentication
CRC
CRT
CRU
CTOConfigureToOrder
EAIA
ECAEngineeringChangeAnnouncements
EEPROMElectricallyErasableProgrammableRead-OnlyMemory
EFI
EPO
ESD
EUEuropeanUnion
FCCFederalCommunicationsCommission
FRUFieldReplaceableUnit
GAVGeneralAnnounceVariant
GPU
HDDharddiskdrive
HDMI
ICs
ICCID
ISOInternationalStandardizationOrganization
LANlocalareanetwork
LCD
MAC
MTmachinetype
MTMmachinetypeandmodel
PC
PCHPlatformControllerHub
POST
RAMrandom-accessmemory
thirdgenerationofmobiletelecommunicationstechnology
complementarymetal-oxidesemiconductor
cyclicredundancycheck
cathoderaytube
customer-replaceableunit
EnhancedAssetInformationArea
ExtensibleFirmwareInterface
emergencypower-off
electrostaticdischarge
graphicsprocessingunit
high-definitionmultimediainterface
integratedcircuits
integratecircuitcardidentity
liquidcrystaldisplay
mediaaccesscontrol
personalcomputer
power-onself-test
©CopyrightLenovo2015
93
Page 100

AbbreviationTerm
RF
RFID
RIringindicator
RJregisteredjack
SATASerialAdvancedTechnologyAttachment
SIM
SVP
TFTs
UEFI
USBUniversalSerialBus
UUID
VGA
VRAMvideorandom-accessmemory
WANwideareanetwork
radiofrequency
radio-frequencyidentification
subscriberidentitymodule
supervisorpassword
thin-filmtransistors
UnifiedExtensibleFirmwareInterface
universallyuniqueidentifier
videographicsarray
94ThinkPadX260HardwareMaintenanceManual
 Loading...