

Lenovo ThinkPad P15, ThinkPad P17 Setup Guide [en, ar, bg, cs, da, de, el, es, fi, fr, he, hr, hu, id, it, ja, ko, nb, nl, pl, pt, pt, ro, ru, sh, sk, sl, sv, th, tr, uk, zc, zh]
Page 1
Ubuntu Linux Setup Guide
For Lenovo ThinkPad P15 and P17
***Official support of Debian 10.7 and later.
Page 2
2
Section 1 – BIOS Setup and Pre-Installation Steps
The first step before installing Linux is to make sure the system BIOS is setup correctly.
• Boot into BIOS by pressing the function F1 key at the “Lenovo” splash screen.
Page 3
3
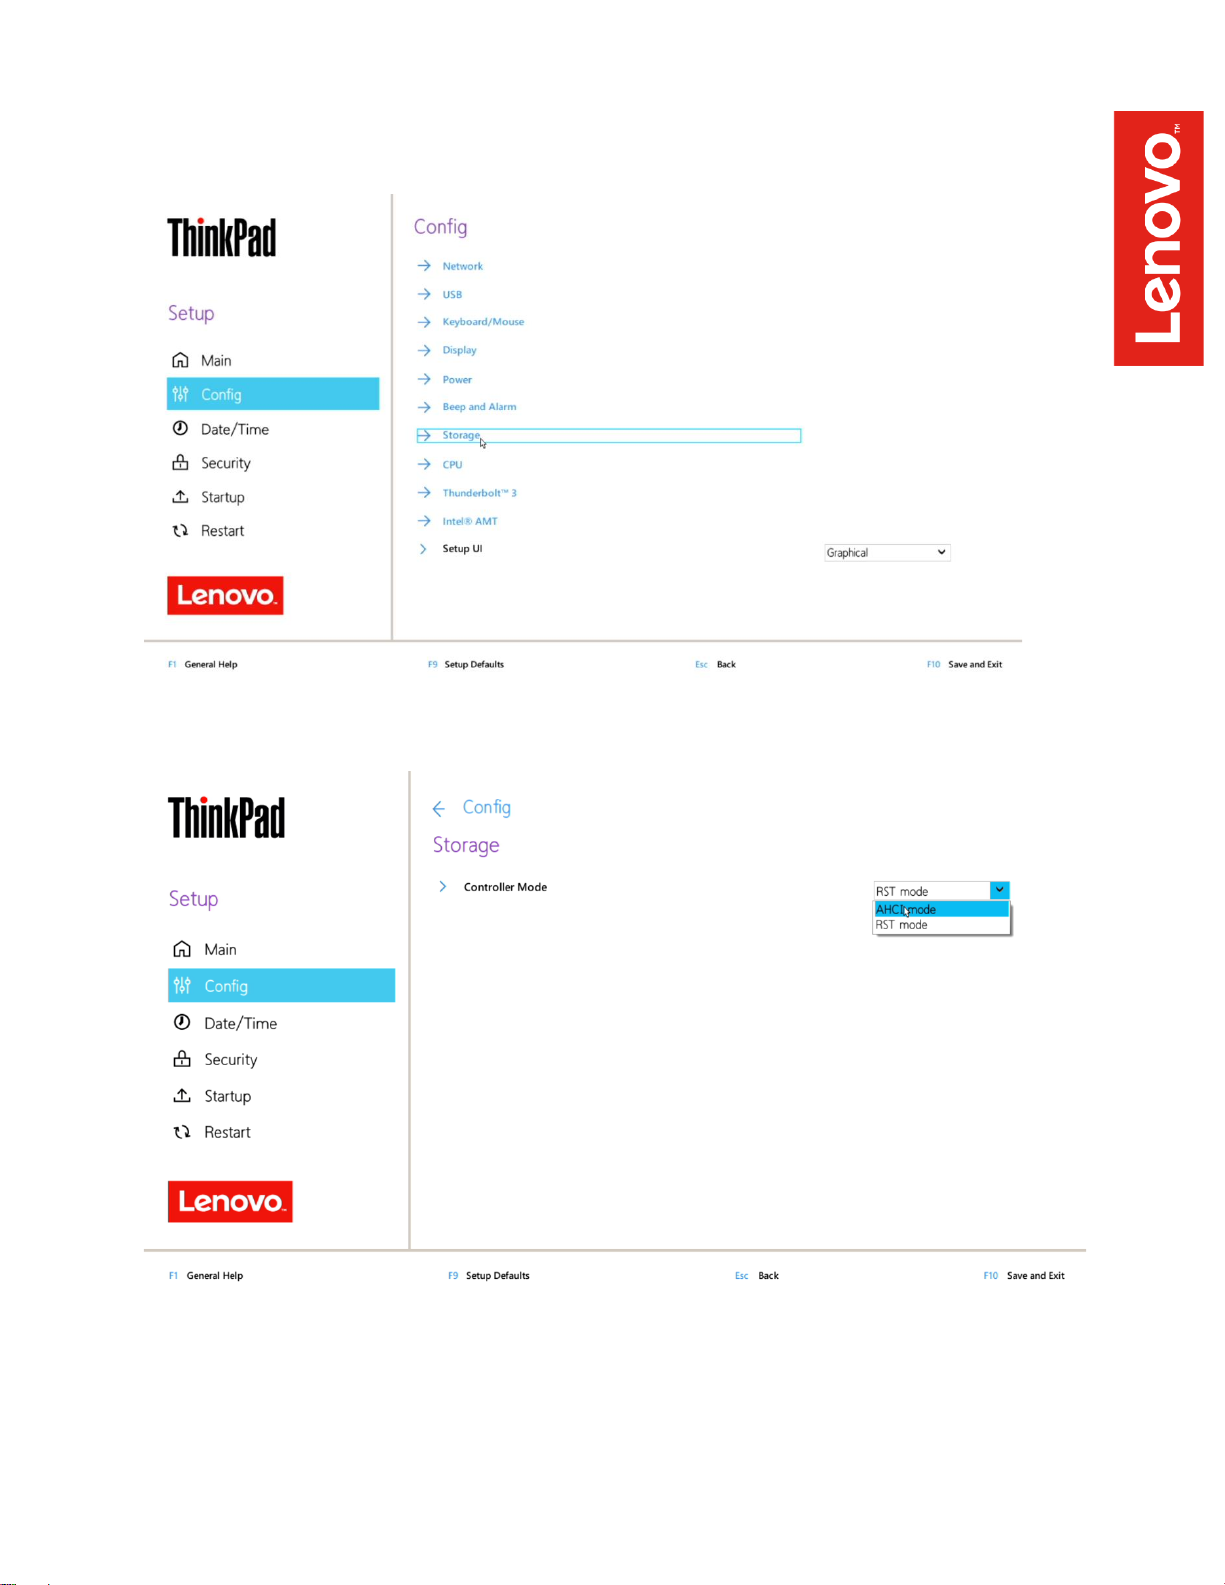
• Tab over to the “Config” menu tab
• Enter the “Storage” category and change the “Controller Mode” to “AHCI mode”
Page 4
4
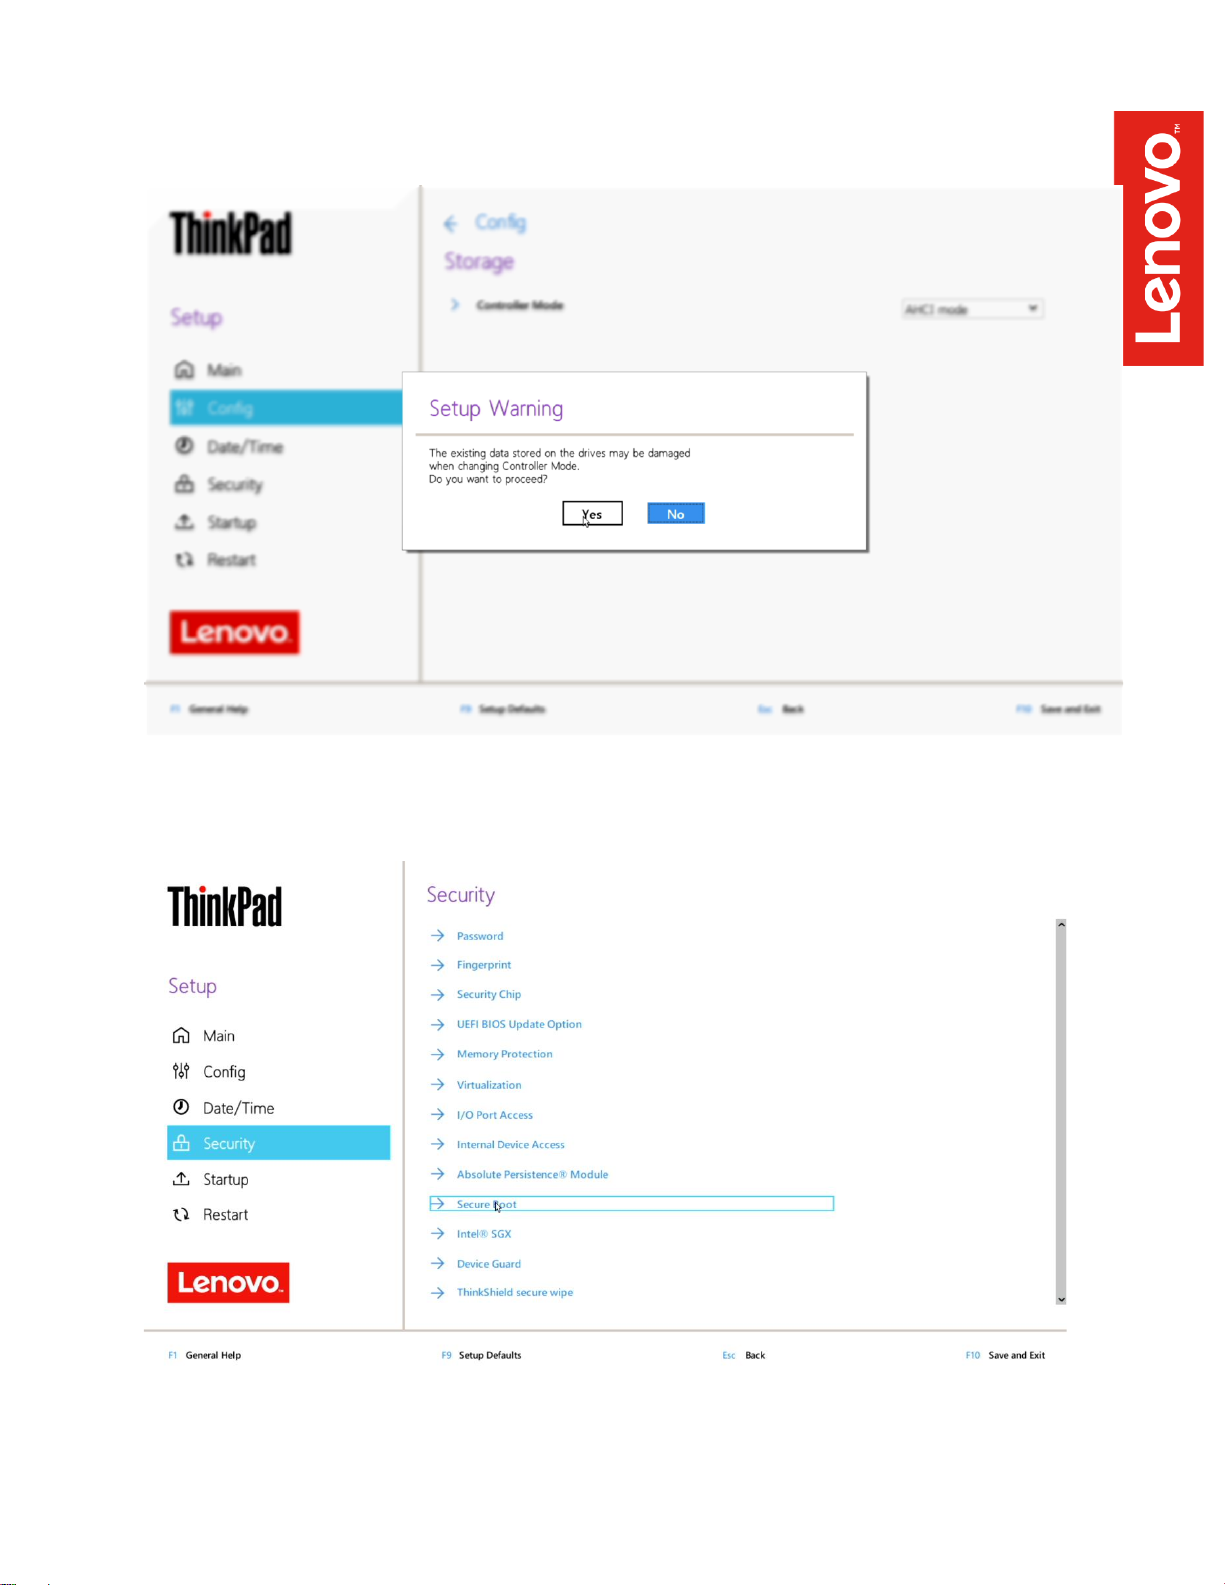
• Select “Yes” to proceed with changing the Controller Mode
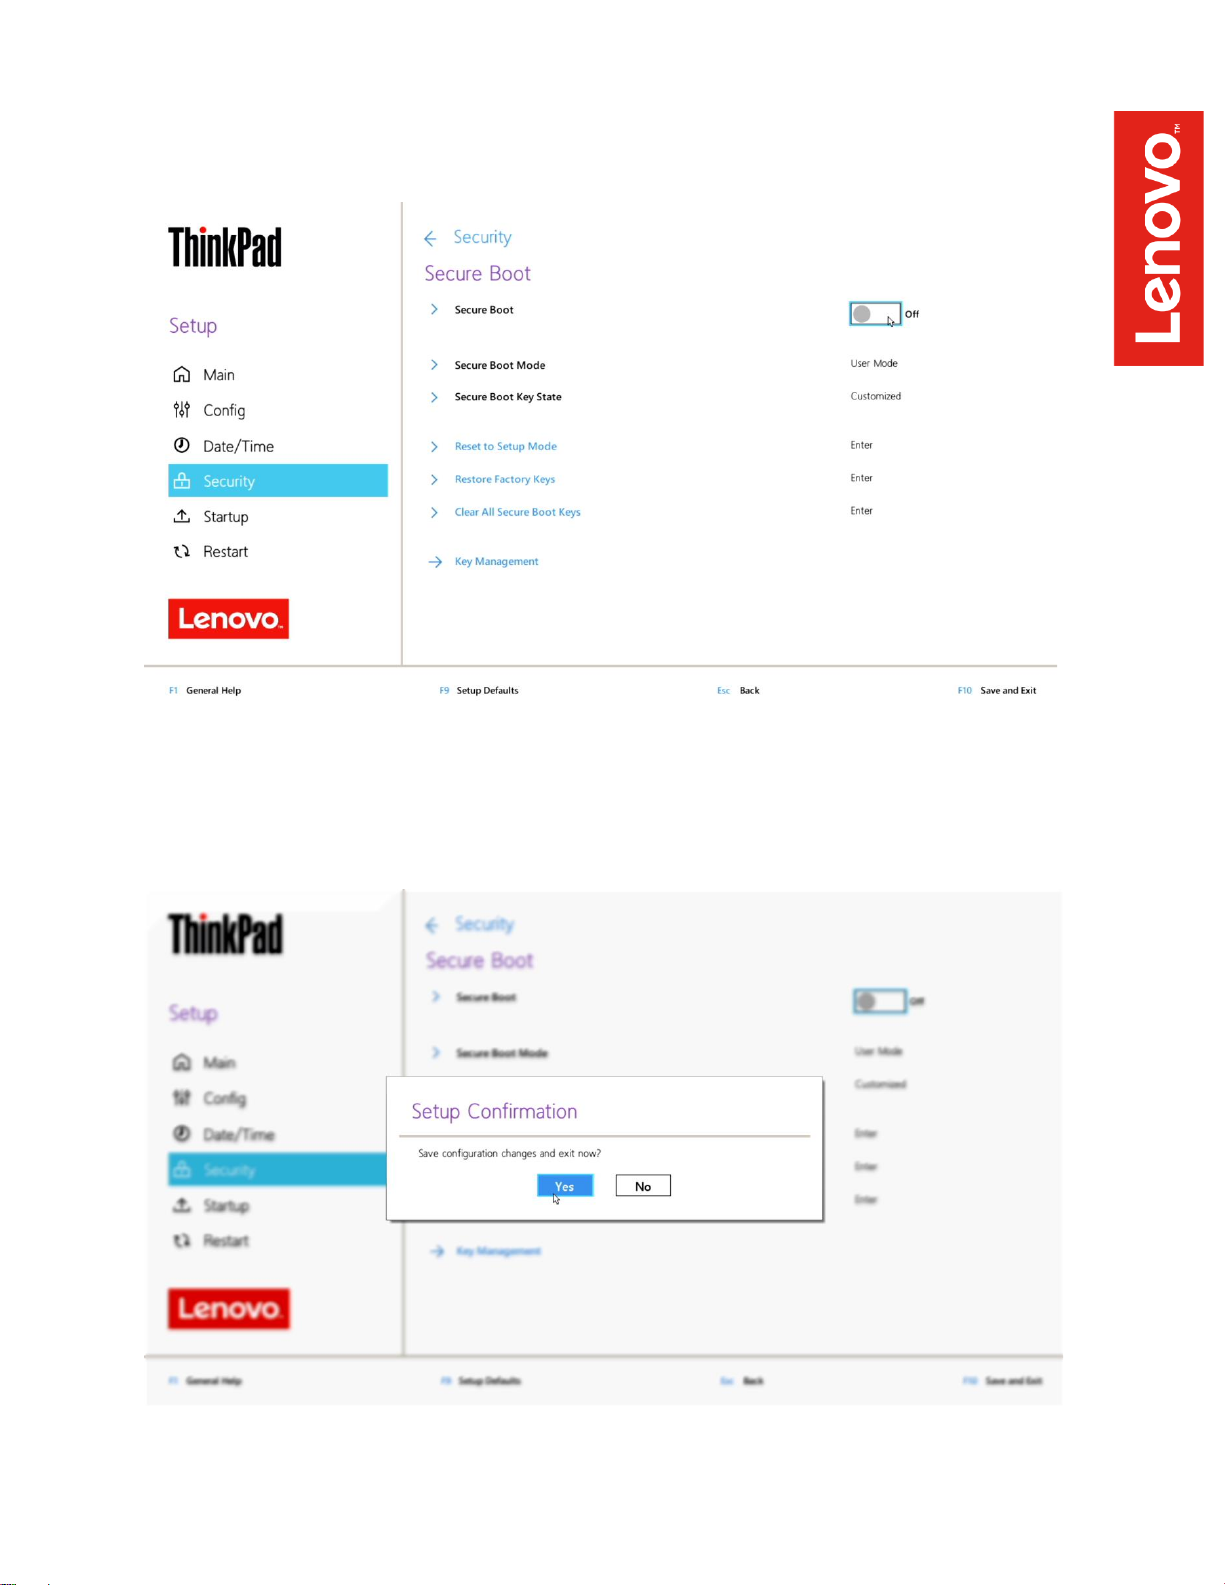
• Tab over to the “Security” menu tab and enter the “Secure Boot” category
Page 5
5
• Set “Secure Boot” to “Off”
• Press function F10 key to save and exit BIOS setup.
Page 6

6
Page 7
7
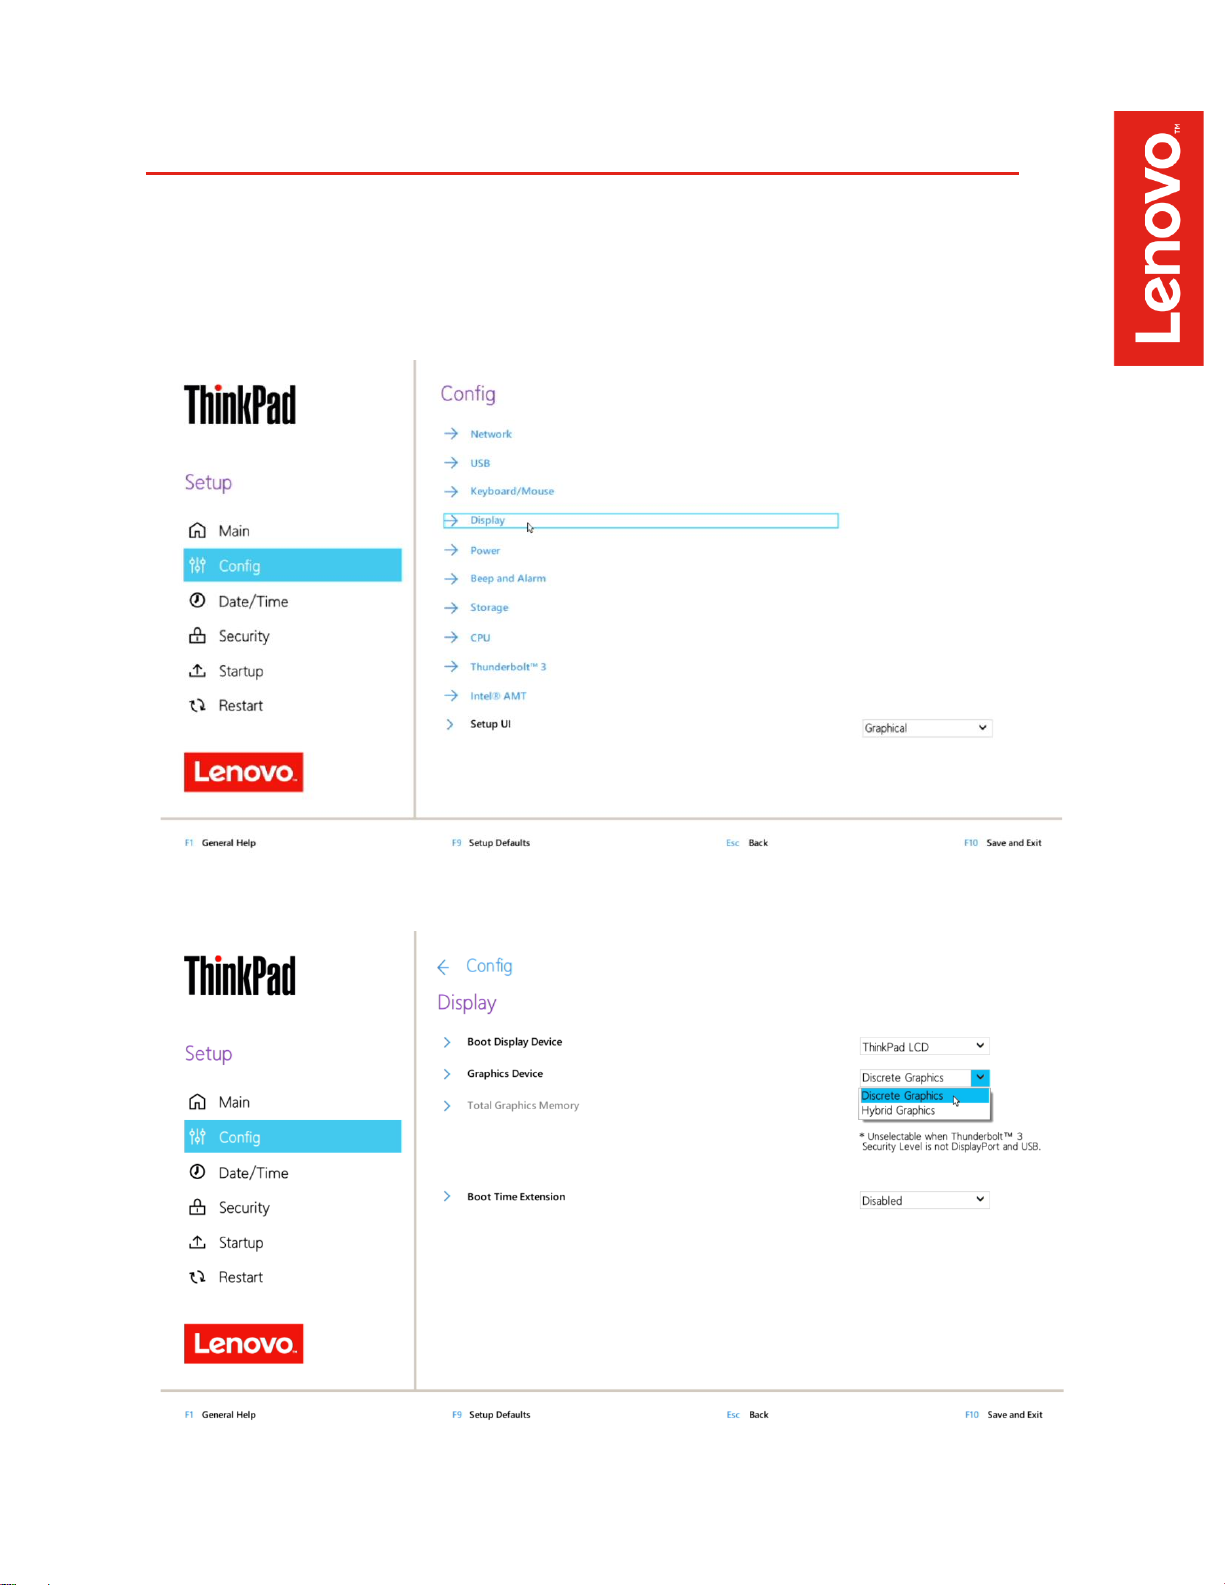
Section 2 – Discrete vs Hybrid Graphics
The Lenovo ThinkPad P15, P17, and P1 Gen 3 systems offer both Nvidia and Intel graphics.
“Discrete Graphics” must be used until the Nvidia graphics driver is updated in Section 5.
• Boot into BIOS and tab over to the “Config” menu option, then select the “Display” option.
• Ensure that the “Graphics Device” is set to “Discrete Graphics”.
Page 8
8
Section 3 – Installing Debian 10.7
Please refer to the following instructions and screenshots on how to install Debian 10.7 on the
Lenovo ThinkPad P15 and P17
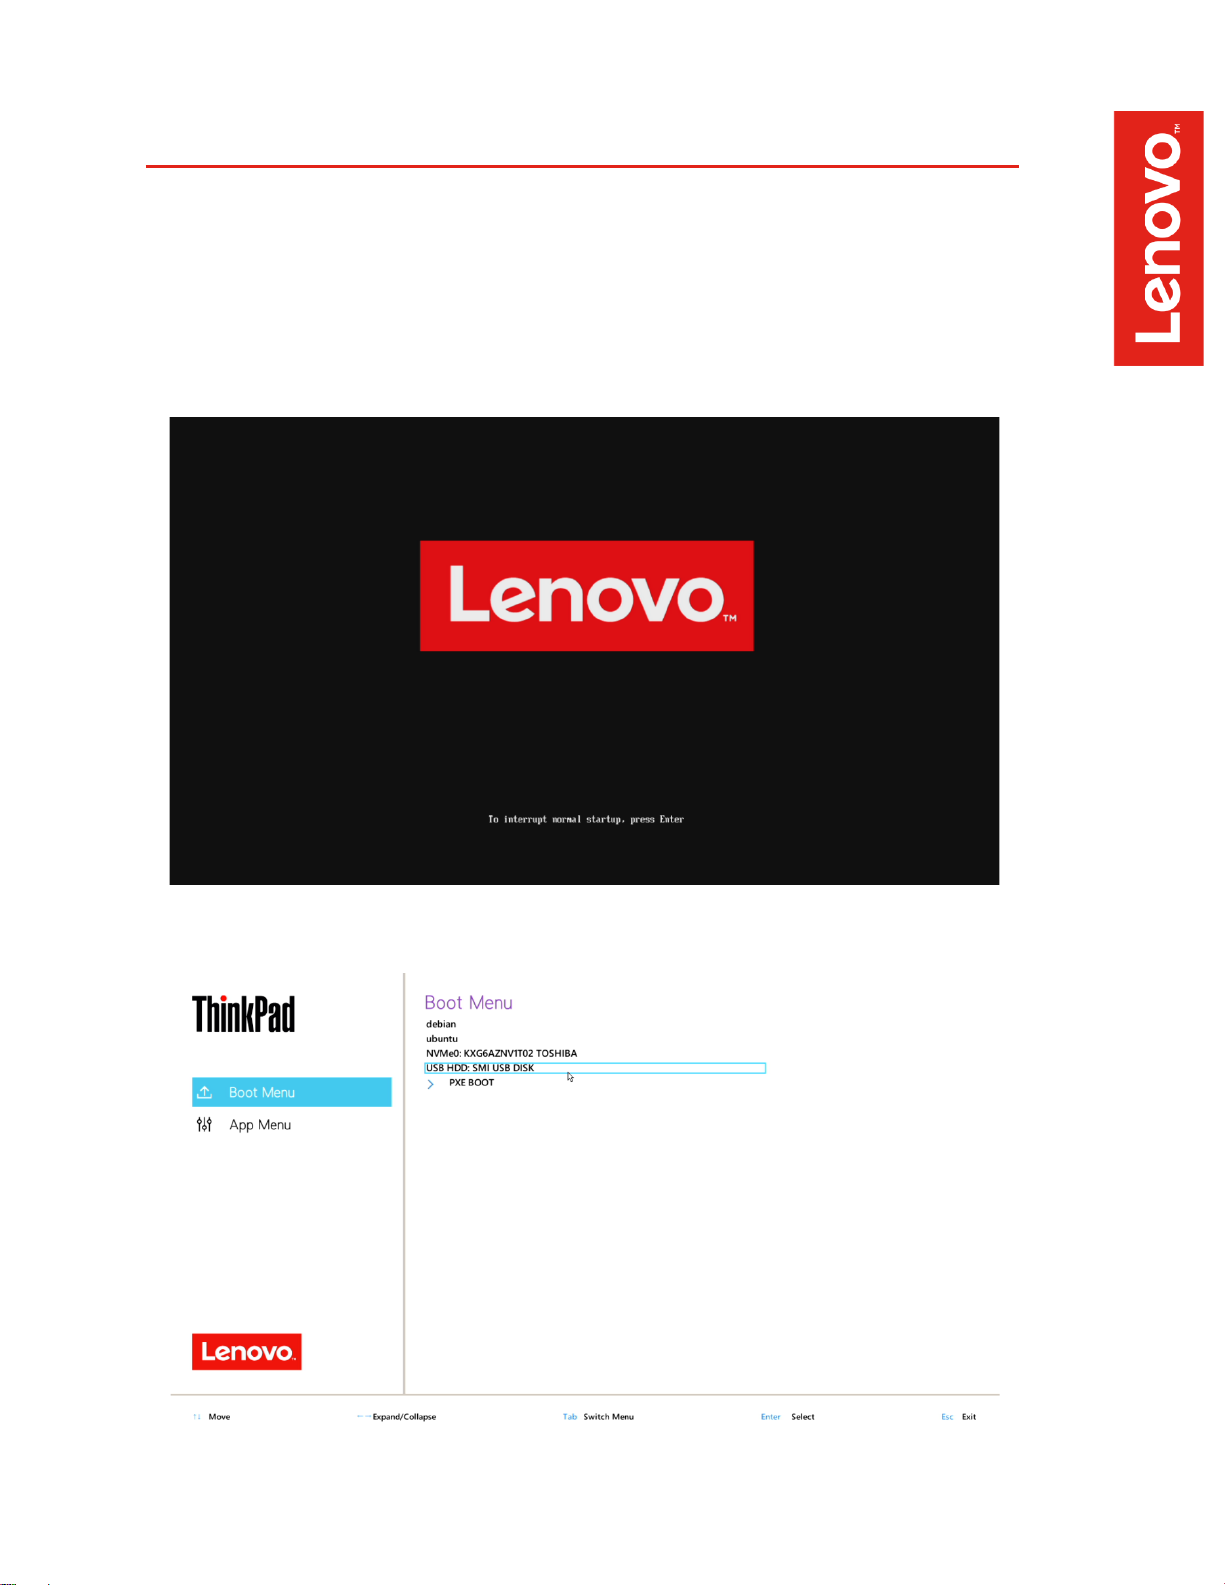
• Insert the Ubuntu 10.7 installation media.
• Power on the system and press the F12 function key whenever the following Lenovo
splash screen appears.
• Select the Linux bootable installation media from the F12 boot menu list.
Page 9
9
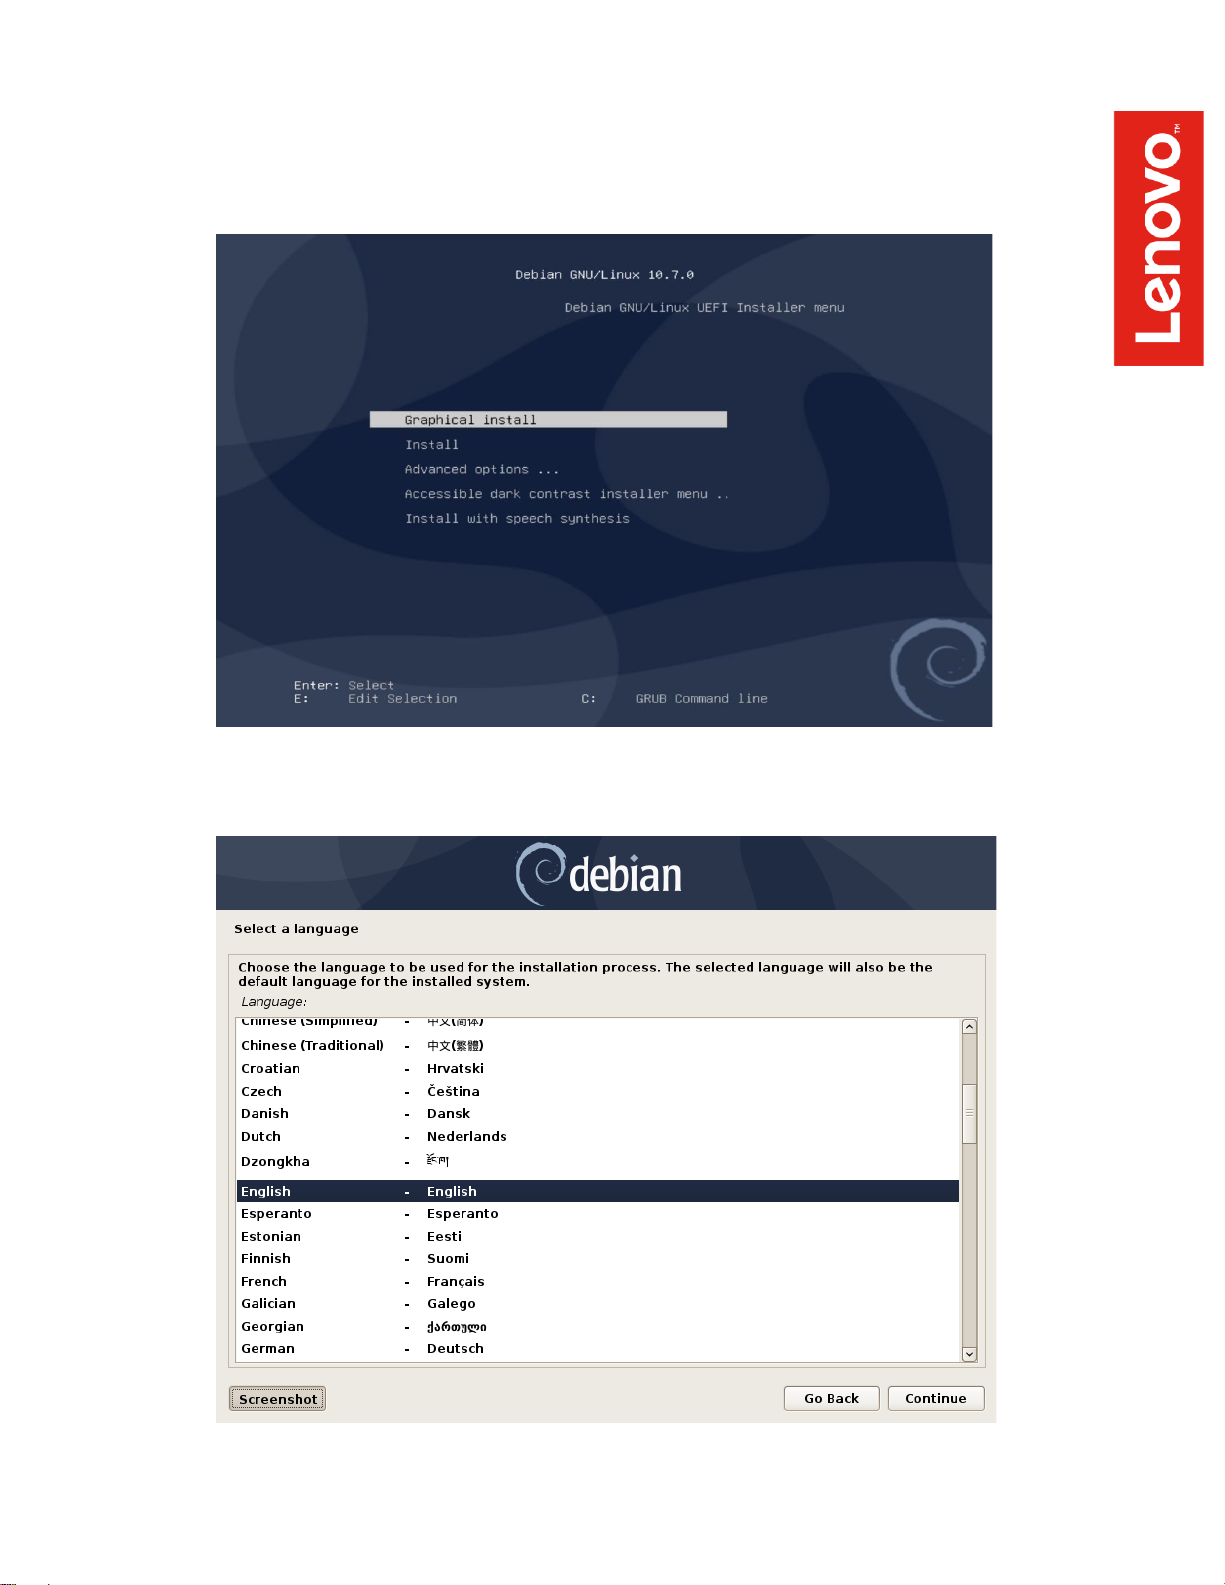
• Highlight “Graphical install” from the Debian boot menu and press ‘E’ to edit.
• Select the appropriate language and “Continue”.
Page 10

10
• Continue to personalize options.
Page 11

11
• Set the desired root password
• Set the desired user name.
Page 12

12
• Set the password for the user.
• Choose “Guided – use entire disk” partitioning method.
Page 13

13
• Select the storage device on which to install the operating system.
• Chose “All files in one partition…” as the partitioning scheme.
Page 14

14
• Choose to “Finish partitioning and write changes to disk”
• Next select “Yes” to write the changes to the disk.
Page 15

15
• Choose “No” when asked to use a network mirror.
• Choose desired software to install.
Page 16

16
• Choose the desired default display manager.
• Select “Yes” to install the GRUB boot loader to the master boot record.
Page 17

17
• Select the boot disk for boot loader installation.
Page 18

18
Section 4 – Update Debian and Prepare Environment
To access a Graphical User Interface, you will need to update your Debian kernel to the latest
version and install essential packages.
- Note that a wired network connection is required until the wireless network driver can be
installed during Step 6.
• After starting up the system, you should see a flashing cursor on the top left of the screen.
Press “ALT + F2” keys to log in.
• Edit the sources list to include necessary sources
# su
# sudo nano /etc/apt/sources.list
- Comment out the “deb cdrom…: source
deb http://deb.debian.org/debian buster-backports main
deb http://deb.debian.org/debian buster main contrib non-free
deb-src http://deb.debian.org/debian buster main contrib non-free
Page 19

19
• Update sources
# apt-get update
• Install the following packages
# apt-get install ‘build essential’
# apt-get install linux-headers*
# apt -t buster-backports install linux-image-amd64
- This will install kernel 5.9
Page 20

20
• Update the initramfs image then reboot the system
# sudo update-initramfs -u
# sudo reboot
• After rebooting, the graphical login screen should be visible
Page 21

21
Section 5 – Installing the Nvidia Graphics Driver
In order to get optimal performance out of the Nvidia GPU, it’s a good idea to install the Nvidia
graphics driver by following the steps below:
• Download the latest Nvidia graphics driver for your system’s appropriate Nvidia GPU.
https://www.nvidia.com/Download/Find.aspx?lang=en-us
• Use the terminal to blacklist the nouveau graphics driver
# su
# nano /etc/modprobe.d/blacklist-nouveau.conf
blacklist nouveau
options nouveau modeset=0
Page 22

22
• Update the initramfs image then reboot the system
# sudo update-initramfs -u
# sudo reboot
• On startup, only a flashing cursor in the top left of the screen should be visible. Access the
text login by pressing “CTRL + ALT + F4”
• Use the Telinit command to stop all x processes
# su
# sudo telinit 3
• Navigate to the file location of the Nvidia driver. If located on a USB driver, follow these
steps to access the drive:
# mkdir /media/usb
# sudo fdisk -l
- This will list connected storage devices
# mount /dev/sda1 /media/usb
Page 23

23
• Continue to change directory to the driver file location
# cd /media/usb
• Make the Nvidia installer an executable then run the executable
# chmod +x NVIDIA-Linux-x86-64-*
# ./NVIDIA-Linux-x86_64*
• Optional: Choose whether to install the 32-bit compatibility libraries.
Page 24

24
• Select to “Install and overwrite” libglvnd libraries.
• Nvidia driver installing progress bar may appear.
Page 25

25
• Select “Yes” to update the X-configuration file to use the Nvidia X driver.
• Select “OK” to acknowledge the driver installation is complete.
Page 26

26
• Execute the following command to verify the Nvidia driver is loaded.
# nvidia-smi
• Reboot the system.
# sudo reboot
Page 27

27
Section 6 – Wireless Network Driver
The wireless network driver is not native to the Debian 10 kernel, so users will not be able to
connect to wireless networks by default. The following steps can be followed to install the Wi-Fi
driver on a ThinkPad P15 and P17.
• Download the AX201 Wi-Fi driver from the following link:
https://git.kernel.org/pub/scm/linux/kernel/git/firmware/linux-firmware.git/tree/iwlwifi-QuZ-a0-hrb0-55.ucode
• Using the terminal, copy the Wi-Fi driver from its location to the firmware library
# su
# cd <file location>
# cp iwlwifi-QuZ-a0-hr-b0-55.ucode /usr/lib/firmware
• Update the initramfs image
# sudo update-initramfs -u
• Reboot the system and ensure that wireless connections are now enabled
# sudo reboot
Page 28

28
Section 7 – Revision History
Version
Date
Authors
Changes/Updates
1.0
2/12/2021
Gregor Linzmeier
& Hady Asad
Initial launch release
 Loading...