

Page 1

Lenovo
Tab M8 (4th Gen) 2024
User Guide
TB301FU
TB301XU
Page 2

Contents
Welcome ............................................................................... 1
Basics ..................................................................................... 2
Set up and get started .................................................................................... 2
Prepare for setup ......................................................................................... 2
Initial setup .....................................................................................................2
Learn about gestures ......................................................................................4
Basic gestures ...............................................................................................4
More gestures................................................................................................5
Customize your home screen ....................................................................... 6
Home settings ............................................................................................... 6
Widgets ...........................................................................................................6
Wallpaper ........................................................................................................7
Color palette .................................................................................................. 7
Use your apps .....................................................................................................7
Search for an app ........................................................................................7
Move an app to another screen .............................................................7
Manage the open apps .............................................................................. 8
Remove or uninstall an app ..................................................................... 8
Entertainment Space ....................................................................................... 8
Open the Entertainment Space .............................................................8
Disable the Entertainment Space ..........................................................8
Notifications and Quick settings .................................................................9
Notifications panel ......................................................................................9
Quick settings panel ................................................................................... 9
Factory reset, update and force shutdown ...........................................10
Factory reset ................................................................................................10
System update ............................................................................................. 10
i
Page 3

Force shutdown...........................................................................................10
Settings ................................................................................. 11
WLAN ....................................................................................................................11
Mobile network ..................................................................................................11
VPN ......................................................................................................................... 11
Bluetooth ............................................................................................................. 12
Display .................................................................................................................. 12
Brightness ...................................................................................................... 12
Reading mode .............................................................................................. 12
Eye protection and safety information .............................................. 13
Screen lock ......................................................................................................... 13
Split Screen ........................................................................................................ 13
Enable split screen mode ........................................................................ 13
Adjust the split screen size ..................................................................... 14
Exit split screen mode .............................................................................. 14
Digital Wellbeing & parental controls ...................................................... 14
Digital Wellbeing ......................................................................................... 14
Parental controls ......................................................................................... 15
Battery .................................................................................................................. 15
Permission management ............................................................................... 16
Language ............................................................................................................ 16
Apps ...................................................................................... 17
Camera ................................................................................................................. 17
Open Camera ............................................................................................... 17
Camera settings .......................................................................................... 17
Switch camera modes............................................................................... 18
View photos and videos ........................................................................... 18
Files ....................................................................................................................... 18
Browse files ................................................................................................... 18
Clean files ...................................................................................................... 19
ii
Page 4

Share files ...................................................................................................... 19
Google apps ....................................................................................................... 19
Advanced features ............................................................ 20
Multiple users .....................................................................................................20
Multi-User Preferences .............................................................................20
Creating new user accounts ...................................................................20
Switching between user accounts .......................................................20
Deleting a user account ........................................................................... 21
Appendix .............................................................................. 22
Important safety and handling information ..........................................22
Electronic emission notices .........................................................................26
Environmental, recycling, and disposal information ..........................28
ENERGY STAR model information ............................................................30
Export classification notice .......................................................................... 31
HEVC Standard .................................................................................................32
iii
Page 5
Welcome
Before using your device, be sure to read the following:
•Quick Start Guide, Safety & Warranty
•Regulatory Notice
To get more information and download the above documents, please go to
https://support.lenovo.com.
All pictures and illustrations in this guide are for your reference only. The
actual product may vary.
Icons
Instruction, reminder, or suggestion.
Attention or caution.
Danger or warning.
1
Page 6
Basics
Set up and get started
Prepare for setup
To make setup as smooth as possible, please prepare the following:
•An internet connection through a Wi-Fi network or a mobile network.
You may need the name and password of the Wi-Fi network.
•For devices with SIM card slots, install SIM card provided by your carrier.
•Your previous device or a backup of your device, if you’re transferring
your data to your new device.
Initial setup
This device has an easy setup process to help you get going when you
first turn on your device. You can follow the onscreen setup instructions
manually.
After the initial setup, additional changes can be made in Settings.
1. Press and hold the Power button until you see the Lenovo logo. You will
see Hi there on the screen.
– Select your language: Tap and select your language from the
language list.
– Vision settings: Tap to customize the size of the display and text,
and enable Magnification to improve screen visibility. Enable Select
to Speak or TalkBack to make your device easier to use without the
screen.
2. Tap Start.
3. Read and accept the service agreements, then tap Next.
4. Connect to Wi-Fi network or mobile network (if your device supports it).
– Tap a network, and enter a password if required.
– Tap Add new network, then type a Wi-Fi network name manually
2
Page 7
and enter a password if required.
– Tap Use mobile network for setup to activate mobile network service
on your device.
If you set up oine, you need to manually set the time and date in the
next step.
5. Transfer apps and data from your previous device to the new device.
You can transfer many of your apps, settings, and content from your
previous device directly to your new device.
Bring the two devices close together, then follow the onscreen
instructions.
6. Check privacy settings. Manage Google app permissions.
7. Select one of the following screen unlock methods to increase your
device security. Follow the onscreen instructions to set a screen unlock
method.
– Pattern
– PIN
– Password
You can also tap Not now to set up later in Settings > Unlock and
security > Screen lock.
8. Select your preferred navigation mode.
– Gesture Navigation
Operate your device by gestures. Refer to “Learn about gestures” for
details.
– 3-button Navigation
Three buttons will appear on the navigation bar at the bottom of the
screen.
Button Description
•Go back
Returning to the previous menu or exiting an app.
•Home
Returning to the home screen.
•Switch apps
Viewing the open apps.
9. Tap Finish device setup, you can get started on your device.
3
Page 8
Learn about gestures
Your device supports Gesture navigation and 3-button navigation.
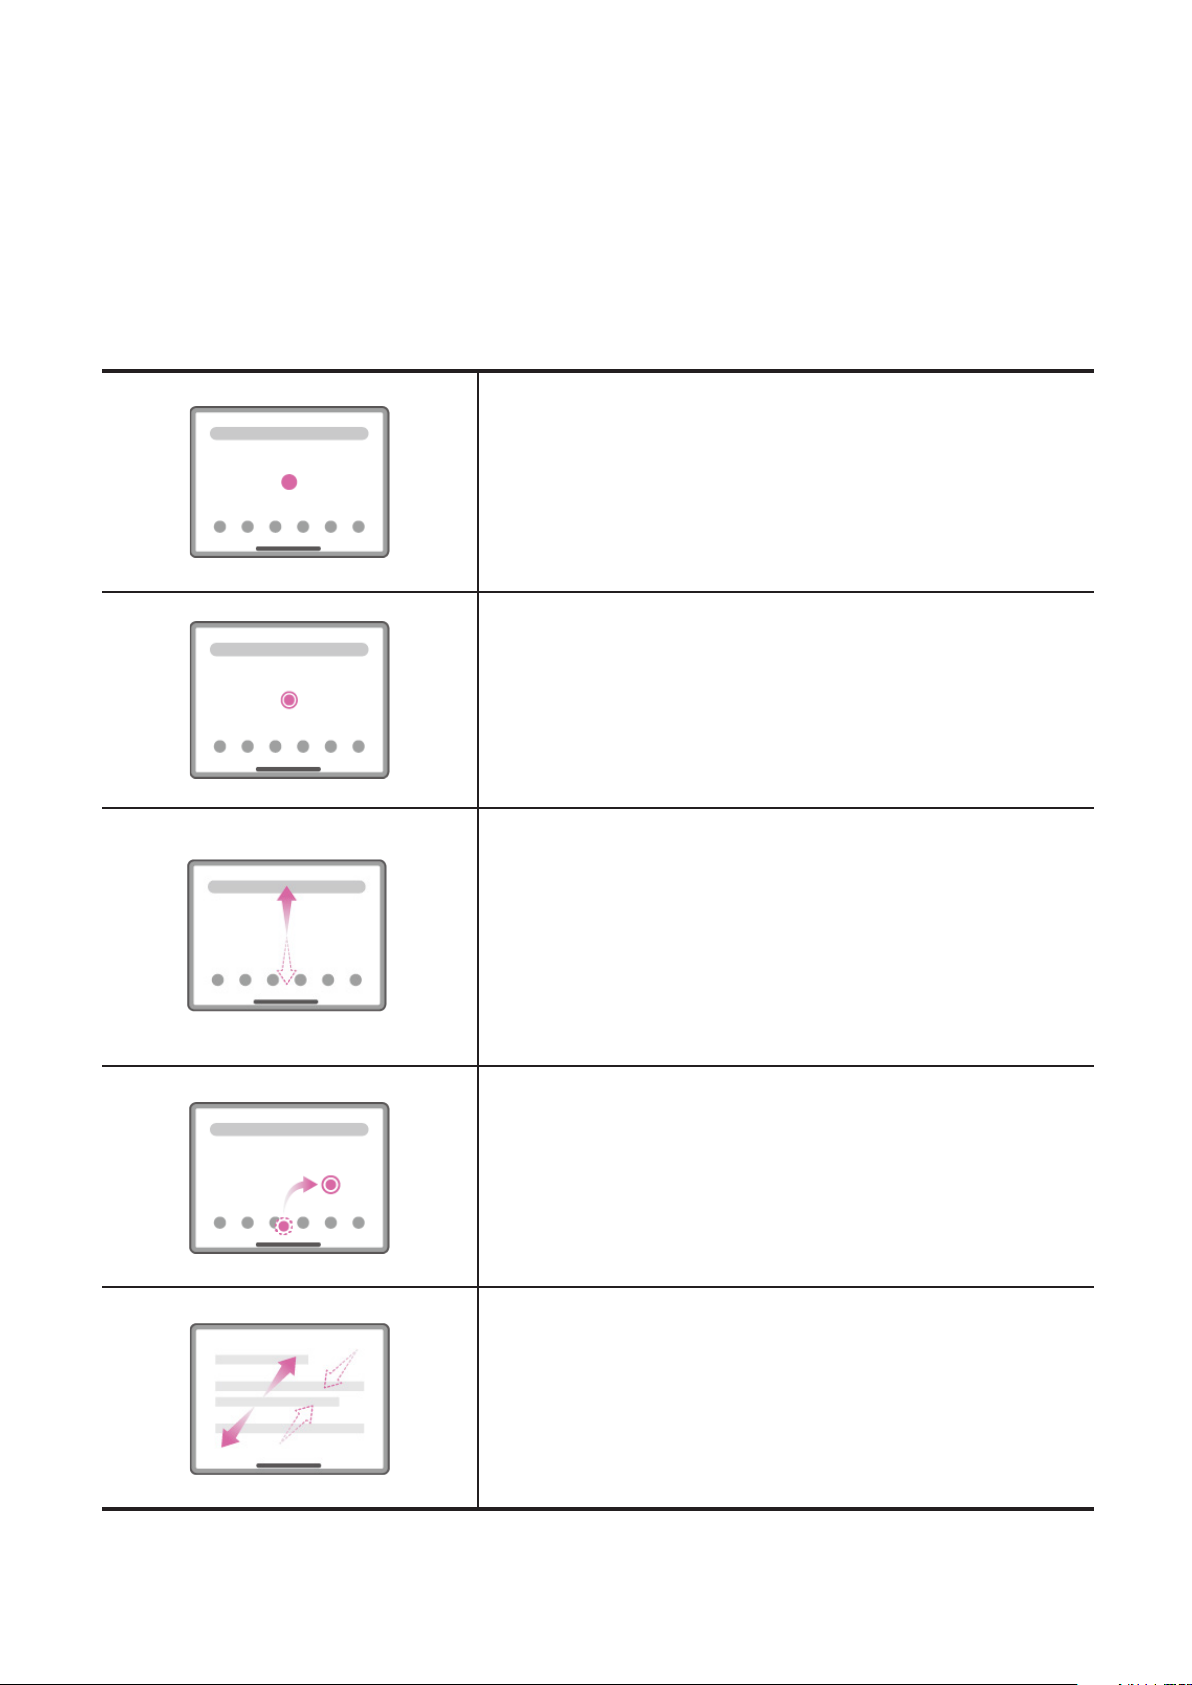
Basic gestures
Tap
•Selecting or opening an item.
Press and hold
•Accessing frequently used functions of
the app.
•Customizing your home screen.
Swipe
•Swiping up to open the list of all apps.
•Swiping down to open the Notifications
panel.
•Swiping down from top right corner to
open the Quick settings panel.
Hold and drag
•Moving an app to where you want to
place it.
Spread and pinch
•Zooming in and out on websites,
photos, maps, or other items.
4
Page 9
More gestures
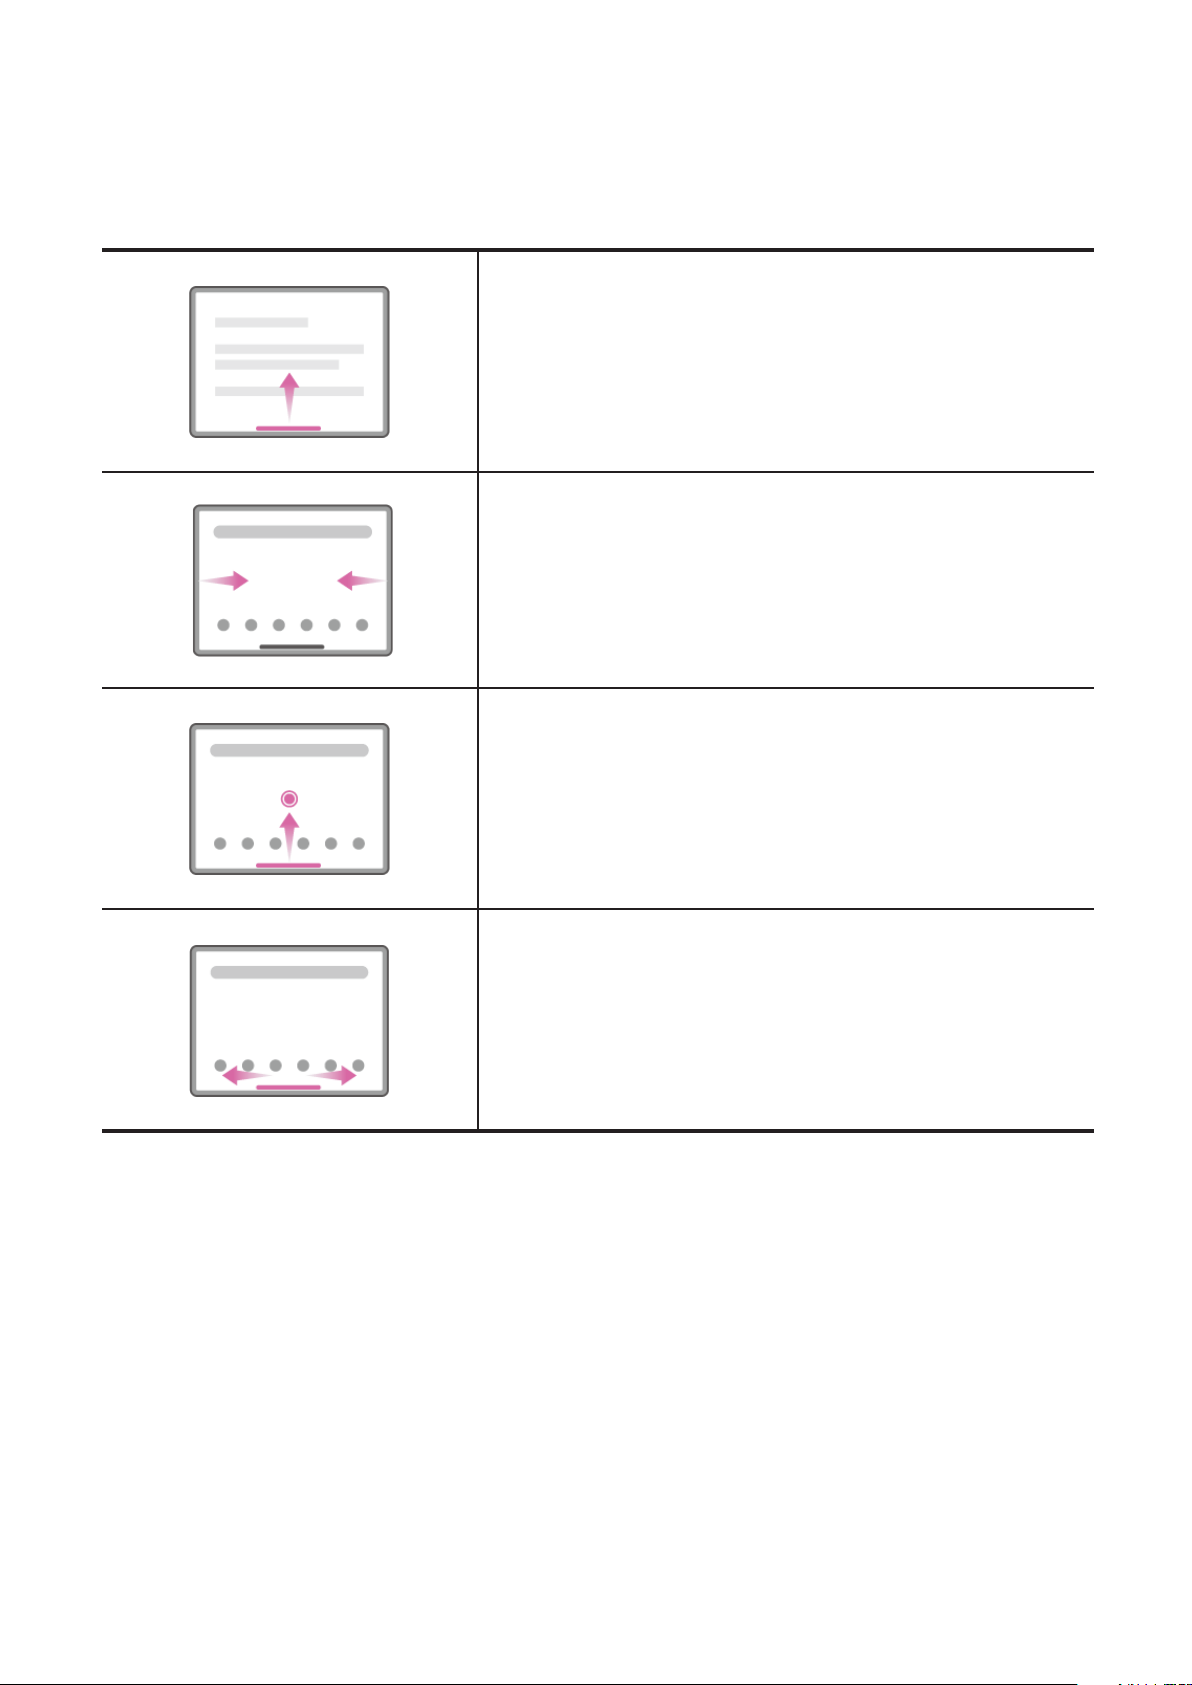
The following gestures are only available for the Gesture navigation style. To
change the navigation style, go to Settings > System > System navigation.
Swipe up from the bottom edge.
•Returning to the home screen.
Swipe from the left or right edge.
•Switching to the previous page.
Swipe up from the bottom edge and hold.
•Viewing the open apps.
Swipe left or right at the bottom edge.
•Switching between open apps.
5
Page 10
Customize your home screen
1
2
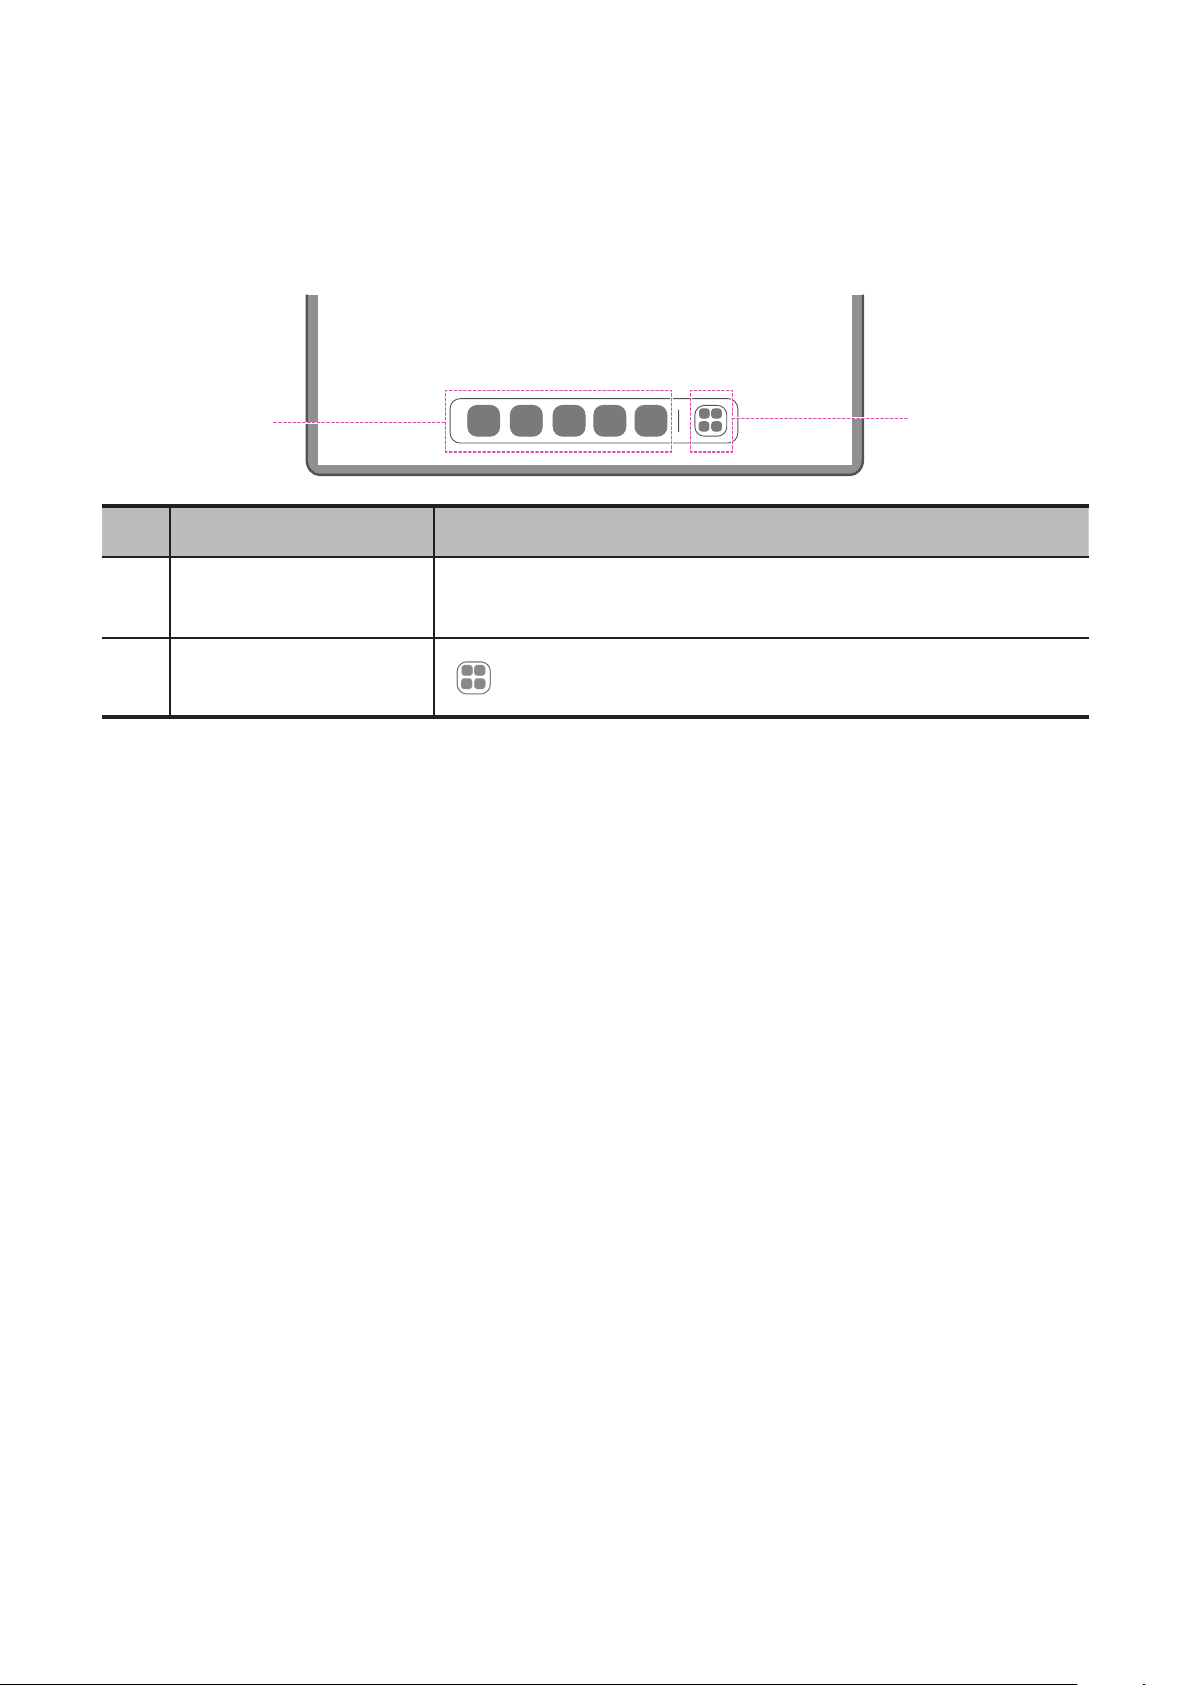
The home screen is the starting point for using your device. For your
convenience, the home screen is already set up with some useful apps and
widgets.
No. Function Description
1
2
You can customize your home screen in the following ways.
Hotseat Add apps to the hotseat.
All applications : Tap to view all apps.
Home settings
Press and hold anywhere on the home screen except the icons, and tap
Home settings to customize your device.
•Notification dots
Show notification dots on app icons.
•Add app icons to Home screen
Add app icons for new apps to the home screen.
•Swipe to access the Entertainment Space
Swipe right to open Entertainment Space from the home screen.
Widgets
You can add a widget on your home screen. Widgets provide you with
quick-views of the calendar events information, mails, maps, and more.
1. Press and hold anywhere on the home screen except the icons, tap
Widgets, and select a widget you want to add.
2. Press and drag the widget to where you want to place it, then release it.
6
Page 11
Wallpaper
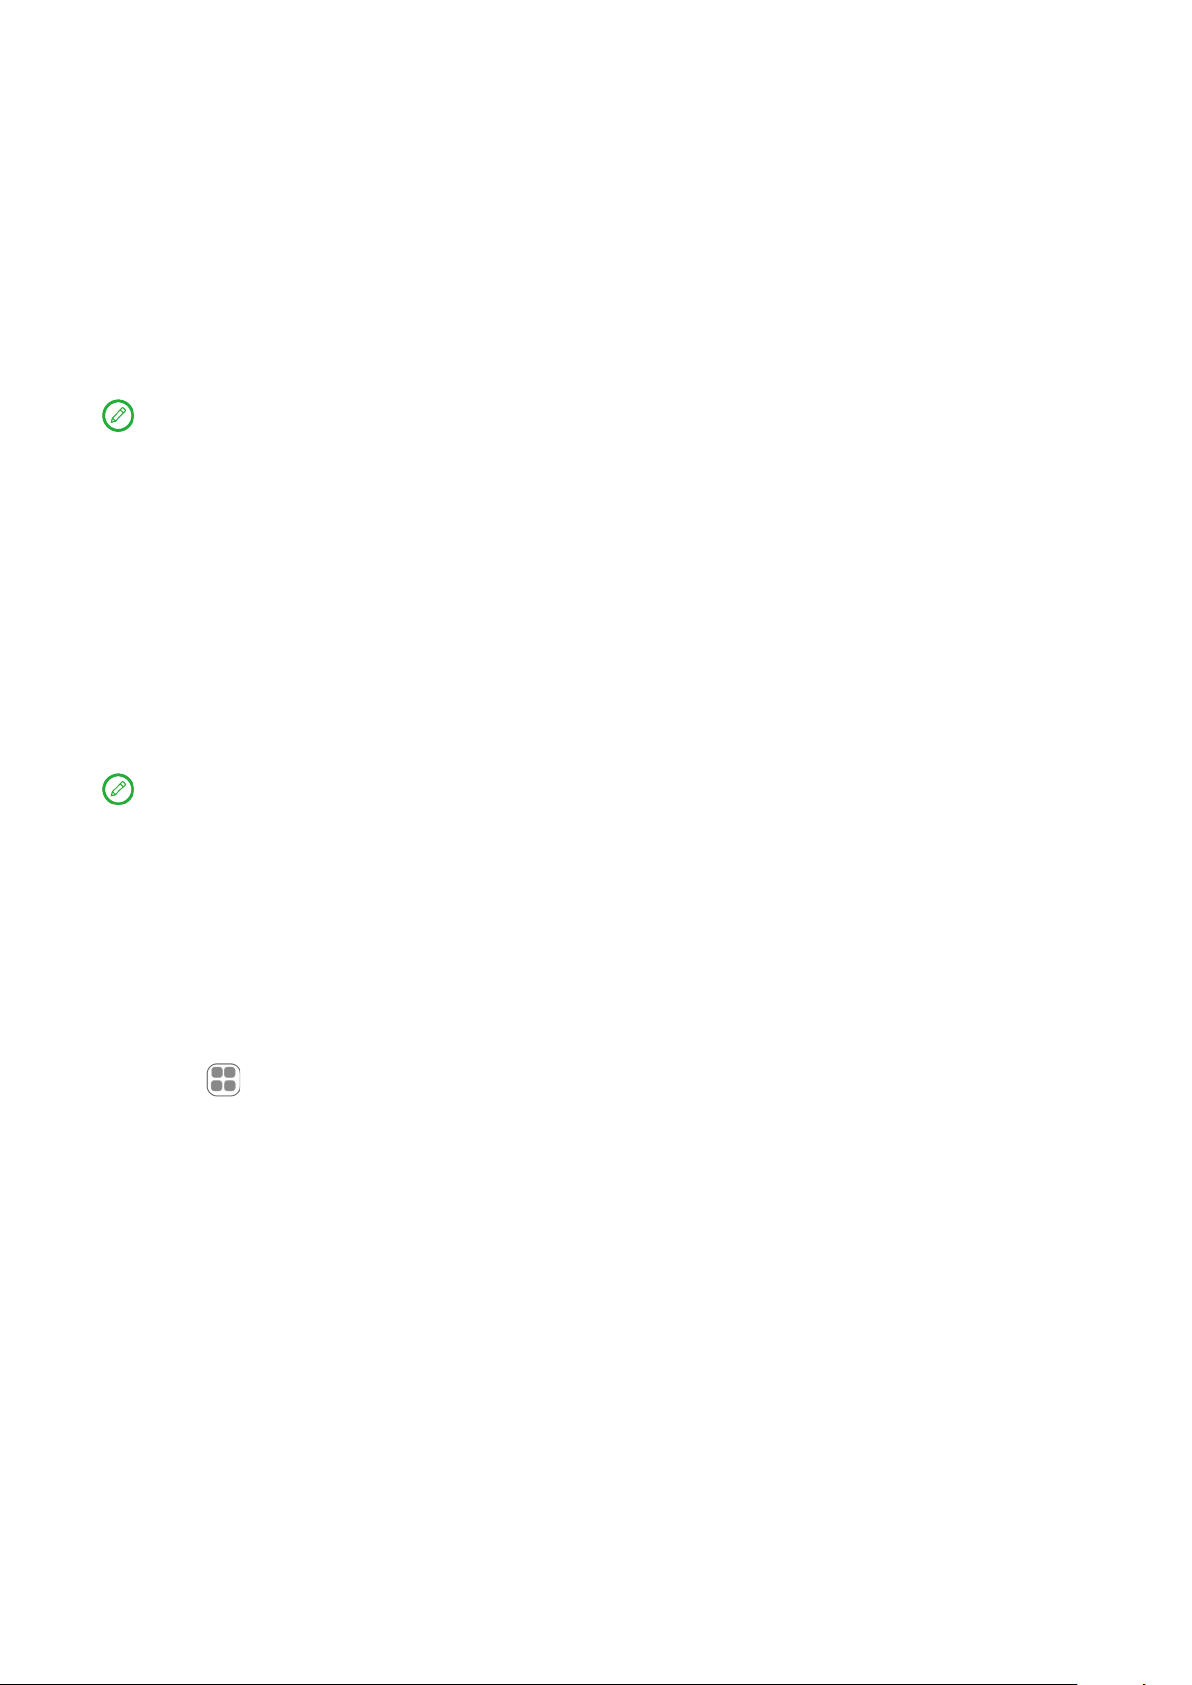
To set your wallpaper, do the following:
1. Press and hold anywhere on the home screen except the icons, tap
Wallpapers, and select a picture.
2. Select Lock Screen or Desktop.
3. Tap Set wallpaper.
You can also go to Settings > Wallpaper and home screen > Set
wallpaper to set your wallpaper.
Color palette
To set system theme color and desktop app icon color, do the following:
1. Press and hold anywhere on the home screen except the icons, tap Color
palette.
2. Enable the color options as needed.
You can also go to Settings > Wallpaper and home screen to set it.
Use your apps
Search for an app
1. Tap on the home screen or swipe up from the home screen to see a
list of all apps.
2. Find an app directly or enter keywords in the search bar to search for an
app.
Move an app to another screen
Press and hold the app that you want to move, drag it to where you want to
place it, and then release it.
7
Page 12
Manage the open apps
1. View a list of open apps using either of the following ways:
– Gesture navigation: Swipe up from the bottom of the screen and
hold.
– 3-button navigation: Tap at the bottom of the screen.
2. On the open app list screen, you can do the following:
– Tap an app window to access the app.
– Swipe an app window up to close the app.
– Swipe an app window down to lock or unlock the app.
– Press and hold an app window to view more actions.
– Tap Clear all to stop all the apps.
Remove or uninstall an app
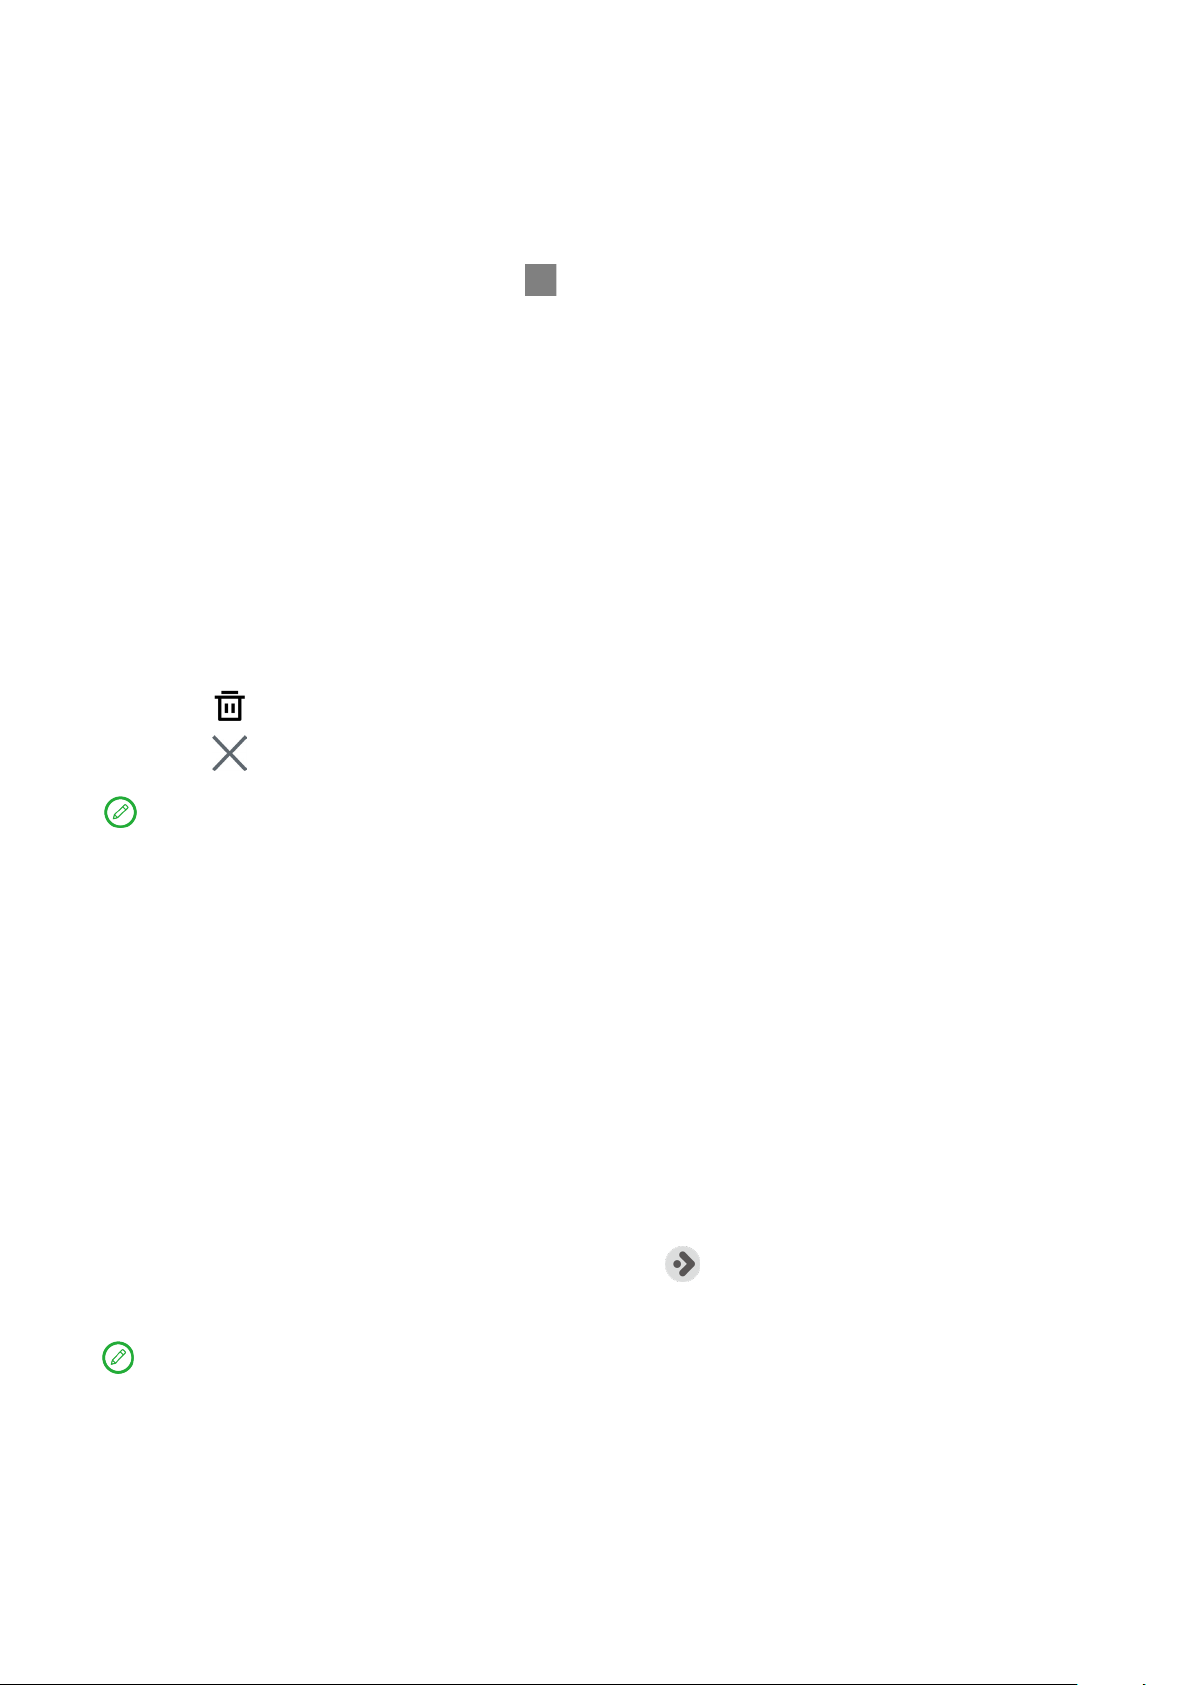
Press and hold an app icon, then you can do the following:
•Tap to uninstall the app from the device.
•Tap to remove the app from the home screen.
•The removed apps can be found in the app list.
•Some system apps are required by the device and cannot be
uninstalled.
Entertainment Space
Entertainment Space is a one-stop, personalized screen for all your favorite
movies, shows, videos, games, and books.
Open the Entertainment Space
Swipe right from the home screen or tap on the left side of the home
screen.
Internet connection and Google account sign-in are necessary for using
the Entertainment Space.
Disable the Entertainment Space
Entertainment Space is enabled by default. Go to Home settings and disable
Swipe to access the Entertainment Space.
8
Page 13
Notifications and Quick settings
Notifications panel
The Notifications panel informs you of new messages, USB connections,
activities in progress such as file downloading, and more.
•To see notifications, swipe down from the top of the screen.
•To close the Notifications panel, swipe up from the bottom of the
screen.
•To dismiss a notification, swipe left or right across the notification.
•To dismiss all notifications, tap Clear all at the bottom of the
Notifications panel.
•To manage notifications, tap Manage at the bottom of the Notifications
panel, or go to Settings > Notifications.
Quick settings panel
The Quick settings panel provides quick access to device functions. Icons
change colors when corresponding functions are enabled and disabled.
•To open the Quick settings panel, swipe down from the top right corner
of the screen.
•To close the Quick settings panel, swipe up from the bottom of the
screen.
•To enable or disable a function, tap the function icon.
•Press and hold a function icon to open the function’s setting screen (if
provided).
•Tap to switch accounts
•Tap to edit the Quick settings panel.
•Tap to open Settings.
•Tap to power o or restart your device.
9
Page 14
Factory reset, update and force shutdown
Factory reset
Factory reset will erase all data from your device’s internal storage. Please
back up important data on the device before resetting your device.
1. Go to Settings > System > Reset options > Erase all data (factory reset).
2. Tap Erase all data to reset the manufacturer’s default settings.
System update
Your device will prompt you to download and install updates when a new
system version is available. You can also manually check for updates and set
update methods.
1. Go to Settings > System > System Update, and tap Check for updates.
2. Tap at the top right of the System Update screen to enable or disable
the automatic download and overnight upgrade features as needed.
Download and install system updates from ocial sources only.
Force shutdown
Press and hold the Power and Volume down buttons for about 8 seconds
until the device turns o.
10
Page 15
Settings
WLAN
Connecting to the internet over a WLAN network is an eective method to
save your mobile data.
1. Go to Settings > Network & internet > Internet, and turn on Wi-Fi to
display a list of available networks.
2. Tap a network, and enter a password if required.
3. Tap CONNECT.
After the device is connected to a WLAN network, will be displayed at
the top of the screen.
Mobile network
For devices, with SIM card slots, you can insert a SIM card and enable mobile
network data access.
To set up Internet access through a mobile network, do the following:
1. Go to Settings > Network & internet > Mobile network.
2. Open your mobile operator service and enable the mobile network.
You need a valid SIM card with a data service. If you don't have a SIM
card, contact your carrier.
VPN
VPNs are used within organizations to allow you to communicate private
information securely over a non-private network. You may need to
configure a VPN, for example, to access your work email. Ask the network
administrator for the settings necessary to configure a VPN for your network.
11
Page 16

1. Go to Settings > Network & internet > More network settings > VPN.
2. Tap to edit the VPN profile.
3. Tap SAVE.
4. Tap to edit or forget the VPN.
Bluetooth
You can pair your device to other Bluetooth-enabled devices, like Bluetooth
headphones.
1. Go to Settings > Bluetooth, and enable Use Bluetooth.
2. Tap Pair new device, and select a device name to match and connect.
After the device is connected to a Bluetooth device, will be displayed at
the top of the screen.
Display
Brightness
•Manual adjustment
Go to Settings > Display, and move the Brightness slider to adjust the
screen brightness manually.
•Automatic adjustment
Go to Settings > Display, and enable Adaptive brightness to allow the
screen to change brightness as lighting changes automatically.
Reading mode
1. Go to Settings > Display > Reading mode, and turn on Enable Reading
Mode.
2. Select a reading mode display eect.
12
Page 17

Eye protection and safety information
When Eye protection mode is enabled, the screen will have an amber tint,
which reduces blue light. This allows you to read or view the screen more
comfortably in dimly lit environments.
1. Go to Settings > Display > Eye protection mode, and enable Eye
protection mode.
2. Tap Schedule to customize your eye protection mode time.
3. Slide the Intensity slider to adjust the light as needed.
Please use the device in a well-lit area, and when using the device, keep it
at a suitable distance from your eyes. To avoid eyestrain, take a break from
looking at the screen after a period of time.
While concentrating on the performance capabilities of its screens, Lenovo
also places importance on users’ eye health. This product has received TÜV
Rheinland’s “Low Blue Light” certification and can be used with confidence.
For further information, please visit https://support.lenovo.com.
Screen lock
Setting a screen lock is an eective way to increase device security. Do the
following to set screen lock.
1. Go to Settings > Unlock and security > Screen lock.
2. Select a screen unlock method and follow the onscreen instructions to
set it.
Split Screen
Split screen mode enables you to open two apps in a split screen and use
them at the same time.
Enable split screen mode
To open split screen, do one of the following:
13
Page 18
- Method one:
1. Press and hold the app icon, then tap .
2. Tap another app you want to split.
- Method two:
1. Open the list of the open apps.
2. Tap on the app you want to split and then tap another app.
Not all applications support split screen mode.
Adjust the split screen size
Slide the or in the middle of the two screens to adjust the split screen
size.
Exit split screen mode
Slide the or to the edge of the screen.
Digital Wellbeing & parental controls
With Digital Wellbeing & parental controls, you can access real-time reports
showing how much time you spend on your device. You can also set limits
for what you want to manage.
Go to Settings > Digital Wellbeing & parental controls, and then set the
related functions.
Digital Wellbeing
•Dashboard
– View your screen time, notifications received and times opened.
– Set daily timers for most apps.
•Bedtime mode
– Customize the start and end times of bedtime mode.
– Set the time period during which the device will automatically
activate Bedtime mode while charging.
14
Page 19

•Focus mode
Select distracting apps, then tap TURN ON NOW to pause distracting
apps and hide their notifications.
•Manage notifications
Disable or enable notifications for specific apps.
•Do Not Disturb
Block notifications and avoid interruption when you need to concentrate.
•Show icon in the app list
Display the digital wellbeing icon in the list of all apps.
Parental controls
•Tap Set up parental controls and follow the on screen instructions. You
can connect your parent’s device or your child’s device using Google
Family Link.
•After connecting the devices, a parent can manage mature content,
website access, location services, and other settings on a child’s device.
Battery
Go to Settings > Battery, and you can check the battery usage and manage
the battery.
•Battery usage
View usage from the last full charge.
•Battery Saver
Reduce power consumption by limiting background activity, visual
eects, certain features, and some network connections.
•Battery enhancement
Enable Battery protection mode and Battery maintenance mode to
extend battery life.
Battery protection mode
exposes the battery to high temperatures and high voltage that may
cause it to age faster. When Battery protection mode is enabled, power
prevents charging for extended periods, which
15
Page 20

will eventually be maintained between 40%-60% to extend battery life.
•Battery Manager
Check which apps drain the battery and choose to restrict these apps.
•Battery percentage
Show or hide the battery percentage in the status bar.
Permission management
Some apps may require your permission for location or privacy data access
to provide corresponding services. To manage app permissions, do any of
the following methods:
•Manage an individual app’s permissions
Press and hold an app, go to App info > Permissions, check the
permissions granted or denied to the app, and tap to reset the permission.
•Manage permissions by category
– Location: Go to Settings > Location > App location permissions,
check the apps that access location, and tap an app to reset the
permission.
– Privacy: Go to Settings > Privacy > Permission manager, select a
capability, check the apps that access the capability, and tap an app
to reset the permission.
Language
You can add frequently-used languages to your list and set your system
language.
1. Go to Settings > System > Languages.
2. Tap Add a language and select the language that you want to add.
3. Tap SET AS DEFAULT.
Set the system language by dragging to the top of the list.
16
Page 21
Apps
Camera
Open Camera
Tap on the home screen to open Camera.
On some models, the app may not appear on the home screen. You can
open the list of all apps and find the app.
Camera settings
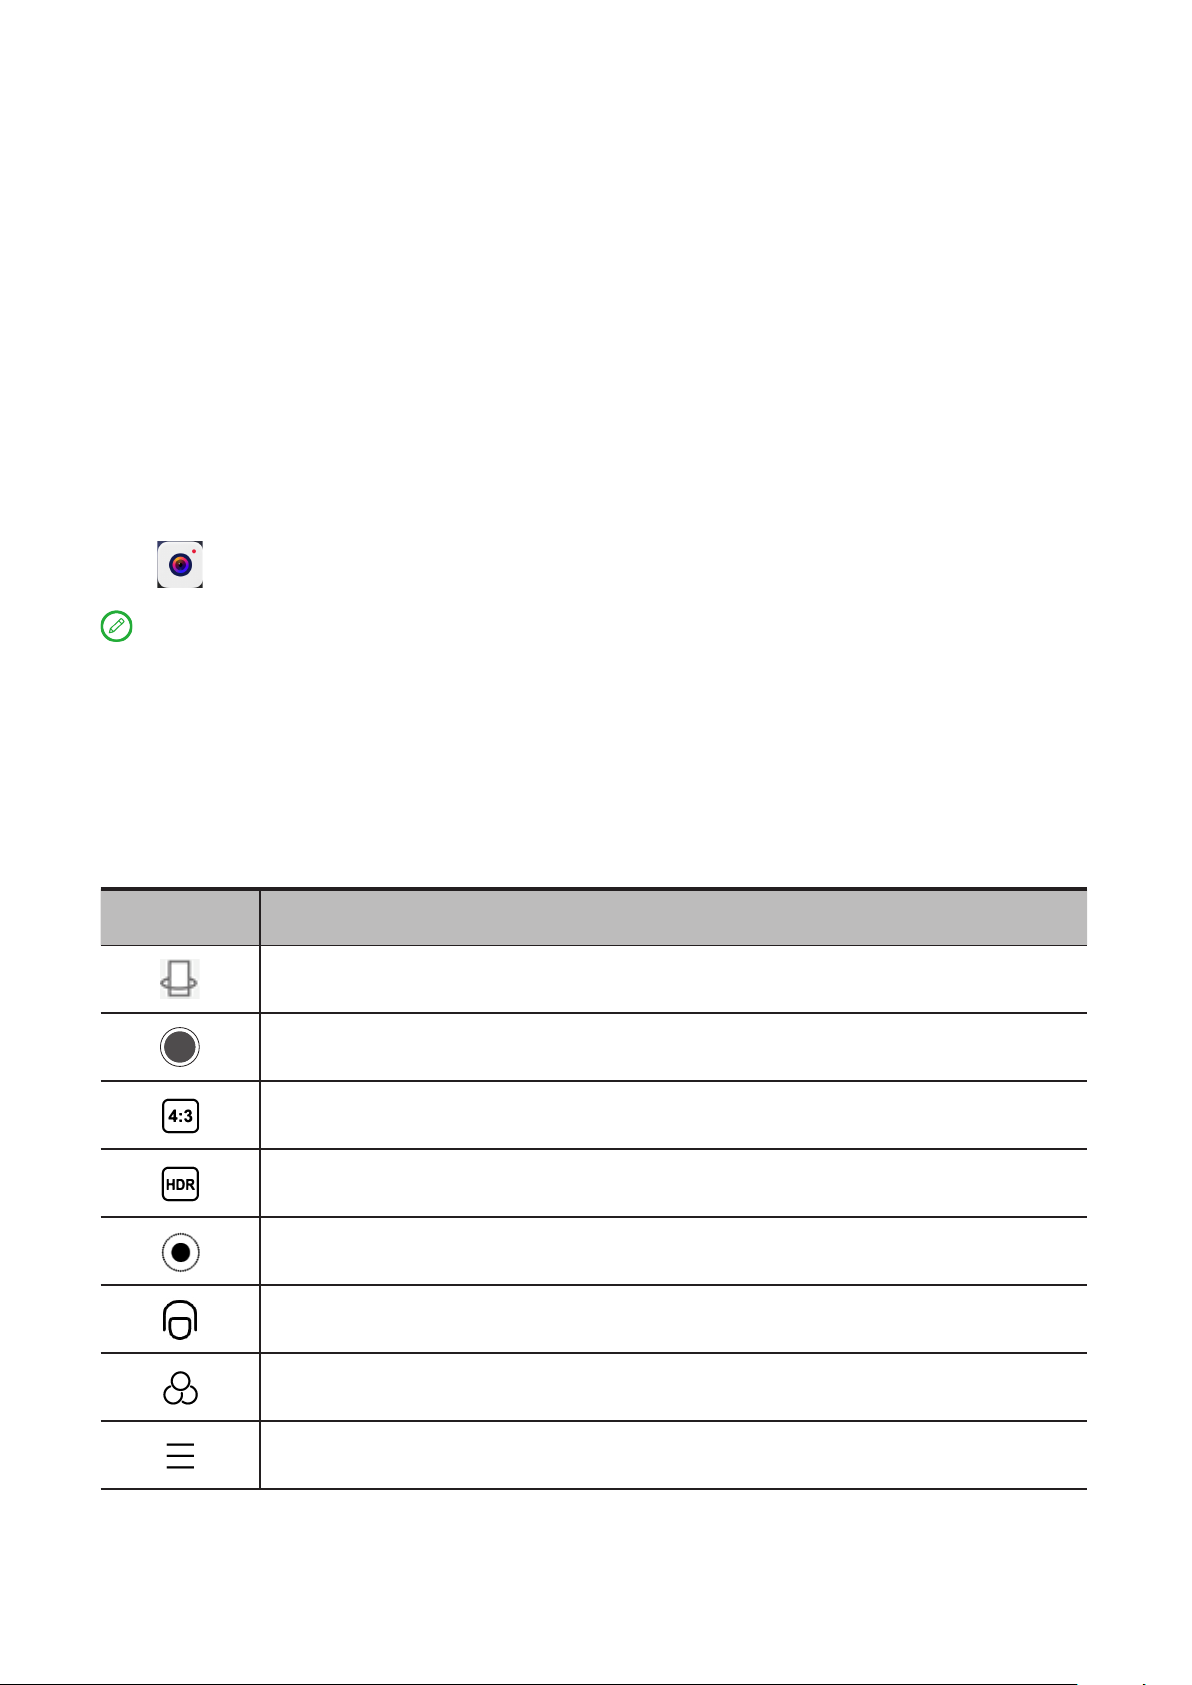
Use the icons on the main camera screen and the settings menu to configure
your camera’s settings.
Icon Description
Switch to front camera or rear camera
Take a photo
Select photo size
Turn HDR on and o
Blur the background
Apply beauty eects
Select a filter and preview the eect
Configure other camera settings
17
Page 22
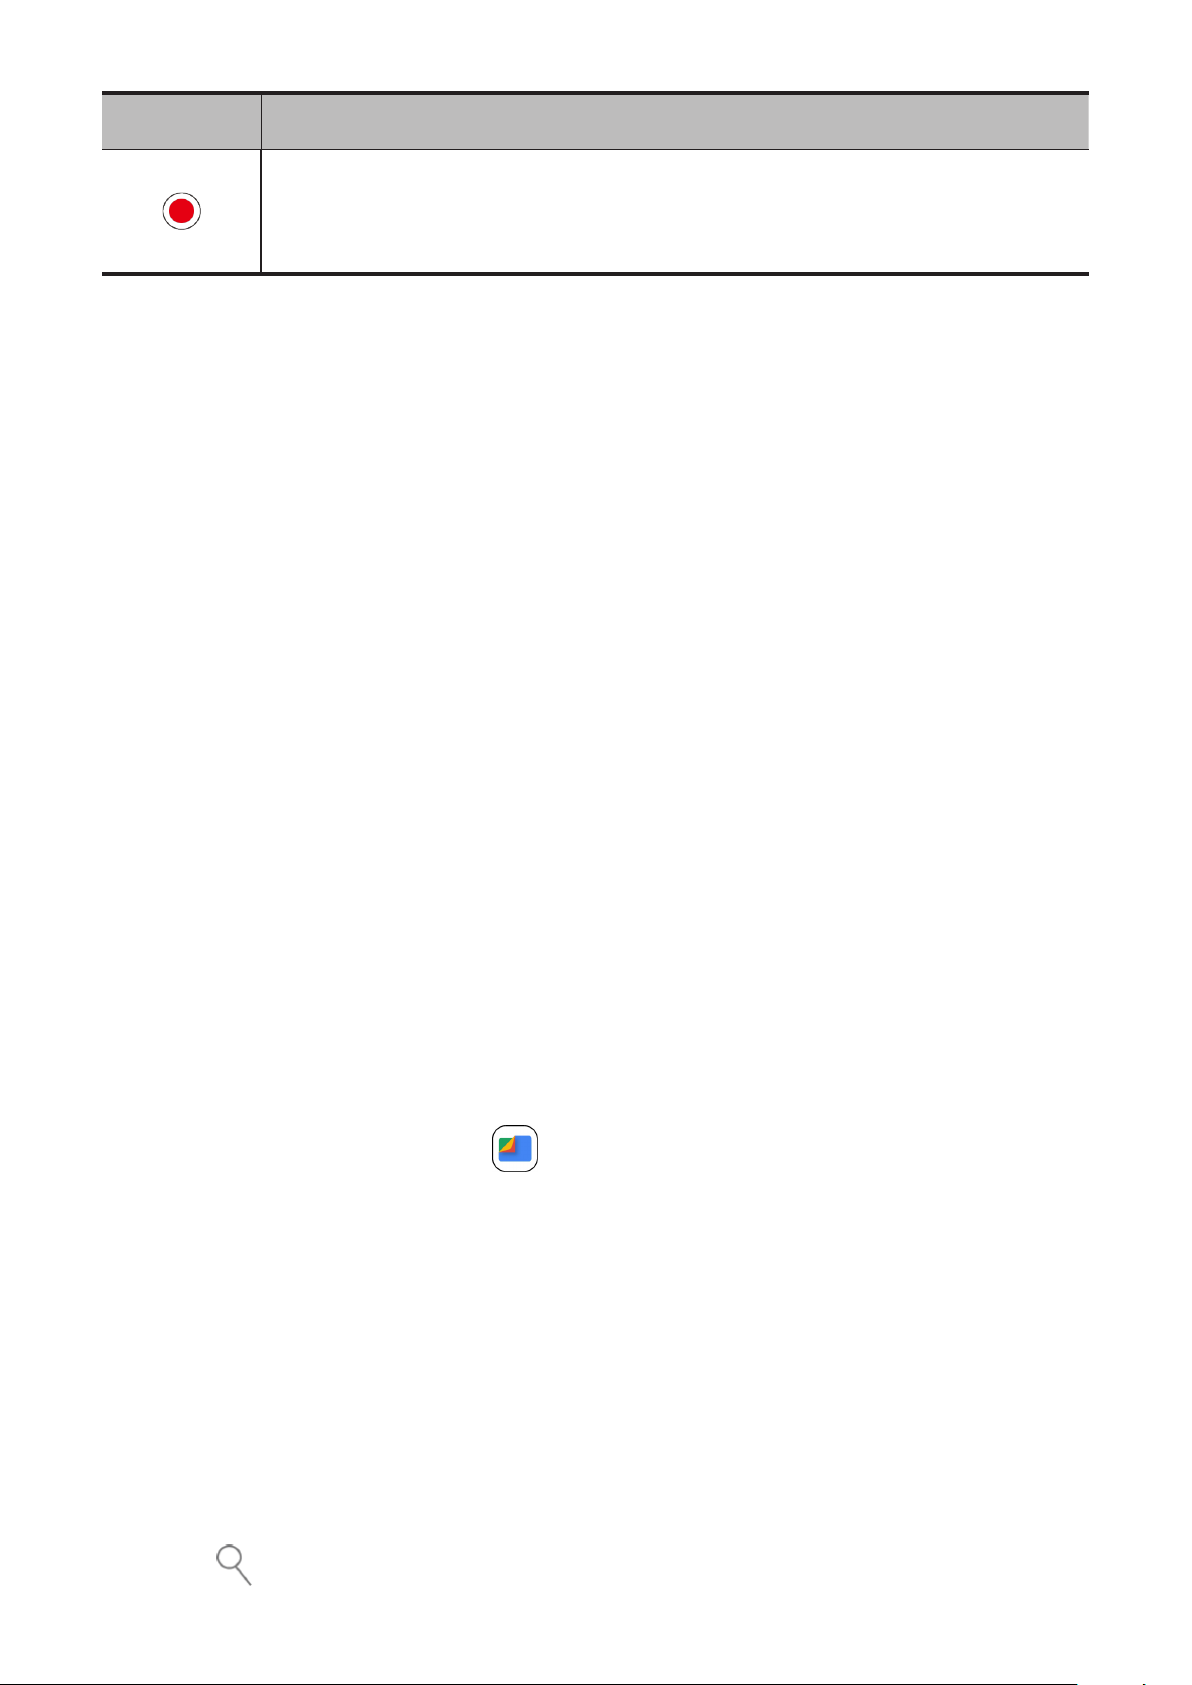
Icon Description
Record a video
Tap Video to switch to the video mode before you can see
this icon.
Switch camera modes
•Pictures
Take photos.
•Video
Record videos.
View photos and videos
Photos and videos are stored in your device’s internal storage. You can view
your photos and videos by using the following methods.
•Tap the thumbnail when using the Camera app.
•Go to Photos.
•Go to Files.
Files
Open the list of all apps. Tap to open Files. You can view and manage
files stored on your device, including images, videos, audio, and more.
Browse files
Go to Files > Browse, and you can do the following:
•View recently stored files.
•View files by category.
•Tap Internal storage and view files by storage path.
•Tap at the top right of the screen, and type in keywords to search for
18
Page 23

a file.
Clean files
Go to Files > Clean, check the internal storage space and clean junk files.
Share files
Go to Files > Nearby Share, and follow the onscreen prompts to quickly
send or receive files.
Google apps
Google apps are preinstalled on your device. You can visit support.google.
com to learn more about Google apps. The apps can be also obtained from
Google Play Store.
19
Page 24

Advanced features
Multiple users
Go to Settings > System > Multiple users, and enable Allow multiple users.
Multi-User Preferences
There are three user types:
•Owner: An owner has full control over all user permissions and manages
all user accounts.
•Guest: There is only one guest account. A guest has restricted access to
the device.
•New User: There can be multiple standard user accounts.
Creating new user accounts
Swipe down from the top right corner of the screen.
•Tap > Add user to create a standard user account.
•Tap > Add guest to create a guest account.
Or go to Settings > System > Multiple users.
•Tap Add guest to create a guest account.
•Tap Add user, and then enter User info to create a standard user
account.
Switching between user accounts
•On the home screen, swipe down from the top right corner of the
screen, and then tap to switch between dierent user accounts.
•On the lock screen interface, tap , then select the user you want to
switch to.
20
Page 25

•Go to Settings > System > Multiple users, then select the user account
you want to switch to.
Deleting a user account
Swipe down from the top right corner of the screen. Tap > USER
SETTINGS, select the account you want to delete, then tap Delete user to
delete accounts. You can also go to Settings > System > Multiple users to
delete accounts.
21
Page 26

Appendix
Important safety and handling information
To avoid personal injury, property damage, or accidental damage to the
product, read all of the information in this section before using the product.
For additional tips to help you operate your device safely, go to http://www.
lenovo.com/safety.
Handle your device with care
Do not drop, bend, or puncture your device; do not insert foreign objects
into or place heavy objects on your device. Sensitive components inside
might become damaged.
Your device screen is made of glass. The glass might break if the device is
dropped on a hard surface, is subjected to a high impact, or is crushed by a
heavy object. If the glass chips or cracks, do not touch the broken glass or
attempt to remove it from the device. Stop using the device immediately
and contact Lenovo technical support for repair, replacement, or disposal
information.
When using your device, keep it away from hot or high-voltage
environments, such as electrical appliances, electrical heating equipment, or
electrical cooking equipment. Use your device only in the temperature range
of 0°C (32°F) to 40°C (104°F) (storage -20°C (-4°F) to 60°C (140°F)) to
avoid damage.
Don’t expose your device to water, rain, extreme humidity, sweat or other
liquids.
Do not disassemble or modify your device
Your device is a sealed unit. There are no end-user serviceable parts inside.
All internal repairs must be done by a Lenovo-authorized repair facility or a
Lenovo-authorized technician. Attempting to open or modify your device
will void the warranty.
22
Page 27
Built-in rechargeable battery notice
Do not attempt to replace the internal rechargeable lithium ion battery.
There is a risk of explosion if the battery is replaced with an incorrect type.
Contact Lenovo Support for replacement.
Plastic bag notice
DANGER
Plastic bags can be dangerous. Keep plastic bags away from babies and
children to avoid danger of suocation.
Adapter information
•Prevent your device and AC adapter from getting wet.
Do not immerse your device in water or leave your device in a location
where it can come into contact with water or other liquids.
•Use approved charging methods only.
Please only use standard Lenovo power adapters. The use of
third-party power adapters will aect the charging speed, resulting
in abnormal charging and potential damage to the equipment.
– Connect a standard power adapter to a suitable power outlet.
– Use a standard data cable to connect the device to a PC or a device
that complies with USB 2.0 or higher.
Charging devices might become warm during normal use. Ensure that you
have adequate ventilation around the charging device. Unplug the charging
device if any of the following occurs:
•The charging device has been exposed to rain, liquid, or excessive
moisture.
•The charging device shows signs of physical damage.
•You want to clean the charging device.
WARNING
Lenovo is not responsible for the performance or safety of products not
manufactured or approved by Lenovo. Use only approved Lenovo ac
adapters and batteries.
23
Page 28
EU ErP (EcoDesign) Directive (2009/125/EC) external power adapters (Regulation (EU) 2019/1782)
Ecodesign for Energy-Related Products Regulations
2010 - UK SI 2010 No. 2617 (Ext PSU), SI 2020 No.
485 (Ntwk Standby), SI 2014 No. 1290 as amended
Lenovo products are in compliance with the EU EcoDesign (ErP) Directive
& UK EcoDesign for Energy-related Products Regulations. Refer to the
following for details:
For EU, refer to the system declaration https://www.lenovo.com/us/en/
compliance/eu-doc, and for UK refer to the system declaration https://www.
lenovo.com/us/en/compliance/uk-doc.
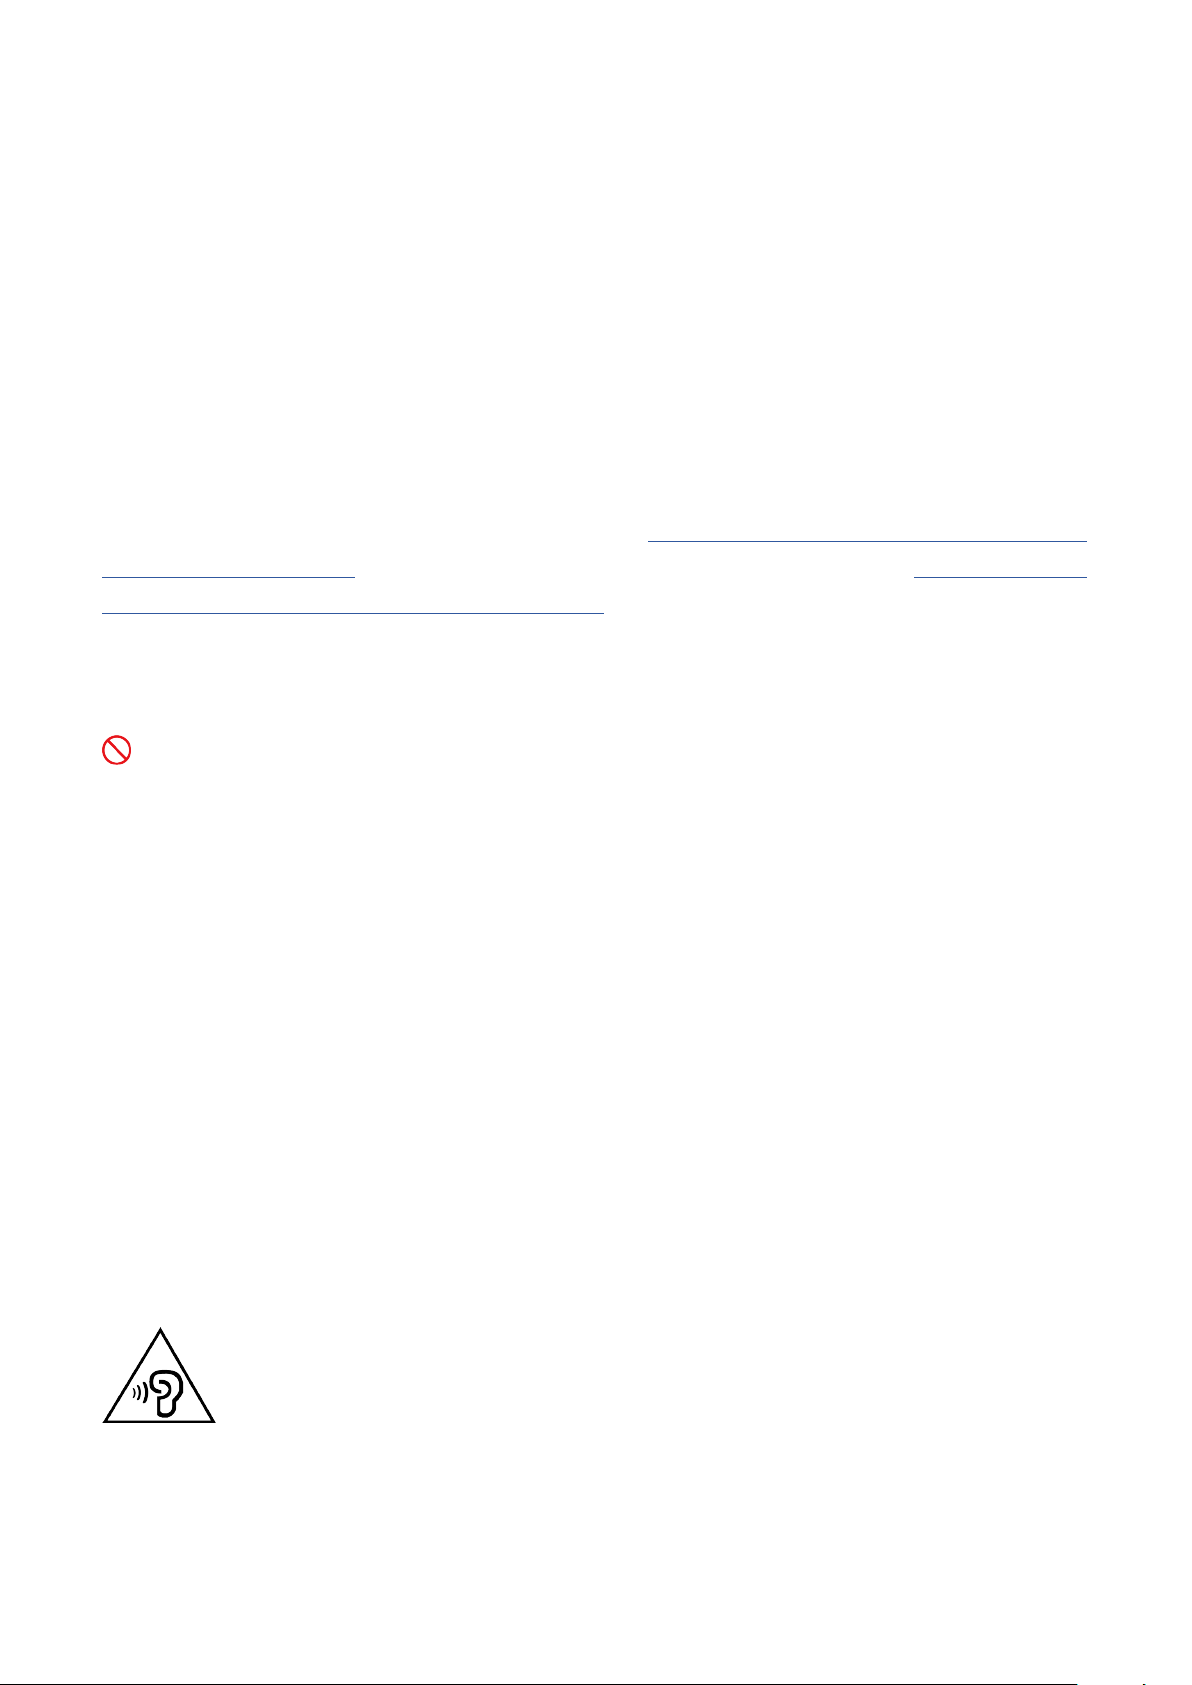
Caution about high volume usage
WARNING
Exposure to loud noise from any source for extended periods of time may
aect your hearing. The louder the sound, the less time is required before
your hearing could be aected.
To protect your hearing:
•Limit the amount of time you use headsets or headphones at high
volume.
•Avoid turning up the volume to block out noisy surroundings.
•Turn the volume down if you can’t hear people speaking near you.
If you experience hearing discomfort, including the sensation of pressure or
fullness in your ears, ringing in your ears or mued speech, you should stop
listening to the device through your headset or headphones and have your
hearing checked.
To prevent possible hearing damage, do not listen at high volume levels for
long periods.
24
Page 29

Take care when using your device in a motor vehicle
or on a bicycle
Always prioritize your safety and the safety of others. Follow the law. Local
laws and regulations might govern how you can use mobile electronic
devices, such as your device, while you drive a motor vehicle or ride a
bicycle.
Dispose according to local laws and regulations
When your device reaches the end of its useful life, do not crush, incinerate,
immerse in water, or dispose of your device in any manner contrary to
local laws and regulations. Some internal parts contain substances that
can explode, leak, or have adverse environmental effects if disposed of
incorrectly.
See “Environmental, recycling, and disposal information” for additional
information.
Keep your device and accessories away from small
children
Your device contains small parts that can be a choking hazard to small
children. Additionally, the glass screen can break or crack if dropped on or
thrown against a hard surface.
Protect your data and software
Do not delete unknown files or change the name of files or directories that
were not created by you. Otherwise, your device software might fail to work.
Be aware that accessing network resources can leave your device vulnerable
to computer viruses, hackers, spyware, and other malicious activities that
might damage your device, software, or data. It is your responsibility to
ensure that you have adequate protection in the form of firewalls, antivirus
software, and anti-spyware software and keep such software up to date.
Keep electrical appliances away from your device. These include electric
fans, radios, high-powered speakers, air-conditioners, and microwave ovens.
The strong magnetic fields generated by electrical appliances can damage
the screen and the data on the device.
25
Page 30

Be aware of heat generated by your device
When your device is turned on or the battery is charging, some parts might
become hot. The temperature that they reach depends on the amount of
system activity and the battery charge level. Extended contact with your
body, even through clothing, could cause discomfort or even a skin burn.
Avoid keeping your hands, your lap, or any other part of your body in
contact with a hot section of the device for any extended time.
Electronic emission notices
FCC Compliance Statement
This equipment has been tested and found to comply with the limits for a
Class B digital device, pursuant to Part 15 of the FCC Rules. These limits are
designed to provide reasonable protection against harmful interference in
a residential installation. This equipment generates, uses, and can radiate
radio frequency energy and, if not installed and used in accordance with
the instructions, may cause harmful interference to radio communications.
However, there is no guarantee that interference will not occur in a particular
installation. If this equipment does cause harmful interference to radio or
television reception, which can be determined by turning the equipment o
and on, the user is encouraged to try to correct the interference by one or
more of the following measures:
•Reorient or relocate the receiving antenna.
•Increase the separation between the equipment and receiver.
•Connect the equipment to an outlet on a circuit dierent from that to
which the receiver is connected.
•Consult an authorized dealer or service representative for help.
Lenovo is not responsible for any radio or television interference caused by
unauthorized changes or modifications to this equipment. Unauthorized
changes or modifications could void the user’s authority to operate the
equipment.
This device complies with Part 15 of the FCC Rules. Operation is subject
to the following two conditions: (1) this device may not cause harmful
interference, and (2) this device must accept any interference received,
including interference that may cause undesired operation.
26
Page 31

Responsible Party:
Lenovo (United States) Incorporated
1009 Think Place - Building One
Morrisville, NC 27560
Telephone: 1-919-294-5900
ISED Caution
This device complies with Innovation, Science and Economic Development
Canada license-exempt RSS standard(s). Operation is subject to the
following two conditions:
(1) This device may not cause interference, and (2) this device must accept
any interference, including interference that may cause undesired operation
of the device.
Le présent appareil est conforme aux CNR d’Industrie Canada applicables
aux appareils radio exempts de licence. L’exploitation est autorisée aux deux
conditions suivantes:
(1) l’appareil ne doit pas produire de brouillage, et
(2) l’utilisateur de l’appareil doit accepter tout brouillage radioélectrique subi,
même si le brouillage est susceptible d’en compromettre le fonctionnement.
Japanese VCCI Class B statement
この装置は、クラス B 情報技術装置です。この装置は、家庭環境で使用すること
を目的としていますが、この装置がラジオやテレビジョン受信機に近接して使用
されると、受信障害を引き起こすことがあります。取扱説明書に従って正しい取
り扱いをして下さい。VCCI-B
Japan compliance statement for products that
connect to power mains rated at less than or equal to
20A per phase
日本の定格電流が 20A/ 相以下の機器に対する高調波電流規制
高調波電流規格 JIS C 61000-3-2 適合品
27
Page 32
Environmental, recycling, and disposal information
General recycling statement
Lenovo encourages owners of information technology (IT) equipment to
responsibly recycle their equipment when it is no longer needed. Lenovo
offers a variety of programs and services to assist equipment owners in
recycling their IT products. For information on recycling Lenovo products,
go to http://www.lenovo.com/recycling.
Important battery and WEEE information
Take back and recycling information for WEEE and batteries/accumulators
in the European Union and the United Kingdom
The crossed-out wheeled bin marking applies only to countries with WEEE
and batteries waste regulations within the European Union (EU), and United
Kingdom (UK).
Appliances and batteries/accumulators are labeled in accordance with local
regulations concerning waste electrical and electronic equipment (WEEE)
and waste batteries and waste accumulators. These regulations determine
the framework for the return and recycling of used appliances and used
batteries/accumulators as applicable within each geography. This label is
applied to various products to indicate that the product is not to be thrown
away, but rather put in the established collection systems for reclaiming
these end of life products.
The label on the battery may also include a chemical symbol for the metal
concerned in the battery (Pb for lead, Hg for mercury, and Cd for cadmium).
Users of electrical and electronic equipment (EEE) and users of batteries/
accumulators with the crossed-out wheeled bin marking must not dispose
of end of life products as unsorted municipal waste, but use the collection
framework available to them for the return, recycle, and recovery of WEEE
and waste batteries/accumulators and to minimize any potential effects
of EEE and batteries on the environment and human health due to the
presence of hazardous substances.
28
Page 33

Lenovo electrical and electronic equipment (EEE) may contain parts and
components, which at end-of-life might qualify as hazardous waste.
EEE and waste electrical and electronic equipment (WEEE) can be delivered
free of charge to the place of sale or any distributor that sells electrical and
electronic equipment of the same nature and function as the used EEE or
WEEE.
Before placing electrical and electronic equipment (EEE) in the waste
collection stream or in waste collection facilities, the end user of equipment
containing batteries and/or accumulators must remove those batteries and
accumulators for separate collection.
Dispose of lithium batteries and battery packs from Lenovo products:
A coin-cell type lithium battery might be installed inside your Lenovo
product. You can find details about the battery in the product
documentation. If the battery needs to be replaced, contact your place of
purchase or contact Lenovo for service. If you need to dispose of a lithium
battery, insulate it with vinyl tape, contact your place of purchase or a
waste-disposal operator, and follow their instructions.
Your Lenovo device might contain a lithium-ion battery pack or a nickel
metal hydride battery pack. You can find details on the battery pack in the
product documentation. If you need to dispose of a battery pack, insulate it
with vinyl tape, contact Lenovo sales, service, or your place of purchase, or a
waste-disposal operator, and follow their instructions. You also can refer to
the instructions provided in the user guide for your product.
For proper collection and treatment, go to: https://www.lenovo.com/
environment.
For additional WEEE information, go to: https://www.lenovo.com/recycling.
Battery recycling information for Brazil
Declarações de Reciclagem no Brasil
Descarte de um Produto Lenovo Fora de Uso Equipamentos elétricos e
eletrônicos não devem ser descartados em lixo comum, mas enviados à
pontos de coleta, autorizados pelo fabricante do produto para que sejam
encaminhados e processados por empresas especializadas no manuseio
de resíduos industriais, devidamente certificadas pelos orgãos ambientais,
de acordo com a legislação local. A Lenovo possui um canal específico
29
Page 34
para auxiliá-lo no descarte desses produtos. Caso você possua um produto
Lenovo em situação de descarte, ligue para o nosso SAC ou encaminhe um
e-mail para: [email protected], informando o modelo, número de série
e cidade, a fim de enviarmos as instruções para o correto descarte do seu
produto Lenovo.
Recycling information for Japan
Recycling and disposal information for Japan is available at
http://www.lenovo.com/recycling/japan.
Recycling information for India
Recycling and disposal information for India is available at
https://www.lenovo.com/in/en/social_responsibility/sustainability/ptb_
india.html.
Battery recycling marks
•The battery recycling information of Taiwan
•Battery recycling information for the United States and Canada
ENERGY STAR model information
ENERGY STAR® is a joint program of the U.S. Environmental Protection
Agency and the U.S. Department of Energy aimed at saving money and
protecting the environment through energy ecient products and practices.
Lenovo is proud to offer our customers products with the ENERGY STAR
30
Page 35

qualified designation. You might find an ENERGY STAR mark axed on the
computer or displayed on the power settings interface. Lenovo tablets of the
following model name, if carry an ENERGY STAR mark, have been designed
and tested to conform to the ENERGY STAR program requirements for
tablets.
TB301FU
By using ENERGY STAR qualified products and taking advantage of
the power-management features of the tablet, you can help reduce the
consumption of electricity. Reduced electrical consumption can contribute
to potential financial savings, a cleaner environment, and the reduction of
greenhouse gas emissions.
For more information about ENERGY STAR, go to http://www.energystar.
gov.
Lenovo encourages you to make ecient use of energy an integral part of
your day-to-day operations. To help in this endeavor, Lenovo has preset the
following power-management features to take effect when the computer
has been inactive for a specified length of time:
Power plan: Default
Turn o the display: After 30 seconds.
Press the power button to turn on the display.
The Wake on LAN function: NA
Export classification notice
This product is subject to the United States Export Administration
Regulations (EAR) and has an Export Classification Control Number (ECCN)
of 5A992.c. It can be re-exported except to any of the embargoed countries
in the EAR E1 country list.
31
Page 36
HEVC Standard
This product supports digital video coding under certain versions of HEVC
standard and is covered by patents at patentlist.accessadvance.com.
32
 Loading...