

Lenovo TAB 7
User Guide
Lenovo TB- 7504F
Lenovo TB- 7504X
All information labeled with * in this guide refers only to the WLAN+LTE model
(Lenovo TB -7504X).
Basics
Before using this information and the product it supports, be sure to read the follow ing:
Safety, Warranty & Quick Start Guide
Regulatory Notice
"Important safety and handling information" in "Appendix".
The Safety, Warranty & Quick Start Guide and the Regulatory Notice are available on the
website at http://support.lenovo.com.
Note: All pictures and illustrations in this document are for your reference only and may
differ from the final product.
Lenovo Help
Looking for help ? The Lenovo Help app can offer you support for getting direct access to
Lenovo's web assistance and forums*, frequent Q&A*, system upgrades*, hardware function
tests, warranty status checks*, service requests**, and repair status**.
Note:
* requires data network access.
** is not available in all countries.
You have two ways to get this app:
Search for and download the app from Google Play.
Scan the following QR code with a Lenovo Android device.
Technical specifications
Model Lenovo TB-7504F Lenovo TB-7504X
CPU MediaTek® MT8161 MediaTek® MT8735B
Battery 3500mAh 3500mAh
Wireless
communication
Note: Lenovo TB -7504X supports LTE Band 1,2,3,5,7,8,20,38 and 40, but in some countries
LTE is not supported. To know if your device works with LTE networks in your country,
contact your carrier.
Bluetooth 4.0; WLAN 802.11 b/g/n;
GPS; A -GPS
Bluetooth 4.0; WLAN 802.11 b/g/n;
GPS; A -GPS; GSM/UMTS/FDDLTE/TDD-LTE
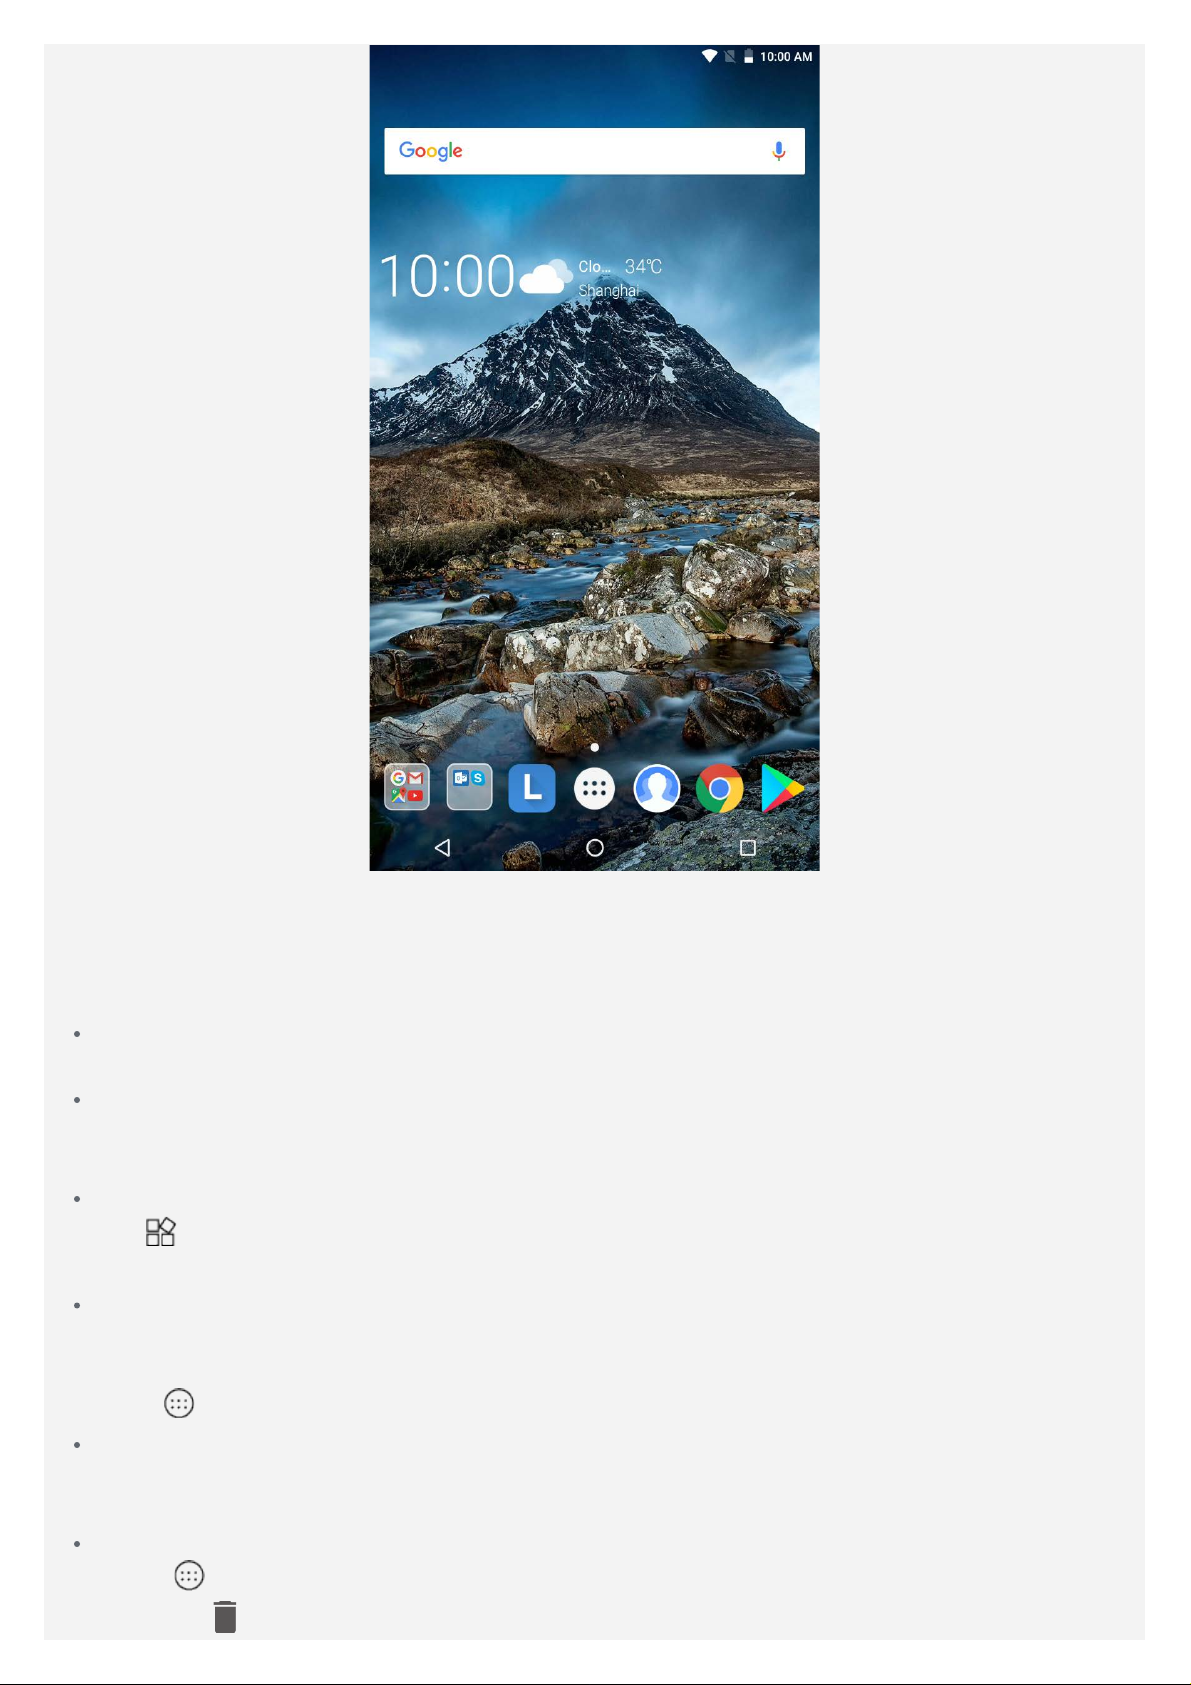
Home screen
The home screen is the starting point for using your device. For your convenience, the home
screen is already set up with some useful apps and widgets.
Note: Your device's features and the home screen may be different depending on
2. Drag to , and then release and tap OK.
your location, language, carrier, and device model.
You can customize your home screen at any time.
Home screen
On the fi rst home screen, there is a Google Search bar and some useful apps.
Preview screen
Press and ho ld anywhere on the home screen except the icons.
At the bottom of the screen are WALLPAPERS and WIDGETS.
Add a widget to a home screen
Tap
drag it to where you want to place it and release.
Change the wallpaper
Press and ho ld anywhere on the home screen except the icons, select WALLPAPERS at the
bottom of the screen, and then choose the wallpaper that you like.
Go to
Move an app to another screen
Press and ho ld an app that you want to move, drag it to the left or right side of the screen,
then release i t where you want to place it.
Uninstall an app
1. Tap
at the bo ttom of the p review screen, press and hold the widget you want to add, then
> Settings > Display > Wallpaper and choose the wallpaper that you like.
, press and hold an app that you want to uninstall.
Note: Some of the system apps cannot be uninstalled.
Screen Buttons
There are three buttons in the taskbar.
Back button : Tap to return to the previous page.
Home button: Tap to return to the default home screen.
Recent button: Tap to see recent apps. Then you can do the following:
Tap an app to open it.
Swipe an app window right or left to close it.
Tap to lock app or tap to unlock app.
Tap to stop running the app.
Tap to stop running all the apps.
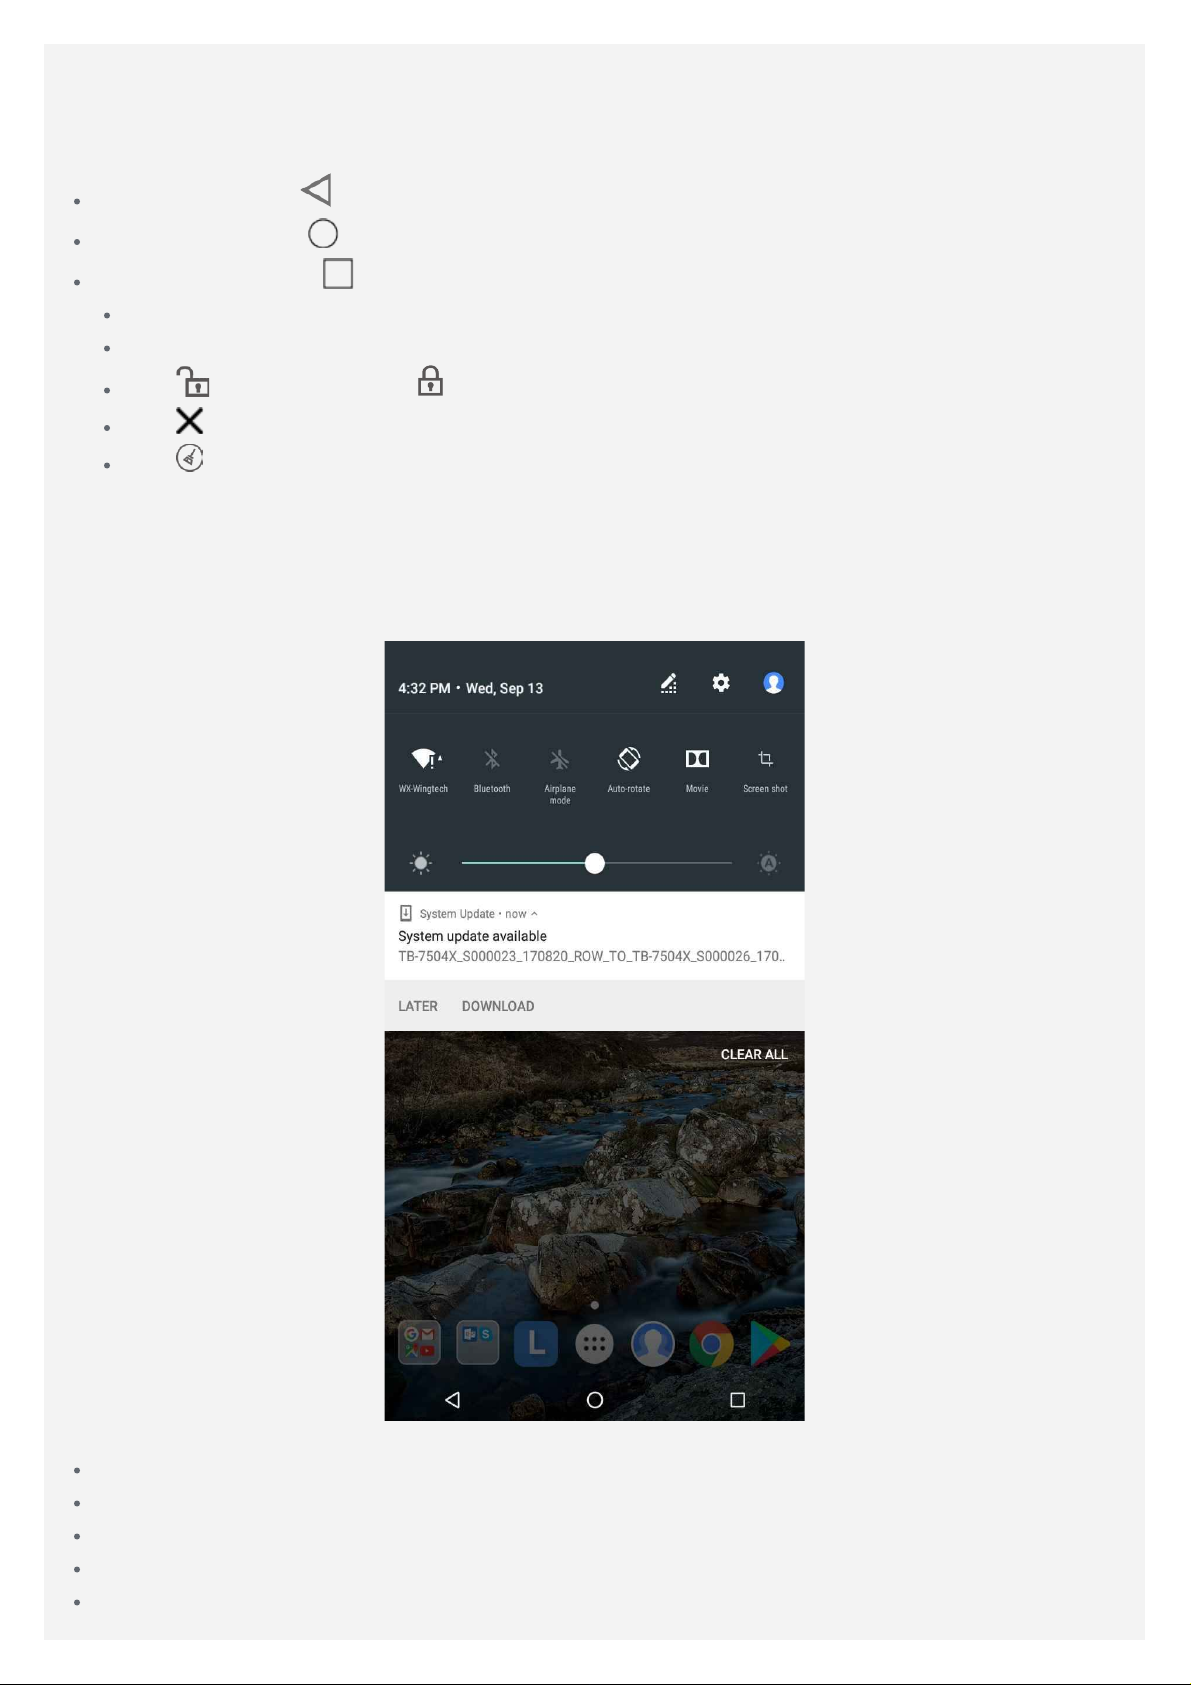
Notifications and Quick Settings
The Notifications panel informs you of new messages, USB connection, and activities in progress
such as file downloading. The Quick Settings panel allows you to access frequently -used
settings such as the WLAN switch.
You can do any of the following:
To see notifications, swipe down from the top of the screen.
To close the Notifications panel, swipe up from the bottom of the screen.
To dismiss a notification, swipe left or right across the notification.
To dismiss all notifications, tap CLEAR ALL at the bottom of the Notifications panel.
To open the Quick Settings panel, swipe down from the top of the screen twice.

To close the Quick Settings panel, swipe up from the bottom of the screen.
Force shutdown/reboot
Press and ho ld the power button for about 8 seconds until the device turns off; press and hold
the power button for about 10 seconds to reboot.
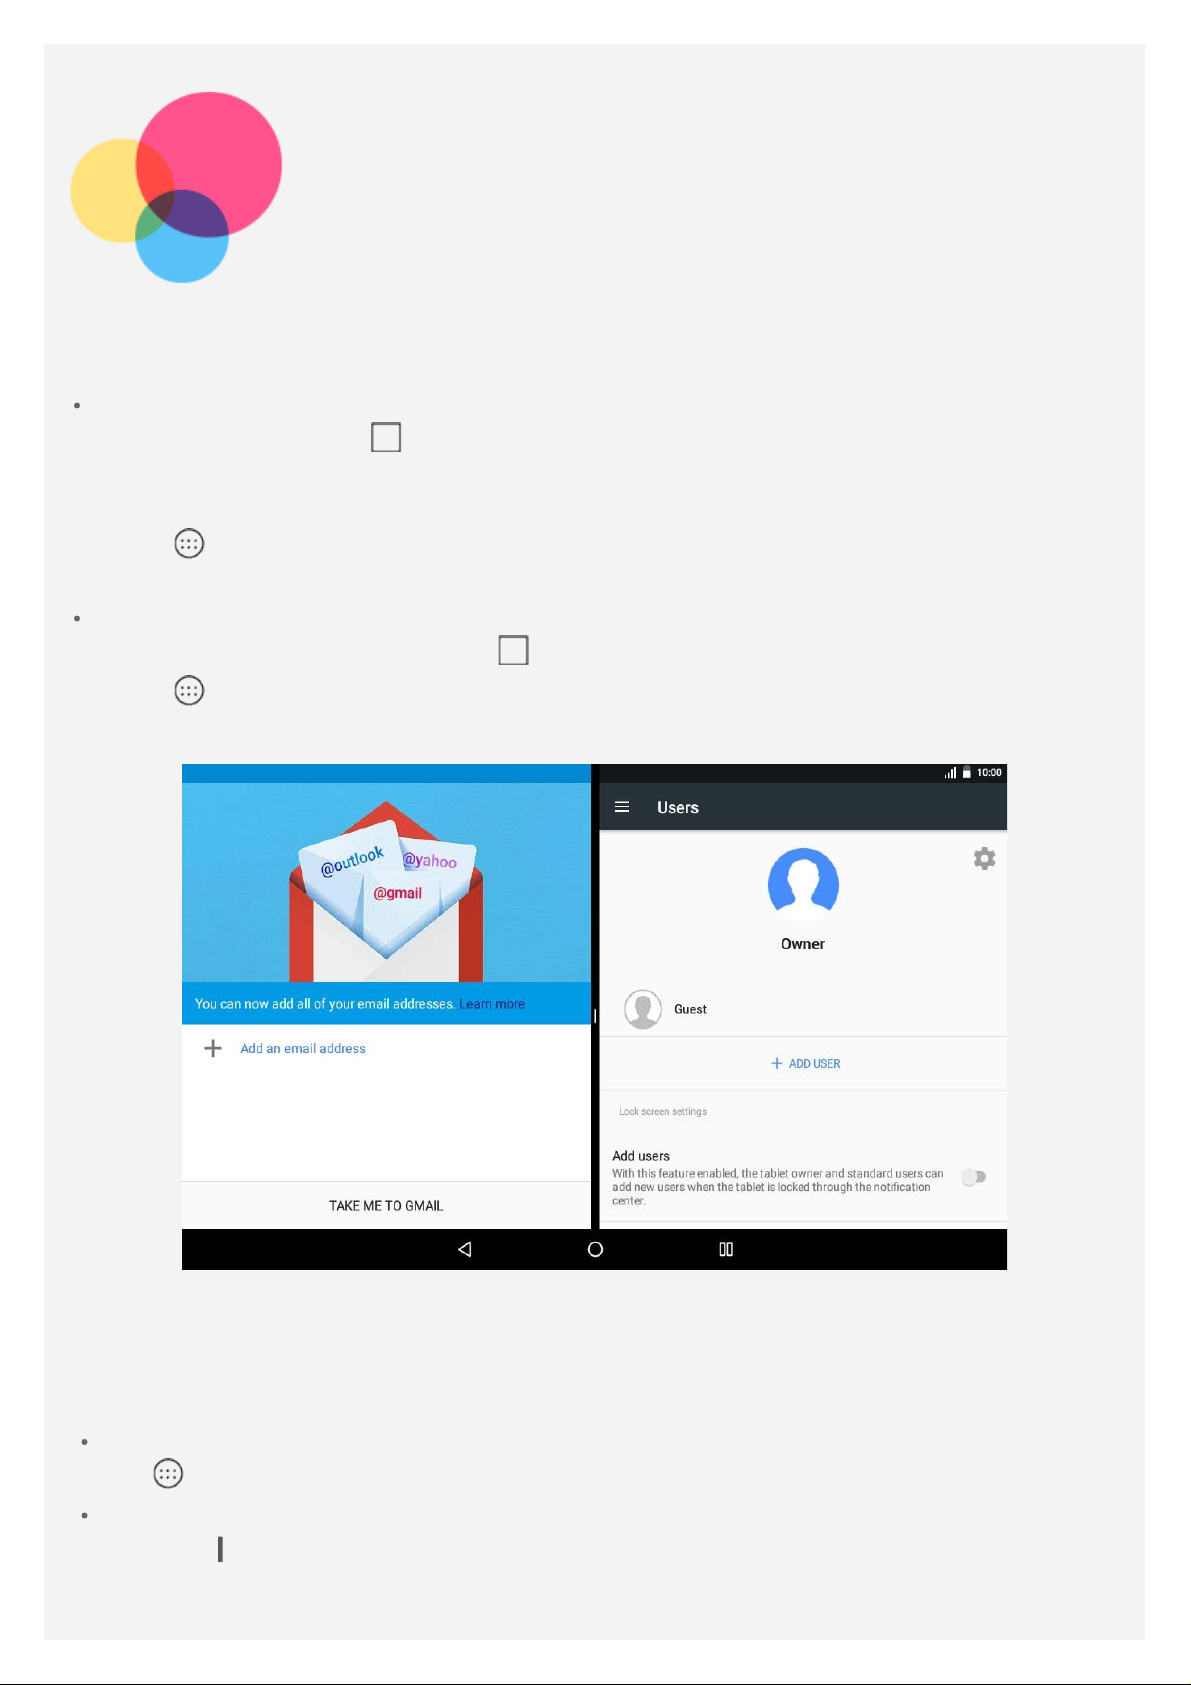
Split screen mode
Using split screen mode
Method 1
1. Open an app then tap
2. Press and h old the first app, drag it to "Drag here to use split screen " then release. The
app will be locked into position.
3. Tap
split screen mode.
Method 2
1. Open an app then press and hold
2. Tap
screen mode.
, choose the second app yo u want to open. The two apps will then be displayed in
, choose the second app yo u want to open. The two apps will be displayed in split
.
. This app will be locked into on the screen.
Note: Not all applications support split screen mode .
Split screen settings
In split screen mode you can do the following:
Replace the second app
Tap
Adjust the split screen size
Slide the "
, choose another app.
" in the middle of the two apps, to adjust the split screen size.
Exiting split screen mode
You can exit split screen mode by:
Choosing an app that doesn't support split screen mode.
Pressing and holding to exit the split mode .
Slide the " " to the edge to exit the split mode.
Multi-user
Multi-user
There are three user types:
Owner: An owner has full control over all user permissions and manages all user accounts.
Guest: There is only one Guest account. A Guest has restricted access to the device. For
instance, a Guest can't open Unknown sources.
New User : There can be multiple user accounts, including standard user a nd child user. A
standard user can manage child user accounts.
Creating new user accounts
On the h ome screen, tap > ADD USER to create user accounts.
On the h ome screen, swipe down from the top of the screen, and tap > Add user to create
user accounts.
Tap > Settings > Users > ADD USER to create user accounts.
Tap to create a standard user account.
Tap to create a child user account.
Note: Before you add a child user account, you need to set up a screen lock to
protect your apps and personal data.
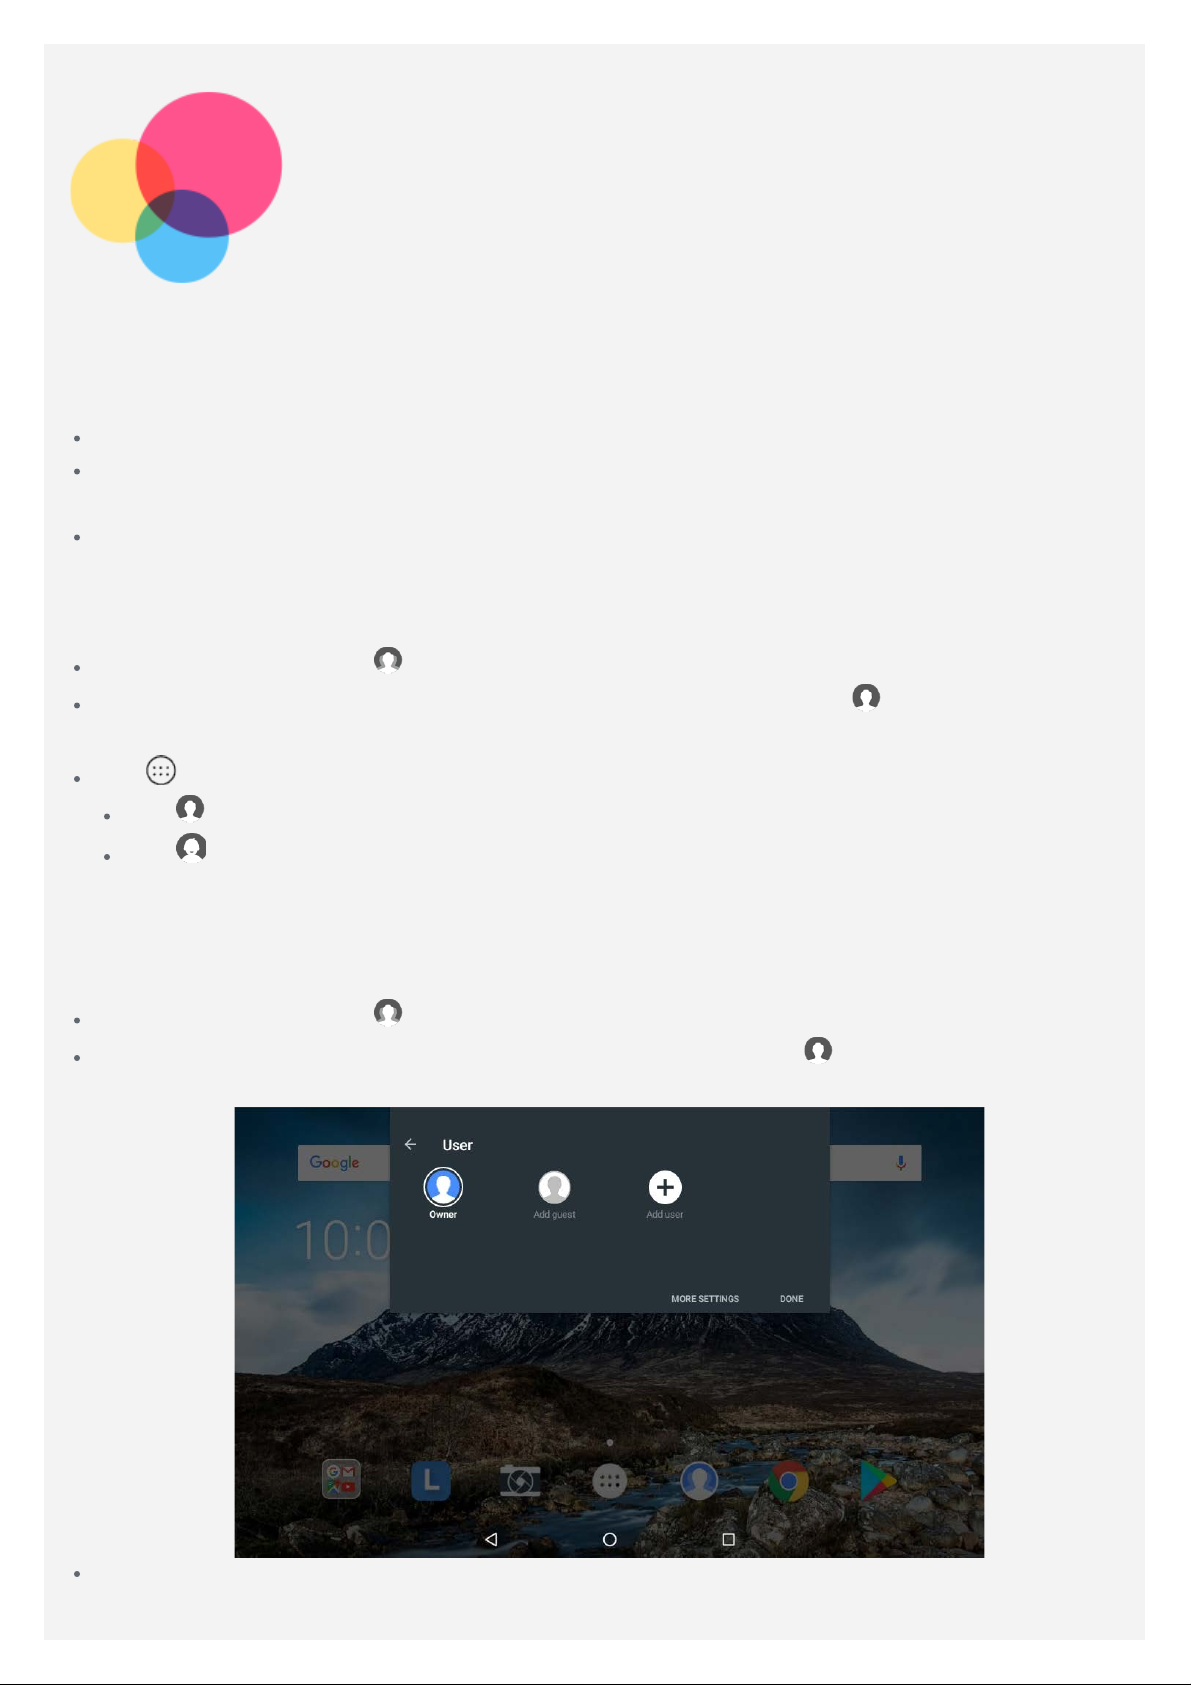
Switching between user accounts
On the h ome screen, tap , select the user account you want to switch.
On the h ome screen, swipe down from the top of the screen, tap and then tap user photos
to switch between different user accounts.
On the l ock screen interface, select the user photos you want to switch, then ta p and swipe
up to switch to the user account.
Tap > Settings > Users , select the user account you want to switch.
Deleting a user account
On the h ome screen, tap , and tap the icon located beside the account you would like
to delete, then tap DELETE USER > DELETE.
On the h ome screen, swipe down from the top of the screen, tap , tap MORE SETTINGS
and tap the
USER > DELETE.
Tap > Settings > Users , and tap the icon located beside the account you would like to
delete, then tap DELETE USER > DELETE .
icon located beside the account you would like to delete, then tap DELETE

Camera
To open the Camera app, go to Camera.
Taking photos and videos
You can take photos and record videos with your device's built-in camera.
Tap to take a photo.
Tap to record a video.
Tap to convert to panorama mode.
Tap to switch between the front and the rear camera.
Tap / to enable or disable HDR.
Tap to configure other camera settings.
Taking screenshots

Press and ho ld the Power button and the Volume down button at the same time.
Viewing pictures and videos
Photos and videos are stored in your device's internal storage. You can view your photos and
videos by using the following methods:
Tap the thumbnail when using the Camera ap p.
Go to Photos.
Go to File Manager .
The screenshots are stored in your device's internal storage. You can view your screenshots by
using the following methods:
Go to Photos.
Go to File Manager .

Network
You need to set up a wireless network before connecting to the Internet.
Set up a WLAN network
Set up a mobile network*
Set up a VPN network
Set up a hotspot*
Setting up a WLAN network
Go to > Settings > WLAN.
Turn on the WLAN switch and tap a WLAN hotspot in the list to connect to the Internet.
When you a re connecting to a secure hotspot, you need to enter your login name and password
to connect.
*Setting up a mobile network
Go to > Settings > Data usage .
Note: You need a valid SIM card with a data service. If you don't have a SIM card, contact
your carrier.
Setting up a VPN network
VPNs are used within organizations to allow you to communicate private information securely
over a non- private network. You may need to configure a VPN, for example, to access your work
email. Ask the network's administrator for the settings necessary to configure a VPN for your
network.
Go to > Settings > More > VPN.
Tap to edit the VPN profile, including the server name, the type, and the server address,
and then tap SAVE.
Tap the VPN server name, input the username and password, and then tap CONNECT to
connect to the VPN network.
Tap to edit or delete the VPN.
Note: You need to set a lock screen pattern, PIN or password before using a VPN. Go to
Settings > Security > Screen lock to select a screen lock option and set up the screen
lock.
*Setting up a hotspot
You can use personal hotspot to share an Internet connection with a computer or other device.
Go to
Tap WLAN hotspot and switch it on.
Tap Set up WLAN hotspot to configure the hotspot.
You can also use Bluetooth tethering or USB tethering.
> Settings > More > Tethering & portable hotspot and do the following:

Note: Tell your friends the Network name and password, and then they can share your
mobile network.

Internet
You can browse the w eb if your device is connected to a wireless network or a cellular network.
To open the browser app, go to Chrome.
Visiting websites
You can use the Chrome app to visit websites.
Type a web address
You don't need to type th e full web address of an "http://" website to access it.
To visit "http://www.lenovo.com", simply type "www.lenovo.com" into the address bar and tap
.

Search for keywords
You can also typ e keywords into the address bar to search for webpag es.
You can set a search engine in
Add a new webpage
> Settings > Search engine .
Tap
Tap
Close a webpage
Tap
Refresh a webpage
Tap
Tap
> New tab to add a new webpage tab.
> New incognito tab to visit a website without leaving any traces of your visit.
> to close a webpage tab.
> to refresh a webpage.
to go forward to a recent webpage.
Saving webpages
You can save images and webpages in your device's internal storage.
Save images
Press and ho ld the image, then tap Download image.
Bookmark webpages
Tap
Tap
> to add a webpage to Bookmarks.
> Bookmarks to view bookmarks.
Setting accessibility preferences
Tap > Settings > Accessibility to set the text scaling and the webpage zoom.

Gmail
You can send and receive emails if your device is connected to a wireless network.
To access the Gmail app, go to Gmail.
Setting up a Gmail account
You can sign i nto Gmail if you have a Gmail account. If not, you will need to create a Gmail
account, and you can also sign in email accounts provided by other company.
Using Gmail
After setting up an email account you can use the Gmail app to send and receive emails.

Maps
You need to select the following settings before you can use Maps.
Go to Settings > Location and enable location access for Google app s.
Finding a location
Type the address that you want to find, then tap .
You can also ta p , then sa y the address you want.
Current location
Tap to see your current location.
Then tap Explore around you to check what is nearby.
Planning a route
Tap and type in "Your location " and "Choose destination", or just choose the starting point
as "Your location".
Choose the travel mode: by car, by bus, on foot, or by bicycle.


Sync
You can transfer data between your device and computer such as music, pictures, videos,
documents, Android application package (APK) files, and so on.
Connecting your device to your computer
Connect your device and computer using a USB cable.
Slide down from the top of the screen, you will see "USB for file transfer" in the
notifications bar.
Tap USB for file transfer for other options.
Selecting the computer connection mode
You can select one of the following options:
Media device (MTP) : Select this mode if you want to transfer media files such as photos,
videos, and ringtones between your tablet and the computer.
Camera (PTP) : Select this mode if you only want to transfer only photos and videos between
your tablet and the computer.
MIDI: Select this mode if you want MIDI -enabled apps on your device to work with MIDI
software on the computer.
Charging: Select this mode if you want to charge your tablet only.

Installing APKs
Follow these steps:
You need to set the device to allow the installation of apps obtained from unknown sources.
Go to Settings > Security, switch on Unknown sources.
Copy the APK file from the computer to the device in "Media device (MTP)" mode.
Open the apps category in the File manager.

Communication
You can use the device to send messages or manage contacts.
Contacts
You can manage contacts through the Contacts application, and you can create contacts,
manage contacts.
Create a contact
Go to Contacts.
Tap to create a contact.
Select the storage location.
Enter contact information, for example, "Name", "Phone", "Email" and so on.
When finished, tap .
Import/export contacts
Go to Contacts.
Tap > Import/export , select the contact you want to import/export, and tap OK.
*Make a call
Go to Phone.
Tap , enter the number and tap to make a call.

Note: A SIM card needs to be inserted for personal calls. Otherwise, only emergency calls
are available.
*Send a message
Go to Messaging.
Tap to edit a message.
Tap to choose a contact and send message.


Settings
Settings home screen
Tap > Settings . When you are setting any other functions (except Scheduled power on and
off) for the device, slide your finger right across the screen, and open the settings home screen.
Language & input
1. Tap > Settings > Languages & input > Languages > Add a language.
2. Select the language that you want to add.
3. Drag the added language to the first line.

Appendix
Important safety and handling information
To avoid personal injury, property damage, or accidental damage to the product, read all of the
information in this section before using the product. For additional tips to help you operate your
device safely, go to http://www.lenovo.com/safety.
Handle your device with care
Do not drop, bend, or puncture your device; do not insert foreign objects into or place heavy
objects on your device. Sensitive components inside might become damaged.
Your device screen is made of glass. The glass might break if the device is dropped on a hard
surface, is subjected to a high impact, or is crushed by a heavy object. If the glass chips or
cracks, do not touch the broken glass or attempt to remove it from the device. Stop using the
device immediately and contact Lenovo technical support for repair, replacement, or disposal
information.
When using your device, keep it away from hot or high- voltage e nvironments, such as electrical
appliances, electrical heating equipment, or electrical cooking equipment. Use your device only
in the temperature range of 0°C (32°F) to 40°C (104°F) (storage - 20°C ( -4°F) to 60°C (140°F)) to
avoid damage.
Don't expose your device to water, rain, extreme humidity, sweat or other liquids.
Do not disassemble or modify your device
Your device is a sealed unit. There are no end -user serviceable parts inside. All internal repairs
must be done by a Lenovo-authorized repair facility or a Lenovo-authorized technician.
Attempting to open or modify your device will void the warranty.
Built- in rechargeable battery notice
Do not attempt to replace the internal rechargeable lithium io n battery. There is risk of explosion
if the battery is replaced with an incorrect type. Contact Lenovo Support for factory replacement.
Plastic bag notice
DANGER:
Plastic bags can be dangerous. Keep plastic bags away from babies and children to avoid
danger of suffocation.
Adapter information
Prevent your device and AC adapter from getting wet.
Do not immerse your device in water or leave your device in a location where it can come into
contact with water or other liquids.
Use approved charging methods only.
Note: Please only use standard Lenovo power adapters. The use of third- party p ower
adapters will affect the charging speed, resulting in abnormal charging and potential damage

to the e quipment.
Connect a standard power adapter to a suitable power outlet.
Use a standard data cable to connect the device to a PC or a device that complies with
USB 2.0 or higher.
Charging devices might become warm during normal use. Ensure tha t you h ave adequate
ventilation around the charging device. Unplug the charging device if any of the following occurs:
The charging device has been exposed to rain, liquid, or excessive moisture.
The charging device shows signs of physical damage.
You want to clean the charging device.
Warning:
Lenovo is not responsible for the performance or safety of products not manufactured or
approved by Lenovo. Use only approved Lenovo ac adapters and batteries.
Caution about high volume usage
Warning: exposure to loud noise from any source for extended periods of time may affect your
hearing. The louder the sound, the less time is required before your hearing could be affected.
To protect your hearing:
Limit the amount of time you use headsets or headphones at high volume.
Avoid turning up the volume to block out noisy surroundings.
Turn the volume down if you can't hear people speaking near you.
If you experience hearing discomfort, including the sensation of pressure or fullness in your
ears, ringing in your ears or muffled speech, you should stop listening to the device through
your headset or headphones and have your hearing checked.
Take care when using your device in a motor vehicle or on a bi cycle
Always prioritize your safety and the safety of others. Follow the law. Local laws and regulations
might govern how you can use mobile electronic devices, such as your device, while you drive a
motor vehicle or ride a bicycle.
Dispose according to local laws and regula tions
When your device reaches the end of its useful life, do not crush, incinera te, immerse in water,
or dispose of your device in any manner contrary to local laws and regulations. Some internal
parts contain substances that can explode, leak, or have an adverse environmental effects if
disposed of incorrectly.
See "Recycling and environmental information" for additional information.
Keep your device and accessories away from small children
Your device contains small parts that can be a choking hazard to small children. Additionally, the
glass screen can break or crack if dropped on or thrown against a hard surface.
Protect your data and software
Do not delete unknown files or change the name of files or directories that were not created by
you; otherwise, your device software might fail to work.
Be a ware that accessing network resources can leave your device vulnerable to computer
viruses, hackers, spyware, and other malicious activities that might damage your d evice,
software, or data. It is your responsibility to ensure that you have adequate protection in the
form of firewalls, antivirus software, and anti -spyware software and keep such software up to
date.

Keep electrical appliances away from your device. The se include electric fans, radios, high -
powered speakers, air -conditioners, and microwave ovens. The strong magnetic fields generated
by electrical appliances can damage the screen and the data on the device.
Be a ware of heat generated by your device
When your device is turned on or the battery is charging, some parts might become hot. The
temperature that they reach depends on the amount of system activity and the battery charge
level. Extended contact with your body, even through clothing, could cause discomfort or even a
skin burn. Avoid keeping your hands, your lap, or any other part of your body in contact with a
hot section of the device for any extended time.
Electronic emission notices
FCC Compliance Statement
This equipment has been tested and found to comply with the limits for a Class B digital device,
pursuant to Part 15 of the FCC Rules. These limits are designed to provide reasonable
protection against harmful interference in a residential installation. This equipment generates,
uses, and can radiate radio frequency energy and, if not installed and used in accordance with
the instructions, may cause harmful interference to radio communications. However, there is no
guarantee that interference will not occur in a particular installation. If this equipment does
cause harmful interference to radio or television reception, which can be de termined by turning
the equipment off and on, the user is encouraged to try to correct the interference by one or
more of the following measures:
Reorient or relocate the receiving antenna.
Increase the sep aration between the equipment and receiver.
Connect the equipment into an outlet on a circuit different from that to which the receiver is
connected.
Consult an authorized dealer or service represen tative for help.
Lenovo is not responsible for any radio or television inte rference caused by unauthorized
changes or modifications to this equipment. Unauthorized changes or modifications could void
the user's authority to operate the equipment.
This device complies with Part 15 of the FCC Rules. Operation is subject to the following two
conditions: (1) this device may not cause harmful interference, and (2) this device must accept
any interference received, including interference that may cause undesired operation .
Responsible Party:
Lenovo (United States) Incorporated
1009 Th ink Place - Building One
Morrisville, NC 27560
Telephone: 1-919 -294 -5900
IC Caution
This device complies with Industry Canada license-exempt R SS standard(s). Operation is subject
to the fo llowing two conditions:
(1) This device may not cause interference, and
(2) this device must accept any interference, including interference that may cause undesired
operation of the device.
Le présent appareil est conforme aux CNR d'Industrie Canada applicables aux appareils radio
exempts de licence. L'exploitation est autorisée aux deux conditions suivantes:
(1) l'appareil ne doit pas produire de brouillage, et
(2) l'utilisateur de l'appareil doit accepter tout brouillage radioélectrique subi, même si le

brouillage est susceptible d'en compromettre le fonctionnement.
Japanese VCCI Class B statement
この装置は、クラスB情報技 術装置です。この装置は、家庭環境で使用することを目的としていますが、
この装置がラジオやテレビジョン受信機に近接して使用されると、受信障害を引き起こすことがありま
す。 取扱説明書に従って正しい取り扱いをして下さい。VCCI-B
Japan compliance statement for products that connect to power mains rated at less than or equal
to 20A per phase
日本の定格電流が 20A/相 以下の機器に対する高 調波電流規 制
高調波電流規格 JIS C 61000-3-2 適合品
Environmental, recycling, and disposal information
General recycling statement
Lenovo encourages owners of information technology (IT) equipment to responsibly recycle their
equipment when it is no longer needed. Lenovo offers a variety of programs and services to
assist equipment owners in recycling their IT products. For information on recycling Lenovo
products, go to http://www.lenovo.com/recycling.
Important battery and WEEE information
Batteries and electrical and electronic equipment marked with the symbol of a crossed -out
wheeled bin may not be disposed as unsorted municipal waste. Batteries and waste of electrical
and electronic equipment (WEEE) shall be treated separatel y using the collection framework
available to customers for the return, recycling, and treatment of batteries and WEEE. When
possible, remove and isolate batteries from WEEE prior to placing WEEE in the waste collection
stream. Batteries are to be collected separately using the framework available for the return,
recycling, and treatment of batteries and accumulators.
Country -specific information is available at http://www.lenovo.com/recycling.
Battery recycling information for Brazil
Declarações de Reciclagem no Brasil
Descarte de um Produto Lenovo Fora de Uso Equipamentos elétricos e eletrônicos não devem
ser descartados em lixo comum, mas enviados à pontos de coleta, autorizados pelo fabricante
do produto para qu e sejam encaminhados e processados por empresas especializadas no
manuseio de resíduos industriais, devidamente certificadas pelos orgãos ambientais, de acordo
com a legislação local. A Lenovo possui um canal específico para auxi liá-lo no descarte desses
produtos. Caso você possua um produto Lenovo em situação de descarte, ligue para o nosso
SAC ou encaminhe um e -mail para: reciclar@lenovo.com, informando o modelo, número de série
e cidade, a fim de enviarmos as instruções para o correto descarte do seu produto Lenovo.
Recycling information for Japan
Recycling and disposal information for Japan is available at
http://www.lenovo.com/recycling/japan.
Recycling information for India
Recycling and disposal information for India is available at
http://www.lenovo.com/social_responsibility/us/en/sustainability/ptb_india.html.
Battery recycling marks

The battery recycling information of Taiwan
Battery recycling information for the United States and Canada
Battery recycling information for the European Union
ENERGY STAR model information
ENERGY STAR® is a joint program of the U.S. Environmental Protection Agency and the U.S.
Department of Energy aimed at saving money and protecting the environment through energy
efficient products and practices.
Lenovo is proud to offer our customers products with the ENERGY STAR qualified designation.
You might find an ENERGY STAR mark affixed on the computer or displayed on the power
settings interface. Lenovo phones of the following model name, if carry an ENERGY STAR mark,
have been designed and tested to conform to the ENERGY STAR program requirements for
phones.
Lenovo TB-7504F
By using ENERGY STAR qualified products and taking advantage of the power -management
features of the phone, you can help reduce the consumption of electricity. Reduced electrical
consumption can contribute to potential financial savings, a cleaner environment, and the
reduction of greenhouse gas emissions.
For more information about ENERGY STAR, go to http://www.energystar.gov.
Export classification notice
This product is subject to the United States Export Administration Regulations (EAR) and has an
Export Classification Control Number (ECCN) of 5A992.c. It can be re- exported except to any of
the embargoed countries in the EAR E1 country list.
Troubleshooting
Insufficient memory prompt appears during app installation
Please free up some memory and try to install again.
The touch screen does not work or is not sensitive
Please press and hold the On/Off button for more than 8 seconds until the device turns off. Then
switch it on again in normal way.
Device does not power on or system crashes
Please charge the battery for half an hour and then press and hold the On/Off button for more
than 8 seconds until the device turns off. Then switch it on again in norma l way.
The device cannot access the internet via a wireless network
Restart the wireless router or go to Settings an d restart WLAN.

The device cannot wake up from sleep mode
Please press and hold the On/Off button for more than 8 seconds until the device turns off. Then
switch it on again in normal way.
 Loading...