

Page 1

ThinkServerRD230
HardwareMaintenanceManual
MachineTypes:1043,1044,4010,and4011
Page 2

Note:
Beforeusingtheinformationandtheproductitsupports,besuretoreadandunderstandthefollowing:
•TheReadMeFirstthatcomeswithyourproduct
•“Safetyinformation”onpageiii
•AppendixC“Notices”onpage135
SeventhEdition(February2012)
©CopyrightLenovo2010,2012.
LIMITEDANDRESTRICTEDRIGHTSNOTICE:IfdataorsoftwareisdeliveredpursuantaGeneralServicesAdministration
“GSA”contract,use,reproduction,ordisclosureissubjecttorestrictionssetforthinContractNo.GS-35F-05925.
Page 3

Contents
Safetyinformation..........iii
Chapter1.Generalinformation.....1
Introduction.................1
Serverdocumentation.............1
Chapter2.Serversetuproadmap....5
Chapter3.Featuresand
technologies..............7
Whatisincludedwithyourserver........7
Features..................7
Specications................7
Softwareprograms..............9
EasyStartup...............9
EasyManage...............9
Reliability,availability,andserviceability......9
Chapter4.Diagnostics........11
Troubleshootingtables...........11
DVDdriveproblems...........11
Generalproblems............12
Harddiskdriveproblems.........12
Intermittentproblems..........13
Keyboard,mouse,orpointing-device
problems...............13
Memoryproblems...........14
Microprocessorproblems........15
Monitorproblems............15
Optional-deviceproblems........17
Powerproblems............17
Serialportproblems...........19
Softwareproblems...........19
UniversalSerialBus(USB)portproblems..20
Solvingpowerproblems...........20
SolvingEthernetcontrollerproblems......20
Solvingundeterminedproblems........21
Eventlogs................22
Viewingeventlogswithoutrestartingthe
server................22
Systemeventlog..............22
DiagnosticLEDsonthefrontcontrolpanel...23
Onboarddebugdigitron...........23
Chapter5.Locatingparts,controls,
LEDs,andconnectors........25
Frontview................25
Rearview.................25
Frontcontrolpanel.............25
Locatingservercomponents.........28
Locatingpartsonthesystemboard......29
Locatingconnectorsonthebackplane.....34
Chapter6.Installing,removing,or
replacinghardware..........35
Guidelines................35
Precautions..............35
Handlingstatic-sensitivedevices.....36
Systemreliabilityguidelines........36
Workinginsidetheserverwiththepoweron.37
Removingtheservercover..........37
Installing,removing,orreplacingoptionalhardware
devices.................38
Installingorremovingamemorymodule...38
Removingorinstallinginternaldrives....41
Installingorremovingtherisercard.....50
InstallingorremovingaPCIcard......53
RemovingorinstallingtheEthernetcard...55
Installing,removing,orreplacinghardware
devices.................56
Removingorinstallingthesystemboard
battery................56
RemovingorinstallingtheRAIDcontroller..58
Removingorinstallingtheheatsink
assembly...............71
Removingorinstallingthemicroprocessor..73
Removingorinstallingthesystemfans...77
Removingorinstallingthepowersupply...79
Removingorinstallingthesystemboard...84
Completingthepartsreplacement.......87
Installingtheservercover........88
Connectingthecables..........88
Turningontheserver..........88
Updatingtheserverconguration.....88
Turningofftheserver..........89
Connectingexternaldevices.......89
Chapter7.Partslisting,RD230T ypes
1043,1044,4010,and4011......91
Replaceableservercomponents........91
Shipgroup................101
Powercords...............106
Chapter8.Conguringtheserver.109
UsingtheSetupUtilityprogram........109
StartingtheSetupUtilityprogram.....110
©CopyrightLenovo2010,2012
i
Page 4

IntroductionoftheBIOSitems.......110
Usingpasswords............117
RAIDcontrollers..............118
UsingtheThinkServerEasyStartupprogram...118
BeforeyouusetheEasyStartupDVD....119
Setupandconguration.........119
ConguringRAID............120
Typicaloperatingsysteminstallation....120
ConguringtheonboardSATAsoftwareRAID..121
RAIDinformation............121
StartingtheIntelMatrixStorageManager
program...............121
CreatingtheRAIDvolume........121
DeletingtheRAIDvolume........122
RebuildingtheRAIDvolume.......122
Onboard1068ESASRAIDcontrollerConguration
Utilityprogram...............122
ConnectingtheminiSAScable......122
StartingtheCongurationUtilityprogram..124
AccessingtheAdapterPropertieswindow..125
SASRAIDsettings...........125
CreatingordeletingtheRAID1array....126
AccessingtheSASTopologywindow....126
ConguringtheGigabitEthernetcontroller....127
Updatingthermware............127
UsingtheEasyUpdateFirmwareUpdater
program...............127
InstallingtheThinkServerEasyManage
program.................128
AppendixA.RAIDbatterycard
assembly..............129
Specications...............129
Batterylifeanddataretentiontime.....129
AppendixB.Gettinginformation,
help,andservice..........131
Informationresources............131
Usingthedocumentation.........131
ThinkServerWebsite..........131
LenovoSupportWebsite.........131
Helpandservice..............132
Beforeyoucall.............132
Callingforservice............132
Usingotherservices..........133
Purchasingadditionalservices......133
AppendixC.Notices.........135
Trademarks................136
Importantnotes..............136
PolyvinylChloride(PVC)cableandcordnotice..136
Recyclinginformation............136
Batteryreturnprogram..........137
Requirementforbatteriescontaining
perchlorate..............138
Particulatecontamination..........139
ImportantinformationfortheEuropeanDirective
2002/96/EC................139
RestrictionofHazardousSubstancesDirective
(RoHS)..................143
ChinaRoHS..............143
Turkishstatementofcompliance......144
GermanOrdinanceforWorkglossstatement...144
Electronicemissionnotices..........144
FederalCommunicationsCommission(FCC)
Statement...............144
Index.................147
iiThinkServerRD230HardwareMaintenanceManual
Page 5
Safetyinformation
Note:Beforeusingtheproduct,besuretoreadandunderstandthemultilingualsafetyinstructionsonthe
documentationDVDthatcomeswiththeproduct.
Antesdeusaroproduto,leiaeentendaasinstruçõesdesegurançamultilínguesnoDVDdedocumentação
queoacompanha.
Предидаизползватетозипродукт,задължителнопрочететеивникнетевмногоезичнитеинструкции
забезопасноствDVDдискасдокументация,койтосепредоставяспродукта.
PrijeupotrebeovogproizvodaobaveznopročitajtevišejezičnesigurnosneuputekojesenalazenaDVD-us
dokumentacijomkojidobivateuzproizvod.
PředpoužitímproduktujetřebasipřečístaporozumětbezpečnostnímpokynůmuvedenýmnadiskuDVDs
dokumentací,kterýjedodávánsproduktem.
Førdubrugerproduktet,skaldusørgeforatlæseogforstådesikkerhedsforskrifter,derndespåere
sprog,pådendokumentations-dvd,derfølgermedproduktet.
LuetuotteenmukanatoimitetullaDVD-tietolevylläolevatmonikielisetturvaohjeetennentämäntuotteen
käyttöä.
Avantd'utiliserleproduit,veillezàbienlireetcomprendrelesinstructionsdesécuritémultilinguesgurant
surleDVDdedocumentationfourniavecleproduit.
Πρινχρησιμοποιήσετετοπροϊόν,βεβαιωθείτεότιέχετεδιαβάσεικαικατανοήσειτιςοδηγίεςασφάλειας,οι
οποίεςείναιδιαθέσιμεςσεδιάφορεςγλώσσεςστοDVDτεκμηρίωσηςπουσυνοδεύειτοπροϊόν.
VorVerwendungdesProduktssolltenSieunbedingtdiemehrsprachigenSicherheitsanweisungenaufder
Dokumentations-DVDlesen,dieimLieferumfangdesProduktsenthaltenist.
AtermékhasználataelőttmindenképpenolvassaelésértelmezzeatermékhezkapottdokumentációsDVD
lemezentalálható,többnyelvenelolvashatóbiztonságielőírásokat.
Primadiutilizzareilprodotto,accertarsidileggereecomprendereleinformazionisullasicurezzamultilingue
disponibilisulDVDdidocumentazionefornitoconilprodotto.
製品をご使用になる前に、製品に付属のDocumentationDVDに収録されているマルチリンガルの「安
全に正しくご使用いただくために」を読んで理解してください。
제품을사용하기전에제품과함께제공되는문서DVD의다국어안전지침을주의깊게읽어보십시오.
Voordatuhetproductgebruikt,moetuervoorzorgendatudemeertaligeveiligheidsinstructiesopde
documentatie-dvdvanhetproducthebtgelezenenbegrijpt.
©CopyrightLenovo2010,2012
iii
Page 6

Przedskorzystaniemzproduktunależyzapoznaćsięzwielojęzycznymiinstrukcjamibezpieczeństwa
znajdującymisięnapłycieDVDzdokumentacjądostarczonąwrazzproduktem.
Antesdeutilizaroproduto,leiaatentamenteasinstruçõesdesegurançamultilinguesqueconstamno
DVDdedocumentaçãofornecidocomoproduto.
Înaintedeautilizaprodusul,asiguraţi-văcăaţicititşiînţelesinstrucţiuniledesiguranţăînmaimultelimbide
peDVD-ulcudocumentaţiecareînsoţeşteprodusul.
Førdubrukerproduktet,måduleseogforstådenerspråkligesikkerhetsinformasjonenpåDVDenmed
dokumentasjonsomfølgermedproduktet.
Преждечемиспользоватьэтотпродукт,внимательноознакомьтесьсинструкциямипотехнике
безопасностинаразныхязыках,которыеможнонайтинаDVD-дискесдокументациейвкомплектес
продуктом.
在使用本产品之前,请务必先阅读和了解产品附带的文档DVD中的多语言安全说明。
Prenegotoupotrebiteproizvodobaveznopaljivoproitajteiprouiteviejezikouputstvozabezbednostna
dokumentacionomDVD-ukojistedobiliuzproizvod.
PredpouvanmproduktusipretajteviacjazynbezpenostnpokynynadiskuDVDsdokumentcioudodanoms
produktom.
Predenzačneteuporabljatiizdelek,jepomembno,daprebereteinrazumetevečjezičnavarnostnanavodila
naDVD-juzdokumentacijo,kistegaprejeliskupajzizdelkom.
Antesdeutilizarelproducto,asegúresedeleerycomprenderlasinstruccionesdeseguridadmultilingüesdel
DVDdedocumentaciónqueseproporcionaconelproducto.
Varnogamedattläsasäkerhetsinstruktionernapådokumentations-DVD-skivansomföljermedprodukten
innandubörjaranvändaprodukten.
使用本產品之前,請務必閱讀並瞭解產品隨附的文件DVD上的多國語言版本安全資訊。
Buürünükullanmadanönce,ürünlebirliktegönderilenbelgeDVD'siüzerindekiçokdiliçerengüvenlik
yönergeleriniokuyupanladýðýnýzdaneminolun.
Передвикористаннямцьогопродуктууважноознайомтесязінструкціямизтехнікибезпекинарізних
мовах,щоможназнайтинаDVD-дискуздокументацієювкомплектізпродуктом.
Important:Eachcautionanddangerstatementinthistopicislabeledwithanumber.Thisnumberis
usedtocrossreferenceanEnglish-languagecautionordangerstatementwithtranslatedversionsofthe
cautionordangerstatementintheSafetyInformationdocument.Forexample,ifadangerstatementis
labeled“Statement1,”translationsforthisdangerstatementareintheSafetyInformationdocumentunder
“Statement1.”
Besuretoreadandunderstandallcautionanddangerstatementsinthisdocumentbeforeyouperformthe
procedures.Readandunderstandanyadditionalsafetyinformationthatcomeswiththeserveroroptional
devicebeforeyouinstall,remove,orreplacethedevice.
ivThinkServerRD230HardwareMaintenanceManual
Page 7
Statement1
DANGER
Electricalcurrentfrompower,telephone,andcommunicationcablesishazardous.
Toavoidashockhazard:
•Donotconnectordisconnectanycablesorperforminstallation,maintenance,orrecongurationofthis
productduringanelectricalstorm.
•Connectallpowercordstoaproperlywiredandgroundedelectricaloutlet.
•Connecttoproperlywiredoutletsanyequipmentthatwillbeattachedtothisproduct.
•Whenpossible,useonehandonlytoconnectordisconnectsignalcables.
•Neverturnonanyequipmentwhenthereisevidenceofre,water ,orstructuraldamage.
•Disconnecttheattachedpowercords,telecommunicationssystems,networks,andmodemsbeforeyou
openthedevicecovers,unlessinstructedotherwiseintheinstallationandcongurationprocedures.
•Connectanddisconnectcablesasdescribedinthefollowingtablewheninstalling,moving,oropening
coversonthisproductorattacheddevices.
Toconnect:Todisconnect:
1.TurneverythingOFF .
2.First,attachallcablestodevices.
3.Attachsignalcablestoconnectors.
4.Attachpowercordstooutlet.
5.TurndevicesON.
1.TurneverythingOFF .
2.First,removepowercordsfromoutlet.
3.Removesignalcablesfromconnectors.
4.Removeallcablesfromdevices.
Statement2
DANGER
Dangerofexplosionifbatteryisincorrectlyreplaced.
Whenreplacingthelithiumcoincellbattery,useonlythesameoranequivalenttypethatis
recommendedbythemanufacturer .Thebatterycontainslithiumandcanexplodeifnotproperly
used,handled,ordisposedof.
Donot:
•Throworimmerseintowater
•Heattomorethan100°C(212°F)
•Repairordisassemble
Disposeofthebatteryasrequiredbylocalordinancesorregulations.
©CopyrightLenovo2010,2012
v
Page 8
Statement3
CAUTION:
Whenlaserproducts(suchasCD-ROMs,DVDdrives,beropticdevices,ortransmitters)are
installed,notethefollowing:
•Donotremovethecovers.Removingthecoversofthelaserproductcouldresultinexposureto
hazardouslaserradiation.Therearenoserviceablepartsinsidethedevice.
•Useofcontrolsoradjustmentsorperformanceofproceduresotherthanthosespeciedherein
mightresultinhazardousradiationexposure.
DANGER
SomelaserproductscontainanembeddedClass3AorClass3Blaserdiode.Notethefollowing.
Laserradiationwhenopen.Donotstareintothebeam,donotviewdirectlywithoptical
instruments,andavoiddirectexposuretothebeam.
Statement4
≥18kg(39.7lb)≥32kg(70.5lb)≥55kg(121.2lb)
<32kg(70.5lb)<55kg(121.2lb)<100kg(220.5lb)
CAUTION:
Usesafepracticeswhenlifting.
Statement5
CAUTION:
Thepowercontrolbuttononthedeviceandthepowerswitchonthepowersupplydonotturnoff
theelectricalcurrentsuppliedtothedevice.Thedevicealsomighthavemorethanonepower
cord.T oremoveallelectricalcurrentfromthedevice,ensurethatallpowercordsaredisconnected
fromthepowersource.
viThinkServerRD230HardwareMaintenanceManual
Page 9
Statement6
CAUTION:
Ifyouinstallastrain-reliefbracketoptionovertheendofthepowercordthatisconnectedtothe
device,youmustconnecttheotherendofthepowercordtoaneasilyaccessiblepowersource.
Statement7
CAUTION:
Ifthedevicehasdoors,besuretoremoveorsecurethedoorsbeforemovingorliftingthedeviceto
avoidpersonalinjury.Thedoorswillnotsupporttheweightofthedevice.
Statement8
CAUTION:
Neverremovethecoveronapowersupplyoranypartthathasthefollowinglabelattached.
Hazardousvoltage,current,andenergylevelsarepresentinsideanycomponentthathasthislabel
attached.Therearenoserviceablepartsinsidethesecomponents.Ifyoususpectaproblemwith
oneoftheseparts,contactaservicetechnician.
Statement9
CAUTION:
Toavoidpersonalinjury,disconnectthehot-swapfancablesbeforeremovingthefanfromthedevice.
Statement10
CAUTION:
Thefollowinglabelindicatessharpedges,corners,orjointsnearby.
©CopyrightLenovo2010,2012
vii
Page 10
Statement11
CAUTION:
Thefollowinglabelindicatesahotsurfacenearby.
Statement12
DANGER
Overloadingabranchcircuitispotentiallyarehazardandashockhazardundercertainconditions.T oavoid
thesehazards,ensurethatyoursystemelectricalrequirementsdonotexceedbranchcircuitprotection
requirements.Refertotheinformationthatisprovidedwithyourdeviceforelectricalspecications.
Statement13
CAUTION:
Makesurethattherackissecuredproperlytoavoidtippingwhentheserverunitisextended.
Statement14
CAUTION:
SomeaccessoryoroptionboardoutputsexceedClass2orlimitedpowersourcelimitsandmustbe
installedwithappropriateinterconnectingcablinginaccordancewiththenationalelectriccode.
Statement15
CAUTION:
Thepower-controlbuttononthedevicedoesnotturnofftheelectricalcurrentsuppliedtothe
device.Thedevicealsomighthavemorethanoneconnectiontodcpower.Toremoveallelectrical
currentfromthedevice,ensurethatallconnectionstodcpoweraredisconnectedatthedcpower
inputterminals.
viiiThinkServerRD230HardwareMaintenanceManual
Page 11
Statement16
CAUTION:
Toreducetheriskofelectricshockorenergyhazards:
•Thisequipmentmustbeinstalledbytrainedservicepersonnelinarestricted-accesslocation,as
denedbytheNECandthelatesteditionofIEC60950,TheStandardforSafetyofInformation
TechnologyEquipment.
•Connecttheequipmenttoareliablygroundedsafetyextralowvoltage(SELV)source.AnSEL V
sourceisasecondarycircuitthatisdesignedsothatnormalandsinglefaultconditionsdonot
causethevoltagestoexceedasafelevel(60Vdirectcurrent).
•Thebranchcircuitovercurrentprotectionmustberatedinaccordancewithlocalbuildingcodes.
•Use16AmericanWireGauge(AWG)or1.3mm
2
copperconductoronly,notexceeding3meters
inlength.
•Torquethewiring-terminalscrewsto12inch-pounds(1.4newton-meters).
•Incorporateareadilyavailableapprovedandrateddisconnectdeviceintheeldwiring.
Statement17
CAUTION:
ThisproductcontainsaClass1Mlaser.Donotviewdirectlywithopticalinstruments.
Statement18
CAUTION:
Donotplaceanyobjectontopofrack-mounteddevices.
Statement19
CAUTION:
Hazardousmovingparts.Keepngersandotherbodypartsaway.
©CopyrightLenovo2010,2012
ix
Page 12

Statement20
CAUTION:
Thebatteryisalithiumionbattery.T oavoidpossibleexplosion,donotburnthebattery.Exchangeit
onlywiththeLenovo-approvedpart.Recycleordiscardthebatteryasinstructedbylocalregulations.
xThinkServerRD230HardwareMaintenanceManual
Page 13

Chapter1.Generalinformation
Thischapterprovidessomegeneralinformationaboutyourproduct.
Thischaptercontainsthefollowingitems:
•“Introduction”onpage1
•“Serverdocumentation”onpage1
Introduction
ThisHardwareMaintenanceManualforyourLenovo
serverfeatures,specications,componentlocations,congurationinstructions,hardwarereplacement
procedures,partslisting,andtroubleshootinganddiagnostics.
Note:TheHardwareMaintenanceManualisintendedonlyfortrainedservicepersonnelofLenovo.The
HardwareMaintenanceManualisupdatedfrequently,andthemostup-to-dateversionisalwaysavailablein
EnglishontheLenovoWebsiteat:
http://www.lenovo.com/ThinkServerUserGuides
Thisdocumentcontainsinstructionsonhowtoinstall,remove,orreplaceCustomerReplaceableUnits
(CRUs)andFieldReplaceableUnits(FRUs).
Replaceablecomponentsareofthreetypes:
®
ThinkServer
®
productcontainsinformationaboutthe
•Self-serviceCRUs:Self-serviceCRUsareeasytoinstallandcustomersareresponsibleforreplacingall
Self-serviceCRUs.IfaLenovoservicetechnicianinstallsaSelf-serviceCRUatyourrequest,youwillbe
chargedfortheinstallation.
•Optional-serviceCRUs:AlthoughdealingwithOptional-serviceCRUsrequiressometechnicalskills,
Optional-serviceCRUsaresafeforcustomerstoreplace.YoumayinstallanOptional-serviceCRU
yourselforrequestLenovotoinstallit,atnoadditionalcharge,underthetypeofwarrantyservicethat
isdesignatedfortheserver.
•FRUs:FRUsmustbereplacedonlybytrainedservicetechnicians.
Notes:
1.BeforeservicingaLenovoproduct,besuretoreadandunderstandthe“Safetyinformation”onpageiii.
2.Forinformationaboutthetermsofwarranty,refertotheWarrantyandSupportInformationonthe
documentationDVDthatcomeswiththeserver.TheWarrantyandSupportInformationisalsoavailable
ontheLenovoWebsiteat:
http://www.lenovo.com/ThinkServerUserGuides
Toobtainthemostup-to-dateinformationabouttheserver,goto:
http://www.lenovo.com/thinkserver
LenovomaintainspagesontheWorldWideWeb,whereyoucangetthelatesttechnicalinformationand
downloaddocumentationordevicedriversandupdates.ToaccesstheLenovoSupportWebsite,goto:
http://www.lenovo.com/support
Serverdocumentation
Thistopicprovidesageneraldescriptionofeachdocumentforyourserverandinstructionsonhow
toobtainallthedocuments.
©CopyrightLenovo2010,2012
1
Page 14

Printeddocuments
Thefollowingdocumentsareprintedoutandincludedinyourserverpackage.
•ReadMeFirst
Thisisamultilingualdocumentyoushouldreadrst.Thisdocumentguidesyoutoreadthecomplete
warranty,support,andsafetyinformationonthedocumentationDVDthatcomeswithyourserverbefore
usingtheproduct.Thisdocumentalsoprovidesinformationabouthowtondthemostup-to-date
informationontheLenovoSupportWebsite.
•ImportantNotices
Thisdocumentincludessafetyandlegalnoticesthatyoushouldreadandunderstandbeforeusing
theserver.
•RackInstallationInstructions
Thisdocumentprovidesinstructionsonhowtoinstallyourserverintoastandardrackcabinetbyusing
therailkitshippedwiththeserver.
Note:Thisdocumentisavailableinvelanguages.AprintedEnglishversionisincludedinyourserver
package.APDFversionofFrench,German,Italian,andSpanishareprovidedonthedocumentationDVD
thatcomeswiththeserver.
DocumentationDVD
ThedocumentationDVD,whichcomeswithyourserver,containsvariousdocumentsforyourserverin
PortableDocumentFormat(PDF)andHyperTextMarkupLanguage(HTML).ThedocumentationDVDisnot
bootable.ToviewthedocumentsontheDVD,youwillneedacomputerwithaWebbrowserandtheAdobe
Readerprogram,whichisavailablefordownloadat:
http://www.adobe.com
TostartthedocumentationDVD,inserttheDVDintotheopticaldrive.TheDVDisAutoPlayenabledand
startsautomaticallyinmostenvironments.IftheDVDfailstostartorifyouareusingaLinux
®
operating
system,openthelaunch.htmlelocatedintherootdirectoryoftheDVD.
Note:LenovomaintainspagesontheWorldWideWeb,whereyoucangetthelatesttechnicalinformation
anddownloaddocumentationordevicedriversandupdates.Someinformationinthedocumentsonthe
documentationDVDmightchangewithoutnoticeaftertherstreleaseoftheDVD.Y oucanalwaysobtainall
themostup-to-datedocumentationforyourserverfromtheLenovoWebsiteat:
http://www.lenovo.com/ThinkServerUserGuides
ThefollowingdocumentsareonthedocumentationDVDthatcomeswithyourserver:
•SafetyInformation
Thisisamultilingualdocumentthatincludesallthesafetystatementsforyourproductinmorethan30
languages.Besuretoreadandunderstandallthesafetystatementsbeforeusingtheproduct.
•WarrantyandSupportInformation
ThisdocumentincludestheLenovowarrantystatement,CustomerReplaceableUnits(CRUs)information,
andinformationabouthowtocontacttheLenovoCustomerSupportCenter.
•UserGuide
Thisdocumentprovidesdetailedinformationtohelpyougetfamiliarwithyourserverandhelpyouuse,
congure,andmaintainyourserver.
•RackInstallationInstructions
Thisdocumentprovidesinstructionsonhowtoinstallyourserverintoastandardrackcabinetbyusing
therailkitshippedwiththeserver.
2ThinkServerRD230HardwareMaintenanceManual
Page 15

•RemoteManagementUserGuide
Thisdocumentprovidesinformationaboutserverremotemanagement.ThisdocumentisinEnglishonly.
•MegaRAIDSASSoftwareUserGuide
ThisdocumentprovidesinformationaboutRedundantArrayofIndependentDisks(RAID)andhowto
usetheutilityprogramstocongure,monitor,andmaintainyourserverRAIDandrelateddevices.This
documentisinEnglishonly.
Documentonlyfortrainedservicepersonnel
ThefollowingdocumentisintendedonlyfortrainedservicepersonnelofLenovo.
HardwareMaintenanceManual
Thisdocumentprovidesdiagnosticinformation,partslisting,andreplacementproceduresforallField
ReplaceableUnits(FRUs,partsreplacedbytrainedservicepersonnel)aswellasallCRUs.Thisdocumentis
updatedfrequently,andthemostup-to-dateversionisalwaysavailableinEnglishontheLenovoWebsiteat:
http://www.lenovo.com/ThinkServerUserGuides
Chapter1.Generalinformation3
Page 16

4ThinkServerRD230HardwareMaintenanceManual
Page 17

Chapter2.Serversetuproadmap
Thischapterprovidesageneralroadmaptoguideyouthroughsettingupyourserver.
Theserversetupprocedurevariesdependingonthecongurationoftheserverwhenitwasdelivered.In
somecases,theserverisfullyconguredandyoujustneedtoconnecttheservertothenetworkandan
electricaloutlet,andthenyoucanturnontheserver.Inothercases,theserverneedstohavehardware
featuresinstalled,requireshardwareandrmwareconguration,andrequirestheoperatingsystemto
beinstalled.
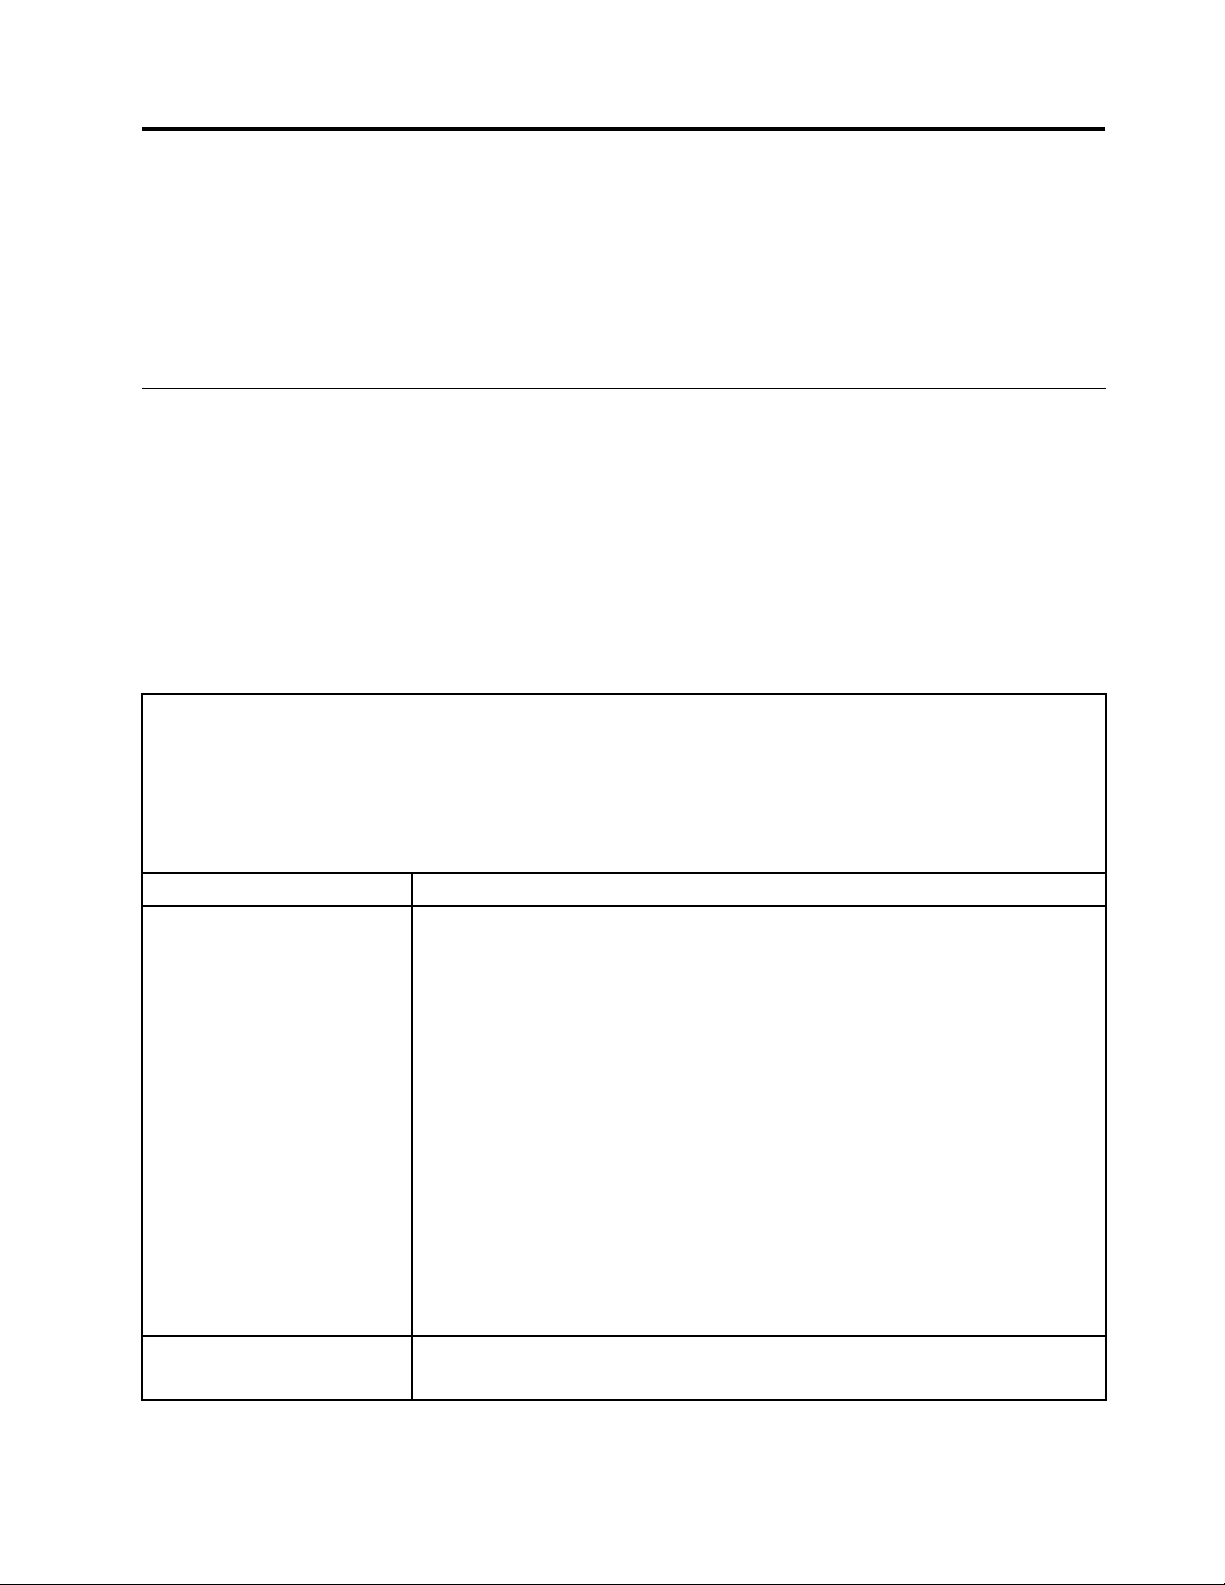
Table1.Serversetuproadmap
TaskWheretondtheinformation
Unpack
Installhardware
InstalltheserverintherackTheRackInstallationInstructionsmanualisprintedandalsoincludedonthe
ConnecttheEthernetcable
andpowercord
Turnontheservertoverify
operation
ReviewtheBIOSsettings
andcustomizeasneeded
CongureRAID(onboard
SATARAIDortheinstalled
SASRAIDadapter)
Checkforrmwareupdates
Installoperatingsystemand
basicdrivers
Installanyadditionaldrivers
neededforaddedfeatures
CongureEthernetsettings
intheoperatingsystem
Installremotemanagement
applications
Installapplications
Chapter3“Featuresandtechnologies”onpage7
Chapter6“Installing,removing,orreplacinghardware”onpage35
documentationDVD.
“Rearview”onpage25
“Turningontheserver”onpage88
“StartingtheSetupUtilityprogram”onpage110
“RAIDcontrollers”onpage118
“UsingtheEasyUpdateFirmwareUpdaterprogram”onpage127
“UsingtheThinkServerEasyStartupprogram”onpage118
Refertotheinstructionsthatcamewiththehardwareoption.
Seetheoperatingsystemhelp.Thisstepisnotrequirediftheoperatingsystemwas
installedusingtheThinkServerEasyStartupprogram.
“InstallingtheThinkServerEasyManageprogram”onpage128
Refertothedocumentationthatcomeswiththeapplicationsthatyouwanttoinstall.
©CopyrightLenovo2010,2012
5
Page 18

6ThinkServerRD230HardwareMaintenanceManual
Page 19

Chapter3.Featuresandtechnologies
Whatisincludedwithyourserver
TheRD230serverpackageincludestheserver,apowercord,documentation,thedocumentationDVD,and
softwaremedia.
Features
TheRD230serveroffersthefollowingfeaturesandtechnologies:
•Microprocessor(s):TheserversupportsuptotwoIntel®Xeon®dual-core,quad-core,orhex-core
microprocessors.
•BIOS:Theserverrmwaredenesastandardinterfacebetweentheoperatingsystem,platformrmware,
andexternaldevices.
•EasyStartupDVD:TheThinkServerEasyStartupprogramguidesyouthroughthecongurationofthe
hardware,theRAIDcontroller,andtheinstallationoftheoperatingsystemanddevicedrivers.
•Integratednetworksupport:Theservercomeswithtwointegratedsingle-portGigabitEthernet
controllersandeachsupportsconnectiontoa10Mbps,100Mbps,or1000Mbpsnetwork.Formore
information,see“ConguringtheGigabitEthernetcontroller”onpage127.
•Largedata-storagecapacityandhot-swapcapability:Somehot-swapservermodelssupportfour
3.5-inchhot-swapharddiskdrives.Withthehot-swapfeature,youcanadd,remove,orreplaceharddisk
driveswithoutturningofftheserver.
•Largesystem-memorycapacity:Theserversupportsupto64GBofsystemmemory.Thememory
modulesupportserrorcorrectingcode(ECC)foruptoeightindustry-standardsingle-rankordual-rank,
1333MHz,DDR3(third-generationdouble-data-rate)registeredsynchronousdynamicrandomaccess
memory(SDRAM)dualinlinememorymodules(DIMMs).
•High-performancegraphicscontroller:Theservercomeswithanonboardhigh-performancegraphics
controllerthatsupportshighresolutionsandincludesmanyperformance-enhancingfeaturesforthe
operating-systemenvironment.
•Redundantconnection:
toaredundantEthernetconnection.IfaproblemoccurswiththeprimaryEthernetconnection,all
Ethernettrafcthatisassociatedwiththeprimaryconnectionisautomaticallyswitchedtotheredundant
NIC.Iftheapplicabledevicedriversareinstalled,thisswitchingoccurswithoutdatalossandwithout
userintervention.
•IntelligentPlatformManagementInterface(IPMI)2.0:Thecommand-lineinterfaceprovidesdirect
accesstoservermanagementfunctionsthroughtheIPMI2.0protocol.Usethecommand-lineinterface
toissuecommandstocontroltheserverpower,viewsysteminformation,andidentifytheserver.Youcan
alsosaveoneormorecommandsasatextleandruntheleasascript.
•RAIDsupport:Theserversupportsanonboard1068ESerialAttachedSCSI(SAS)RAIDcontroller,an
onboardSATAsoftwareRAID,andanadd-onSASRAIDcard(ThinkServer8708ELPSASRAIDAdapter,
ThinkServer8708EM2SASRAIDAdapter,orThinkServerRAID700Adapter),whicharerequiredforyou
tousethehot-swapSATAorSASharddiskdrivesandtocreatetheredundantarrayofindependent
disks(RAID)congurations.
Thetwoonboardnetworkinterfacecontrollers(NIC)provideafailovercapability
Specications
Thefollowinginformationisasummaryofthefeaturesandspecicationsoftheserver.Dependingonthe
servermodel,somefeaturesmightnotbeavailable,orsomespecicationsmightnotapply.
©CopyrightLenovo2010,2012
7
Page 20
Table2.Featuresandspecications
Microprocessor(s):Supportsupto
twoIntelXeondual-core,quad-core,
orhex-coremicroprocessors.Forthe
specictypeandspeedinformation
aboutthemicroprocessor,use
theSetupUtilityprogram.See
“UsingtheSetupUtilityprogram”on
page109
microprocessorsforyourserver,goto
http://www.lenovo.com/thinkserver.
OntheThinkServersystemspage,
clickProducts➙Options➙
ThinkServerProcessors.
Memorymodules:
•Minimumsystemmemory:2GB
•Maximumsystemmemory:64GB
•Types:ECC,1333MHz,DDR3
•Slots:Eightdualinlinememory
•Supports2GB,4GB,and8GB
Integratedgraphicscard:
•8MBvideomemory
Size:
•Height:43.6mm(1.72inches)
•Width:436mm(17.17inches)
•Depth:568mm(22.36inches)
•
RAIDcontrollers:
•OnboardSATASoftwareRAID
•ThinkServer8708ELPSASRAID
•ThinkServer8708EM2SASRAID
•ThinkServerRAID700Adapter
.Foralistofthesupported
(eightmemoryslots,eachwithone
8GBRDIMMinstalled)
registeredSDRAMDIMMsonly
module(DIMM)slots
RDIMMs
Maximumweight:17kg(37.48lb)
whenfullycongured
Adapter
Adapter
Opticaldrive:
•SlimDVD/RW
Harddiskdriveexpansionbays
(dependingonthemodel):
Uptofour3.5-inchSATAorSAShard
diskdrives
Expansionslots:
•ThreePCIExpressslotsonthe
systemboardandthePCIExpress
x16slotisforarisercard(thereis
onePCIExpressx16slotonthe
risercard)
Powersupply:
powersupply
Systemfans:Fivesystemfans
withautomaticenergy-savingnoise
reductiontechnology
Integratedfunctions:
•Twosingle-portGbEthernet
controllers
•SixUSB2.0connectors(twofront
andfourrear)
•TwoRJ-45Ethernetconnectors
•Oneserialport
•OneVideoGraphicsArray(VGA)
monitorconnector
Electricalinput
•Inputvoltage:
–Lowrange:
–Highrange:
Single600-watt
Minimum:100Vac
Maximum:127Vac
Inputfrequencyrange:50to
60Hz
Minimum:200Vac
Maximum:240Vac
Inputfrequencyrange:50to
60Hz
Environment:
•Airtemperature:
–Serveron:10°Cto35°C(50°F
to95°F);altitude:0to914.4m
(3000ft)
–Serveron:10°Cto32°C(50°F
to89.6°F);altitude:914.4m(3
000ft)to2133.6m(7000ft)
–Serveroff:10°Cto43°C(50°F
to109.4°F);maximumaltitude:
2133.6m(7000ft)
–Shipping:-40°Cto60°C(-104°F
to140°F)
•Humidity:
–Serveron:8-90%,
non-condensing
–Serveroff:8-90%,
non-condensing
–Shippingandstorage:upto
93%,non-condensing
•Particulatecontamination:
Attention:Airborneparticulates
andreactivegasesactingalone
orincombinationwithother
environmentalfactorssuchas
humidityortemperaturemight
posearisktotheserver.
Notes:
1.Powerconsumptionandheat
outputvarydependingonthe
numberandtypeofoptional
featuresinstalledandthe
power-managementoptional
featuresinuse.
2.Thesoundlevelsweremeasured
incontrolledacoustical
environmentsaccordingto
theproceduresspeciedbythe
AmericanNationalStandards
Institute(ANSI)S12.10and
ISO7779andarereportedin
accordancewithISO9296.
Actualsound-pressurelevelsina
givenlocationmightexceedthe
averagevaluesstatedbecause
ofroomreectionsandother
nearbynoisesources.The
noiseemissionlevelstated
isthedeclared(upperlimit)
8ThinkServerRD230HardwareMaintenanceManual
Page 21
Table2.Featuresandspecications(continued)
sound-powerlevel,inbels,fora
randomsampleofsystem.
3.Thereisnokeyboardconnector
ormouseconnectoronthe
server.Y oucanconnectaUSB
keyboardandUSBmouseto
theserverbyusingtheUSB
connectors.
Softwareprograms
Lenovoprovidessoftwaretohelpgetyourserverupandrunning.
EasyStartup
TheThinkServerEasyStartupprogramsimpliestheprocessofconguringRAIDandinstallingsupported
Microsoft®Windows®andLinuxoperatingsystemsanddevicedriversonyourserver.TheEasyStartup
programisprovidedwithyourserverontheThinkServerEasyStartupDVD.TheDVDisself-starting(bootable).
TheuserguidefortheEasyStartupprogramisontheDVDandcanbeaccesseddirectlyfromtheprogram
interface.Foradditionalinformation,see“UsingtheThinkServerEasyStartupprogram”onpage118
EasyManage
TheThinkServerEasyManageAgentenablesthisservertobemanagedbythecentralizedconsoleofan
EasyManageCoreServeroverthenetwork.TheThinkServerEasyManageAgentissupportedon32-bitand
64-bitWindows,RedHat,andSUSEoperatingsystems.
.
Reliability,availability,andserviceability
Reliability,availability,andserviceability(hereafterreferredtoasRAS)arethreeimportantserverdesign
features.TheRASfeatureshelpyoutoensuretheintegrityofthedatastoredontheserver,theavailabilityof
theserverwhenyouneedit,andtheeasewithwhichyoucandiagnoseandcorrectproblems.
TheserverhasthefollowingRASfeatures:
•AdvancedCongurationandPowerInterface(ACPI)
•AdvancedDesktopManagementInterface(DMI)
•Automaticmemorydownsizingonerrordetection
•Automaticrestartonnon-maskableinterrupt(NMI)
•Availabilityofmicrocodelevel
•Built-in,menu-drivensetup,systemconguration,andRAIDconguration
•Built-inmonitoringforfan,temperature,andvoltage
•Coolingfanswithspeed-sensingcapability
•ECCDDR3SDRAMwithSerialPresenceDetect(SPD)
•Errorcodesandmessagestohelpyouidentifyproblems
•Generatingerrorlogsforthepower-onself-test(POST)failures
•Hot-swapSASharddiskdrives
•IntegratedEthernetcontrollers
•IntelligentPlatformManagementInterface(IPMI)2.0
Chapter3.Featuresandtechnologies9
Page 22

•Power-onself-test(POST)
•RedundantEthernetconnectionwithfailovercapability(requiresanoptionalEthernetcard)
•Standbyvoltageforsystem-managementfeaturesandmonitoring
•System-errorlight-emittingdiode(LED)onthefrontpanel
•Vitalproductdata(VPD),includingtheserialnumberinformationandreplacementpartnumbers,storedin
thenonvolatilememoryforeasierremotemaintenance
10ThinkServerRD230HardwareMaintenanceManual
Page 23
Chapter4.Diagnostics
Thischapterdescribesthediagnostictoolsthatareavailabletohelpyousolveproblemsthatmightoccurin
theserver.
Ifyoucannotdiagnoseandcorrectaproblembyusingtheinformationinthischapter,seeAppendixB
“Gettinginformation,help,andservice”onpage131
Troubleshootingtables
Usethetroubleshootingtablestondsolutionstoproblemsthathaveidentiablesymptoms.
Ifyouhavejustaddednewsoftwareoranewoptionaldeviceandtheserverisnotworking,completethe
followingstepsbeforeyouusethetroubleshootingtables:
1.Checktheoperatorinformationpanel.
2.Removethesoftwareordevicethatyoujustadded.
3.Reinstallthenewsoftwareornewdevice.
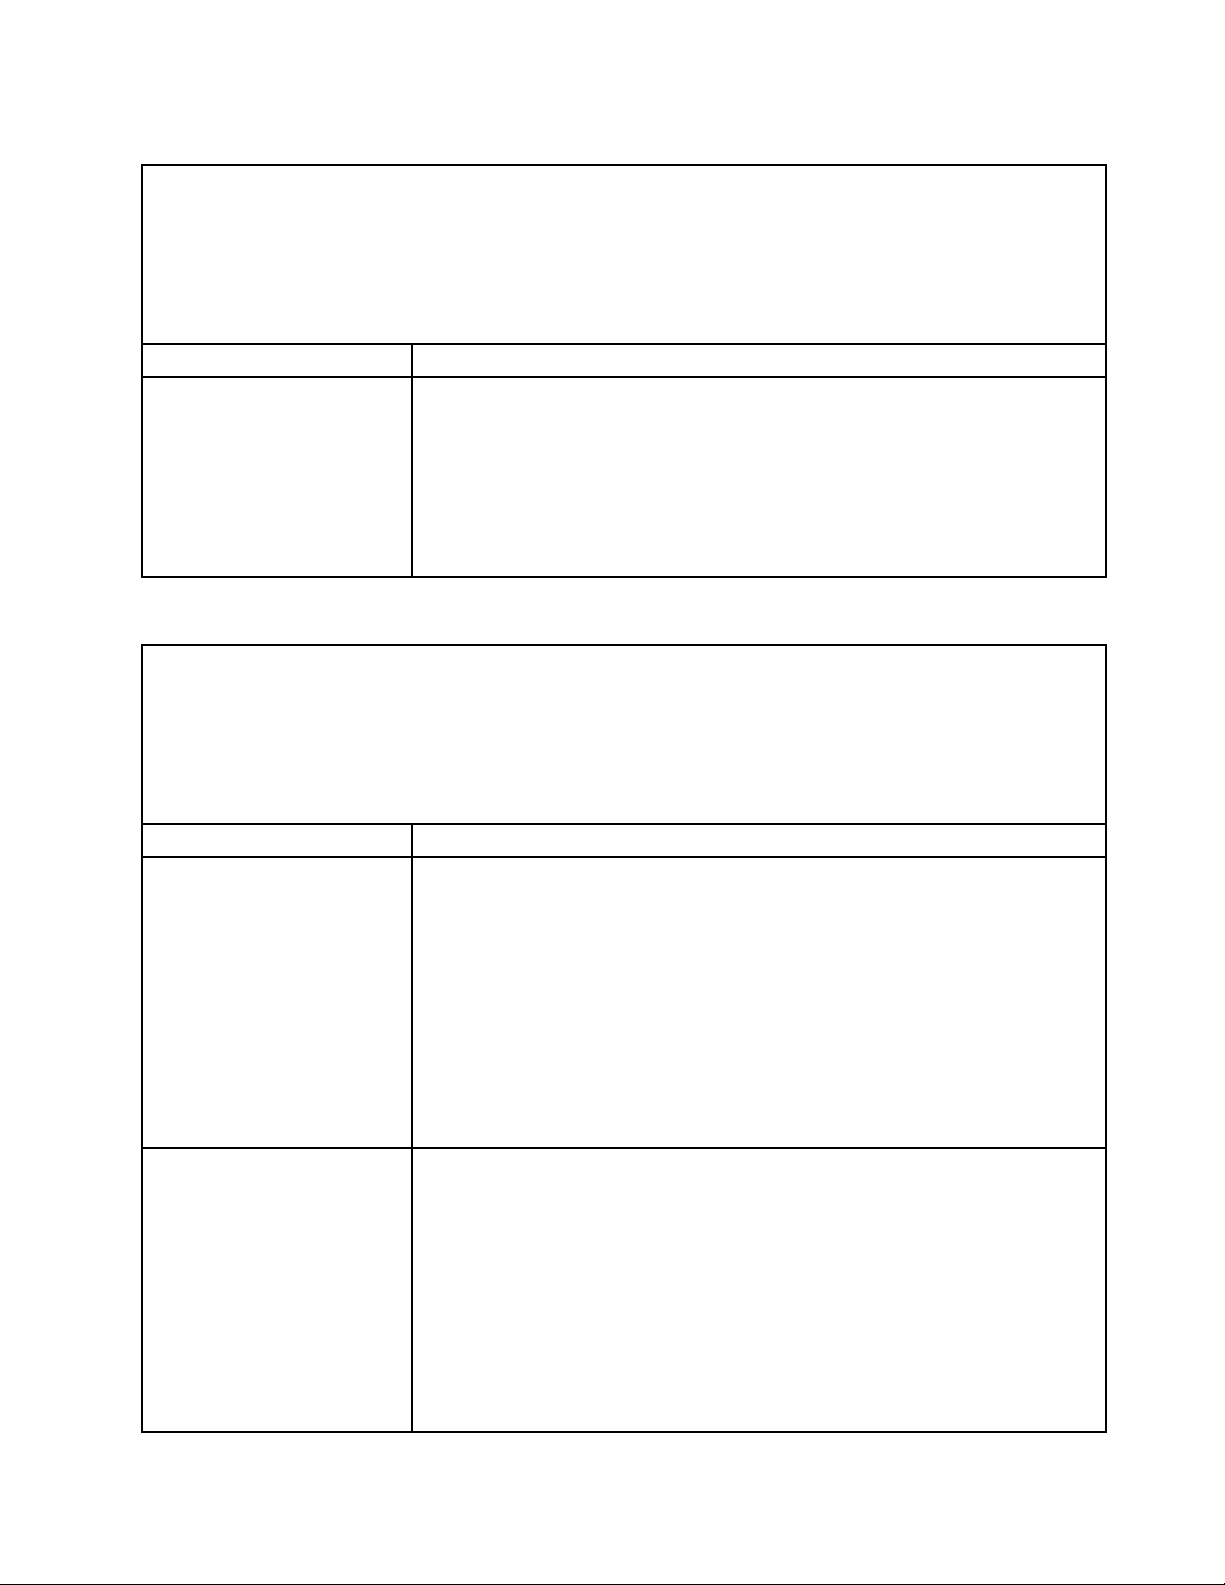
DVDdriveproblems
•FollowthesuggestedactionsintheorderinwhichtheyarelistedintheActioncolumnuntiltheproblemis
solved.
•SeethepartslistinginChapter7“Partslisting,RD230Types1043,1044,4010,and4011”onpage91to
determinewhichcomponentsarecustomerreplaceableunits(CRUs)andwhichcomponentsareeld
replaceableunits(FRUs).
•Ifanactionstepisprecededby“(T rainedservicetechnicianonly), ”thatstepmustbeperformedonlyby
atrainedservicetechnician.
SymptomAction
TheDVDdriveisnot
recognized.
ADVDisnotworkingcorrectly.
1.Makesurethat:
•TheSATAchanneltowhichtheDVDdriveisattached(primaryorsecondary)
isenabledintheSetupUtilityprogram.
•Allcablesandjumpersareinstalledcorrectly.
•Thesignalcableandconnectorarenotdamagedandtheconnectorpins
arenotbent.
•ThecorrectdevicedriverisinstalledfortheDVDdrive.
2.Reseatthefollowingcomponents:
a.DVDdrive
b.DVDdrivecables
3.Replacethefollowingcomponentsoneatatime,intheordershown,restarting
theservereachtime:
a.DVDdrive
b.DVDdriveandcables
c.(T rainedservicetechnicianonly)Systemboard
1.CleantheDVD.
2.ReseattheDVDdrive.
formoreinformation.
©CopyrightLenovo2010,2012
11
Page 24
•FollowthesuggestedactionsintheorderinwhichtheyarelistedintheActioncolumnuntiltheproblemis
solved.
•SeethepartslistinginChapter7“Partslisting,RD230Types1043,1044,4010,and4011”onpage91to
determinewhichcomponentsarecustomerreplaceableunits(CRUs)andwhichcomponentsareeld
replaceableunits(FRUs).
•Ifanactionstepisprecededby“(T rainedservicetechnicianonly), ”thatstepmustbeperformedonlyby
atrainedservicetechnician.
SymptomAction
3.ReplacetheDVDdrive.
TheDVDdrivetrayisnot
working.
1.Makesurethattheserveristurnedon.
2.Inserttheendofastraightenedpaperclipintothemanualtray-releaseopening.
3.ReseattheDVDdrive.
4.ReplacetheDVDdrive.
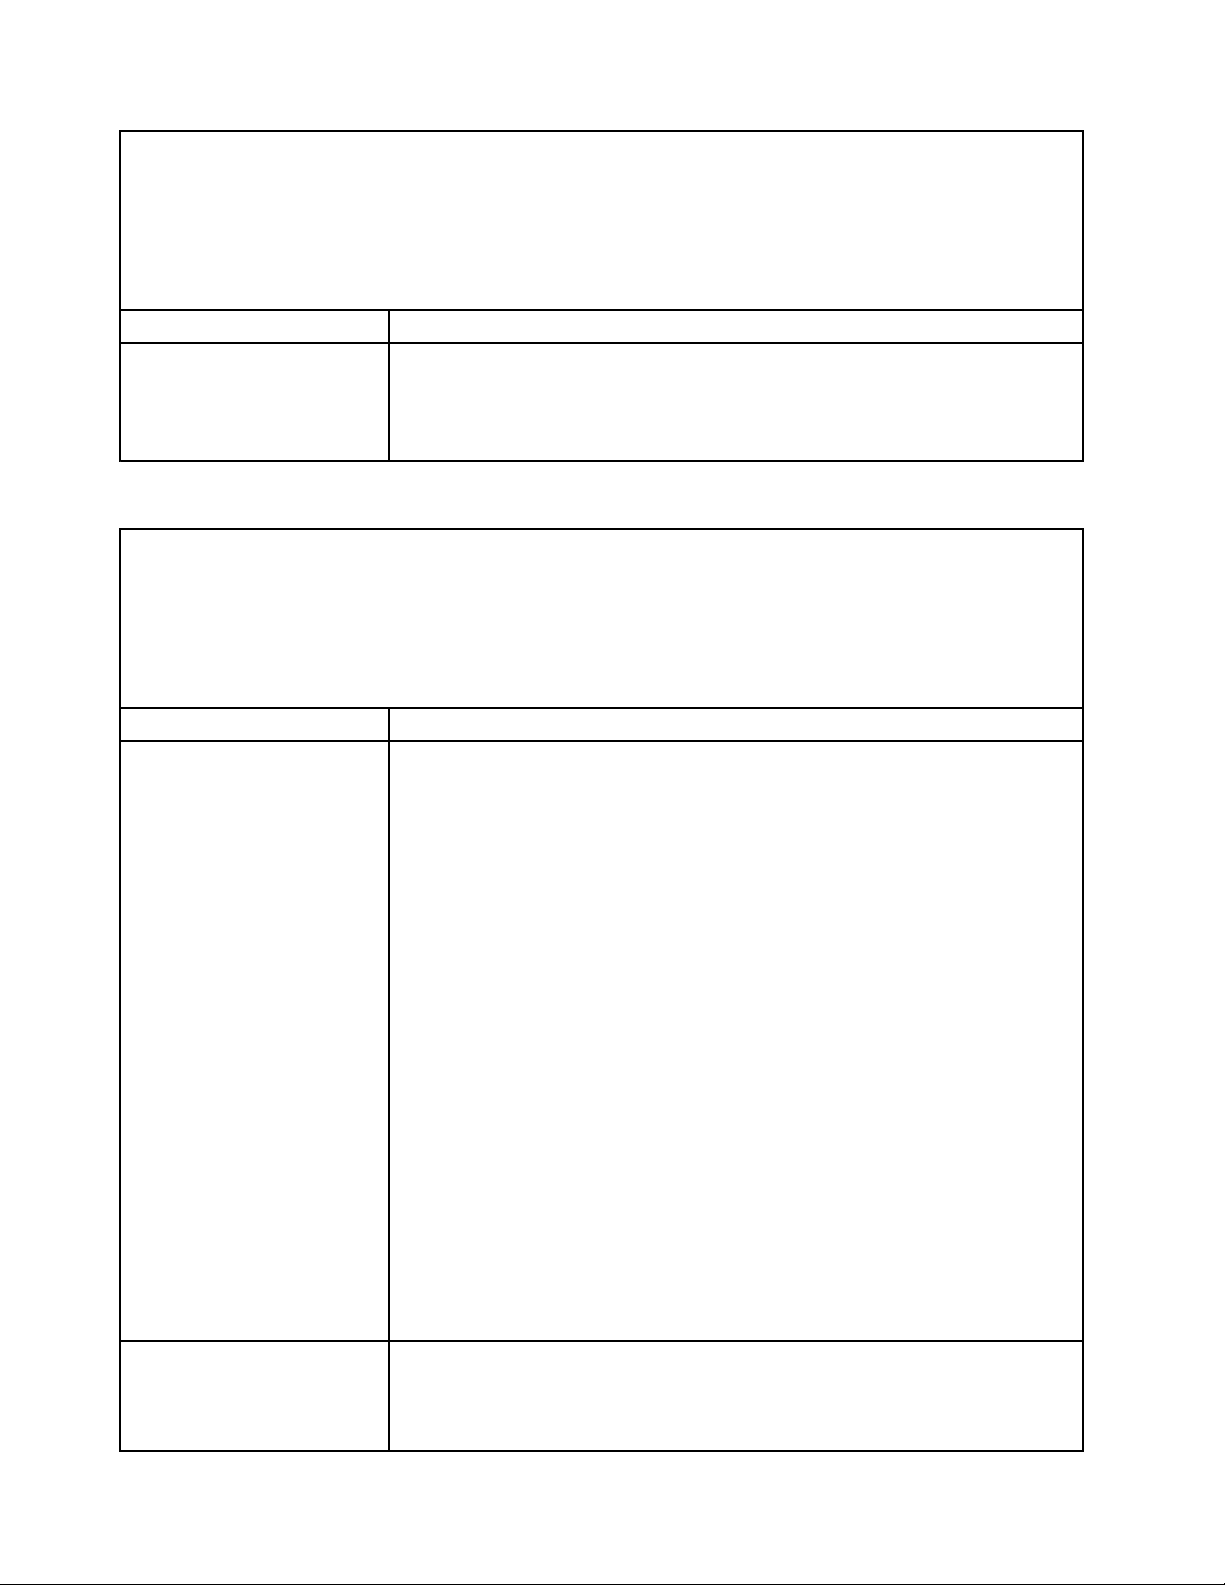
Generalproblems
•FollowthesuggestedactionsintheorderinwhichtheyarelistedintheActioncolumnuntiltheproblemis
solved.
•SeethepartslistinginChapter7“Partslisting,RD230Types1043,1044,4010,and4011”onpage91to
determinewhichcomponentsarecustomerreplaceableunits(CRUs)andwhichcomponentsareeld
replaceableunits(FRUs).
•Ifanactionstepisprecededby“(T rainedservicetechnicianonly), ”thatstepmustbeperformedonlyby
atrainedservicetechnician.
SymptomAction
Acoverlockisbroken,anLED
isnotworking,orasimilar
problemhasoccurred.
IfthepartisaCRU,replaceit.IfthepartisaFRU,thepartmustbereplacedbya
trainedservicetechnician.
Harddiskdriveproblems
•FollowthesuggestedactionsintheorderinwhichtheyarelistedintheActioncolumnuntiltheproblemis
solved.
•SeethepartslistinginChapter7“Partslisting,RD230Types1043,1044,4010,and4011”onpage91
determinewhichcomponentsarecustomerreplaceableunits(CRUs)andwhichcomponentsareeld
replaceableunits(FRUs).
•Ifanactionstepisprecededby“(T rainedservicetechnicianonly), ”thatstepmustbeperformedonlyby
atrainedservicetechnician.
SymptomAction
Notalldrivesarerecognizedby
theharddiskdrivediagnostic
tests.
Theserverstopsresponding
duringtheharddiskdrive
diagnostictest.
Aharddiskdrivewasnot
detectedwhiletheoperating
systemwasbeingstarted.
Removethedrivethatisindicatedbythediagnostictests;then,runtheharddisk
drivediagnostictestsagain.Iftheremainingdrivesarerecognized,replacethe
drivethatyouremovedwithanewone.
Removetheharddiskdrivethatwasbeingtestedwhentheserverstopped
responding,andrunthediagnostictestagain.Iftheharddiskdrivediagnostictest
runssuccessfully,replacethedrivethatyouremovedwithanewone.
Reseatallharddiskdrivesandcables;then,runtheharddiskdrivediagnostic
testsagain.
to
12ThinkServerRD230HardwareMaintenanceManual
Page 25
Intermittentproblems
•FollowthesuggestedactionsintheorderinwhichtheyarelistedintheActioncolumnuntiltheproblemis
solved.
•SeethepartslistinginChapter7“Partslisting,RD230Types1043,1044,4010,and4011”onpage91to
determinewhichcomponentsarecustomerreplaceableunits(CRUs)andwhichcomponentsareeld
replaceableunits(FRUs).
•Ifanactionstepisprecededby“(T rainedservicetechnicianonly), ”thatstepmustbeperformedonlyby
atrainedservicetechnician.
SymptomAction
Aproblemoccursonly
occasionallyandisdifcultto
diagnose.
1.Makesurethat:
•Allcablesandcordsareconnectedsecurelytotherearoftheserverand
attacheddevices.
•Whentheserveristurnedon,airisowingfromthefangrille.Ifthereis
noairow,thefanisnotworking.Thiscancausetheservertooverheat
andshutdown.
2.Checkthesystem-eventlog(see“Eventlogs”onpage22).
3.See“Solvingundeterminedproblems”onpage21.
Keyboard,mouse,orpointing-deviceproblems
•FollowthesuggestedactionsintheorderinwhichtheyarelistedintheActioncolumnuntiltheproblemis
solved.
•SeethepartslistinginChapter7“Partslisting,RD230Types1043,1044,4010,and4011”onpage91to
determinewhichcomponentsarecustomerreplaceableunits(CRUs)andwhichcomponentsareeld
replaceableunits(FRUs).
•Ifanactionstepisprecededby“(T rainedservicetechnicianonly), ”thatstepmustbeperformedonlyby
atrainedservicetechnician.
SymptomAction
Allorsomekeysonthe
keyboarddonotwork.
Themouseorpointingdevice
doesnotwork.
1.Makesurethat:
•Thekeyboardcableissecurelyconnected.
•Theserverandthemonitorareturnedon.
2.Thekeyboardiscompatiblewiththeserver.RefertotheWebsiteat
http://www.lenovo.com/thinkserver.
3.IfyouareusingaUSBkeyboardanditisconnectedtoaUSBhub,disconnect
thekeyboardfromthehubandconnectitdirectlytotheserver.
4.Replacethefollowingcomponentsoneatatime,intheordershown,restarting
theservereachtime:
a.Keyboard
b.(T rainedservicetechnicianonly)Systemboard
1.Makesurethat:
•Themouseorpointingdeviceiscompatiblewiththeserver.RefertotheWeb
siteathttp://www.lenovo.com/thinkserver.
•Themouseorpointing-devicecableissecurelyconnectedtotheserver.
•Themouseorpointing-devicedevicedriversareinstalledcorrectly.
•Theserverandthemonitorareturnedon.
•ThemouseisenabledintheSetupUtilityprogram.
2.IfyouareusingaUSBmouseorpointingdeviceanditisconnectedtoaUSB
hub,disconnectthemouseorpointingdevicefromthehubandconnectit
directlytotheserver.
Chapter4.Diagnostics13
Page 26
•FollowthesuggestedactionsintheorderinwhichtheyarelistedintheActioncolumnuntiltheproblemis
solved.
•SeethepartslistinginChapter7“Partslisting,RD230Types1043,1044,4010,and4011”onpage91to
determinewhichcomponentsarecustomerreplaceableunits(CRUs)andwhichcomponentsareeld
replaceableunits(FRUs).
•Ifanactionstepisprecededby“(T rainedservicetechnicianonly), ”thatstepmustbeperformedonlyby
atrainedservicetechnician.
SymptomAction
3.Replacethefollowingcomponentsoneatatime,intheordershown,restarting
theservereachtime:
a.Mouseorpointingdevice
b.(T rainedservicetechnicianonly)Systemboard
Memoryproblems
•FollowthesuggestedactionsintheorderinwhichtheyarelistedintheActioncolumnuntiltheproblemis
solved.
•SeethepartslistinginChapter7“Partslisting,RD230Types1043,1044,4010,and4011”onpage91to
determinewhichcomponentsarecustomerreplaceableunits(CRUs)andwhichcomponentsareeld
replaceableunits(FRUs).
•Ifanactionstepisprecededby“(T rainedservicetechnicianonly), ”thatstepmustbeperformedonlyby
atrainedservicetechnician.
SymptomAction
Theamountofsystemmemory
thatisdisplayedislessthan
theamountofinstalledphysical
memory.
MultiplerowsofDIMMsina
branchareidentiedasfailing.
1.Makesurethat:
•NoerrorLEDsarelitontheoperatorinformationpanelorontheDIMM.
•Memorymirroringdoesnotaccountforthediscrepancy.
•Thememorymodulesareseatedcorrectly.
•Youhaveinstalledthecorrecttypeofmemory.
•Ifyouchangedthememory,youupdatedthememorycongurationinthe
SetupUtilityprogram.
•Allbanksofmemoryareenabled.Theservermighthaveautomatically
disabledamemorybankwhenitdetectedaproblem,oramemorybank
mighthavebeenmanuallydisabled.
2.CheckthePOSTeventlogforDIMMerrormessages:
•IfaDIMMwasdisabledbyasystems-managementinterrupt(SMI),replace
theDIMM.
•IfaDIMMwasdisabledbytheuserorbyPOST,runtheSetupUtilityprogram
andenabletheDIMM.
3.Makesurethatthereisnomemorymismatchwhentheserverisattheminimum
memoryconguration.
4.AddonepairofDIMMsatatime,makingsurethattheDIMMsineachpair
arematching.
5.ReseattheDIMMs.
6.ReplacetheDIMMsinstep5onpage14,oneatatime,intheordershown,
restartingtheservereachtime.
1.ReseattheDIMMs;then,restarttheserver.
2.Replacethelowest-numberedDIMMswithidenticalknowngoodDIMMs;
then,restarttheserver.Repeatasnecessary.Ifthefailurescontinueafterall
identiedpairsarereplaced,gotostep4onpage15
.
14ThinkServerRD230HardwareMaintenanceManual
Page 27
•FollowthesuggestedactionsintheorderinwhichtheyarelistedintheActioncolumnuntiltheproblemis
solved.
•SeethepartslistinginChapter7“Partslisting,RD230Types1043,1044,4010,and4011”onpage91to
determinewhichcomponentsarecustomerreplaceableunits(CRUs)andwhichcomponentsareeld
replaceableunits(FRUs).
•Ifanactionstepisprecededby“(T rainedservicetechnicianonly), ”thatstepmustbeperformedonlyby
atrainedservicetechnician.
SymptomAction
3.ReturntheremovedDIMMs,onepairatatime,totheiroriginalconnectors,
restartingtheserveraftereachpair,untilapairfails.ReplaceeachDIMMinthe
failedpairwithanidenticalknowngoodDIMM,restartingtheserverafteryou
reinstalleachDIMM.ReplacethefailedDIMM.Repeatstep3onpage15
youhavetestedallremovedDIMMs.
4.(Trainedservicetechnicianonly)Replacethesystemboard.
Microprocessorproblems
•FollowthesuggestedactionsintheorderinwhichtheyarelistedintheActioncolumnuntiltheproblemis
solved.
•SeethepartslistinginChapter7“Partslisting,RD230Types1043,1044,4010,and4011”onpage91
determinewhichcomponentsarecustomerreplaceableunits(CRUs)andwhichcomponentsareeld
replaceableunits(FRUs).
•Ifanactionstepisprecededby“(T rainedservicetechnicianonly), ”thatstepmustbeperformedonlyby
atrainedservicetechnician.
SymptomAction
Theserveremitsacontinuous
beepduringthePOST,
indicatingthatthestartup
(boot)microprocessorisnot
workingcorrectly.
1.Makesurethattheserversupportsallthemicroprocessorsandthatthe
microprocessorsmatchinspeedandcachesize.
2.(Trainedservicetechnicianonly)Reseatmicroprocessor1.
3.(Trainedservicetechnicianonly)Ifthereisnoindicationofwhichmicroprocessor
hasfailed,isolatetheerrorbytestingwithonemicroprocessoratatime.
4.Replacethefollowingcomponentsoneatatime,intheordershown,restarting
theservereachtime:
a.(T rainedservicetechnicianonly)Microprocessor2
b.VRM2
c.(T rainedservicetechnicianonly)Systemboard
5.(Trainedservicetechnicianonly)Ifmultipleerrorcodesindicateamicroprocessor
error,reversethelocationsoftwomicroprocessorstodeterminewhetherthe
errorisassociatedwithamicroprocessororwithamicroprocessorsocket.
•Iftheerrorisassociatedwithamicroprocessor,replacethemicroprocessor.
•IftheerrorisassociatedwithaVRM,replacetheVRM.
•Iftheerrorisassociatedwithamicroprocessorsocket,replacethesystem
board.
until
to
Monitorproblems
Somemonitorshavetheirownself-tests.Ifyoususpectaproblemwithyourmonitor,seethedocumentation
thatcomeswiththemonitorforinstructionsfortestingandadjustingthemonitor.
Chapter4.Diagnostics15
Page 28
•FollowthesuggestedactionsintheorderinwhichtheyarelistedintheActioncolumnuntiltheproblemis
solved.
•SeethepartslistinginChapter7“Partslisting,RD230Types1043,1044,4010,and4011”onpage91to
determinewhichcomponentsarecustomerreplaceableunits(CRUs)andwhichcomponentsareeld
replaceableunits(FRUs).
•Ifanactionstepisprecededby“(T rainedservicetechnicianonly), ”thatstepmustbeperformedonlyby
atrainedservicetechnician.
SymptomAction
Testingthemonitor
Thescreenisblank.
Themonitorhasscreen
jitter,orthescreenimageis
wavy,unreadable,rolling,or
distorted.
1.Makesurethatthemonitorcablesarermlyconnected.
2.Tryusingadifferentmonitorontheserver,ortryusingthemonitorthatisbeing
testedonadifferentserver.
3.Runthediagnosticprograms.Ifthemonitorpassesthediagnosticprograms,
theproblemmightbeavideodevicedriver.
4.(Trainedservicetechnicianonly)Replacethesystemboard.
1.IftheserverisattachedtoaKVMswitch,bypasstheKVMswitchtoeliminateit
asapossiblecauseoftheproblem:connectthemonitorcabledirectlytothe
correctconnectorontherearoftheserver.
2.Makesurethat:
•Theserveristurnedon.Ifthereisnopowertotheserver,see“Power
problems”onpage17
•Themonitorcablesareconnectedcorrectly.
•Themonitoristurnedonandthebrightnessandcontrastcontrolsare
adjustedcorrectly.
•NoPOSTerrorsaregeneratedwhentheserveristurnedon.
3.Makesurethatthecorrectserveriscontrollingthemonitor,ifapplicable.
4.See“Solvingundeterminedproblems”onpage21.
1.Ifthemonitorself-testsshowthatthemonitorisworkingcorrectly,consider
thelocationofthemonitor.Magneticeldsaroundotherdevices(suchas
transformers,appliances,uorescentlights,andothermonitors)cancause
screenjitterorwavy,unreadable,rolling,ordistortedscreenimages.Ifthis
happens,turnoffthemonitor.
.
2.Reseatthemonitor.
3.Replacethefollowingcomponentsoneatatime,intheordershown,restarting
Wrongcharactersappearon
thescreen.
1.Ifthewronglanguageisdisplayed,updatetheserverrmwarewiththecorrect
2.Reseatthemonitor.
3.Replacethefollowingcomponentsoneatatime,intheordershown,restarting
16ThinkServerRD230HardwareMaintenanceManual
Attention:Movingacolormonitorwhileitisturnedonmightcausescreen
discoloration.
Movethedeviceandthemonitoratleast305mm(12inches)apart,andturnon
themonitor.
Topreventdiskettedriveread/writeerrors,makesurethatthedistancebetween
themonitorandanyexternaldiskettedriveisatleast76mm(3inches).
theservereachtime:
a.Monitor
b.(T rainedservicetechnicianonly)Systemboard
language(seeUpdatingthermware).
theservereachtime:
a.Monitor
b.(T rainedservicetechnicianonly)Systemboard
Page 29
Optional-deviceproblems
•FollowthesuggestedactionsintheorderinwhichtheyarelistedintheActioncolumnuntiltheproblemis
solved.
•SeethepartslistinginChapter7“Partslisting,RD230Types1043,1044,4010,and4011”onpage91to
determinewhichcomponentsarecustomerreplaceableunits(CRUs)andwhichcomponentsareeld
replaceableunits(FRUs).
•Ifanactionstepisprecededby“(T rainedservicetechnicianonly), ”thatstepmustbeperformedonlyby
atrainedservicetechnician.
SymptomAction
ALenovooptionaldevicethat
wasjustinstalleddoesnot
work.
ALenovooptionaldevicethat
usedtoworkdoesnotwork
now.
Thesystemfannoiseishuge.
1.Makesurethat:
•Thedeviceisdesignedfortheserver.Foralistofthesupportedoptionsfor
yourserver,gotohttp://www.lenovo.com/thinkserver.OntheThinkServer
systemspage,clickProducts➙Options.
•Youfollowedtheinstallationinstructionsthatcamewiththedeviceandthe
deviceisinstalledcorrectly.
•Youhavenotloosenedanyotherinstalleddevicesorcables.
•YouupdatedthecongurationinformationintheSetupUtilityprogram.
Whenevermemoryoranyotherdeviceischanged,youmustupdatethe
conguration.
2.Reseatthedevicethatyoujustinstalled.
3.Replacethedevicethatyoujustinstalled.
1.Makesurethatallofthehardwareandcableconnectionsforthedeviceare
secure.
2.Ifthedevicecomeswithtestinstructions,usethoseinstructionstotestthe
device.
3.IfthefailingdeviceisanSCSIdevice,makesurethat:
•ThecablesforallexternalSCSIdevicesareconnectedcorrectly.
•ThelastdeviceineachSCSIchain,ortheendoftheSCSIcable,is
terminatedcorrectly.
•AnyexternalSCSIdeviceisturnedon.YoumustturnonanexternalSCSI
devicebeforeyouturnontheserver.
4.Reseatthefailingdevice.
5.Replacethefailingdevice.
ThecurrentBIOSisdesignedtoautomaticallylowerfanspeedswithmostRAIDcard
options.However,theLSI8708cardneedsahigherfanspeedwhenthebatteryis
installed.Whenthereisnobatteryinstalledinthecard,theuserhavetochange
thefanspeedmanually.
Powerproblems
•FollowthesuggestedactionsintheorderinwhichtheyarelistedintheActioncolumnuntiltheproblemis
solved.
•SeethepartslistinginChapter7“Partslisting,RD230Types1043,1044,4010,and4011”onpage91
determinewhichcomponentsarecustomerreplaceableunits(CRUs)andwhichcomponentsareeld
replaceableunits(FRUs).
•Ifanactionstepisprecededby“(T rainedservicetechnicianonly), ”thatstepmustbeperformedonlyby
atrainedservicetechnician.
SymptomAction
Thepower-controlbuttondoes
notwork(theserverdoesnot
start).
Note:Thepower-control
buttonwillnotfunctionuntil
1.Makesurethatthepower-controlbuttonisworkingcorrectly:
a.Disconnecttheserverpowercords.
b.Reconnectthepowercords.
Chapter4.Diagnostics17
to
Page 30
•FollowthesuggestedactionsintheorderinwhichtheyarelistedintheActioncolumnuntiltheproblemis
solved.
•SeethepartslistinginChapter7“Partslisting,RD230Types1043,1044,4010,and4011”onpage91to
determinewhichcomponentsarecustomerreplaceableunits(CRUs)andwhichcomponentsareeld
replaceableunits(FRUs).
•Ifanactionstepisprecededby“(T rainedservicetechnicianonly), ”thatstepmustbeperformedonlyby
atrainedservicetechnician.
SymptomAction
3minutesaftertheserverhas
beenconnectedtoacpower.
Theserverdoesnotturnoff.
Theserverunexpectedlyshuts
down,andtheLEDsonthe
operatorinformationpanelare
notlit.
c.(T rainedservicetechnicianonly)Reseattheoperatorinformationpanel
cables,andthenrepeatstepsa.onpage18andb.onpage18.Iftheserver
starts,reseattheoperatorinformationpanel.Iftheproblemremains,replace
theoperatorinformationpanel.
2.Makesurethat:
•Thepowercordsarecorrectlyconnectedtotheserverandtoaworking
electricaloutlet.
•Thetypeofmemorythatisinstallediscorrect.
•TheDIMMisfullyseated.
•TheLEDsonthepowersupplydonotindicateaproblem.
•Themicroprocessorsareinstalledinthecorrectsequence.
3.Reseatthefollowingcomponents:
a.DIMMs
b.(T rainedservicetechnicianonly)Powerswitchconnector
c.(T rainedservicetechnicianonly)Powerbackplane
4.Replacethefollowingcomponentsoneatatime,intheordershown,restarting
theservereachtime:
a.DIMMs
b.(T rainedservicetechnicianonly)Powerswitchconnector
c.(T rainedservicetechnicianonly)Powerbackplane
d.(T rainedservicetechnicianonly)Systemboard
5.Ifyoujustinstalledanoptionaldevice,removeit,andrestarttheserver.If
theservernowstarts,youmighthaveinstalledmoredevicesthanthepower
supplysupports.
6.See“Solvingundeterminedproblems”onpage21.
1.DeterminewhetheryouareusinganAdvancedCongurationandPower
Interface(ACPI)oranon-ACPIoperatingsystem.Ifyouareusinganon-ACPI
operatingsystem,dothefollowing:
a.PressCtrl+Alt+Delete.
b.T urnofftheserverbypressingthepower-controlbuttonfor5seconds.
c.Restarttheserver.
d.IftheserverfailsthePOSTandthepower-controlbuttondoesnotwork,
disconnectthepowercordfor20seconds;then,reconnectthepowercord
andrestarttheserver.
2.IftheproblemremainsorifyouareusinganACPI-awareoperatingsystem,
suspectthesystemboard.
See“Solvingundeterminedproblems”onpage21
.
18ThinkServerRD230HardwareMaintenanceManual
Page 31

Serialportproblems
•FollowthesuggestedactionsintheorderinwhichtheyarelistedintheActioncolumnuntiltheproblemis
solved.
•SeethepartslistinginChapter7“Partslisting,RD230Types1043,1044,4010,and4011”onpage91to
determinewhichcomponentsarecustomerreplaceableunits(CRUs)andwhichcomponentsareeld
replaceableunits(FRUs).
•Ifanactionstepisprecededby“(T rainedservicetechnicianonly), ”thatstepmustbeperformedonlyby
atrainedservicetechnician.
SymptomAction
Thenumberofserialportsthat
areidentiedbytheoperating
systemislessthanthenumber
ofinstalledserialports.
Aserialdevicedoesnotwork.1.Makesurethat:
1.Makesurethat:
•EachportisassignedauniqueaddressintheSetupUtilityprogramand
noneoftheserialportsisdisabled.
•Theserialportadapter(ifoneispresent)isseatedcorrectly.
2.Reseattheserialportadapter.
3.Replacetheserialportadapter.
•Thedeviceiscompatiblewiththeserver.
•Theserialportisenabledandisassignedauniqueaddress.
•Thedeviceisconnectedtothecorrectconnector.
2.Reseatthefollowingcomponents:
a.Failingserialdevice
b.Serialcable
3.Replacethefollowingcomponentsoneatatime,intheordershown,restarting
theservereachtime:
a.Failingserialdevice
b.Serialcable
c.(T rainedservicetechnicianonly)Systemboard
Softwareproblems
•FollowthesuggestedactionsintheorderinwhichtheyarelistedintheActioncolumnuntiltheproblemis
solved.
•SeethepartslistinginChapter7“Partslisting,RD230Types1043,1044,4010,and4011”onpage91
determinewhichcomponentsarecustomerreplaceableunits(CRUs)andwhichcomponentsareeld
replaceableunits(FRUs).
•Ifanactionstepisprecededby“(T rainedservicetechnicianonly), ”thatstepmustbeperformedonlyby
atrainedservicetechnician.
SymptomAction
Yoususpectasoftware
problem.
1.Todeterminewhethertheproblemiscausedbythesoftware,makesurethat:
•Theserverhastheminimummemorythatisneededtousethesoftware.For
memoryrequirements,seetheinformationthatcomeswiththesoftware.
Ifyouhavejustinstalledanadapterormemory,theservermighthavea
memory-addressconict.
•Thesoftwareisdesignedtooperateontheserver.
•Othersoftwareworksontheserver.
•Thesoftwareworksonanotherserver.
2.Ifyoureceiveanyerrormessageswhileyouusethesoftware,seethe
informationthatcomeswiththesoftwareforadescriptionofthemessagesand
suggestedsolutionstotheproblem.
3.Contactthesoftwarevendor.
to
Chapter4.Diagnostics19
Page 32

UniversalSerialBus(USB)portproblems
•FollowthesuggestedactionsintheorderinwhichtheyarelistedintheActioncolumnuntiltheproblemis
solved.
•SeethepartslistinginChapter7“Partslisting,RD230Types1043,1044,4010,and4011”onpage91to
determinewhichcomponentsarecustomerreplaceableunits(CRUs)andwhichcomponentsareeld
replaceableunits(FRUs).
•Ifanactionstepisprecededby“(T rainedservicetechnicianonly), ”thatstepmustbeperformedonlyby
atrainedservicetechnician.
SymptomAction
AUSBdevicedoesnotwork.
1.Makesurethat:
•ThecorrectUSBdevicedriverisinstalled.
•TheoperatingsystemsupportsUSBdevices.
•AstandardPS/2keyboardormouseisnotconnectedtotheserver.Ifitis,a
USBkeyboardormousewillnotworkduringthePOST.
2.MakesurethattheUSBcongurationoptionaldevicesaresetcorrectlyinthe
SetupUtilityprogram.
3.IfyouareusingaUSBhub,disconnecttheUSBdevicefromthehuband
connectitdirectlytotheserver.
Solvingpowerproblems
Powerproblemscanbedifculttosolve.Forexample,ashortcircuitcanexistanywhereonanyofthe
powerdistributionbuses.Usually,ashortcircuitwillcausethepowersubsystemtoshutdownbecauseof
anovercurrentcondition.T odiagnoseapowerproblem,usethefollowinggeneralprocedure:
1.Turnofftheserveranddisconnectallacpowercords.
2.Checkforloosecablesinthepowersubsystem.Alsocheckforshortcircuits,forexample,ifaloose
screwiscausingashortcircuitonacircuitboard.
3.Removetheadaptersanddisconnectthecablesandpowercordstoallinternalandexternaldevices
untiltheserverisattheminimumcongurationthatisrequiredfortheservertostart(see“Solving
undeterminedproblems”onpage21
4.Reconnectallacpowercordsandturnontheserver.Iftheserverstartssuccessfully,replacethe
adaptersanddevicesoneatatimeuntiltheproblemisisolated.
fortheminimumconguration).
Iftheserverdoesnotstartfromtheminimumconguration,replacethecomponentsintheminimum
congurationoneatatimeuntiltheproblemisisolated.
SolvingEthernetcontrollerproblems
ThemethodthatyouusetotesttheEthernetcontrollerdependsonwhichoperatingsystemyouareusing.
Seetheoperating-systemdocumentationforinformationaboutEthernetcontrollers,andseetheEthernet
controllerdevice-driverreadmele.
Trythefollowingprocedures:
•Makesurethatthecorrectdevicedrivers,whichcomewiththeserver,areinstalledandthattheyareat
thelatestlevel.
•MakesurethattheEthernetcableisinstalledcorrectly.
–Thecablemustbesecurelyattachedatallconnections.Ifthecableisattachedbuttheproblem
remains,tryadifferentcable.
–IftheEthernetcontrollerissettooperateat100Mbps,youmustuseCategory5cabling.
20ThinkServerRD230HardwareMaintenanceManual
Page 33

–Ifyoudirectlyconnecttwoservers(withoutahub),orifyouarenotusingahubwithXports,usea
crossovercable.TodeterminewhetherahubhasanXport,checktheportlabel.Ifthelabelcontains
anX,thehubhasanXport.
•Determinewhetherthehubsupportsauto-negotiation.Ifitdoesnot,tryconguringtheintegrated
Ethernetcontrollermanuallytomatchthespeedandduplexmodeofthehub.
•ChecktheEthernetcontrollerLEDsontherearpaneloftheserver.TheseLEDsindicatewhetherthere
isaproblemwiththeconnector,cable,orhub.
–TheEthernetlinkstatusLEDislitwhentheEthernetcontrollerreceivesalinkpulsefromthehub.Ifthe
LEDisoff,theremightbeadefectiveconnectororcableoraproblemwiththehub.
–TheEthernettransmit/receiveactivityLEDislitwhentheEthernetcontrollersendsorreceivesdata
overtheEthernetnetwork.IftheEthernettransmit/receiveactivityLEDisoff,makesurethatthehub
andnetworkareoperatingandthatthecorrectdevicedriversareinstalled.
•ChecktheLANactivityLEDsontherearoftheserver.TheLANactivityLEDislitwhendataisactiveon
theEthernetnetwork.IftheLANactivityLEDisoff,makesurethatthehubandnetworkareoperating
andthatthecorrectdevicedriversareinstalled.
•Checkforoperating-system-speciccausesoftheproblem.
•Makesurethatthedevicedriversontheclientandserverareusingthesameprotocol.
IftheEthernetcontrollerstillcannotconnecttothenetworkbutthehardwareappearstobeworking,the
networkadministratormustinvestigateotherpossiblecausesoftheerror.
Solvingundeterminedproblems
Ifthediagnostictestsdidnotdiagnosethefailureoriftheserverisinoperative,usetheinformationin
thissection.
Ifyoususpectthatasoftwareproblemiscausingfailures(continuousorintermittent),see“Software
problems”onpage19.
DamageddatainCMOSmemoryordamagedrmwarecancauseundeterminedproblems.Toresetthe
CMOSdata,usethepasswordswitch2(SW4)tooverridethepower-onpasswordandcleartheCMOS
memory;see“Locatingpartsonthesystemboard”onpage29.
ChecktheLEDsonallthepowersupplies.IftheLEDsindicatethatthepowersuppliesareworking
correctly,dothefollowing:
1.Turnofftheserver.
2.Makesurethattheserveriscabledcorrectly.
3.Removeordisconnectthefollowingdevices,oneatatime,untilyoundthefailure.Turnontheserver
andrecongureiteachtime.
•Anyexternaldevices
•Surge-suppressordevice(ontheserver)
•Modem,printer,mouse,andnon-Lenovodevices
•Eachadapter
•Harddiskdrives
•Memorymodules:Theminimumcongurationrequirementis1GBDIMMpermicroprocessor(2GB
inatwo-microprocessorconguration).
Thefollowingminimumcongurationisrequiredfortheservertostart:
•Onemicroprocessor
•One1GBDIMM
•Onepowersupply
•Powercord
•ServeRAIDSASadapter
•Systemboardassembly
4.Turnontheserver.Iftheproblemremains,suspectthefollowingcomponentsinthefollowingorder:
a.Powersupply
Chapter4.Diagnostics21
Page 34

b.Power-supplycage
c.Memory
d.Microprocessor
e.Systemboard
Iftheproblemissolvedwhenyouremoveanadapterfromtheserverbuttheproblemrecurswhenyou
reinstallthesameadapter,suspecttheadapter;iftheproblemrecurswhenyoureplacetheadapterwitha
differentone,suspectthesystemboardorextendercard.
Ifyoususpectanetworkingproblemandtheserverpassesallthesystemtests,suspectanetworkcabling
problemthatisexternaltotheserver.
Eventlogs
Errorcodesandmessagesaredisplayedinthefollowingtypesofeventlogs:
•POSTeventlog:Thislogcontainsthethreemostrecenterrorcodesandmessagesthatweregenerated
duringthePOST.
•System-eventlog:ThislogcontainsallthePOSTandsystemmanagementinterrupt(SMI)events.Y ou
canviewthesystem-eventlogthroughtheSetupUtilityprogramandthroughtheastheIPMIevent
log.Thesystem-eventlogislimitedinsize.Whenitisfull,newentrieswillnotoverwriteexistingentries;
therefore,youmustperiodicallysaveandthenclearthesystem-eventlogthroughtheSetupUtility
program.Whenyouaretroubleshooting,youmighthavetosaveandthenclearthesystem-eventlogto
makethemostrecenteventsavailableforanalysis.
Messagesarelistedontheleftsideofthescreen,anddetailsabouttheselectedmessagearedisplayedon
therightsideofthescreen.Tomovefromoneentrytothenext,usetheUpArrowandDownArrowkeys.
Viewingeventlogswithoutrestartingtheserver
Iftheserverisnothung,methodsareavailableforyoutoviewoneormoreeventlogswithoutrestarting
theserver.
IfIPMItoolisinstalledintheserver,youcanuseittoviewthesystem-eventlog.Mostrecentversionsof
theLinuxoperatingsystemcomewithacurrentversionofIPMItool.
Thefollowingtabledescribesthemethodsthatyoucanusetoviewtheeventlogs,dependingonthe
conditionoftheserver.Thersttwoconditionsgenerallydonotrequirethatyourestarttheserver.
Table3.Methodsforviewingeventlogs
ConditionAction
Theserverisnothungandisconnectedtoanetwork.UseIPMItooltoviewthesystem-eventlog.
Theserverisnothungandisnotconnectedtoanetwork.UseIPMItoollocallytoviewthesystem-eventlog.
Theserverishung.
YoucanrestarttheserverandpressDeltostarttheSetup
Utilityprogramandviewthesystem-eventlog.
Systemeventlog
Thesystem-eventlogcontainsmessagesofthreetypes:
22ThinkServerRD230HardwareMaintenanceManual
Page 35

InformationInformationmessagesdonotrequireaction;they
recordsignicantsystem-levelevents,suchas
whentheserverisstarted.
WarningWarningmessagesdonotrequireimmediateaction;
theyindicatepossibleproblems,suchaswhenthe
recommendedmaximumambienttemperatureis
exceeded.
ErrorErrormessagesmightrequireaction;theyindicate
systemerrors,suchaswhenafanisnotdetected.
Eachmessagecontainsdateandtimeinformation,anditindicatesthesourceofthemessage(POST).
DiagnosticLEDsonthefrontcontrolpanel
IdentifyingthediagnosticLEDsonthefrontcontrolpanelisaveryimportantmethodfordiagnosingserver
problems.See“Frontcontrolpanel”onpage25
fordetailedinformation.
Onboarddebugdigitron
Theonboarddebugdigitronhelpstrainedservicetechnicianstoidentifyserverproblems.Whenyouturnon
theserver,theonboarddebugdigitronwilldisplaydebugcodeonthescreen.
Chapter4.Diagnostics23
Page 36

24ThinkServerRD230HardwareMaintenanceManual
Page 37

Chapter5.Locatingparts,controls,LEDs,andconnectors
Thischapterprovidesinformationtohelpyoulocateyourserverparts,controls,light-emittingdiodes
(LEDs),andconnectors.
Note:Theillustrationsinthisdocumentmightdifferslightlyfromyourmodel.
Frontview
Figure1“Frontviewoftheserver”onpage25showsthedrivesandpartsonthefrontoftheserver.
Figure1.Frontviewoftheserver
1Slimopticaldrive
2Frontcontrolpanel(see“Frontcontrolpanel”onpage25)
3Mountingpointfor3.5-inchharddiskdrive
Rearview
Figure2“Rearviewoftheserver”onpage25showsthelocationsoftheconnectorsandpartsonthe
rearoftheserver.
Figure2.Rearviewoftheserver
1Powercordconnector
2Powersupplyassembly7Ethernetconnector1
3USBconnectors(1and2)8Ethernetconnector2(sharewithMGMT)
4VGAmonitorconnector9PCIexpansionslot
5Serialport
6USBconnectors(3and4)
Frontcontrolpanel
Thissectionprovidesinformationaboutthefrontcontrolpaneloftheserver.
©CopyrightLenovo2010,2012
25
Page 38

Thefollowingillustrationhelpsyouidentifytheconnectors,controls,andLEDsonthefrontcontrolpanelof
yourserver.
Figure3.Frontcontrolpanellocations
1USBconnector
2USBconnector
3IDbutton9PowerbuttonandLED
4NMIbutton
5Resetbutton
6Ethernet1statusLED
7Ethernet2statusLED
8HarddiskdrivestatusLED
10SystemIDLED
11SystemstatusLED
12LED(willnotbeusedinthisserver)
ThefollowingtabledescribesthemeaningoftheLEDsonthefrontcontrolpanel.
Table4.FrontcontrolpanelLEDs
LEDStateColorDescription
PowerLED
LED
Ethernet1
statusLED
Ethernet2
statusLED
LED
IDLED
OnGreen
Blinking
GreenTheserverpowerisunderS1.
OffOff
OffOff
Blinking
Green
OnGreen
Blinking
Green
OffOff
OnGreen
Blinking
Green
OffOff
On
Red
OffOff
On
Blue
OffOffSystemisnotidentied.
Theserverpowerison.
Theserverpowerisoff.
Theharddiskdriveisnotactive. Harddiskdrive
Theharddiskdriveisactive.
LANislinked.
LANisactive.
LANisnotlinked.
LANislinked.
LANisactive.
LANisnotlinked.
Failure.Overtemperatureorovervoltage. Systemstatus
Nofailure.
Systemisidentied.
EachharddiskdrivehastwostatusLEDsonthefront.TheGreenLED1(bottom)indicatesactivityand
theAmberLED2(top)indicatestheRAIDstatus.
Notes:
26ThinkServerRD230HardwareMaintenanceManual
Page 39

•IftheonboardSATAandonboardSATAsoftwareRAIDarecongured,notethefollowing:
–TheSGPIOconnectorofthe4–portSATAcableinthechassisshouldbeconnectedtotheJ45
connectoronthesystemboard.See“Locatingpartsonthesystemboard”onpage29
.
–ThefunctionoftheAmberLED2isonlyavailableafteryouentertheoperatingsystem.
•IftheonboardSASandonboard1068ESASRAIDcontrollerarecongured,notethattheSGPIO
connectorofthe4–portmini-SAScableinthechassisshouldbeconnectedtotheJ51connectoronthe
systemboard.See“Locatingpartsonthesystemboardwithanonboard1068ESASRAID”onpage31.
Table5.HarddiskdriveLEDs
GreenLED1
Description
Harddiskdriveisnotpresent.
Harddiskdriveispresentbutisnotactive.
Harddiskdriveispresentandactive.Blinking
Serverisintheprocessoflocatingtheharddiskdrive.On
RAIDhasfailed.
Harddiskdriveisrebuilding.BlinkingBlinking
(bottom)AmberLED2(top)
OffOff
OnOff
Off
Blinking
OffOn
Note:Forsomemodels,theharddiskdrivestatusinformationmightbedifferentfromtheinformationlistedin
theabovetable.Fortheseservermodels,refertothefollowingtwotablesfortheharddiskdriveLEDstatus.
Table6.HarddiskdriveLEDsfortheonboardSATAandonboardSA TAsoftwareRAIDcongurations(somemodels)
GreenLED1
Description
Harddiskdriveisnotpresent.
Harddiskdriveispresentbutisnotactive.
Harddiskdriveispresentandactive.Blinking
Serverisintheprocessoflocatingtheharddiskdrive.OnOff
RAIDhasfailed.
Harddiskdriveisrebuilding.Blinking
Table7.HarddiskdriveLEDsfortheadd-onSASRAIDadapterconguration(somemodels)
Description
Harddiskdriveisnotpresent.
Harddiskdriveispresentbutisnotactive.
Harddiskdriveispresentandactive.Blinking
Serverisintheprocessoflocatingtheharddiskdrive.
RAIDhasfailed.
Harddiskdriveisrebuilding.BlinkingBlinking
(bottom)AmberLED2(top)
OffOff
OnOff
Off
OnOff
Off
GreenLED1
(bottom)AmberLED2(top)
OffOff
OnOff
Off
BlinkingBlinking
OffOn
Chapter5.Locatingparts,controls,LEDs,andconnectors27
Page 40

Table8.HarddiskdriveLEDsfortheonboard1068ESASRAIDcontrollerandadd-onSASRAIDadaptercongurations
(somemodels)
GreenLED1
Description
Harddiskdriveisnotpresent.
Harddiskdriveispresentbutisnotactive.
Harddiskdriveispresentandactive.Blinking
Serverisintheprocessoflocatingtheharddiskdrive.
RAIDhasfailed.
Harddiskdriveisrebuilding.BlinkingBlinking
(bottom)AmberLED2(top)
OffOff
OnOff
Off
BlinkingBlinking
OffOn
TheEthernet1andEthernet2connectorshavetwostatusLEDsthatindicatetheLANconnectionand
activityoftheconnection.
Table9.EthernetLEDs
LEDStateColorDescription
RJ-45linkage/activity(left)
RJ-45speed(right)
OnGreen10/100/1000Mblinked
Blinking
OffOff
On
OnGreen
OffOff
Green10/100/1000Mbactivity
NoLANconnection.
Amber1000Mblinkedandactive
100Mblinkedandactive
10MbmodeornoLANconnection.
Locatingservercomponents
Figure4“Servercomponentlocations”onpage29showsthelocationsofthemajorcomponentsinyour
server.
28ThinkServerRD230HardwareMaintenanceManual
Page 41

Figure4.Servercomponentlocations
1Lefthandleofthechassis
2Slimopticaldrive7Systemfans
3PCIcard
4Memorymodules
5Powersupplyassembly
6Heatsinkassemblyandmicroprocessor(s)underneath
8Righthandleofthechassis
9Mountingpointsforthe3.5-inchharddiskdrives
Locatingpartsonthesystemboard
ThissectionillustratesthelocatingpartsonthesystemboardwithanonboardSATAsoftwareRAID(on
somemodels),andthesystemboardwithanonboard1068ESASRAID(onsomemodels).
LocatingpartsonthesystemboardwithanonboardSAT AsoftwareRAID
ThefollowingillustrationsshowthelocationsofthepartsonthesystemboardwithanonboardSATA
softwareRAID.
“LocatingpartsonthesystemboardwithanonboardSATAsoftwareRAID”onpage29
Chapter5.Locatingparts,controls,LEDs,andconnectors29
Page 42

Figure5.LocatingmajorpartsonthesystemboardwithanonboardSA T AsoftwareRAID
1Memoryslot(CPU1DIMMCHA1)13SATAconnector1
2Memoryslot(CPU1DIMMCHA0)14SATAconnector2
3Memoryslot(CPU1DIMMCHB0)15SATAconnector3
4Memoryslot(CPU1DIMMCHC0)16SATAconnector5
5Powerconnector2(forCPU0)17SATAconnector4
624-pinpowerconnectorforthesystemboard
7Microprocessor(CPU0)19PCIExpressx8slot(notused)
8Memoryslot(CPU0DIMMCHA1)20PCIExpressx8slot(notused)
9Memoryslot(CPU0DIMMCHA0)21PCIExpressx16slot(fortherisercard)
10Memoryslot(CPU0DIMMCHB0)22Microprocessor(CPU1)
11Memoryslot(CPU0DIMMCHC0)23Powerconnector3(forCPU1)
12SATAconnector0
18Systemboardbattery
30ThinkServerRD230HardwareMaintenanceManual
Page 43

Figure6.LocatingotherconnectorsonthesystemboardwithanonboardSA T AsoftwareRAID
1J47(systemfan1connector)7J35(forfrontcontrolcable)
2J48(systemfan2connector)8JP1(ClearCMOSjumper)
3J50(systemfan3connector)9USB2connector
4J56(systemfan4connector)10J45connector(fortheSGPIOconnectorofthe4–portSATAcable)
5J49(systemfan5connector)11JP8(COM2connector)
6J19(frontUSBconnector)
ThefollowingtableintroducesthejumperswitchesonthesystemboardwithanonboardSATAsoftware
RAID.
Table10.Jumpersettings
JumperPositionDescription
JP1:Clear
CMOS
Pins1-2
Pins2-3
Thedefaultpositionatwhichthejumperisplacedonpins1-2duringthenormal
operationofthesystem.
Ifthejumperisplacedonpins2-3,whenthejumperismovedbacktothedefault
position,thesettingsofCMOSwillbeclearedautomaticallyatthenextstartup.
Note:BeforeclearingtheCMOS,turnofftheserveranddisconnectthepowercord.Movethejumperfrom
pins1-2topins2-3.Waitmorethanveminutesandthenmovethejumperbacktothenormalposition
(pins1-2)toclearCMOS.
Locatingpartsonthesystemboardwithanonboard1068ESASRAID
Thefollowingillustrationsshowthelocationsofthepartsonthesystemboardwithanonboard1068E
SASRAID.
Chapter5.Locatingparts,controls,LEDs,andconnectors31
Page 44

24
25
26
27
28
Figure7.Locatingmajorpartsonthesystemboardwithanonboard1068ESASRAID
1Memoryslot(CPU1DIMMCHA1)15SATAconnector3
2Memoryslot(CPU1DIMMCHA0)16SATAconnector5
3Memoryslot(CPU1DIMMCHB0)17SATAconnector4
4Memoryslot(CPU1DIMMCHC0)18SASconnectors(top:SAS1;bottom:SAS0)
5Powerconnector2(forCPU0)19SASconnectors(top:SAS3;bottom:SAS2)
624-pinpowerconnectorforthesystemboard
7Microprocessor(CPU0)21SASconnectors(top:SAS7;bottom:SAS6)
8Memoryslot(CPU0DIMMCHA1)22Onboard1068ESASRAIDcontroller
9Memoryslot(CPU0DIMMCHA0)23Systemboardbattery
10Memoryslot(CPU0DIMMCHB0)24PCIExpressx8slot
11Memoryslot(CPU0DIMMCHC0)25PCIExpressx8slot
12SATAconnector026PCIExpressx16slot(fortherisercard)
13SATAconnector127Microprocessor(CPU1)
14SATAconnector228Powerconnector3(forCPU1)
20SASconnectors(top:SAS5;bottom:SAS4)
32ThinkServerRD230HardwareMaintenanceManual
Page 45

12
13
Figure8.Locatingotherconnectorsonthesystemboardwithanonboard1068ESASRAID
1J47(systemfan1connector)8J51(fortheSGPIOconnectoroftheonboard4–portmini-SAS
cable)
2J48(systemfan2connector)9JP1(ClearCMOSjumper)
3J50(systemfan3connector)10J35(forfrontcontrolcable)
4J56(systemfan4connector)11USB2connector
5J49(systemfan5connector)12J45connector(fortheSGPIOconnectorofthe4–portSATAcable)
6J20(frontUSBconnector)13JP7(SetOnboardSASjumper)
7J19(frontUSBconnector)14J16(COM2connector)
Thefollowingtableintroducesthejumperswitchesonthesystemboardwithanonboard1068ESASRAID.
Table11.Jumpersettings
JumperPositionDescription
JP1:Clear
CMOS
JP7:Set
Onboard
SAS
Pins1-2
Pins2-3
Pins1-2
Pins2-3
Thedefaultpositionatwhichthejumperisplacedonpins1-2duringthenormal
operationofthesystem.
Ifthejumperisplacedonpins2-3,whenthejumperismovedbacktothedefault
position,thesettingsofCMOSwillbeclearedautomaticallyatthenextstartup.
Thedefaultpositionatwhichthejumperisplacedonpins1-2duringthenormal
operationofthesystem.TheonboardSAScontrollerisenabled.
Ifthejumperisplacedonpins2-3,theonboardSAScontrollerisdisabled.
Note:BeforeclearingtheCMOS,turnofftheserveranddisconnectthepowercord.Movethejumperfrom
pins1-2topins2-3.Waitmorethanveminutesandthenmovethejumperbacktothenormalposition
(pins1-2)toclearCMOS.
Chapter5.Locatingparts,controls,LEDs,andconnectors33
Page 46

Locatingconnectorsonthebackplane
Backplaneconnectorlocationsshowstheconnectorlocationsonthebackplane.
Figure9.Backplaneconnectorlocations
1Powerconnector2
2Powerconnector1
3Opticaldrivepowerconnector
4MiniSASsignalconnector
34ThinkServerRD230HardwareMaintenanceManual
Page 47

Chapter6.Installing,removing,orreplacinghardware
Thischapterprovidesinstructionsonhowtoinstall,remove,orreplacehardwareforyourserver.
Thischaptercontainsthefollowingitems:
•Guidelines
•Removingtheservercover
•Installing,removing,orreplacingoptionalhardwaredevices
•Installing,removing,orreplacinghardwaredevices
•Completingthepartsreplacement
ForalistoftheThinkServeroptions,gotohttp://www.lenovo.com/thinkserver.ClicktheProductstaband
thenclickOptionstoviewthesupportedserveroptioninformation.
Guidelines
Thissectionprovidessomeguidelinesthatyoushouldreadandunderstandbeforeusingyourserver.
Precautions
Beforeyouusetheserver,besuretoreadandunderstandthefollowingprecautions:
•Beforeusingtheproduct,besuretoreadandunderstandthemultilingualsafetyinstructionsandthe
LenovoLimitedWarranty(LLW)onthedocumentationDVDthatcomeswiththeproduct.Readingand
understandingthesafetyinstructionsreducestheriskofpersonalinjuryanddamagetoyourproduct.
•Whenyouinstallyournewserver,taketheopportunitytodownloadandapplythemostrecentrmware
updates.Thisstepwillhelptoensurethatanyknownissuesareaddressedandthatyourserveris
readytofunctionatmaximumlevelsofperformance.T odownloadrmwareupdatesforyourserver,
dothefollowing:
1.Gotohttp://www.lenovo.com/support.
2.ClickDownloadDrivers&SoftwareandfollowtheinstructionsontheWebpagetodownload
rmwareupdatesforyourserver.
See“Updatingthermware”onpage127formoreinformation.
•Beforeyouinstalloptionalhardwaredevices,makesurethattheserverisworkingcorrectly.Iftheserveris
notworkingcorrectly,seeChapter4“Diagnostics”onpage11todobasictroubleshooting.Iftheproblem
cannotbesolved,seeAppendixB“Gettinginformation,help,andservice”onpage131.
•Observegoodhousekeepingintheareawhereyouareworking.Putremovedcoversandotherparts
inasafeplace.
•Ifyoumustturnontheserverwhiletheservercoverisremoved,makesurethatnooneisneartheserver
andthatnotoolsorotherobjectshavebeenleftinsidetheserver.
•Donotattempttoliftanobjectthatyouthinkistooheavyforyou.Ifyouhavetoliftaheavyobject,
observethefollowingprecautions:
–Makesurethatyoucanstandsafelywithoutslipping.
–Distributetheweightoftheobjectequallybetweenyourfeet.
–Useaslowliftingforce.Nevermovesuddenlyortwistwhenyouliftaheavyobject.
–Toavoidstrainingthemusclesinyourback,liftbystandingorbypushingupwithyourlegmuscles.
©CopyrightLenovo2010,2012
35
Page 48

•Makesurethatyouhaveanadequatenumberofproperlygroundedelectricaloutletsfortheserver,
monitor,andotherdevices.
•Backupallimportantdatabeforeyoumakechangestodrives.
•Haveasmallat-bladescrewdriveravailable.
•Youdonothavetoturnofftheservertoinstallorreplaceahot-swapredundantpowersupplymodule,
hot-swapharddiskdrives,orhot-plugUSBdevices.However,youmustturnofftheserverbefore
performinganystepsthatinvolveinstalling,removing,orreplacingadaptercablesornon-hot-swap
devicesorcomponents.
•ToviewtheLEDsonthesystemboardandinternalcomponents,leavetheserverconnectedtopower.
•Whenyouarenishedworkingontheserver,reinstallallsafetyshields,guards,labels,andgroundwires.
•Whenworkinginsidetheserver,youmightndsometaskseasierifyoulaytheserveronitsside.
Handlingstatic-sensitivedevices
Attention:Donotopenthestatic-protectivepackagethatcontainsthenewpartuntilthedefectiveparthasbeen
removedfromtheserverandyouarereadytoinstallthenewpart.Staticelectricity,althoughharmlesstoyou,
canseriouslydamageservercomponentsandparts.
Whenyouhandleserverpartsandcomponents,taketheseprecautionstoavoidstatic-electricitydamage:
•Limityourmovement.Movementcancausestaticelectricitytobuilduparoundyou.
•Wearanelectrostatic-dischargewriststrap,ifoneisavailable.
•Alwayscarefullyhandlethepartsandothercomponents(suchasPCIcards,memorymodules,system
boards,andmicroprocessors)byitsedgesoritsframe.Donottouchsolderjoints,pins,orexposed
circuitry.
•Preventothersfromtouchingthepartsandothercomputercomponents.
•Beforeyoureplaceanewpart,touchthestatic-protectivepackagecontainingthenewparttoametal
expansion-slotcoverorotherunpaintedmetalsurfaceontheserverforatleasttwoseconds.This
reducesstaticelectricityfromthepackageandyourbody.
•Removethenewpartfromthestatic-protectivepackageanddirectlyinstallitintheserverwithout
placingitonanyothersurface.Ifitishardforyoutodothisinyourspecicsituation,placethe
static-protectivepackageofthenewpartonasmooth,levelsurface,andthenplacethenewparton
thestatic-protectivepackage.
•Donotplacethepartontheservercoverorothermetalsurface.
•Takeadditionalcarewhenhandlingdevicesduringcoldweather.Heatingreducesindoorhumidity
andincreasesstaticelectricity.
Systemreliabilityguidelines
Tohelpensurepropercoolingandsystemreliability,makesurethatyoufollowtheseguidelines:
•Eachofthedrivebayshasadriveoradummytrayinstalled;orthereisanelectromagneticinterface(EMI)
protectivepanelorEMIshieldinstalledtoprotectthedrivecage.
•Iftheserverhasredundantpower,eachofthepowersupplymodulebayhasaredundantpowersupply
moduleinstalled,oronebayhasamodulewhiletheotherbayiscoveredbyashield.
•Leaveadequatespacearoundtheservertomakesurethattheservercoolingsystemworkswell.Leave
approximately50mm(2inches)ofopenspacearoundthefrontandrearoftheserver.Donotplace
objectsinfrontofthefans.Forpropercoolingandairow,installtheservercoverbeforeyouturnon
theserver.Operatingtheserverforextendedperiodsoftime(morethan30minutes)withtheserver
coverremovedmightdamageservercomponents.
36ThinkServerRD230HardwareMaintenanceManual
Page 49

•Properlyroutethecables.Forsomeoptions,suchasPCIcards,followthecablinginstructionsthatcome
withtheoptionsinadditiontotheinstructionsinthismanual.
•Makesurethatyoureplaceafailingfanwithin48hours.
•Whenreplacingahot-swapdrive,installthenewhot-swapdrivewithintwominutesofremoval.
Workinginsidetheserverwiththepoweron
Attention:Staticelectricitythatisreleasedtointernalservercomponentswhentheserveristurnedonmightcause
theservertohalt,whichmightresultinthelossofdata.Toavoidthispotentialproblem,alwaysuseanESDwriststrap
orothergroundingsystemwhenyouworkinsidetheserverwiththepoweron.
Theserversupportshot-swapdevicesandisdesignedtooperatesafelywhileitisturnedonandthecoveris
removed.Followtheseguidelineswhenyouworkinsidetheserverwiththepoweron:
•Avoidwearingloose-ttingclothingonyourforearms.Buttonlong-sleevedshirtsbeforeworkinginside
theserver;donotwearcufflinkswhileyouareworkinginsidetheserver.
•Donotallowyournecktieorscarftohanginsidetheserver.
•Removejewelry,suchasbracelets,necklaces,rings,andloose-ttingwristwatches.
•Removeitemsfromyourshirtpocket,suchaspensandpencils.Theseitemsmightfallintotheserveras
youleanoverit.
•Avoiddroppinganymetallicobjectsintotheserver,suchaspaperclips,hairpins,andscrews.
Removingtheservercover
Attention
DonotopenyourserverorattemptanyrepairbeforereadingandunderstandingtheSafetyInformationandthe
WarrantyandSupportInformationontheThinkServerDocumentationDVDthatcomeswithyourproduct,and
Guidelines.Toobtainacopyofthepublications,goto:
http://www.lenovo.com/support
Thissectionprovidesinstructionsonhowtoremovetheservercover.
Attention:Forpropercoolingandairow,installtheservercoverbeforeturningontheserver.Operatingthe
serverformorethan30minuteswiththeservercoverremovedmightdamageservercomponents.
Toremovetheservercover,dothefollowing:
1.Removeallmediafromthedrives.Then,turnoffallattacheddevicesandtheserver.
2.Disconnectallpowercordsfromelectricaloutlets.
3.Disconnectthepowercord(s),Input/Output(I/O)cables,andallothercablesthatareconnectedto
theserver.
4.Loosenthethumbscrewintherearoftheservercover(1).Then,slidetheservercovertotherearuntil
youcanliftituptocompletelyremoveitfromthechassis(
Notes:
a.Thethumbscrewissecurelyinstalledandyouneedtouseatool,forexampleascrewdriver,to
loosenit.
b.Thethumbscrewisanintegratedpartoftheservercoveranditcannotberemovedfromtheserver
cover.
2).
Chapter6.Installing,removing,orreplacinghardware37
Page 50

Figure10.Removingtheservercover
Toreinstalltheservercover,see“Installingtheservercover”onpage88.
Installing,removing,orreplacingoptionalhardwaredevices
Thissectionprovidesinstructionsonhowtoinstall,remove,orreplaceoptionalhardwaredevicesforyour
server.Youcanexpandthecapabilitiesofyourserverbyaddingmemorymodules,PCIcards,ordrives,
andmaintainyourserverbyreplacingthefailingoptionalhardwaredevices.Ifyouarereplacinganoptional
hardwaredevice,performtheremovalprocedureandthenperformtheinstallationprocedurefortheoptional
hardwaredeviceyouwanttoreplace.
Installingorremovingamemorymodule
Thissectionprovidesinstructionsonhowtoinstallorremoveamemorymodule.Foralistofthesupported
memorymodulesforyourserver,goto
http://www.lenovo.com/thinkserver.OntheThinkServersystemspage,clickProducts➙Options➙
ThinkServer.
Memorymoduleinstallationrules
YourserverhaseightmemoryslotsforinstallingorreplacingDDR3SDRAMDIMMsthatprovideuptoa
maximumof64GBofsystemmemory.
Thefollowingtablesprovideinformationaboutthememorymoduleinstallationrulesthatyoushould
considerwheninstallingamemorymodule.The“X”markindicatesthesuggestedmemoryslot(s)into
whichthememorymodule(s)shouldbeinstalledindifferentsituations.Thenumber,forexample1,2,or3,
indicatestheinstallationsequence.See“Locatingpartsonthesystemboard”onpage29toidentifythe
variousmemoryslots.
Note:Allmemorymoduletypesandcapacitiesmustbeconsistent.
Table12.DIMMinstallationruleswhenasinglemicroprocessor(CPU0)isinstalled
DIMMslotOneDIMMTwoDIMMsThreeDIMMsFourDIMMs
CPU0DIMMCHA1
CPU0DIMMCHA0
CPU0DIMMCHB0
38ThinkServerRD230HardwareMaintenanceManual
XX,1X,1X,1
X,2X,2X,2
X,4
Page 51

Table12.DIMMinstallationruleswhenasinglemicroprocessor(CPU0)isinstalled(continued)
DIMMslotOneDIMMTwoDIMMsThreeDIMMsFourDIMMs
CPU0DIMMCHC0
Note:InstallingDIMMsonchannelAandchannelBofCPU0shouldenableChannelMirroringMode.Thismode
requiresthatyouinstalltheDIMMsinpair,andtheDIMMinstallationforChannelMirroringModeisoneDIMMon
CPU0DIMMCHA0andoneDIMMonCPU0DIMMCHB0whenasinglemicroprocessor(CPU0)isinstalled.
Table13.DIMMinstallationruleswhentwomicroprocessors(CPU0andCPU1)areinstalled
DIMMslotTwoDIMMsFourDIMMsSixDIMMsEightDIMMs
CPU0DIMMCHA1
CPU0DIMMCHA0
CPU0DIMMCHB0
CPU0DIMMCHC0
CPU1DIMMCHA1
CPU1DIMMCHA0
CPU1DIMMCHB0
CPU1DIMMCHC0
Note:FortheChannelMirroringMode,itrequiresthatyouinstalltheDIMMsinpair,andtheDIMMinstallationfor
ChannelMirroringModewhentwomicroprocessors(CPU0andCPU1)areinstalledisshownbelow.Followthis
sequenceratherthanthesequencelistedaboveifyouwanttousetheChannelMirroringMode.
1.Pair1:installaDIMMonCPU0DIMMCHA0andtheninstallaDIMMonCPU0DIMMCHB0.
2.Pair2:installaDIMMonCPU1DIMMCHA0andtheninstallaDIMMonCPU1DIMMCHB0.
X,1X,1X,1X,1
X,3X,3X,3
X,2X,2X,2X,2
X,4X,4X,4
X,3X,3
X,5X,5
X,6X,6
X,7
X,8
Installingamemorymodule
Attention
DonotopenyourserverorattemptanyrepairbeforereadingandunderstandingtheSafetyInformationandthe
WarrantyandSupportInformationontheThinkServerDocumentationDVDthatcomeswithyourproduct,and
Guidelines.Toobtainacopyofthepublications,goto:
http://www.lenovo.com/support
Thissectionprovidesinstructionsonhowtoinstallamemorymodule.
Toinstallamemorymodule,dothefollowing:
1.Removeallmediafromthedrivesandturnoffallattacheddevicesandtheserver.Then,disconnectall
powercordsfromelectricaloutletsanddisconnectallcablesthatareconnectedtotheserver.
2.Removetheservercover.SeeRemovingtheservercover.
3.Locatetheappropriatememoryslotonthesystemboardintowhichyouwillinstallthememorymodule.
Tooptimizesystemperformance,followtherelatedmemorymoduleinstallationrulesandinstallthe
memorymoduleintoamemoryslotstartingwiththememorymodulefarthestfromthemicroprocessor.
See“Memorymoduleinstallationrules”onpage38.
4.Opentheretainingclipsofthememoryslotintowhichyouwanttoinstallthememorymodule.
Chapter6.Installing,removing,orreplacinghardware39
Page 52

Figure11.Openingtheretainingclipsofthememoryslot
5.Touchthestatic-protectivepackagethatcontainsthenewmemorymoduletoanyunpaintedmetal
surfaceontheoutsideoftheserver.Then,removethenewmemorymodulefromthepackage.
6.Positionthenewmemorymoduleoverthememoryslot.Makesurethatthenotch1onthenewmemory
moduleisalignedwiththekey2inthememoryslot.Then,pressthenewmemorymodulestraightdown
intothememoryslotuntiltheretainingclipscloseandthenewmemorymodulesnapsintoposition.
Note:Ifthereisagapbetweenthememorymoduleandtheretainingclips,thememorymodulehas
notbeencorrectlyinstalled.Opentheretainingclips,removethememorymodule,andthenreinstallit
intotheslot.
Figure12.Installingthememorymodule
7.Tocompletetheinstallation,goto“Completingthepartsreplacement”onpage87.
Removingamemorymodule
Attention
DonotopenyourserverorattemptanyrepairbeforereadingandunderstandingtheSafetyInformationandthe
WarrantyandSupportInformationontheThinkServerDocumentationDVDthatcomeswithyourproduct,and
Guidelines.Toobtainacopyofthepublications,goto:
http://www.lenovo.com/support
Thissectionprovidesinstructionsonhowtoremoveamemorymodule.
Toremoveamemorymodule,dothefollowing:
40ThinkServerRD230HardwareMaintenanceManual
Page 53

1.Removeallmediafromthedrivesandturnoffallattacheddevicesandtheserver.Then,disconnectall
powercordsfromelectricaloutletsanddisconnectallcablesthatareconnectedtotheserver.
2.Removetheservercover.SeeRemovingtheservercover.
3.Locatethememoryslotwiththememorymodulethatyouwanttoremove.See“Locatingpartsonthe
systemboard”onpage29forthelocationsofthememoryslots.
4.Carefullyopentheretainingclipsoneachendofthememoryslotandthengraspthememorymodule
straightupbyitsedges.
Figure13.Removingthememorymodule
5.Ifyouareinstructedtoreturnthefailingmemorymodule,followallpackaginginstructionsanduseany
packagingmaterialsthataresuppliedtoyouforshipping.
6.Tocompletetheremovalprocedure,goto“Completingthepartsreplacement”onpage87.
Removingorinstallinginternaldrives
Thissectionprovidesinstructionsonhowtoremoveorinstallinternaldrivesfortheserver.
SeeSpecicationsforinformationaboutthetypesofinternaldrivesthattheserversupportsandother
importantinformation,andseeFrontviewforthelocationsofthedrivebaysintheserver.
Wheninstallinganinternaldrive,besuretoconsiderthefollowinginformation:
•Makesurethatyouhaveallthecablesandotherequipmentthatisspeciedinthedocumentationthat
comeswiththedrive.
•Selectthedrivebayinwhichyouwanttoinstallthedrive.
•Checktheinstructionsthatcomewiththedrivetoseewhetheryouhavetosetanyswitchesorjumpers
onthedrive.IfyouareinstallingaSASdevice,besuretosettheSASIDforthatdevice.
•TheEMIintegrityandcoolingoftheserverareprotectedbyhavingallbays,PCIslots,andPCIExpress
slotscoveredoroccupied.Whenyouinstalladrive,PCIcard,orPCIExpresscard,savetheEMC
shieldandllerpanelfromthebay,PCIcardslot,orPCIExpresscardslotintheeventthatyoulater
removethedevice.
•Goto
http://www.lenovo.com/thinkserverandclicktheOptionstabforalistofsupportedoptions.
Chapter6.Installing,removing,orreplacinghardware41
Page 54

Removingtheopticaldrive
Attention
DonotopenyourserverorattemptanyrepairbeforereadingandunderstandingtheSafetyInformationandthe
WarrantyandSupportInformationontheThinkServerDocumentationDVDthatcomeswithyourproduct,and
Guidelines.Toobtainacopyofthepublications,goto:
http://www.lenovo.com/support
Thissectionprovidesinstructionsonhowtoremovetheopticaldrive.
Toremovetheopticaldrive,dothefollowing:
1.Removeallmediafromthedrivesandturnoffallattacheddevicesandtheserver.Then,disconnectall
powercordsfromelectricaloutletsanddisconnectallcablesthatareconnectedtotheserver.
2.Removetheservercover.SeeRemovingtheservercover.
3.Disconnectthepowercablefromtheopticaldrivepowerconnectoronthebackplane.SeeLocating
connectorsonthebackplane.
4.DisconnectthesignalcablefromtheSATA5connectoronthesystemboard.See“Locatingpartson
thesystemboard”onpage29
5.Presstheretentiontab1andslidetheopticaldriveoutofthefrontoftheserver.
.
Figure14.Removingtheopticaldrive
6.Disconnectthepowercableandthesignalcablefromtherearoftheremovedopticaldrive.
7.Removetheopticaldriveretentiontabbyremovingthetwoscrewsthatsecurethetab.Savethe
retentiontabtousewhenyouinstallanewopticaldrive.
42ThinkServerRD230HardwareMaintenanceManual
Page 55

Figure15.Removingtheopticaldriveretentiontab
8.Ifyouareinstructedtoreturntheremovedopticaldrive,followallpackaginginstructionsanduseany
packagingmaterialsthataresuppliedtoyouforshipping.
9.Tocompletetheremovalprocedure,goto“Completingthepartsreplacement”onpage87.
Installingtheopticaldrive
Attention
DonotopenyourserverorattemptanyrepairbeforereadingandunderstandingtheSafetyInformationandthe
WarrantyandSupportInformationontheThinkServerDocumentationDVDthatcomeswithyourproduct,and
Guidelines.Toobtainacopyofthepublications,goto:
http://www.lenovo.com/support
Thissectionprovidesinstructionsonhowtoinstalltheopticaldrive.
Toinstalltheopticaldrive,dothefollowing:
1.Ifyouarereplacingtheopticaldrive,makesurethat:
•Youhaveallthecablesandotherequipmentthatisspeciedinthedocumentationthatcomes
withthenewopticaldrive.
•Youhavecheckedtheinstructionsthatcomewiththenewopticaldrivetodeterminewhetheryou
mustsetanyswitchesorjumpersinthedrive.
•Youhaveremovedtheretentiontabfromtherearoftheoldopticaldriveandhaveitavailablefor
installationonthenewopticaldrive.
Note:Ifyouareinstallingadrivethatcontainsalaser,observethefollowingsafetyprecautions.
Statement3
CAUTION:
Whenlaserproducts(suchasCD-ROMs,DVDdrives,beropticdevices,ortransmitters)are
installed,notethefollowing:
•Donotremovethecovers.Removingthecoversofthelaserproductcouldresultinexposure
tohazardouslaserradiation.Therearenoserviceablepartsinsidethedevice.
•Useofcontrolsoradjustmentsorperformanceofproceduresotherthanthosespeciedherein
mightresultinhazardousradiationexposure.
Chapter6.Installing,removing,orreplacinghardware43
Page 56

DANGER
Class 1 Laser Product
Laser Klasse 1
Laser Klass 1
Luokan 1 Laserlaite
Appareil A Laser de Classe 1
`
SomelaserproductscontainanembeddedClass3AorClass3Blaserdiode.Notethefollowing.
Laserradiationwhenopen.Donotstareintothebeam,donotviewdirectlywithoptical
instruments,andavoiddirectexposuretothebeam.
2.Touchthestatic-protectivepackagethatcontainsthenewopticaldrivetoanyunpaintedmetalsurface
ontheserver.Then,removetheopticaldrivefromthepackageandplaceitonastatic-protective
surface.
3.Followtheinstructionsthatcomewiththeopticaldrivetosetjumpersorswitches,ifthereareany.
4.Installthetwoscrewstosecuretheretentiontabtotherearofthenewopticaldrive.Then,connectthe
signalcable1andthepowercable2totherearofthenewopticaldrive.
Figure16.Installingtheretentiontabandconnectingthecables
44ThinkServerRD230HardwareMaintenanceManual
Page 57

5.Routethecablesthroughthedrivebayholeinthefrontandthenslidetheopticaldriveintothedrive
bayuntilitsnapsintoposition.
Figure17.Installingtheopticaldrive
6.Connectthepowercabletotheopticaldrivepowerconnectoronthebackplane.SeeLocating
connectorsonthebackplane.
7.ConnectthesignalcabletotheSATA5connectoronthesystemboard.See“Locatingpartsonthe
systemboard”onpage29.
8.Tocompletetheinstallation,goto“Completingthepartsreplacement”onpage87.
Removingahot-swapharddiskdrive
Attention
DonotopenyourserverorattemptanyrepairbeforereadingandunderstandingtheSafetyInformationandthe
WarrantyandSupportInformationontheThinkServerDocumentationDVDthatcomeswithyourproduct,and
Guidelines.Toobtainacopyofthepublications,goto:
http://www.lenovo.com/support
Thissectionprovidesinstructionsonhowtoremoveahot-swapharddiskdrive.Thissectionappliesonlyto
servermodelsthathavehot-swapharddiskdrivesinstalled.
Attention:Tomaintainpropersystemcooling,donotoperatetheserverformorethan10minuteswithout
eitheradriveorallerpanelinstalledineachdrivebay.
Toremoveahot-swapharddiskdrive,dothefollowing:
Note:Youdonothavetoturnofftheserverwhenremovingahot-swapharddiskdrive.
1.Rotatethedrivetrayhandle2oftheharddiskdrivetrayassembly1totheopenposition.Then,grasp
thehandleandpullthedrivetrayassemblywiththeharddiskdriveoutofthebay.
Chapter6.Installing,removing,orreplacinghardware45
Page 58

Figure18.Removingtheharddiskdrivetrayassemblywiththeharddiskdrive
2.Removethescrewsthatsecuretheharddiskdriveinthetray.Then,removetheharddiskdrive.
Figure19.Removinga3.5-inchharddiskdrive
3.Ifyouareinstructedtoreturntheremovedharddiskdrive,followallpackaginginstructionsanduseany
packagingmaterialsthataresuppliedtoyouforshipping.
46ThinkServerRD230HardwareMaintenanceManual
Page 59

4.Tocompletetheremovalprocedure,goto“Completingthepartsreplacement”onpage87.
Installingahot-swapharddiskdrive
Attention
DonotopenyourserverorattemptanyrepairbeforereadingandunderstandingtheSafetyInformationandthe
WarrantyandSupportInformationontheThinkServerDocumentationDVDthatcomeswithyourproduct,and
Guidelines.Toobtainacopyofthepublications,goto:
http://www.lenovo.com/support
Thissectionprovidesinstructionsonhowtoinstallahot-swapharddiskdrive.Thissectionappliesonlyto
servermodelsthatsupporthot-swapharddiskdrives.
Attention:Tomaintainpropersystemcooling,donotoperatetheserverformorethan10minuteswithout
eitheradriveorallerpanelinstalledineachdrivebay.
Important:Beforeyouinstalloptionalhardwaredevices,makesurethattheserverisworkingcorrectly.If
theserverisnotworkingcorrectly,refertotheDiagnosticsforyourserverfordetaileddiagnosticinformation.
Toobtainthepublication,goto:
http://www.lenovo.com/support
Toinstallahot-swapharddiskdrive,dothefollowing:
Notes:
1.Youdonothavetoturnofftheserverfortheinstallationofahot-swapharddiskdrive.
2.ThecablescomewiththeSATAharddiskdriveoptionkitwillnotbeusedinthisserver.
1.Rotatethedrivetrayhandle2oftheharddiskdrivetrayassembly1totheopenposition.Then,grasp
thehandleandpullthedrivetrayassemblyoutofthebay.
Figure20.Removingtheharddiskdrivetrayassembly
2.Removethescrewsthatsecuretheplasticllerandthenremovetheplasticller.
Chapter6.Installing,removing,orreplacinghardware47
Page 60

Figure21.Removingtheller
3.Touchthestatic-protectivepackagethatcontainsthenewharddiskdrivetoanyunpaintedmetal
surfaceontheserver.Then,removetheharddiskdrivefromthepackageandplaceitona
static-protectivesurface.
4.Makesurethatthedrivetrayhandleisintheopenposition.
5.Alignthescrewholesinbothsidesoftheharddiskdrivewiththecorrespondingholesinthetray.Then,
installthescrewstosecuretheharddiskdriveinthetray.
48ThinkServerRD230HardwareMaintenanceManual
Page 61

Figure22.Installinga3.5-inchharddiskdrive
6.Keepthehandleontheharddiskdrivetrayassemblyfullyopen,slidethetraywiththeharddiskdrive
intothecorrespondingmountingpointofthehot-swapharddiskdrivebay(
1),andthenslightlypress
thehandletolockthetrayintoplace(2).
7.ChecktheharddiskdrivestatusLEDstomakesurethattheharddiskdriveisoperatingcorrectly.You
mighthavetorestarttheserverforthedrivetoberecognized.IftheamberharddiskdrivestatusLED
foradriveislitcontinuously,itindicatesthatthedriveisfaultyandmustbereplaced;ifthegreenhard
diskdriveactivityLEDisashing,thisindicatesthatthedriveisbeingaccessed.
Note:IftheserverisconguredforRAIDoperationusingaRAIDcontroller,youmighthaveto
recongurethediskarraysafteryoureplaceharddiskdrives.
8.Tocompletetheinstallation,goto“Completingthepartsreplacement”onpage87.
Chapter6.Installing,removing,orreplacinghardware49
Page 62

Installingorremovingtherisercard
Thissectionprovidesinstructionsonhowtoinstallorremovetherisercard.
Installingtherisercard
Attention
DonotopenyourserverorattemptanyrepairbeforereadingandunderstandingtheSafetyInformationandthe
WarrantyandSupportInformationontheThinkServerDocumentationDVDthatcomeswithyourproduct,and
Guidelines.Toobtainacopyofthepublications,goto:
http://www.lenovo.com/support
Thissectionprovidesinstructionsonhowtoinstalltherisercard.TherisercardhasaPCIcardinstalledonit.
Toinstalltherisercard,dothefollowing:
Note:Useanydocumentationthatcomeswiththerisercardandfollowthoseinstructionsinadditionto
theinstructionsinthissection.
1.Removeallmediafromthedrivesandturnoffallattacheddevicesandtheserver.Then,disconnectall
powercordsfromelectricaloutletsanddisconnectallcablesthatareconnectedtotheserver.
2.Removetheservercover.SeeRemovingtheservercover.
3.LocatetheappropriatePCIslotonthesystemboardforinstallingtherisercard.See“Locatingpartson
thesystemboard”onpage29.
4.Touchthestatic-protectivepackagethatcontainstherisercardtoanyunpaintedmetalsurfaceonthe
server.Then,removetherisercardfromthestatic-protectivepackage.
5.Presstherisercard(mighthavingaPCIcardinstalled)downintotheappropriatePCIcardslotonthe
systemboard.Then,closetheretentiontabtosecurethePCIcard(installedontherisercard)andthen
installthefasteningscrewtosecuretherisercardinplace.
Note:TherisercardmighthaveaPCIcardalreadyinstalledonit.CarefullytthePCIcardintothe
server.
50ThinkServerRD230HardwareMaintenanceManual
Page 63

Figure23.Installingtherisercard
6.Tocompletetheinstallation,goto“Completingthepartsreplacement”onpage87.
Removingtherisercard
Attention
DonotopenyourserverorattemptanyrepairbeforereadingandunderstandingtheSafetyInformationandthe
WarrantyandSupportInformationontheThinkServerDocumentationDVDthatcomeswithyourproduct,and
Guidelines.Toobtainacopyofthepublications,goto:
http://www.lenovo.com/support
ThissectionprovidesinstructionsonhowtoremovetherisercardwithaPCIcardinstalled.
Toremovetherisercard,dothefollowing:
Note:Useanydocumentationthatcomeswiththerisercardandfollowthoseinstructionsinadditionto
theinstructionsinthissection.
1.Removeallmediafromthedrivesandturnoffallattacheddevicesandtheserver.Then,disconnectall
powercordsfromelectricaloutletsanddisconnectallcablesthatareconnectedtotheserver.
2.Removetheservercover.SeeRemovingtheservercover.
Chapter6.Installing,removing,orreplacinghardware51
Page 64

3.DisconnectanycablesfromthePCIcardoranycablesthatimpedeaccesstotherisercard.
4.OpentheretentiontabthatsecuresthePCIcard,whichisinstalledontherisercard.
Figure24.Openingtheretentiontab
5.Removethefasteningscrewthatsecurestherisercard(1)andlifttherisercardstraightupbyits
edgestoremoveit(2).
52ThinkServerRD230HardwareMaintenanceManual
Page 65

Figure25.Removingtherisercard(withaPCIcardinstalled)
6.Tocompletetheremovalprocedure,goto“Completingthepartsreplacement”onpage87.
InstallingorremovingaPCIcard
ThissectionprovidesinstructionsonhowtoinstallorremoveaPCIcard.
InstallingaPCIcard
Attention
DonotopenyourserverorattemptanyrepairbeforereadingandunderstandingtheSafetyInformationandthe
WarrantyandSupportInformationontheThinkServerDocumentationDVDthatcomeswithyourproduct,and
Guidelines.Toobtainacopyofthepublications,goto:
http://www.lenovo.com/support
ThissectionprovidesinstructionsonhowtoinstallaPCIcard.
ToinstallaPCIcard,dothefollowing:
Note:UseanydocumentationthatcomeswiththePCIcardandfollowthoseinstructionsinadditionto
theinstructionsinthissection.
1.Removeallmediafromthedrivesandturnoffallattacheddevicesandtheserver.Then,disconnectall
powercordsfromelectricaloutletsanddisconnectallcablesthatareconnectedtotheserver.
2.Removetheservercover.SeeRemovingtheservercover.
3.Removetherisercard.See“Removingtherisercard”onpage51.
Chapter6.Installing,removing,orreplacinghardware53
Page 66

4.InstallthePCIcardintotheslotontherisercard.
Figure26.InstallingaPCIcardintotheslotontherisercard
5.InstalltherisercardintoanappropriatePCIcardslotonthesystemboard.See“Installingtheriser
card”onpage50.
6.ConnectanycablestothePCIcard.
7.Tocompletetheinstallation,goto“Completingthepartsreplacement”onpage87.
RemovingaPCIcard
Attention
DonotopenyourserverorattemptanyrepairbeforereadingandunderstandingtheSafetyInformationandthe
WarrantyandSupportInformationontheThinkServerDocumentationDVDthatcomeswithyourproduct,and
Guidelines.Toobtainacopyofthepublications,goto:
http://www.lenovo.com/support
ThissectionprovidesinstructionsonhowtoremoveaPCIcard.
ThePCIcardisinstalledontherisercard.T oremoveaPCIcard,dothefollowing:
Note:UseanydocumentationthatcomeswiththePCIcardandfollowthoseinstructionsinadditionto
theinstructionsinthissection.
1.Removeallmediafromthedrivesandturnoffallattacheddevicesandtheserver.Then,disconnectall
powercordsfromelectricaloutletsanddisconnectallcablesthatareconnectedtotheserver.
2.Removetheservercover.SeeRemovingtheservercover.
3.DisconnectanycablesfromthePCIcardoranycablesthatimpedeaccesstotherisercard.
4.RemovetherisercardtogetherwiththeinstalledPCIcard.See“Removingtherisercard”onpage51.
5.RemovethePCIcardfromthePCIcardslotontherisercard.
54ThinkServerRD230HardwareMaintenanceManual
Page 67

Figure27.RemovingthePCIcardfromtherisercard
6.Tocompletetheremovalprocedure,goto“Completingthepartsreplacement”onpage87.
IfyouareinstructedtoreturnthePCIcard,followallpackaginginstructionsanduseanypackagingmaterials
thataresuppliedtoyouforshipping.
RemovingorinstallingtheEthernetcard
ThissectionprovidesinstructionsonhowtoremoveorinstalltheEthernetcard.
RemovingtheEthernetcard
Attention
DonotopenyourserverorattemptanyrepairbeforereadingandunderstandingtheSafetyInformationandthe
WarrantyandSupportInformationontheThinkServerDocumentationDVDthatcomeswithyourproduct,and
Guidelines.Toobtainacopyofthepublications,goto:
http://www.lenovo.com/support
ThissectionprovidesinstructionsonhowtoremovetheEthernetcard.
TheEthernetcardisinstalledontherisercard.ToremovetheEthernetcard,dothefollowing:
Note:UseanydocumentationthatcomeswiththeEthernetcardandfollowthoseinstructionsinadditionto
theinstructionsinthissection.
1.Removeallmediafromthedrivesandturnoffallattacheddevicesandtheserver.Then,disconnectall
powercordsfromelectricaloutletsanddisconnectallcablesthatareconnectedtotheserver.
2.Removetheservercover.SeeRemovingtheservercover.
3.Disconnectanycablesthatimpedeaccesstotherisercard.
4.RemovetherisercardtogetherwiththeinstalledEthernetcard.See“Removingtherisercard”on
page51.
5.Referto“RemovingaPCIcard”onpage54andfollowthoseinstructionstoremovetheEthernet
cardfromtherisercard.
6.IfyouareinstructedtoreturntheEthernetcard,followallpackaginginstructionsanduseanypackaging
materialsthataresuppliedtoyouforshipping.
7.Tocompletetheremovalprocedure,goto“Completingthepartsreplacement”onpage87.
Chapter6.Installing,removing,orreplacinghardware55
Page 68

InstallingtheEthernetcard
Attention
DonotopenyourserverorattemptanyrepairbeforereadingandunderstandingtheSafetyInformationandthe
WarrantyandSupportInformationontheThinkServerDocumentationDVDthatcomeswithyourproduct,and
Guidelines.Toobtainacopyofthepublications,goto:
http://www.lenovo.com/support
ThissectionprovidesinstructionsonhowtoinstalltheEthernetcardandhowtoinstalltheEthernetcard
driveronWindowsoperatingsystems.
ToinstalltheEthernetcard,dothefollowing:
1.Removeallmediafromthedrivesandturnoffallattacheddevicesandtheserver.Then,disconnectall
powercordsfromelectricaloutletsanddisconnectallcablesthatareconnectedtotheserver.
2.Removetheservercover.SeeRemovingtheservercover.
3.Touchthestatic-protectivepackagethatcontainstheEthernetcardtoanyunpaintedsurfaceonthe
outsideoftheserver.Then,removetheEthernetcardfromthepackage.
4.See“InstallingaPCIcard”onpage53andfollowthoseinstructionstoinstalltheEthernetcard.
5.Tocompletetheinstallation,goto“Completingthepartsreplacement”onpage87.
OnLinuxoperatingsystems,youdonotneedtoinstallanydevicedriverfortheEthernetcard;onWindows
operatingsystems,youneedtoinstallthedevicedriverfortheEthernetcard.Toinstallthedevicedriver
onWindowsoperatingsystems,dothefollowing:
1.Saveanyopendocumentsandexitallapplications.
2.InserttheEasyStartupDVDthatcamewithyourserverintotheDVDdrive.
Note:YoudonotneedtousethedriverdiscthatcamewiththeEthernetcard.
3.Right-clickMyComputerandselectProperties.TheSystemPropertieswindowopens.
4.OntheHardwaretab,clicktheDeviceManagerbutton.TheDeviceManagerwindowopens.
5.ExpandtheNetworkadaptersandthenright-clickoneoftheEthernetcards(PRO/1000PTorthe
yellowquestionmark).
6.SelectUpdateDriver....TheHardwareUpdateWizardprogramopens.
7.SelectInstallthesoftwareautomatically(Recommended)andclickNexttocontinue.
8.Followtheinstructionsonthescreen.
Installing,removing,orreplacinghardwaredevices
Thissectionprovidesinstructionsonhowtoinstall,remove,orreplacehardwaredevicesforyourserver.You
canmaintainyourserverbyreplacingthefailinghardwaredevices.Ifyouarereplacingahardwaredevice,
performtheremovalprocedureandthenperformtheinstallationprocedureforthehardwaredeviceyou
wanttoreplace.
Removingorinstallingthesystemboardbattery
Thissectionprovidesinstructionsonhowtoremoveorinstallthesystemboardbattery.
56ThinkServerRD230HardwareMaintenanceManual
Page 69

Removingthesystemboardbattery
Attention
DonotopenyourserverorattemptanyrepairbeforereadingandunderstandingtheSafetyInformationandthe
WarrantyandSupportInformationontheThinkServerDocumentationDVDthatcomeswithyourproduct,and
Guidelines.Toobtainacopyofthepublications,goto:
http://www.lenovo.com/support
Thissectionprovidesinstructionsonhowtoremovethesystemboardbattery.
Toremovethesystemboardbattery,dothefollowing:
1.Removeallmediafromthedrivesandturnoffallattacheddevicesandtheserver.Then,disconnectall
powercordsfromelectricaloutletsanddisconnectallcablesthatareconnectedtotheserver.
2.Removetheservercover.SeeRemovingtheservercover.
3.Locatethebatteryonthesystemboard.See“Locatingpartsonthesystemboard”onpage29.
4.Removethesystemboardbattery.
Figure28.Removingthesystemboardbattery
5.Disposeofthebatteryasrequiredbylocalordinancesorregulations.
6.Toinstallanewsystemboardbattery,see“Installingthesystemboardbattery”onpage57.
Installingthesystemboardbattery
Attention
DonotopenyourserverorattemptanyrepairbeforereadingandunderstandingtheSafetyInformationandthe
WarrantyandSupportInformationontheThinkServerDocumentationDVDthatcomeswithyourproduct,and
Guidelines.Toobtainacopyofthepublications,goto:
http://www.lenovo.com/support
Thissectionprovidesinstructionsonhowtoinstallthesystemboardbattery.
Besuretoconsiderthefollowinginformationwhenyoureplacethebatteryintheserver:
•Youmustreplacethebatterywithalithiumbatteryofthesametypefromthesamemanufacturer.
•Afteryoureplacethesystemboardbattery,youmustreconguretheserverandresetthesystemdate
andtime.
•Toavoidpossibledanger,readandfollowthefollowingsafetystatement.
Statement2
CAUTION:
Whenreplacingthelithiumbattery,useonlyPartNumber33F8354oranequivalenttypebattery
Chapter6.Installing,removing,orreplacinghardware57
Page 70

recommendedbythemanufacturer.Ifyoursystemhasamodulecontainingalithiumbattery,replace
itonlywiththesamemoduletypemadebythesamemanufacturer.Thebatterycontainslithiumand
canexplodeifnotproperlyused,handled,ordisposedof.Donot:
•Throworimmerseintowater
•Heattomorethan100°C(212°F)
•Repairordisassemble
Toinstallthesystemboardbattery,dothefollowing:
Note:Followanyspecialhandlingandinstallationinstructionsthatcomewiththereplacementbattery.
1.Holdthesystemboardbattery1andpositiononesideofthebatteryintoitssocket.Then,pressthe
othersideofthebatteryuntilitsnapsintoplace.
Figure29.Installingthesystemboardbattery
2.Makesurethatthebatteryclipholdsthebatterysecurely.
3.Tocompletetheinstallation,goto“Completingthepartsreplacement”onpage87.Youneedtousethe
SetupUtilityprogramandresettheconguration,suchasthesystemdateandtimeandpasswords.
SeeStartingtheSetupUtilityprogramfordetails.
RemovingorinstallingtheRAIDcontroller
ThissectionprovidesinstructionsonhowtoremoveorinstalltheRAIDcontroller.
RemovingtheRAIDcontroller
Attention
DonotopenyourserverorattemptanyrepairbeforereadingandunderstandingtheSafetyInformationandthe
WarrantyandSupportInformationontheThinkServerDocumentationDVDthatcomeswithyourproduct,and
Guidelines.Toobtainacopyofthepublications,goto:
http://www.lenovo.com/support
ThissectionprovidesinstructionsonhowtoremovetheRAIDcontrollerinstalledinyourserver.
Notes:
1.UseanydocumentationthatcomeswiththeRAIDcontrollerandfollowthoseinstructionsinadditionto
theinstructionsinthissection.
2.Whenyoudisconnectthepowersourcefromtheserver,youlosetheabilitytoviewtheLEDsbecause
theLEDsarenotlitwhenthepowersourceisremoved.Beforeyoudisconnectthepowersource,make
anoteofwhichLEDsarelit,includingtheLEDsthatarelitonthefrontcontrolpanel.
TheRAIDcontrollerisinstalledontherisercard.ToremovetheRAIDcontroller,dothefollowing:
1.Removeallmediafromthedrivesandturnoffallattacheddevicesandtheserver.Then,disconnectall
powercordsfromelectricaloutletsanddisconnectallcablesthatareconnectedtotheserver.
58ThinkServerRD230HardwareMaintenanceManual
Page 71

2.Removetheservercover.See“Removingtheservercover”onpage37.
3.Pressthetabsonbothsidesoftheconnectoronthesignalcabletowardseachotherandremovethe
cablefromtheRAIDcontroller.
4.DisconnectanyothercablesfromtheRAIDcontrolleroranycablesthatimpedeaccesstotherisercard.
5.RemovetherisercardtogetherwiththeinstalledRAIDcontroller.See“Removingtherisercard”on
page51
.
6.Referto“RemovingaPCIcard”onpage54andfollowthoseinstructionstoremovetheRAIDcontroller
fromtherisercard.
Note:DependingonyourRAIDcontroller,ifnecessary,removetheRAIDbatteryfromtheRAID
controllerbyremovingthescrewsthatsecurethebatteryonthecontrolleranddisconnectinganycables.
7.IfyouareinstructedtoreturntheRAIDcontroller,followallpackaginginstructionsanduseany
packagingmaterialsthataresuppliedtoyouforshipping.
Whattodonext:
•Toworkwithanotherpieceofhardware,gototheappropriatesection.
•Tocompletetheremovalprocedure,goto“Completingthepartsreplacement”onpage87
.
InstallingtheThinkServer8708ELPSASRAIDAdapter
Attention
DonotopenyourserverorattemptanyrepairbeforereadingandunderstandingtheSafetyInformationandthe
WarrantyandSupportInformationontheThinkServerDocumentationDVDthatcomeswithyourproduct,and
Guidelines.Toobtainacopyofthepublications,goto:
http://www.lenovo.com/support
ThissectionprovidesinstructionsonhowtoinstalltheThinkServer8708ELPSASRAIDAdapter(hereafter
referredtoastheRAIDcontrollerwithinthissection).
ToinstalltheRAIDcontroller,dothefollowing:
Note:UseanydocumentationthatcomeswiththeRAIDcontrollerandfollowthoseinstructionsinaddition
totheinstructionsinthissection.
1.Removeallmediafromthedrivesandturnoffallattacheddevicesandtheserver.Then,disconnectall
powercordsfromelectricaloutletsanddisconnectallcablesthatareconnectedtotheserver.
2.Removetheservercover.See“Removingtheservercover”onpage37.
3.Touchthestatic-protectivepackagethatcontainstheRAIDcontrollertoanyunpaintedsurfaceonthe
outsideoftheserver.Then,removetheRAIDcontrollerfromthepackage.
4.DependingonyourRAIDcontroller,youmightneedtoinstallaThinkServer8708ELPSASRAIDadapter
battery(hereafterreferredtoasthebatterycardassembly)ontheRAIDcontroller.Thebatterycard
assemblymountsdirectlytotheRAIDcontrollerusingasmallboard-to-boardconnector(daughtercard).
ToinstallthebatterycardassemblyontheRAIDcontroller,dothefollowing:
Notes:
a.ThebatterycardassemblyprotectstheintegrityofthecacheddataontheRAIDcontrollerby
providingbackuppowerupto72hoursinthecaseofacompleteacpowerfailureorabriefpower
outage.Ithasbuilt-infunctionalitytochargethebatterypackautomaticallyandtocommunicate
batterystatusinformationsuchasvoltage,temperature,andcurrenttoyourserver.Italsoprovides
aninexpensivealternativetousinganuninterruptiblepowersupply,andasecondleveloffault
tolerancewhenusedinconjunctionwithanuninterruptiblepowersupply.Formoreinformationabout
thebatterycardassembly,seeAppendixA“RAIDbatterycardassembly”onpage129
.
Chapter6.Installing,removing,orreplacinghardware59
Page 72

b.Thebatterycardassemblyoptionkitcontainsauserguide,thebatterycardassembly,andthree
Phillips-headscrews.Donotremovethebatterycardassemblyfromtheantistaticshipping
containeruntilyouarereadytoinstallit.Whenyouremovethebatterycardassemblyfromyour
server,placeitinitsoriginalcontainer.
c.ChecktheappropriatesupportWebsitesforthelatestupdatesforyourbasicinput/outputsystem
(BIOS)code,utilityprograms,devicedrivers,andothersoftwareapplications.Followtheinstructions
providedbyyourServiceProvidertodownloadandinstallupdates.
d.Itisrecommendedthatyoureplacethebatterypackonthebatterycardassemblyannuallyorafter
500rechargingcycles,whichevercomesrst.
e.Thetemperatureofthebatterycardassemblyisgenerally15–20degreeshigherthantheambient
temperatureduringfastcharge.Therefore,tocompletefastchargecycle,theambienttemperature
shouldbelessthan45degrees.Iftheambienttemperatureexceeds45degrees,thefastcharge
cyclewillterminateprematurely,thuspreventingthebatterycardassemblyfromreachingafully
chargedstate.
Attention:
•WhenattachingthebatterycardassemblytoaPCIExpressslot,centerthePhillips-headscrew
drivertoavoiddamagingthescrewheadanddonotover-tightenthescrewsasyoumightdamage
thebatterycardassembly.
•Thebatteryinthebatterycardassemblymustrechargeforatleastsixhoursduringfastcharge
undernormaloperatingconditions.
60ThinkServerRD230HardwareMaintenanceManual
Page 73

a.Notethetopviewandthebottomviewofthebatterycardassembly.Then,insertthebatterypack
harnessconnectorintothe5-pinJ3batterypackharnessconnectoronthebacksideofthebattery
cardassembly.
Figure30.Bottomviewofthebatterycardassembly
1J3batterypackharnessconnector
2J1connector
3J2board-to-boardconnector
Figure31.Topviewofthebatterycardassembly
1Batterypackharness
b.Withthefrontsideup,placetheRAIDcontrolleronaat,clean,static-freesurface.
Chapter6.Installing,removing,orreplacinghardware61
Page 74

c.HoldthebatterycardassemblywiththebatterysideupandtheJ2board-to-boardconnectorlining
upwiththeJ7BBUconnector1ontheRAIDcontroller.Carefullypressthebatterycardassembly
ontotheRAIDcontrollersothatthetwoconnectorsarermlyjoined.Then,securethebattery
cardassemblytotheRAIDcontrollerwiththethreescrewsandthestandoffsthatcomewiththe
batterycardassemblyaccessorykit.
Figure32.Installingthebatterycardassembly
5.See“InstallingaPCIcard”onpage53andfollowthoseinstructionstoinstalltheRAIDcontroller.
6.ConnecttheminiSASsignalcablestotheRAIDcontrollerandthebackplanebydoingthefollowing:
Note:Usethe200mm(7.87inches)mini-SASsignalcable.
Figure33.Connectingthemini-SASsignalcable
1Port0-3ontheRAIDcontroller
2SASconnector4SASconnector
3Labelforthemini-SASsignalcable
a.Connectoneend2ofthemini-SASsignalcabletotheport0-3ontheRAIDcontroller.
b.Connecttheotherend4ofthemini-SASsignalcabletothemini-SASsignalconnectoronthe
backplane.See“Locatingconnectorsonthebackplane”onpage34
.
Whattodonext:
•Toworkwithanotherpieceofhardware,gototheappropriatesection.
•Tocompletetheinstallation,goto“Completingthepartsreplacement”onpage87.
62ThinkServerRD230HardwareMaintenanceManual
Page 75

InstallingtheThinkServer8708EM2SASRAIDAdapter
Attention
DonotopenyourserverorattemptanyrepairbeforereadingandunderstandingtheSafetyInformationandthe
WarrantyandSupportInformationontheThinkServerDocumentationDVDthatcomeswithyourproduct,and
Guidelines.Toobtainacopyofthepublications,goto:
http://www.lenovo.com/support
ThistopicprovidesinstructionsonhowtoinstalltheThinkServer8708EM2SASRAIDAdapter(hereafter
referredtoastheRAIDcontrollerwithinthistopic)andthebatterycardassemblyforthisRAIDcontroller.
Productdescription
TheRAIDcontrollerenablesyoutocreatethetieredstoragewithSATAharddiskdrives,SASharddisk
drives,orboth.WiththeMD2low-proleformfactorandtwointernalminiSASconnectors,itenablesyouto
attachupto32harddiskdrivestohigh-densityserversandsystemsformaximumdesignexibility.Italso
supportsallkeyRAIDlevels,includingRAID6andRAID60,toprovideincreasingfaulttolerance.
Note:RAID50andRAID60areonlyavailableformorethansixharddiskdrives.
Youroptionpackageincludes:
•ThinkServer8708EM2SASRAIDAdapter
•One400mm(15.7inches)miniSASsignalcable
•Two630mm(24.8inches)miniSASsignalcables(foryourservermodel,thesecableswillnotbeused)
•Theuserguidefortheoption
Note:TousetheRAIDcontroller,youneedtoinstalltheThinkServer8708EM2RAIDBattery(product
number:67Y2629)ontheRAIDcontroller.TheThinkServer8708EM2RAIDBatterydoesnotcomewiththe
RAIDcontroller.Youneedtoseparatelyorderit.
Overviewofthe8708EM2RAIDcontroller
ThefollowingillustrationshowstheoverviewoftheRAIDcontroller.
Figure34.Overviewofthe8708EM2RAIDcontroller
1Port0-3
2Port4-7
InstallingtheRAIDcontroller
Attention:IfyouinstalltheRAIDcontrolleronanonboardSATAandhot-swapbasedserver,youneedto
reconguretheRAIDcontrollerandreinstalltheoperatingsystem.Makesureyoubackupyourdatabefore
Chapter6.Installing,removing,orreplacinghardware63
Page 76

recongurationandreinstallation.UsetheThinkServerEasyStartupDVDthatcamewithyourserverto
reconguretheRAIDcontroller,reinstalldevicedrivers,andreinstalltheoperatingsystem.
ToinstalltheRAIDcontroller,dothefollowing:
Note:UseanydocumentationthatcomeswiththeRAIDcontrollerandfollowthoseinstructionsinaddition
totheinstructionsinthistopic.
1.Removeallmediafromthedrivesandturnoffallattacheddevicesandtheserver.Then,disconnectall
powercordsfromelectricaloutletsanddisconnectallcablesthatareconnectedtotheserver.
2.Removetheservercover.See“Removingtheservercover”onpage37.
3.Removetherisercard.See“Removingtherisercard”onpage51.
4.Touchthestatic-protectivepackagethatcontainstheRAIDcontrollertoanyunpaintedsurfaceonthe
outsideoftheserver.Then,removetheRAIDcontrollerfromthepackage.
5.InstalltheThinkServer8708EM2RAIDBattery(hereaftercalledthebatterycardassembly)onthe
RAIDcontroller.Useanydocumentationthatcomeswiththebatterycardassemblyandfollowthose
instructionsinadditiontotheinstructionsin“InstallingtheThinkServer8708EM2RAIDBattery”
onpage65
.
Note:TheThinkServer8708EM2RAIDBatterydoesnotcomewiththeRAIDcontroller.Y ouneed
toseparatelyorderit.
6.Usethe400mm(15.75inches)miniSASsignalcableandconnectoneendofthecabletoport0-3
ontheRAIDcontroller.
7.InstalltheRAIDcontrollerwiththebatteryintothePCIcardslotontherisercard.
Figure35.InstallingtheRAIDcontrollerintothePCIcardslotontherisercard
8.InstalltherisercardwiththeinstalledRAIDcontrollerintoanappropriatePCIcardslotonthesystem
board.
64ThinkServerRD230HardwareMaintenanceManual
Page 77

9.Connecttheotherendofthe400mm(15.75inches)miniSASsignalcabletotheminiSASsignalcable
connector1onthebackplaneofyourserver.
Figure36.MiniSASsignalcableconnectoronthebackplane
InstallingtheThinkServer8708EM2RAIDBattery
ThistopicprovidesinstructionsonhowtoinstalltheThinkServer8708EM2RAIDBattery(hereaftercalledthe
batterycardassembly).
Productdescription
TheThinkServer8708EM2SASRAIDControllerBatteryprotectstheintegrityofthecacheddataonthe
8708EM2SASRAIDcontrollerbyprovidingbackuppowerupto72hoursincaseofacompleteacpower
failureorabriefpoweroutage.Ithasabuilt-infunctionalitytochargethebatterypackautomaticallyandto
communicatebatterystatusinformationsuchasvoltage,temperature,andcurrenttoyourserver.Italso
providesaninexpensivealternativebyusinganuninterruptiblepowersupply,andasecondleveloffault
tolerancewhenusedinconjunctionwithanuninterruptiblepowersupply.
CAUTION:
Itisrecommendedthatyoureplacethebatterypackonthebatterycardassemblyonceayearor
after500rechargingcycles,whichevercomesrst.
Youroptionpackagecontainsthefollowing:
•TheThinkServer8708EM2SASRAIDControllerBattery
•ThreePhillips-headscrews
•Theuserguidefortheoption
Chapter6.Installing,removing,orreplacinghardware65
Page 78

Topview
Thegurebelowshowsthetopviewofthebatterycardassembly.
Figure37.Topviewofthebatterycardassembly
1batterypackharness
Bottomview
Thegurebelowshowsthebottomviewofthebatterycardassembly.
Figure38.Bottomviewofthebatterycardassembly
1J4batterypackharnessconnector3J2connector
2J5board-to-boardconnector
Installingthebatterycardassembly
Beforeyouinstallthebatterycardassembly,takethefollowingprecautionstopreventstaticelectricity
fromdamagingelectronicparts:
•Beforetouchinganyelectronicparts,drainthestaticelectricityfromyourbody.Youcandothisby
touchingthemetalframeofyourserver.
•Donotremovethebatterycardassemblyfromtheantistaticshippingcontaineruntilyouarereadyto
installit.Whenyouremovethebatterycardassemblyfromyourserver,placeitinitsoriginalcontainer.
Note:ChecktheappropriatesupportWebsitesforthelatestupdatesforyourbasicinput/outputsystem
(BIOS)code,utilityprograms,devicedrivers,andothersoftwareapplications.Followtheinstructions
providedbyyourServiceProvidertodownloadandinstallupdates.
OnlinetechnicalsupportisavailablethroughtheLenovoSupportWebsiteat:
http://www.lenovo.com/support
66ThinkServerRD230HardwareMaintenanceManual
Page 79

Attention:
•Electrostaticdischargecandamagethebatterycardassemblyandthe8708EM2SASRAIDadapteron
whichthebatterycardassemblyisinstalled.Alwaysgroundyourselfanduseagroundstrapbefore
touchingthebatterycardassemblyorthe8708EM2SASRAIDadapter.Performtheinstallationprocedure
atanESD-safeworkstation.
•WhenattachingthebatterycardassemblytoaPCIExpressslot,centerthePhillips-headscrewdriverto
avoiddamagingthescrewheadanddonotover-tightenthescrewsasyoumightdamagethebattery
cardassembly.
•Thebatteryinthebatterycardassemblymustrechargeforatleastsixhoursduringfastchargeunder
normaloperatingconditions.
•Thetemperatureofthebatterycardassemblyisgenerally15-20degreeshigherthantheambient
temperatureduringfastcharge.Therefore,tocompleteafastchargecycle,theambienttemperature
shouldbelessthan45degrees.Iftheambienttemperatureexceeds45degrees,thefastchargecyclewill
terminateprematurely,thuspreventingthebatterycardassemblyfromreachingafullychargedstate.
Thebatterycardassemblymountsdirectlytothe8708EM2SASRAIDcontrollerusingasmallboard-to-board
connector.Toinstallthebatterycardassemblyforthe8708EM2SASRAIDcontroller,dothefollowing:
1.Removethebatterycardassemblyfromthepackage.
2.Insertthebatterypackharness(asshownin“Topview”onpage66)intothe5-pinJ4batterypack
harnessconnector(asshownin“Bottomview”onpage66)onthebacksideofthebatterycard
assembly.
3.Withthe8708EM2SASRAIDcontrolleronaat,clean,andstatic-freesurface,holdthebatterycard
assemblywiththebatterysideupandtheJ5board-to-boardconnector(asshownin“Bottomview”
onpage66)liningupwiththeJ10BBU(batterybackupunits)connectoronthe8708EM2SASRAID
controller,asshown:
Figure39.Installingthebatterycardassemblyontothe8708EM2SASRAIDcontroller
1J10BBUconnector
4.Carefullypressthebatterycardassemblyontothe8708EM2SASRAIDcontroller,sothatthetwo
connectorsarermlyjoined.
5.UsetheprovidedPhillips-headscrewstosecurethebatterycardassemblytothe8708EM2SAS
RAIDcontroller.
6.Installthe8708EM2SASRAIDcontrollerwiththebatterycardassemblyintoaselectedPCIExpressslot
inyourserver.See“InstallingtheThinkServer8708EM2SASRAIDAdapter”onpage63
Chapter6.Installing,removing,orreplacinghardware67
.
Page 80

InstallingtheThinkServerRAID700Adapter
Attention
DonotopenyourserverorattemptanyrepairbeforereadingandunderstandingtheSafetyInformationandthe
WarrantyandSupportInformationontheThinkServerDocumentationDVDthatcomeswithyourproduct,and
Guidelines.Toobtainacopyofthepublications,goto:
http://www.lenovo.com/support
ThistopicprovidesinstructionsonhowtoinstalltheThinkServerRAID700Adapter(hereafterreferredtoas
theRAIDcontrollerwithinthistopic)andthebatterycardassemblyforthisRAIDcontroller.
ToinstalltheRAIDcontroller,dothefollowing:
Note:UseanydocumentationthatcomeswiththeRAIDcontrollerandfollowthoseinstructionsinaddition
totheinstructionsinthistopic.
1.Removeallmediafromthedrivesandturnoffallattacheddevicesandtheserver.Then,disconnectall
powercordsfromelectricaloutletsanddisconnectallcablesthatareconnectedtotheserver.
2.Removetheservercover.See“Removingtheservercover”onpage37.
3.Removetherisercardassembly.See“Removingtherisercard”onpage51.
4.Touchthestatic-protectivepackagethatcontainstheRAIDcontrollertoanyunpaintedsurfaceonthe
outsideoftheserver.Then,removetheRAIDcontrollerfromthepackage.
5.DependingonyourRAIDcontroller,youmightneedtoinstallaThinkServerRAID700Battery(hereafter
referredtoasthebatterycardassembly)ontheRAIDcontroller.Thebatterycardassemblymounts
directlytotheRAIDcontrollerthroughasmallboard-to-boardconnector(daughtercard).
Notes:
a.ThebatterycardassemblyprotectstheintegrityofthecacheddataontheRAIDcontrollerby
providingbackuppowerupto72hoursinthecaseofacompleteacpowerfailureorabriefpower
outage.Ithasbuilt-infunctionalitytochargethebatterypackautomaticallyandtocommunicate
batterystatusinformationsuchasvoltage,temperature,andcurrenttoyourserver.Italsoprovides
aninexpensivealternativetousinganuninterruptiblepowersupply,andasecondleveloffault
tolerancewhenusedinconjunctionwithanuninterruptiblepowersupply.Formoreinformationabout
thebatterycardassembly,seeAppendixA“RAIDbatterycardassembly”onpage129
.
b.Thebatterycardassemblyoptionkitcontainsauserguide,thebatterycardassembly,andthree
Phillips-headscrews.Donotremovethebatterycardassemblyfromtheantistaticshipping
containeruntilyouarereadytoinstallit.Whenyouremovethebatterycardassemblyfromyour
server,placeitinitsoriginalcontainer.
c.ChecktheappropriatesupportWebsitesforthelatestupdatesforyourbasicinput/outputsystem
(BIOS)code,utilityprograms,devicedrivers,andothersoftwareapplications.Followtheinstructions
providedbyyourServiceProvidertodownloadandinstallupdates.
d.Itisrecommendedthatyoureplacethebatterypackonthebatterycardassemblyannuallyorafter
500rechargingcycles,whichevercomesrst.
e.Thetemperatureofthebatterycardassemblyisgenerally15-20°C(59-68°F)higherthanthe
ambienttemperatureduringfastcharge.Therefore,tocompleteafastchargecycle,theambient
temperatureshouldbelowerthan45°C(113°F).Iftheambienttemperatureexceeds45°C(113°F),
thefastchargecyclewillterminateprematurely,thuspreventingthebatterycardassemblyfrom
reachingafullychargedstate.
Attention:
68ThinkServerRD230HardwareMaintenanceManual
Page 81

•WhenattachingthebatterycardassemblytoaPCIExpressslot,centerthePhillips-headscrew
drivertoavoiddamagingthescrewheadanddonotover-tightenthescrewsasyoumightdamage
thebatterycardassembly.
•Thebatteryinthebatterycardassemblymustrechargeforatleastsixhoursduringfastcharge
undernormaloperatingconditions.
ToinstallthebatterycardassemblyontotheRAIDcontroller,dothefollowing:
a.Notethebottomviewofthebatterycardassembly.
Figure40.Bottomviewofthebatterycardassembly
1J1board-to-boardconnector
2J2remoteconnector(reservedforuse)
b.Withthefrontsideup,placetheRAIDcontrolleronaat,clean,static-freesurface.
c.HoldthebatterycardassemblywiththebatterysideupandtheJ1board-to-boardconnector
liningupwiththeJ6B1BBUconnector1ontheRAIDcontroller.Carefullypressthebatterycard
assemblyontotheRAIDcontrollersothatthetwoconnectorsarermlyjoined.Then,securethe
batterycardassemblytotheRAIDcontrollerwiththethreescrewsandthestandoffsthatcome
withthebatterycardassemblyaccessorykit.
Figure41.InstallingthebatterycardassemblyontotheRAIDcontroller
1J6B1BBUconnector
Chapter6.Installing,removing,orreplacinghardware69
Page 82

6.ConnecttheminiSASsignalcabletoports0-3ontheRAIDcontroller.
Note:Usethe400mm(15.75inches)miniSASsignalcable.
Figure42.ConnectingtheminiSASsignalcabletotheRAIDcontroller
1Ports0-3
2Ports4-7(reservedforuse)
7.InstalltheRAIDcontrollerintoanappropriatePCIcardslotontherisercardassembly.Then,install
thescrewtosecuretheRAIDcontrollerinplace.
Figure43.InstallingtheRAIDcontrollerintothePCIcardslotontherisercard
8.InstalltherisercardwiththeRAIDcontrollerintoanappropriatePCIcardslotonthesystemboard.
70ThinkServerRD230HardwareMaintenanceManual
Page 83

9.Connecttheotherendofthe400mm(15.75inches)miniSASsignalcabletotheminiSASsignalcable
connector1onthebackplaneofyourserver.
Figure44.MiniSASsignalcableconnectoronthebackplane
Whattodonext:
•Toworkwithanotherpieceofhardware,gototheappropriatesection.
•Tocompletetheinstallation,goto“Completingthepartsreplacement”onpage87.
Removingorinstallingtheheatsinkassembly
Thissectionprovidesinstructionsonhowtoremoveorinstalltheheatsinkassembly.
Removingtheheatsinkassembly
Attention
DonotopenyourserverorattemptanyrepairbeforereadingandunderstandingtheSafetyInformationandthe
WarrantyandSupportInformationontheThinkServerDocumentationDVDthatcomeswithyourproduct,and
Guidelines.Toobtainacopyofthepublications,goto:
http://www.lenovo.com/support
Thissectionprovidesinstructionsonhowtoremovetheheatsinkassembly.
CAUTION:
Theheatsinkassemblymightbeveryhot.T urnofftheserverandwaitthreetoveminutes
tolettheservercoolbeforeremovingtheservercover.
Toremovetheheatsinkassembly,dothefollowing:
1.Removeallmediafromthedrivesandturnoffallattacheddevicesandtheserver.Then,disconnectall
powercordsfromelectricaloutletsanddisconnectallcablesthatareconnectedtotheserver.
2.Removetheservercover.SeeRemovingtheservercover.
3.Removetheeightscrewsthatsecuretheheatsinkassembly(1-8)andgentlyliftouttheheatsink
assembly.
Chapter6.Installing,removing,orreplacinghardware71
Page 84

Figure45.Removingtheheatsinkassembly
1-8Screws
9Airow
10Indicatesthefrontofthechassis
4.Ifyouareinstructedtoreturntheheatsinkassembly,followallpackaginginstructionsanduseany
packagingmaterialsthataresuppliedtoyouforshipping.
5.Toinstalltheheatsinkassembly,see“Installingtheheatsinkassembly”onpage72.
Installingtheheatsinkassembly
Attention
DonotopenyourserverorattemptanyrepairbeforereadingandunderstandingtheSafetyInformationandthe
WarrantyandSupportInformationontheThinkServerDocumentationDVDthatcomeswithyourproduct,and
Guidelines.Toobtainacopyofthepublications,goto:
http://www.lenovo.com/support
Thissectionprovidesinstructionsonhowtoinstalltheheatsinkassembly.
CAUTION:
Theheatsinkandmicroprocessormightbeveryhot.Turnofftheserverandwaitthreeto
veminutestolettheservercoolbeforeremovingtheservercover.
72ThinkServerRD230HardwareMaintenanceManual
Page 85

Toinstalltheheatsinkassembly,dothefollowing:
1.Removeallmediafromthedrivesandturnoffallattacheddevicesandtheserver.Then,disconnectall
powercordsfromelectricaloutletsanddisconnectallcablesthatareconnectedtotheserver.
2.Removetheservercover.SeeRemovingtheservercover.
3.Positiontheheatsinkassemblyinplacebyaligningtheretainingscrewsontheheatsinkassemblywith
thecorrespondingholesinthesystemboard.Then,tightentheeightscrewsfollowingthenumerical
sequenceasshownbelowtosecuretheheatsinkassemblyonthesystemboard.
Figure46.Installingtheheatsinkassembly
1-8Screws
9Airow
10Indicatesthefrontofthechassis
4.Tocompletetheinstallation,goto“Completingthepartsreplacement”onpage87.
Removingorinstallingthemicroprocessor
Thissectionprovidesinstructionsonhowtoremoveorinstallthemicroprocessor.
Chapter6.Installing,removing,orreplacinghardware73
Page 86

Removingthemicroprocessor
Attention
DonotopenyourserverorattemptanyrepairbeforereadingandunderstandingtheSafetyInformationandthe
WarrantyandSupportInformationontheThinkServerDocumentationDVDthatcomeswithyourproduct,and
Guidelines.Toobtainacopyofthepublications,goto:
http://www.lenovo.com/support
Thissectionprovidesinstructionsonhowtoremovethemicroprocessor.
CAUTION:
Theheatsinkandmicroprocessormightbeveryhot.Turnofftheserverandwaitthreeto
veminutestolettheservercoolbeforeremovingtheservercover.
Toremovethemicroprocessor,dothefollowing:
1.Removeallmediafromthedrivesandturnoffallattacheddevicesandtheserver.Then,disconnectall
powercordsfromelectricaloutletsanddisconnectallcablesthatareconnectedtotheserver.
2.Removetheservercover.SeeRemovingtheservercover.
3.Removetheheatsinkassembly.See“Removingtheheatsinkassembly”onpage71.
4.Liftthesmallhandleandopentheretainertoaccessthemicroprocessor.Then,carefullyliftthe
microprocessorstraightupandoutofthesocket,andplaceitonastatic-protectivesurface.
Note:Touchonlytheedgesofthemicroprocessor.
Figure47.Removingthemicroprocessor
5.Ifyouareinstructedtoreturnthemicroprocessor,followallpackaginginstructionsanduseany
packagingmaterialsthataresuppliedtoyouforshipping.
6.Tocompletetheremovalprocedure,goto“Completingthepartsreplacement”onpage87.
74ThinkServerRD230HardwareMaintenanceManual
Page 87

Installingthemicroprocessor
Attention
DonotopenyourserverorattemptanyrepairbeforereadingandunderstandingtheSafetyInformationandthe
WarrantyandSupportInformationontheThinkServerDocumentationDVDthatcomeswithyourproduct,and
Guidelines.Toobtainacopyofthepublications,goto:
http://www.lenovo.com/support
Thissectionprovidesinstructionsonhowtoinstallthemicroprocessor.
CAUTION:
Theheatsinkandmicroprocessormightbeveryhot.Turnofftheserverandwaitthreeto
veminutestolettheservercoolbeforeremovingtheservercover.
Note:Whenyouneedtoinstallasecondmicroprocessor,rstremovethedualheatsinkandthen
removeexcessgreasefromtherstmicroprocessorandthemicroprocessorsocketarea.Makesurethe
microprocessorandsocketareaarecleanofgrease.Usethenewheatsinkthatcomeswiththesecond
microprocessoroptionkitanddisposeoftheoldone.Thenewheatsinkhasgreasealreadyappliedforboth
therstandsecondmicroprocessors.
Foroptimalperformance,followthesemicroprocessorinstallationrules:
1.Whentwomicroprocessorsareinstalled,bothmusthavethesamecorevoltageandcorespeed.
2.Whenonlyonemicroprocessorisinstalled,itmustbeinthesocketlabeledCPU0.Theothersocket
mustbekeptempty.
3.AlwaysinstallthemicroprocessorrstintotheCPU0socket,andtheninstallanothermicroprocessor
intotheCPU1socketifyouwanttoinstalltwomicroprocessors.
Toinstallthemicroprocessor,dothefollowing:
1.Removeallmediafromthedrivesandturnoffallattacheddevicesandtheserver.Then,disconnectall
powercordsfromelectricaloutletsanddisconnectallcablesthatareconnectedtotheserver.
2.Removetheservercover.SeeRemovingtheservercover.
3.Removetheheatsinkassembly.See“Removingtheheatsinkassembly”onpage71.
4.Pressdownandpushthesmallhandleoutwardonthemicroprocessorsockettoliftthehandleto
theopenposition.
Figure48.Liftingthehandle
5.Gentlypresstheretainerofthemicroprocessorsockettoopenit.
Chapter6.Installing,removing,orreplacinghardware75
Page 88

Figure49.Openingtheretainer
6.Removetheprotectivecoverfromthemicroprocessorsocket.Toavoiddamagingthepinsinthe
microprocessorsocket,donottouchthepinswhileremovingthecover.
Figure50.Removingthemicroprocessorsocketcover
7.Removethenewmicroprocessorfromtheprotectivecoverthatprotectsthegoldcontactsonthe
bottomofthenewmicroprocessor.
8.Holdthenewmicroprocessorbytheedgesandalignthenotches1onitwiththetabs2inthe
microprocessorsocket.Then,installthemicroprocessorintothesocket.
76ThinkServerRD230HardwareMaintenanceManual
Page 89

Figure51.Installingthemicroprocessor
9.Tocompletetheinstallation,goto“Completingthepartsreplacement”onpage87.
Removingorinstallingthesystemfans
Thissectionprovidesinstructionsonhowtoremoveorinstallthesystemfans.
Removingthesystemfans
Attention
DonotopenyourserverorattemptanyrepairbeforereadingandunderstandingtheSafetyInformationandthe
WarrantyandSupportInformationontheThinkServerDocumentationDVDthatcomeswithyourproduct,and
Guidelines.Toobtainacopyofthepublications,goto:
http://www.lenovo.com/support
Thissectionprovidesinstructionsonhowtoremovethesystemfans.
Toremovethesystemfans,dothefollowing:
1.Removeallmediafromthedrivesandturnoffallattacheddevicesandtheserver.Then,disconnectall
powercordsfromelectricaloutletsanddisconnectallcablesthatareconnectedtotheserver.
2.Removetheservercover.SeeRemovingtheservercover.
3.Removetheheatsinkassembly.See“Removingtheheatsinkassembly”onpage71.
4.Disconnectthesystemfancablesonthesystemboard.SeeFigure8“Locatingotherconnectorson
thesystemboardwithanonboard1068ESASRAID”onpage33.
5.Carefullyliftthesystemfanstraightuptoremoveitoutoftheserver.Then,placeitonastatic-protective
surface.
6.Ifyouareinstructedtoreturnthesystemfanstothemanufacturer,followallpackaginginstructions,and
useanypackagingmaterialsthataresuppliedtoyouforshipping.
7.Toinstallthesystemfans,see“Installingthesystemfans”onpage78.
Chapter6.Installing,removing,orreplacinghardware77
Page 90

Installingthesystemfans
Attention
DonotopenyourserverorattemptanyrepairbeforereadingandunderstandingtheSafetyInformationandthe
WarrantyandSupportInformationontheThinkServerDocumentationDVDthatcomeswithyourproduct,and
Guidelines.Toobtainacopyofthepublications,goto:
http://www.lenovo.com/support
Thissectionprovidesinstructionsonhowtoinstallthesystemfans.
Toinstallthesystemfans,dothefollowing:
1.Removeallmediafromthedrivesandturnoffallattacheddevicesandtheserver.Then,disconnectall
powercordsfromelectricaloutletsanddisconnectallcablesthatareconnectedtotheserver.
2.Removetheservercover.SeeRemovingtheservercover.
3.Removetheheatsinkassembly.See“Removingtheheatsinkassembly”onpage71.
4.Carefullyputthesystemfansintotheserver.Mindthesevenports1thatsecurethesystemfans.Align
theholesinthesystemfanswiththecorrespondingportsontheserver.
Figure52.Thesevenportsthatsecurethesystemfans
5.Connectthesystemfancablestothecorrespondingconnectorsonthesystemboardinthenumerical
orderfollowingtheillustrationbelow.
78ThinkServerRD230HardwareMaintenanceManual
Page 91

Figure53.Connectingthesystemfancablestotheconnectorsonthesystemboard
6.Tocompletetheinstallation,goto“Completingthepartsreplacement”onpage87.
Removingorinstallingthepowersupply
Thissectionprovidesinstructionsonhowtoremoveorinstallthepowersupply.
Removingthepowersupply
Attention
DonotopenyourserverorattemptanyrepairbeforereadingandunderstandingtheSafetyInformationandthe
WarrantyandSupportInformationontheThinkServerDocumentationDVDthatcomeswithyourproduct,and
Guidelines.Toobtainacopyofthepublications,goto:
http://www.lenovo.com/support
Thissectionprovidesinstructionsonhowtoremovethepowersupply.
Whenyouremoveapowersupply,observethefollowingprecautions.
DANGER
Hazardousmovingparts.Keepngersandotherbodypartsaway.
Chapter6.Installing,removing,orreplacinghardware79
Page 92

Statement8
CAUTION:
Neverremovethecoveronapowersupplyoranypartthathasthefollowinglabelattached.
Hazardousvoltage,current,andenergylevelsarepresentinsideanycomponentthathasthislabel
attached.Therearenoserviceablepartsinsidethesecomponents.Ifyoususpectaproblemwith
oneoftheseparts,contactaservicetechnician.
Toremovethepowersupply,dothefollowing:
1.Removeallmediafromthedrivesandturnoffallattacheddevicesandtheserver.Then,disconnectall
powercordsfromelectricaloutletsanddisconnectallcablesthatareconnectedtotheserver.
2.Removetheservercover.SeeRemovingtheservercover.
3.Removethefourscrews(1and2)thatsecurethepowersupply.
Figure54.Removingthescrewsthatsecurethepowersupply
80ThinkServerRD230HardwareMaintenanceManual
Page 93

4.Disconnectpowersupplycables3,4,and5fromthesystemboard.Then,disconnectpowersupply
cables1and2fromthebackplane.
Figure55.Disconnectingthepowersupplycables
5.Disconnectthepowersupplycablesfromanyothercardsordevices.
Note:Thepowersupplycablesareintegratedpartsofthepowersupply.Donottrytoremoveor
disconnectthepowersupplycablesfromthepowersupply.
6.Carefullyliftthepowersupplyoutoftheserver.
7.Ifyouareinstructedtoreturnthepowersupply,followallpackaginginstructionsanduseanypackaging
materialsthataresuppliedtoyouforshipping.
8.Toinstallanewpowersupply,see“Installingthepowersupply”onpage81.
Installingthepowersupply
Attention
DonotopenyourserverorattemptanyrepairbeforereadingandunderstandingtheSafetyInformationandthe
WarrantyandSupportInformationontheThinkServerDocumentationDVDthatcomeswithyourproduct,and
Guidelines.Toobtainacopyofthepublications,goto:
http://www.lenovo.com/support
Thissectionprovidesinstructionsonhowtoinstallthepowersupply.
Whenyouinstallapowersupply,observethefollowingprecautions.
Chapter6.Installing,removing,orreplacinghardware81
Page 94

DANGER
Hazardousmovingparts.Keepngersandotherbodypartsaway.
Statement8
CAUTION:
Neverremovethecoveronapowersupplyoranypartthathasthefollowinglabelattached.
Hazardousvoltage,current,andenergylevelsarepresentinsideanycomponentthathasthislabel
attached.Therearenoserviceablepartsinsidethesecomponents.Ifyoususpectaproblemwith
oneoftheseparts,contactaservicetechnician.
Toinstallthepowersupply,dothefollowing:
1.Removeallmediafromthedrivesandturnoffallattacheddevicesandtheserver.Then,disconnectall
powercordsfromelectricaloutletsanddisconnectallcablesthatareconnectedtotheserver.
2.Removetheservercover.SeeRemovingtheservercover.
3.Carefullyplacethepowersupplyintotheserverbyaligningthescrewholesinthepowersupplywith
thecorrespondingholesinthechassis.Then,installthefourscrews1and2tosecurethepower
supplyinplace.
82ThinkServerRD230HardwareMaintenanceManual
Page 95

Figure56.Installingthescrewstosecurethepowersupply
4.Connectthepowersupplycablestothesystemboardconnectors3,4,and5,andtothebackplane
connectors1and2.
Figure57.Connectingthepowersupplycables
Chapter6.Installing,removing,orreplacinghardware83
Page 96

5.Connectthepowersupplycablestoanyothercardsordevices.
6.Tocompletetheinstallation,goto“Completingthepartsreplacement”onpage87.
Removingorinstallingthesystemboard
Thissectionprovidesinstructionsonhowtoremoveorinstallthesystemboard.
Removingthesystemboard
Attention
DonotopenyourserverorattemptanyrepairbeforereadingandunderstandingtheSafetyInformationandthe
WarrantyandSupportInformationontheThinkServerDocumentationDVDthatcomeswithyourproduct,and
Guidelines.Toobtainacopyofthepublications,goto:
http://www.lenovo.com/support
Thissectionprovidesinstructionsonhowtoremovethesystemboard.
CAUTION:
Theheatsinkassemblymightbeveryhot.T urnofftheserverandwaitthreetoveminutes
tolettheservercoolbeforeremovingtheservercover.
Toremovethesystemboard,dothefollowing:
1.Removeallmediafromthedrivesandturnoffallattacheddevicesandtheserver.Then,disconnectall
powercordsfromelectricaloutletsanddisconnectallcablesthatareconnectedtotheserver.
2.Removetheservercover.SeeRemovingtheservercover.
3.RemoveanyadaptercardsinstalledinthePCIcardslots.See“RemovingaPCIcard”onpage54.
4.Removetheheatsinkassemblyandamemorymodule.See“Removingtheheatsinkassembly”on
page71and“Removingamemorymodule”onpage40.
5.Removethebattery.See“Removingthesystemboardbattery”onpage57.
6.Removethemicroprocessor.See“Removingthemicroprocessor”onpage74.
7.Notethelocationofallcableconnectionsonthesystemboardanddisconnectallcables.See“Locating
partsonthesystemboard”onpage29
8.Removetheninescrewsthatsecurethesystemboardtothechassis.
.
84ThinkServerRD230HardwareMaintenanceManual
Page 97

Figure58.Removingtheninescrewsthatsecurethesystemboard
9.Carefullyliftthesystemboardoutofthechassis.
10.Removethemicroprocessorsocketcoverfromthenewsystemboard.
11.Removethemicroprocessorfromthefailingsystemboardandinstallitonthenewsystemboard.
12.Thefailingsystemboardmustbereturnedwithamicroprocessorsocketcovertoprotectthepinsduring
shippingandhandling.Installthemicroprocessorsocketcoverremovedfromthenewsystemboardon
thefailingsystemboard.Toinstallthemicroprocessorsocketcover,dothefollowing:
a.Releasetheleversecuringthemicroprocessorretainerandopentheretainertoaccessthe
microprocessor.
b.Graspthemicroprocessoronthesidesandliftitstraightupandoutofthesocket.Donottouchthe
contactsonthemicroprocessorsocket.
c.Alignthenotches1ofthemicroprocessorsocketcoverwiththealignmentkeys2ofthe
microprocessorsocket.Lowerthesocketcoverstraightdownintothemicroprocessorsocket
onthesystemboard.
Chapter6.Installing,removing,orreplacinghardware85
Page 98

Note:Yourmicroprocessorsocketandcovermightlookslightlydifferentfromtheillustration.
d.Carefullypressthesocketcoverstraightdownwardsuntilitissecuredintothesocket.
e.Lowerthemicroprocessorretainerandthenlowerthelevertosecuretheretainer.Makesurethe
leverissecurelylockedintoposition.
13.Ifyouareinstructedtoreturnthesystemboardtothemanufacturer,followallpackaginginstructions,
anduseanypackagingmaterialsthataresuppliedtoyouforshipping.
14.Toinstallthesystemboard,see“Installingthesystemboard”onpage86.
Installingthesystemboard
Attention
DonotopenyourserverorattemptanyrepairbeforereadingandunderstandingtheSafetyInformationandthe
WarrantyandSupportInformationontheThinkServerDocumentationDVDthatcomeswithyourproduct,and
Guidelines.Toobtainacopyofthepublications,goto:
http://www.lenovo.com/support
Thissectionprovidesinstructionsonhowtoinstallanewsystemboardafterafailingsystemboard
isremoved.
86ThinkServerRD230HardwareMaintenanceManual
Page 99

CAUTION:
Theheatsinkandmicroprocessormightbeveryhot.Turnofftheserverandwaitthreeto
veminutestolettheservercoolbeforeremovingtheservercover.
Toinstallanewsystemboardafterafailingsystemboardisremoved,dothefollowing:
1.Installanewsystemboardintothechassisandalignthescrewholeswiththoseinthechassis.Insert
andtightentheninescrewsthatsecurethesystemboard.
Figure59.Installingtheninescrewsthatsecurethesystemboard
2.Installthemicroprocessor.See“Installingthemicroprocessor”onpage75.
3.Installthebattery.See“Installingthesystemboardbattery”onpage57.
4.Installtheheatsinkassemblyandamemorymodule.See“Installingtheheatsinkassembly”onpage
and“Installingamemorymodule”onpage39.
72
5.InstalltheadaptercardsinthePCIslots.See“InstallingaPCIcard”onpage53.
6.Notethelocationofallcableconnectionsonthesystemboardandconnectallcables.See“Locating
partsonthesystemboard”onpage29.
7.Tocompletetheinstallation,goto“Completingthepartsreplacement”onpage87.
Completingthepartsreplacement
Thissectionprovidesinstructionstohelpyoucompletethepartsreplacementandturnonyourserver.
Tocompletethepartsreplacement,youmustreinstalltheservercover,reconnectallthecablesand,for
somedevices,runtheSetupUtilityprogramtodofurthersetup.
Chapter6.Installing,removing,orreplacinghardware87
Page 100

Installingtheservercover
Thissectionprovidesinstructionsonhowtoinstalltheservercover.
Attention:Forpropercoolingandairow,installtheservercoverbeforeturningontheserver.Operating
theserverforextendedperiodsoftime(morethan30minutes)withthecoverremovedmightdamage
servercomponents.
Toinstalltheservercover,dothefollowing:
1.Makesurethatallcables,add-oncards,andothercomponentsareinstalledandseatedcorrectlyand
thatyouhavenotleftloosetoolsorpartsinsidetheserver.Also,makesurethatallinternalcablesare
correctlyrouted.
2.Positiontheservercoveronthechassissothattherailguidesonthebottomoftheservercoverengage
therails.Then,slidetheservercovertothefrontoftheserveruntilitsnapsintopositionandisclosed.
Then,tightenthethumbscrewtosecuretheservercover.
Note:Althoughtheservercoverissecuredbyathumbscrew,forsafetyconsideration,besuretousea
tool,forexampleascrewdriver,totightenthethumbscrewandalwaysmakesurethatthethumbscrew
issecurelyinstalled.Also,donotover-tightenthethumbscrew.
Connectingthecables
Attention:Topreventdamagetoequipment,connectthepowercordslast.
Iftheservercablesandconnectorpanelhavecolor-codedconnectors,matchthecolorofthecableend
withthecoloroftheconnector.Forexample,matchabluecableendwithabluepanelconnector,ared
cableendwitharedconnector,andsoon.SeeRearviewforanillustrationoftheI/Oconnectorson
therearoftheserver.
Turningontheserver
Whentheserverisconnectedtoanacpowersourcebutisnotturnedon,theoperatingsystemdoesnot
run,andallcorelogicexceptfortheserviceprocessor(theintegratedmanagementmodule)isshutdown;
however,theservercanrespondtorequeststotheserviceprocessor,suchasaremoterequesttoturnon
theserver.Thepower-onLEDashestoindicatethattheserverisconnectedtoanacpowersourcebut
isnotturnedon.
Approximatelyvesecondsaftertheserverisconnectedtoacpower,oneormorefansmightstartrunning
toprovidecoolingwhiletheserverisconnectedtopowerandthepower-onbuttonLEDashesquickly.
Approximatelyonetothreeminutesaftertheserverisconnectedtoacpower,thepower-controlbutton
becomesactive(thepower-onLEDashesslowly),andoneormorefansmightstartrunningtoprovide
coolingwhiletheserverisconnectedtopower.Then,youcanturnontheserverbypressingthepower
buttononthefrontcontrolpanel.See“Frontcontrolpanel”onpage25
.
Updatingtheserverconguration
Whenyouturnontheserverforthersttimeafteryouaddorremoveadevice,youmightreceiveamessage
sayingthatthecongurationhasbeenchanged.TheSetupUtilityprogramstartsautomaticallysothatyou
cansavethenewcongurationsettings.Formoreinformation,seeChapter8“Conguringtheserver”on
page109
Someoptionaldeviceshavedevicedriversthatyoumustinstall.Forinformationaboutinstallingdevice
drivers,seethedocumentationthatcomeswitheachdevice.
.
88ThinkServerRD230HardwareMaintenanceManual
 Loading...