

Lenovo L24q-10 User Guide

Lenovo
L24q-10
User Guide

Product numbers
F16238QX0
65CF-GAC3- WW
First Edition (August 2016)
© Copyright Lenovo 2016.
LENOVO products, data, computer software, and services have been developed exclusively at private expense and are
sold to governmental entities as commercial items as defined by 48 C.F.R. 2.101 with limited and restricted rights to use,
reproduction and disclosure.
LIMITED AND RESTRICTED RIGHTS NOTICE: If products, data, computer software, or services are delivered pursuant
a General Services Administration "GSA" contract, use, reproduction, or disclosure is subject to restrictions set forth in
Contract No. GS-35F-05925.

Contents
Safety information ����������������������������������������������������������������������������������������������������������������������������������������������� iii
General Safety guidelines ������������������������������������������������������������������������������������������������������������������������������������������������������������������������������ iii
TCO Certied �������������������������������������������������������������������������������������������������������������������������������������������������������������������������������������������������� iv
Chapter 1� Getting started
Shipping contents ����������������������������������������������������������������������������������������������������������������������������������������������������������������������������������������� 1-1
Notice for use ����������������������������������������������������������������������������������������������������������������������������������������������������������������������������������������������� 1-2
Product overview ����������������������������������������������������������������������������������������������������������������������������������������������������������������������������������������� 1-3
Adjusting the tilt ������������������������������������������������������������������������������������������������������������������������������������������������������������������������������������� 1-3
Monitor controls�������������������������������������������������������������������������������������������������������������������������������������������������������������������������������������� 1-3
Setting up your monitor ������������������������������������������������������������������������������������������������������������������������������������������������������������������������������� 1-4
Connecting and turning on your monitor ������������������������������������������������������������������������������������������������������������������������������������������������ 1-4
Registering your option �������������������������������������������������������������������������������������������������������������������������������������������������������������������������������� 1-7
Chapter 2� Adjusting and using your monitor
Comfort and accessibility ���������������������������������������������������������������������������������������������������������������������������������������������������������������������������� 2-1
Arranging your work area ����������������������������������������������������������������������������������������������������������������������������������������������������������������������� 2-1
Positioning your monitor ������������������������������������������������������������������������������������������������������������������������������������������������������������������������ 2-1
Quick tips for healthy work habits ���������������������������������������������������������������������������������������������������������������������������������������������������������� 2-2
Accessibility information ������������������������������������������������������������������������������������������������������������������������������������������������������������������������ 2-2
Adjusting your monitor image �������������������������������������������������������������������������������������������������������������������������������������������������������������������� 2-3
Using the direct access controls �������������������������������������������������������������������������������������������������������������������������������������������������������������� 2-3
Using the On-Screen Display (OSD) controls ���������������������������������������������������������������������������������������������������������������������������������������� 2-4
Selecting a supported display mode �������������������������������������������������������������������������������������������������������������������������������������������������������� 2-7
Understanding power management ������������������������������������������������������������������������������������������������������������������������������������������������������������� 2-8
Caring for your monitor ������������������������������������������������������������������������������������������������������������������������������������������������������������������������������ 2-9
Detaching the monitor base and stand ��������������������������������������������������������������������������������������������������������������������������������������������������������� 2-9
Chapter 3� Reference information
Monitor specications ���������������������������������������������������������������������������������������������������������������������������������������������������������������������������������� 3-1
Troubleshooting ������������������������������������������������������������������������������������������������������������������������������������������������������������������������������������������� 3-3
Manual image setup �������������������������������������������������������������������������������������������������������������������������������������������������������������������������������� 3-4
Manually installing the monitor driver ��������������������������������������������������������������������������������������������������������������������������������������������������� 3-5
Installing the monitor driver in Windows 7 ��������������������������������������������������������������������������������������������������������������������������������������� 3-5
Installing the monitor driver in Windows10 �������������������������������������������������������������������������������������������������������������������������������������� 3-6
Getting further help ���������������������������������������������������������������������������������������������������������������������������������������������������������������������������� 3-7
Service information ���������������������������������������������������������������������������������������������������������������������������������������������������������������������������� 3-8
Customer responsibilities ������������������������������������������������������������������������������������������������������������������������������������������������������������������� 3-8
��������������������������������������������������������������������������������������������������������������������������������������������������������������
����������������������������������������������������������������������������������������������������������������������
����������������������������������������������������������������������������������������������������������������������������������������������
1-1
2-1
3-1
Appendix A� Service and Support ������������������������������������������������������������������������������������������������������������������� A-1
Registering your option ������������������������������������������������������������������������������������������������������������������������������������������������������������������������������� A-1
Online technical support ����������������������������������������������������������������������������������������������������������������������������������������������������������������������������� A-1
Telephone technical support������������������������������������������������������������������������������������������������������������������������������������������������������������������������ A-1
Appendix B� Notices ������������������������������������������������������������������������������������������������������������������������������������������ B-1
Recycling information �������������������������������������������������������������������������������������������������������������������������������������������������������������������������������� B-2
Trademarks �������������������������������������������������������������������������������������������������������������������������������������������������������������������������������������������������� B-2
Power cords and power adapters ����������������������������������������������������������������������������������������������������������������������������������������������������������������� B-3
Contents ii

Safety information
General Safety guidelines
For tips to help you use your computer safely, go to:
http://www�lenovo�com/safety
Before installing this product, read the Safety Information�
DANGER
To avoid shock hazard:
• Do not remove the covers.
• Do not operate this product unless the stand is attached.
• Do not connect or disconnect this product during an electrical storm.
• The power cord plug must be connected to a properly wired and grounded power outlet.
• Any equipment to which this product will be attached must also be connected to properly
wired and grounded power outlets�
• To isolate the monitor from the electrical supply, you must remove the plug from the
power outlet� The power outlet should be easily accessible�
To take special precautions to avoid the introduction of hazards when operating, installing,
servicing, transporting or storing equipment, the necessary instructions shall be made
available�
To reduce the risk of electric shock, do not perform any servicing other than that contained
in the operating instructions unless you are qualied to do so.
Handling:
• If your monitor weighs more than 18 kg (39.68 lb), it is recommended that it be moved
or lifted by two people�
Safety information
iii

Congratulations!
This product is TCO Certied – for Sustainable IT
TCO Certied is an international third party sustainability certication for IT
products. TCO Certied ensures that the manufacture, use and recycling of IT
products reect environmental, social and economic responsibility. Every TCO
Certied product model is veried by an accredited independent test laboratory.
This product has been veried to meet all the criteria in TCO Certied, including:
Corporate Social Responsibility
Socially responsible production - working conditions and labor law in manufacturing country
Energy Efciency
Energy efciency of product and power supply. Energy Star compliant, where applicable
Environmental Management System
Manufacturer must be certied according to either ISO 14001 or EMAS
Minimization of Hazardous Substances
Limits on cadmium, mercury, lead & hexavalent chromium including requirements for mercury-free products,
halogenated substances and hazardous ame retardants
Design for Recycling
Coding of plastics for easy recycling� Limit on the number of different plastics used�
Product Lifetime, Product Take Back
Minimum one-year product warranty� Minimum three-year availability of spare parts� Product takeback
Packaging
Limits on hazardous substances in product packaging� Packaging prepared for recycling
Ergonomic, User-centered design
Visual ergonomics in products with a display� Adjustability for user comfort (displays, headsets)
Acoustic performance – protection against sound spikes (headsets) and fan noise (projectors, computers)
Ergonomically designed keyboard (notebooks)
Electrical Safety, minimal electro-magnetic Emissions
Third Party Testing
All certied product models have been tested in an independent, accredited laboratory.
A detailed criteria set is available for download at www�tcodevelopment�com, where you can also nd a
searchable database of all TCO Certied IT products.
TCO Development, the organization behind TCO Certied, has been an international driver in the eld of
Sustainable IT for 20 years. Criteria in TCO Certied are developed in collaboration with scientists, experts,
users and manufacturers. Organizations around the world rely on TCO Certied as a tool to help them reach
their sustainable IT goals. We are owned by TCO, a non-prot organization representing ofce workers. TCO
Development is headquartered in Stockholm, Sweden, with regional presence in North America and Asia.
For more information, please visit
www�tcodevelopment�com
Safety information
iv
Chapter 1� Getting started
HDMI
This User’s Guide provides detailed operation instructions for the user. For quick instruction
overview, please see the Setup Poster for brief information�
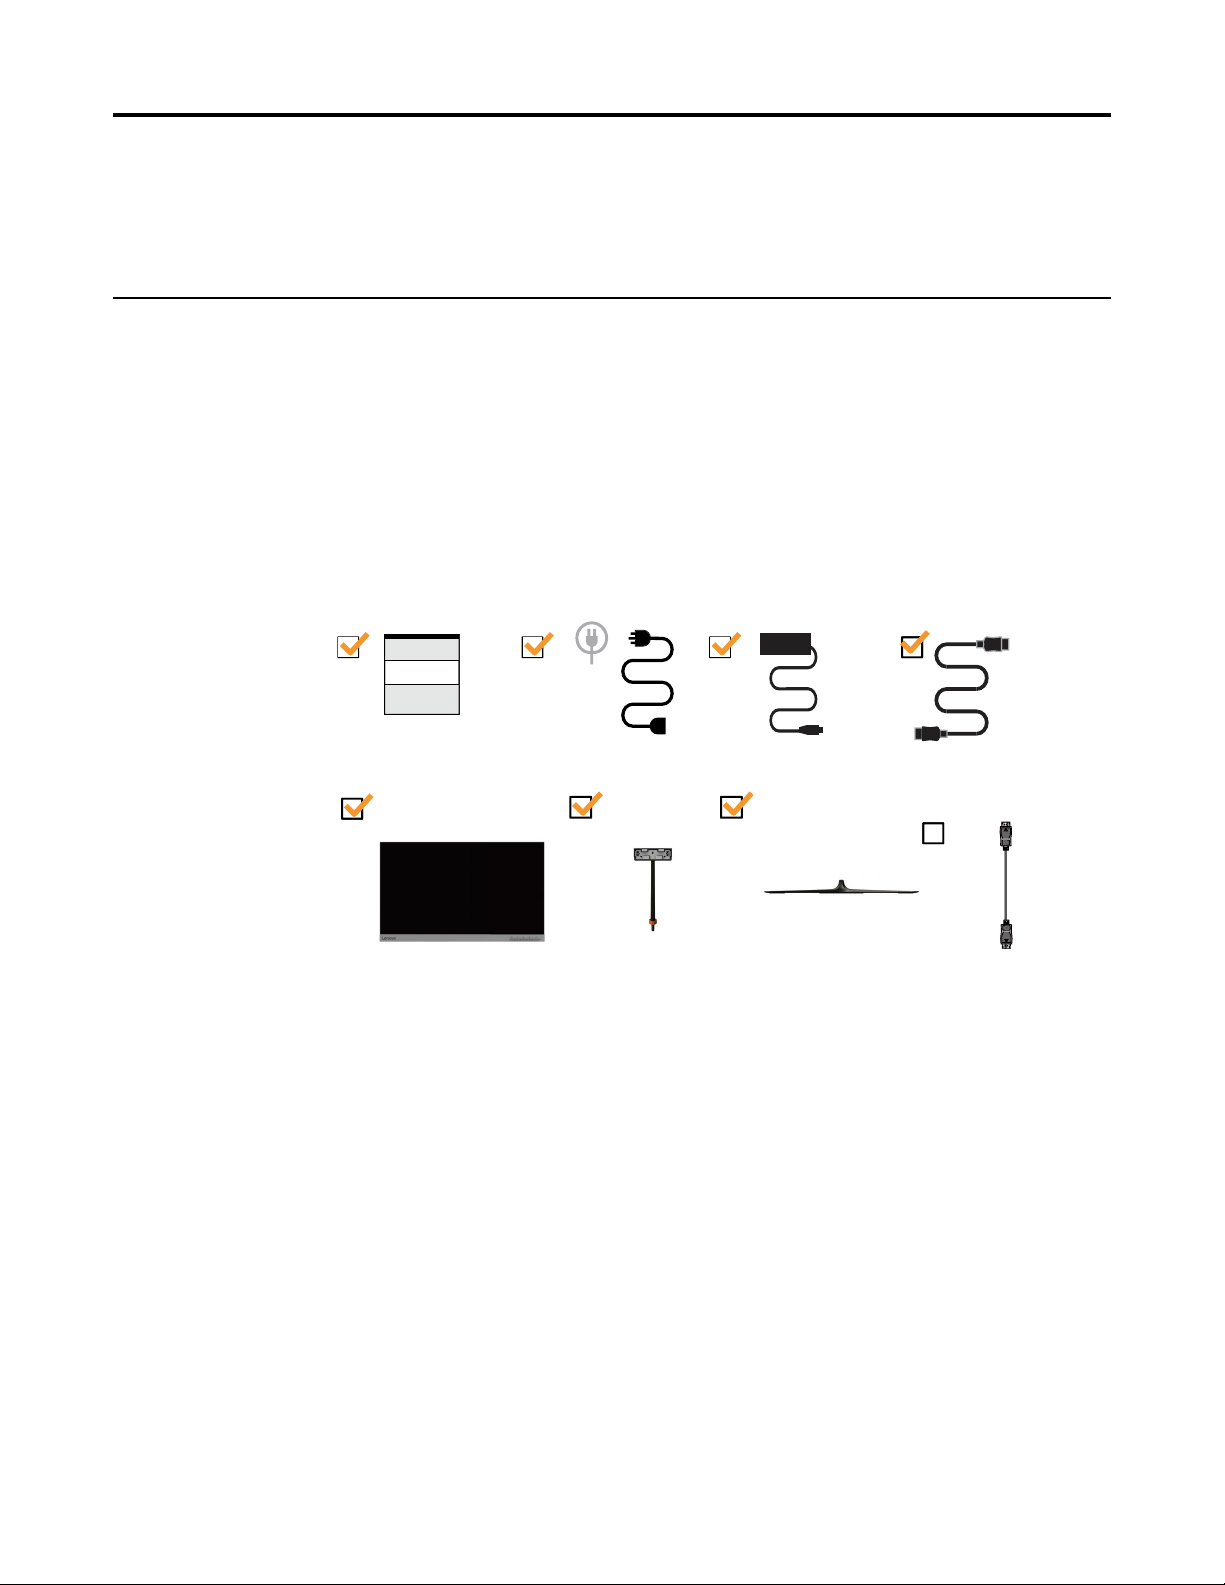
Shipping contents
The product package should include the following items:
• Information Flyer
• Flat Panel Monitor
• Adapter
• HDMI Cable
• DP Cable(Optional)
• Base
• Stand
DP
Chapter 1� 1-1
Notice for use
-5°
0°
22°
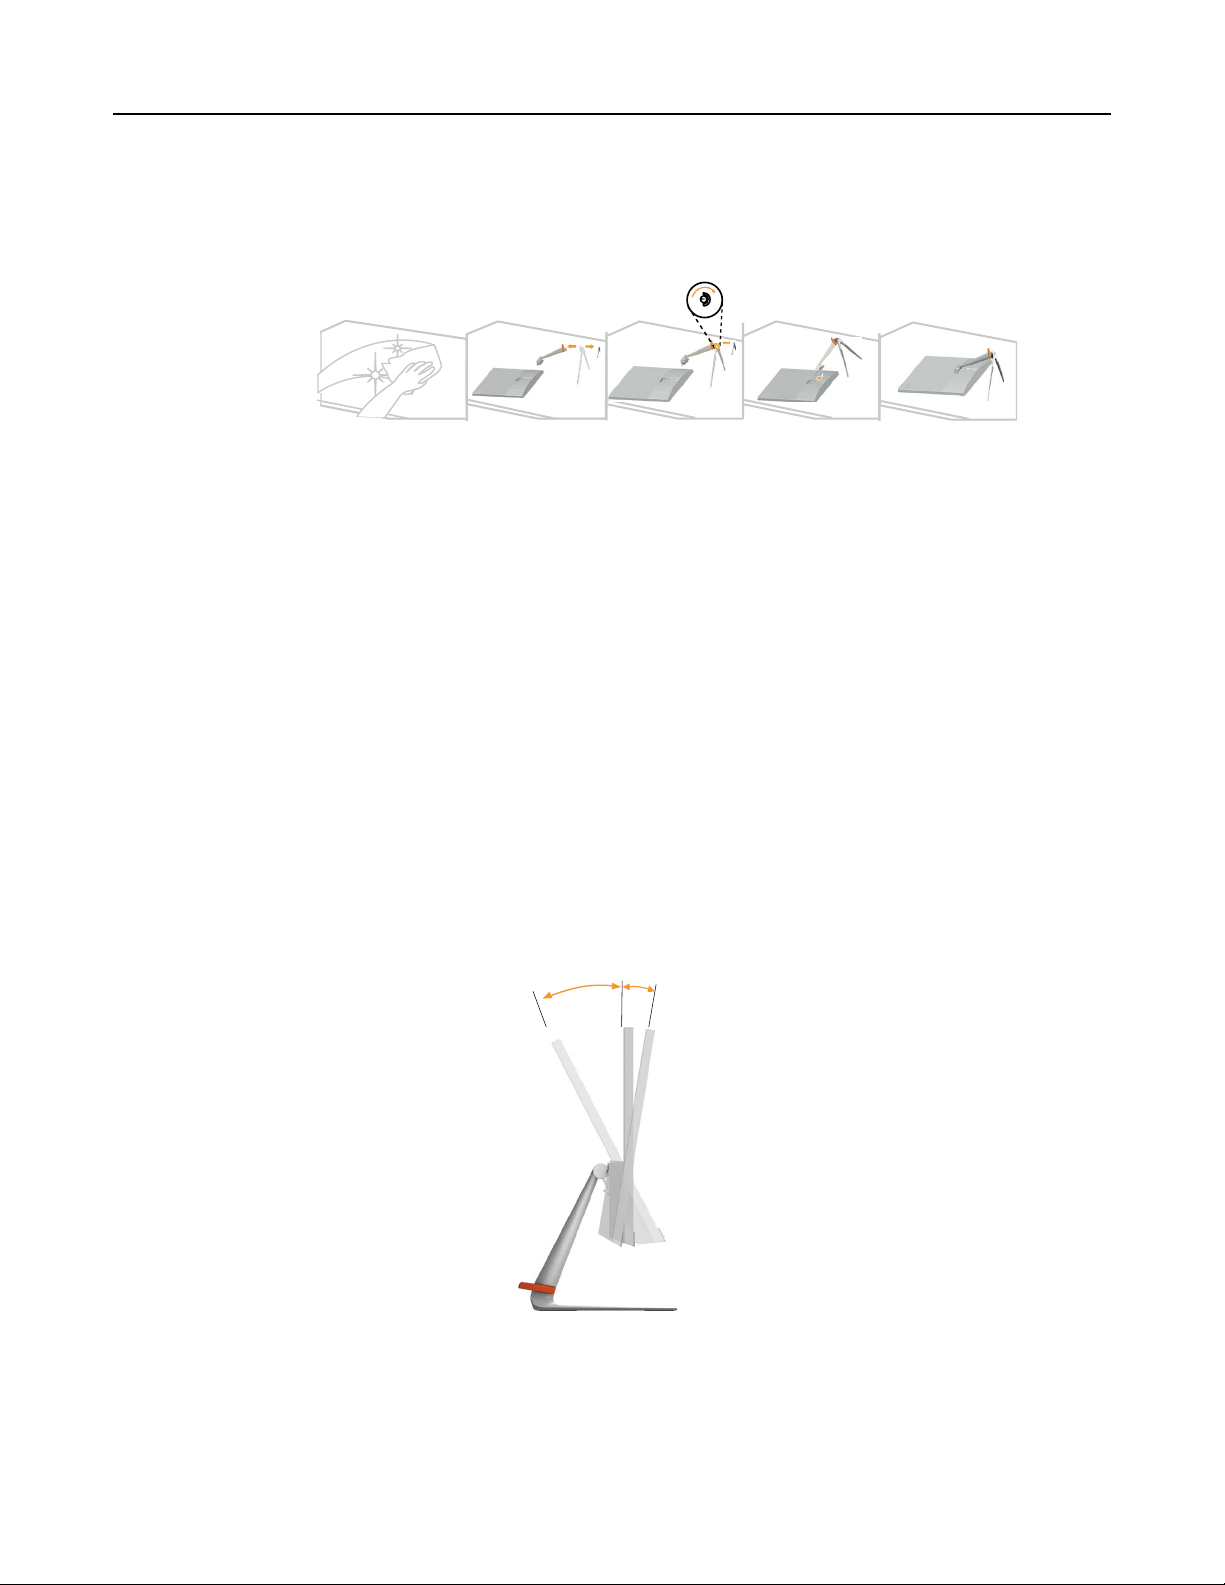
Product overview
To set up your monitor, please see the illustrations below�
Note: Do not touch the monitor within the screen area� The screen area is glass and can be
damaged by rough handling or excessive pressure�
1� Place your monitor with the screen face down on a soft at surface.
2� Align the stand assembly bracket to the monitor�
3� Insert the bracket towards monitor until it locks in place�
Note: Remove the screws from base before detaching base and stand from the monitor�”on page
2-11”�
This section will provide information on adjusting monitor positions, setting user controls, and
using the cable lock slot�
Adjusting the tilt
Please see the illustration below for an example of the tilt range�
Chapter 1� 1-2

Monitor controls
The keypad controls on the panel frame are accesses to various functions�
For information on how to utilize these keypad controls, please see "Adjusting your monitor
image"on page 2-3�
Setting up your monitor
This section provides information on how to set up your monitor�
Connecting and turning on your monitor
Note: Be sure to read the Safety information on page iii before carrying out this procedure�
1� Power off your computer and all attached devices, then unplug the computer power cord�
Chapter 1� 1-3
Chapter 1. 1-4
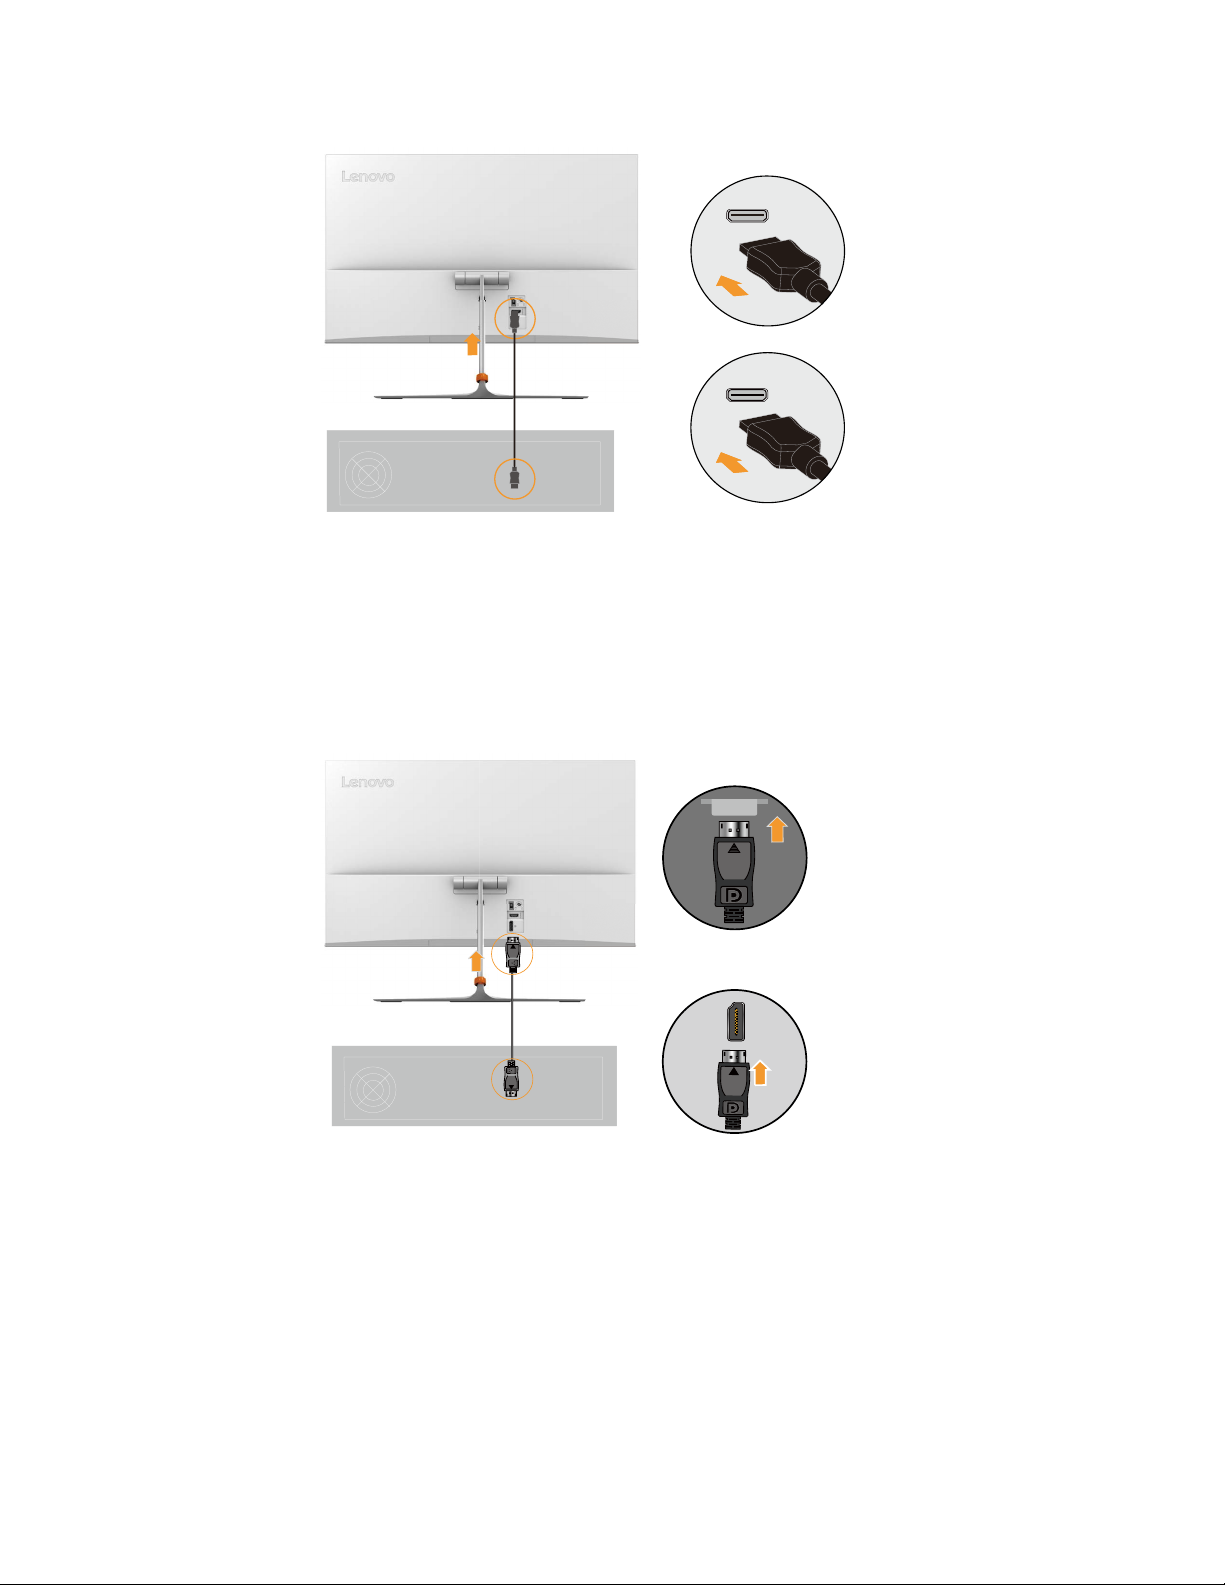
2. Connect one end of the
HDMI
cable to the monitor
HDMI
connector and the other end to the
computer.
3
Note:
HDMI
Lenovo recommends that customers who require to use the HDMI input on their
monitor purchase the " Lenovo HDMI to HDMI Cable OB47070
"www.lenovo.com/support/monitoraccessories.
. Connect one end of the DP cable to the monitor DP connector and the other end to the
computer.
DP
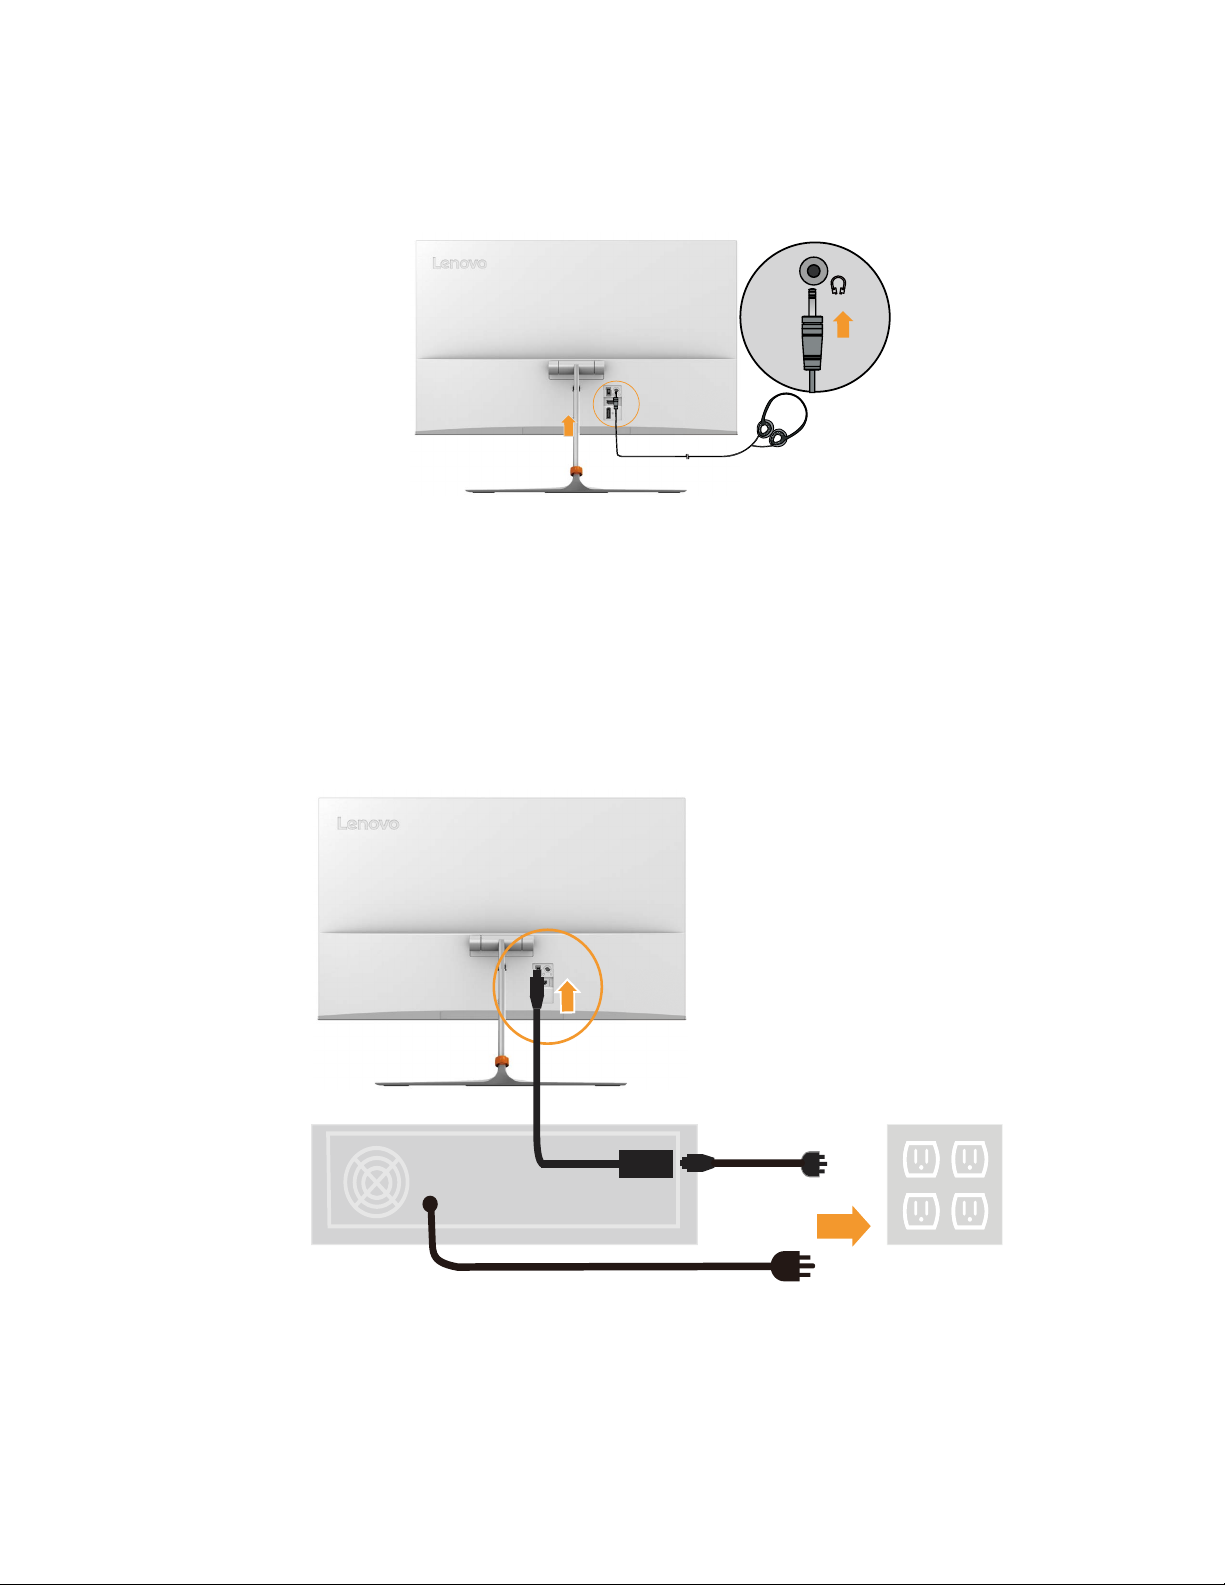
4� Connect the headphone to the headphone output terminal of the monitor�
Note: Please be aware that excessive and/or extreme volume might damage your hearing
ability�
Headphone
5� Insert the Adapter into the monitor, then plug the monitor power cord and the computer
cord into grounded electrical outlets�
Note: A certied power supply cord has to be used with this equipment. The relevant
national installation and or equipment regulations shall be considered. A certied power
supply cord not lighter than ordinary polyvinyl chloride exible cord according to IEC
60227 (designation H05VV-F 3G 0�75mm² or H05VVH2-F2 3G0�75mm²) shall be used�
Alternative a exible cord be of synthetic rubber according to IEC 60245 (designation H05RR-F
3G 0�75mm 2 ) shall be used�
Adapter
Chapter 1� 1-5
 Loading...