

Page 1

Lenovo 5110 DigitalPrinter™
Lenovo 6110 DigitalPrinter™
User’s Guide for Windows
• Setup troubleshooting
A checklist to find solutions to common setup problems.
• Printer overview
Learn about the printer parts and the printer software.
• Printing ideas
How to print several projects on various types of paper.
May 2003
• Maintenance
Caring for your cartridges and ordering supplies.
• General troubleshoot ing
Error messages, print quality pr oblems, paper jams, and much more.
www.lenovo.com
Page 2

Edition: May 2003
This publication could include technical inaccuracies or typographical errors. Changes are periodically made to the information herein;
these changes will be incorporated in later editions. Improvements or changes in the products or the programs described may be made
at any time.
References in this publication to products, programs, or services do not imply that the manufacturer intends to make these available in all
countries in which it operates. Any reference to a product, program, or service is not intended to state or imply that only that product,
program, or service may be used. Any functionally equivalent product, program, or service that does not infringe any existing intellectual
property right may be used instead. Evaluation and verification of operation in conjunction with other products, programs, or services,
except those expressly designated by the manufacturer, are the user’s responsibility.
This software and any accompanying documentation provided under this agreement are commercial computer software and
documentation developed exclusively at private expense.
2
Page 3

Contents
Chapter 1: Printer overview .......................................................... 5
Understanding the printer parts................. ................ ..................................... 5
Using memory cards (Lenovo 6110 only)......... .............................................. 7
Using the printer software .............................................................................. 8
Using the paper type sensor........................................................................ 12
Chapter 2: Printing ideas............................................................. 13
Printing on pla in p a per ................................................................................. 13
Printing phot o s .......... ................................................................................... 14
Printing on premium or coated paper........................................................... 16
Printing on both sides of a sheet of paper.................................................... 17
Printing card s ............................................................................................... 19
Printing envelopes........................................................................................ 21
Printing color images in black and white............... .. ..................................... 23
Printing a booklet.......................................................................................... 24
Printing labels............................................................................................... 27
Printing handouts......................................................................................... 29
Printing a poster........................................................................................... 31
Printing iron-on transfers.............................................................................. 34
Printing transparencies................................................................................. 35
Printing your document in reverse order ...................................................... 37
Printing a banner..................................... ................ ..................................... 39
Printing on cu st o m si ze p ap e r. .. ............. .. ... ............. .. .. .............. .. .. ............. . 41
Chapter 3: Maintenance............................................................... 43
Replacing the print cartridges... .................. ..................... .................. ........... 43
Aligning the p rin t ca rt ridges............................................................ .. .. .......... 47
Improving print quality.................................................................................. 47
Contents
3
Page 4

Preserving the print cartridges..................................................................... 49
Ordering supplies......................................................................................... 50
Chapter 4: Setup troubleshooting.............................................. 51
Troubleshooting checklist............................................................................. 51
Solving printer software installation problems.............................................. 52
Chapter 5: General troubleshooting........................................... 55
Understanding error messages and flashing lights...................................... 55
Resolving unsuccessful or slow printing....................................................... 57
Clearing paper misfeeds or jams......... ...................................... ................... 59
Solving print quality problems ...................................................................... 60
Solving specialty media problems................................................................ 63
Service station in China................................................................................ 64
Notices........................................................................................... 66
Glossary......................................................................................... 67
Index............................................................................................... 71
Contents
4
Page 5
1
Printer overvie w
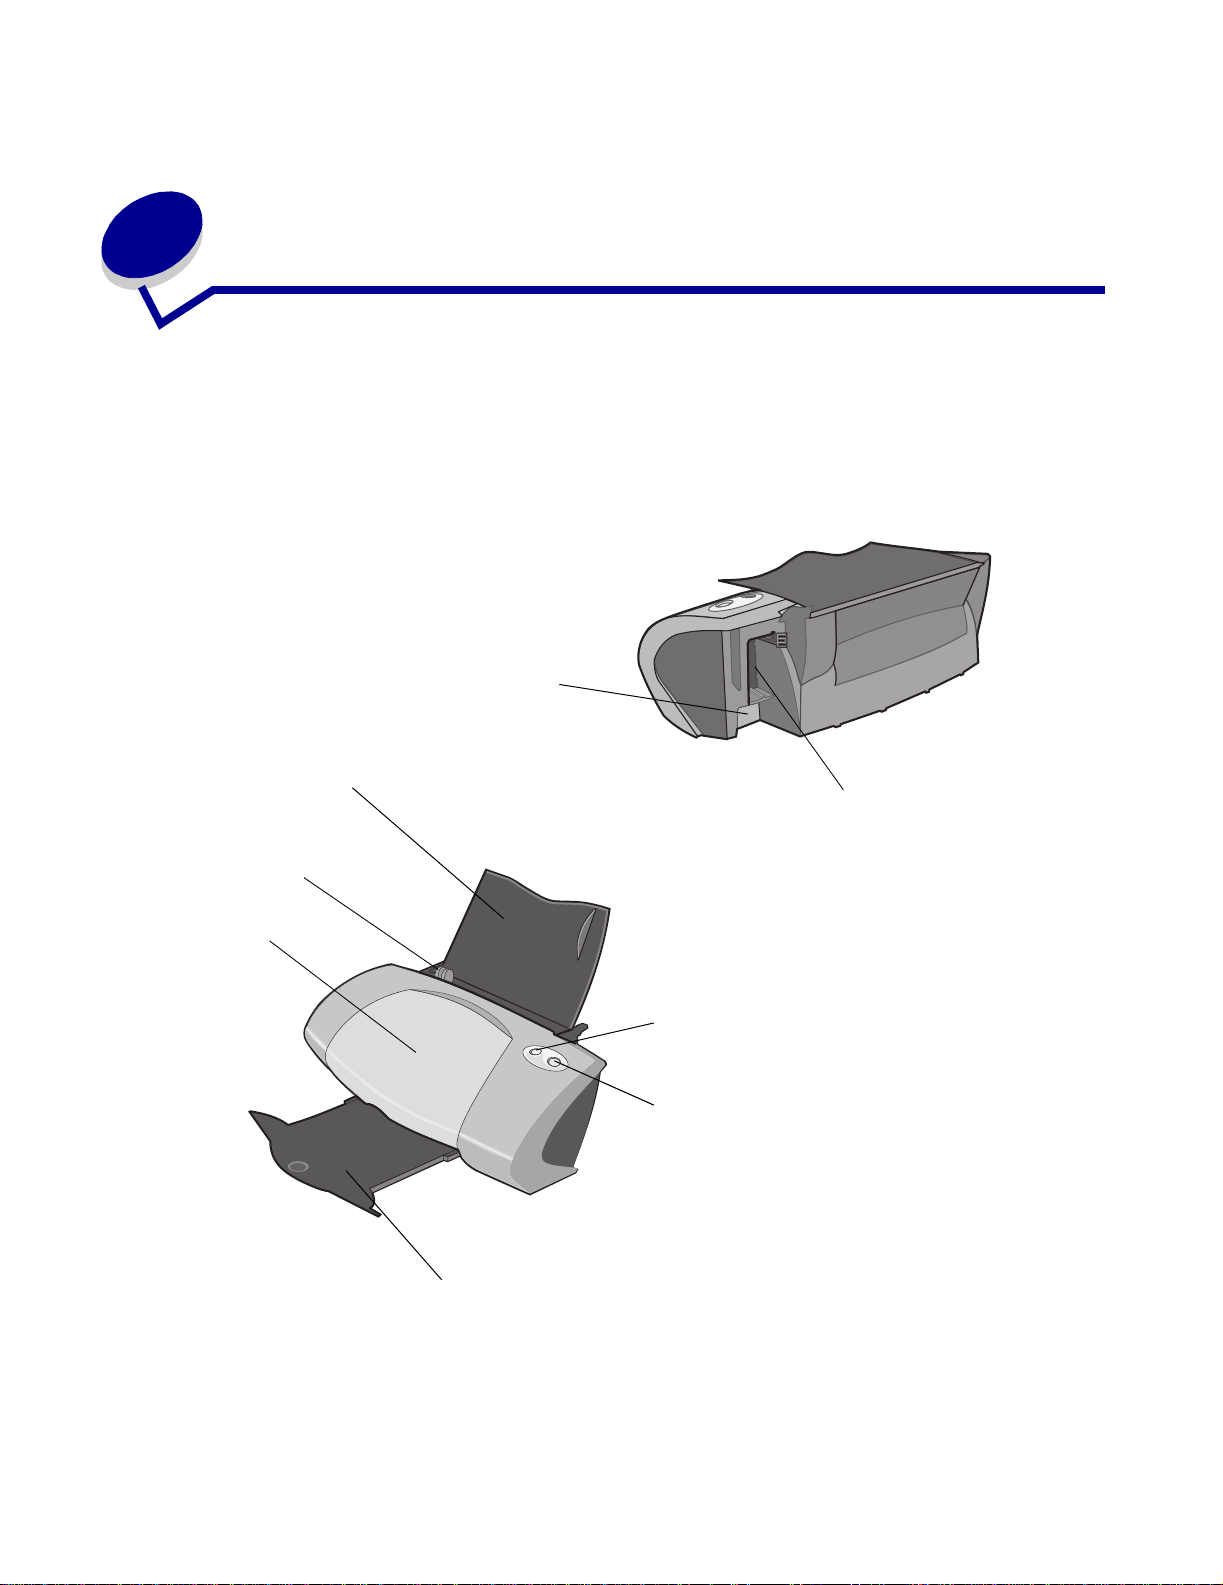
Understanding the printer parts
Lenovo 5110 DigitalPrinter™
USB cable connector
Paper support
Paper guide
and release tab
Front cover
Power supply connector
Paper F e ed button
Power button
Paper exit tray
Printer overview
5
Page 6
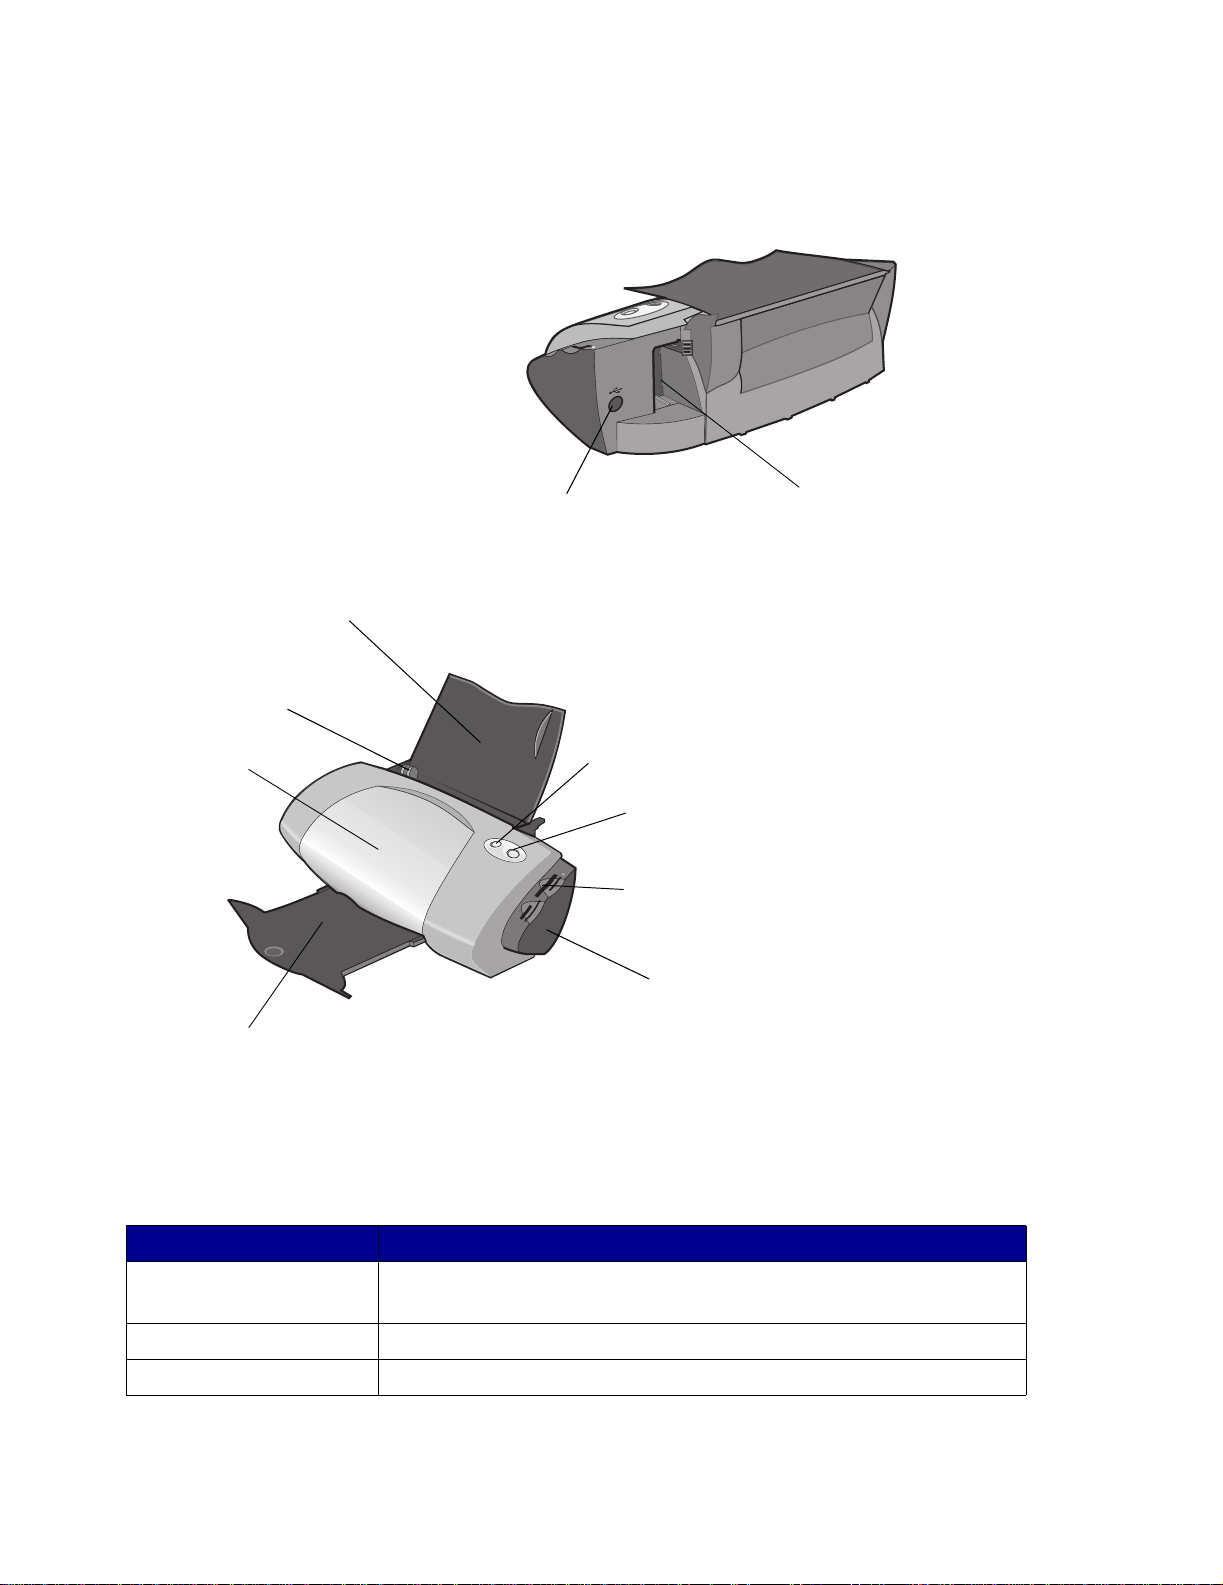
Lenovo 6110 DigitalPrinter™
Paper support
Paper guide
and release tab
Front cover
Paper ex it tray
USB cable connector
Power supply connector
Paper Feed button
Power button
Memory card slots
USB card reader
The followi ng table describes each part.
Use this: When you want to:
Front cover • Install or change print cartridges.
• Clear paper jams.
Memory card slots Access your photos.
Paper exit tray Stack paper after printing.
Understanding the printer parts
6
Page 7
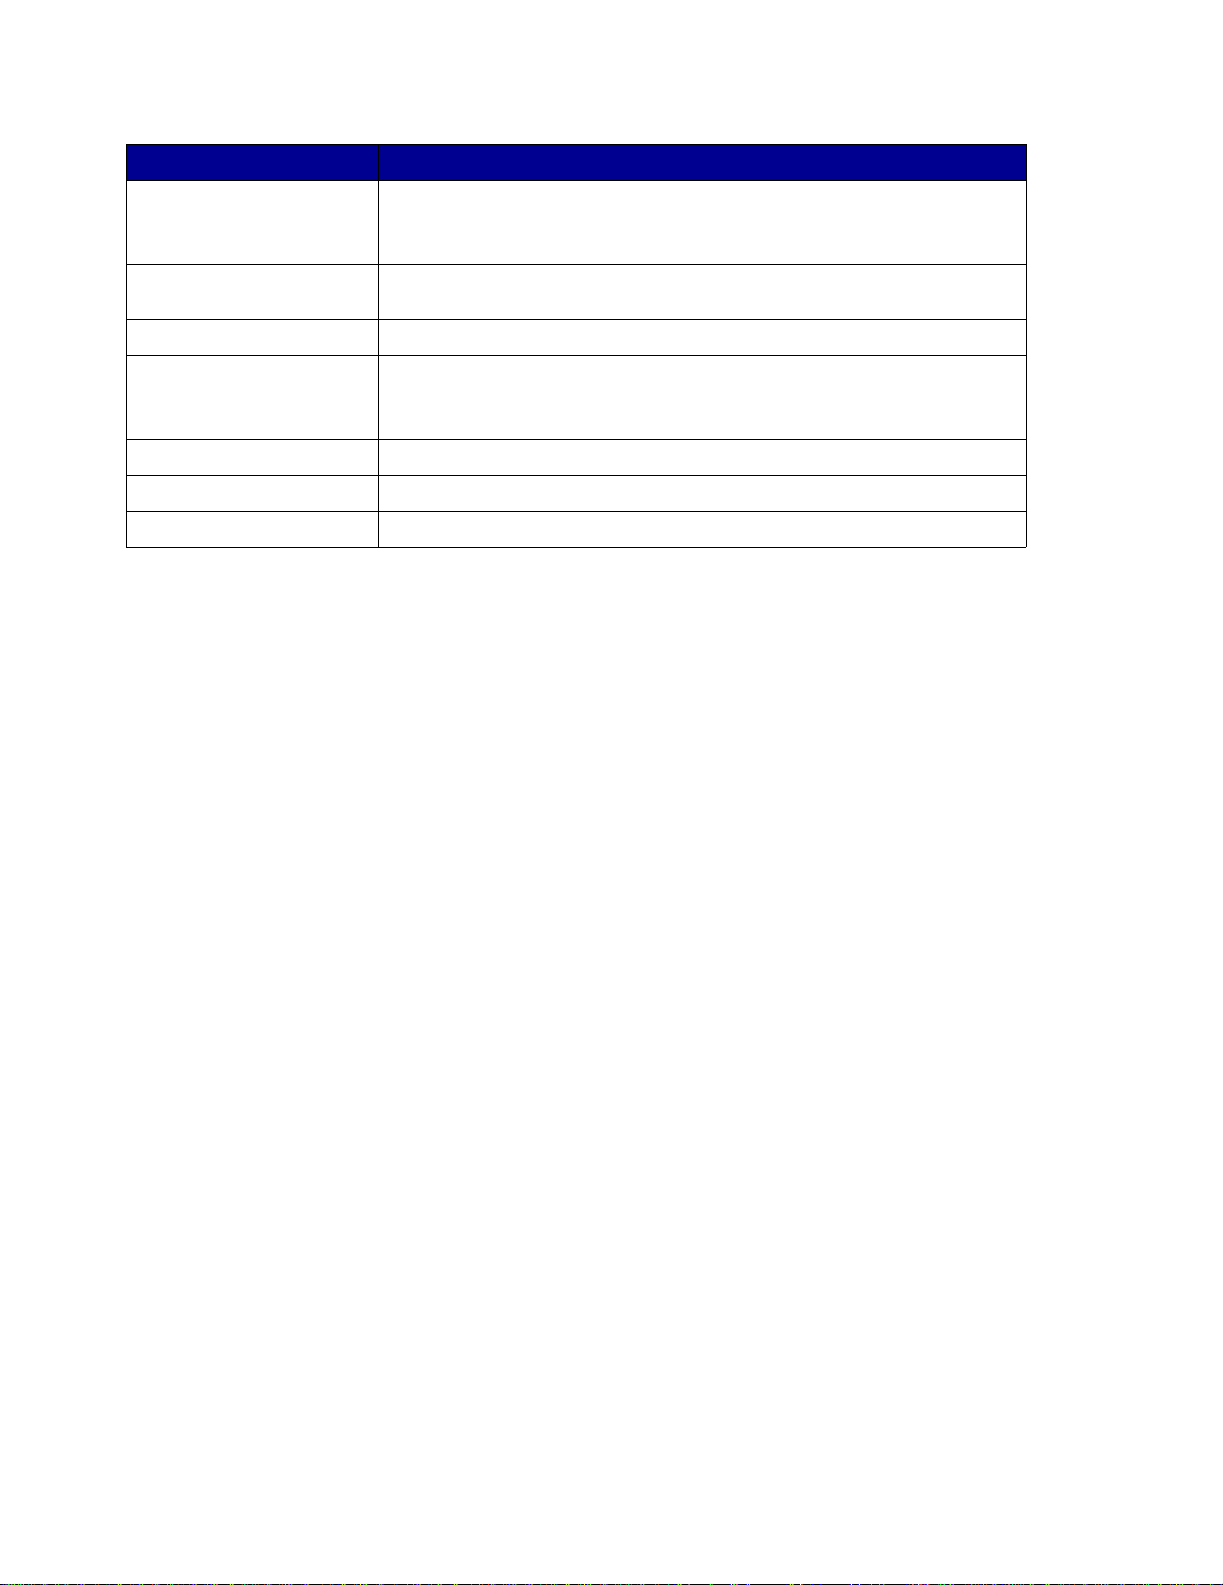
Use this: When you want to:
Paper Feed button • Eject paper from the printer.
• Check the printer status. For more information, see “Understanding
error messages and flashing lights” on page 55.
Paper guide and
release tab
Paper support Keep paper straight in the sheet feeder.
Power button • Turn the printer on or off.
Power supply connector Supply power to the printer.
USB cable connector Connect the printer to the computer.
USB card reader Transfer data from a memory card to your computer.
Make sure paper feeds correctly into the printer.
• Check the printer status. For more information, see “Understanding
error messages and flashing lights” on page 55.
Using memory cards (Lenovo 6110 only)
Most digital cameras use a memory card to store photos. You can in sert the memory card into your
printer and print your photos or save them on your computer.
Inserting a memory card
Your printer supports the following digi tal media:
• CompactFlash Type I and Type II
• IBM Microdrive
• Secure Digital
• MultiMedia Card
• Memory Stick
• SmartMedia
Using memory cards (Lenovo 6110 only)
7
Page 8
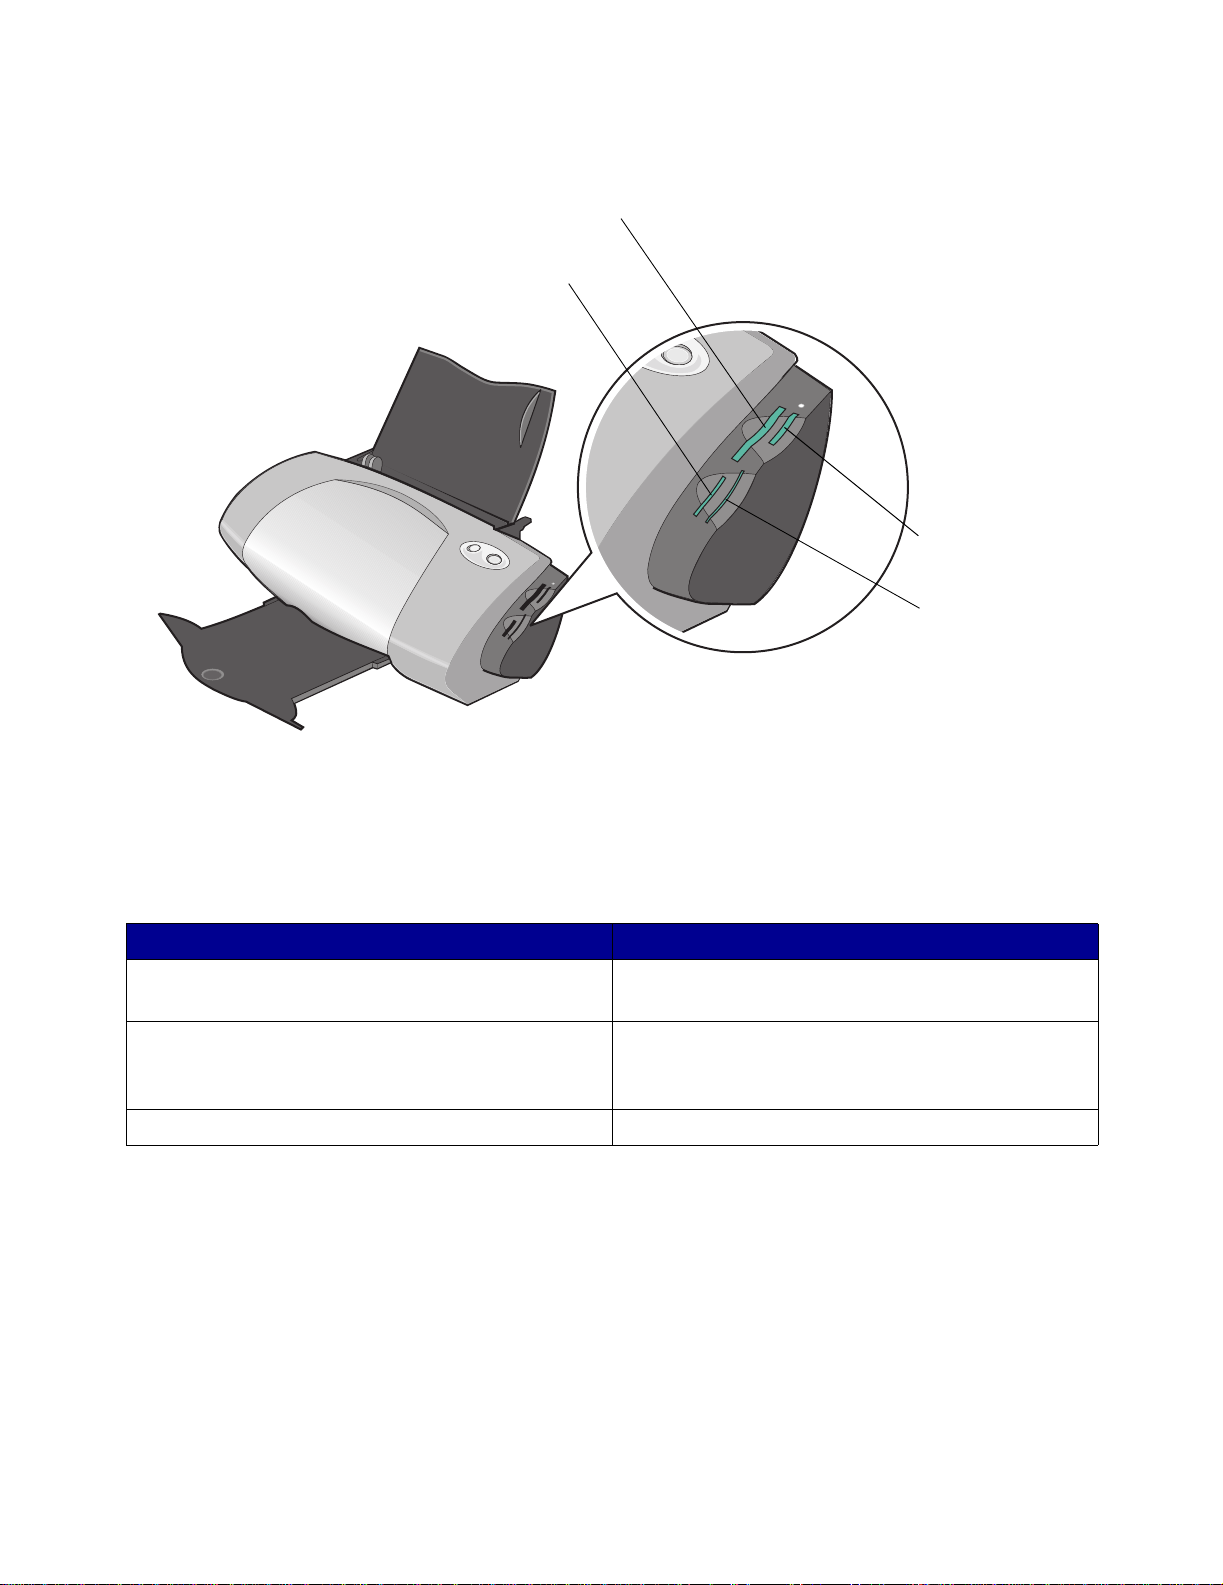
The USB card reader on your printer has four slots to accommodate these media. This illustration
shows you where to insert each of the supported memory cards.
CompactFlash Type I and
Type II, IBM Microdrive
Secure Digital,
MultiMedia Card
Memory Stick
SmartMedia
Before y ou insert your memory card, consider the following information:
• Insert only one memory card at a time.
• A small light on top of the card reader com es on once your card is properly installed.
If you are inserting a memory card of this type: Make sure:
• CompactFlash Type I and II
• IBM Microdrive
•Memory Stick
• Secure Digital
• MultiMedia Card
• SmartMedia The gold contact area faces toward the printer.
The name label faces toward the printer.
The gold contact area faces away from the printer.
Using the printer software
Your printer soft wa re w orks wi th your operating system to print documents wit h superior r esult s. Thi s
software has two parts: the Printer driver and the Lenovo Solution Center.
Using the printer software
8
Page 9
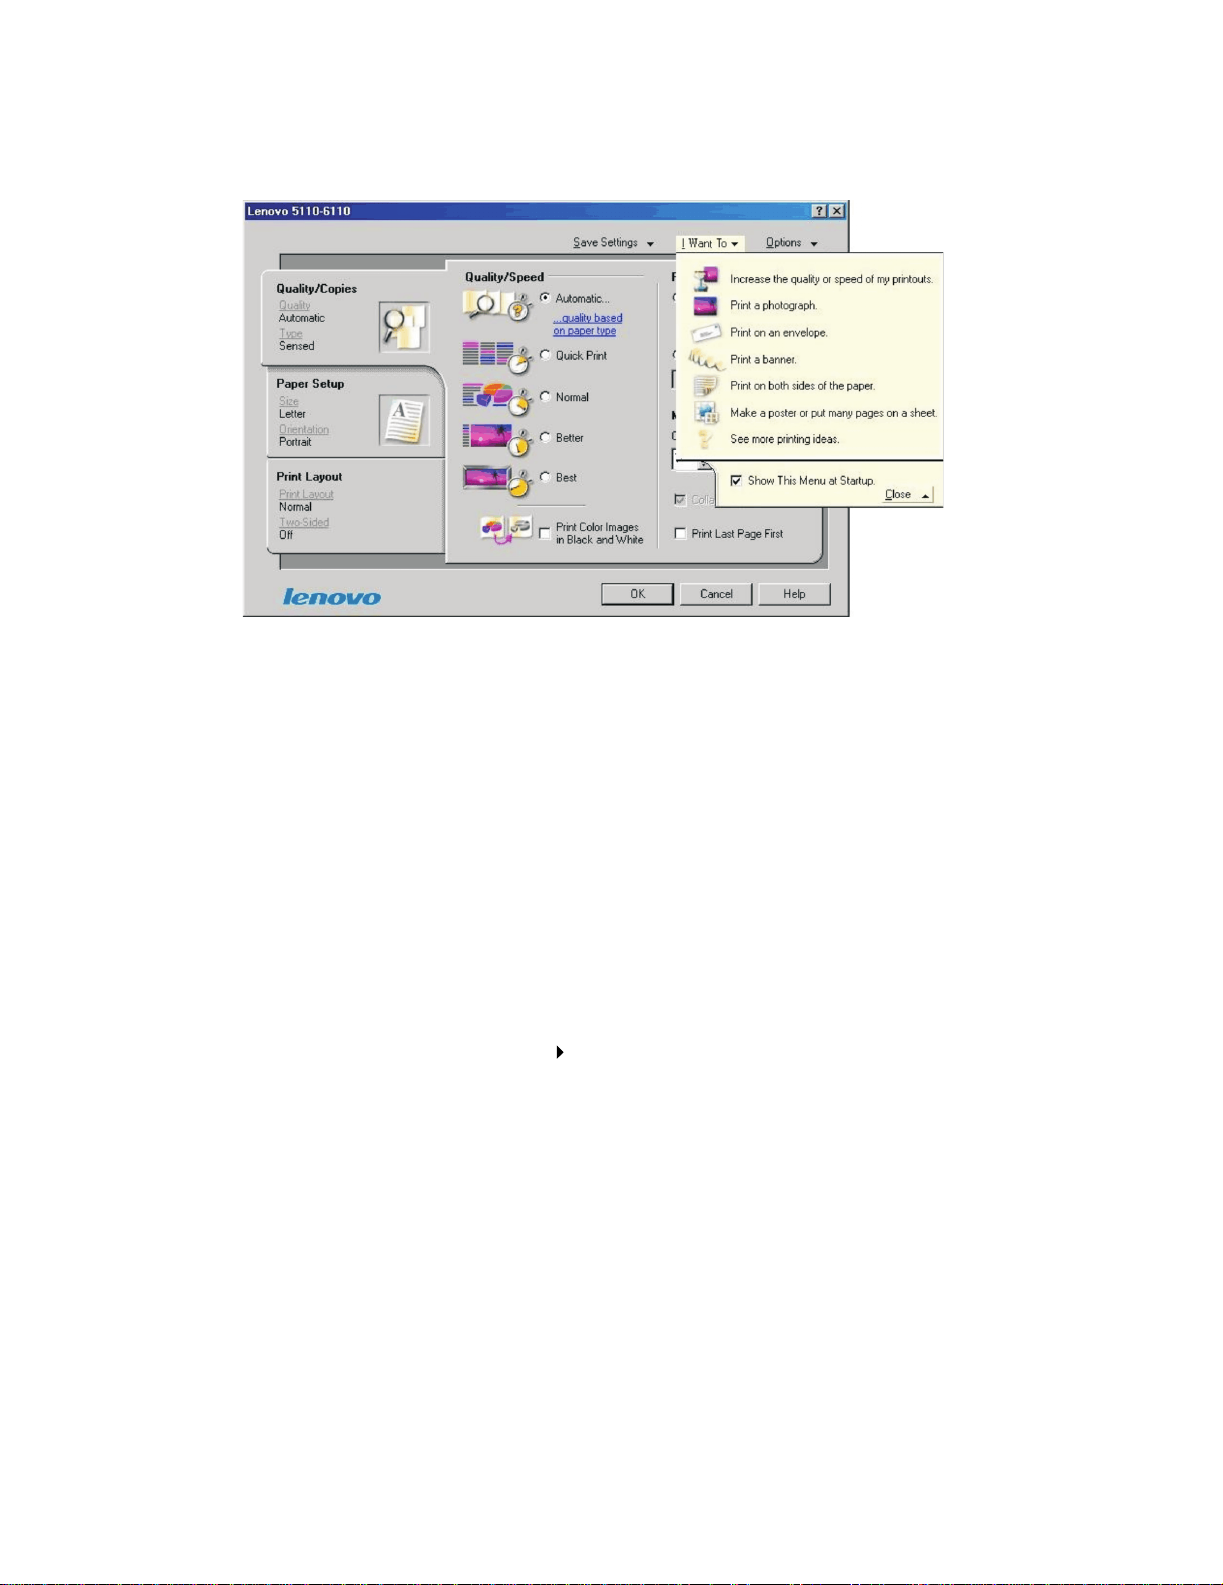
Printer driver
You can change your printer settings in the printer driver. To print a typical document on plain paper,
you do not need to change your printer settings. When you install the printer software, th e Print
Properties are set to these default settings:
• Paper Type: Use Printer Sensor
• Quality/Speed: Autom atic
• Paper Size: A4 or Letter
• Orientation: Portrait
• Layout : Normal
For more inf ormation about the printer settings f or diff erent types of print jobs , see “Printing ideas” on
page 13.
Customizing the settings for your document
1 With your document open, click File Print.
The Print dialog box appears.
2 From the Print dialog box, click Properties, Preferences, or Options. 3 From the Quality/Copies tab, select a print quality setting. 4 From the Paper Setup tab, select a paper type and size setting. 5 From the Print Layout tab, change the layout of your document.
Using the printer software
9
Page 10
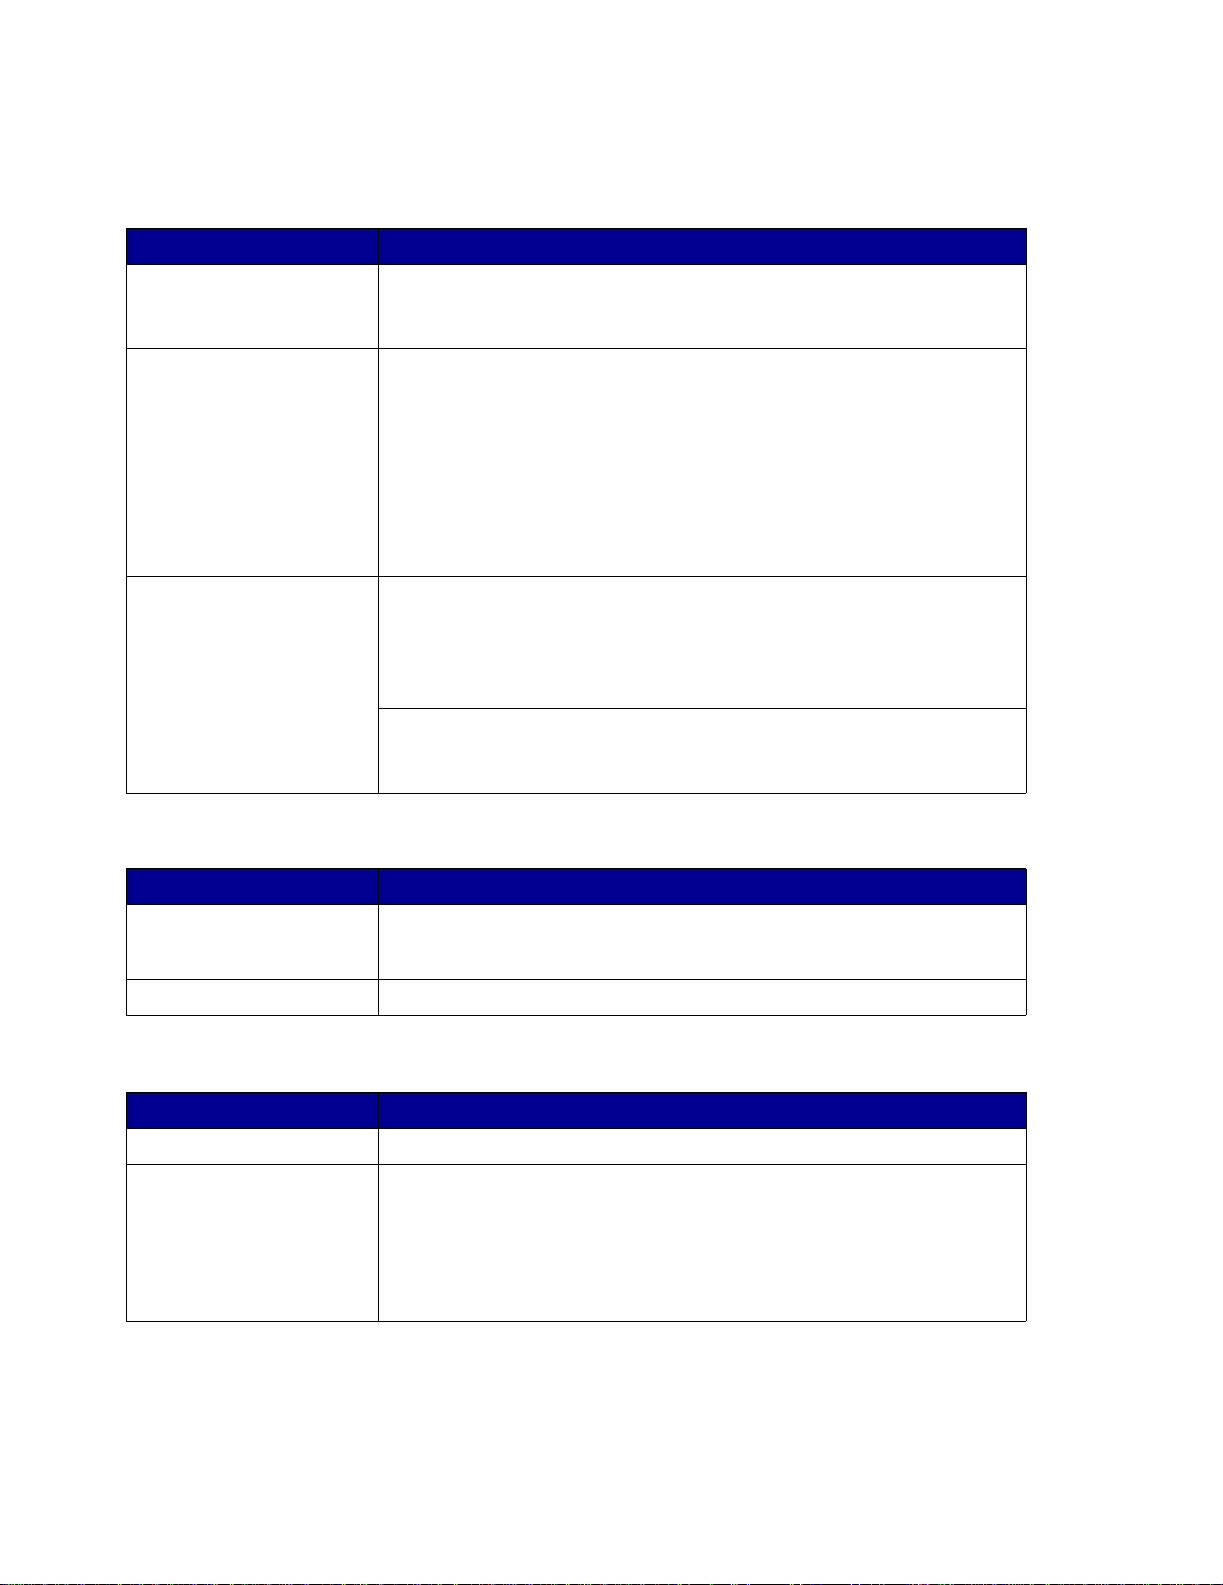
6 Click OK to apply your settings.
Quality/Copies tab
From: Select:
Paper Type • Use printer sensor when you want the paper type sensor to detect
the paper in your printer.
• Use my choice when you want to select the paper type.
Quality/Speed • Automatic when you want the printer to select the correct print
quality for the detected paper type.
• Quick Print when you want to print documents quickly, but with
reduced print quality.
• Normal when you want to print most documents on plain paper.
• Better when you want to print photos and documents containing
graphics on coated or glossy paper.
• Best when you want to print crisp photos and high resolution
graphics, but with reduced speeds.
Multiple Copies • Collate Copies if you want to print more than one copy of a
document. This option prints all the pages of the first copy, and then
all the pages of the second copy, and so on.
• Print Last Page First if you want to print the pages in reverse order.
• The number of copies you want to print.
Print Color Images in Black and White to save the ink in your color
cartridge.
Note: This option is not available if a black cartridge is not installed.
Paper Setup tab
From: Select:
Paper Size Paper, Envelope, Banner, or Borderless, and then select the size
specific to your paper type. If your paper size is not listed, select
Custom Size. For help, see page 41.
Orientation Portrait or Landscape.
Print Layout tab
From: Select:
Layout Normal, Banner, Mirror, N-up, Poster, or Booklet.
Duplexing • Two-Sided to print your document on both sides of the page.
• Side Flip or Top Flip to set which way the pages of your finished
documents turn.
Note: If you select Side Flip, the pages of your document turn like the
pages of a magazine. If you select Top Flip, the pages turn like the
pages of a legal pad.
Using the printer software
10
Page 11
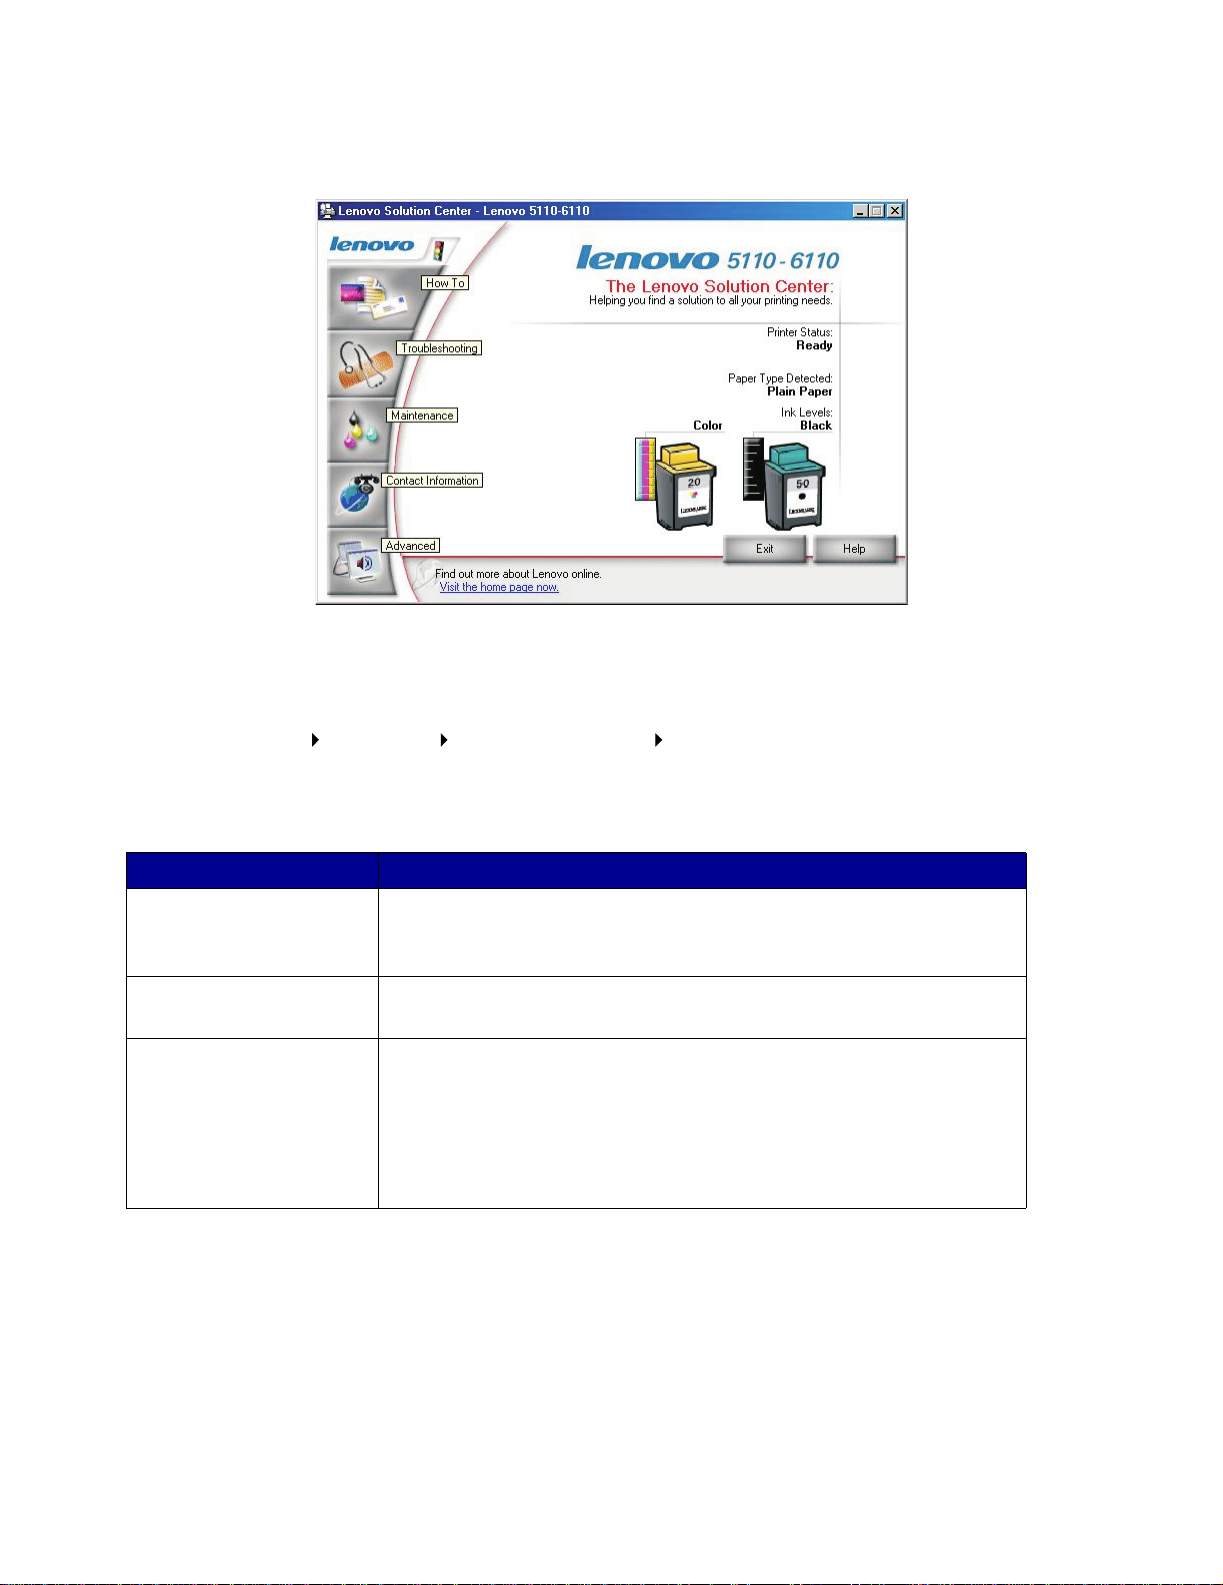
Lenov o Solution Center
The Lenovo 5110-6110 Solution Center (LSC) is a guide you can refer to for printer help.
There are two ways to open the LSC:
• Click Start Programs Lenovo 5110-6110 Lenovo 5110-6110 Solution Center.
• Double-click the Lenovo 5110-6110 Solution Center desktop icon.
The followi ng table describes the LSC tabs:
From this tab: You can:
How To • Receive printer information.
• Receive basic printing tips.
• Receive printing project information.
Troubleshooting • View tips for your printer status.
• View common troubleshooting topics.
Maintenance • Install a print cartridge.
• View information about how to purchase new cartridges.
• Clean the print cartridge nozzles.
• Align the cartridges.
• Solve other problems.
Note: Do not click this tab while a job is in progress.
Using the printer software
11
Page 12

From this tab: You can:
Contact Information • View information about ordering supplies.
• Receive contact information for Lenovo Customer Support.
Advanced • Change printing status appearance options.
Using the paper type sensor
Your printer has a paper type sensor that detects these paper types:
• Plain paper
• Transparencies
• Coated paper
• Glossy/Photo paper
If you want the printer to select your paper type:
1 With your document open, click File Print.
The Print dialog box appears.
2 From the Print dialog box, click Properties, Preferences, or Options. 3 From the P r int Properties dialog box, select the Quality/Copies tab. 4 From the Paper Type area, select Use printer sensor.
Note: Your printer can detect the type of paper y ou are using; it cannot detect the paper
size.
If you want to turn the paper type sensor of f and select your paper type:
1 With your document open, click File Print.
The Print dialog box appears.
2 From the Print dialog box, click Properties, Preferences, or Options. 3 From the P r int Properties dialog box, select the Quality/Copies tab. 4 From the Paper Type area, select Use my choice.
Using the paper type sensor
12
Page 13
2
Printing ideas
Printing on plain paper
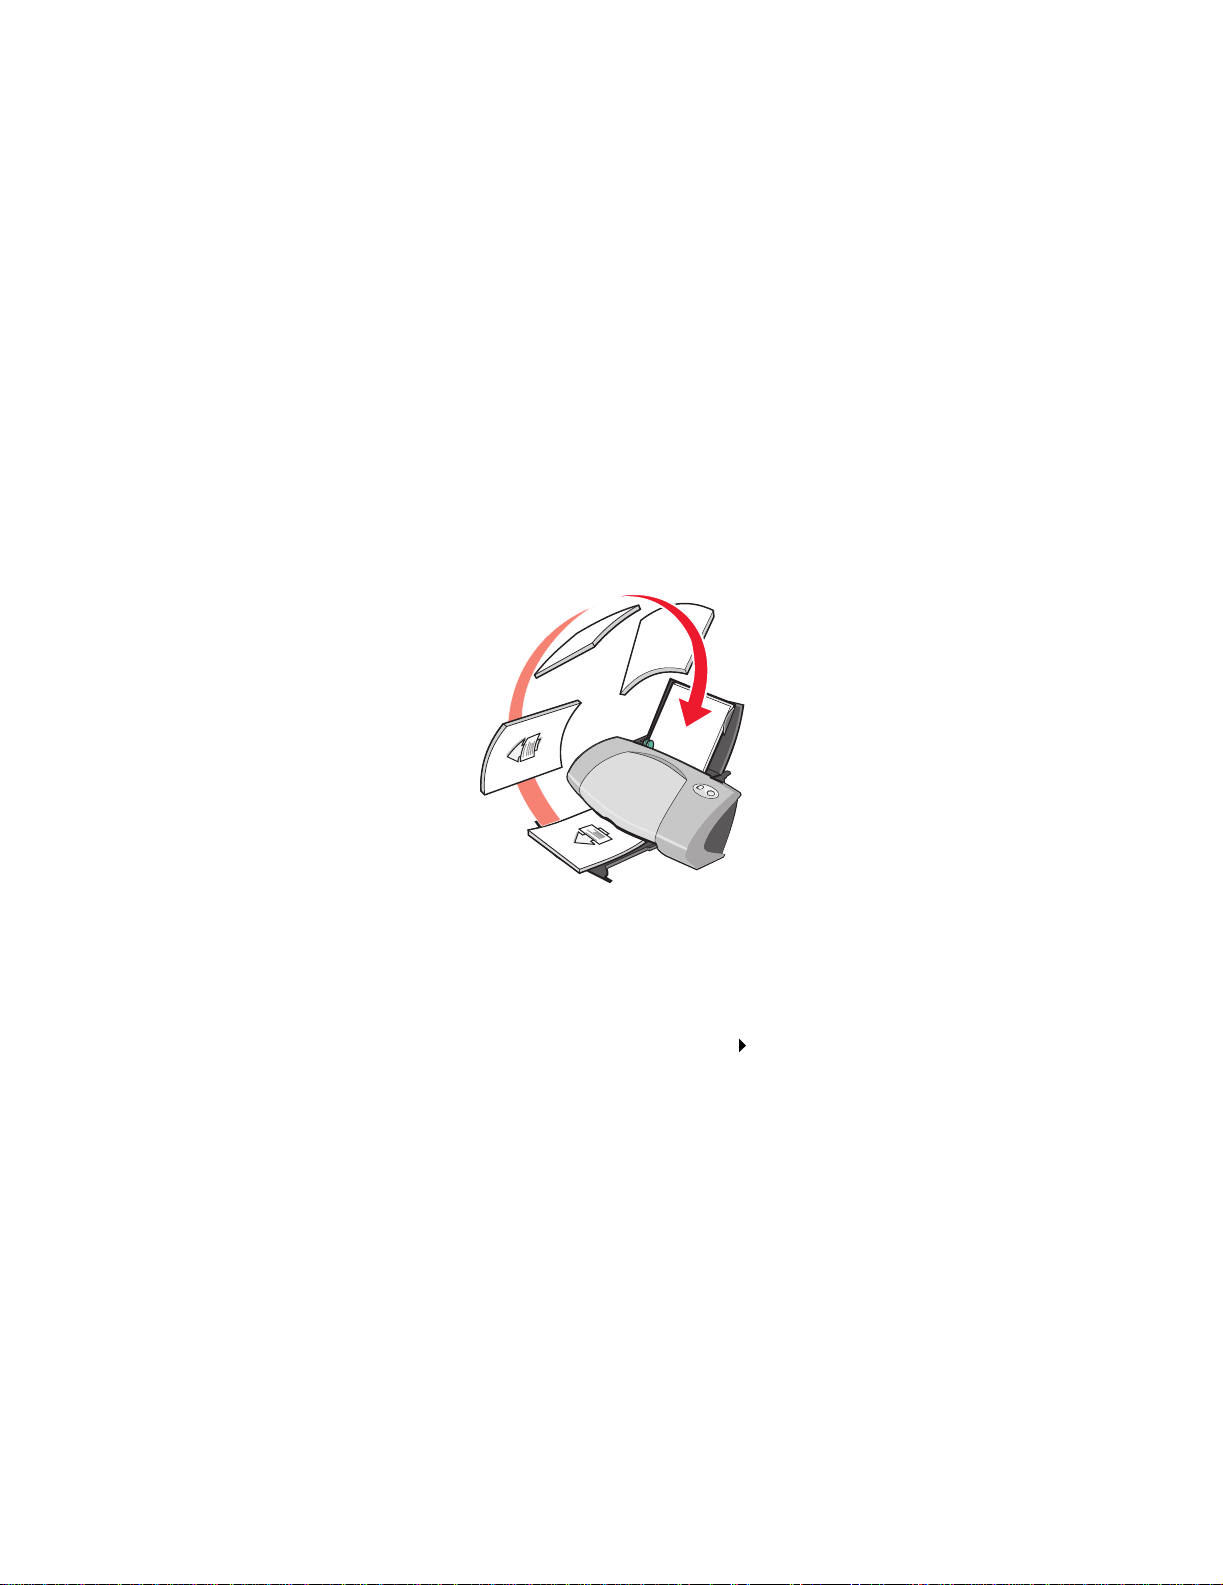
You can load up to 100 sheets of plain paper at a time, depending on the thickness of the paper.
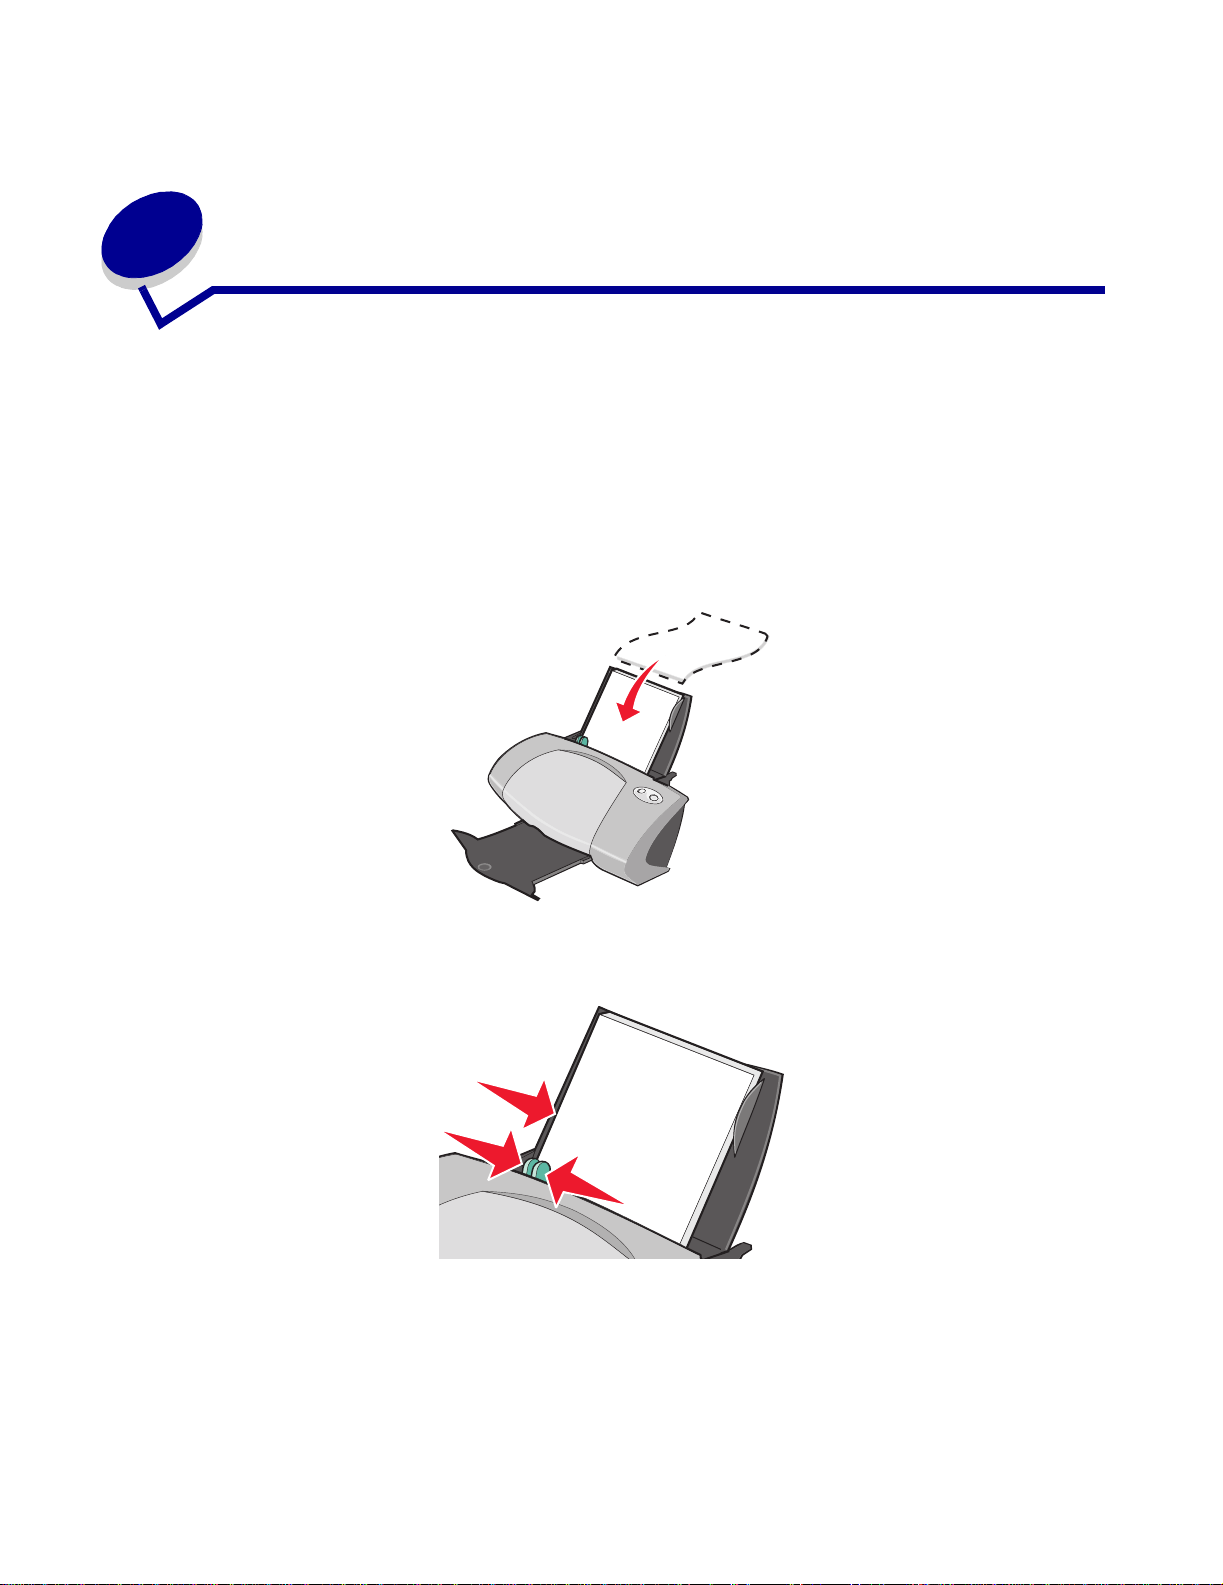
Step 1: Load the paper
• Load the paper vertically against the right side of the paper support.
• Do not force the paper into the printer.
• Squeeze and slide the paper guide to the left side of the paper.
Note: If you are using letter size paper , adjust ing the paper guide ma y not be necessary.
Printing ideas
13
Page 14

Step 2: Customize the print settings
If you are using plain A4 or letter size paper, and you want to print with normal print quality, you do
not need to adjust the settings.
If you are using specialty media, follow the steps for your paper typ e.
Step 3: Print your document
Click OK.
Printing photos
For the best photo printing results, we recommend you use:
• The photo software included with your printer .
• A photo cartridge. For more information on car tr idges, see page 43.
• Photo paper.
Note: Y ou may w ant to print on plain paper before lo ading your photo paper and changing
your settings. To print on photo cards, see page 19.
If you want to print a borderless photo using another software program, you may need to manually
adjust settings such as:
• Paper size
• Page margins
• Image size
Refer to y our other software program’s documentation for more information.
Step 1: Load the photo paper
• For best results, use photo paper that is made for inkj et printers. You can also use coated or
glossy paper. You can load up to 25 sheets at a time, depending on the thickness of the
paper.
• If your paper includes instructi ons, read them carefully.
Printing photos
14
Page 15
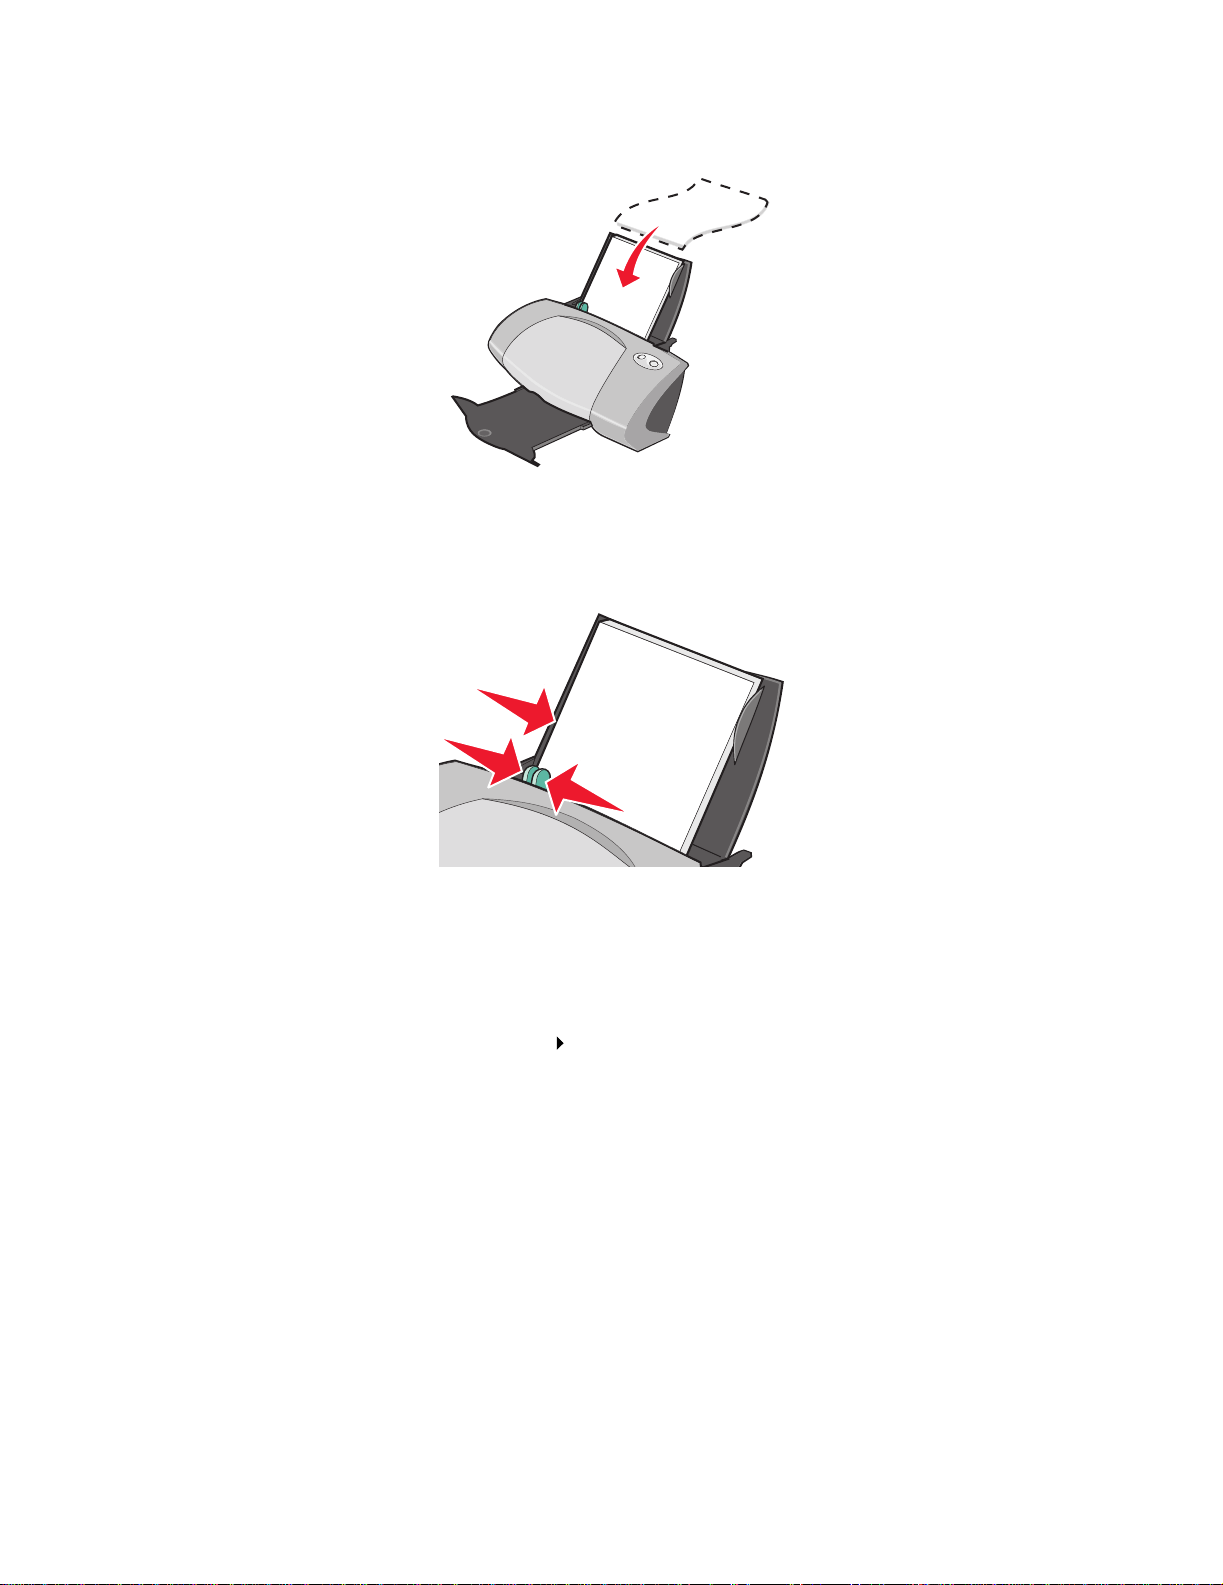
• Load the photo paper vertically against the right side of the paper support.
• Make sure the glossy or coated side is facing you.
• Do not force the paper into the printer.
• Squeeze and slide the paper guide to the left side of the photo paper .
Note: If you are using letter size paper , adjust ing the paper guide ma y not be necessary.
Step 2: Customize the print settings
1 With your document open, click File Print.
The Print dialog box appears.
2 From the Print dialog box, click Properties, Preferences, or Options. 3 Select a paper size:
a From the P r int Properties dialog box, select the Paper Setup tab.
b From the Paper Size area, select:
– Borderless if y ou want to print a borderless photo. The size of the paper you are
using and the size of the photo you want to print must be the same.
– Paper if you do not want the printer to print to the edges of the paper.
Printing photos
15
Page 16
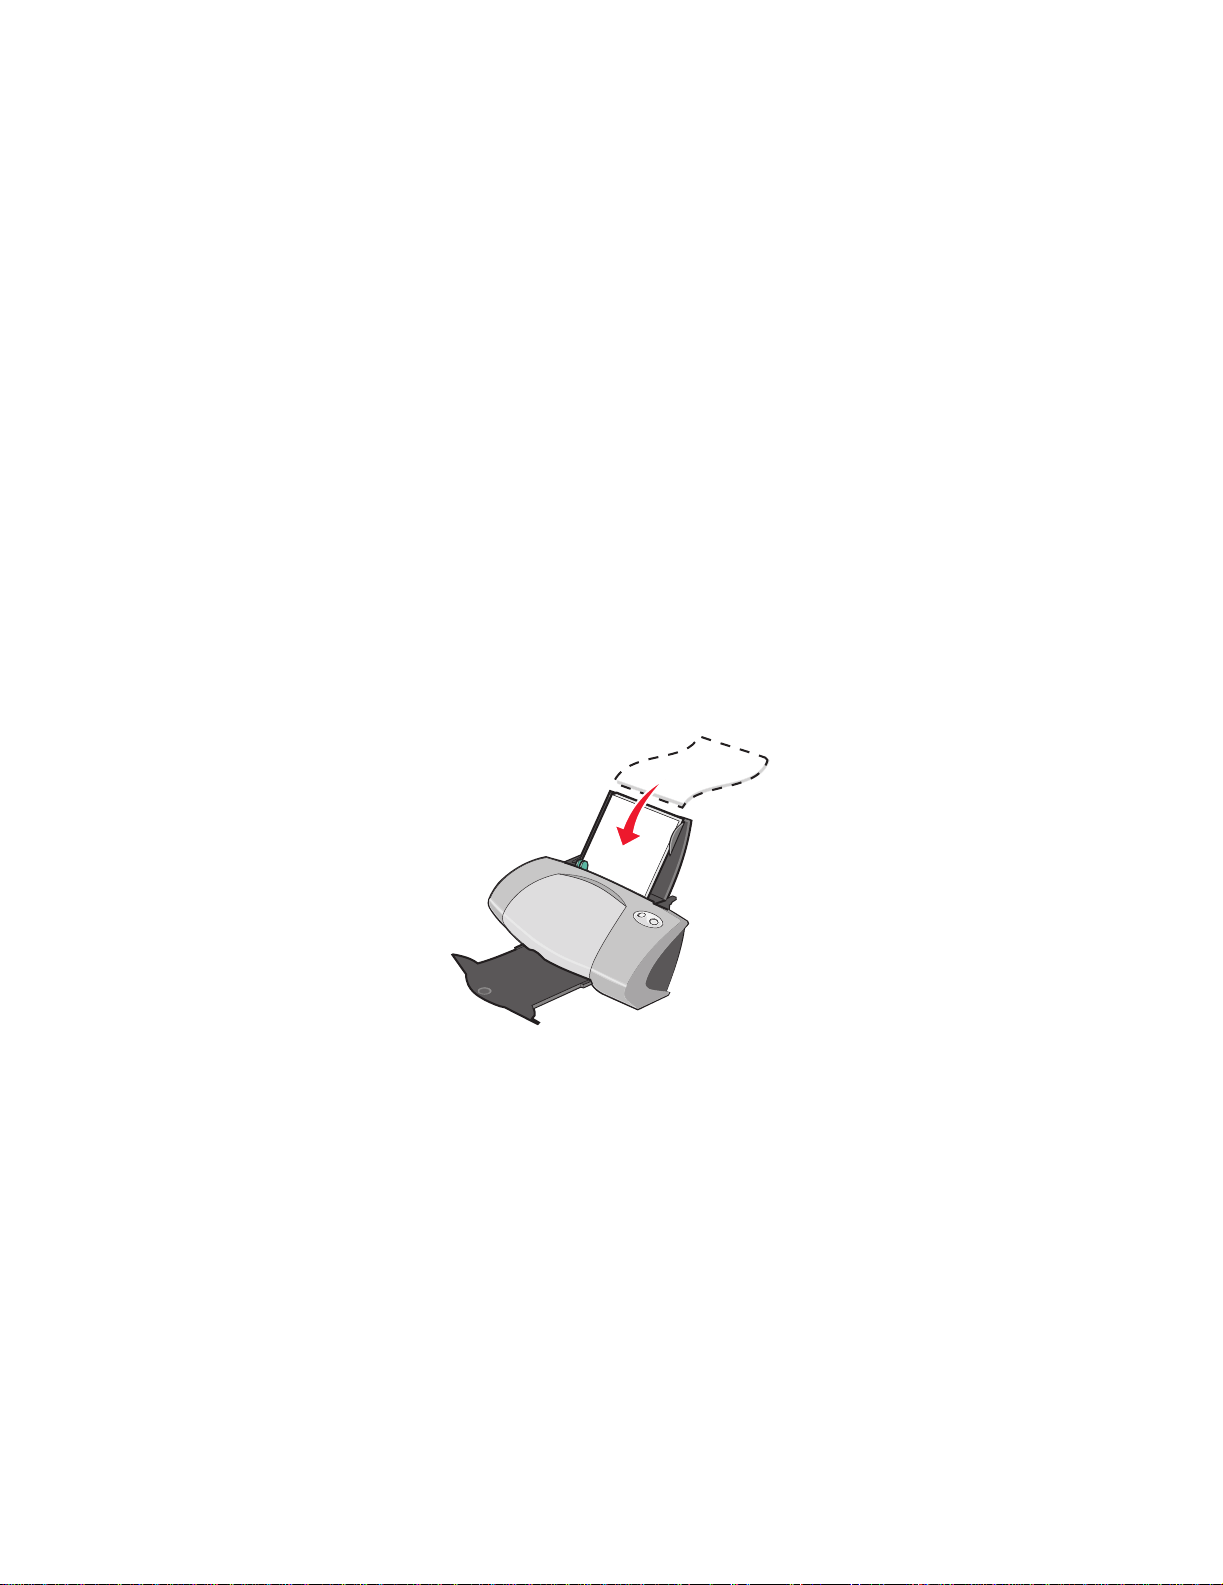
c From the Paper Size menu, select the correct size . F or more inf ormation about printing on
custom size paper, see page 41.
4 Click OK.
Step 3: Print your photos
Click OK.
Note: To prevent smudging, remove each photo as it exits the printer, and then let it dry
before stacking.
Printing on premium or coated paper
You can load up to 100 sheets of premium paper at a time, depending on the thickness of the paper.
Step 1: Load the premium paper
• If your paper includes instructi ons, read them carefully.
• Load the premium paper vertically against the right side of the paper support.
• If there is a special mark on the paper, make sure the mark is facing away from you.
• Do not force the paper into the printer.
Printing on premium or coated paper
16
Page 17
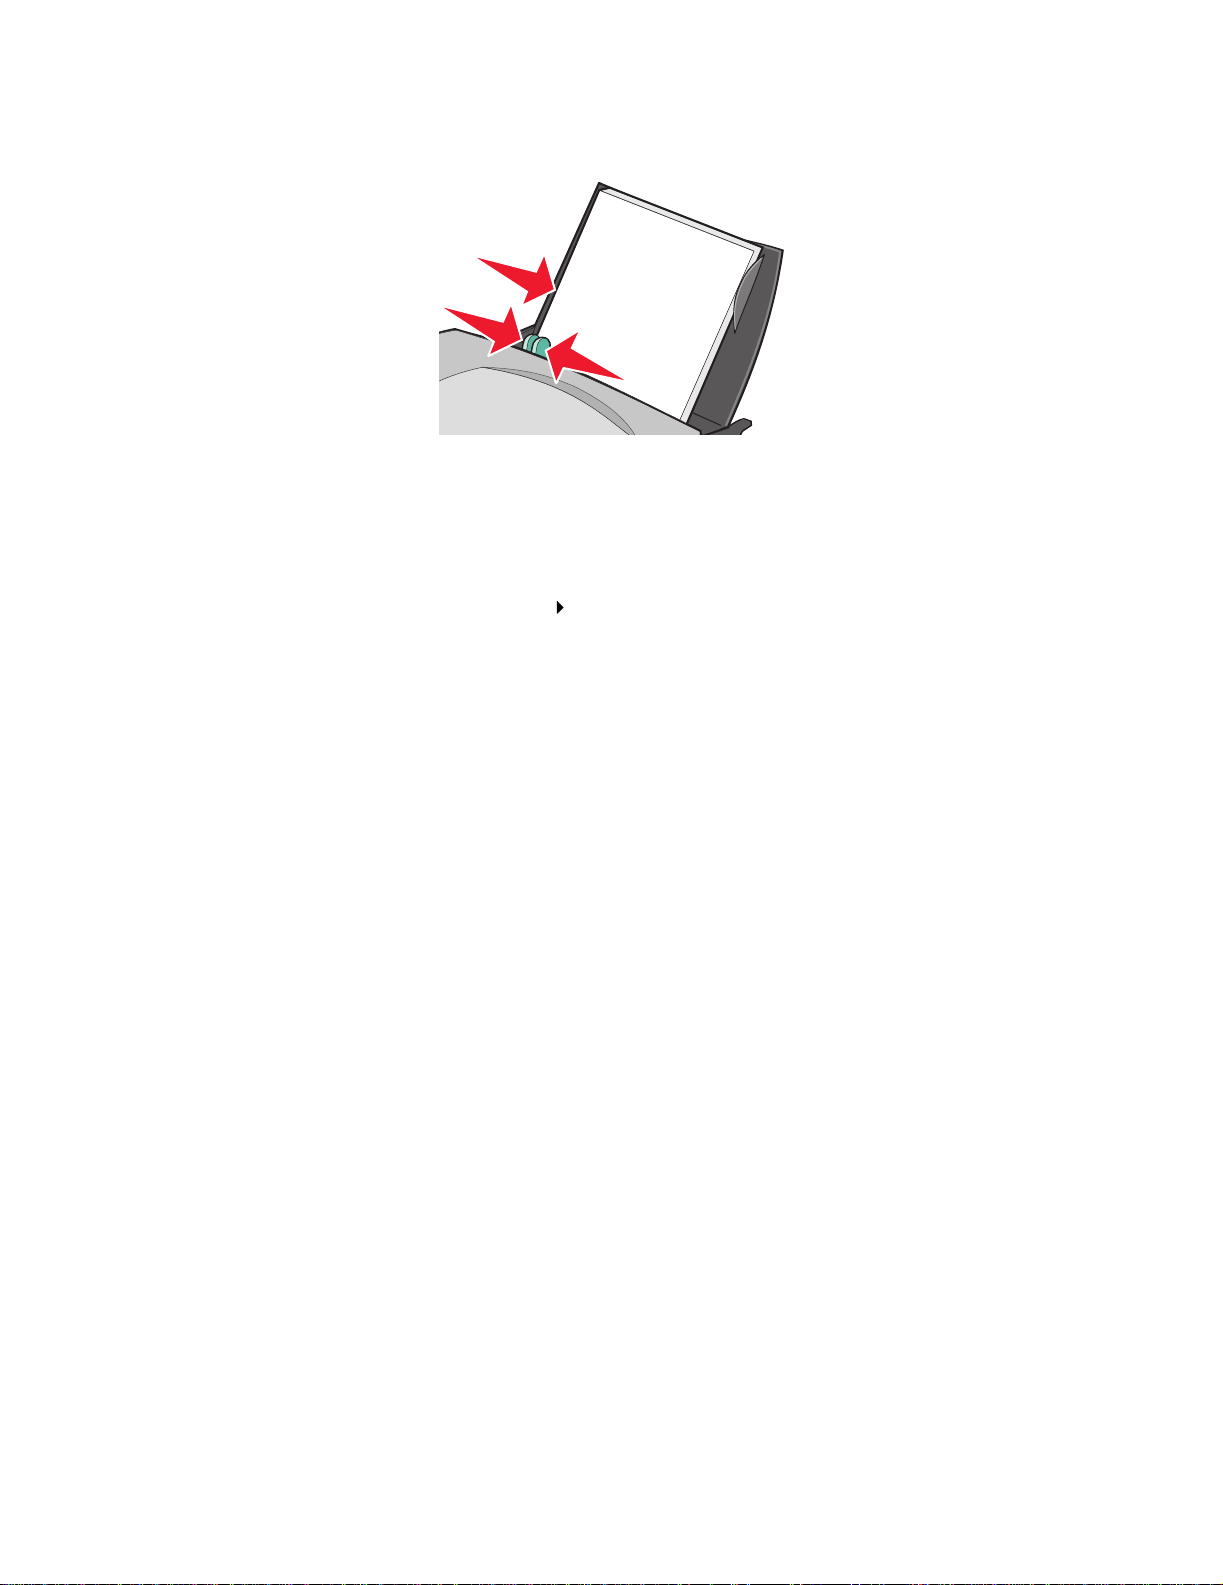
• Squeeze and slide the paper guide to the left side of the paper.
Note: If you are using letter size paper , adjust ing the paper guide ma y not be necessary.
Step 2: Customize the print settings
1 With your document open, click File Print.
The Print dialog box appears.
2 From the Print dialog box, click Properties, Preferences, or Options. 3 Select a paper size:
a From the P r int Properties dialog box, select the Paper Setup tab.
b From the Paper Size area, select Paper.
c From the Paper Size menu, select the correct size . F or more inf ormation about printing on
custom size paper, see page 41.
4 Click OK.
Step 3: Print your document
Click OK.
Note: The paper exit tray holds up to 50 sheets of premium paper. If you want to print
more than 50 pages, remov e the first 50 sheets from the paper e xi t tra y bef ore you
continue printing.
Printing on both sides of a sheet of paper
You can conserve paper by printing on both side s. Load up to 100 sheets of paper at a time,
depending on the thickness of the paper.
Printing on both sides of a sheet of paper
17
Page 18
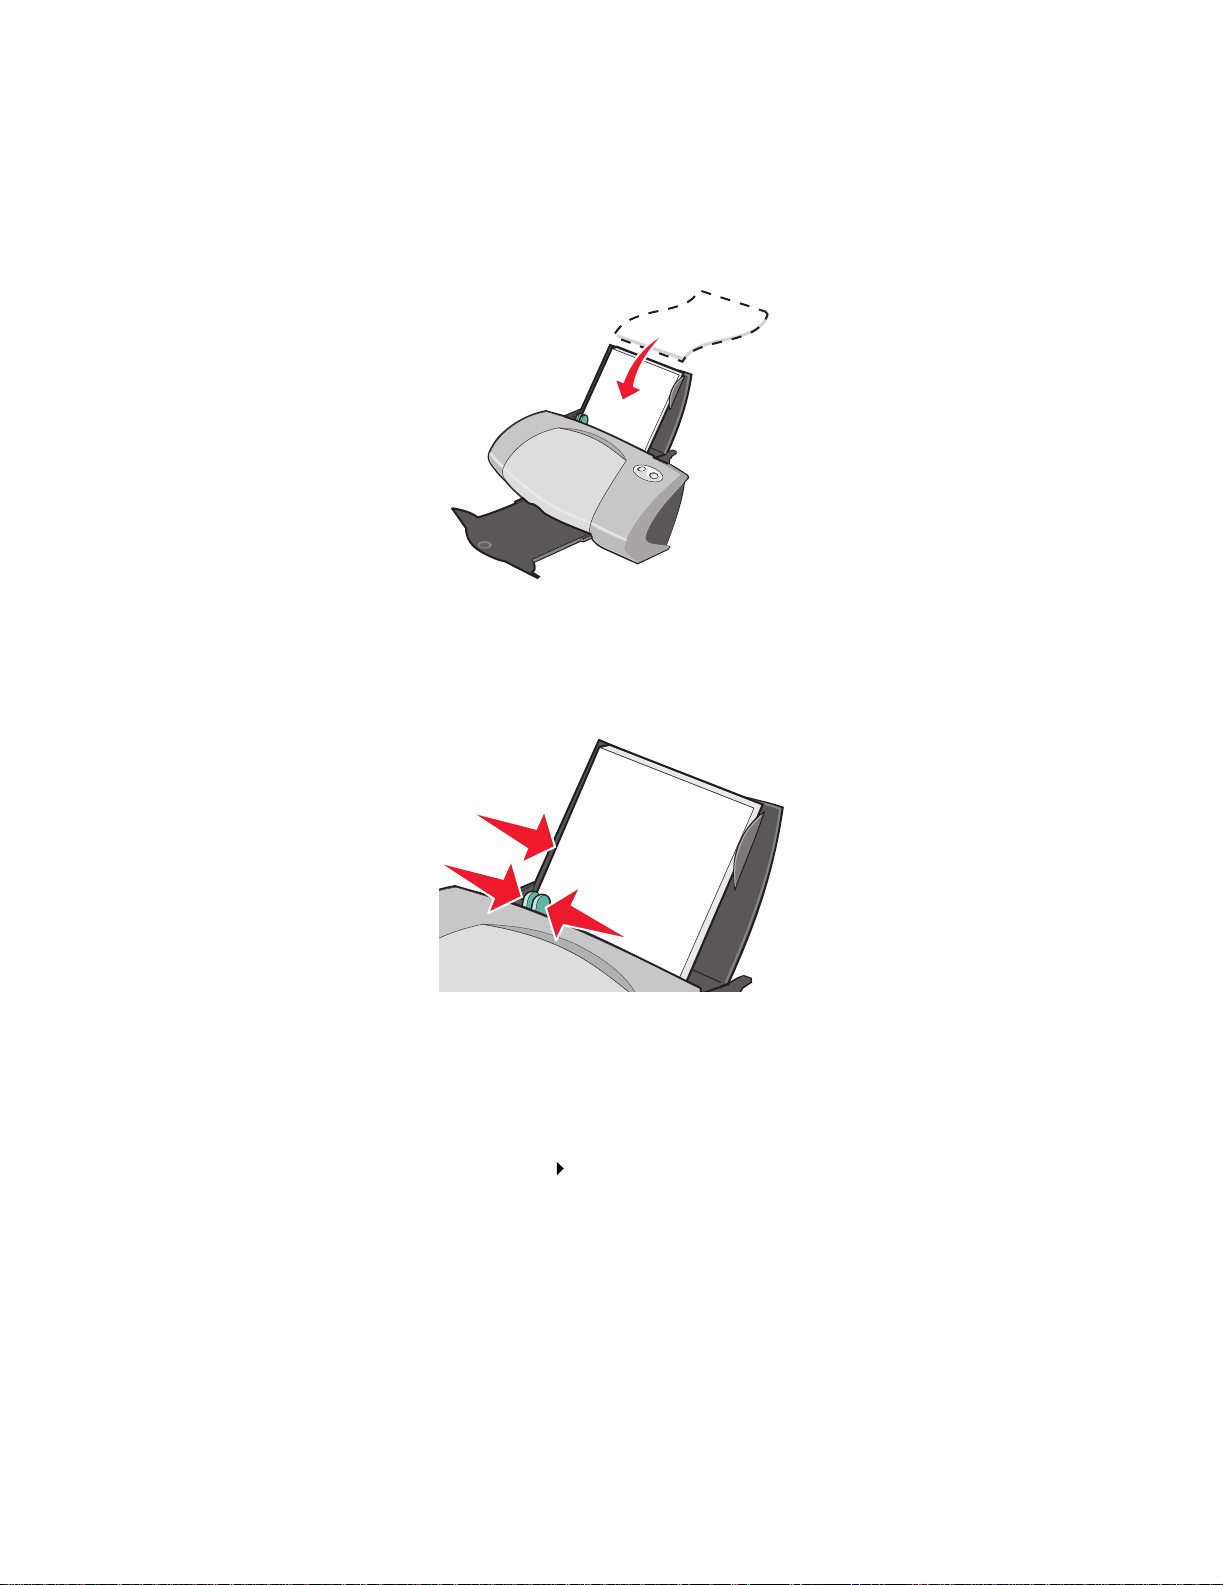
Step 1: Load the paper
Note: For the best print quality, use a heavier weight paper.
• Load the paper vertically against the right side of the paper support.
• Do not force the paper into the printer.
• Make sure the print side is f a cing you.
• Squeeze and slide the paper guide to the left side of the paper.
Note: If you are using letter size paper , adjust ing the paper guide ma y not be necessary.
Step 2: Customize the print settings
1 With your document open, click File Print.
The Print dialog box appears.
2 From the Print dialog box, click Properties, Preferences, or Options. 3 Print on both sides of the page:
a From the P r int Properties dialog box, select the Print Layout tab.
b From the Duplexing area , select Two-Sided.
Printing on both sides of a sheet of paper
18
Page 19
c Select Side Flip or Top Flip.
If you select Side Flip, the pages of your document turn like the pages of a magazine. If
you select Top Flip, the pages turn like the pages of a legal pad.
4 Further customize your document f ollowing the steps f or your paper type. 5 Click OK.
Step 3: Print your document
Click OK.
The odd-numbered pages print first, along with a reload ing instruction page. When the
odd-numbered pages finish printing, the printer software prompts you to rel oad the paper.
1 Load the stac k of paper and r eloa ding inst ruction page wi th t he p rinted si de facing away fr om
you and the arrows pointing down into the paper support.
2 Click Continue Printing.
The even-numbered pages print.
If you do not want to print the reloadi ng instruction page:
1 From the Print Properties dialog box, click Options Style Options. 2 Clear the Print Instruction page to assist in reloading check box. 3 Click OK.
Printing cards
You can load up to 25 g reeti ng ca rds , index cards, photo cards, or po stca rds at a t ime , depending o n
the thickness of the cards.
Printing cards
19
Page 20
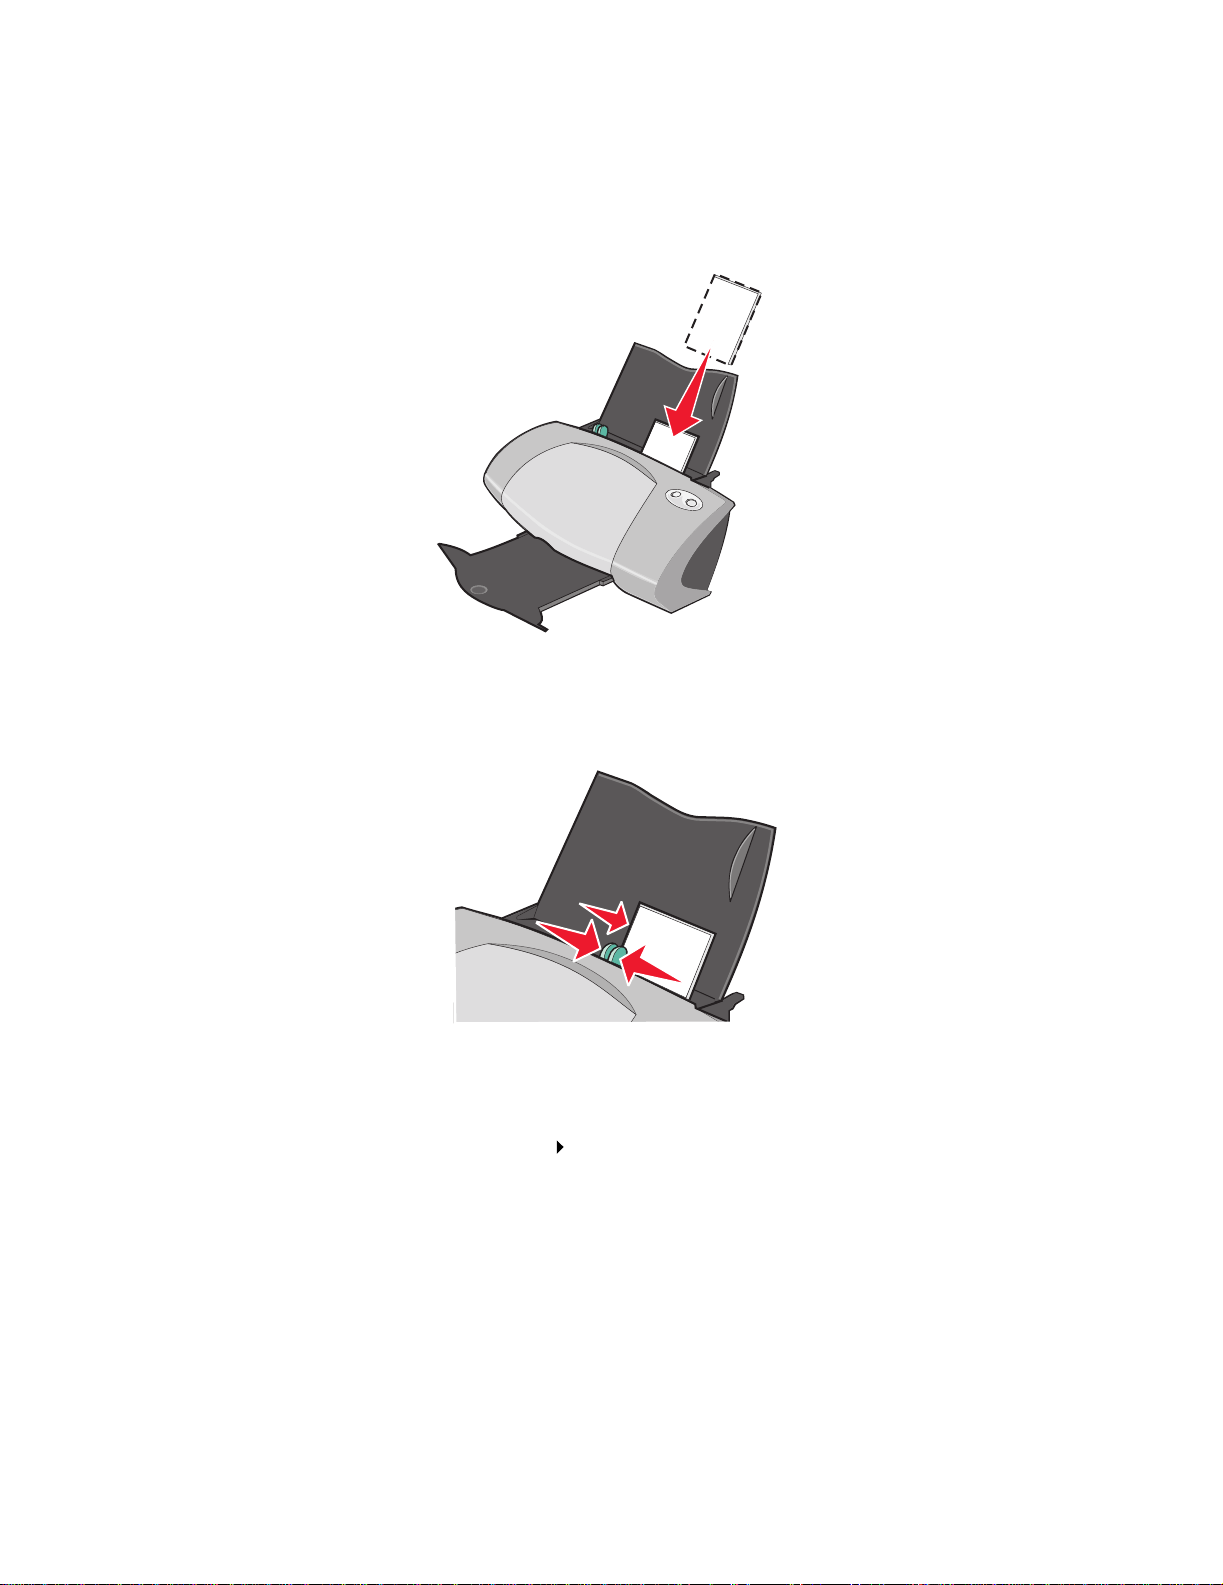
Step 1: Load the cards
• If your cards include instructions, read them carefully.
• Load the cards vertically against the right side of the paper support.
• Make sure the print side is f a cing you.
• Do not force the cards in to the printer.
• Squeeze and slide the paper guide to the lef t side of the cards.
Step 2: Customize the print settings
1 With your document open, click File Print.
The Print dialog box appears.
2 From the Print dialog box, click Properties, Preferences, or Options. 3 Select a paper size:
a From the P r int Properties dialog box, select the Paper Setup tab.
b From the Paper Size area, select:
Printing cards
20
Page 21
– Borderless if y ou want to print a borderless photo. The size of the paper you are
using and the size of the photo you want to print must be the same.
– Paper if you do not want the printer to print to the edges of the paper.
c From the Paper Size menu, select the correct size . F or more inf ormation about printing on
custom size paper, see page 41.
4 Click OK.
Step 3: Print your cards
Click OK.
Printing envelopes
You can load up to 10 envelopes at a time , depending on the thickness of the envelopes.
Step 1: Load the envelopes
Note: Do not use envelopes with holes, windows, deep embossing, metal clasps, string
ties, or folding bars.
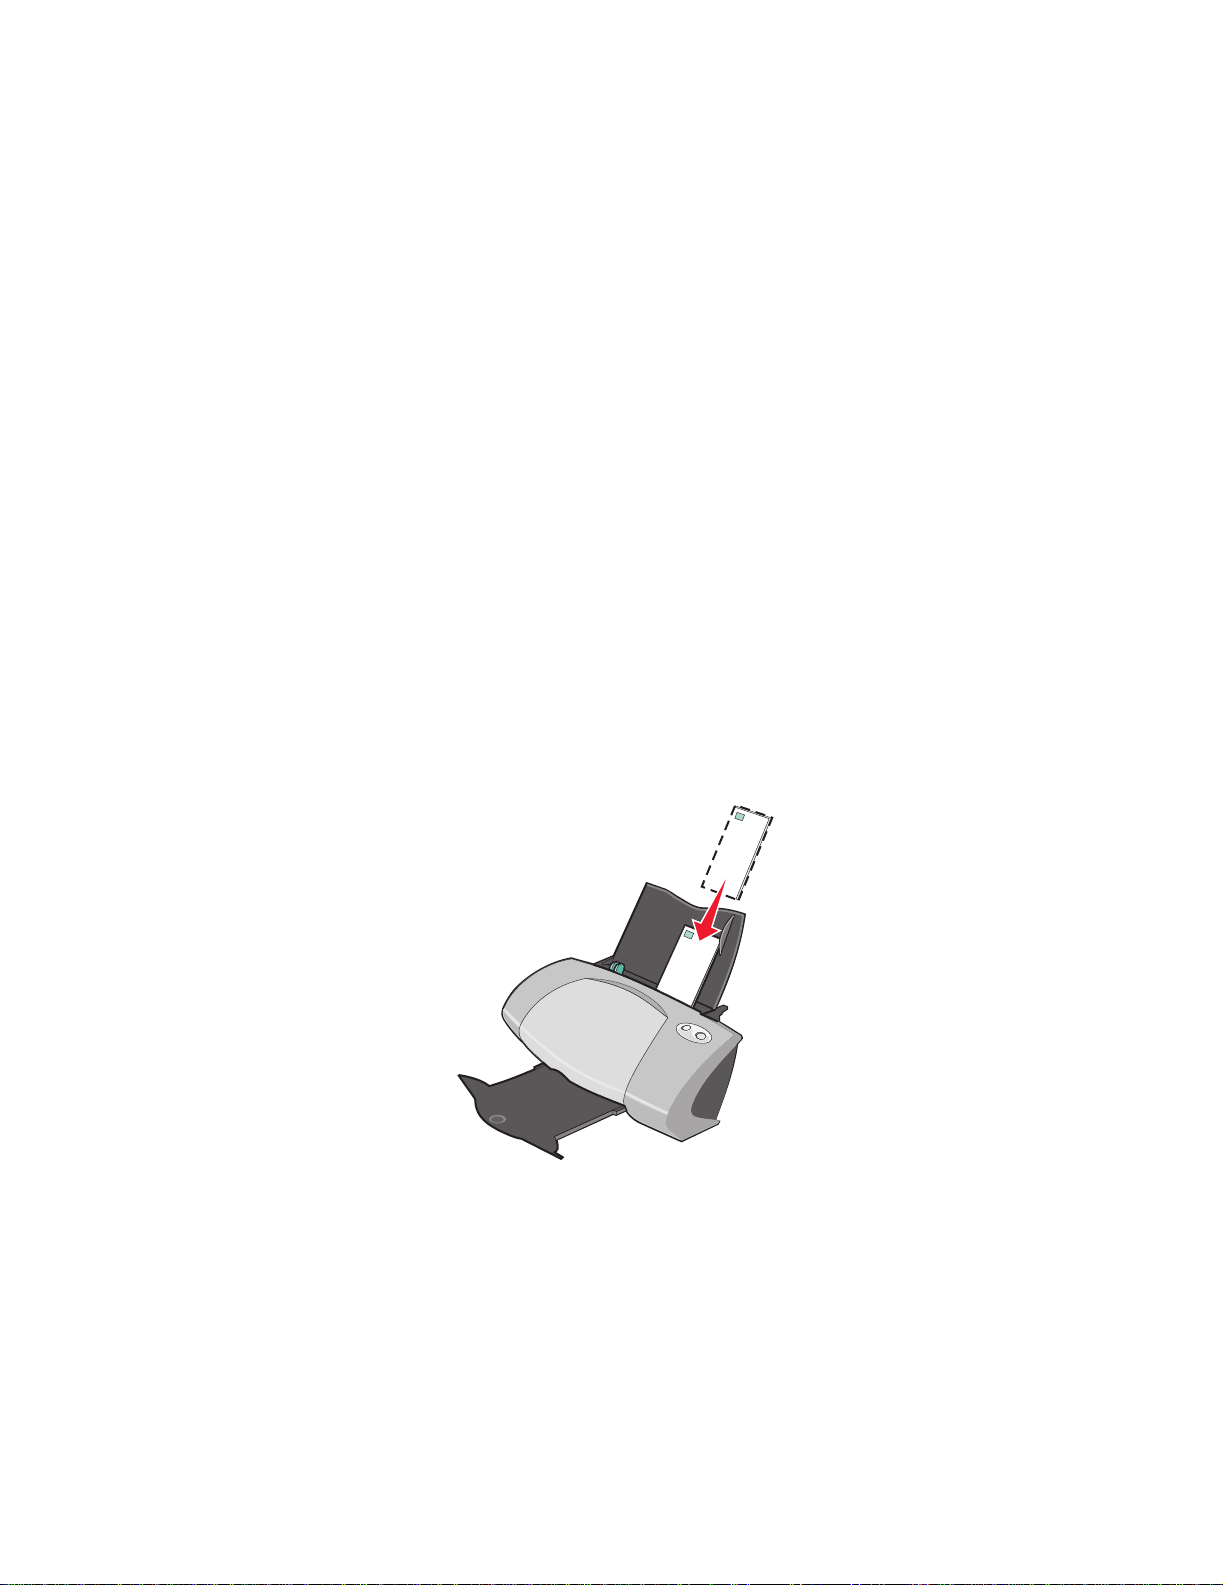
• Load the envelopes vertically against the right side of the paper support.
• Make sure the print side is f a cing you.
• Make sure the stamp location is in the upper left corner.
• Do not force the en velopes into the printer.
Printing env el o pe s
21
Page 22
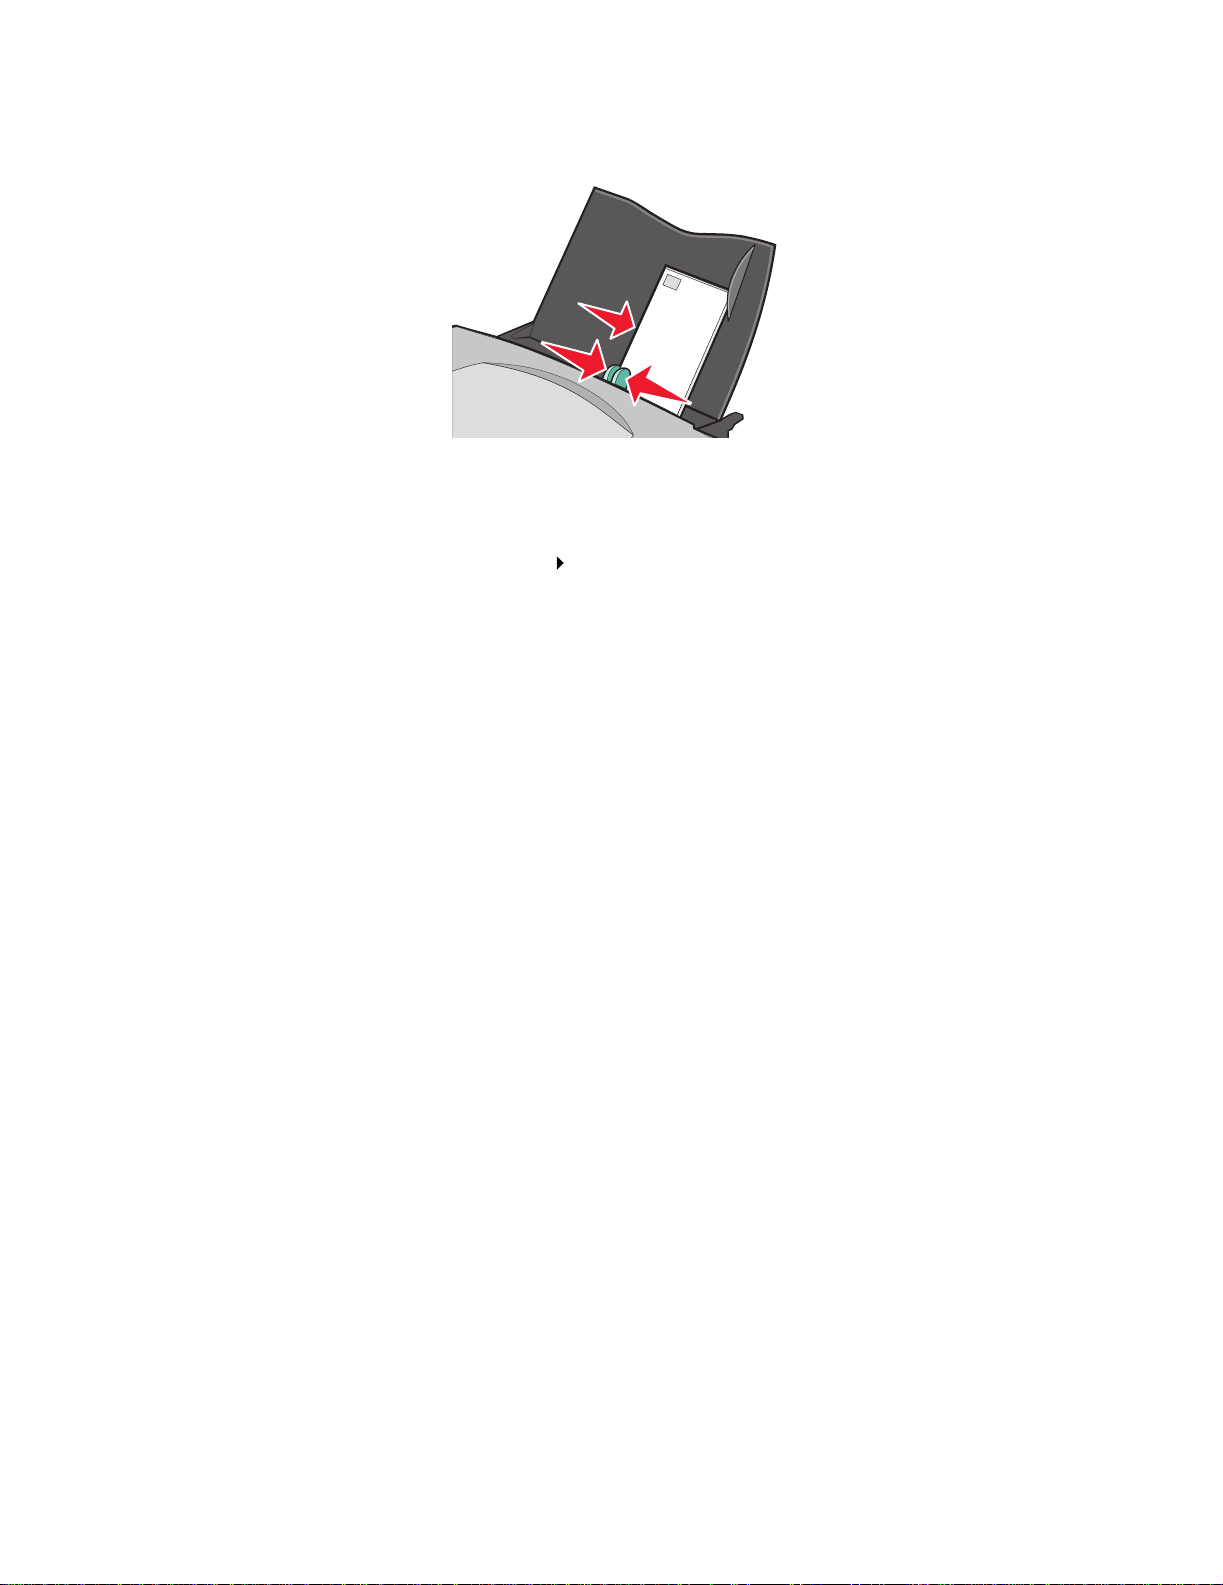
• Squeeze and slide the paper guide to the left side of the envelopes.
Step 2: Customize the print settings
1 With your document open, click File Print.
The Print dialog box appears.
2 From the Print dialog box, click Properties, Preferences, or Options. 3 Select an envelope size:
a From the P r int Properties dialog box, select the Paper Setup tab.
b From the Paper Size area, select Envelope.
c From the Envelope Siz e menu, select the correct size. For more information about
printing on custom size paper, see page 41.
4 Select the orientation:
a From the P r int Properties dialog box, select the Paper Setup tab.
b From the Orientation area, select Landscape.
5 Click OK.
Note: Many software programs are designed to override the settings in Paper Setup.
Make sure landscape orientation is selected in your software program.
Step 3: Print your envelopes
Click OK.
Note: The paper exit tray holds up to 10 envelopes. If you want to print more than 10
envelopes, remove the first 10 from the paper exit tray before the others print.
Printing env el o pe s
22
Page 23
Printing color images in black and white
You can load up to 100 sheets of paper at a time, depending on the thickness of the paper.
Printing color images in black helps to conserve ink in your color print cartridge.
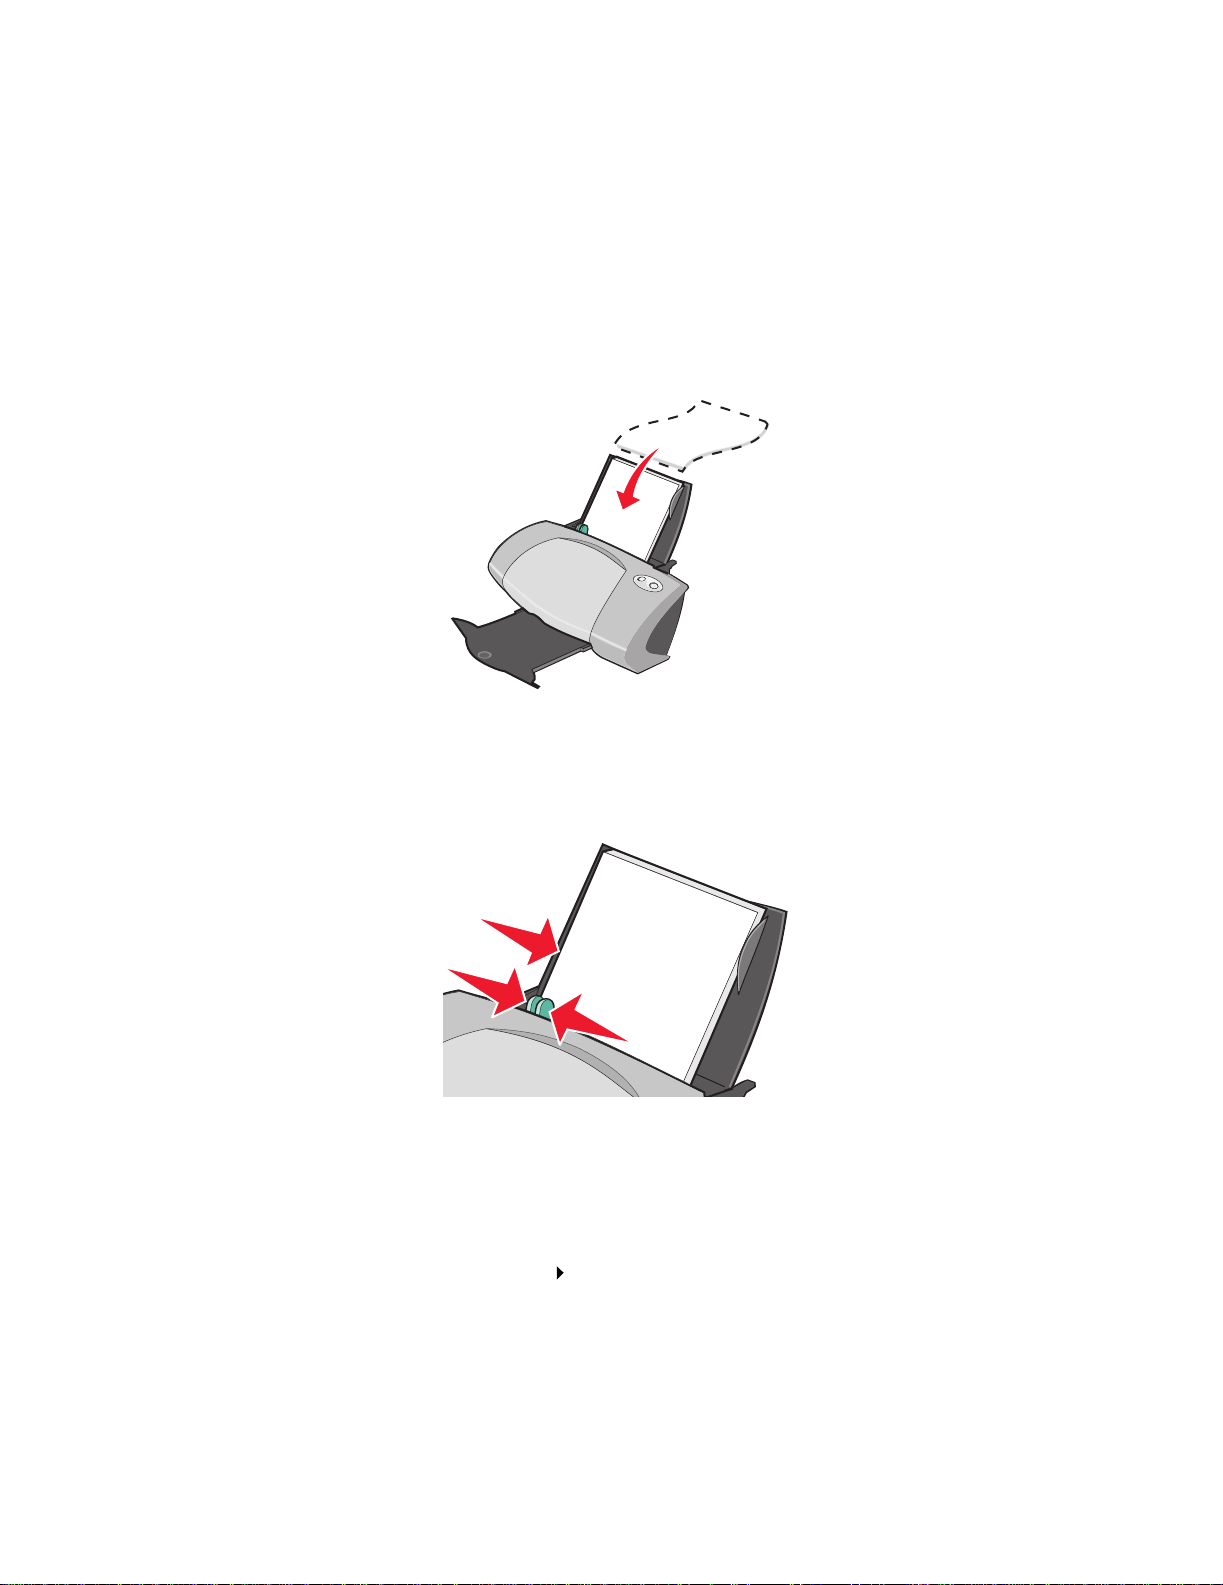
Step 1: Load the paper
• Load the paper vertically against the right side of the paper support.
• Make sure the print side is f a cing you.
• Do not force the paper into the printer.
• Squeeze and slide the paper guide to the left side of the paper.
Note: If you are using letter size paper , adjust ing the paper guide ma y not be necessary.
Step 2: Customize the print settings
1 With your document open, click File Print.
The Print dialog box appears.
2 From the Print dialog box, click Properties, Preferences, or Options.
Printing color images in black and white
23
Page 24
3 To print color images in black and white :
a From the P r int Properties dialog box, select the Quality/Copies tab.
b Select Print Color Images in Black and White.
4 Further customize your document f ollowing the steps f or your paper type. 5 Click OK.
Step 3: Print your document
Click OK.
Note: The paper exit tra y holds up to 50 sheets of plain paper. If you want to print more ,
remove the first 50 sheets from the paper exit tray before the others print.
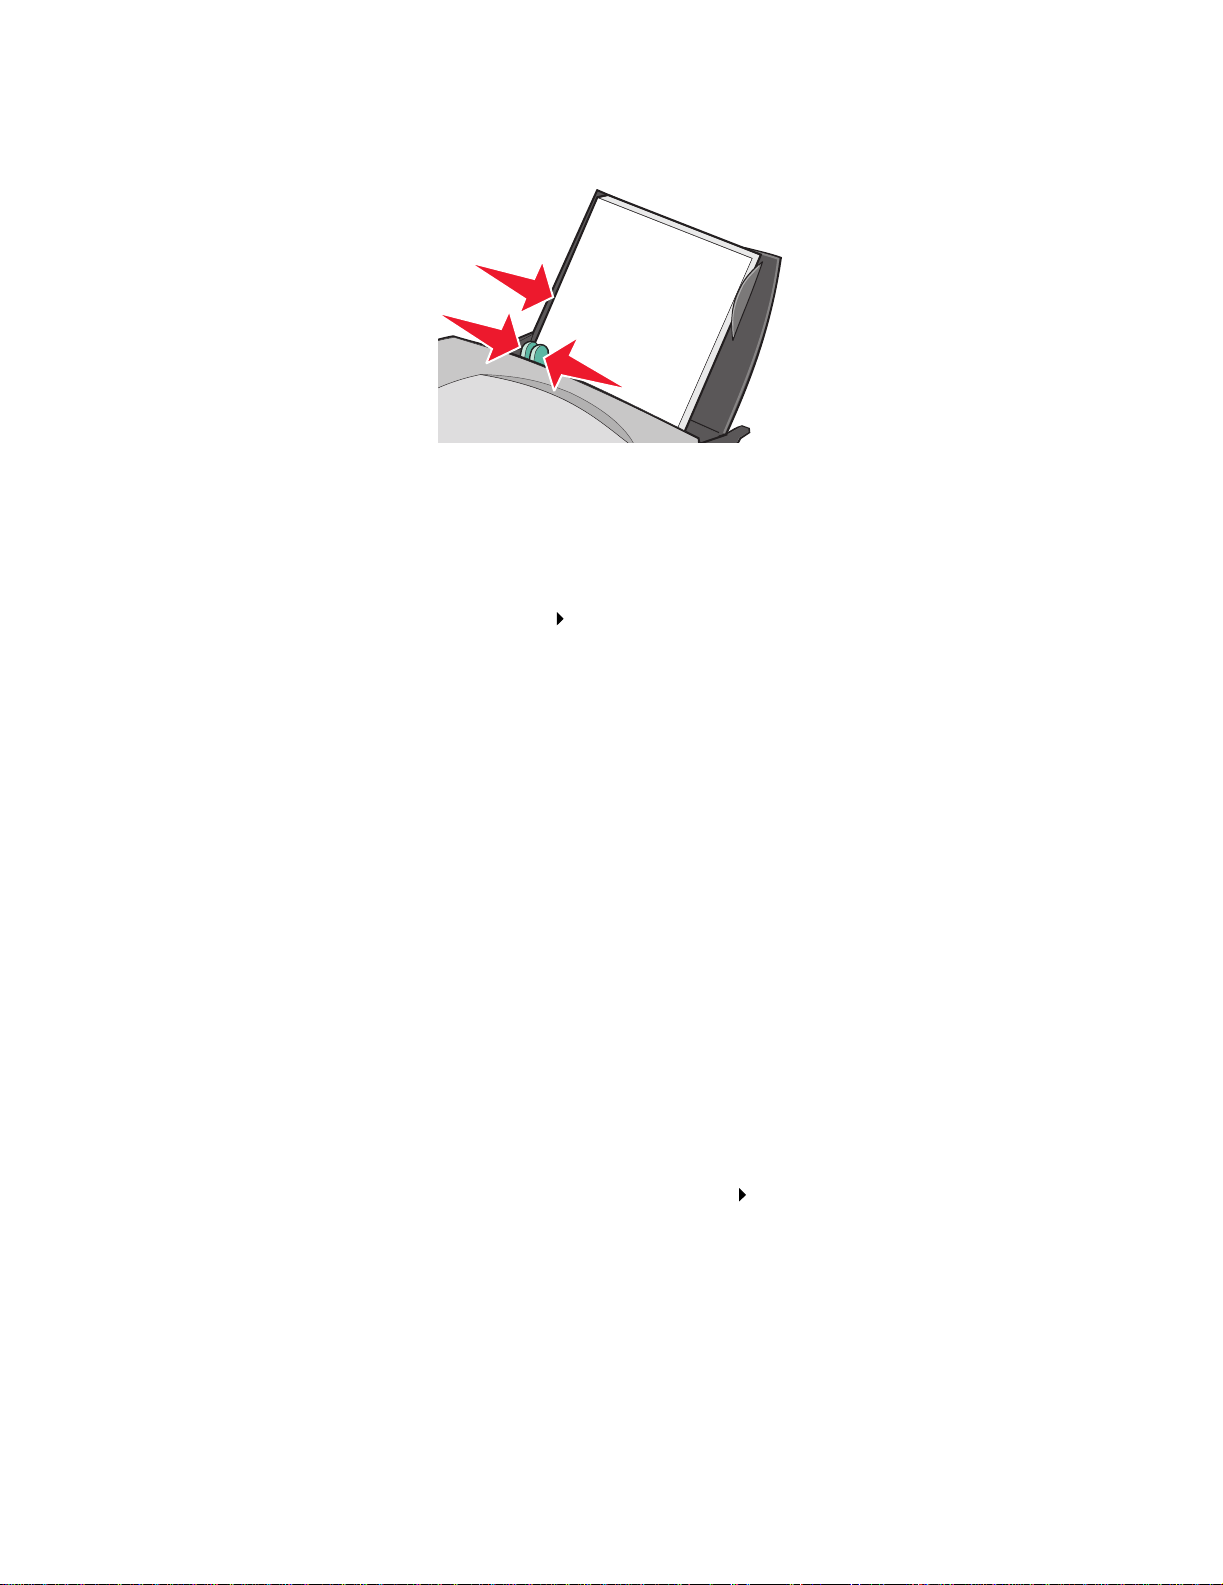
Printing a booklet
You can print and bundle your do cument to make a booklet. You can load up to 100 sheets of paper
at a time, depending on the thicknes s of the paper.
Step 1: Load the paper
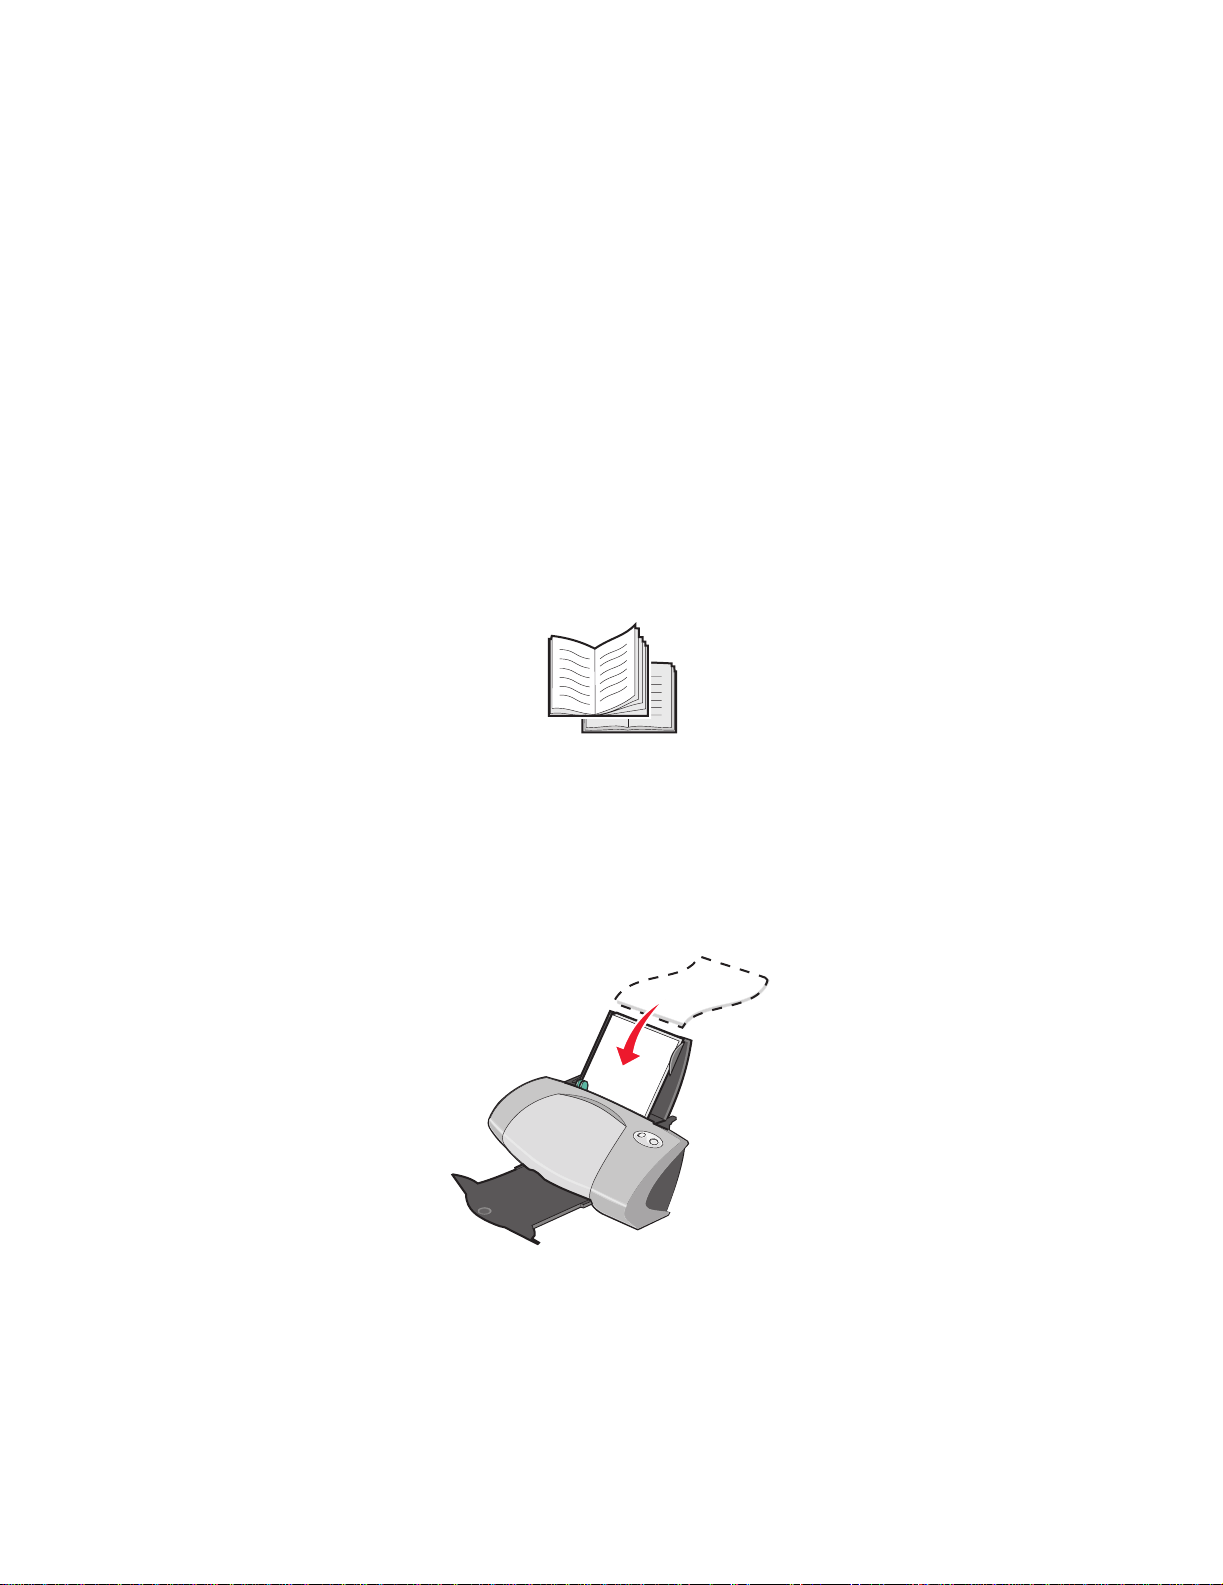
• Load the paper vertically against the right side of the paper support.
• Make sure the print side is f a cing you.
• Do not force the paper into the printer.
Printing a booklet
24
Page 25
• Squeeze and slide the paper guide to the left side of the paper.
Note: If you are using letter size paper , adjust ing the paper guide ma y not be necessary.
Step 2: Customize the print settings
1 With your document open, click File Print.
The Print dialog box appears.
2 From the Print dialog box, click Properties, Preferences, or Options. 3 Select a paper size:
a From the P r int Properties dialog box, select the Paper Setup tab.
b From the Paper Size area, select Paper.
c From the Paper Size menu, select A4 or Letter.
4 Select a print layout:
a From the P r int Properties dialog box, select the Print Layout tab.
b From the Lay out area, select Booklet.
5 Enter the number of sheets per bundle.
Note: A bundle is a group of pages that are folded in half and stac ked before binding. V ery
thick bundles may not fold well, so if you are printing with thick paper, use fewer
printed sheets per bundle.
a From the Print Properties dialog box, click Options Style Options.
b Enter the number of sheets you want in each bundle and then click OK.
6 Click OK to close the Print Properties dialog box.
Printing a booklet
25
Page 26
Step 3: Print your document
Click OK.
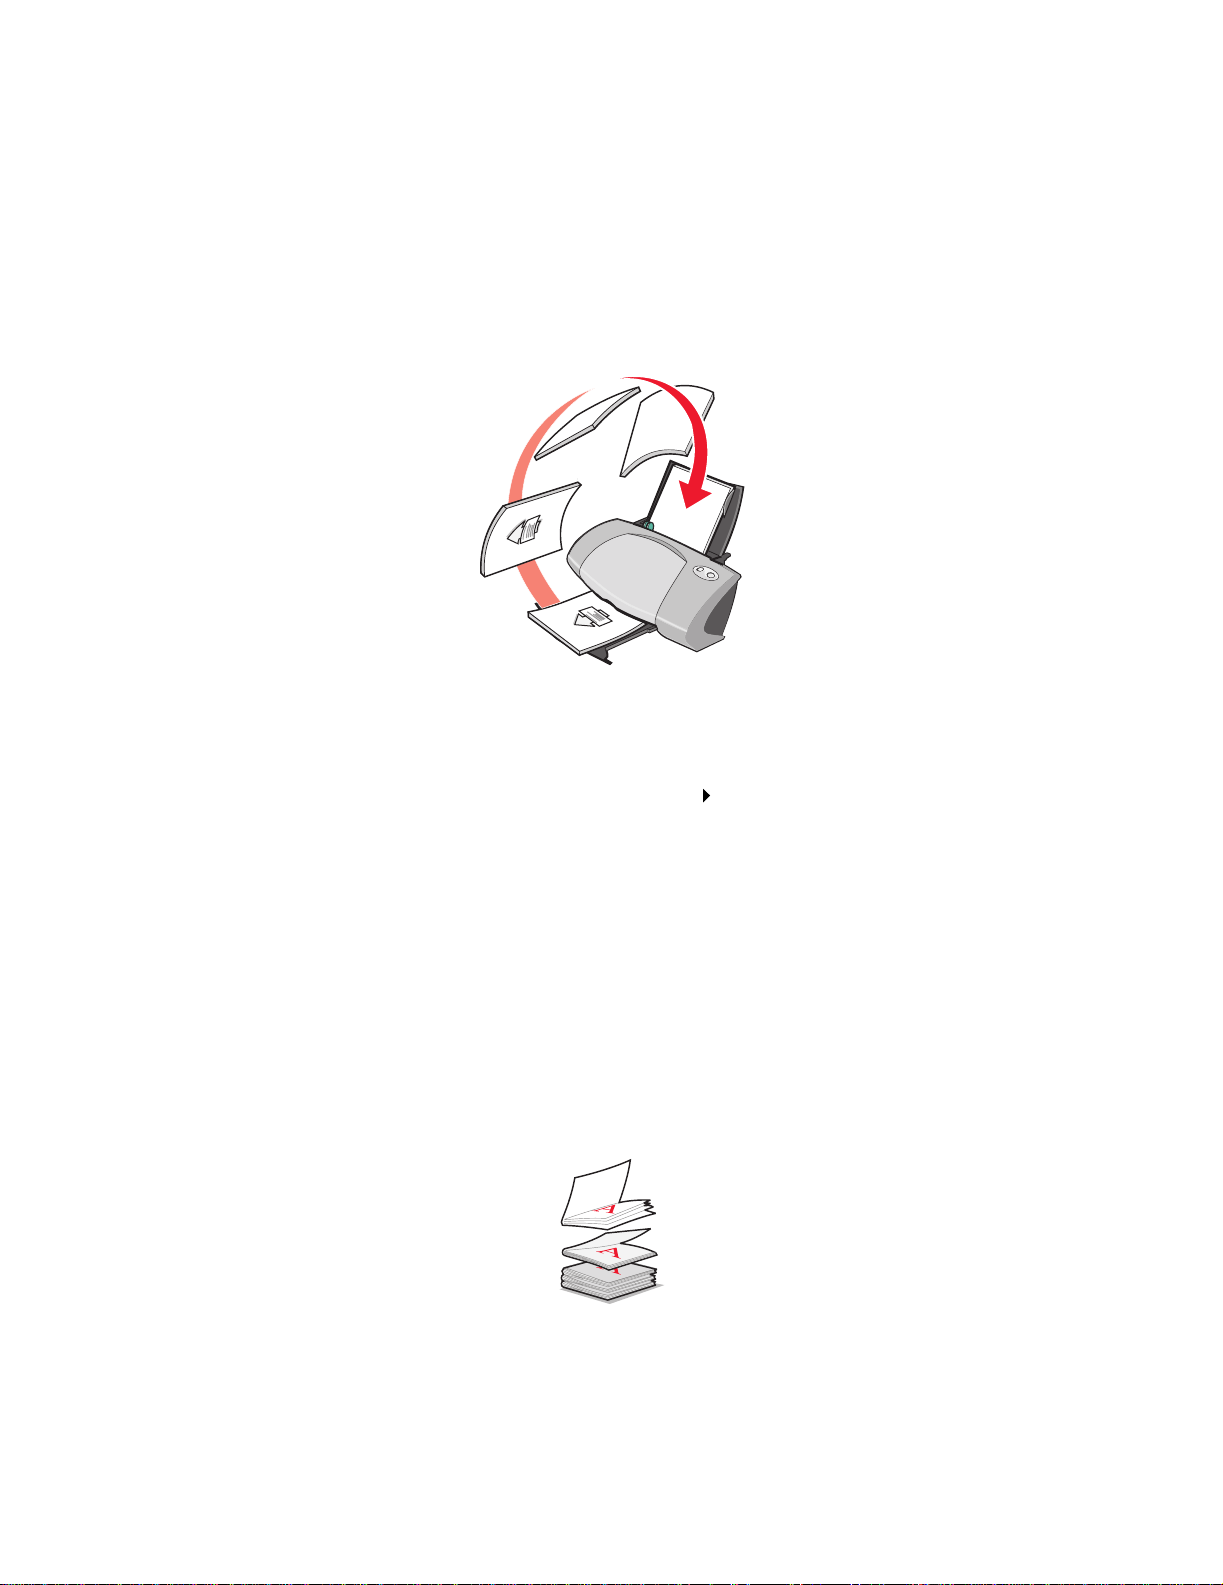
After the first half of y our booklet and the reloading instruction page prints , your printer software
prompts you to reload the paper.
1 Insert the stack of paper and the reloading instruction page with the printed side facing away
from you and the arrows pointing down into the paper support.
2 Click Continue Printing.
If you do not want to print the reloadi ng instruction page:
1 From the Print Properties dialog box, click Options Style Options . 2 Clear the Print instruction page to assist in reloading check box. 3 Click OK.
Step 4: Build your booklet
After your document prints, stack the bundles together and bind your booklet.
To build your bookle t:
1 Remove the first bundle from the paper exit tray, fold it in half, and set it aside. 2 Remove the next bundle, fold it in half, and then stack it on top of the first bundle.
3 Continue to stack the bundles on top of each other until your booklet is complete.
Printing a booklet
26
Page 27
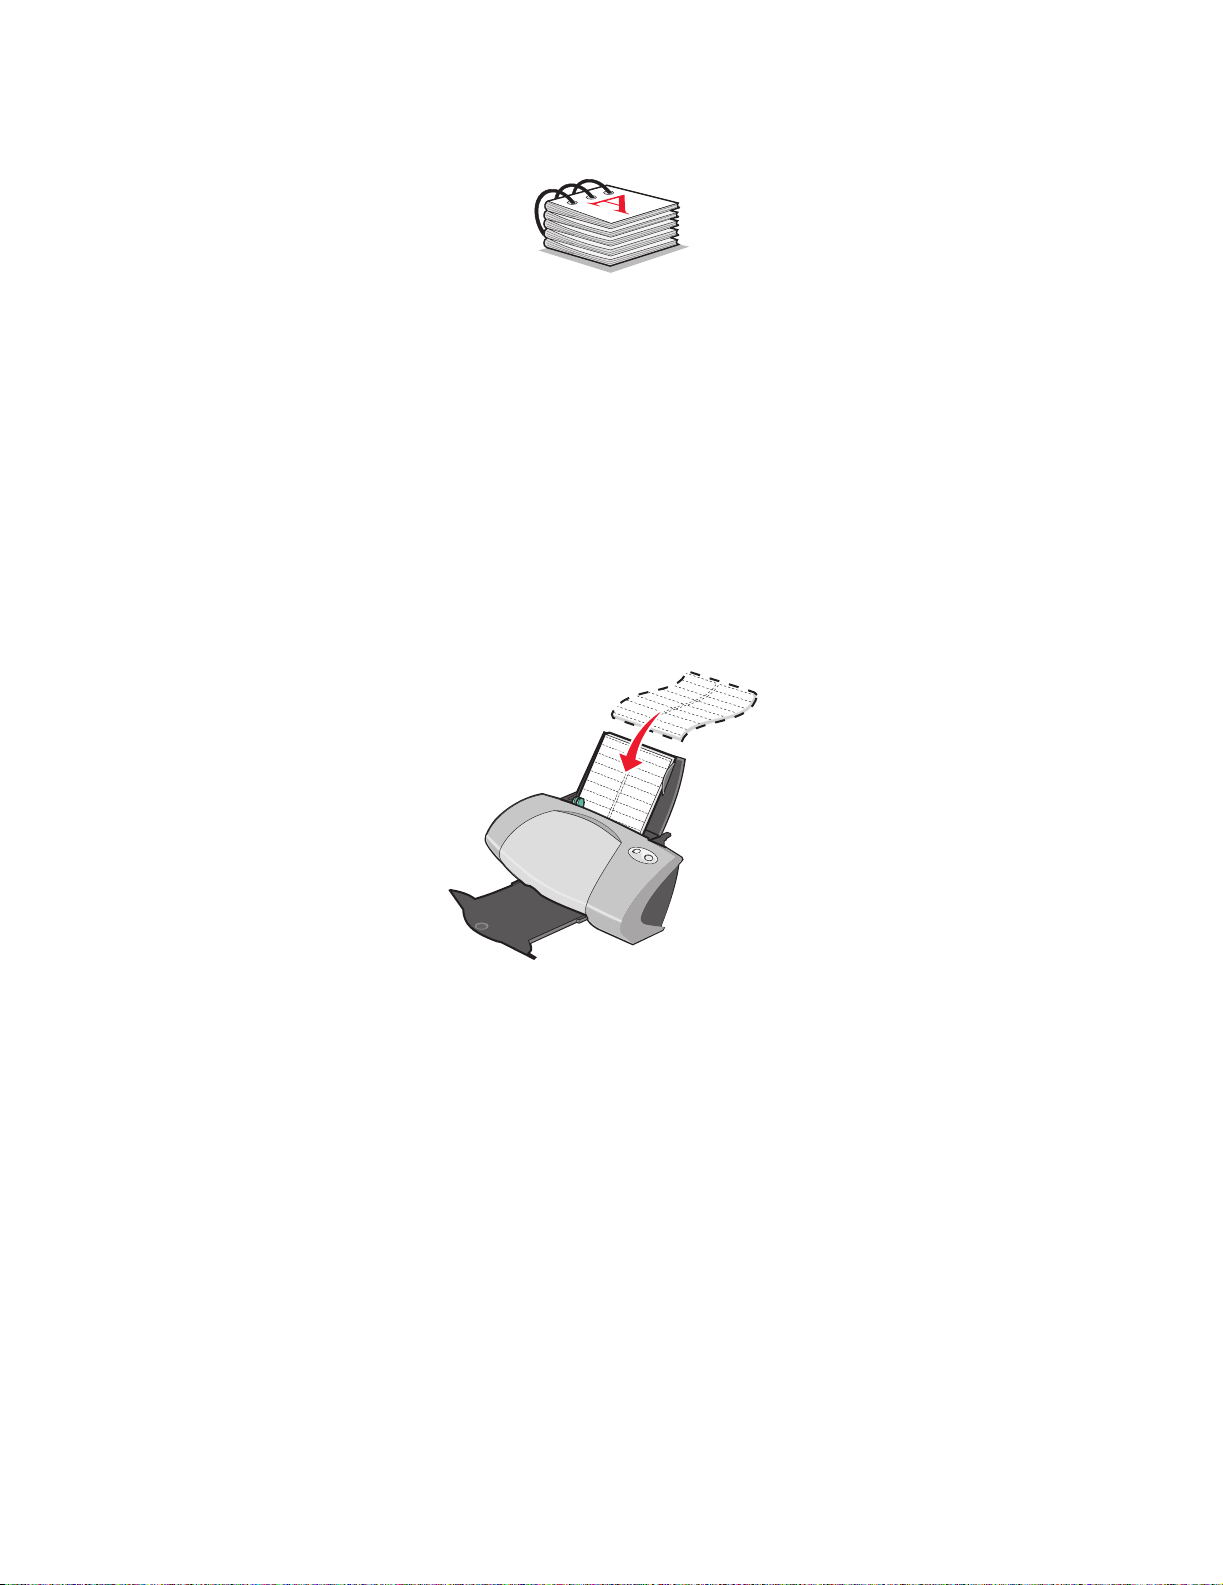
4 Bind the bundles to complete your booklet.
Printing labels
You can load up to 20 sheets of labels at a time, depending on the thickness of the sheets.
Step 1: Load the labels
• Use labels designed for inkjet printers.
• If your labels include instructions, read them carefully.
• Do not print within 1 mm (0.04 in.) of the edge of a label.
• Load the labels vertically against the right side of the paper support.
• Make sure there are no missing or curled labels.
• Make sure the print side is f a cing you.
• Do not force the labels into the printer.
Printing labels
27
Page 28
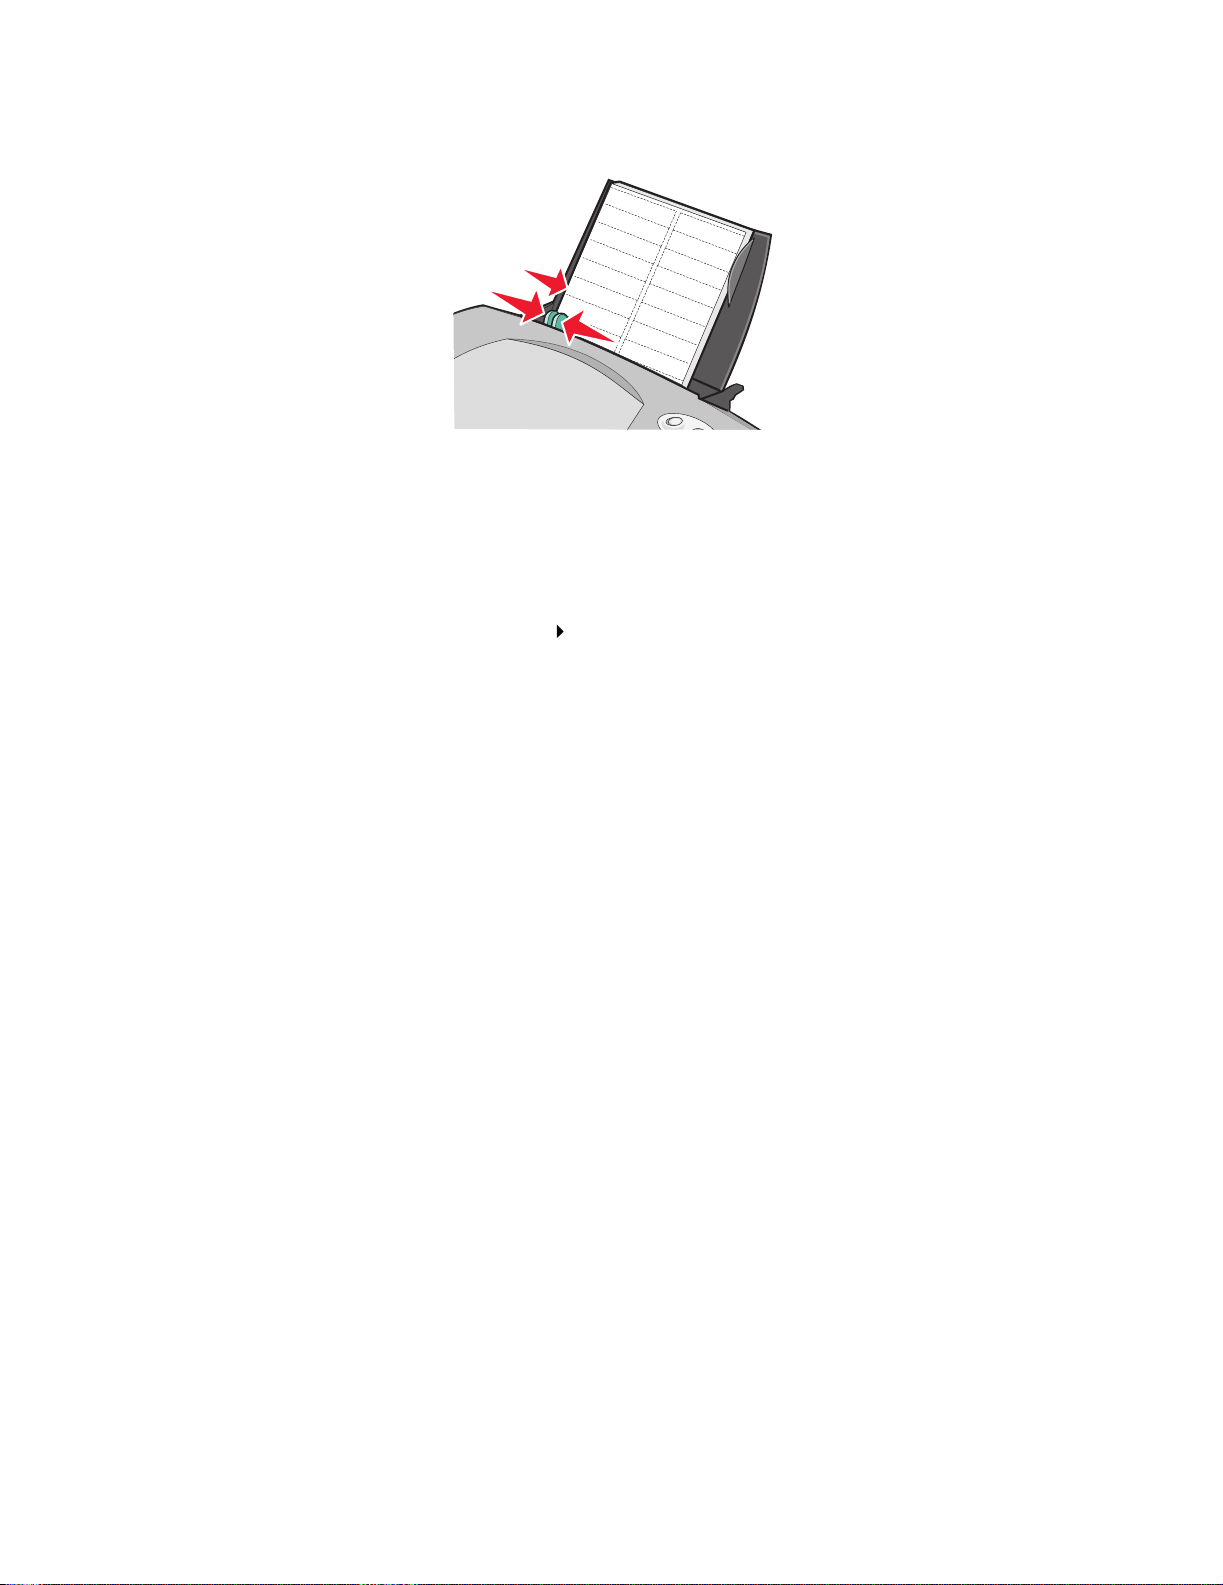
• Squeeze and slide the paper guide to the left side of the labels.
Note: If you are using letter size sheets of labels, adjusting the paper guide may not be
necessary.
Step 2: Customize the print settings
1 With your document open, click File Print.
The Print dialog box appears.
2 From the Print dialog box, click Properties, Preferences, or Options. 3 Select a paper size:
a From the P r int Properties dialog box, select the Paper Setup tab.
b From the Paper Size area, select Paper.
c From the Paper Size menu, select the correct size . F or more inf ormation about printing on
custom size paper, see page 41.
4 Click OK.
Step 3: Print yo ur labels
Click OK.
Note: The paper exit tray holds up to 10 sheets of labels . If you want to print more than
10 sheets, remove the first 10 sheets from the paper exit tray before the others
print.
Printing labels
28
Page 29
Printing handouts
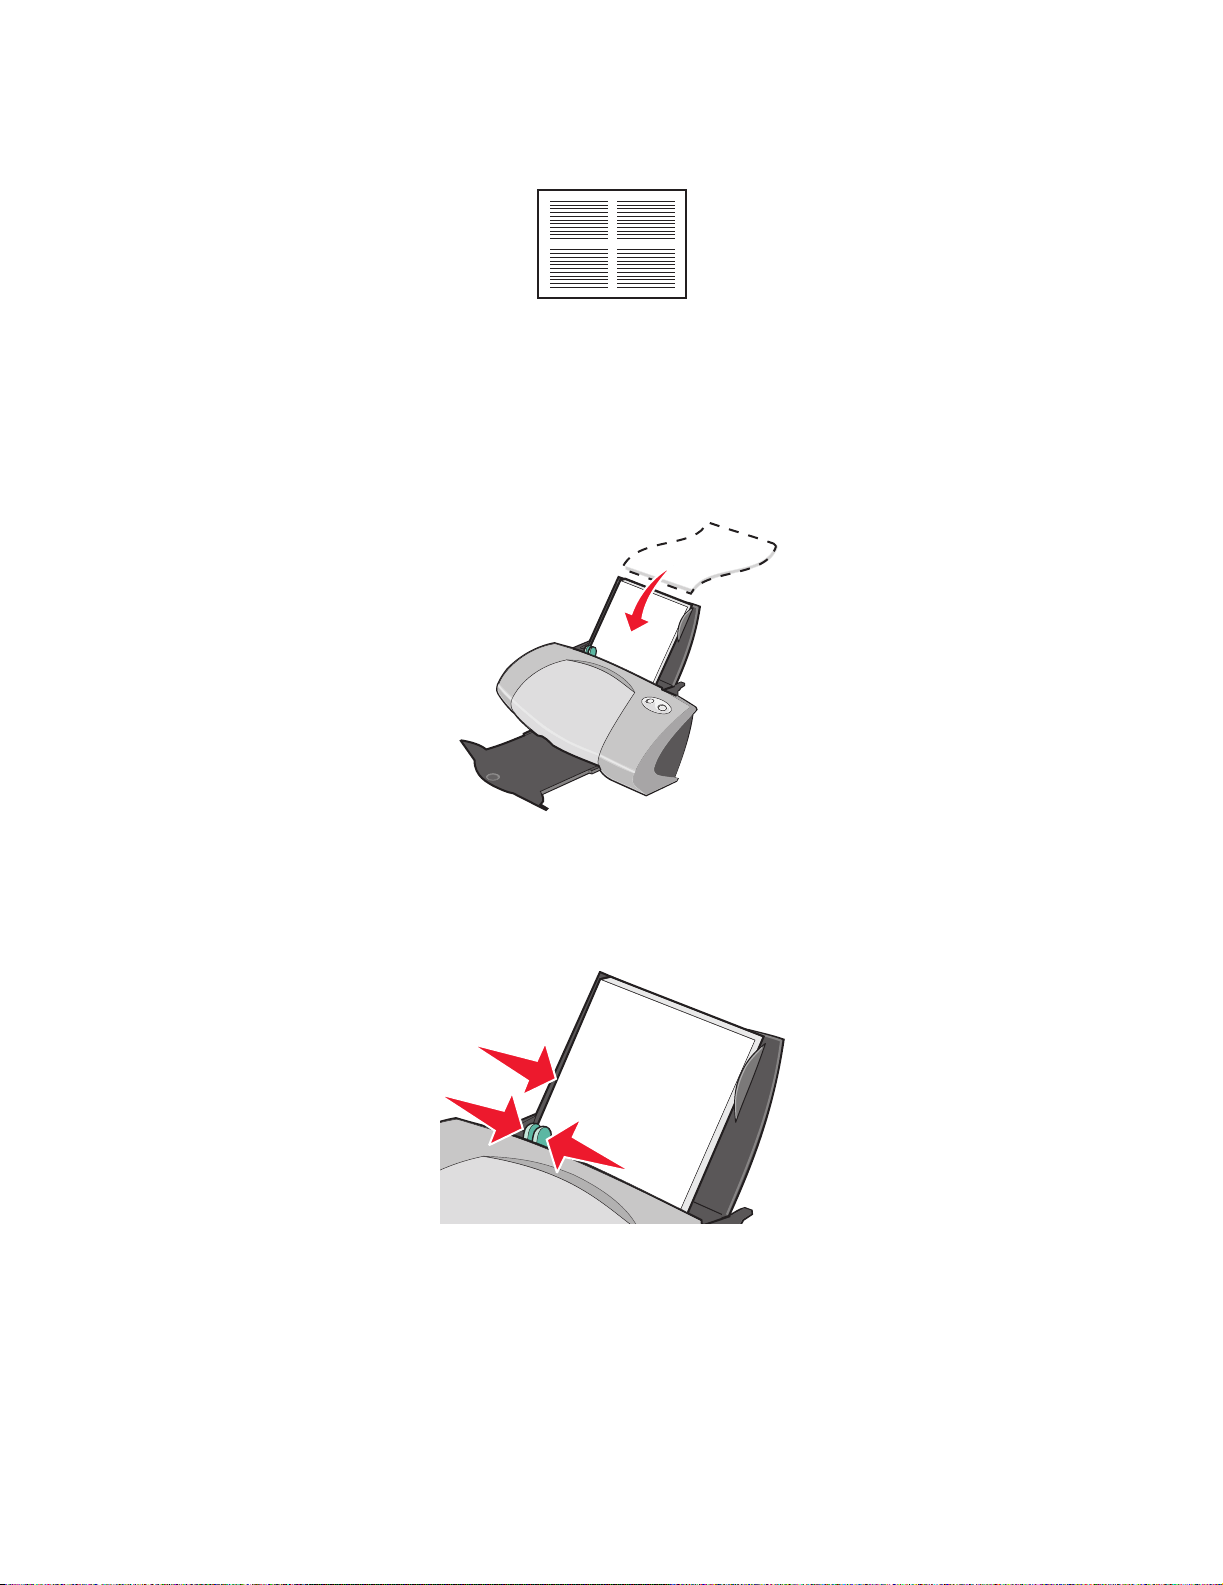
You can conserve paper by printing handouts, or multiple page images, on a single sheet of paper.
Load up to 100 sheets of paper at a time, depending on the thic kness of the paper.
Step 1: Load the paper
• Load the paper vertically against the right side of the paper support.
• Make sure the print side is f a cing you.
• Do not force the paper into the printer.
• Squeeze and slide the paper guide to the left side of the paper.
Note: If you are using letter size paper , adjust ing the paper guide ma y not be necessary.
Note: For the best print quality, use a heavier weight paper.
Printing handouts
29
Page 30

Step 2: Customize the print settings
1 With your document open, click File Print.
The Print dialog box appears.
2 From the Print dialog box, click Properties, Preferences, or Options. 3 Select a print layout:
a From the P r int Properties dialog box, select the Print Layout tab.
b From the Lay out area, select N-up.
c Select the number of pages (two, three, four, or eight) you want to print on a single sheet
of paper.
d If you want to print a border around each page image, select Print Page Borders.
4 To print on both sides of the paper:
a From the P r int Properties dialog box, select the Print Layout tab.
b From the Duplexing area , select Two-Sided.
c Select Side Flip or Top Flip binding.
If you select Side Flip, the pages of your document turn like the pages of a magazine. If
you select Top Flip, the pages turn like the pages of a legal pad.
5 Click OK.
Step 3: Print your handouts
Click OK.
If you formatted your handouts to print on one side of the page, y ou are finished.
Printing handouts
30
Page 31
If you formatted your handouts to print on both sides of the page, continue printing your handouts .
1 After the first half of your handouts prints, your printer software prompts you to reload the
paper . Insert the paper and reloading instruction page with the printed side fac ing awa y from
you and the arrows pointing down into the paper support.
2 Click Continue Printing.
If you do not want to print the reloadi ng instruction page:
1 From the Print Properties dialog box, click Options Style Options . 2 Clear the Print instruction page to assist in reloading check box. 3 Click OK.
Printing a poster
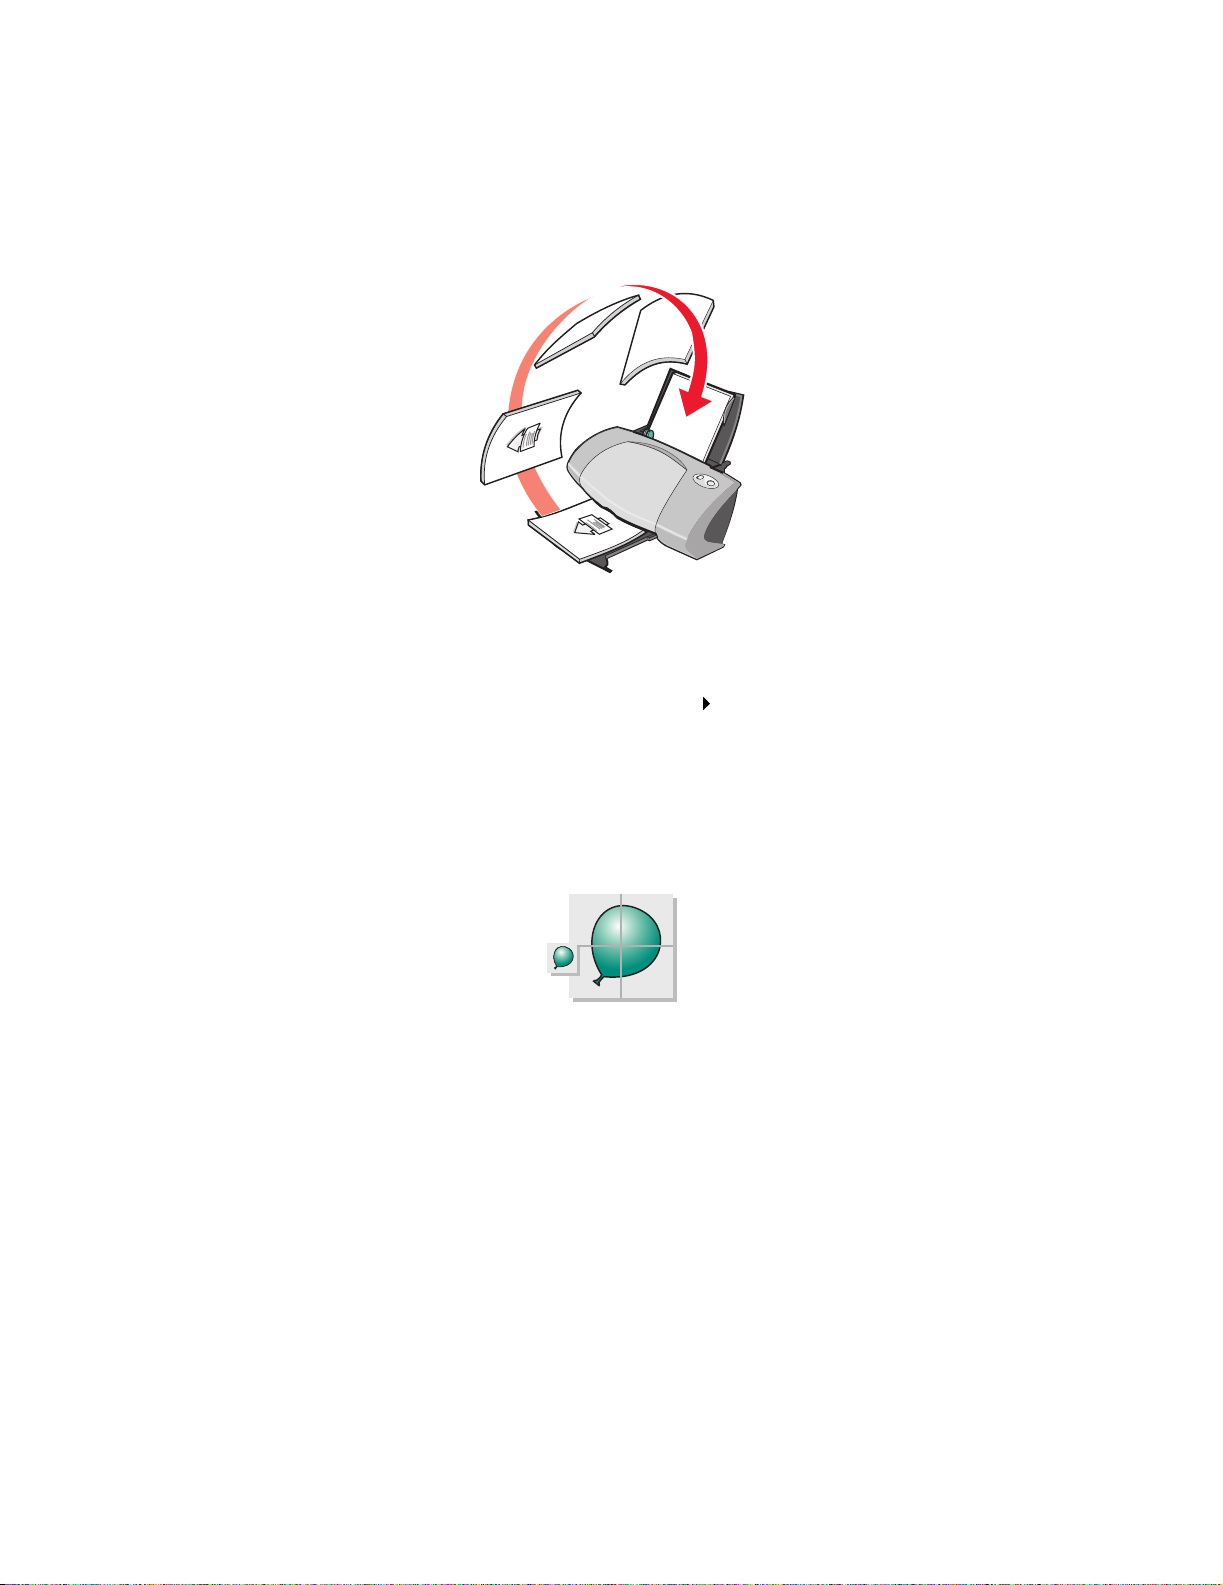
You can enlarge a single page image to print on multiple pages. For example, you can enlarge a
photograph to print as a four-, nine-, or 16-page poster.
Print up to 100 sheets of paper at a time, depending on the thicknes s of the paper.
Printing a poster
31
Page 32
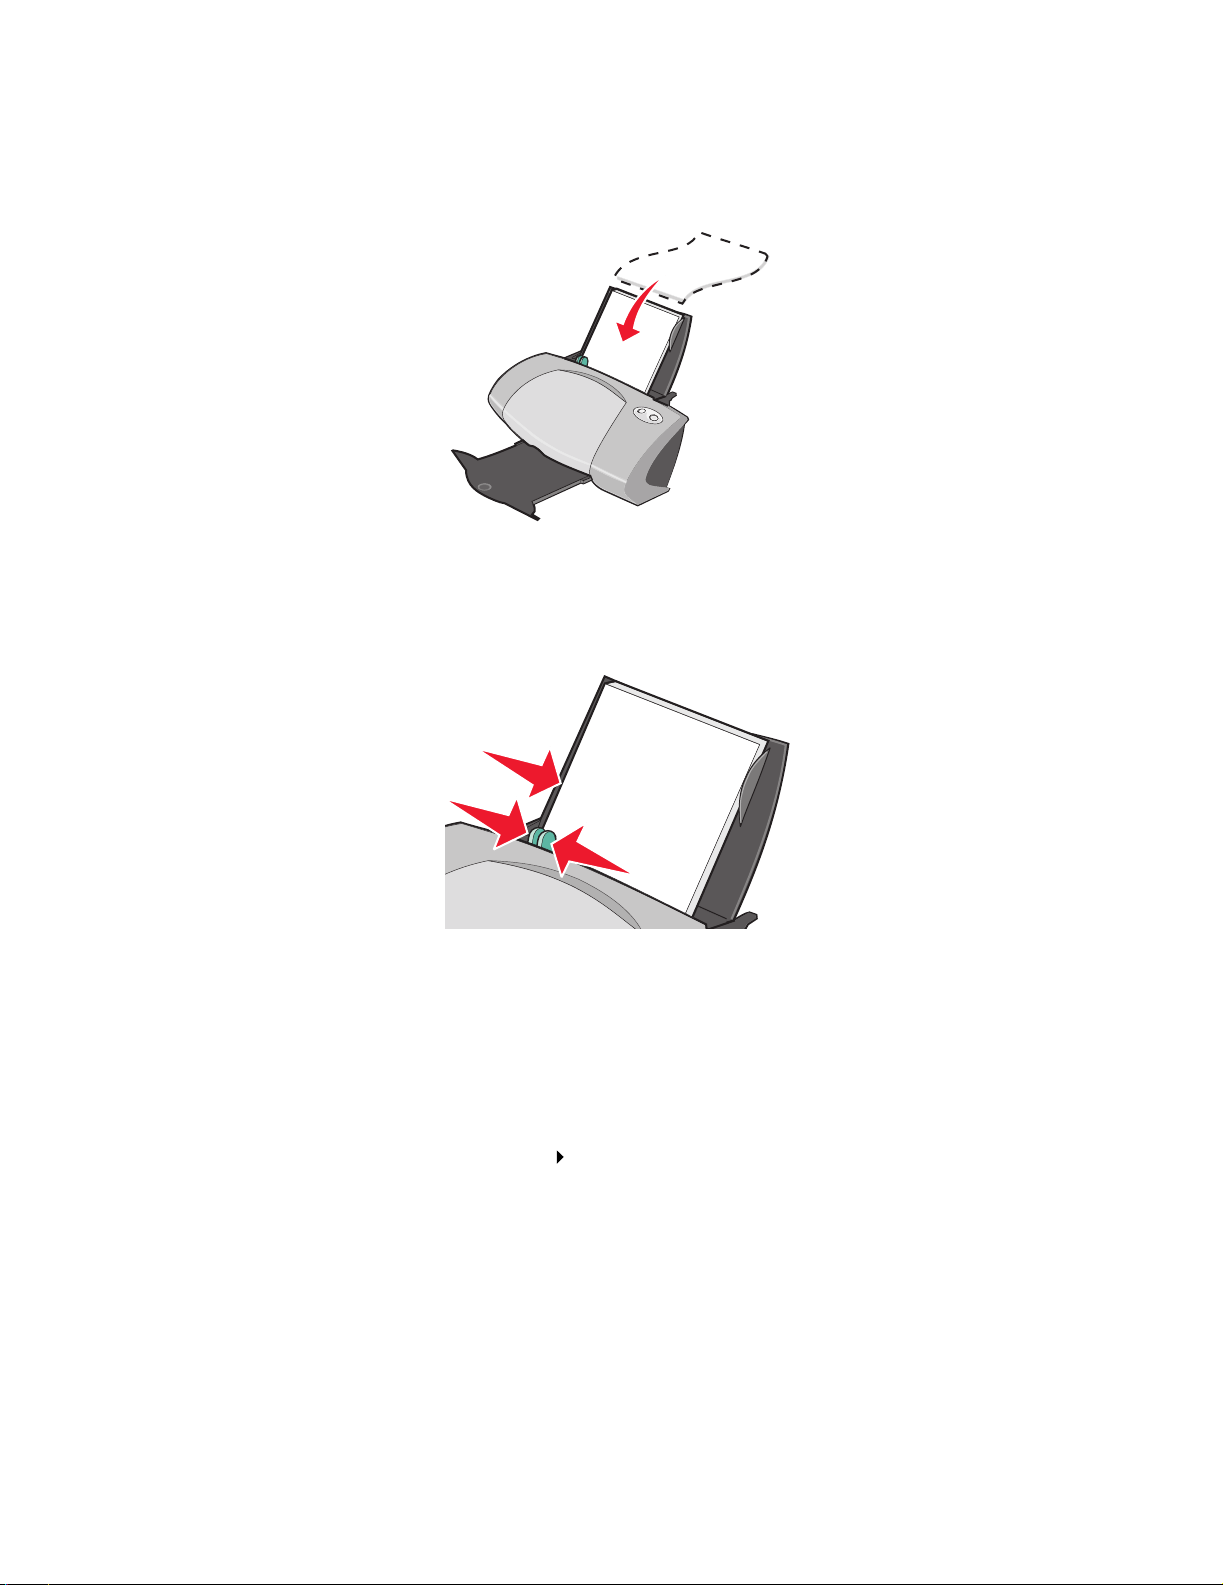
Step 1: Load the paper
• Load the paper vertically against the right side of the paper support.
• Make sure the print side is f a cing you.
• Do not force the paper into the printer.
• Squeeze and slide the paper guide to the left side of the paper.
Note: If you are using letter size paper , adjust ing the paper guide ma y not be necessary.
Note: For the best print quality, use a heavier weight paper.
Step 2: Customize the print settings
1 With your document open, click File Print.
The Print dialog box appears.
2 From the Print dialog box, click Properties, Preferences, or Options 3 Select a print layout:
a From the P r int Properties dialog box, select the Print Layout tab.
b From the Lay out area, select Poster.
Printing a poster
32
Page 33

4 Select your poster size:
a Select the size of y our poster: 2 x 2 (four p ages total) , 3 x 3 (nine pag es total), or 4 x 4 ( 16
pages total).
b Select Print Crop Marks if you want help cutting the edges of your pages.
5 If you need to reprint a selection of pages:
a Click Select Pages To Print...
The pages that are not going to print ha ve a circle and a bar symbol over th e n umber and
are shaded. Select or clear each page by cli cking it.
b Click OK.
6 Click OK.
Step 3: Print your poster
Click OK.
Assemble your poster
1 On each printed page, trim the white edges from two adjacent sides.
For example, trim the white edge from the top and left sides of each page.
Printed pages
with the white
edge trimmed
from two
adjacent sides
Trimmed edges
Untrimmed
edges
2 Arrange the pages so that ev ery trimmed edge overlaps an untrimmed edge (the white edge). 3 Tape the backs of the pages together. 4 To complete your poster, trim any remaining white edges.
Printing a poster
33
Page 34
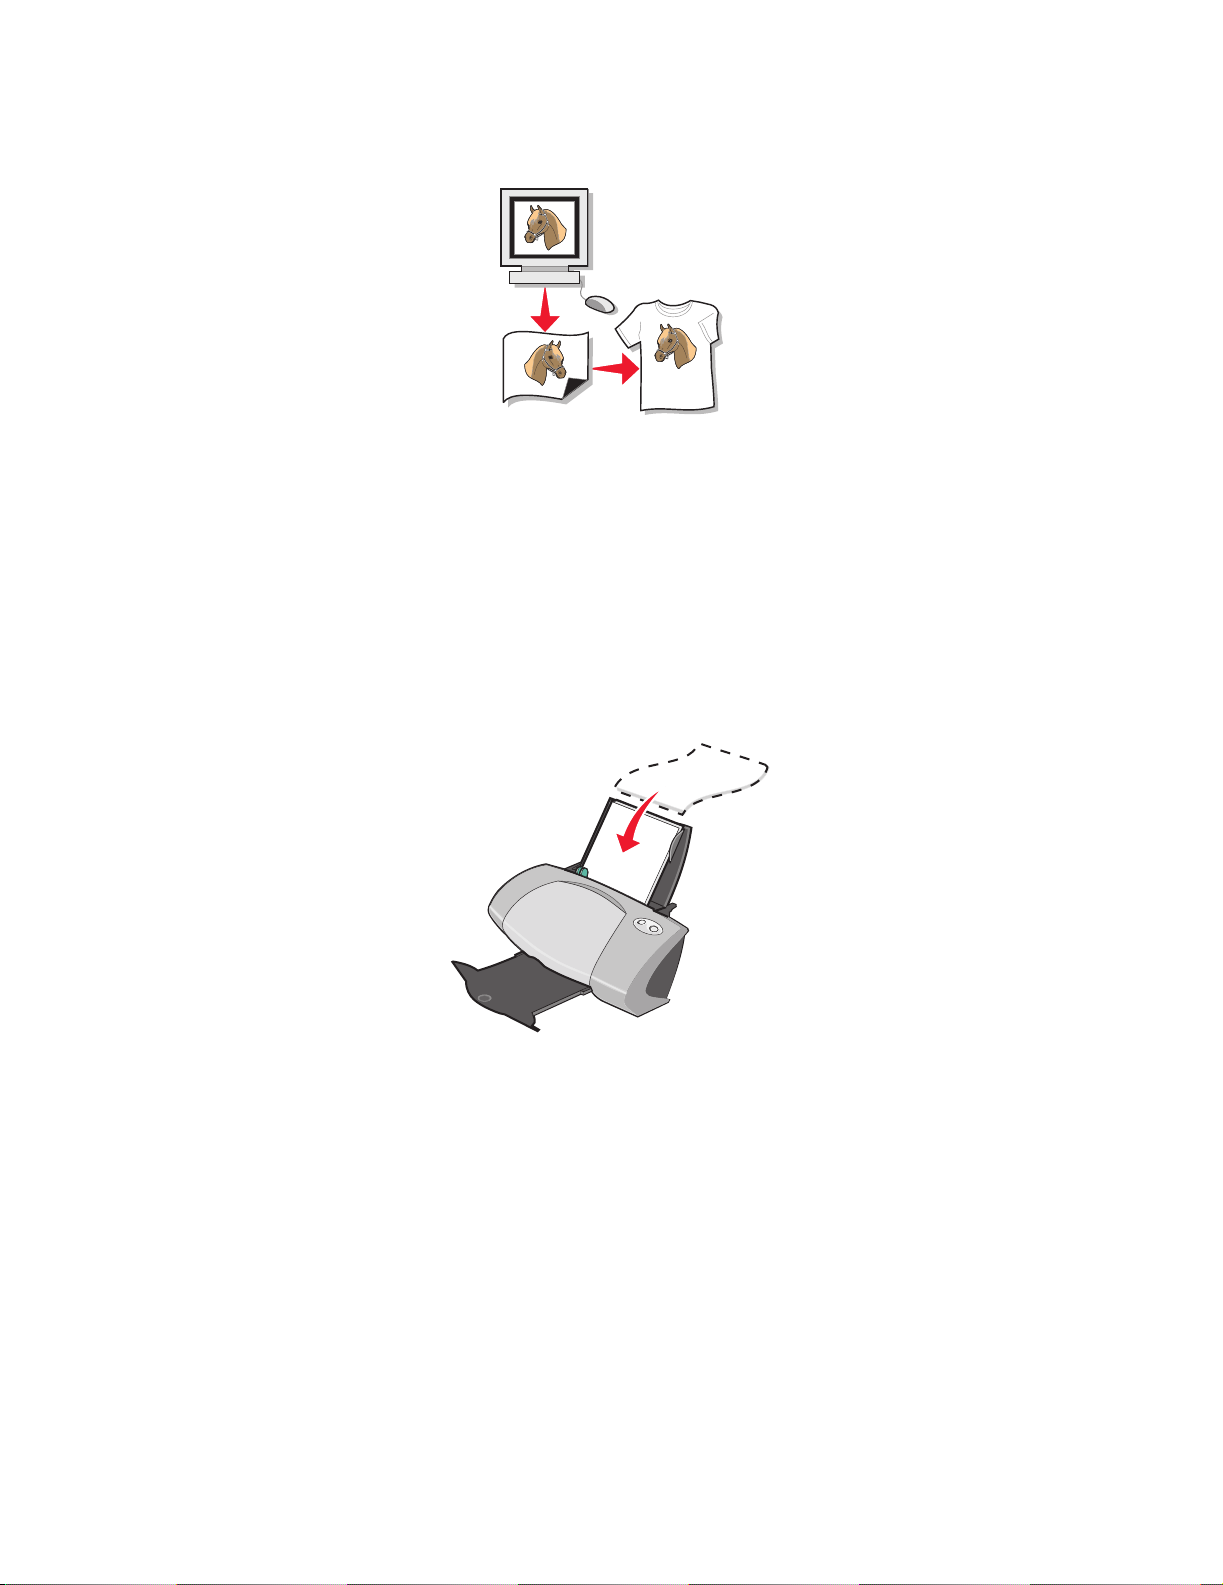
Printing iron-on transfers
You can load up to 100 iron-on transfers at a time, depending on the thickness of the transfers. You
may want to print on plain paper before loading your iron-on transfers.
Note: For best results, load one iron-on transfer at a time.
Step 1: Load the iron-on transfers
• If your iron-on tr ansfers include instructions, read them carefully.
• Load the iron-on transfers vertically against the right side of the paper support.
• Make sure the print side (blank side) is facing you.
• Do not force the iron-on transfers into the printer.
Printing iron-on transfers
34
Page 35
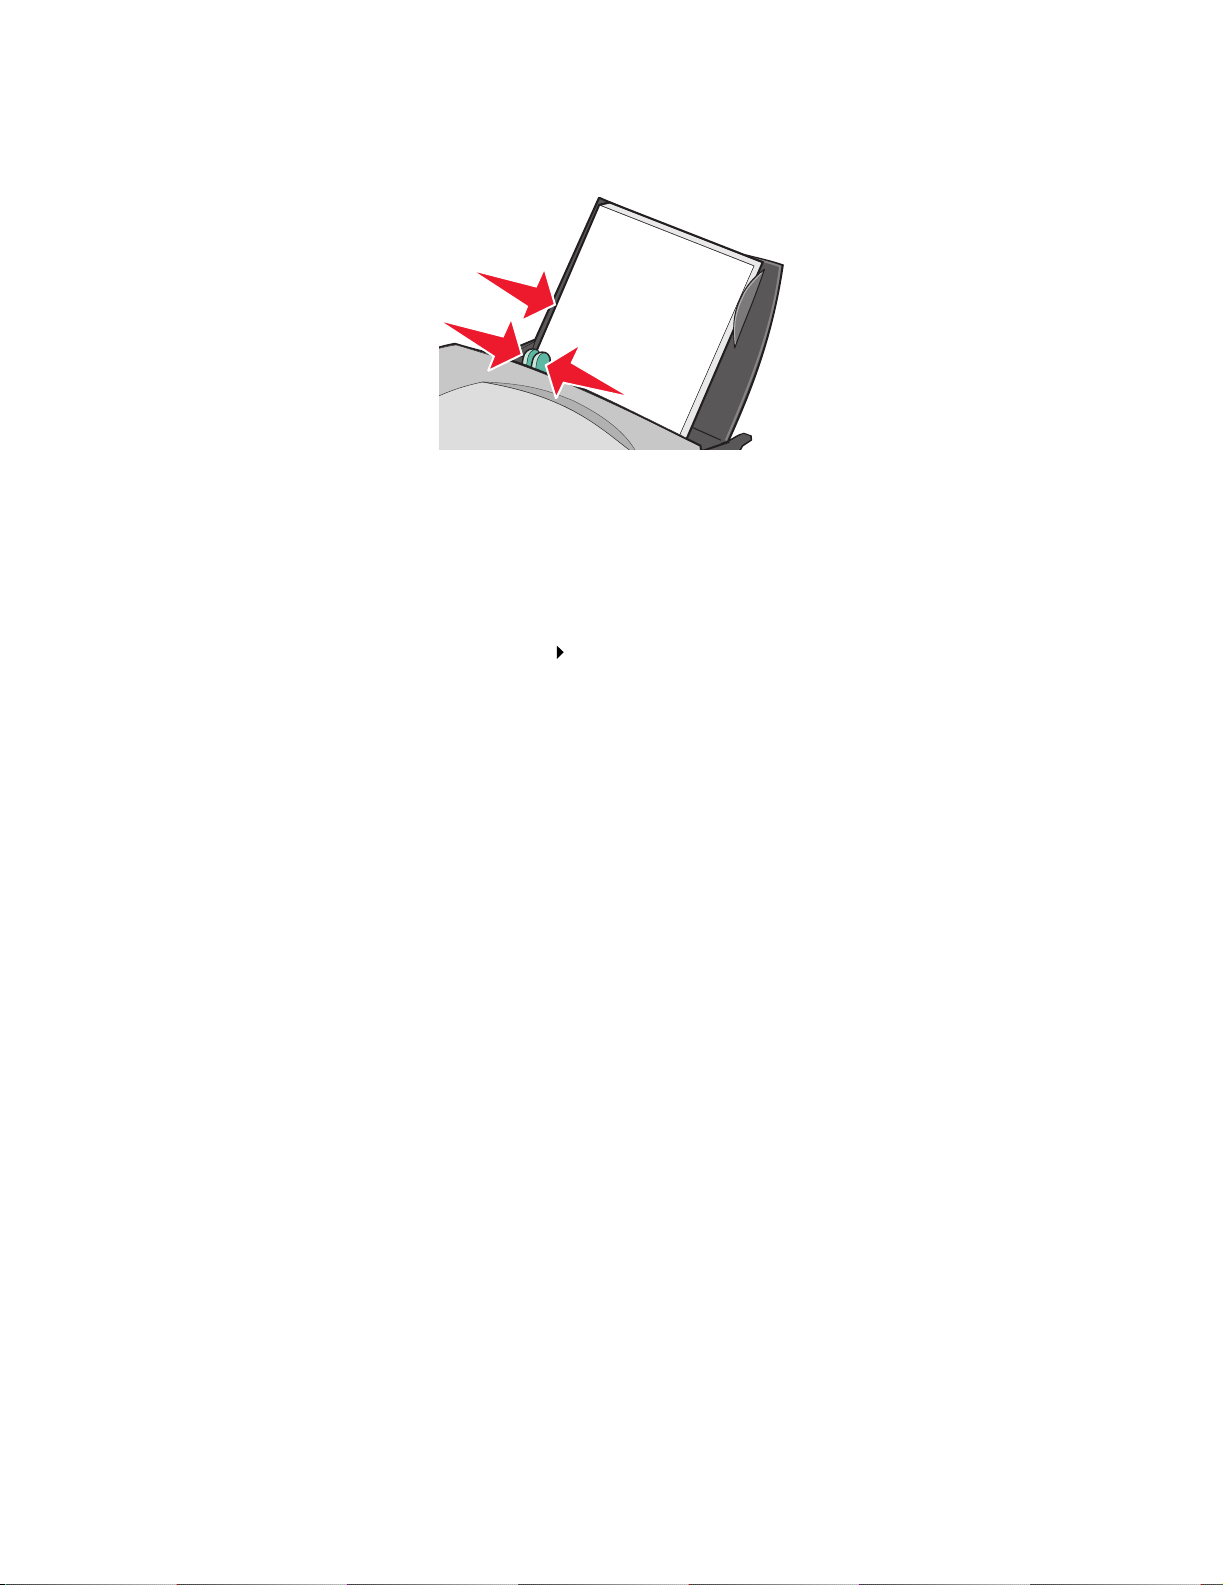
• Squeeze and slide the paper guide to the lef t side of the iron-on transfers.
Note: If you are using letter size iron-on transfers, adjusting the paper guide may not be
necessary.
Step 2: Customize the print settings
1 With your document open, click File Print.
The Print dialog box appears.
2 From the Print dialog box, click Properties, Preferences, or Options. 3 If your software program does not have mirror or iron-on settings, select a print layout:
a From the P r int Properties dialog box, select the Print Layout tab.
b From the Lay out area, select Mirror.
4 Click OK.
Step 3: Print your iron-on transfer
Click OK.
Note: T o prevent smudging, remov e each iron-on t ransf e r as it exits the printer, and then
let it dry before stacking.
Printing transparencies
You can load up to 20 transparencies at a time, depending on the thickness of the tr ansparencies.
Step 1: Load the transparencies
• Use transparencies designed for inkjet printers.
Printing transparencies
35
Page 36
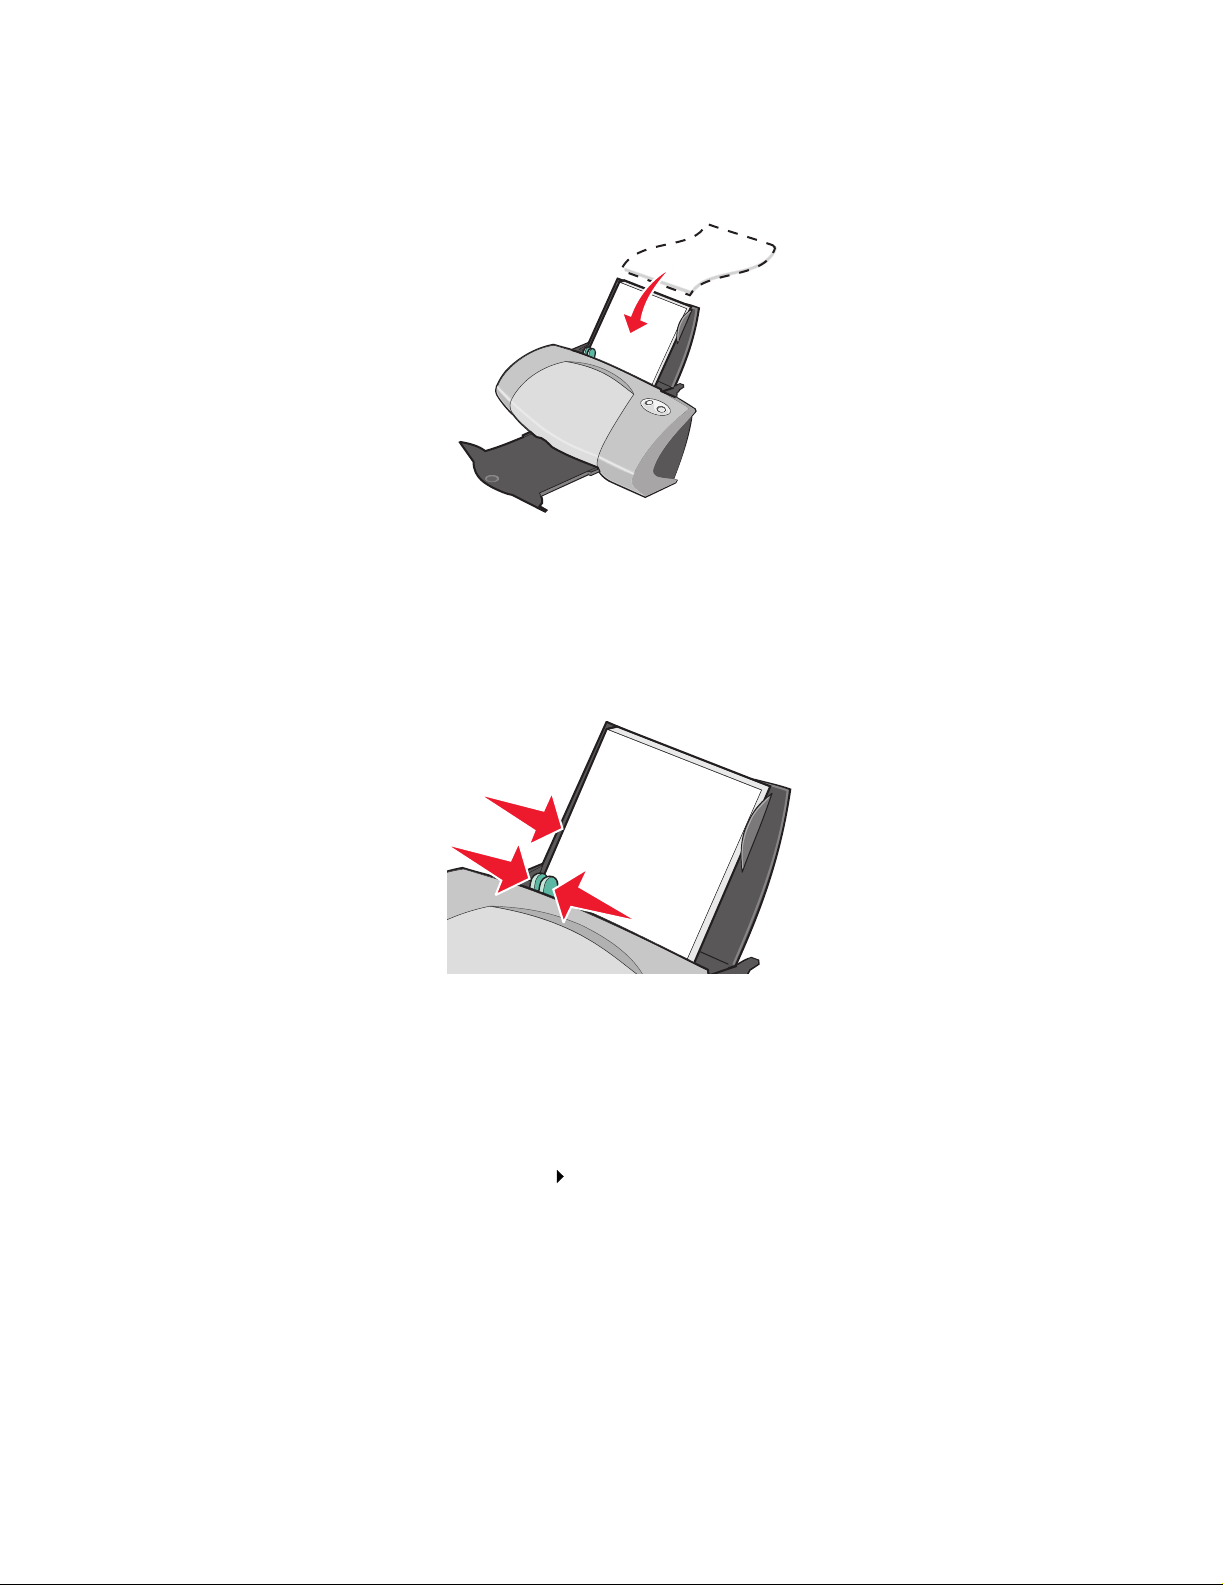
• If your transparencies include instructions, read them carefully.
• Load the transparencies vertically against the right si de of the paper support.
• Make sure the rough sid e (print side) of the t ransparenci es is f acing you. If the tr ansparencies
have a remo v ab le stripe, mak e sure each st ripe is fac ing a wa y from you and do wn to war d the
printer.
• Do not force the transparencies into the printer.
• Squeeze and slide the paper guide to the left side of the transparencies.
Note: If you are using letter size transparencies, adjusting the paper guide may not be
necessary.
Step 2: Customize the print settings
1 With your document open, click File Print.
The Print dialog box appears.
2 From the Print dialog box, click Properties, Preferences, or Options. 3 Select a paper size:
a From the P r int Properties dialog box, select the Paper Setup tab.
b From the Paper Size area, select Paper.
Printing transparencies
36
Page 37
c From the Paper Size menu, select A4 or Letter.
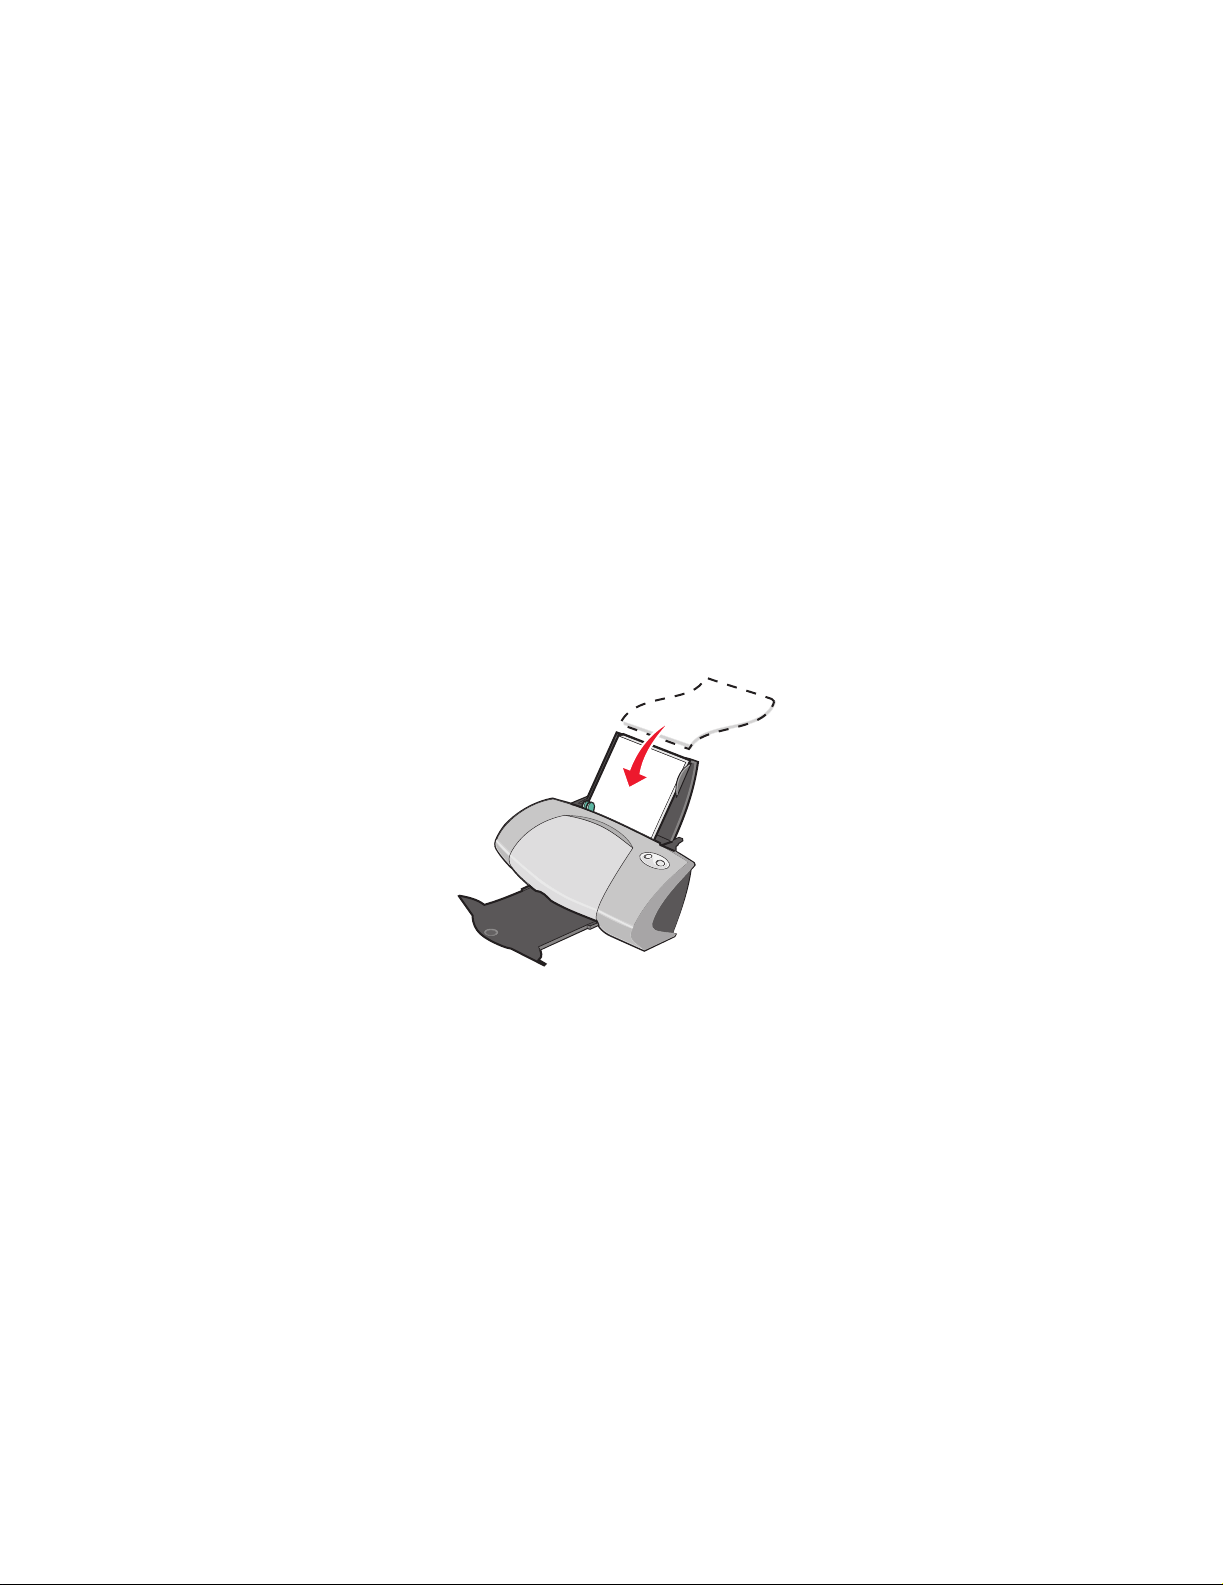
4 Click OK.
Step 3: Print your transparencies
Click OK.
Note: T o pre vent smudging, remo ve eac h transparency as it e xits the printer , and t hen let
it dry before stacking.
Printing your document in reverse order
You can load up to 100 sheets of paper at a time, depending on the thickness of the paper.
Step 1: Load the paper
• Load the paper vertically against the right side of the paper support.
• Make sure the print side is f a cing you.
• Do not force the paper into the printer.
Printing your document in reverse order
37
Page 38
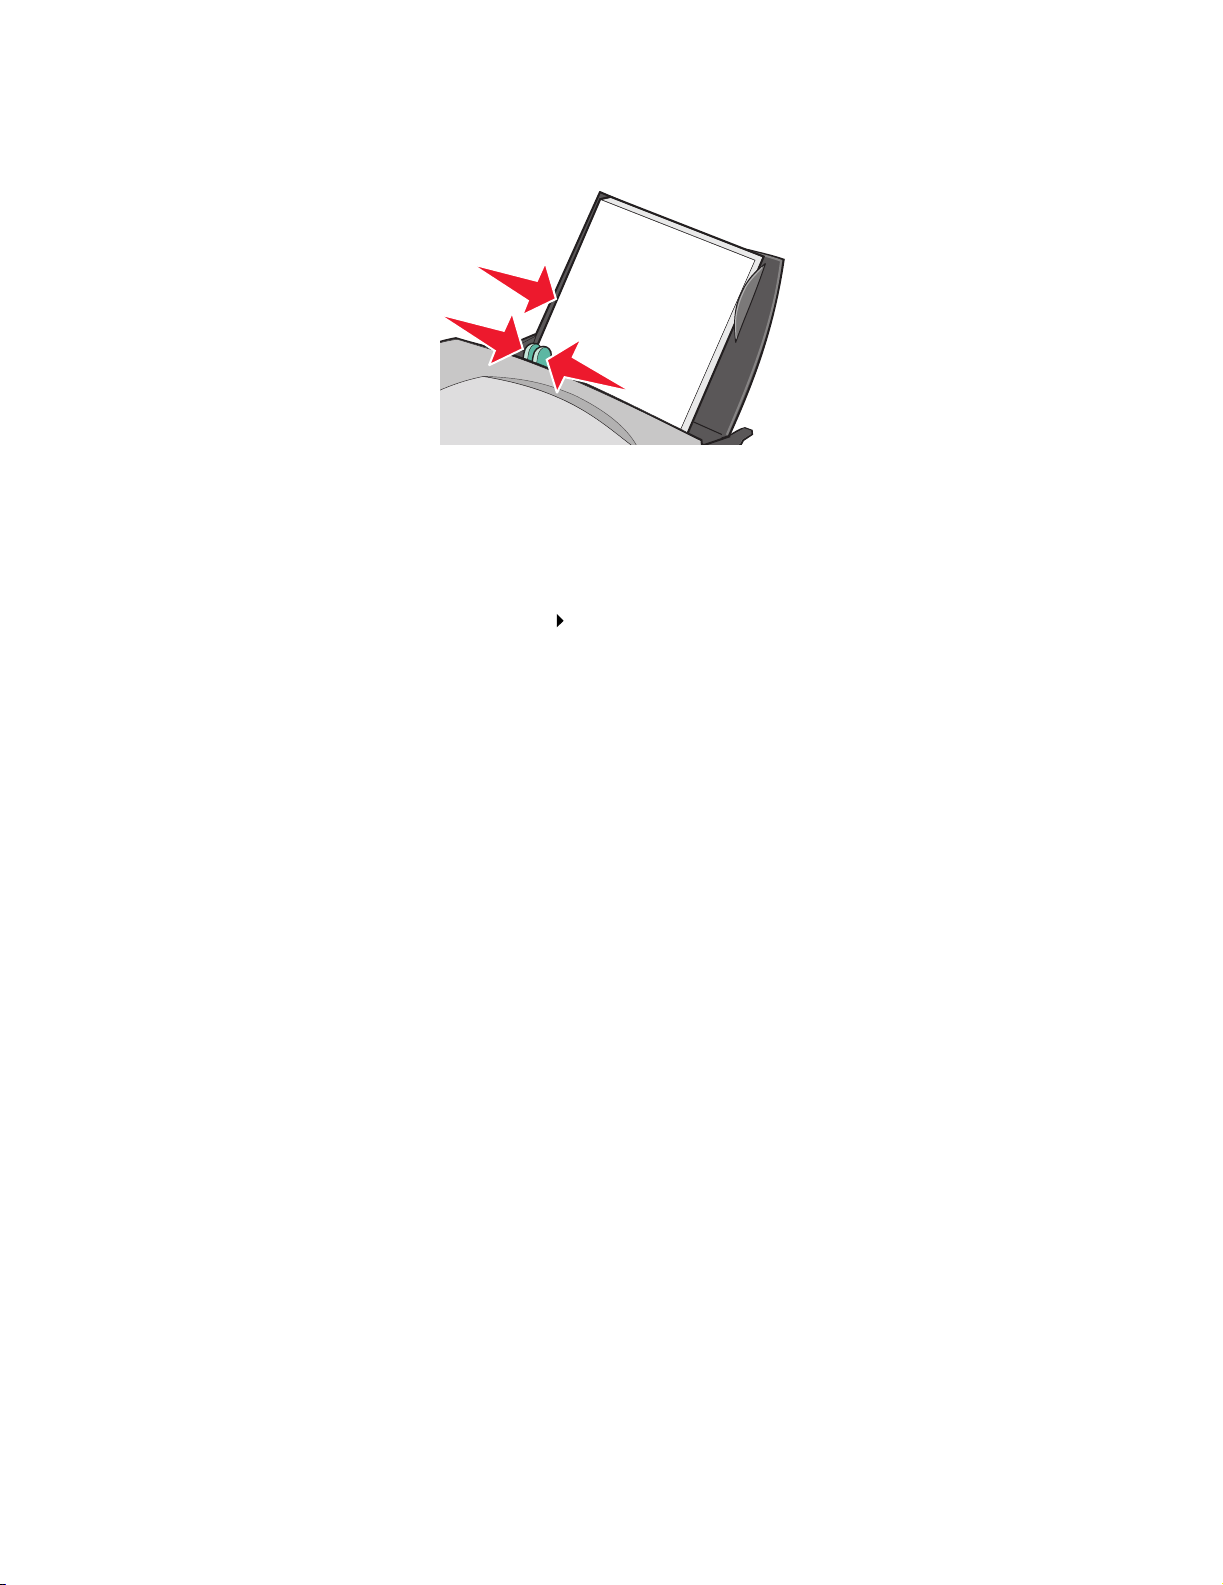
• Squeeze and slide the paper guide to the left side of the paper.
Note: If you are using letter size paper , adjust ing the paper guide ma y not be necessary.
Step 2: Customize the print settings
1 With your document open, click File Print.
The Print dialog box appears.
2 From the Print dialog box, click Properties, Preferences, or Options. 3 To print the last page first:
a From the P r int Properties dialog box, select the Quality/Copies tab.
b Select Print Last Page First.
4 Follow the steps for your paper type to further customize your document. 5 Click OK.
Step 3: Print your document
Click OK.
Note: The paper exit tra y holds up to 50 sheets of plain paper. If you want to print more ,
remove the first 50 sheets from the paper exit tray before the others print.
Printing your document in reverse order
38
Page 39
Printing a banner
You can load up to 20 sheets of banner paper at a time.
Step 1: Load the banner paper
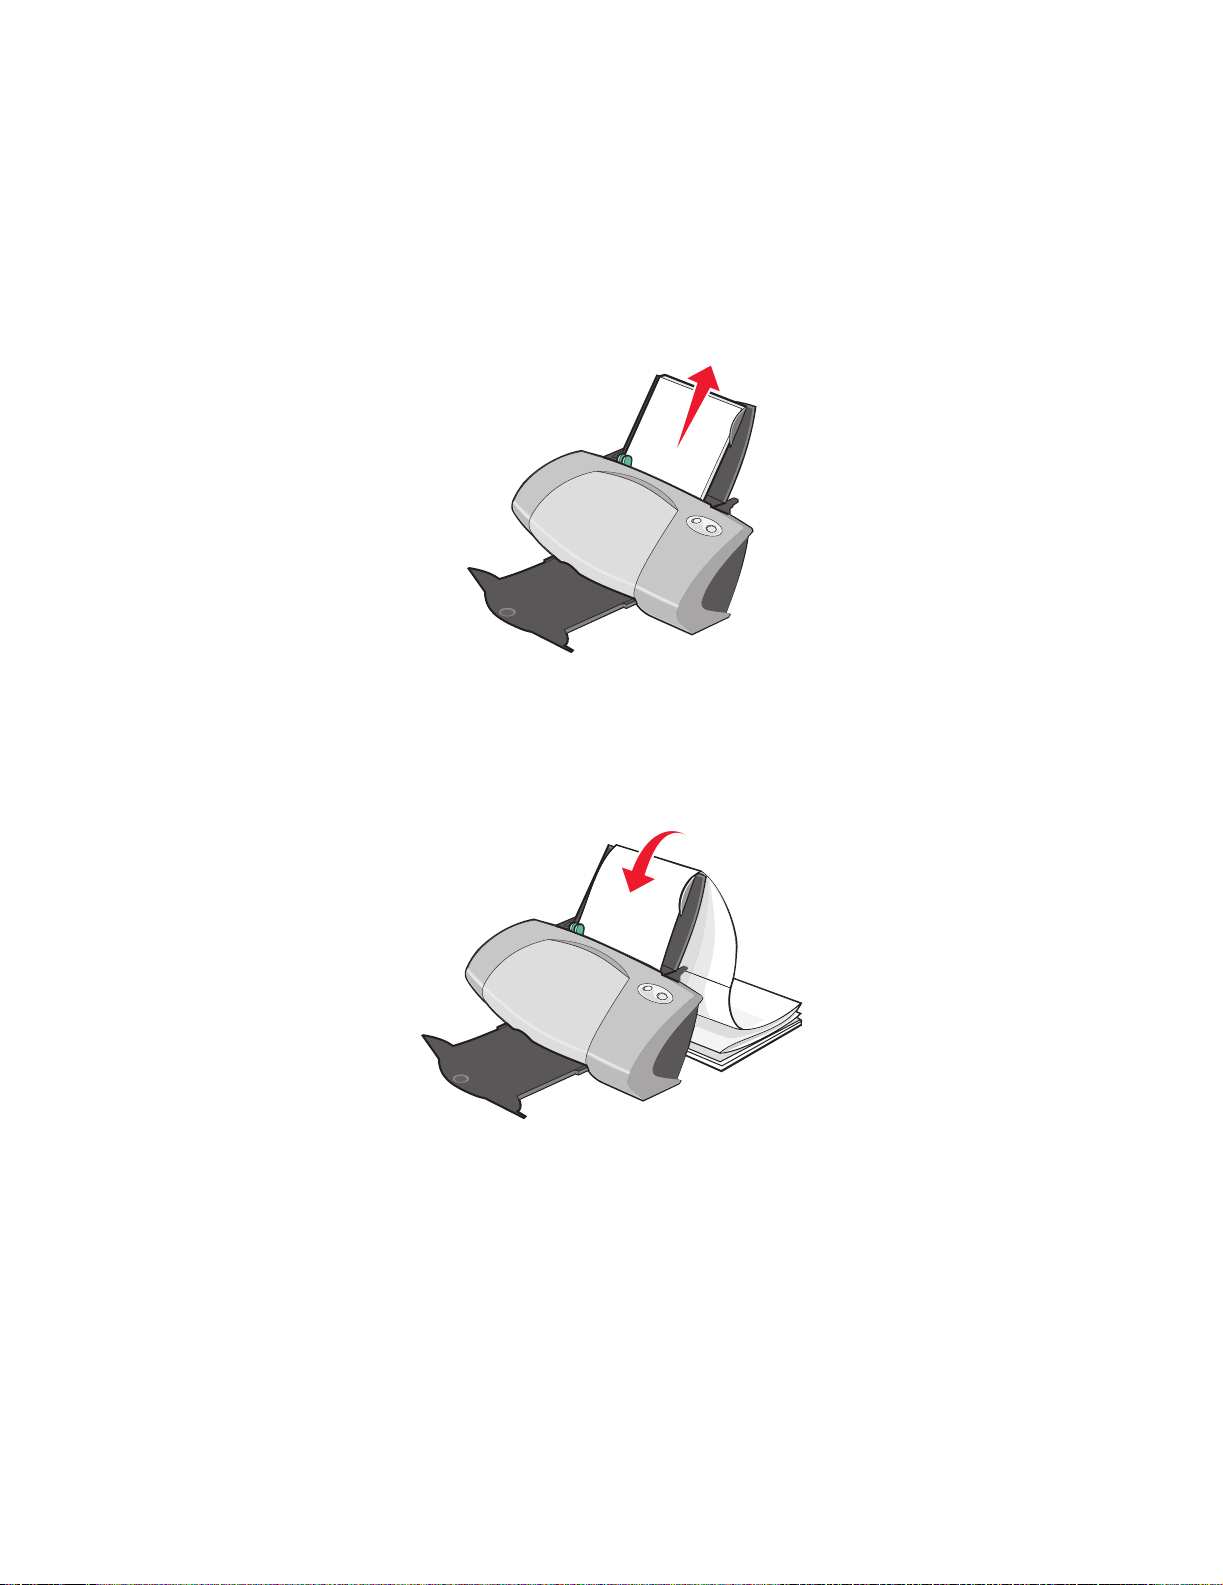
1 Remove any paper from the printer.
2 Place a stack of banner paper with only the number of sheets you need to print your ba nner
behind the printer.
Note: Loading excess banner paper may cause a paper jam. F or help, see “Printer has a
paper jam” on page 60.
3 Load the leading edge of the banner paper into the printer against the right side of th e paper
support.
Printing a banner
39
Page 40
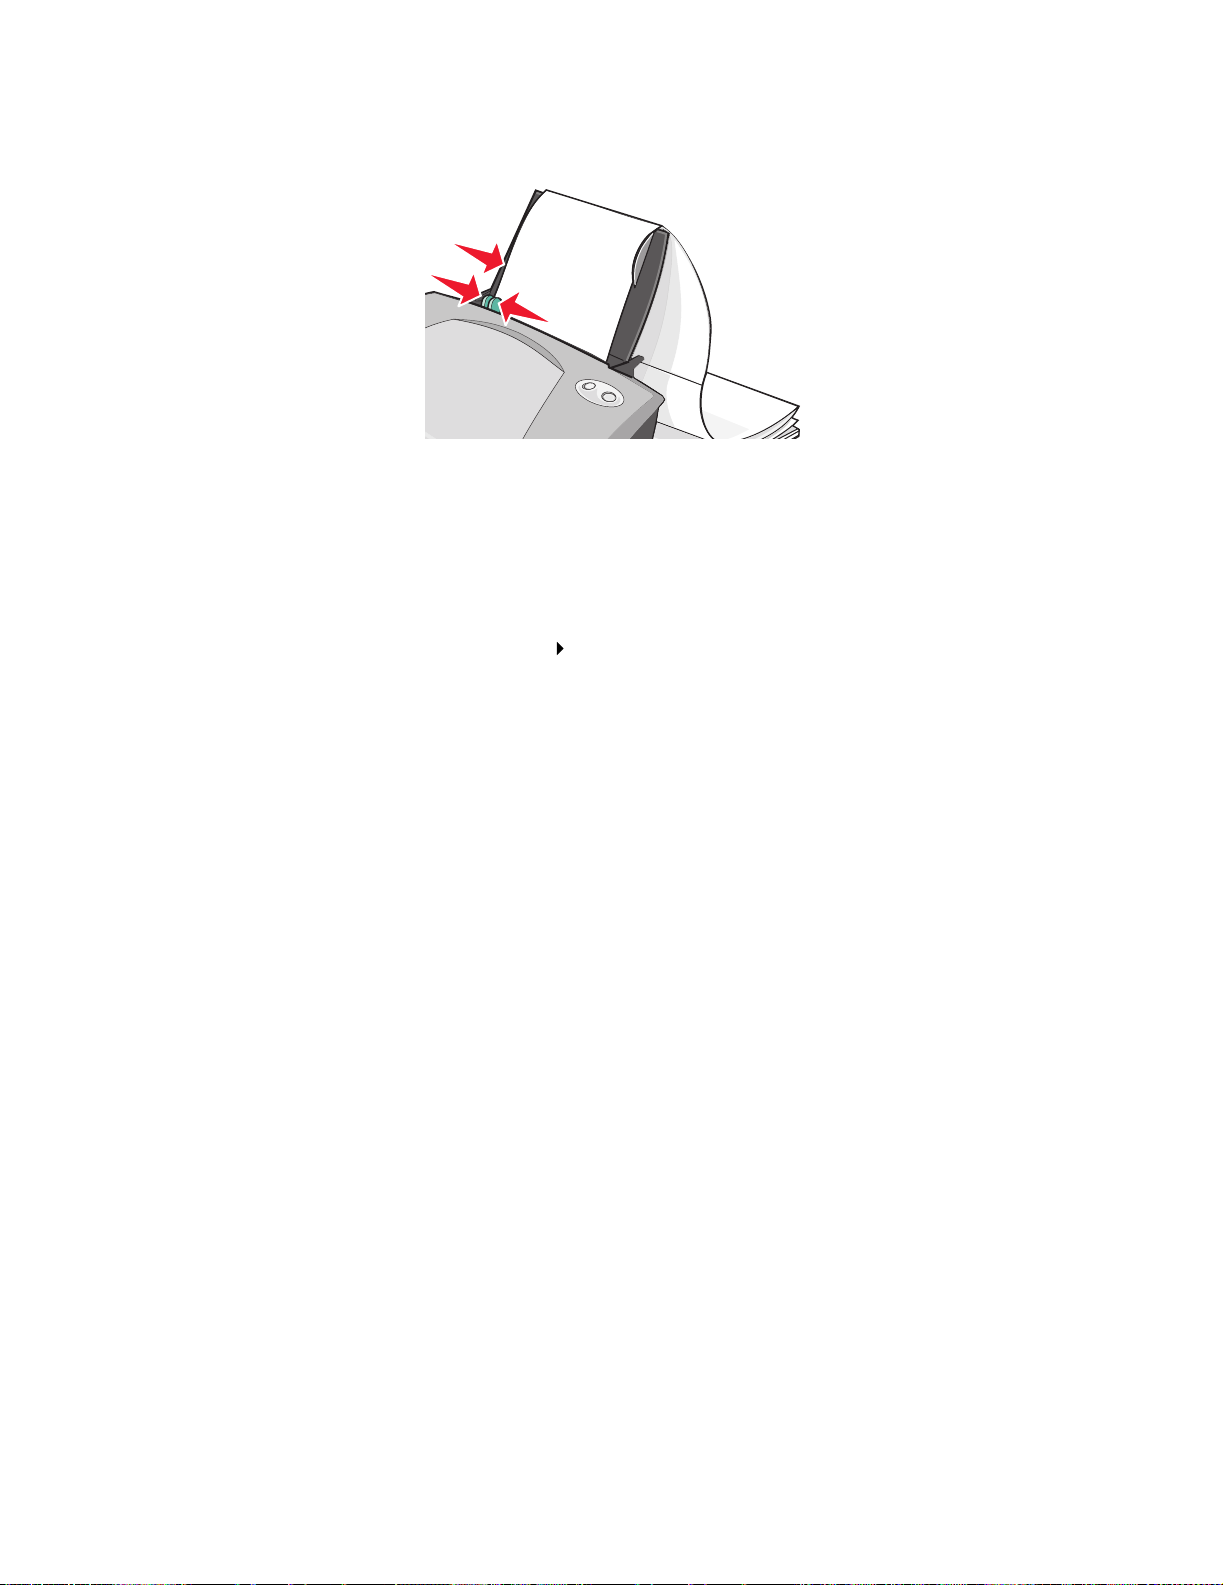
4 Squeeze and slide the paper guide to the left edge of the banner paper .
Note: If you are using letter size banner paper, adjusting the paper guide may not be
necessary.
Step 2: Customize the print settings
1 With your document open, click File Print.
The Print dialog box appears.
2 From the Print dialog box, click Properties, Preferences, or Options. 3 Select a banner size:
a From the P r int Properties dialog box, select the Paper Setup tab.
b From the Paper Size area, select Banner.
c From the Banner Size menu, select A4 or Letter.
4 Select the orientation:
a From the P r int Properties dialog box, select the Paper Setup tab.
b From the Orientation area, select Portrait or Landscape.
5 Select a print layout:
a From the P r int Properties dialog box, select the Print Layout tab.
b From the Lay out area, select Banner.
6 Click OK.
Step 3: Print your banner
Click OK.
Printing a banner
40
Page 41
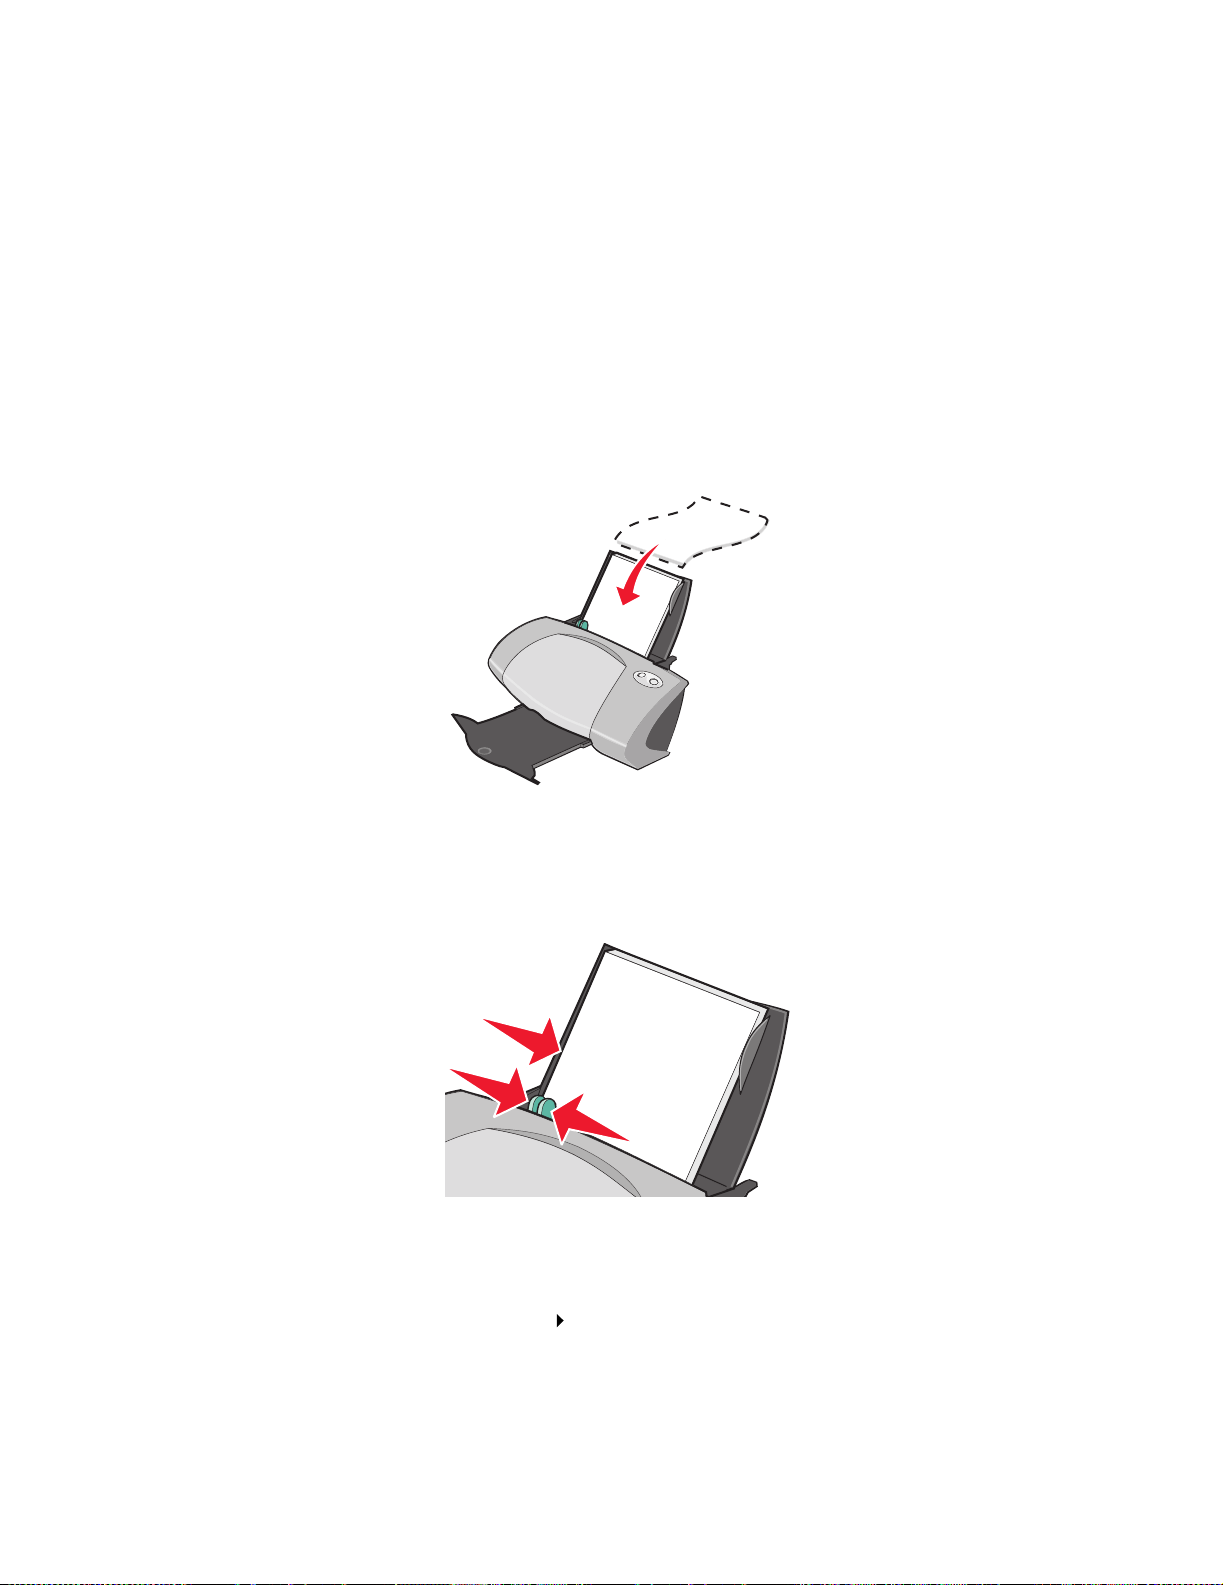
Printing on custom size paper
You can load up to 100 sheets of custom size paper at a time, depending on the thickness of the
paper.
Step 1: Load the custom size paper
• Make sure your paper size fits within these dimensions:
– Width: 76 to 216 mm (3 to 8.5 in.)
– Length: 127 to 432 mm (5 to 17 in.)
• Load the paper vertically against the right side of the paper support.
• Make sure the print side is f a cing you.
• Do not force the paper into the printer.
• Squeeze and slide the paper guide to the left side of the paper.
Step 2: Customize the print settings
1 With your document open, click File Print.
The Print dialog box appears.
Printing on custom size paper
41
Page 42

2 From the Print dialog box, click Properties, Preferences, or Options. 3 Create a custom paper size:
a From the P r int Properties dialog box, select the Paper Setup tab.
b From the Paper Size menu, select Custom Size.
A dialog box displays on the screen.
c From the Units area, select Millimeters or Inches.
d Type the dimensions for your custom paper size.
e Click OK.
4 Continue to customize your document based on your paper type.
Step 3: Print your document
Click OK.
Printing on custom size paper
42
Page 43
3
Maintenance
Replacing the print cartridges
The Lenovo 5110-6110 uses the following cartridges:
Left cartridge carrier:
Lexmark Color cartridge only
19 48
20 50
25 55
Note: Y ou can use t he printer with just a color cartridge or just a blac k cartridge. You mu st
have a color cartridge installed when you print with a photo cartridge.
For inform ation about ordering supplies, see page 50.
Right cartridge carrier:
Lexmark Black or Photo cartridge only
90 (photo)
Removing the used cartridges
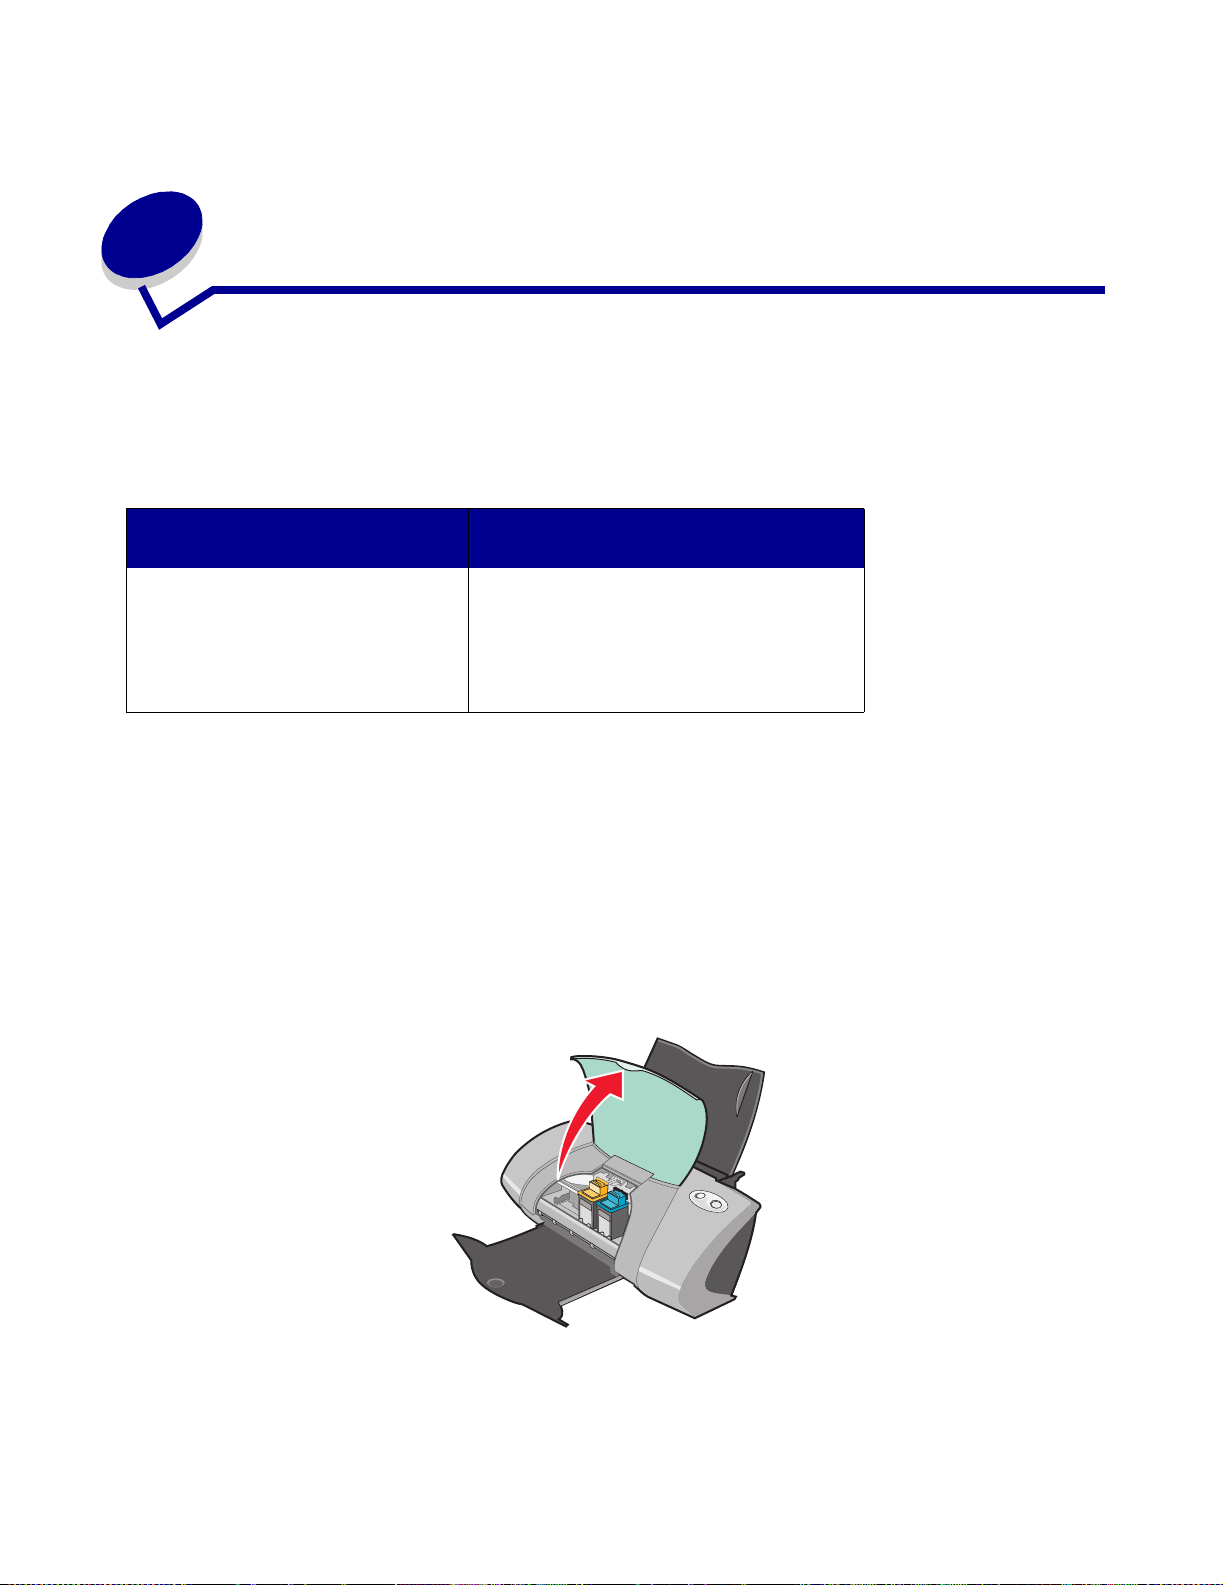
1 Make sure the power light is on. 2 Raise the front cov er.
The cartridge carrier moves to the loading position, unless the printer is busy.
Maintenance
43
Page 44
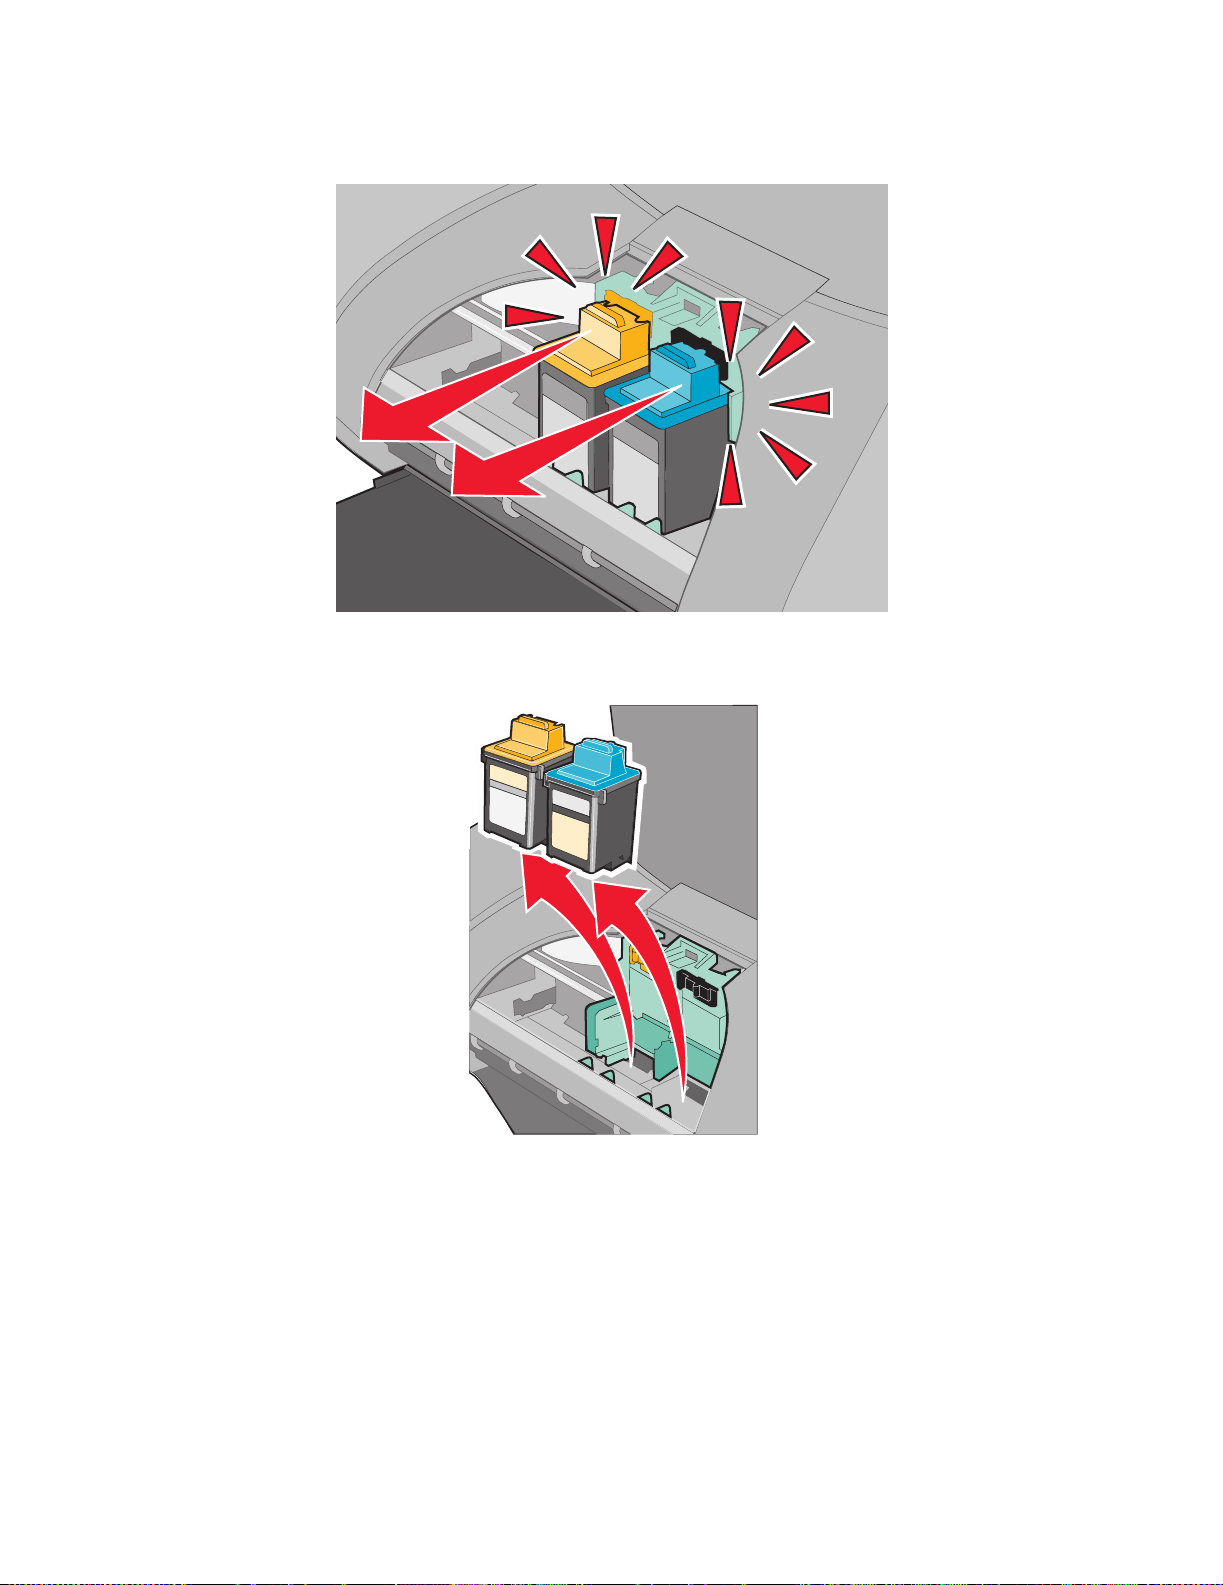
3 Pull the cartridges toward you until y ou hear a snap.
4 Remove the used cartridges. Store them in an airtight container or dispose of them properly.
Replacing the print cartridges
44
Page 45
Installing the cartridges
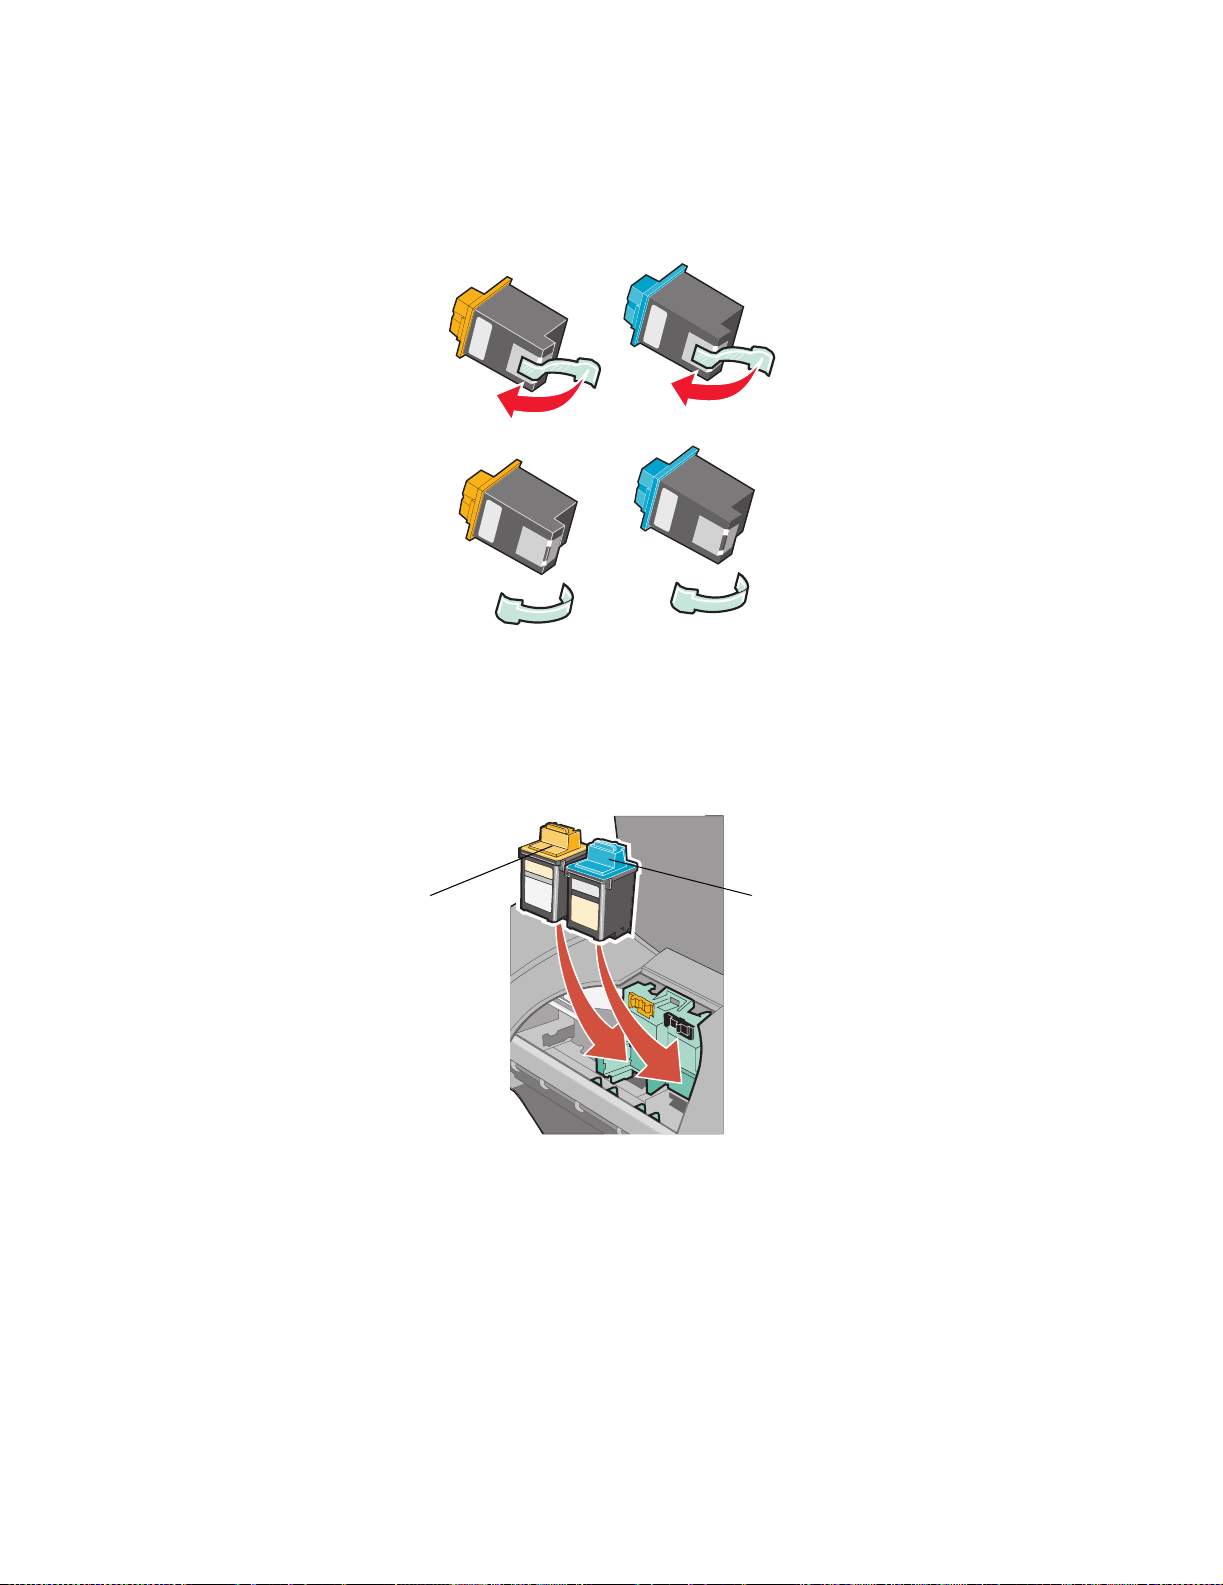
1 If you are installing new cartridges, remove the sticker and transparent tape from the back
and bottom of the cartridges
Warning: Do not touch or remove the gold contact areas on the back and bottom of the
cartridges.
2 Insert the color cartridge in the left carrier. Insert the black or photo cartridge in the right
carrier. Depending on the part numbers you use, the color of the car tr idge tops may vary.
P/N 19, 20, or 25 P/N 48, 50, 55, or 90 (Photo)
Note: T o e xtend the lif e of y our color cartridge and improve printing speed, install a b lack
or photo cartridge along with the color cartridge.
Replacing the print cartridges
45
Page 46
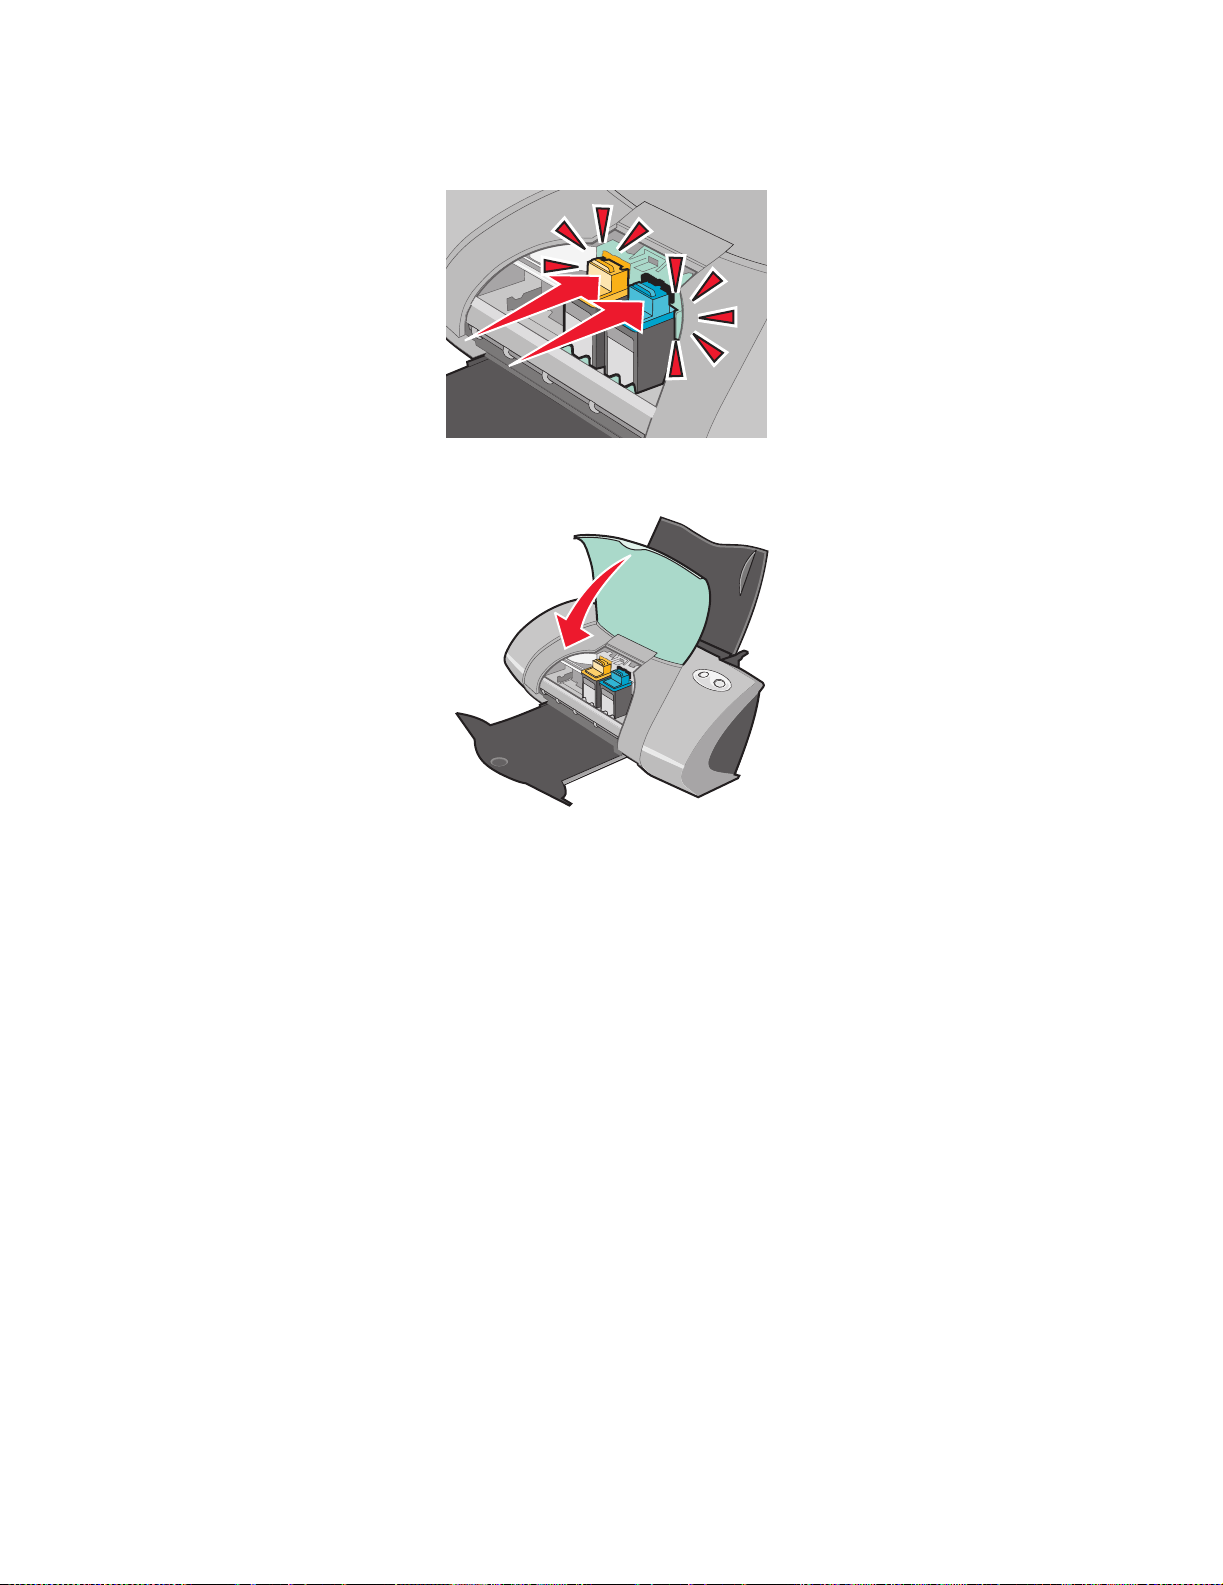
3 Snap the cartridges into place.
4 Close the front cov er.
Note: The front cover must be cl osed to star t a print job.
Specifying cartridge settings in the printer software
Before you specify the print cartridge settings in the printer software, install the cartridges. For help,
see “Installing the cartridges” on page 45.
1 Open the LSC. For help, see “Lenovo Solution Center” on page 11. 2 From the Maintenance tab, click Install a new print cartridge. 3 Select the type of cartridge you installed.
Note: Specify whether the cartridge is a new cartridge or an old cartridge (one that has
been used before). If an old cartridge is incorrectly identified as New Cartridge in
the Lenovo Solution Center, ink levels may be incorrect.
4 Click OK or Next. 5 If you installed a ne w cartridge, continue with “Aligning the print cartridges.”
Replacing the print cartridges
46
Page 47

Aligning the print cartridges
Typically, you only align print cartridges after installing or replacing a cartridge. However, you may
also need to align cartridges when:
• Characters are not properly formed or are not aligned at the left margin.
• Vertical, straight lines are w avy.
To align the cartridges:
1 Load plain paper. 2 Open the Lenovo Solution Center. For help, see page 11. 3 From the Maintenance tab, click Align to fix the blurry edges. 4 Click Print.
The Alignment page prints.
If you have to manually align the cartridges, you must select the best alignment values from
the printed page.
a Find the number under the darkest arrow for each alignment group.
b Use the arrows in the Align Cartridges dialog box to select the number that matches the
darkest arrow on the printed page for each alignment group.
c Click OK.
If the alignment page does not print, make sure you have complete ly removed the sticker
and transparent tape from both cartridges. For help, see page 45.
Improving print quality
If you are not satisfied with the print quality of your document, make sure you:
• Use the appropriate paper for the document. F or exampl e, use ph oto paper if y ou are p rinting
a photo.
• Use paper that is a heavier weight, bright white, or coated.
• Select a higher print quality:
1 From your software program, click File Print.
The Print dialog box appears.
2 From the Print dialog box, click Properties, Preferences, or Options. 3 From the Quality /Speed ar ea, select Better or Best.
Aligning the print cartridges
47
Page 48
If your document still does not have the print quality you want, fol low these steps:
1 Reinsert the print cartridges:
a Remove the print cartridges. For help, see page 43.
b Insert the print cartridges. For help, see page 45.
c Print your document again.
d If print quality has not improved, continue with step 2.
2 Clean the print nozzles:
a Load paper . For help, see page 13.
b Open the Lenovo Solution Center. For help, see page 11.
c Click the Maintenance tab.
d From the Maintenance tab , click Clean to fix horizontal streaks.
e Click Print.
A nozzle page prints, forcing ink through the nozzles to clean the clogged nozzles.
f Print your document again to verify that y our print quality has improved.
g If you are not satisfied with your print quality, continue with step 3, and then print your
document again.
3 Wipe the print cartridge nozzles and contacts:
a Remove the print cartridges. For help, see page 43.
b Dampen a clean, lint-free cloth with water.
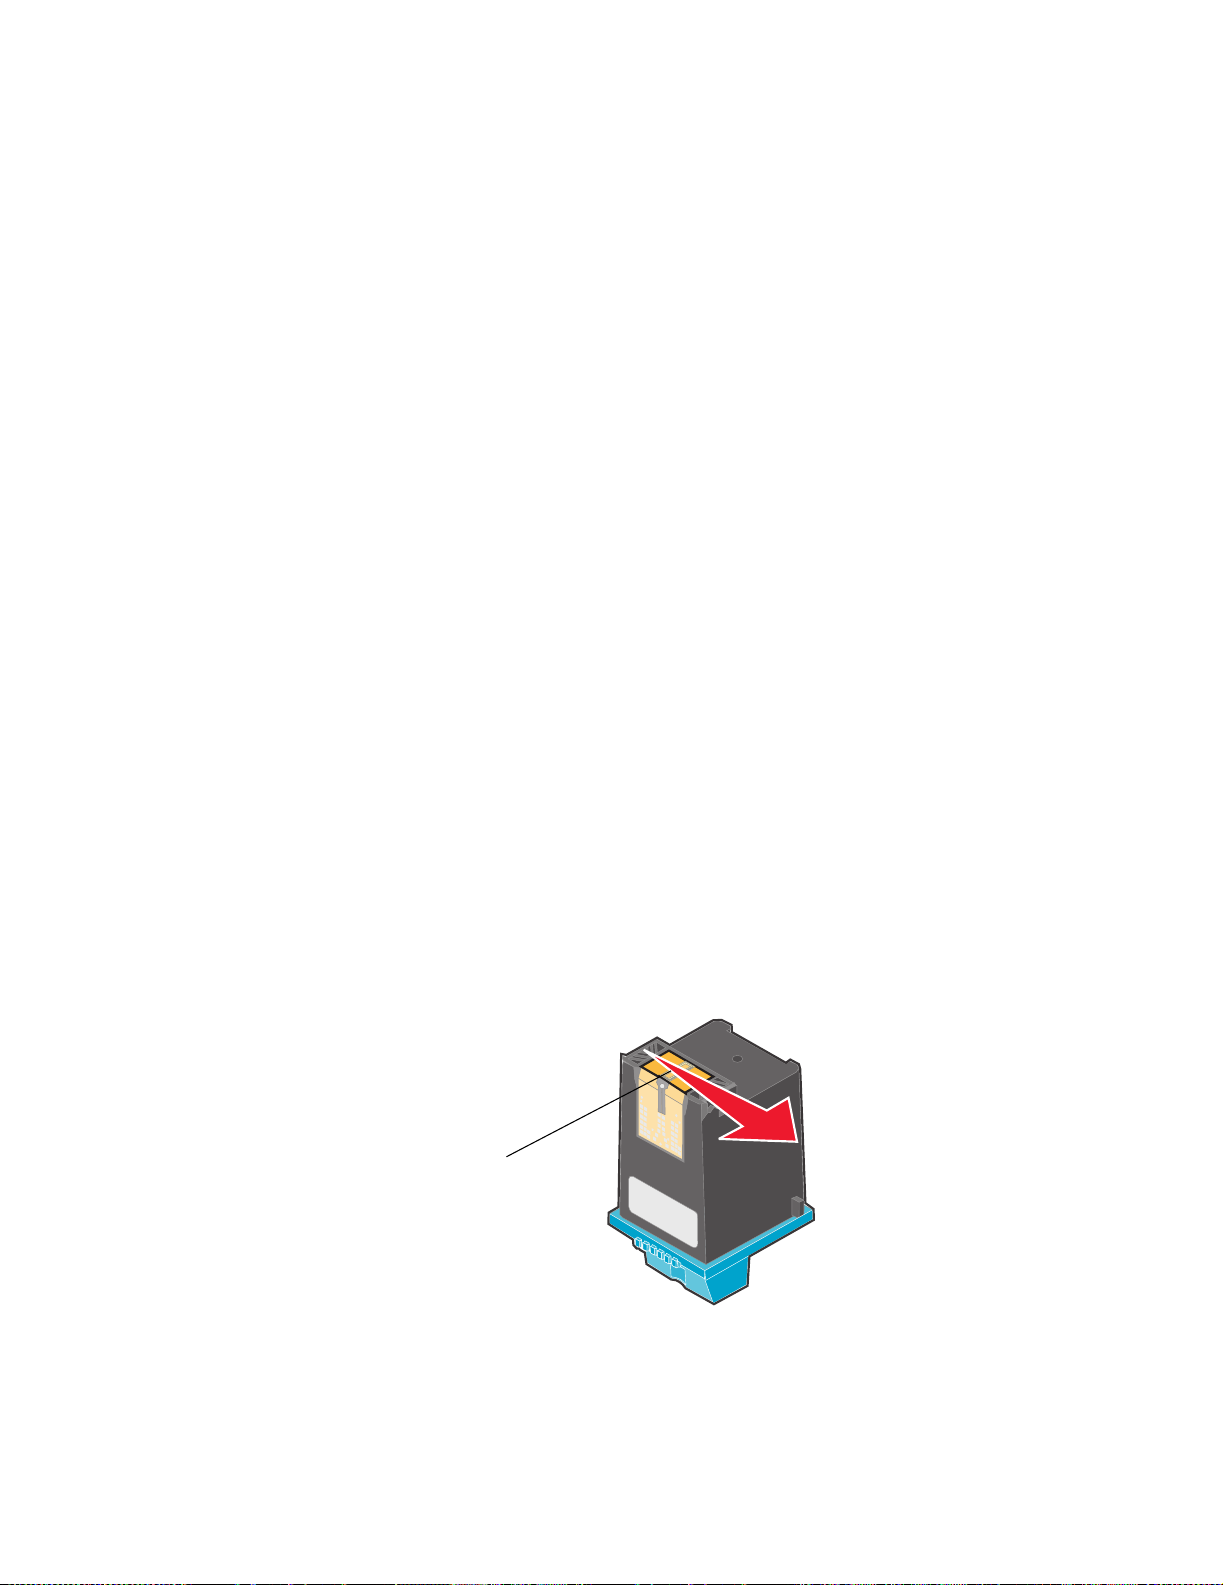
c Gently hold the cloth against the nozzles for about three seconds, and then wipe in the
direction shown.
Nozzles
Improving print quality
48
Page 49
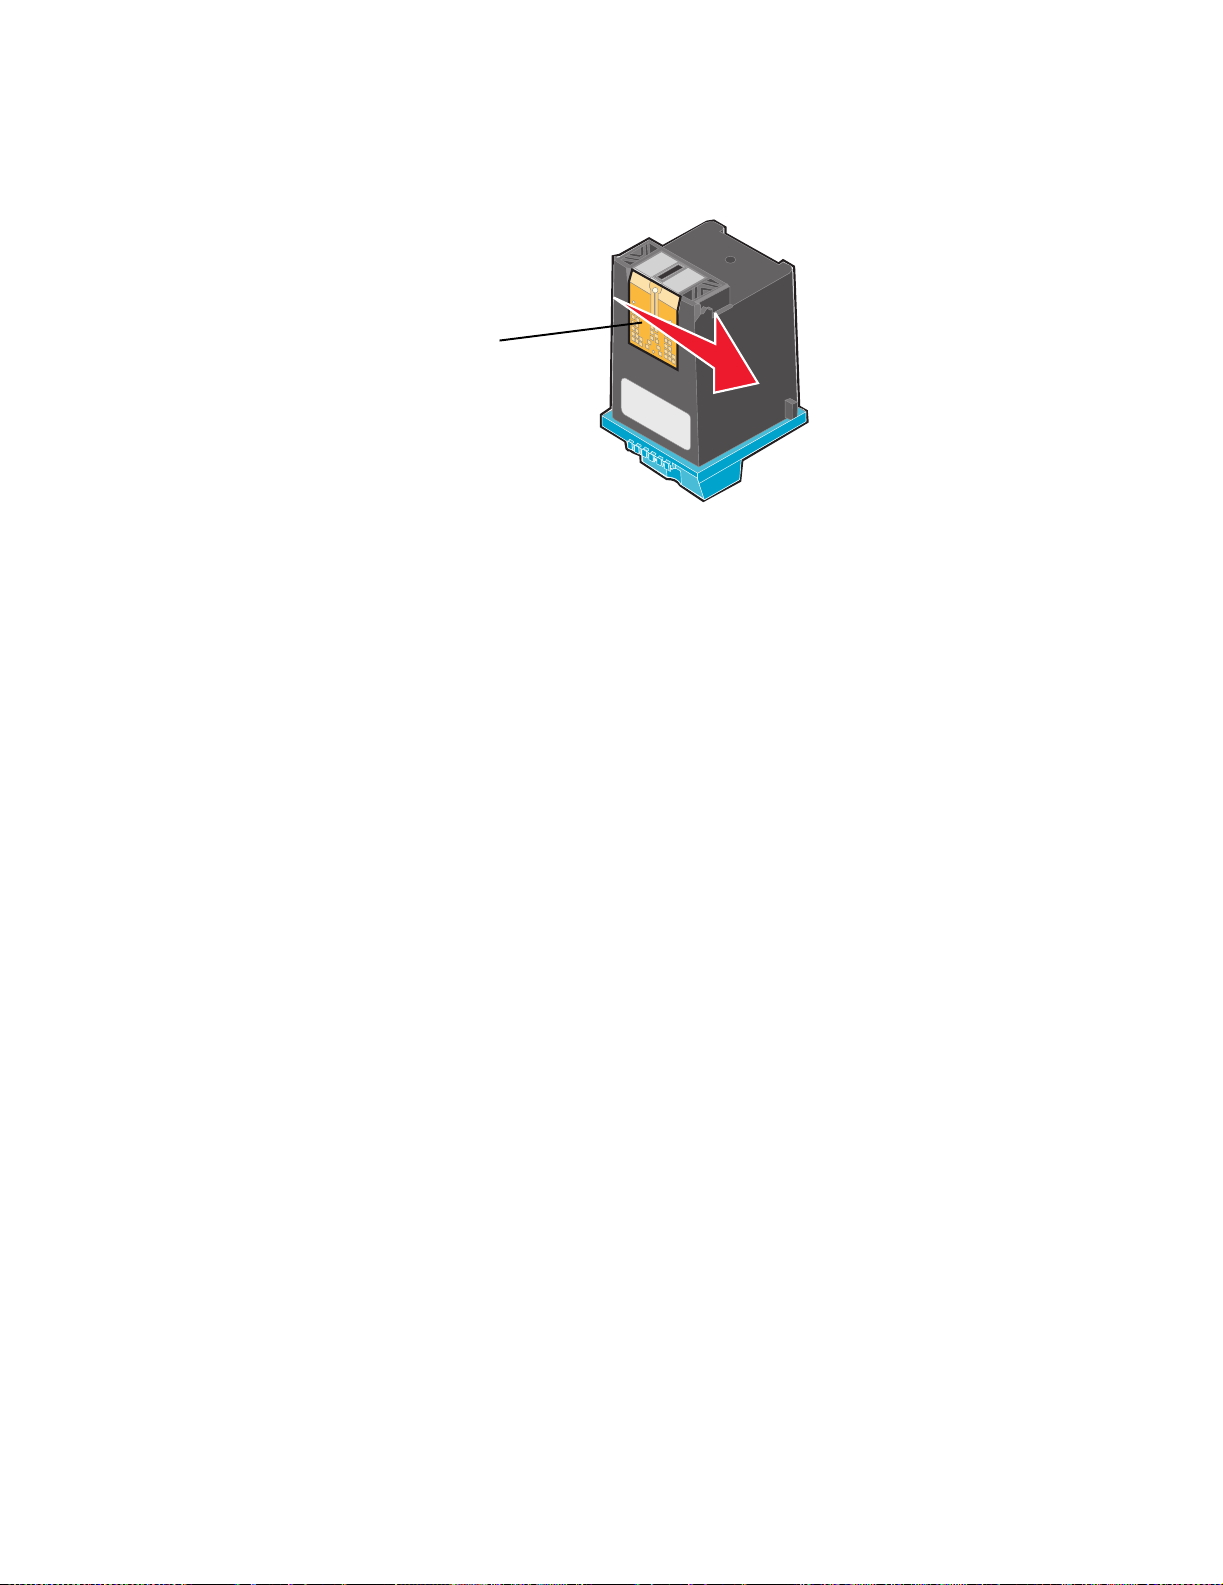
d Using another clean section of the cloth, gently hold the cloth against the contact s for
about three seconds, and then wipe in the direction shown.
Contacts
e With another clean section of the cloth, repeat step c through d.
f Allow the nozzles and contacts to dry completely.
g Reinsert the print cartridges.
h Print your document again.
i If the print quality does not improve, repeat step 3 up to two more times.
j If print quality is still not satisfactory, replace the print cartridges. For information, see
“Ordering supplies” on page 50.
Preserving the print cartridges
To ensure the longest life fr om your print cartridges and optimum performance from your printer:
• Keep a new cartridge in its packaging until you are ready to install it.
• Keep y our photo cartridge in the print cartridge storage unit when not in use. A print cartridge
storage unit is included with new photo print car tr idges.
• Do not remove a print cartridge from the printer except to replace, clean, or store it in an
airtight container. The print cartridges do not print correctly if left e xposed for an extended
period.
Lenovo’s printer warranty does not cover repair of failures or damage caused by a refilled cartridge.
We do not recommend use of refilled cartridges. Refilling cartridges can affect print quality and
cause damage to the printer. For best results, use Lexmark supplies.
Preserving the print cartridges
49
Page 50
Ordering supplies
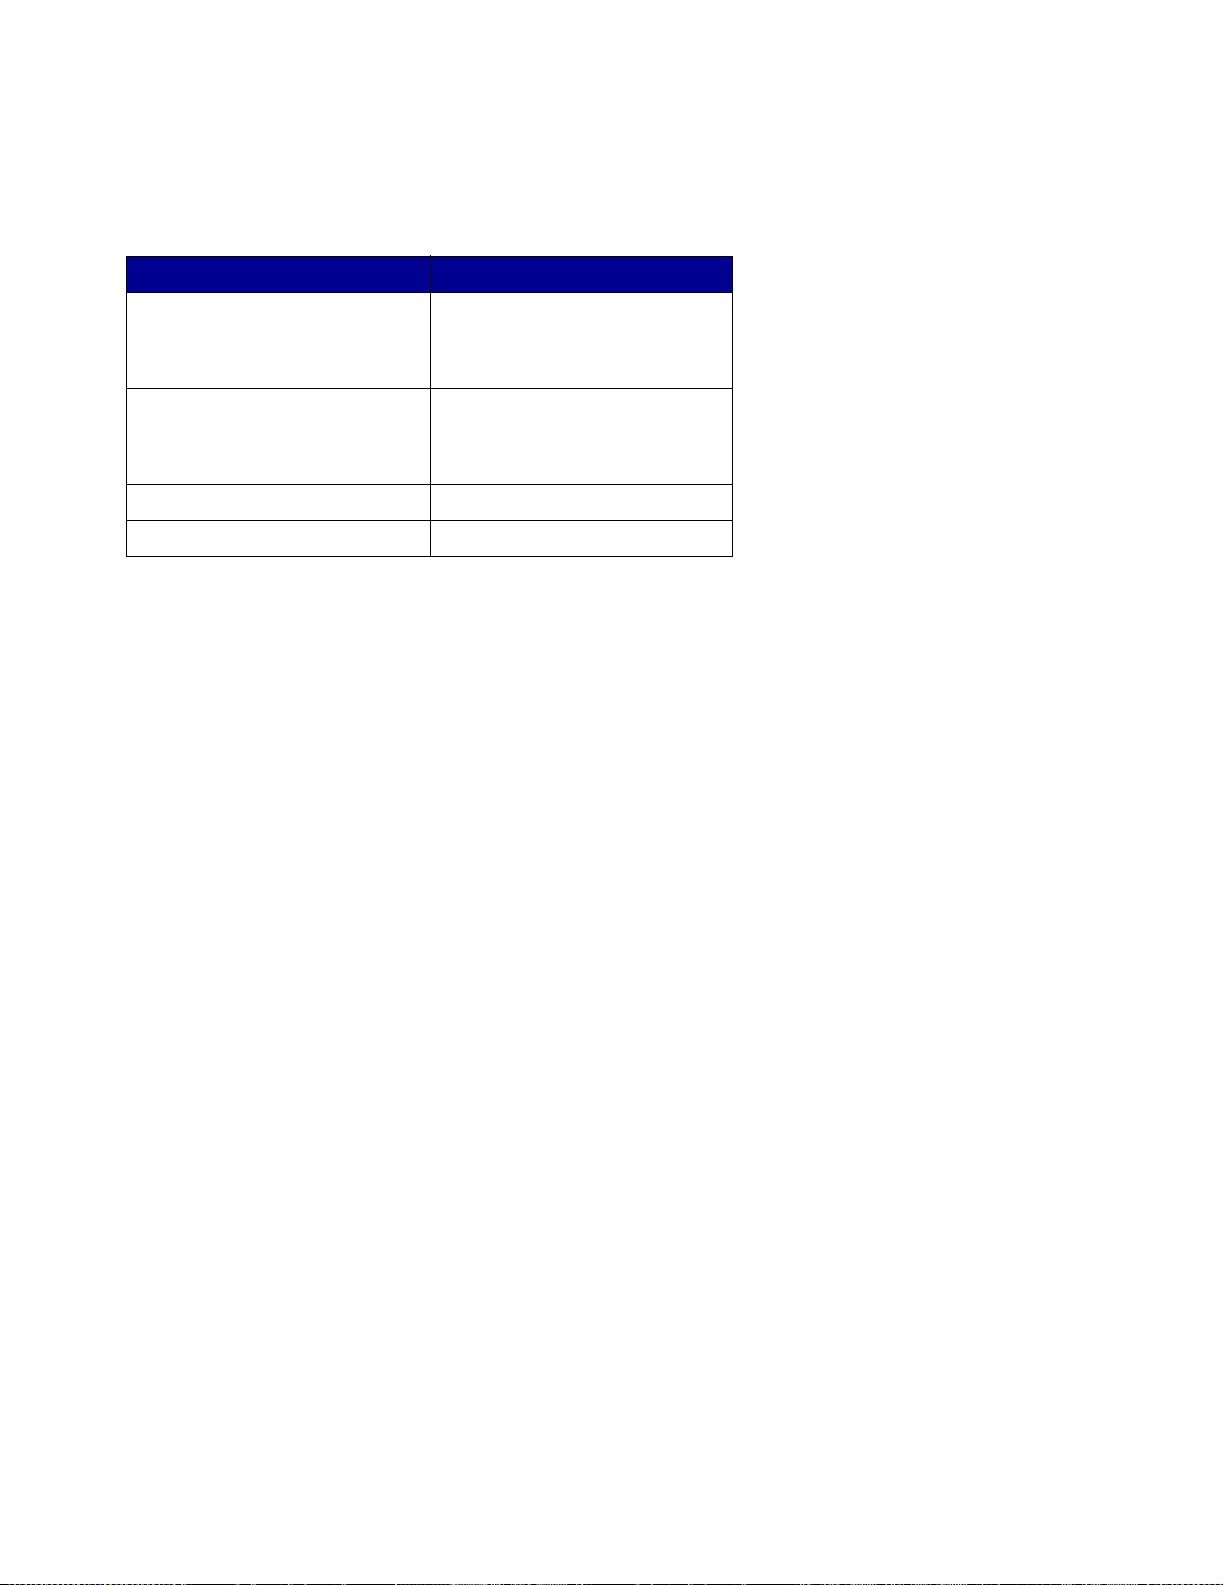
To order supplies or locate a dealer near you, contact the Lenovo Web site at www.lenovo.com.
Item: Part number:
Black cartridge 48
50
55
Color cartridge 19
20
25
Photo cartridge 90
USB cable 12A2405
Ordering supplies
50
Page 51

4
Setup troub leshooting
Troubleshooting checklist
Is the power supply firmly attached to y our printer and a properly gr ounded electrical outl et?
Are both your printer and computer on?
Is your USB cable securely attached to your printer and computer?
Are any printer lights blinking? For help, see “Understanding error messages and flashing
lights” on page 55.
Did you remov e the sticker and transparent tape from the back and bottom of both print
cartridges?
Did you install the print cartridges correctly? For help, see page 45.
Is the paper loaded correctly? Make sure you do not push the paper too far into the printer.
For help, see page 13.
Did you install the printer soft ware correctly?
From your desktop, click Start Programs or All Programs.
If Lenovo 5110-6110 does not appear in your list of programs, install the printer
software.
Setup troubl eshooting
51
Page 52

Is the printer set as the default printer?
To set the printer to be the default printer:
1 Click Start Settings Printers 2 Right-click the Lenovo 5110 and make sure that Set as Default is selected.
Is your printer connected directly to your computer through an external device, such as a
USB hub, switch box, scanner, or fax machine? If it is, follow these steps:
1 Disconnect your printer from any external devices. 2 Connect your printer dir ectly to your computer with a USB cable. 3 Follow these instructions to print a test page.
a Open the Lenovo Solution Ce nter. For help, see page 11.
b From the Maintenance tab, click Print a Test Page.
• If the test page prints, the problem may be with your external devices, not
your printer. Check the documentation that came with your external devices
for hel p.
• If the test page does not print, ref e r to the printer software Help for further
troubleshooting information.
Solving printer software installation problems
If the printer software does not install properly, a communications error message appears when you
try to print. You may need to remove the printer software, and then reinstall it.
When I insert the printer software CD, nothing happens.
1 Close all open software programs. 2 Restart your computer.
Solving printer softwar e in stal l a ti on pr oblems
52
Page 53
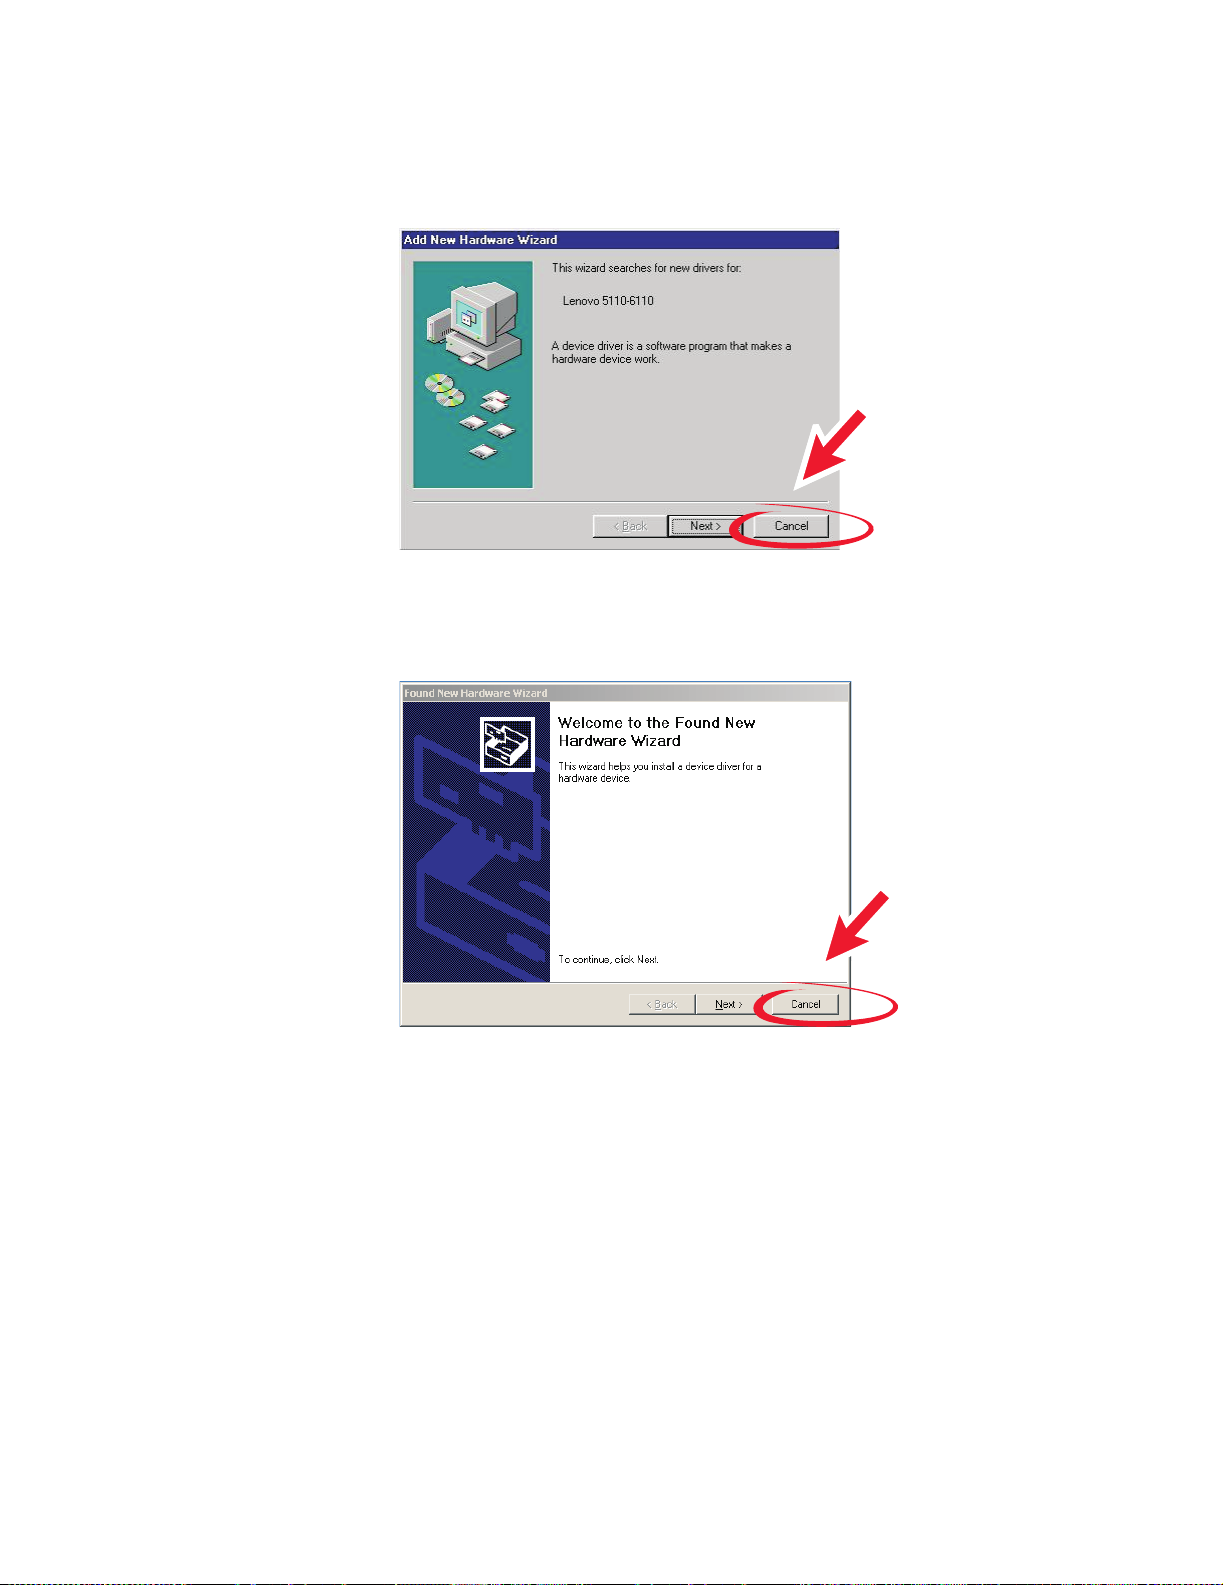
3 Click Cancel on all screens similar to the following that appear.
Windows 98/Me
Windows 2000/XP
4 Eject and reinsert the printer software CD. 5 From your desktop, double-click My Computer. 6 Double-click your CD-ROM drive icon. If necessary, double-click setup.exe. 7 Follo w the instructions on your screen to complete printer sof tware installation.
Solving printer softwar e in stal l a ti on pr oblems
53
Page 54

Removing the printer softwa re
1 From your desktop, click Start Programs Lenovo 5110-6110 Uninstall
Lenovo 5110-6110.
2 Follo w the instructions on your screen to remove the printer software. 3 Restart the computer before reinstalling the printer software.
Installing the printer software
You can install the printer software using the printer software CD that came with your printer, or you
can download it from the Lenovo Web site at www.lenovo.com.
Using the CD that came with your printer
1 Close all open software programs. 2 When your desktop appears, insert the printer software CD.
The Lenovo Instal ler screen appears.
3 Click Install. 4 Follow instructions on your screen to complete printer software installation.
A printer icon is automatically created on your desktop.
Using the World Wide Web
1 From the L enov o W eb site , www.lenovo.com, select the appropriate driv er f or y our oper ating
system.
2 Follo w the instructions on your screen to install the printer software.
Solving printer softwar e in stal l a ti on pr oblems
54
Page 55
5
General troub leshooting
For information about: See page:
Understanding error messages and flashing lights 55
Resolving unsuccessful or slow printing 57
Clearing paper misfeeds or jams 59
Solving print quality problems 60
Solving specialty media problems 63
Understanding error messages and flashing lights
Use this section to understand printer software error messages on your computer screen and
blinking lights on your printer.
Paper Jam message
For help clearing a paper jam, see “Printer has a paper jam” on page 60.
Ink Low message
A print cartridge is running out of ink. An Ink Low message appears when one of your cartridges is
25% full or less.
When this message appears you can:
• Click OK.
General troubleshooting
55
Page 56
• Click the ? to get more information about ordering supplies.
• Order a new cartridge or locate a dealer near you by contacti ng the Lenovo Web site at
www.lenovo.com.
For help:
• Installing a new cartridge, see page 45.
• Ordering supplies, see “Ordering supplies” on page 50.
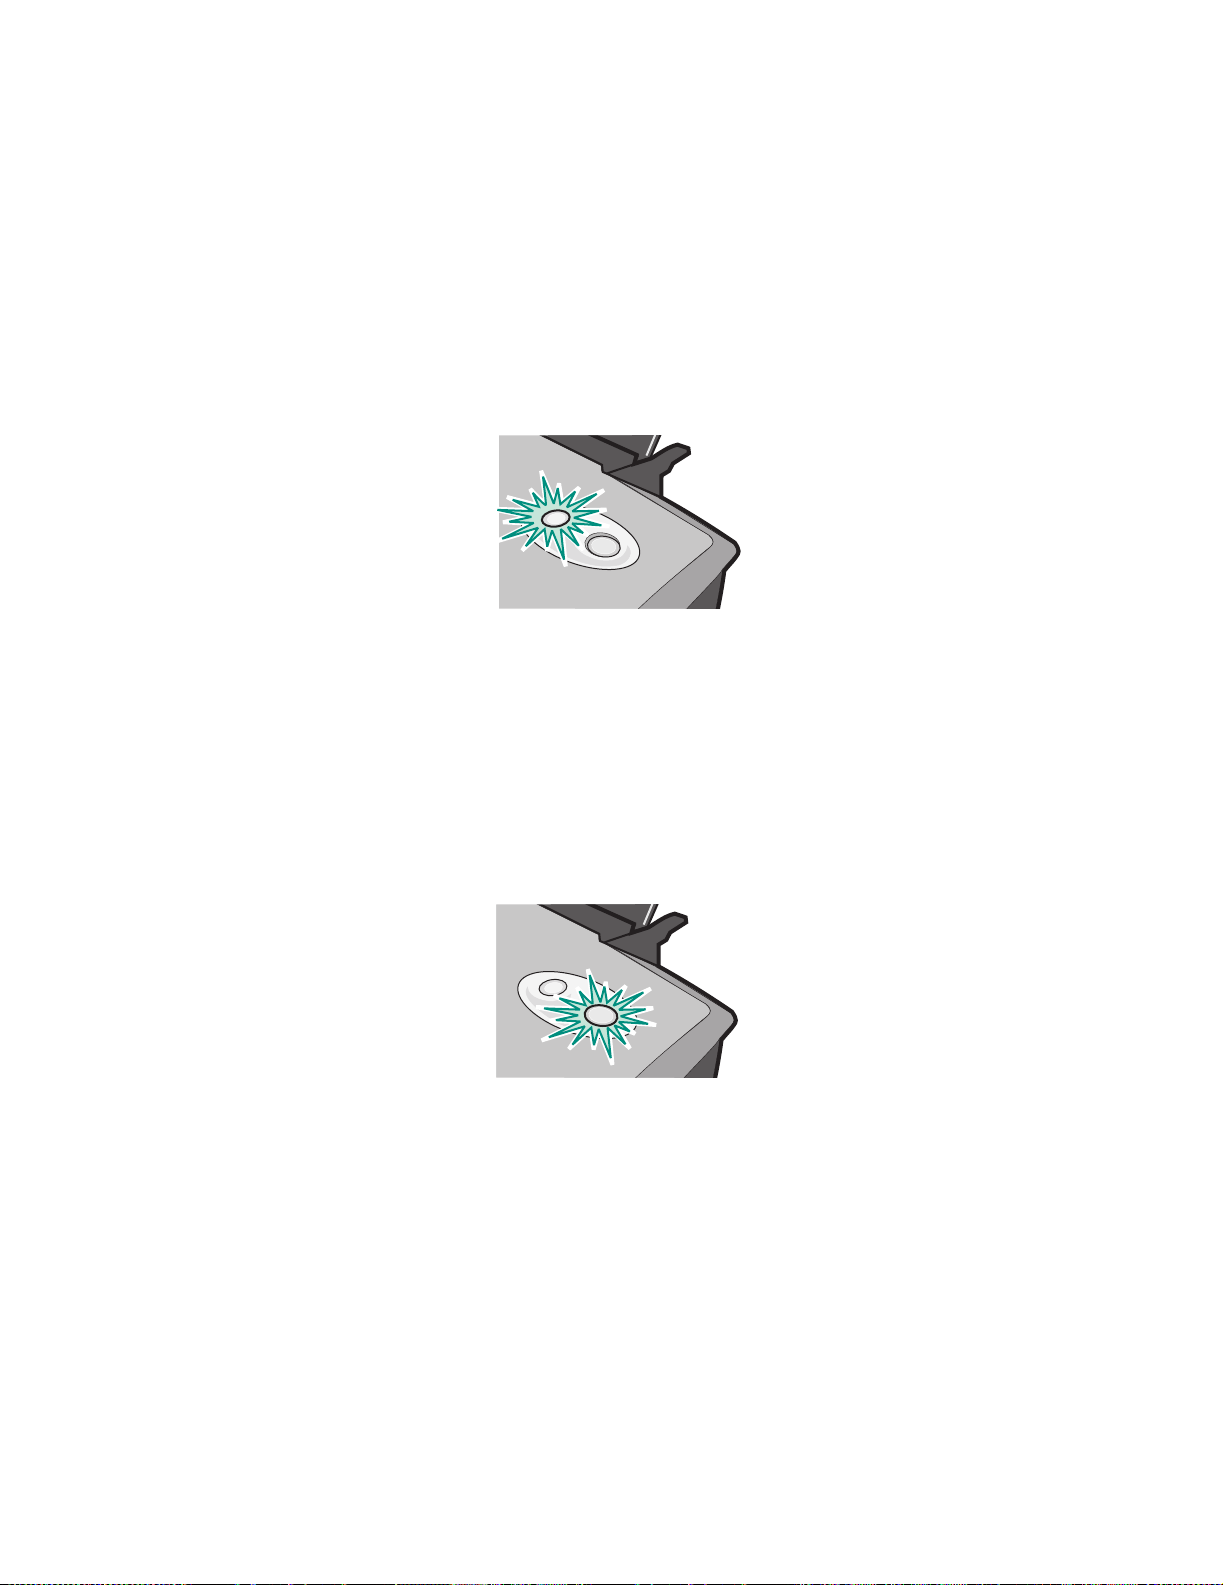
The paper feed light is blinking
If the printer is out of paper:
1 Load paper. 2 Press the paper feed button.
If the printer has a paper jam, see page 60.
The power light is blinking
The print cartridge carrier is stalled.
1 Check your computer screen for error messages. 2 Turn the printer off. 3 Wait a few seconds, and then turn the printer back on. For more help, see “Clearing paper
misfeeds or jams” on page 59.
Understanding error messages and flashing lights
56
Page 57

Resolving unsuccessful or slow printing
The followi ng topics can help you improve unsuccessful or slow printing.
Printer is plugged in, but does not print
For help, first see the troubleshooting checklist on page 51, and then:
Check the printer status:
Windows 98/Me/2000 Windows XP
1 Click Start Settings Printers.
2 From the Printers folder, double-click
the Lenovo 5110-6110 printer icon.
3 From the Printer menu, make sure:
• Set as Default is selecte d.
• Pause Printing is not selected.
1 Click Start Control Panel.
2 Click Printers and Other Hardware.
3 Click View installed printers or fax
printers.
4 From the Printers folder, make sure
there is a check next to the
Lenovo 5110-6110 printer icon
(indicating that it is the default printer). If
there is no check, right-click the icon,
and then click Set as Default Printer.
5 From the Printer menu, make sure that
Pause Printing is not selected.
• Check the printer port:
Windows 98/Me Windows 2000 Windows XP
1 Click Start Settings
Printers.
2 Right-click the
Lenovo 5110-6110 printer
icon, and then click
Properties.
3 Click the Details tab.
4 From the Ports drop-down
menu, check the printer port.
If the USB port is not listed,
remove, and then reinstall the
printer software.
5 Click OK.
1 Click Start Settings
Printers.
2 Right-click the
Lenovo 5110-6110 printer
icon, and then click
Properties.
3 Click the Ports tab.
4 From the list of ports, select
USB printer port.
If the USB port is not listed,
remove, and then reinstall the
printer software.
5 Click Apply. 6 Click OK.
1 Click Start Control
Panel Printers an d Ot h e r
Hardware Printers and
Faxes.
2 Right-click the
Lenovo 5110-6110 printer
icon, and then click
Properties.
3 Click the Ports tab.
4 From the list of ports, select
USB printer port or Virtual
printer port for USB.
If the USB port is not listed,
remove, and then reinstall the
printer software.
5 Click Apply. 6 Click OK.
Resolving unsuccessful or slow printing
57
Page 58

• Make sure you have not installed multiple copies of the pr inter software:
1 Windows 98/Me/2000: Clic k Start Settings Printers.
Windows XP: Click Start Control Panel Printers and Other Hardware Printers
and Faxes.
2 In the Printers folder, make sure there is only one Lenovo 5110-6110 printer icon.
• If you have installed multiple copies of the printer software, remo ve each copy, and then
restart the computer and reinstall the printer software.
• If the printer port is incorrect, remove, and then reinstall the printer software.
After you check these items, print a test page. For help, see page 52.
Test page does not print
For help, first see the troubleshooting checklist on page 51, and then:
• If the paper is jammed, see “Printer has a paper jam” on page 60.
• Try printing your test page again. If it still does not print, see:
– “Resolving unsuccessful or slow printing” on page 57
– “Solving printer software installation problems” on page 52
Alignment page does not print
Make sure:
• You completely removed the transparent tape and sticker from the back and bottom of the
print cartridges. For help, see page 45.
• You installed the cartridges correctly. For help, see page 45.
• You loaded the paper correctly and did not force the paper into the printer.
Printer ejects a blank page after appearing to print
Make sure:
• You removed the sticker and transparent tape from the back and bottom of the print
cartridges. For help , see page 45.
• Your cartridge does not have clogged nozzles . Clean the print cartridge nozzles and contacts.
For help, see page 47.
Resolving unsuccessful or slow printing
58
Page 59

Printer prints very slowly
• Close any software programs not in use.
• Check the document you are printing. Photos and graphics may take longer to print than
regular text. Documents that are large or that contain background images may also take
longer to print.
• Check the printer to see if another document is being printed. Print jobs are printed in the
order the printer receives them.
• Decrease the print quality setting to Normal or Quick Pr int.
Note: Higher print quality settings result in better qual ity documents , but ma y t ake longer
to print.
Clearing paper misfeeds or jams
The followi ng topics can help you clear paper misfeeds or jams.
Paper misfeeds or multiple sheets feed
Make sure:
• Your paper is recommended for inkjet printers.
• The edges of your paper are not curled.
• A piece of paper from a previous print job i s not jammed in the printer.
• You do not load too much paper. Depending on the weight of the paper, you can load up to
100 sheets of plain paper, 20 transparencies or labels, 10 env elopes, or 25 cards.
• You do not force the paper into the printer. For example, A4 paper should extend slightly
beyond the top of th e paper support and letter size paper should align with the top of the
paper support.
• The paper guide is against the left edge of the paper.
• The paper guide does not cause the paper to bow.
• The printer is on a flat, level surface.
• The printer settings you have chosen are correct for the type of document you are printing.
For help, see “Printing ideas” on page 13.
• The paper is against the right side of the paper support.
Printer does not feed envelopes or specialty media
Make sure:
Clearing paper misfeeds or jams
59
Page 60

• Your printer feeds paper without problems.
• Load the envelopes or specialty media vertically against the right side of the paper support.
Squeeze and slide the paper guide to the left edge of the envelopes or spec ialty media. For
help, see “Printing id eas” on page 13.
• You select the appropriate envelope or specialty media si ze and the appropriate paper type.
• You are using a specialty media or envelope size supported by your printer.
• Your softwar e pr ogr am is designe d t o print e nvelopes. For help, check your softw are prog ram
documentation.
• The envelope or specialty media is not jammed. For help, see “Printer has a paper jam” on
page 60.
Printer has a paper jam
If the paper is lodged too far into the printer and cannot be removed:
1 Turn the printer off. 2 Turn the printer back on.
If the printer does not automatically eject the page:
a Turn the printer off.
b Pull firmly on the paper to remove it.
If you cannot reach the paper, raise the front cover, pull the paper out, and then close the
front cover.
c Turn the printer on.
Note: Do not force the paper into the printer.
Solving print quality problems
If print quality is unsatisfactory, you may need to adjust your marg in settings, select a higher p rint
quality, align the print cartridges, or clean the nozzles.
The followi ng topics can help you improve an unsatisfactory document.
Print is too dark or smudged
• Make sure the paper is straight and not wrinkled.
• Let the ink dry completely before handlin g the paper.
• Make sure the paper type and paper size settings in the printer software match the paper
loaded in the printer . For help, see page 8.
Solving print quality problems
60
Page 61

• Make sure the print quality setting is appropriate for the paper type.
• Clean the print cartridge nozzles and contacts. For help, see “Improving print quality” on
page 47.
V ertical strai ght lines ar e not smooth
To improve the print quality of vertical straight lines in tables, borders, and graphs:
• Select a higher print quality.
• Align the print cartridges. For help, see “Aligning the print cartridges” on page 47.
• Clean the print cartridge nozzles and contacts. For help, see “Improving print quality” on
page 47.
Print smears on the page
• The next page exiting the printer may be smearing the ink. Remove each page as it exits the
printer and let it dry completely before stacking.
• Clean the print cartridge nozzles and contacts. For help, see “Improving print quality” on
page 47.
Printed pages have alternating bands of light and dark print (intermittent printing)
Select a higher print quality. For help, see page 8.
Characters are missing or unexpected
• Make sure the Lenovo printer is selected as the default printer.
• Clean the print cartridge nozzles and contacts. For help, see “Improving print quality” on
page 47.
If you do not want to print a borderless document, your margins must fall within these settings:
Margin: Minimum setting:
Left and right • 6.35 mm (0.25 in.) for U.S. Letter, U.S. Legal, Banner Letter,
and custom paper sizes
• 3.175 mm (0.125 in.) for envelopes
• 3.37 mm (0.13 in.) for most paper sizes
Top • 1.7 mm (0.067 in.)
Bottom • 12.7 mm (0.5 in.) for black print jobs
• 19 mm (0.75 in.) recommended for color print jobs
Solving print quality problems
61
Page 62

Printed characters are improperly formed or misaligned
• Cancel all print jobs and print your job again. To cancel al l print jobs: 1 Click Start Settings Printers. 2 Double-click your printer icon. 3 Select the document you want to cancel. 4 From the Document menu, click Cancel.
• Repeat steps 3 through 4 for all the documents you want to cancel.
• Align the print cartridges. For help, see “Aligning the print cartridges” on page 47.
• Clean the print cartridge nozzles and contacts. For help, see “Improving print quality” on
page 47.
Colors on the printout differ from the colors on the screen
• A cartridge may be low on ink. Check the ink levels in the Lenovo Solution Center. For help,
see “Lenovo Solution Center” on page 11.
• Use a different paper brand. Each paper brand accepts ink differently and prints with color
variations.
Select Natural Color as the document color:
1 With your document open, click File Print.
The Print dialog box appears.
2 From the Print dialog box, click Properties, Preferences, or Options. 3 Click Options Quality Options. 4 Click Select color settings manually. 5 Select Natural Color.
Colors on the printout are faded
Try the suggestions listed in the section “Colors on the printout differ from the colors on the screen”
on page 62. If the colors still seem faded, clean the print cartridge nozzles and contacts. For help,
see “Improving print quality” on page 47.
Photos do not print as expected
• Use a photo paper designed for inkj et printer s.
• Select a higher print quality.
Solving print quality problems
62
Page 63

• Select photo paper as the paper type.
• Print a borderless document:
1 With your document open, click File Print.
The Print dialog box appears.
2 From the Print dialog box, click Properties, Preferences, or Options. 3 From the P r int Properties dialog box, select the Paper Setup tab. 4 From the Paper Size area, select Borderless. 5 From the Paper Size menu, select the correct size. 6 From the Print Properties dialog box, click OK. 7 From the Print dialog box, click OK.
Solving specialty media problems
The following topics can help solve problems with specialty media.
Glossy or photo papers or transparencies stick together
• Load one sheet of photo paper or transparencies at a time.
• Use a photo paper or transparency designed for inkjet printers.
• Make sure you loaded the paper correctly (with print side facing you) and selected the
appropriate settings in the printer software. For help, see “Printing phot os” on page 14 or
“Printing transparencies” on page 35.
• Remove each page as it exits the printer, and then let it dry completely before stac king.
Transparencies or photos contain white lines
• Make sure you loaded the paper correctly (with print side facing you) and selected the
appropriate settings in the printer software. For help, see “Printing transparencies” on
page 35 or “Printing photos” on page 14.
• Select a higher print quality, such as Better or Best.
• Clean the print cartridge nozzles and contacts. For help, see “Improving print quality” on
page 47.
Solving specialty media pr oblems
63
Page 64
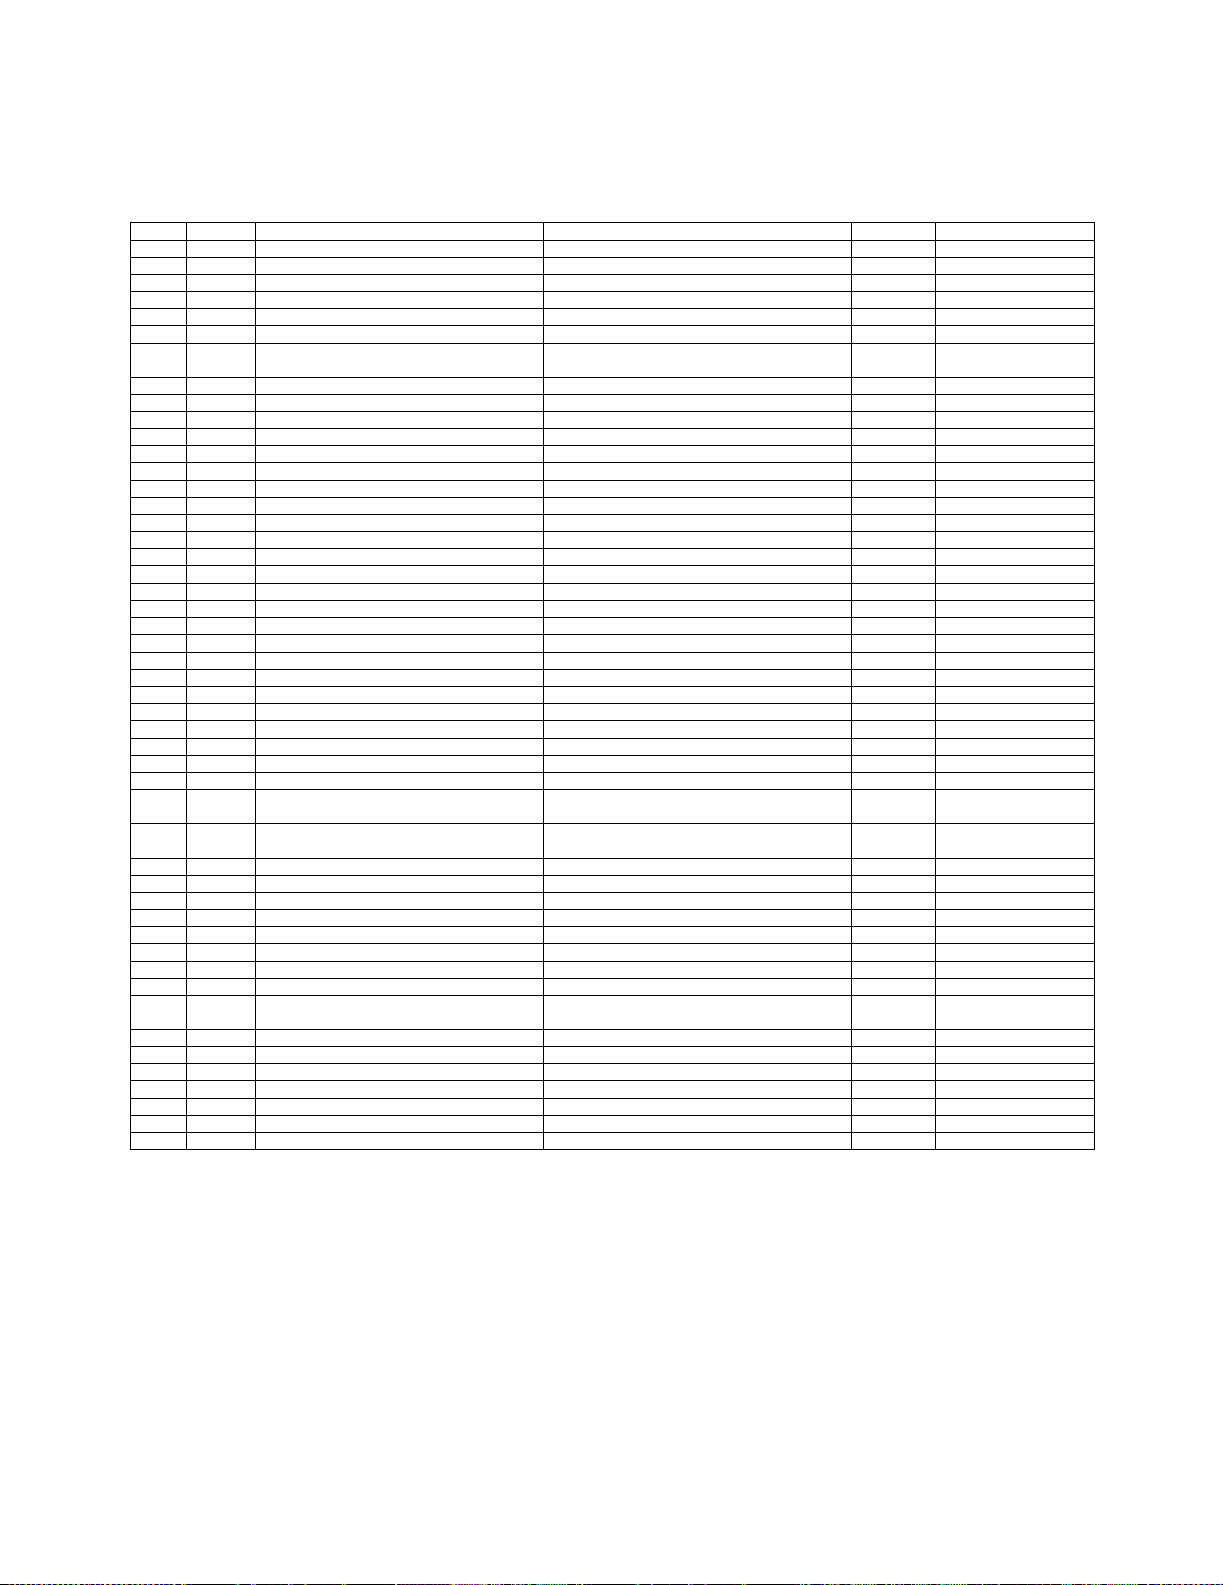
Service station in China
省份 城市 维修站名称 通讯地址 通讯邮编 服务咨询电话
安徽省 合肥市 合肥联星电脑技术服务有限公司 合肥市屯溪路 120 号省地矿局大门西侧 230009 0551-4653222-12
安徽省 芜湖市 芜湖市环联电脑有限公司 皖芜湖市九华中路 326 号 241000 0553-3829207
安徽省 合肥市 合肥佳维电脑技术服务有限责任公司 合肥荣事达大道 93 号 230001 0551-2615660
安徽省 蚌埠市 北京金色快车计算机技术有限公司蚌埠分公司 安徽省蚌埠市胜利路 21 号(地税大厦一楼) 233008 0552-2049920
北京市 北京市 联想(北京)有限公司北京客户服务部 北京市西城区新街口外大街 2 号有研大厦一层 100088 010-82015080-6 01/602
福建省 福州市 福州计通信息技术有限公司 福州市湖东路 82 号闽江工程局综合大楼一楼 350003 0591-7802979
福建省 厦门市 厦门市新四美达科技发展有限公司 厦门湖滨南路 128 号“联想服务”店面
福建省 泉州市 泉州科达电脑有限公司 泉州市九一路龙宫 D 座 106 号 362000 0595-2983215
甘肃省 兰州市 兰州天地电脑技术有限公司 兰州市科技街 06 号 730000 0931-8269999
甘肃省 酒泉市 酒泉创通科贸有限责任公司 甘肃省酒泉市东大街 90 号 735000 0937-2631139
广东省 湛江市 湛江市零壹电脑技术服务有限公司 湛江市赤坎区人民大道北碧海银沙电脑城 1038 之一室 524000 0759-3352182
广东省 广州市 联想电脑广州客户服务中心 广州市天河区黄埔大道中 181 号东成花苑首层 10-11 号 510660 020-85677229/85675151
广东省 深圳市 联想电脑深圳客户服务中心 深圳市南山区高新技术产业园区(南区)联想研发中心 518057 0755-26955888-3000
广东省 江门市 江门市新时速网络技术有限公司 广东省江门市蓬江区潮江路 8 号之十六 529000 0750-3111338/3111388
广东省 惠州市 惠州市联惠电脑服务有限公司 惠州市麦地路 39 号 516001 0752-2234670
广东省 佛山市 佛山市景裕经贸有限公司计算机服务分公司 广东省佛山市华远东路 18 号 2 号铺 528000 0757-3208698
广东省 东莞市 东莞市超想电脑有限公司 广东省东莞市体育路天源电脑城 227 室 523008 0769-2470403
广东省 汕头市 汕头市海立科技有限公司 汕头市中信海滨花园西区三幢 53 号铺面 515000 0754-8941436
广西省 桂林市 桂林市利得科技有限公司 桂林市自由路花桥综合楼 1-11 541004 0773-5858990
广西省 柳州市 柳州铁路华新电子计算机技术交流站 广西柳州市南站路 19 号院 3 号楼 1 楼 545007 0772-3925176
广西省 南宁市 南宁市联鹏计算机服务有限责任公司 南宁市星湖路 37 号 530022 0771-5848812
贵州省 遵义市 遵义中立信息技术有限责任公司 遵义市中华路 430 号 563000 0851-5980818
贵州省 贵阳市 贵阳中阳科技服务有限公司 贵州省贵阳市中华北路 172 号 550004 0851-6833414
海南省 海口市 海南赛维计算机技术有限公司 海南省海口市五指山路 28 号联想服务 570203 0898-65313500/65313501
河北省 保定市 保定市新岛科技贸易公司 河北省保定市朝阳北路高开区路口 071051 0312-3130437/0312-3135500
河北省 张家口市 张家口市建达电脑公司 张家口市建国路 33 号 075024 0313-2043505
河北省 邯郸市 邯郸市华维科技有限公司 邯郸市中华北大街(汉光厂段 16 号) 056002 0310-7031477
河北省 石家庄市 联想(北京)有限公司石家庄维修部 河北省石家庄市和平西路 79 号 050011 0311-7069631
河北省 唐山市 唐山志帮电子技术有限公司 唐山市路北区建华西道永昌楼 31-5-6 号 063000 0315-2049722
河南省 信阳市 河南省信阳科宇有限公司 河南省信阳市新华西路 53 号 464000 0376-6207020
河南省 洛阳市 洛阳市东博电子技术服务有限公司 河南省洛阳市涧西区延安路 15 号 471003 0379-4911357
河南省 商丘市 河南佳泰计算机工程有限公司
河南省 平顶山市 平顶山市长兴伟业计算机有限公司
河南省 新乡市 新乡超越计算机有限公司 河南省新乡市北干道 351 号(郊委路口西) 453000 0373-3333421/3333422
河南省 郑州市 联想电脑郑州客户服务中心 郑州市农业路 66 号附 2 号 450002 0371-3910195
黑龙江省 齐齐哈尔市 齐齐哈尔市北联电脑有限责任公司 黑龙江省齐齐哈尔市龙华路 75 号 161000 0452-2408415
黑龙江省 牡丹江市 牡丹江北联电脑服务有限公司 黑龙江省牡丹江市西安区景福街 123-B 号 157000 0453-6237330
黑龙江省 佳木斯市 佳木斯三江电脑商场 佳木斯市光复路 617 号 154002 0454-8622813
黑龙江省 大庆市 大庆市萨尔图区维尔电子技术服务部 黑龙江省大庆市萨尔图区东风新村纬二路 H-9 楼 4 门 163311 0459-6390619/4603434
黑龙江省 哈尔滨市 联想电脑哈尔滨客户服务中心 哈尔滨市南岗区西大直街 19 号海燕大酒店一楼 150006 0451-3673541
湖北省 宜昌市 宜昌赛维电脑服务有限责任公司 宜昌市沿江大道 148 号 443000 0717-6254851/6254875
湖北省 十堰市
湖北省 武汉市 联想电脑武汉客户服务中心 武汉市武昌洪山区珞瑜路 188-8 号 430074 027-87876817
湖北省 襄樊市 襄樊市凯星电脑技术服务有限公司 湖北省襄樊市樊城区长虹北路诸葛亮广场铜像对面 441003 0710-3232006
湖北省 荆州市 荆州市天昊电脑科技服务有限公司 湖北荆州市南湖路 1 号 434023 0716-8477222/8430745
湖南省 衡阳市 衡阳创益电子服务有限公司 湖南省衡阳市雁峰区先锋路 117 号 421001 0734-8124888
湖南省 怀化市 怀联电脑经营部 怀化市迎丰中路 356 号 418000 0745-2710816
湖南省 长沙市 深圳联想电脑有限公司长沙客户服务部 长沙市解放中路 136-138 号 410011 0731-4436640
湖南省 岳阳市 岳阳维创软件有限公司 岳阳市巴陵中路人保大厦西侧创业中心一楼 414000 0730-8284363
十堰市科学器材有限责任公司 118 阳光使者维修中
心 十堰市朝阳中路 2 号 442000 0719-8674713/8655118
商丘市民主东路高科技电子城 A 区 8 号(台/服/外)商
丘市团结路北侧宜馨园小区 3 号楼 307 号 476000 0370-2282969
河南省平顶山市曙光街东段(曙光街与文明路交叉口路
东20米)
361006/361004
(手持)
467000 0375-4997355
0592-2228383
Service station in China
64
Page 65
湖南省 株州市 株洲今联数码科技有限公司 株州市华联电脑城 C 座 108 号 412000 0733-8287058
吉林省 长春市 长春东大电脑技术有限公司 长春市人民大街 8 号长春科技城 2B17 室 130051 0431-2785885/2788678
吉林省 延吉市 延边天池电脑公司 吉林省延吉市河南街 61-4 号 133001 0433-2836402
吉林省 吉林市 吉林三豪电子工程有限公司 吉林省吉林市重庆街 121 号 132001 0432-2548888/2538888
江苏省 苏州市 苏州市创捷工业控制技术有限公司维修站 苏州市十全街 933 号 215006 0512-65100387
江苏省 徐州市 徐州市徐联计算机有限公司 徐州市中山南路 131 号 221003 0516-3817919
江苏省 连云港市 连云港市东凌计算机技术服务有限公司维修中 心 连云港市新浦区通灌南路 88 号 222003 0518-5400111
江苏省 无锡市 无锡市中科新瑞系统集成有限公司 无锡市解放东路 890-2 号 214007 0510-2828280
江苏省 扬州市 扬州安泰新技术开发有限公司 扬州市大学北路 120 号(京华大酒店向南 50 米) 225009 0514-7360780
江苏省 常州市 常州市凯特计算机技术有限公司 常州市西横街 23 号 213003 0519-6670386
江苏省 南京市 联想(上海)有限公司南京客户服务部 南京市王府大街 115 号 210004 025-4466994-118
江苏省 南通市 南通晓东电脑有限公司 南通市北郭东村 23 号附房 01 号 226006 0513-5280433
江西省 南昌市 江西诚维技术服务有限公司 南昌市南京西路 271 号 ( 南昌市中级人民法院对面) 330006 0791-6250578/6250598
辽宁省 丹东市 丹东市九三电脑有限公司 丹东市振兴区八纬路钟源小区 3 号楼 106 室 118000 0415-2145654/2129093
辽宁省 锦州市 锦州市太和电脑有限公司 锦州市中央大街二段 44-88 号 121000 0416-3147341/3135707
辽宁省 本溪市 本溪市仁合电脑科技中心 本溪市平山区铁路街 189 号 117000 0414-2837113
辽宁省 抚顺市 抚顺市兴联科技服务站 抚顺市新抚区东二街 7 号 113008 0413-2600998
辽宁省 鞍山市 鞍山市中冶电脑网络有限公司 鞍山市铁东区南中华路 259 号 114000 0412-6342588/6332525
辽宁省 沈阳市 联想电脑沈阳客户服务中心 沈阳市沈河区望云寺路 50 号 110013 024-22950561
辽宁省 大连市 大连市联创科技发展有限公司 大连市西岗区新华街 57 号(体育场 11 号看台) 116021 0411-3771281
内蒙古 包头市 包头市杰诚电子技术服务有限责任公司 包头市青山区富强路 10#29 号 014030 0472-3341597
内蒙古 海拉尔 呼伦贝尔盟科教电脑应用服务中心 内蒙古海拉尔市西四道街西四综合楼 6 号联想服务 021000 0470-8347755
内蒙古 呼和浩特市 呼和浩特市联心计算机技术服务有限公司 内蒙古呼和浩特市呼伦南路 7 号 010020 0471-6917978/0471-6917948
宁夏 银川市 银川普信阳光信息技术服务有限公司 银川市民族北街 25 号 750001 0951-6023966
青海省 西宁市 西宁华冠技术服务有限公司 西宁市西关大街 59 号 810001 0971-6166428
山东省 聊城市 山东省聊城市科霸电脑有限公司 山东省聊城市花园北路 55 号 252000 0635-8431177
山东省 济南市 联想电脑济南客户服务中心 济南市历下区解放路 84-1 号 250013 0531-6412819/6998538
山东省 淄博市 淄博盈科计算机技术服务有限公司 山东省淄博市张店区太平路 9 号 255000 0533-2880550
山东省 青岛市 联想电脑青岛客户服务中心 青岛市威海路 262 号 266021 0532-3023082
山东省 潍坊市 山东潍坊冶达电子公司 山东省潍坊市潍城区向阳路 132 号 261021 0536-8380849/0536-8339306
山东省 烟台市 烟台中天科技有限公司 烟台市芝罘区兴业路 28 号 264000 0535-6665680
山东省 东营市 东营区万维计算机服务中心 东营市东营区黄河路 10-14 号 257000 0546-8558777/0546-8780909
山东省 济宁市 济宁先锋信息服务有限责任公司 济宁市建设北路 116 号 272125 0537-2384111/2310048/2384222
山西省 大同市 大同市城区银河电脑服务部 大同市南关下关 15 号 037008 0352-5022854
山西省 运城市 运城志诚电子有限公司 山西省运城市中银大道 1396 号 044000 0359-2090562
山西省 长治市 长治市海航科技有限公司 山西省长治市太行东路 3 号 046011 0355-2032127
山西省 太原市 联想(北京)有限公司太原客户服务部 太原市桥东街桥东小区 G 区 15 号楼底商 3\4 号 030001 0351-4637035
陕西省 宝鸡市 宝鸡市微电子有限责任公司 宝鸡市体育路步行街 16 号-7 号商业房 721000 0917-3203322
陕西省 汉中市 汉中联翔电子有限公司 陕西省汉中市兴汉路中段(桃心岛家电公司对面) 723000 0916-2112562
陕西省 咸阳市 咸阳新阳光信息技术有限公司 陕西省咸阳市咸通南路联想服务 712000 0910-3322555
陕西省 西安市 联想电脑西安客户服务中心 陕西省西安市太乙路南段 1 号 710054 029-8261188-2159
上海市 上海市 联想(上海)有限公司技术服务部 上海市长宁区法华镇路 358 号 200052 021-62838209
上海市 上海市 联想上海虹口区客户服务中心 上海市曲阳路 17 号 200081 021-55560256
四川省 南充市 南充中立技术服务有限责任公司 南充市顺庆区文化路 264 号 637000 0817-2234777
四川省 宜宾市 宜宾中立现代办公设备维修有限责任公司 四川省宜宾市大南街 82 号附 6 号 644000 0831-8213704
四川省 绵阳市 江油市中立联盟电脑技术服务有限公司 绵阳市长虹大道中段 121 号电子商城 801 室 621000 0816-2311700
四川省 成都市 联想电脑成都客户服务中心 成都市新南路四维村 1#亚华大厦二楼 610041 028-85447487
天津市 天津市 天津市南开区南开电子技术开发研究所 天津市南开区三潭路 196 号 300192 022-27454769/27454770
新疆 乌鲁木齐市 乌鲁木齐市宝隆技术服务有限公司 乌鲁木齐市新华南路 56 号附 5 号 830002 0991-2855588/2856688
云南省 个旧市 红河州中立计算机技术服务部 云南省红河州个旧市中山路 34 号精诚电脑 661000 0873-2134855-207
云南省 昆明市 联想电脑昆明客户服务中心 昆明市一二一大街文昌巷云师大综合楼 650031 0871-5394783
浙江省 温州市 温州市晨星科技有限公司 温州市环城东路瑞信大楼 112-1 号 325000 0577-88831664
浙江省 台州市 台州市椒江远见电脑销售中心 浙江省台州市椒江区中山西路 306 号 318000 0576-8224477/8224466
浙江省 金华市 金华壹加壹计算机技术服务有限公司 浙江省金华市李渔路 976 号 321017 0579-2374848
浙江省 宁波市 宁波腾达电脑技术服务有限公司 宁波市孝闻街 118 号 315010 0574-87273368
浙江省 杭州市 联想(上海)有限公司杭州技术服务部 杭州市湖墅南路 241 号 310005 0571-88392861
重庆市 重庆市 重庆市中立联盟科技有限公司 重庆市两路口皇冠大厦 12F-C 400014 023-63872659
重庆市 重庆市 联想电脑重庆客户服务中心 重庆市渝中区长江一路 69 号 400014 023-69081138
Service station in China
65
Page 66

Notices
Electronic emission notices
Federal Communications Commission (FCC) compliance information statement
The Lenovo 5110 DigitalPrinter, type 4136-LG1, and Lenovo 6110 DigitalPrinter , type 4136-LP1, has been tested and found to comply with
the limits for a Class B digital device, pursuant to Part 15 of the FCC Rules. Operation is subject to the following two conditions: (1) this
device may not cause harmful interference, and (2) this device must accept any interf erence received, including interf erence that may cause
undesired operation.
The FCC Class B limits are designed to provide reasonable protection against harmful interference in a residential installation. This
equipment generates, uses, and can radiate radio frequency energy and, if not installed and used in accordance with the instructions, may
cause harmful interference to radio communications. However, there is no guarantee that interference will not occur in a particular
installation. If this equipment does cause harmful interference to radio or television reception, which can be determined by turning the
equipment off and on, the user is encouraged to try to correct the interference by one or more of the following measures:
• Reorient or relocate the receiving antenna.
• Increase the separation between the equipment and receiver.
• Connect the equipment into an outlet on a circuit different from that to which the receiver is connected.
• Consult your point of purchase or service representative for additional suggestions.
The manufacturer is not responsible for any radio or television interference caused by using other than recommended cables or by
unauthorized changes or modifications to this equipment. Unauthorized changes or modifications could void the user's authority to operate
this equipment.
Note: To assure compliance with FCC regulations on electromagnetic interference for a Class B computing device, use a properly shielded
and grounded cable for parallel attach or for USB attach. Use of a substitute cable not properly shielded and grounded may result in a
violation of FCC regulations.
Any questions regarding this compliance information statement should be directed to:
Director of Lexmark Technology & Services
Lexmark International, Inc.
740 West New Circle Road
Lexington, KY 40550
(859) 232-3000
European Community (EC) directives conformity
This product is in conformity with the protection requirements of EC Council directives 89/336/EEC and 73/23/EEC on the approximation
and harmonization of the laws of the Member States relating to electromagnetic compatibility and safety of electrical equipment des igned
for use within certain voltage limits.
A declaration of conformity with the requirements of the directives is available by contacting Lenovo. Lenovo (Beijing) Ltd. No. 6 Chuang Ye
Road, Shangdi Information Industry Base, Haidian District, Beijing, China. Post Code : 100085. Tel: 86-10-82878888.
This product satisfies the Class B limits of EN 55022 and safety requirements of EN 60950.
Environmental T emperature:
Operating: 16
Storage: 1
Transporation: -40
Note: To ensure good printing quality, please put the product under operating environment for a period of time before using if it has been
kept in a cold environment.
°
C - 32 °C
°
C - 60 °C
°
C - 60 °C
66
Page 67

Glossary
alignment page. A page with printed alignment patterns that ejects from your printer during
cartridge alignment.
alignment values. Numbers corresponding to patterns on the alignment page.
automatic alignment. A feature that automatically aligns the print cartridges.
Automatic Sheet Feeder (ASF). A mechanism that automatically feeds paper into your printer.
banner paper. Continuous sheets of perforated inkjet paper designed for banners. Also called
continuous form paper.
booklets. Multiple pages printed, folded, and bundled to resemble a small book.
bundle. A group of booklet pages that are folded in half and stacked before binding.
cartridge contact. The gold area on your print cartridge that touches the carrier contac ts insid e your
printer.
coated paper. Treated paper designed for high-quality printed images.
collate. A printer software option that lets you automatically print one complete copy of a
multiple-page document before the next copy begins, and so on.
continuous form paper. See banner paper.
custom size paper. A nonstandard paper size.
default printer. The printer automatically used when you send jobs to print.
default printer settings. Printer software settings defined when the printer is manufactured.
driver. See printer software.
duplex. A printer software option that lets you print on both sides of a sheet of paper.
glossy paper. Paper with one glossy side designed for photographs.
67
Page 68

handouts. Multiple-page images printed on a single sheet of paper. See N-up.
label. Self-adhesive paper.
landscape orientation. Page orientation in which text runs parall el with the long edge of the paper.
line art. A printer software option used for printing simple line art and graphics.
long-edge binding. A printer software option that arranges duplexed pages so they can be bound
along the long side of the pages.
manual alignment. A printer software feature that lets you select print cartridge alignment values.
margins. The blank area between printed text or graphics and the edges of a page.
mirror. A printer software option that lets you reverse an image before printing.
N-up. A printer software option that lets you print multiple pages of a document on a single sheet of
paper . For example, select 4-up to print reduced images of pages 1 through 4 on the fir st sheet of
paper, images of pages 5 through 8 on the second sheet, and so on.
natural color. A printer software option used for printing photographs and highly detailed graphic
images.
operating system. The software that provides the basic functions needed for operating your
computer. For example, Windows 98.
paper type sensor. A feature that automatic ally detects some types of paper loaded in the paper
tray.
peripheral device. Any external device connected to and contr olled by a computer.
photo paper. Treated paper designed for photographs.
plain paper. Paper designed for printing text documents.
portrait orientation. Page orientation in which text runs parallel with the short edge of the paper.
68
Page 69

poster. An image printed on multiple sheets of paper that, when assembled, produce an enlarged
version of the original image.
premium paper. Coated paper designed for reports or documents with graphics.
print cartridge. The replaceable unit inside your printer that contains the ink.
print cartridge nozzles. The gold area of the print cartridge that ink flows through before it is
applied to your paper during printing.
print queue. The location on the server where print jobs are stored for printing in the order in which
they are sent.
printer driver. See printer software.
printer port. See USB port.
printer software. (1) The program that lets you select settings to customize your print job. (2) The
program that lets your computer communicate with y our print er.
program. Any software loaded on your computer that lets you perform a specific task, such as word
processing or photo editing.
reverse order printing. A printer software option that lets you print the last page of your document
first so your pages are in sequential order on the exit tray.
sharpen. A printer software option that reduces the blurriness of a printed image.
short-edge binding. A printer software option that arranges duplexed pages so they can be bound
along the short side of the pages.
side flip. A printer software option that arranges duplexed pages so they turn like the pages of a
magazine.
software program. See program.
top flip. A printer software option that arranges dupl e x ed pages so the y turn lik e the pages of a l egal
pad.
transparency. A see-through sheet of print media that can be displaye d on an overhead proje ctor.
USB cable. A lightweight, flexible cable t hat lets your printer communi cate with your computer. USB
cables transmit data at much higher speeds than parallel cables.
USB port. A small, rectangular port on the back of your computer that connects to peripheral
devices, such as a printer, using a USB cable. The U SB port lets your computer communicate with
your printer at hi gh speeds.
69
Page 70

watermark. A light graphic or bac kground text that appears on each page of a document.
70
Page 71

Index
A
aligning print cartridges 47
B
banding 61
banner paper 39
booklet
building 26
borderless printing 14, 15, 21
C
cable, part numbers
USB 50
cards 19
cartridges, print
aligning 47
installing 45
ordering 50
part numbers 43
preserving 49
removing 43
replacing 43
troubleshooting 51
characters, misformed 62
coated paper 14
color cartridge part number 43
conserving color ink 23
custom size paper 41
customizing settings
banner paper 39
booklet 24
borderless photos 14, 15
both sides of the paper 17
cards 19
coated paper 14
custom size paper 41
driver 9
duplexing 17
envelopes 21
glossy paper 14
greeting cards 19
handouts
See multiple images on
one sheet
index cards 19
iron-on transfers 34
labels 27
last page first 37
multiple images on one
sheet 29
photo cards 19
photo paper 14
plain paper 13
postcards 19
poster 31
premium paper 16
printing color images in black
and white 23
printing in reverse order 37
printing multiple images on
one sheet 29
transparencies 35
t-shirt transfers 34
two-sided printing 17
D
dark or smudged print 60
default settings 9
digital media 7
downloaded printer driver,
installing 54
duplexing 17
E
electronic emission notices 66
emission statement 66
envelopes 21
error messages
Ink Low 55
Paper Jam 55
F
FCC statement 66
flashing lights 55
G
glossy paper 14
greeting cards 19
H
handouts 29
I
improving print quality 60
index cards 19
Ink Low message 55
installing
print cartridges 45
printer software 54
intermittent printing 61
iron-on transfers 34
L
labels 27
Lenovo Solution Center 11
loading
banner paper 39
booklet 24
cards 19
coated paper 14
custom size paper 41
duplexing 17
envelopes 21
71
Page 72

glossy paper 14
greeting cards 19
handouts 29
index cards 19
iron-on transfers 34
labels 27
photo cards 19
photo paper 14
postcards 19
poster 31
premium paper 16
print on both sides of the
paper 17
transparencies 35
t-shirt tran s fers 34
two-sided printing 17
M
manual cartridge alignment 47
margins, minimum settings 61
memory cards 7
messages, error
Ink Low 55
Paper Jam 55
multiple images on one
sheet 29
N
N-up 29
O
ordering supplies 50
P
Paper Jam message 55
paper jam, clearing 60
paper misfeeds 59
Paper Setup tab 10
part numbers
color cartridge 43
USB cable 50
photo cards 19
photo paper 14
postcards 19
poster 31
premium paper 16
print cartridge
aligning 47
installing 45
ordering 50
part num b er s 43
preserving 49
replacing 43
print color images in b lac k and
white 23
print in reverse order 37
print last page first 37
Print Layou t tab 10
print on both sides of the
paper 17
print quality
improving 47
printer cable,
troubleshooting 51
printer driver
installing 54
removing 54
printer parts 6
printer software
driver 8
installing 54
Lenovo Solution Center 8
removing 54
printer software CD,
troubleshooting 52
printing
alignment page 47
banner paper 39
booklet 24
borderless photo 14, 15
cards 19
coated paper 14
color images in black and
white 23
custom size paper 41
duplexing 17
envelopes 21
glossy paper 14
greeting cards 19
handouts
See multiple images on
one sheet
index cards 19
iron-on transfers 34
labels 27
last page first 37
N-up
See multiple images on
one sheet
photo cards 19
photo paper 14
plain paper 13
postcards 19
poster 31
premium paper 16
print on both sides of the
paper 17
reverse order 37
test page 52
transparencies 35
t-shirt transfers 34
two-sided printing 17
printing problems
blank pages 58
error messages 55
flashing lights 55
paper feeding 59
paper jams 60
print quality 60
software 52
specialty paper 63
unsuccessful or slow
printing 57
Q
Quality/Copies tab 10
R
removing print cartridges 43
removing printer software 54
replacing print cartridges 43
S
setting recommendations
banner paper 39
booklet 24
borderless photos 14, 15
both sides of the paper 17
cards 19
coated paper 14
color images in black and
white 23
72
Page 73

custom size paper 41
default 9
duplexing 17
envelopes 21
glossy paper 14
greeting cards 19
handouts 29
index cards 19
iron-on transfers 34
labels 27
last page first 37
photo cards 19
photo paper 14
plain paper 13
postcards 19
poster 31
premium paper 16
print color images in black
and white 23
print last page first 37
print on both sides of the
paper 17
transparencies 35
t-shirt tran s fers 34
two-sided printing 17
settings, default 9
slow printing 59
software, printer 8
installing 54
removing 54
specialty paper
solving problems with 63
supplies, ordering 50
margins 61
paper feeding 59
paper jams 60
paper misfeeds 59
print quality 60
printer cable 51
printer not printing 57
printer software
installation 52
slow printing 59
software 52
solving print quality
problems 60
specialty paper 63
test page 52
uninstalling software
(Windows) 58
unsuccessful or slow
printing 57
t-shirt transfers 34
two-sided printing 17
U
USB cable
ordering 50
T
test page
alignment 47
does not print 58
test page, printing 52
transfers, iro n- o n 34
transparencies 35
troubleshooting
alignment page 58
blank pages 58
cartridges 51
error messages 55
flashing lights 55
improving print quality 60
73
Page 74

聯想 and Lenovo are trademarks of Lenovo (Beijing), Ltd.,
www.lenovo.com
 Loading...