

Page 1

MN-002
CD Music system
Page 2

CONTENT
WARNING.........................................................................................................1
PANELS.............................................................................................................4
REMOTE CONTROL.......................................................................................5
AMPLIFIER CONNECTION...........................................................................6
AUX IN/ USB CONNECTION........................................................................7
BASIC OPERATION........................................................................................8
CD OPERATION.............................................................................................10
FM OPERATION............................................................................................11
TROUBLE SHOOTING/ SPECIFICATION...................................................12
WARNING
Please read and understand all the warnings provided below, as well as and those ma kedr
on the unit. This unit has been designed and manufactured to assure personal safety.
Only use power source that is specified
in the User Manual or on the system.
Avoid placing the unit in direct
or sunshine or near a heat source.
Do not bend or pull the power cable
excessively, and do not apply pressure
to it by standing on it.
Keep the unit and power plug
away from water.
Never open the cover and avoid dropping
anything into the unit, such as coins,
hairpins and needles for example.
Unplug the unit from the main power
outlet when you do not use it for a long
time.
1
Page 3
IMPORTANT SAFETY INSTRUCTION
1. Read these Instructions - All the safety and operating instructions should be read
before this product is operated.
2. Keep these Instructions - The safety and operating instructions should be retained
for future reference.
3. Heed all Warnings-All warnings on the appliance and in the operating instructions
should be adhered to.
4. Follow all instructions - All operating and use instructions should be followed.
5. Do not use this apparatus near water- The appliance should not be used near water
or moisture - for example, in a wet basement or near a swimming pool, and the like.
6. Clean only with a damp cloth.
7. Do not block any of the ventilation openings. Install in accordance with the
manufacturer’s instructions.
8. Do not install near any heat sources such as radiators, heat Registers, stoves, or
other apparatus (including amplifiers)that produce heat.
9. Do not defeat the safety purpose of the polarized or grounding -type plug. A
polarized plug has two blades with one wider than the other. A grounding prong.
The wide blade or the third prongs are provided for your safety. When the provided
plug does not fit into your outlet, consult an electrician for replacement of the
obsolete outlet.
10. Protect the power cord from being walked on or pinched particularly at plugs,
convenience receptacles, and the point where they exit from the apparatus.
11. Only use attachments/accessories specified by the manufacturer.
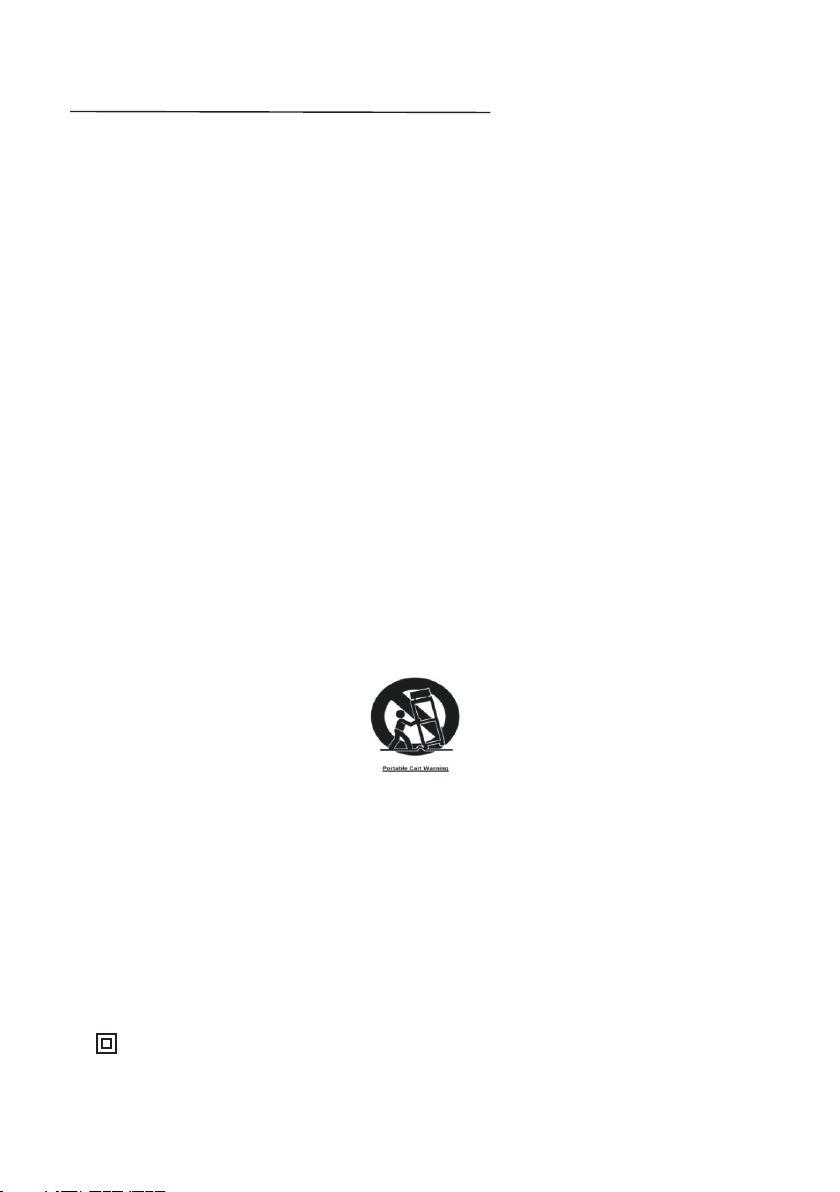
12. Use only with a cart, stand, tripod, bracket, or table specified by the manu-
facturer, or sold with the apparatus. When a cart is used, use caution when
moving the cart/apparatus combination to avoid injury from tip-over.
13. Unplug the apparatus during lightning storms or when unused for long periods
of time.
14. Refer all serving to qualified service personnel. Servicing is required when the
apparatus has been damaged in any way, such as power-supply cord or plug is
damaged, liquid has been spilled or objects have fallen into the apparatus, the
apparatus has been exposed to rain or moisture.
15. Please keep the unit in a good ventilation environment.
16. These servicing instructions are for use by qualified service personnel only. To
reduce the risk of electric shock, do not perform any servicing other than that
contained in the operating instructions unless you are qualified to do so.
17. WARNING: The MAINS PLUG is used as disconnect device, the disconnect
device shall remain readily operable.
18. This equipment is a Class II or double insulated electrical appliance. It has been
designed in such a way that it does not require a safety connection to electrical earth.
2
Page 4

19.
-This lightning flash with arrowhead symbol within an equilateral
triangle is intended to alert the user to the presence of non-insulated
dangerous voltage within the product’s enclosure that may be of sufficient
magnitude to constitute a risk of electric shock.
- Warning: To reduce the risk of electric shock, do not remove cover (or back) as
there are no user-serviceable parts inside. Refer servicing to qualified personnel.
- The exclamation point within an equilateral triangle is intended to alert the user
to the presence of important operating and maintenance in the literature
accompanying the appliance.
20.
21. The batteries in remote control shall not be exposed or excessive heat such as
Invisible laser radiation when open and interlocks defeated.
Avoid exposure to beam of laser.
sunshine, fire or the like.
22. The apparatus shall not be exposed to dripping or slashing and that no objects
filled with liquids, such as vases, shall be placed on the apparatus.
23. To reduce the risk of fire or electric shock, do not expose this apparatus to rain or
moisture.
24. The battery shall not be exposed to excessive heat such as sunshine, fire or the like.
25.
Correct Disposal of this product. This marking indicates that this product
should not be disposed with other household wastes throughout the EU.
To prevent possible harm to the environment or human health from uncontrolled
waste disposal, recycle it responsibly to promote the sustainable reuse of material
resources. To return your used device, please use the return and collection systems
or contact the retailer where the product was purchased. They can take this product
for environmental safe recycling.
ERP II note (Energy Related Products)
This product complies with the European Commission on the Eco-design Directive
and its implementing Regulations- Energy related products. 15 minutes (approx.)
later without any input (expect in FM mode), the system will automatically enter
standby mode. Follow up the instruction manual to assume the function operation.
ACCESSORIES
USB
FREQ.
TIME
RDS/
Part 2: FM Antenna
CD RIP.
PROGRAM
DSP
Part 3: Remote Control
Part 4: User ManualPart 1: Audio cable
USER MANUAL
3
Page 5

PANELS
DISPLAY SCREEN
INDICATOR LIGHT
STANDBY
PLAY/PAUSE
FUNCTION
SEARCH
FAST REWIND
PREVIOUS
PANEL LED LIGHT
EARPHONE PORT
R/L AUX IN SOCKETS
IR SENSOR
EJECT/OPEN/CLOSE
VOLUME KNOB
STOP
TONE
DSP
FAST FORWARD
NEXT
DISC TRAY
EARPHONE
USB PORT
L/R AUDIO OUTPUT
FM ANTENNA
POWER SWITCH
L/R SPEAKERS
POWER SUPPLY
4
Page 6

REMOTE CONTROL
1. Turn on the unit, insert the batteries into the remote control, and direct the remote
control at the remote sensor on the front panel.
2. The distance of the remote control should not exceed 7 meters, or it will not work.
3. If the remote control sensor or IR-radiator is closed, the remote control will not
operate or there will be interference in the way that it would normally function.
4. Interference from other electronic devices that generate high frequency signals can
strongly influence the way that the remote control functions.
STANDBY
USB
CD
FREQUENCY
REPEAT A-B
REPEAT
SEARCH
RANDOM
SAVE
TUNE-
CHANNEL-
DSP
PLAY/PAUSE
FAST FORWARD
FAST REWIND
STOP
BASS+/-
USB
CD FM
FREQ.
1
3
4
7
6
9 0
REPEAT
REP.AB
SEARCH SAVE MO/ST
RANDOM
CH+
TU-
ENTER
CH-
DSP
BASS+
TREBLE+
BASS-
TREBLE-
AUX
2
5
8
TIME
RDS/
CD RIP.
P.LED
PROGRAM
TU+
VOL+
VOL-
EJECT/OPEN/CLOSE
AUX
FM
NUMBER BUTTONS
TIME
RDS/ CD RIPPING
MONO/STEREO
P.LED
PROGRAM
CHANNEL+
TUNE+
ENTER
MUTE
NEXT
PREVIOUS
VOLUME+/-
TREBLE+/-
5
Page 7

SPEAKERS CONNECTION
Disconnect power cables until you have finished all the connections.
→
→
Right Speaker
CONNECTION WITH AMPLIFIER
1. Connect the unit with the amplifier via the audio cable to enjoy a more vivid music
entertainment.
2. Pay attention to the picture below. Each connection must be safe and firm.
3. Disconnect power cables until you have finished all the connections.
FM Antenna
Left Speaker
Left channel
Amplifier
Right channel
6
Page 8

AUX IN/ USB CONNECTION
1. You can enjoy music via other audio devices or USB stick.
2. Pay attention to the picture below for each connection must be safe and firm.
Earphone
RCA cable
EARPHONE
R
R
USB stick
AUX IN operation
1. Press AUX button on remote control or FUNCTION button on the front panel to enter
AUX IN mode.
2. Connect the other music device (e.g. computer) with the CD unit via the RCA cable.
3. Once connected to aux in sockets, only the volume control is available on the unit.
USB operation
1. Insert the USB stick to the USB port on the front panel of the unit.
2. Press USB button on remote control or FUNCTION button on the front panel to enter
USB mode.
3. The unit will automatically detect the USB stick and start playing if there is music
stored.
4. Please refer to BASIC OPERATION for more details.
Note:
1. Depending on the amount of data and media speed, it may take long for the unit to
read the contents of media device. In some cased, reading time may be as long as 60s.
This is not a malfunction.
2. Even when the files are in a supported format, some may not play or display depending
on the compatibility.
3. The file format that this unit can play is Mp3 with extended name “.mp3".
7
Page 9

BASIC OPERATION
Preparation
1. Before the unit is turned on, please check if all the connections are right and safely
made. Insert the plug in the corresponding power socket.
2. Press the POWER ON/OFF button on the rear panel of this unit.
3. Move the disc cover out by pressing the EJECT button on the remote control (or on
the front panel). Put the disc on the disc holder and press the EJECT button again. The
player will start loading the disc and playing the disc automatically.
Standby mode
Press the STANDBY button on the remote control or on front panel to switch on or to
standby mode. Note: Make sure that the unit is connected to the power source.
Select modes
1) Press the CD, USB, FM, AUX buttons on the remote control to enter the related mode.
2) Correctly connect the audio facility (e.g. PC) with this unit, then press the AUX button
on the remote control to enjoy the outer audio input sources function.
3) You can also press the FUNCTION button repeatedly on the front panel to select the
corresponding mode.
Number buttons
1. While playing audio files (e.g. CD), press the Number buttons to select tracks.
E.g. If the number of the track consists of two digits, like 25, press the 2 button first
and then press 5 to select the 25th track.
2. When in FM mode, press the Number buttons to select stations or frequency. Please
refer to FM operation.
Volume setting
Press the VOL+/VOL- buttons on the remote control or rotate the volume knob on the
front panel to adjust the volume to a comfortable level.
Mute button
If you press the MUTE button while playing, the sound signal will not be heard, while
music is still playing. Press MUTE button again or press VOL+/- buttons to resume the
previous volume level.
Previous and next
Briefly press the 9 (PREVIOUS) or the : (NEXT) button to skip to previous or the
next song.
Fast Forward and Rewind
While playing tracks, press the 8 or 7button to fast forward or fast rewind by speed X1
(press once), or speed X2 (press twice), press the third time to resume the normal speed.
8
Page 10

BASIC OPERATION
Enter
Press the ENTER button to enable the selected items.
Play/Pause
While playing a track, press the PLAY/PAUSE button to pause the playback, press
again to resume playback.
Stop
In playing mode, press the STOP button to stop playback, press PLAY/PAUSE button
to start playing from the beginning.
Tone
In any modes, you can adjust bass and treble.
1. Press TONE button on the front panel to select bass or treble, then rotate VOLUME
KNOB from low to high to adjust the effect of bass or treble.
2. Press BASS+/-, TREBLE+/- buttons on the remote control to adjust directly.
DSP
Press the DSP button to select the different sound fields: Jazz, Rock, Classic, Pop, Live,
Dance and off.
Random
Press RANDOM button on the remote control to play the tracks in a random order.
Press again to cancel and resume the normal playback order.
P.LED
Press P.LED button on the remote control to turn off or on the panel LED light.
Repeat A-B
While in playing mode, press the REP. AB button on the remote control to set the section
for repeating.
1. Press the REP.AB button once at the beginning of the section (A).
2. Press the REP.AB button at the end of the section (B). Then it will automatically repeat
section A-B.
3. Press again to exit.
Repeat
While in playing mode, press the REPEAT button to set repeat mode.
For CD, CD-R disc, press the REPEAT button to repeat playing songs.
1. Press once to repeat current track, you will see the “ ”on the display screen.
2. Press again to repeat all tracks, you will see the “ALL ” on the display screen.
3. Press the third time to cancel.
9
Page 11

SPECIAL OPERATION FOR CD
Program
This function is available in stop mode while playing a CD disc. This function makes
tracks of CD be played in a programmed order.
a) Press the STOP button to stop playing, then press PROGRAM button to enter the
program interface: PR 0100.
b) Input the number of tracks you want to play first, e.g. input 04, the fourth track will
be played firstly. When you finish entering the first order, it will turn to the next order
automatically. When you finish all progress, press ENTER to confirm, and it will play
the tracks by the programmed order.
c) To cancel programmed playing, press the STOP button twice to exit.
CD Ripping
CD Ripping is to store tracks from CD to USB device. The operations are as below:
a) Press CD RIP. button on remote control to enter CD Ripping interface: <CD RIP>.
b) Press the or to select the ripping speed: <NORMAL> or <HIGH>.
When you have selected the ripping speed, the unit enters the ready-ripping-status.
c) Press Number buttons to select the tracks you want to rip, it shows: <RIP _ _ Y>.
When you finish selecting the first track, it automatically skips to next track ripping
interface: < RIP _ _ Y>
d) To cancel the track you have selected or to delete a selected number, you can press the
same track number again, when it shows: <RIP _ _N>, the selected track is cancelled.
e) To rip all tracks, press TIME. button. Press again to cancel ripping all tracks.
d) When you have finished tracks selection, press ENTER button on remote control to
start ripping, and the tracks are stored in a new folder of USB device automatically.
f) While the unit is ripping, the display shows the ripping track numbers every 5 seconds.
Press STOP button twice will stop the ripping progress, press ENTER button to start
playback from beginning. If ripping at the normal speed, the unit will play the music.
g) When ripping is over, it shows: <CD RIP>, press STOP button, then press ENTER
button to start playback from the beginning.
E.g. To rip the 5th and 13th tracks into the USB stick, first press CD RIP. button, then
press 0 and 5, it shows: <RIP 05Y>, continue to press 1, 3, it shows: <RIP 13Y>,
press ENTER to start ripping.
TIME selection
To start playing from a specific time of the disc (not for Mp3 disc or USB mode):
Press TIME on remote control once, it shows “D_ _ _ _.” Input numbers to select the
desired time as the beginning of a disc.
E.g. To start the disc from time 35:05 (within the total disc time), press TIME once, then
input numbers 3, 5, 0, 5 on the “D_ _ _ _” interface.
To listen to a desired time of the track (for CD disc, MP3 disc or USB mode):
Press TIME twice, it shows “T_ _ _ _.” Input the numbers to set the desired track time.
E.g. To listen to time 02:08 of a track (within the total current track time), press TIME
twice, then input numbers 0, 2, 0, 8 on the “T_ _ _ _” interface.
10
Page 12

RADIO OPERATION
Please make sure that the aerial on the back of the radio is fully extended and adjusted
before you attempt to tune to an FM station (a vertical position is recommended). This
will ensure that the maximum signal strength is available when the radio begins to scan.
Extending the aerial also ensures the best possible sound quality.
Enter FM mode
1.
Press the FM button on the remote control or FUNCTION button on the front panel.
2. Station tuning
The range of FM frequency is from 87.5MHz to 108.0MHz. Press TU+/- briefly to
adjust the frequency in increment of 0.05MHz.
3. Selecting stations
a) Press Number buttons to select wanted stations, e.g. if you want to listen to the 28th
station, press 2, then press 8, the unit will skip to the 28th station.
next or
b) Press CH+/- buttons to skip to the
c) Press FREQ. button then use Number buttons to select the frequency of the station.
4. Station scanning
a) For automatic scanning:
Press SEARCH button to search all stations from low to high frequency automatically.
The searched stations are saved automatically. Press again to stop scanning.
b) For manual tuning:
Press and hold TU+/- button to scan the next or previous frequency with sufficient
reception, once an available frequency is found, it will stop scanning.
previous station.
5. Save Stations (60 stations)
a) To save the current frequency into the current station.
E.g. If you are listening to the 88.9MHz in the 5th station, press SAVE button to store
the 88.9MHz into the 5th station.
b) To save a special station.
E.g. If you want to save 99.7MHz into the 15th station, first press CH+/- or Number
buttons 1, 5, to select the 15th station; press FREQ. button and input the number
9, 9, 7, 0, then press SAVE button to save.
6. Setting Stereo
Press the MO/ST button to turn STEREO ON or OFF if there is strong stereo signal.
7. RDS information
When there is RDS signal received, press RDS button on the remote control to check
the information of the station: program style, program type, clock time, radio text.
11
Page 13

TROUBLE SHOOTING
For your convenience, we have listed some methods to solve some common problems you may
encounter when you use the system. If the problem occurs repeatedly, contact the nearest
maintenance center.
Problem
Power supply does
not work
Remote control
does not work
Play is unavailable
No sound from
speakers
Discontinuous sound
Possible cause Solution
Power plug is not fully
inserted into the power socket
The batteries have been
used up
The remote control is not
aimed at the remote control
sensor
No disc inserted Insert a disc
Disc incorrectly inserted
Disc is not compatible with
this device
Audio wire is not connected
correctly
Incorrectly connected to
computer
Disc is not clean
Disc scratched
Fully insert the power plug
into the power socket
Replace them with new ones
Please aim the remote control
correctly; in line with the
remote sensor
Reinsert the disc with the
picture upward
Only use discs that are
compatible with this device
Connect the audio wire
correctly
Connect the computer correctly
by referring to the illustration
Replace with a clean disc or
use a soft cloth to clean the
disc
Replace with a new one
SPECIFICATION
Disc type
Input joint
Power supply
Max power
Frequency
Operating conditions
CD, CD-R
USB, AUX INPUT
220-240V~50Hz
60W
87.5-108MHz
Temperature : 5 C~35 C
Installation : on a flat horizontal surface
12
Page 14

Service and support
For information: www.lenco.com
For support: http://lencosupport.zendesk.com
Lenco helpdesk:
Germany 0900-1520530 (Local charges)
The Netherlands 0900-23553626 (Local charges + 1ct p/min)
Belgium 02-6200115 (Local charges)
France 03-81484280
The helpdesk is accessible from Monday till Friday from 9 AM till 6 PM.
When contacting Lenco, you will always be asked for the model and serial number of
your product. The serial number can be found on the back of the device. Please write
down the serial number below:
(Local charges)
Model:
Serial number:_________________________________
Lenco offers service and warranty in accordance to European law, which means that in
case of repairs (both during and after the warranty period) you should contact your local
dealer.
Important note:
It is not possible to send products that need repairs to Lenco directly.
Important note:
If this unit is opened or accessed by a non-official service center in any way, the warranty
expires.
This device is not suitable for professional use. In case of professional use, all warranty
obligations of the manufacturer will be voided.
MN-002
13
Page 15

Notice, statements and information
Lenco is not liable for printing errors in the manual.
The specifications and external appearance of the set are subject to change without prior
notice.
This symbol indicates that the relevant electrical product or battery should not
be disposed of as general household waste in Europe. To ensure the correct
waste treatment of the product and battery, please dispose them in accordance
to any applicable local laws of requirement for disposal of electrical equipment
or batteries. In so doing, you will help to conserve natural resources and
improve standards of environmental protection in treatment and disposal of
electrical waste (Waste Electrical and Electronic Equipment Directive).
Products with the CE marking comply with the EMC Directive (2004/108/EC)
and the Low Voltage Directive (2006/95/EC) issued by the Commission of the
European Community.
®All rights reserved
14
 Loading...