

Page 1
Kitchen Radio with DAB+
KCR-004 DAB+
User Manual
www.lenco.com
Thank you very much for buying the KCR-004 DAB+. In order to let you freely operate the product
and fully enjoy the overbalancing happiness it brings you, we have introduced each function of the
player in detail in this user manual. Please carefully read this user manual before use and keep for
future reference.
Page 2

Table of Contents
Safety Precautions
Appearance and Key Descriptions
Getting Started
KCR-004 DAB+ Functions
Main Menu and Settings
DAB
FM
Preset
AUX-IN
Troubleshooting
Specifications
Page 3

Safety Precautions
It is not recommended to use a headphone to listen KCR-004 DAB+ via
line out connector. In case listening the KCR-004 DAB+ with a
headphone (which is not provided), always reduce the volume before
you put on the headphone. After the headphone is positioned properly,
increase the volume to the desired level.
1
3
2
Do not drop the KCR-004 DAB+ and do not expose it to liquid, moisture or humidity. These
might lead to damage to the device.
If the KCR-004 DAB+ is moved from a cold environment into a warmer one, let it adapt to
the new temperature before operating the device. Otherwise, it might lead to condensation
and cause malfunctions in the device.
Do not use the KCR-004 DAB+ in a dusty environment as dust can damage the interior
electronic components and lead to malfunctions in the device.
Protect the KCR-004 DAB+ from strong vibrations and place it on stable surfaces.
Do not attempt to disassemble the KCR-004 DAB+.
Only use the power adaptor delivered with the KCR-004 DAB+.
Never touch the power plug with wet hands and never pull the power cable when pulling the
plug out of the power socket.
Make sure the electrical voltage specified on the KCR-004 DAB+ and its power plug is
corresponding with the voltage of the power socket. An incorrect voltage will destroy the
device.
If the KCR-004 DAB+ is not used for a long period of time, disconnect it from the power
supply by unplugging the power plug. This is to avoid the risk of fire.
Always power off the KCR-004 DAB+ when cleaning it.
Never use any harsh or strong solvents to clean the KCR-004 DAB+ since these may
damage the surface of the device. Dry, soft cloth is appropriate; however, if the KCR-004
DAB+ is extremely dirty, it may be wiped off with a slightly moist cloth. Make sure the device
is dried off after cleaning.
When it is necessary to ship the KCR-004 DAB+, store it in its original package. Save the
package for this purpose.
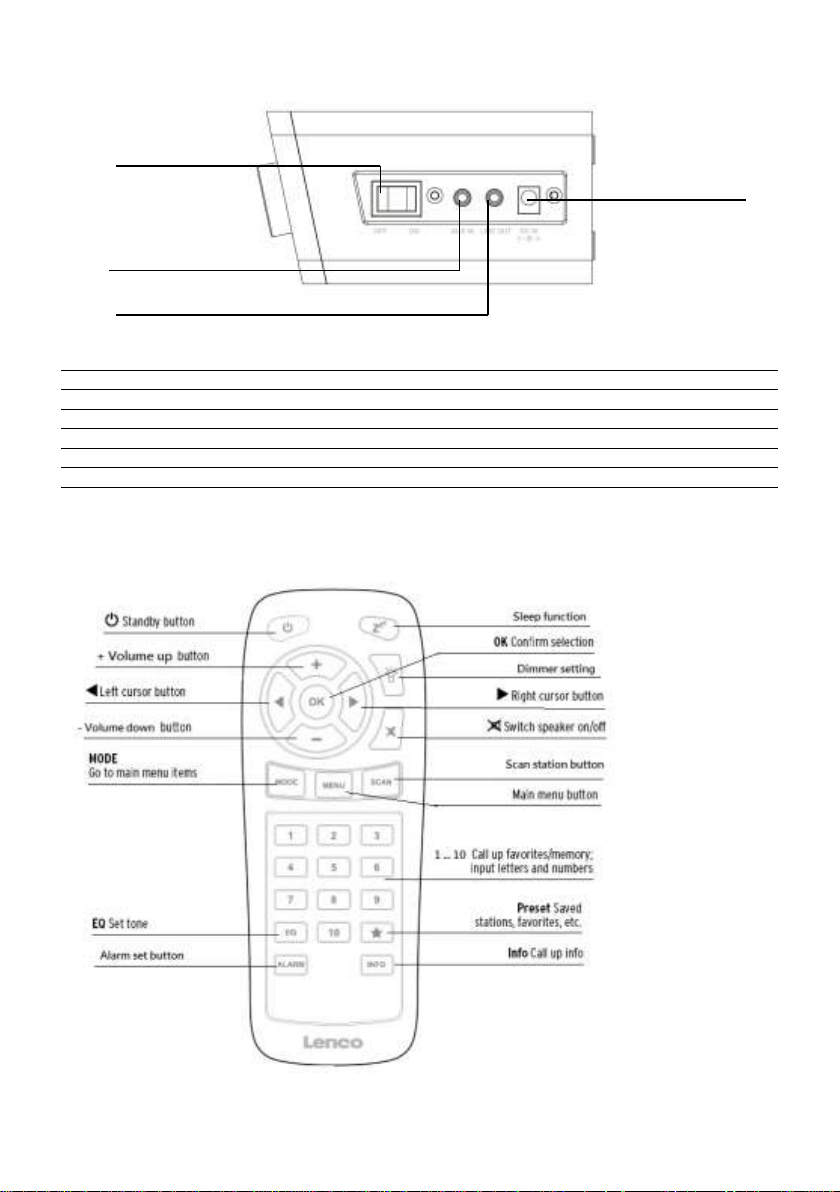
Appearance and Key Descriptions
Page 4
4
5
6
7
No.
Description
Functions
1
LCD Screen
Display
2
Buttons and Knobs
Basic control of operation
3
Remote Receiver
Infra-red reception interface for remote control
4
On/Off Switch
Power on/off
5
AUX In
3.5mm jack for AUX IN
6
Line Out
3.5mm jack for speaker connection
7
DC IN
Power supply
Remote Controller
Page 5
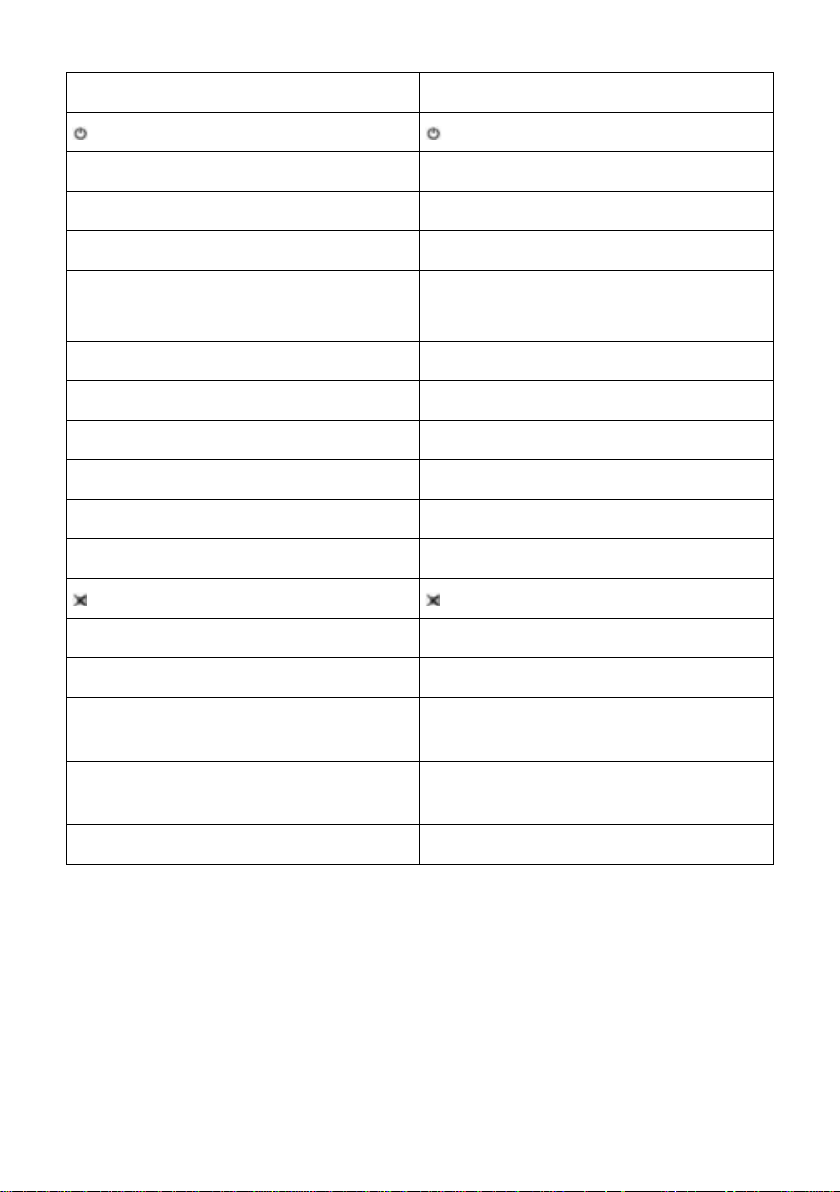
English
English
Standby button
Standby button
+ Volume up button
+ Volume up button
◄ Left cursor button
◄ Left cursor button
- Volume down button
- Volume down button
MODE
Go to main menu items
MODE
Go to main menu items
EQ Set tone
EQ Set tone
Alarm set button
Alarm set button
Sleep function
Sleep function
OK Confirm selection
OK Confirm selection
Dimmer setting
Dimmer setting
► Right cursor button
► Right cursor button
Switch speaker on/off
Switch speaker on/off
Scan station button
Scan station button
Main menu button
Main menu button
1_10 Call up favorites/memory; input
letters and numbers
1_10 Call up favorites/memory; input
letters and numbers
Preset Saved stations, favorites,
etc.
Preset Saved stations, favorites,
etc.
Info Call up info
Info Call up info
Page 6

Remember to pull out the clear plastic tab from the
battery compartment before using the remote.
To remove the battery from the remote, use your thumb
to pull out the battery tray. Replace it with a CR2025
type 3V battery, taking care to insert it with the positive
(+) side up.
Caution: Risk of explosion of the battery might only be
apparent in case an incorrect battery type is used.
Dispose of used batteries according to the instructions.
Warning
Do not ingest the battery, Chemical Burn Hazard
(The remote control supplied with) This product contains a coin/button cell battery. If the
coin/button cell battery is swallowed, it can cause severe internal burns in just 2 hours and can lead
to death.
Keep new and used batteries away from children.
If the battery compartment does not close securely, stop using the product and keep it away from
children.
If you think batteries might have been swallowed or placed inside any part of the body, seek
immediate medical attention.
Getting Started
The packaging box contains the following items:
KCR-004 DAB+ main unit
3.5mm audio cable
Power adaptor
User Manual
Mounting kit (Metal bracket + 8 screws + paper template)
Mounting the set under a cabinet
Page 7

1) Decide on the installation location and installing the unit based on the best cabinet/shelf.
Attach the metal bracket under the cabinet/shelf with the supplied mounting screws. If the
board thickness of cabinet/shelf is thinner than the screw’s height, you can supply the suitable
screw by yourselves.
2) Slide the unit into metal bracket until it locks securely.
3) Due to its heavy weight, the unit should be installed with great care. Make sure that the
cabinet that is used is sturdy enough to support the weight of the unit.
To reduce the risk of fire, do not place the radio on any heating area or without the spacer.
You can slide out the unit from the metal bracket to be used as a standing kitchen radio. Then, you
can slide the plastic clapboard into the unit.
Connect the power adaptor to the side of the KCR-004 DAB+ and plug into power socket.
Switch it on at the side of the KCR-004 DAB+.
When it is the first time running the device, the radio will enter the DAB mode and
automatically scan the DAB/DAB+ stations.
Press and hold or press on the remote control to turn the radio at Standby.
Page 8

During standby mode, press and hold or press on the remote control to turn the
radio to operation mode.
KCR-004 DAB+ Functions
Press or on the remote contol to swap among the modes below: DAB FM
AUX DAB FM …
When it is on the playback display, rotate the knob or press / on the remote control to adjust
the volume. Press on the remote control to mute the sound, press / / to resume the
volume.
Main Menu and Settings
At any operation modes, you may press and hold or press on the remote control
to go to configuration. Press / or / on the remote control to choose
the submenu and then press to confirm. Press or press on the remote
control to go back to the last display.
Set Alarm
There are two alarms available.
Choose Set Alarm in the menu. Or, press on the remote control to enter the alarm1
setting directly; press once again to enter the alarm2 setting.
For each step below, you have to press / or / on the remote
Page 9

control to select and press to confirm -
On/off: Turning on or off.
Time: Adjusting the hour and minute.
Mode: Choosing Daily, Weekdays, Weekends or Once.
Type: Selecting the alarm sound, BEEPER, DAB or FM. (for DAB and FM, the alarm will be
the last listened station).
Volume: Setting the alarm volume.
After you have set up the alarm, there will be an alarm icon on the display.
When the alarm goes off, press any buttons (Except STANDBY and SLEEP buttons) to
enter snooze mode, it will alarm again in 5 minutes. Snooze icon will be shown on
the display.
Press or press on the remote contol to turn off the alarm and/or snooze.
Set Sleep
Set sleep time of 15/30/45/60/90 minutes or turn off sleep timer.
Press / or / on the remote control to select and press to
confirm.
After the sleep timer is set, sleep icon and remaining time will be shown on the display.
Alternatively, press on the remote control to enter the sleep menu.
Page 10

Set Timer
Setup the Timer hh:mm:ss. The maximum time is 2 hours.
Hour (hh): from 00 to2.
Minute (mm): from 00 to 59.
Second (ss): from 00 to 59, each step is 01.
For each one, press / or / on the remote control to select and
press to confirm.
Timer icon will be shown on the display.
On the playing screen, press to view the remaining time. Or it will automatically
turn to the countdown screen in 10 seconds.
On the countdown screen,
- Press any key (except ) or rotate the knob to return playing screen; or
- Press to reset to 00:00: 00 (which means turning off).
After the time counts to the set time, buzzer sound will start. Press any buttons to stop the
buzzer.
Set Time
There are several options on the time setting. Press TIMER and then press /
or press MENU on the remote control and then press / on the remote
control to select and press to confirm.
Set clock: hh:mm. Set the time manually.
Page 11

Set date: dd-mm-yyyy. Set the date manually.
Auto update: From radio or No update. If it is set to be updated from radio, the radio
automatically update the time and date from DAB or FM RDS even you have set the time
and/or date.
Note: If the device is switch off, then switch on again. The setting is automatically taken from
the radio.
Set 12/24 hour: 12 or 24 time format.
Set EQ
Set the Equaliser: Normal, Flat, Pop, Jazz, Rock, Classic, News or Movie. Press TIMER and
then press / or press MENU on the remote control and then press /
on the remote control to select and press to confirm.
Alternatively, press on the remote control to enter EQ menu.
Dimmer
Set the brightness of the display: High, Medium, Low
Or, you can press to swap among the three backlight levels.
Set Language
OSD language: English, Deutsch, Dutch, French
Press TIMER and then press / or press MENU on the remote control
and then press / on the remote control to select the langauge and press to
confirm.
System Reset
Press to confirm factory reset. The system will then restart.
Note: the alarm settings, scanned stations and stored preset stations will be removed after
factory reset.
S/W version
Enter to view the version of firmware of the system.
Page 12

DAB
The first row of the text is the name of the DAB station.
The second row shows the details of the station, press or on the remote
control to view the frequency, bit rate, signal strength and the programme type of the station
and today’s date.
Press / or / on the remote control to change the stations.
You can do Full scan or Manual tune.
Press and hold or on the remote control to do the full scan.
If you want to rescan the station at designated frequency, press and hold or press
on the remote control, then choose Manual Tune to start.
Draw out the wire antenna and fix it in a vertical direction to get the best DAB reception.
FM
The first row of the text is the frequency or the name of the FM station.
The second row shows the details of the station, press or on the
remote control to view the signal strength and the programme type of the FM RDS station
and today’s date.
The third row displays the rolling message from the FM RDS station.
Press / or / on the remote control to adjust the previous/next
frequency. Each step is 0.05MHz.
Page 13

Press and hold / or / on the remote control to adjust the
frequency speed. Once you release the button, the radio will stop at that frequency.
Alternatively, press and hold or on the remote control to do scanning.
The default is scanning up the frequency unless your last operation was adjusting the
frequency downward (after pressing or ).
Preset
In DAB or FM mode, there are 10 presets for each mode.
Press and hold or on the remote control to save the the station.
Press / or / on the remote control to select the number, and
press to confirm.
Press or on the remote control to recall the stored preset station list.
The number keys to on the device or on the remote control are the hotkey of each
presets. Press and hold to save stations and press to recall that station.
AUX-IN
Aux in mode plays audio from an external source such as an MP3 player.
To play audio with Aux in mode:
Turn the volume low on both KCR-004 DAB+ and, if adjustable, the audio source device.
Connect the external audio source to the AUX IN 3.5mm stereo socket.
Adjust the volume of KCR-004 DAB+ (and, if necessary, the audio source device) as
required.
Troubleshooting
Page 14

Error
Remedy
The device does not switch on.
Check if the power adaptor is connected properly with
power supply.
No sound
1. Turn on the sound as it may be muted.
2. Increase the volume.
Hiss in FM mode
1. Check/move the FM antenna.
2. Move the radio.
3. Draw out the wire antenna and try different direction.
No stations
available/burbling/intermittent in
DAB mode.
1. Move the radio.
2. Draw out the wire antenna and fix it in vertical
direction.
3. Rescan local stations only (high-strength).
4. Check the local DAB coverage.
Alarm does not work.
1. Switch on the alarm.
2. Due to the volume setting, refer to the solutions of “No
sound”.
Electro-Magnetic Interference.
The normal function of the product may be disturbed by
strong Electro-Magnetic Interference. If so, simply reset
the product to resume normal operation by following the
instruction manual. In case the function could not resume,
please use the product in other location.
All other undetermined cases.
Switch off, and then switch on again if necessary.
Page 15

Specifications
Model number
KCR-004 DAB+
Description
Kitchen Radio with DAB+
Display
Clock + icons and 2 line x 16 characters
FM
87.5 - 108MHz, RDS supported
DAB/DAB+
174.928 – 239.200MHz (Band III)
Power adaptor
7.5V 1000mA
Standby mode power
consumption
<1 W
Operating temperature
0°C - 35°C
Connections
3.5mm aux in socket, stereo
3.5mm line out socket, stereo
DC IN power supply socket
Dimensions
237mm(L) x 72mm(H) x 137mm(D)
Weight
940g
Power supply adaptor: (For EU only)
Manufacturer: DongGuan Yingna Electronic Technology Co. Ltd.
Model number: PSEA075100V W
Use only original AC adaptor
Use only the power supply listed in the user instructions
Service and support
For helpdesk support and more information, please visit: www.lenco.com
Lenco offers service and warranty in accordance to European law, which means that in case of
repairs (both during and after the warranty period) you should contact your local dealer.
Important note: It is not possible to send products that need repairs to Lenco directly.
Important note: If this unit is opened or accessed by a non-official service center in any way, the
warranty expires.
This device is not suitable for professional use. In case of professional use, all warranty obligations
of the manufacturer will be voided.
Products with the CE marking comply with the EMC Directive (2004/108/EC)
Page 16

and the Low Voltage Directive (2006/95/EC) issued by the Commission of the European
Community.
The declaration of conformity may be consulted at
https://lencosupport.zendesk.com/forums/22413161-CE-Documents
This symbol indicates that the relevant electrical product or battery should not
be disposed of as general household waste in Europe. To ensure the correct
waste treatment of the product and battery, please dispose them in accordance
to any applicable local laws of requirement for disposal of electrical equipment
or batteries. In so doing, you will help to conserve natural resources and
improve standards of environmental protection in treatment and disposal of
electrical waste (Waste Electrical and Electronic Equipment Directive).
® All rights reserved
 Loading...