


Eng |
Eng |
|
|
Table of content |
|
Important Safety Instructions...................................................................................... |
|
|
3 |
Features...................................................................................................................... |
|
|
4 |
Installation ................................................................................................................. |
|
|
5 |
Description of Parts ................................................................................................... |
|
|
6-7 |
Listening to iPod......................................................................................................... |
|
|
8 |
Radio Tuner Operation .............................................................................................. |
|
|
9-10 |
EQ preset, Loudness, Treble and Bass setting............................................................ |
|
|
11 |
Listening to External Audio Source............................................................................. |
|
|
12 |
Clock Setting............................................................................................................... |
|
|
12 |
Alarm Operation.......................................................................................................... |
|
|
13-14 |
Sleep Timer Function.................................................................................................. |
|
|
14 |
Care and Maintenance................................................................................................ |
|
|
15 |
Specifications.............................................................................................................. |
|
|
16 |
2
Important Safety Instructions
When used in the directed manner, this unit has been designed and manufactured to ensure your personal safety. However, improper use can result in potential electrical shock or fire hazards. Please read all safety and operating instructions carefully before installation and use, and keep these instructions handy for future reference. Take special note of all warnings listed in these instructions and on the unit.
1.Water and Moisture
The unit should not be used near water. For example: near a bathtub, washbowl, kitchen sink, laundry tub, swimming pool or in a set basement.
2.Ventilation
The unit should be situated so that its location or position does not interfere with its proper ventilation. For example, it should not be situated on a bed, sofa, rug or similar surface that may block the ventilation openings. The ventilation should not be impeded by covering the ventilation openings with items, such as newspapers, table-cloths, curtains, etc. Also, it should not be placed in a built-in installation, such as a bookcase or cabinet, which may impede the flow of air through the ventilation openings.
3.Heat & Flame
The unit should be situated away from heat sources such as radiators, heat registers, stoves or other appliances (including amplifiers) that produce heat.
No naked flame sources, such as lighted candles, should be placed on the apparatus.
4.Power Source
The unit should be connected to a power supply only of the type described in the operating instructions or as marked on the appliance.
Where the AC/DC Adaptor is used as the disconnect device, the disconnect device shall remain readily operable.
5.Power Cord Protection
Power supply cords should be routed so that they are not likely to be walked on or pinched by items placed upon or against them. It is always best to have a clear area from where the cord exits the unit to where it is plugged into an AC outlet.
6.Cleaning
The unit should be cleaned only as recommended. See the section "Care and Maintenance" of this manual for cleaning instructions.
7.Object and Liquid Entry
Care should be taken so that objects do not fall and liquids are not spilled into any openings or vents located on the product. It shall not be exposed to dripping or splashing and that no objects filled with liquids, such as vases, shall be placed on the apparatus.
8.Attachments
Do not use attachments no recommended by the product manufacturer.
9.Lightning and Power Surge Protection
Unplug the unit from the wall outlet and disconnect the periods of time. This will prevent damage to the product due to lightning and power-line surges.
10.Overloading
Do not overload wall outlets, extension cords, or integral convenience receptacles as this can result in a risk of fire of electric shock.
3

Eng |
Eng |
|
|
11.Damage Requiring Service
This unit should be serviced by qualified service personnel when: A.The power supply cord or plug has been damaged.
B.Objects have fallen into or liquid has been spilled into the enclosure. C.The unit has been exposed to rain.
D.The unit has been dropped or the enclosure damaged.
E.The unit exhibits a marked change in performance or does not operate normally.
12.Periods of Nonuse
If the unit is to be left unused for an extended period of time, such as a month or longer, the power cord should be unplugged from the unit to prevent damage or corrosion.
13.Servicing
The user should not attempt to service the unit beyond those methods described in the user's operating instructions. Service methods not covered in the operating instructions should be referred to qualified service personnel.
Features
Thank you for purchasing the PORTABLE RADIO iPod DOCKING. This model incorporates following features :
Different iPod models Player / Re-charger
FM receiver with digital read out on LCD
Clock and Alarm timer function
Wake up to Alarm (Buzzer), Radio or iPod with Snooze function
Sleep timer function
LCD display with back-light
Audio line-in (AUX) for connecting other digital audio player
Built-in 2 High Fidelity Speakers
Preset EQ effect
iPod, iPod mini, iPod nano, iPod touch, iPod classic and iPod shuffle are trademarks of Apple Computer Inc., registered in the U.S. and other countries.
iPod is not included.
4
Installation
Clock setting battery back-up
A backup battery compartment located at bottom of the unit.
(1)Open the main battery compartment A lid then open the inner clock battery compartment lid as well.
(2)For clock setting backup, follow the polarity diagram shown inside the compartment and install 2 x AAA (UM-4) batteries (purchase separately).
(3)Close the clock battery compartment lid.
Install main battery
(4)For radio, iPod and AUX operation, follow the polarity diagram shown inside
the compartment A and B and install 8 x C (UM-2) batteries (purchase separately).
(5)Close the main battery compartment lids.
AC-DC Adaptor Connection
The unit can be powered by an external AC-DC Adaptor, required the output DC 12V 1500mA (included).
(1)Firmly and securely plug the adaptor's AC plug into AC main outlet.
(2)Connect the adaptor's DC output plug to the DC-in jack of the unit.
Warnings:
Batteries (battery pack or batteries installed) shall not be exposed to excessive heat such as sunshine, fire or the like.
5

Eng |
Eng |
|
|
Description of Parts
Main Unit |
|
|
|
|
|
|
|
Front View |
|
7 |
12 |
|
8 |
|
|
|
|
|
|
|
|
16 9 11 10 |
14 |
|
|
|
|
|
|
|
5 |
|
19 |
|
|
|
|
|
17 |
|
|
|
|
|
|
|
15 |
|
|
|
|
|
|
|
19 |
|
|
|
18 |
6 |
|
13 |
|
Rear View |
|
|
|
|
|
||
|
|
|
|
|
|
|
|
3 |
1 |
2 |
|
4 |
|
|
|
|
|
|
|
|
|
22 |
20 |
23 21 |
Bottom View |
25
26
24
6
Description of Parts
Main Unit
1.Movable iPod docking station
2.iPod docking connector
3.iPod tilt angle slider
4.iPod tilt angle lever
5.POWER button ----- |
To turn the unit on and off |
6.Power Status indicator: LED
7.LCD display
8.Handle
9.SLEEP button ---- Select the time duration of the sleep timer
10. iPod / MEM button ---- iPod Play / Pause function ; Save radio preset station
11. ALARM button ---- Turn the alarm on and off ; Set alarm time and alarm source
12.VOLUME +/- button ----- Adjust volume level up or down
13.MODE / EQ button ---- In power off mode : Select clock setting and
12/24 hour format; Select radio broadcast system In power on mode: Select EQ preset (CLASSIC/
JAZZ/ROCK/POP), Loudness and Treble/Bass setting
14.FM rod antenna
15.PRESET button ---- Select preset radio station
16.TUNING/CH  /
/ and
and /
/ buttons ----
In radio mode: Tune the radio frequency up/down In iPod mode : Skip tracks Forward / Backward; perform high-speed search
17.FUNC button ---- Select FM stereo / FM mono / iPod / AUX modes
18.SNOOZE / LIGHT -----Activate the snooze function ; turn LCD backlight
DIM / BRIGHT / OFF
19.Speakers
20.DC-in jack -----For the connection of external DC power supply
21.Stereo Phones jack
22.AUX jack ---- Auxiliary audio signal input
23.RESET button ---- For resetting the unit
24.Main battery compartment A
25.Main battery compartment B
26.Inner Clock battery compartment
7

Eng |
Eng |
|
|
Listening to iPod
This model adopts different iPod models. Following steps guide you listening to iPod music.
1.Slide the "iPod tilt angle slider" for the "iPod tilt angle lever" to tilt at a desired angle, if apply. Recommend to lay down the iPod during the unit transportation.
2.Your iPod can now be inserted into the docking port by placing the connector on the bottom of the iPod onto connector in the docking bay. Caution: Please be careful when seating the iPod into the docking to avoid damaging the 30-pin connector on the iPod or in the docking system.
3.Slightly push the iPod to a desired tilt angle, if necessary.
4.Press the POWER button once to turn on the unit and the power status indicator lights on.
5.Press the FUNC button to select iPod mode. In iPod mode :
-To start playback music, press the iPod button once.
-To pause the music , press the iPod button.
-To resume music , press the iPod button again.
-You may press the VOLUME +/- button to adjust the volume to a desired level.
-When a song playback, press and hold the /
/ button
to perform high speed search forward / backward.
- To skip to next or previous song, prese the  /
/  button.
- To turn off the unit, press the POWER button and the power status indicator will light off.
-When the unit is powered by external DC adaptor and once the iPod connected to the docking station, the unit recharges the iPod battery.
Note:
Once the iPod is inserted, the unit will switch to iPod mode automatically and neglect the current mode.
8
Radio Tuner Operation
FM Antenna
Fully extend the FM rod antenna for the best FM radio reception.
Radio Tuning
1. Press the POWER button to turn on the unit, where the power status indicator light on.
2.Press the FUNC button to select FM stereo or FM mono radio receiving mode.
3.To manually tune to a desired station, repeatedly press the TUNING
 /
/  button.
4.To automatically search for stations with strong signals, press and hold
the TUNING  /
/  button until the frequency digits on display begins to scan then release the button. The tuner will stop on the first strong
signal it finds.
Notes :
-Manual tune to select weaker stations that might be skipped during automatic tuning.
-If the automatic tuning does not stop on the exact frequency of the station, for example , it stops on 100.9 MHz instead of 100.8 MHz, use the manual tuning method to "fine tune" to the exact frequency of the desired station.
Radio Preset Stations
The units allows you to store up to 20 FM stations for easy recall at any time.
Preset Stations
1. Press the POWER button to turn on the unit, where the power status indicator light on.
2.Press the FUNC button to select FM stereo or FM mono radio receiving mode.
3.Tune to the radio station you want to store in memory by using the TUNING  /
/ button.
4.Press the MEM button. The preset channel number appears on display and blinking.
5.To select desired preset station number, press the CH /
/ button.
6.To confirm preset location, press the MEM button.
7.Repeat steps 3 to 6 to store other stations, if apply.
9

Eng |
Eng |
|
|
Radio Tuner Operation
Notes :
1.There is a few seconds delay when programming, after this delay time, the unit will automatically switch back to normal tuner mode.
2.You can overwrite a preset station by overwriting and storing the new frequency in its place.
Recalling Preset Station
1.Press the POWER button to turn on the unit, where the power status indicator light on.
2.Press the FUNC button to select FM stereo or FM mono radio receiving mode.
3.Press the PRESET button. The preset channel number and PRESET indicator appear on display.
4. To select desired preset station, press the CH / button.
Radio Broadcast System Selection
In case the unit is moved to other countries with slightly different radio broadcast system, the unit allows you to select USA, EU, Australia and Japan systems.
1.Set the unit to Power Off mode.
2.Press the MODE button repeatedly until the flashing indicator US, EU, "AU" or JP is seen.
3.Press the VOLUME +/- button to select one of the broadcasting systems.
4.Press MODE button to save the setting and exit the setting mode.
NOTE:
The followings are the specifications of the three radio broadcast systems:
-USA's Radio Broadcast System
FM 87.5 108 MHz, 0.1 MHz tuning step
-AU and EU's Radio Broadcast System
FM 87.5 108 MHz, 0.05 MHz tuning step
-Japan's Radio Broadcast System
FM 76.0 108 MHz , 0.05 MHz tuning step
10
EQ preset , Loudness, Treble and Bass Setting
Bass setting :
1.Press and hold the EQ button entering Bass setting mode, the "BASS" indicator blinks on display.
2.To select desired bass level, press the CH /
/ button.
Treble setting :
3.Press the EQ button again entering Treble setting mode, the "TRE" indicator blinks on display.
4.To select desired treble level, press the CH /
/ button.
Set Loudness on or off
5.Press the EQ button then press CH /
/ button to set loudness on or off.
6.Press the EQ button to exit bass/treble and loudness setting mode.
EQ setting :
The unit is designed to have four EQ presets for your selection , the CLASSIC , JAZZ, ROCK and POP .
You can select the desired effect by pressing the "EQ" button repeatedly at following sequence :
 ROCK
ROCK  CLASSIC
  JAZZ
JAZZ  POP
POP
OFF (or BASS/TREBLE, if previously set)
11

Eng |
Eng |
|
|
Listening to an External Audio Source
1.Connect an audio cable (not included) with 3.5mm stereo plug from an auxiliary audio device to the AUX jack of the unit.
2. Press the POWER button to turn on the unit.
3.To select auxiliary audio input, press the FUNC button. The "AUX" indicator show on display.
4.Turn on the external auxiliary audio device.
5.The volume and preset equalizer can now be controlled through the unit. Operate all other functions on the external device as usual.
Notes: Press the POWER button to turn off the unit when you finish listening. Don't forget to switch off the power of the external audio device as well.
Clock Setting
When the unit is OFF (power off mode):
Set Clock
1.Press the MODE button and the clock digits blink.
2.Press the CH  /
/ button to set hour.
3.Press the VOLUME +/- button to set minute.
Set 12/24 Hour format
4.Press the MODE button again entering 12/24 hour format setting mode.
5.Press the VOLUME +/- button to select 12 or 24 hour display format.
Exit setting mode
6. To save all settings and auto-exit the setting mode, wait for a few seconds.
12
Alarm Operation
When the unit is OFF (power off mode):
Select wake up alarm source
1.Press and hold the ALARM button until the alarm source indicator blink.
2.Press the VOLUME +/- button to select alarm source BUZ (buzzer) , RAD (radio) or iPod.
Setting the alarm time
3.Press the ALARM button again, alarm time digits blink.
4.Press the CH  /
/  button to set alarm hour.
5.Press the VOLUME +/- button to set alarm minute.
Save settings and activate alarm
6.To save all settings and auto-exit the setting mode, wait for a few seconds.
7.To activate the daily alarm, press the ALARM button and the corresponding alarm source indicator appears on the LCD display.
Notes :
---If "Wake to iPod" is selected but your iPod has not been docked, the alarm source will be redirected to the Alarm Buzzer automatically when the alarm is reached.
---When "Wake to Radio" is selected, make sure the radio station which you want to wake to is tuned.
Wake to Buzzer
When the alarm time is reached, the buzzer alarm will sound for 3 Minutes. It goes into Auto-snooze mode if no further button has been pressed.
The display shows the "SNOOZE" indicator. The buzzer turns off for the snooze time (around 10 minutes) then comes on again. This operation will be repeated three times. After the fourth alarm is finished, the alarm will shut off until the same alarm time on the next day.
You may also activate the snooze function manually after the alarm sounds by pressing the SNOOZE button. The buzzer stops for the snooze time then comes again.
To cancel the snooze before it expires, press the ALARM button.
The snooze operation (including auto-snooze and manual snooze) can be repeated by 3 times only.
To stop the alarm immediately after the buzzer sounds, you can also press the ALARM button. It resets itself for the following day.
13
Eng |
Eng |
|
|
Wake to iPod or Radio
When the alarm time is reached, the selected alarm source (iPod or Radio) will automatically turn on. It starts softly and gradually becomes louder.
It plays for 30 minutes then shuts off and resets itself for the following day. During the activation of the alarm source, you may press the SNOOZE
button to activate the snooze function. The alarm stops for the snooze time (around 10 minutes) then turns on again.
To cancel the snooze before it expires, press the ALARM button.
This manual snooze operation can be repeated three times. Each time the alarm turns on, it plays for 30 minutes (without pressing the snooze button).
To stop the alarm immediately after the alarm sounds, you may also press the ALARM button. It resets itself for the following day.
Sleep Timer Function
Sleep to timer
This feature allows you to fall asleep to the radio or iPod for up to 120 Minutes. The unit shuts off automatically when the time expires.
1. Press the POWER button to turn the unit on.
2.Either tune to the desired radio station in radio mode or playback music from the iPod.
3.To select the sleep timer to turn the unit off after 15, 30, 45, 60, 90 or 120 minutes, press the SLEEP button repeately. The display show the indicator  . The unit plays for the selected length of time then automatically turns off.
4.To turn the unit off before the sleep timer counts down to zero, press
the POWER button at any time.
Notes :
If you are falling asleep to music from an external device connected to the AUX input, the sleep timer will shut off the power to this system but it will not turn off the external device.
14
Care and Maintenance
-Do not subject the unit to excessive force, shock, dust or extreme temperature.
-Do not tamper the internal components of the unit.
-Clean your unit with a damp (never wet) cloth. Solvent or detergent should never be used.
-Avoid leaving your unit in direct sunlight or in hot, humid or dusty places.
-Keep your unit away from heating appliances and sources of electrical noise such as fluorescent lamps or motors.
Resetting the Unit
If the unit experiences a power surge or electric shock, it is possible that the internal micro-controller may lock up and the unit will not respond to any commands from the front panel controls.
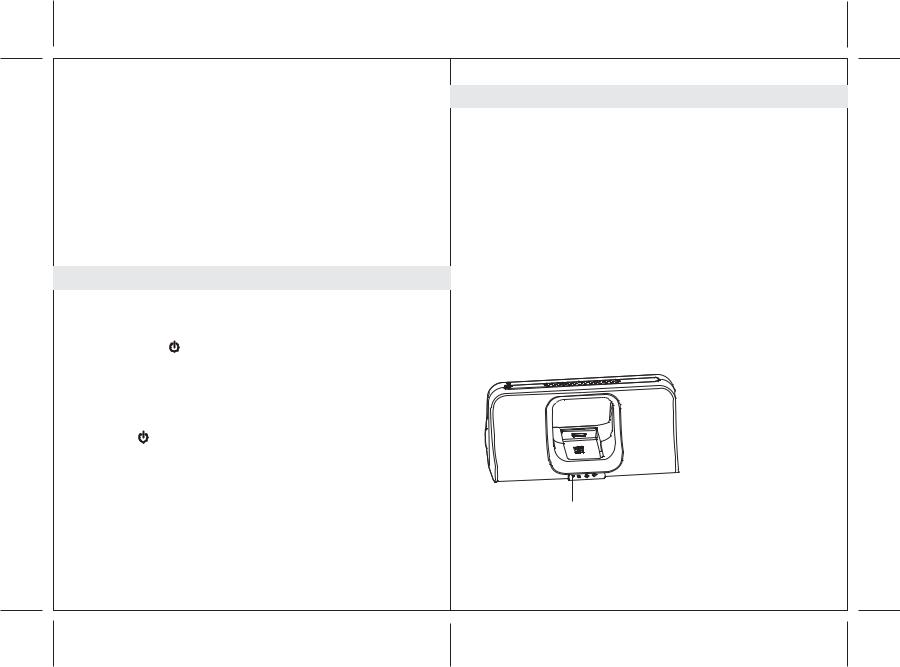
1.In this event, unplug and then reconnect the AC power plug into the wall outlet. 2.Use a straightened paper clip, toothpick or similar objects to press the RESET
button located at the rear of the main unit (see the below figure). The reset operation clears the system memory and all of your previous settings will be erased.
CAUTION: DO NOT USE SHARP, POINTED OBJECT TO PRESS THE RESET BUTTON. IT MAY DAMAGE THE RESET SWITCH INSIDE THE UNIT.
RESET button
15

DE |
DE |
|
|
Inhalt |
|
Wichtige Sicherheitshinweise..................................................................................... |
|
|
3 |
Eigenschaften und Funktionen................................................................................... |
|
|
4 |
Beschreibung der Bedienelemente ............................................................................ |
|
|
5 |
Inbetriebnahme .......................................................................................................... |
|
|
6-7 |
iPod-Musik hören........................................................................................................ |
8 |
Radiobetrieb ............................................................................................................... |
|
|
9-10 |
EQ-Einstellung, Loudness, Höhen und Bässe............................................................ |
11 |
Benutzung externer Audiogeräte................................................................................. |
|
|
12 |
Uhrzeiteinstellung........................................................................................................ |
|
|
12 |
Alarmbetrieb................................................................................................................ |
13-14 |
Einschlaf-Timer-Funktion ............................................................................................ |
|
|
14 |
Handhabung und Wartung........................................................................................... |
|
|
15 |
Technische Daten........................................................................................................ |
|
|
16 |
2
Wichtige Sicherheitshinweise
Dieses Gerät wurde so konzipiert und gefertigt, dass die Sicherheit von Personen gewährleistet werden kann, wenn es in der vorgeschriebenen Weise benutzt wird. Bedenken Sie, dass eine unsachgemäße Benutzung Stromschlagund Feuergefahren zur Folge hat. Bitte lesen Sie sich alle Sicherheitshinweise und diese Bedienungsanleitung vor der Benutzung des Geräts sorgfältig durch und bewahren Sie sie für den späteren Gebrauch auf. Achten Sie insbesondere auf alle Warnhinweise in dieser Anleitung und auf dem Gerät.
1.Wasser und Feuchtigkeit
Das Gerät sollte nicht in der Nähe von Wasser benutzt werden. Beispiel: in der Nähe von Badewannen, Spülen, Waschbecken. Swimmingpools oder feuchten Kellerräumen.
2.Belüftung
Das Gerät sollte so aufgestellt werden, dass die Luftzirkulation nicht beeinträchtigt wird. Das Gerät sollte z. B. nicht auf ein Bett, Sofa, Bettvorleger oder eine andere weiche Unterlage gestellt werden, bei der die Ventilationsöffnungen blockiert werden könnten. Vergewissern Sie sich, dass keine der Ventilationsöffnungen durch Gegenstände wie z.B. Zeitungen, Tischtücher, Vorhänge o. Ä. abgedeckt ist. Das Gerät sollte nicht an Orten, wie z. B. Schränke oder Bücherregale, aufgestellt werden, an denen die Luftzufuhr zu den Ventilationsöffnungen beeinträchtigt werden könnte.
3.Hitze und offene Flammen
Installieren Sie das Gerät nicht in der Nähe von Hitzequellen, wie z. B. Heizungen, Herden oder anderen Geräten die Hitze produzieren (z. B. Verstärker) auf. Gegenstände mit offenen Flammen wie z.B. Kerzen sollten niemals auf das Gerät gestellt werden.
4.Stromversorgung
Das Gerät sollte nur mit der in der Anleitung oder auf dem Gerät angegebenen Netzspannung betrieben werden.
Wenn das Netzteil zum Einund Ausschalten des Geräts benutzt wird, achten Sie bitte immer darauf, dass die Steckdose immer durch den Benutzer erreichbar bleibt.
5.Schutz des Netzkabels
Das Netzkabel sollte so verlegt werden, dass es nicht möglich ist darauf zu treten und keine Gegenstände darauf liegen. Es ist immer sinnvoll den Bereich, an dem das Kabel aus dem Gerät austritt und den Bereich um die Steckdose herum, frei zu halten.
6.Reinigung
Das Gerät sollte nur den Anweisungen entsprechend gereinigt werden. Lesen Sie dazu den Abschnitt „Pflege und Wartung“ in der Bedienungsanleitung für detaillierte Reinigungsanweisungen.
7.Gegenstände und Flüssigkeiten im Gerät
Achten Sie darauf, dass keine Gegenstände oder Flüssigkeiten durch die Öffnungen in das Gehäuse gelangen. Dieses Gerät sollte keinen Wassertropfen und -spritzern
ausgesetzt werden. Gegenstände die mit Flüssigkeiten gefüllt sind sollten nicht auf das Gerät gestellt werden.
8.Zubehör
Verwenden Sie keine Aufsätze, die nicht vom Hersteller angegeben wurden.
9.Gewitter und Spannungsschwankungen
Ziehen Sie den Stecker aus der Steckdose, wenn Sie das Gerät über einen längeren Zeitraum nicht benutzen. Damit wird verhindert, dass das Gerät bei Spannungsunterschieden oder Blitzeinschlägen beschädigt wird.
10.Überlastung
Überlasten Sie niemals Steckdosen, Verlängerungskabel oder Geräteanschlüsse, da dies zu Feueroder Stromschlaggefahr führen kann.
3
DE |
DE |
|
|
11.Bei Reparaturbedarf
Lassen Sie das Gerät durch ausgebildetes Wartungspersonal reparieren, wenn...: A.Das Netzkabel oder der Netzstecker beschädigt sind
B.Gegenstände oder Flüssigkeiten in das Gerät gelangt sind C.Wenn das Gerät Regen oder Wasser ausgesetzt wurde. D.Das Gerät ist heruntergefallen oder das Gehäuse beschädigt.
E.Das Gerät nicht wie gewohnt funktioniert oder einen starken Leistungsabfall zeigt.
12.Nichtbenutzung
Wenn das Gerät über einen längeren Zeitraum nicht benutzt wird (z. B. ein Monat oder länger), sollten Sie den Netzstecker des Geräts aus der Steckdose ziehen, um Schäden und Korrosion zu vermeiden.
13.Wartung
Der Benutzer sollte keine Versuche anstellen das Gerät eigenhändig zu warten, es sei denn es wurde entsprechend in der Bedienungsanleitung beschrieben. Wenden Sie sich bei weiterem Wartungsbedarf immer an ausgebildetes Wartungspersonal.
Eigenschaften und Funktionen
Vielen Dank für den Kauf dieses tragbaren Radios mit iPod-Dock. Dieses Modell verfügt über die folgenden Leistungsmerkmale:
Wiedergabe mit verschiedenen iPod-Modellen / Ladegerät
UKW-Empfang mit digitaler Anzeige auf LCD
Uhrzeitund Alarmfunktion
Weckfunktion mit Signalton, Radio oder iPod und Schlummerfunktion
Einschlaf-Timer-Funktion
LCD-Display mit Hintergrundbeleuchtung
Audioeingang (AUX) zum Anschluss anderer Audiogeräte 2 eingebaute HiFi-Lautsprecher
Equalizer-Effekte
iPod, iPod mini, iPod nano, iPod touch, iPod classic und iPod shuffle sind eingetragene Markenzeichen der Firma Apple Computer, Inc. und registriert in den USA und anderen Ländern.
Ein iPod ist nicht im Lieferumfang inbegriffen.
4
Inbetriebnahme
Einrichten des Reservebatteriesystems
An der Unterseite des Geräts befindet sich ein Reservebatteriefach.
(1)Öffnen Sie das Hauptbatteriefach A und ebenfalls das innere Uhr-Batteriefach. (2)Um die Uhrzeiteinstellungen mit Reservestrom jederzeit aufrecht erhalten zu
können, folgen Sie der Zeichnung innerhalb des Batteriefachs und legen Sie 2 Batterien der Größe AAA (UM-4) ein (nicht im Lieferumfang)
(3)Schließen Sie das Uhr-Batteriefach wieder.
Einlegen der Hauptbatterien
(4)Für den RadioiPodund AUX-Betrieb, folgen Sie der Zeichnung innerhalb der Batteriefächer A und B und legen Sie 8 Batterien der Größe C (UM-2) ein (nicht im Lieferumfang).
(5)Schließen Sie die Hauptbatteriefächer wieder.
Anschluss des Netzteils
Dieses Gerät kann über ein externes Netzteil (im Lieferumfang) mit Strom versorgt werden.
(1)Stecken Sie den Stecker des Netzteils fest in eine Steckdose.
(2)Schließen Sie den DC-Ausgangsstecker des Netzteils am DC-Anschluss des Geräts an.
Warnung:
Die Batterien (Batteriepack oder eingelegte Batterien) dürfen niemals starker Hitze, wie z. B. Sonnenlicht, Feuer o. Ä. ausgesetzt werden.
5

DE |
DE |
|
|
Beschreibung der Bedienelemente |
|
Beschreibung der Bedienelemente |
||||||||||
Hauptgerät |
|
|
|
|
|
|
|
Hauptgerät |
|
|
|
|
Vorderansicht 8 |
|
7 |
12 |
|
|
|
1. Bewegliche iPod-Docking-Station |
|
||||
|
|
|
8 |
|
|
|
||||||
|
|
|
|
16 9 11 10 14 |
|
|
||||||
|
|
|
|
|
|
|
||||||
|
|
|
|
|
|
|
|
|||||
|
|
|
|
|
|
|
|
2. iPod-Docking-Anschluss |
|
|||
|
|
|
|
|
|
|
|
3. iPod-Winkeleinstellung |
|
|||
|
|
|
|
|
|
|
|
4. iPod-Winkeleinstellungshebel |
|
|||
|
|
|
|
|
|
|
5 |
5. POWER-Taste |
---- Ein-/Ausschalten des Geräts |
|||
|
|
|
|
|
|
|
6. Kontrolllampe: LED |
|
|
|||
|
19 |
|
|
|
|
|
17 |
|
|
|||
|
|
|
|
|
|
|
15 |
7. LCD-Anzeige |
|
|
|
|
|
|
|
|
|
|
|
|
|
|
|
||
|
|
|
|
|
|
|
19 |
8. Griff |
|
|
|
|
|
|
|
|
|
|
|
9. SLEEP-Taste ---- |
Einstellung des Einschlaf-Timers. |
||||
|
|
|
|
|
|
|
|
|||||
|
|
|
|
|
|
|
|
10. iPod / MEM-Taste ---- iPod-Wiedergabe/Pause-Funktion |
||||
|
|
|
|
|
|
|
|
|
|
|
Radiosender speichern |
|
|
|
|
|
18 |
6 |
13 |
|
11. ALARM-Taste ---- Ein-/Ausschalten des Alarms; Einstellen des Alarms und |
||||
|
|
|
|
|
|
|
|
|
|
|
|
|
Rückseitenansicht |
|
|
|
|
|
|
|
|
des Alarmsignals |
|||
|
|
|
|
|
|
|
|
12. |
VOLUME +/- ----- Stellen Sie die Lautstärke mithilfe dieser Tasten ein. |
|||
3 |
1 |
2 |
|
|
4 |
|
|
13. |
MODE/EQ-Taste ---- |
Im ausgeschalteten Zustand: Einstellen der Uhrzeit |
||
|
|
|
|
|
|
|||||||
|
|
|
|
|
|
|
|
|
|
|
und des Stundenformats (12/24-Stunden). Auwahl des |
|
|
|
|
|
|
|
|
|
|
|
|
Rundfunksystems. |
|
|
|
|
|
|
|
|
|
|
|
|
Im eingeschalteten Zustand: Auswahl des Equalizers |
|
|
|
|
|
|
|
|
|
|
|
|
(Klassik/Jazz/Rock/Pop), Loudness und Höhen/Bass- |
|
|
|
|
|
|
|
|
|
|
|
|
Einstellung |
|
|
|
|
|
|
|
|
|
14. |
UKW-Teleskopantenne |
|
||
|
|
|
|
|
|
|
|
15. |
PRESET-Taste ---- Aufrufen eines gespeicherten Senders |
|||
|
|
|
|
|
|
|
|
16. TUNING/CH |
/ |
und / |
Tasten ---- |
|
|
|
|
|
|
|
|
|
|
Im Radiomodus: Einstellen der Radiofrequenz |
|||
|
|
|
|
|
|
|
|
|
Im iPod-Betrieb: Vor /Zurück, Schnellsuchlauf |
|||
|
|
|
|
|
|
|
|
17. |
FUNC-Taste ---- Auswahl des Betriebsmodus UKW-Stereo/UKW- |
|||
|
|
|
22 20 |
|
Unterseitenansicht |
18. |
|
Mono/iPod/AUX) |
|
|||
|
|
23 |
|
21 |
|
SNOOZE/LIGHT-Taste Aktivieren der Schlummerfunktion. |
||||||
|
|
|
|
|
|
|
|
|
Einstellung der LCD-Hintergrundbeleuchtung (Verdunkelt/Hell/Aus) |
|||
|
|
|
|
|
|
|
|
19. |
Lautsprecher |
|
|
|
|
|
|
|
|
|
|
|
20. |
DC-IN-Anschluss Anschluss der externen Stromversorgung |
|||
|
|
|
|
|
|
|
|
21. |
Stereo-Kopfhörerausgang |
|
||
|
|
|
|
|
|
|
|
22. AUX-Eingang ---- AUX-Audiosignaleingang |
||||
|
|
|
|
|
|
|
|
23. |
RESET-Knopf ---- Systemreset |
|
||
|
|
|
|
|
|
|
|
24. |
Hauptbatteriefach A |
|
|
|
|
|
|
|
|
|
|
|
25. |
Hauptbatteriefach B |
|
|
|
|
|
|
|
|
|
|
|
26. |
Inneres Uhr-Batteriefach |
|
||
|
|
|
|
|
25 |
|
|
|
|
|
|
|
|
|
|
|
|
|
26 |
24 |
|
|
|
|
|
|
|
|
|
|
|
|
|
|
|
|
|
|
|
|
|
|
|
6 |
|
|
|
|
|
|
7 |
 Loading...