


 Loading...
User’s Manual
GraphicConverter 11.5.2
Programmed by Thorsten Lemke
Manual by Hagen Henke
Sales:
Lemke Software GmbH
PF 6034
D-31215 Peine
Tel: +49-5171-72200
Fax:+49-5171-72201
E-mail: support@lemkesoft.com
Elbsand Publishers
In this manual, you can click the page numbers in the contents and the cross references in the text to jump to that particular page.
1
© 2001-2021 Elbsand Publishers, Hagen Henke. All rights reserved.
Sales: Lemke Software GmbH, PF 6034, D-31215 Peine; www.lemkesoft.com
This book including all parts is protected by copyright. It may not be reproduced in any form outside of copyright laws without permission from the author. This applies in particular to photocopying, translation, copying onto microfilm and storage and processing on electronic systems.
All due care was taken during the compilation of this book. However, errors cannot be completely ruled out. The author and distributors therefore accept no responsibility for any program or documentation errors or their consequences.
This manual was written on a Mac using Adobe FrameMaker 8.
Almost all software, hardware and other products or company names mentioned in this manual are registered trademarks and should be respected as such. The following list is not necessarily complete.
Apple, the Apple logo, and Macintosh are trademarks of Apple, registered in the United States and other countries. Mac and the macOS logo are trademarks of Apple. Lumix is a trademark of Panasonic.
Copyright for all pictures in manual and on cover: Hagen Henke except for ECW and mrSID example pictures. Example pictures of ships, Berlin and Hamburg in the chapters Picture Package and Collage by Detlef Großpietsch. Example picture shadow function: Designed by Freepik.com.
Third Parties Components:
•ExifTool used with permission of Phil Harvey
•Photo CD mark licensed by Kodak
•ECW Compression/Decompression Earth Resource Mapping Pty Ltd.;
•XMP toolkit © Adobe Systems Incorporated and others. All rights reserved. The original version of this source code may be found at http://adobe.com
•NeuQuant © 1994 Anthony Dekker
•DDS and ACE import with the help of Martin Wright
•JPEG 6 © 1998 Thomas G. Lane, updated to 6c by Bruce Barthon
•Remote Control Wrapper, a library of classes by Martin Kahr
•Sparkle framework by Andy Matuschak
•Crashreporter framework by Uli Kusterer
•webp format sdk Copyright © 2010, Google Inc. All rights reserved.
Typesetting: Hagen Henke
Version 8.4, Meissen, Germany 2021
2
Contents
Introduction
Welcome to GraphicConverter . . . . . . . . . . . . . . . . . . . . . . . . . . . . . . . . . . . . . . . . . . . . . . . . . . . . . . . .6 System Requirements . . . . . . . . . . . . . . . . . . . . . . . . . . . . . . . . . . . . . . . . . . . . . . . . . . . . . . . . . . . . . . . .6 Installation . . . . . . . . . . . . . . . . . . . . . . . . . . . . . . . . . . . . . . . . . . . . . . . . . . . . . . . . . . . . . . . . . . . . . . . . . . .6 Update . . . . . . . . . . . . . . . . . . . . . . . . . . . . . . . . . . . . . . . . . . . . . . . . . . . . . . . . . . . . . . . . . . . . . . . . . . . . . 11 Auto Save and Fullscreen Mode . . . . . . . . . . . . . . . . . . . . . . . . . . . . . . . . . . . . . . . . . . . . . . . . . . . . . 11 macOS 10.9 Mavericks . . . . . . . . . . . . . . . . . . . . . . . . . . . . . . . . . . . . . . . . . . . . . . . . . . . . . . . . . . . . . . 14 Support . . . . . . . . . . . . . . . . . . . . . . . . . . . . . . . . . . . . . . . . . . . . . . . . . . . . . . . . . . . . . . . . . . . . . . . . . . . . 16 This Manual . . . . . . . . . . . . . . . . . . . . . . . . . . . . . . . . . . . . . . . . . . . . . . . . . . . . . . . . . . . . . . . . . . . . . . . . 16 Starting the Program and Opening a Picture . . . . . . . . . . . . . . . . . . . . . . . . . . . . . . . . . . . . . . . . . 17 Converting a Picture with Save as... . . . . . . . . . . . . . . . . . . . . . . . . . . . . . . . . . . . . . . . . . . . . . . . . . . 22 Saving and Closing . . . . . . . . . . . . . . . . . . . . . . . . . . . . . . . . . . . . . . . . . . . . . . . . . . . . . . . . . . . . . . . . . 27 Save a Copy as... . . . . . . . . . . . . . . . . . . . . . . . . . . . . . . . . . . . . . . . . . . . . . . . . . . . . . . . . . . . . . . . . . . . . 27 Batch Conversion with Convert & Modify . . . . . . . . . . . . . . . . . . . . . . . . . . . . . . . . . . . . . . . . . . . . 28 Automatic Conversion . . . . . . . . . . . . . . . . . . . . . . . . . . . . . . . . . . . . . . . . . . . . . . . . . . . . . . . . . . . . . . 59 Work Environment . . . . . . . . . . . . . . . . . . . . . . . . . . . . . . . . . . . . . . . . . . . . . . . . . . . . . . . . . . . . . . . . . 62
Internet
Preparing Pictures for the Internet . . . . . . . . . . . . . . . . . . . . . . . . . . . . . . . . . . . . . . . . . . . . . . . . . . 76 Save for web . . . . . . . . . . . . . . . . . . . . . . . . . . . . . . . . . . . . . . . . . . . . . . . . . . . . . . . . . . . . . . . . . . . . . . . . 80 Comparing Pictures . . . . . . . . . . . . . . . . . . . . . . . . . . . . . . . . . . . . . . . . . . . . . . . . . . . . . . . . . . . . . . . . 81 Pictures in E-mails . . . . . . . . . . . . . . . . . . . . . . . . . . . . . . . . . . . . . . . . . . . . . . . . . . . . . . . . . . . . . . . . . . 83 Pictures in mobile phones . . . . . . . . . . . . . . . . . . . . . . . . . . . . . . . . . . . . . . . . . . . . . . . . . . . . . . . . . . . 87 Slices . . . . . . . . . . . . . . . . . . . . . . . . . . . . . . . . . . . . . . . . . . . . . . . . . . . . . . . . . . . . . . . . . . . . . . . . . . . . . . . 87 Photo Albums on the Internet (Catalog) . . . . . . . . . . . . . . . . . . . . . . . . . . . . . . . . . . . . . . . . . . . . . 89 Cloud services . . . . . . . . . . . . . . . . . . . . . . . . . . . . . . . . . . . . . . . . . . . . . . . . . . . . . . . . . . . . . . . . . . . . . 100 Uploading and Downloading Documents . . . . . . . . . . . . . . . . . . . . . . . . . . . . . . . . . . . . . . . . . . 100
On Paper
Paper Format . . . . . . . . . . . . . . . . . . . . . . . . . . . . . . . . . . . . . . . . . . . . . . . . . . . . . . . . . . . . . . . . . . . . . . 101 Printing . . . . . . . . . . . . . . . . . . . . . . . . . . . . . . . . . . . . . . . . . . . . . . . . . . . . . . . . . . . . . . . . . . . . . . . . . . . 101 Multiple printing with Pickture Package . . . . . . . . . . . . . . . . . . . . . . . . . . . . . . . . . . . . . . . . . . . . 105 Layouts with the Collage function . . . . . . . . . . . . . . . . . . . . . . . . . . . . . . . . . . . . . . . . . . . . . . . . . . 107 Print Catalog . . . . . . . . . . . . . . . . . . . . . . . . . . . . . . . . . . . . . . . . . . . . . . . . . . . . . . . . . . . . . . . . . . . . . . 110 Print Folder . . . . . . . . . . . . . . . . . . . . . . . . . . . . . . . . . . . . . . . . . . . . . . . . . . . . . . . . . . . . . . . . . . . . . . . . 114
Processing Pictures
Non-destructive image editing with the Cocooner . . . . . . . . . . . . . . . . . . . . . . . . . . . . . . . . . . 115 Color correction with Color Balance . . . . . . . . . . . . . . . . . . . . . . . . . . . . . . . . . . . . . . . . . . . . . . . . 117 Color correction with Xe8472. . . . . . . . . . . . . . . . . . . . . . . . . . . . . . . . . . . . . . . . . . . . . . . . . . . . . . . 118 Pure Carbon Filter. . . . . . . . . . . . . . . . . . . . . . . . . . . . . . . . . . . . . . . . . . . . . . . . . . . . . . . . . . . . . . . . . . 120
3
Color Range . . . . . . . . . . . . . . . . . . . . . . . . . . . . . . . . . . . . . . . . . . . . . . . . . . . . . . . . . . . . . . . . . . . . . . . 121 Highlights and Shadows . . . . . . . . . . . . . . . . . . . . . . . . . . . . . . . . . . . . . . . . . . . . . . . . . . . . . . . . . . . 122 Cropping for Photo Prints . . . . . . . . . . . . . . . . . . . . . . . . . . . . . . . . . . . . . . . . . . . . . . . . . . . . . . . . . . 123 Picture Size . . . . . . . . . . . . . . . . . . . . . . . . . . . . . . . . . . . . . . . . . . . . . . . . . . . . . . . . . . . . . . . . . . . . . . . . 127 Scanning with GraphicConverter . . . . . . . . . . . . . . . . . . . . . . . . . . . . . . . . . . . . . . . . . . . . . . . . . . . 136 Using the Stamp for Touching Up . . . . . . . . . . . . . . . . . . . . . . . . . . . . . . . . . . . . . . . . . . . . . . . . . . 137 Importing Pictures from Digital Cameras . . . . . . . . . . . . . . . . . . . . . . . . . . . . . . . . . . . . . . . . . . . 138 Cropping . . . . . . . . . . . . . . . . . . . . . . . . . . . . . . . . . . . . . . . . . . . . . . . . . . . . . . . . . . . . . . . . . . . . . . . . . . 142 Free-form select with the Green Screen technology . . . . . . . . . . . . . . . . . . . . . . . . . . . . . . . . . 144 Rotate . . . . . . . . . . . . . . . . . . . . . . . . . . . . . . . . . . . . . . . . . . . . . . . . . . . . . . . . . . . . . . . . . . . . . . . . . . . . . 144 Unsharp Mask and Sharpen Edges . . . . . . . . . . . . . . . . . . . . . . . . . . . . . . . . . . . . . . . . . . . . . . . . . . 150 Enhance local Contrast . . . . . . . . . . . . . . . . . . . . . . . . . . . . . . . . . . . . . . . . . . . . . . . . . . . . . . . . . . . . . 153 Brightness, Contrast, Saturation . . . . . . . . . . . . . . . . . . . . . . . . . . . . . . . . . . . . . . . . . . . . . . . . . . . . 154
Vignetting Correction . . . . . . . . . . . . . . . . . . . . . . . . . . . . . . . . . . . . . . . . . . . . . . . . . . . . . . . . . . . . . . 156
Operator. . . . . . . . . . . . . . . . . . . . . . . . . . . . . . . . . . . . . . . . . . . . . . . . . . . . . . . . . . . . . . . . . . . . . . . . . . . 157 Color Correction . . . . . . . . . . . . . . . . . . . . . . . . . . . . . . . . . . . . . . . . . . . . . . . . . . . . . . . . . . . . . . . . . . . 159 Color Management with Profiles and ColorSync. . . . . . . . . . . . . . . . . . . . . . . . . . . . . . . . . . . . . 161 Selection . . . . . . . . . . . . . . . . . . . . . . . . . . . . . . . . . . . . . . . . . . . . . . . . . . . . . . . . . . . . . . . . . . . . . . . . . . 169 Removing Red Eyes . . . . . . . . . . . . . . . . . . . . . . . . . . . . . . . . . . . . . . . . . . . . . . . . . . . . . . . . . . . . . . . . 177 Undo . . . . . . . . . . . . . . . . . . . . . . . . . . . . . . . . . . . . . . . . . . . . . . . . . . . . . . . . . . . . . . . . . . . . . . . . . . . . . . 180 RGB and CMYK . . . . . . . . . . . . . . . . . . . . . . . . . . . . . . . . . . . . . . . . . . . . . . . . . . . . . . . . . . . . . . . . . . . . 180 Torn Effect . . . . . . . . . . . . . . . . . . . . . . . . . . . . . . . . . . . . . . . . . . . . . . . . . . . . . . . . . . . . . . . . . . . . . . . . . 182 3D Effect. . . . . . . . . . . . . . . . . . . . . . . . . . . . . . . . . . . . . . . . . . . . . . . . . . . . . . . . . . . . . . . . . . . . . . . . . . . 183 Transparency . . . . . . . . . . . . . . . . . . . . . . . . . . . . . . . . . . . . . . . . . . . . . . . . . . . . . . . . . . . . . . . . . . . . . . 188 Zoom . . . . . . . . . . . . . . . . . . . . . . . . . . . . . . . . . . . . . . . . . . . . . . . . . . . . . . . . . . . . . . . . . . . . . . . . . . . . . 189 Levels . . . . . . . . . . . . . . . . . . . . . . . . . . . . . . . . . . . . . . . . . . . . . . . . . . . . . . . . . . . . . . . . . . . . . . . . . . . . . 191 Colors, Modes and Colorize . . . . . . . . . . . . . . . . . . . . . . . . . . . . . . . . . . . . . . . . . . . . . . . . . . . . . . . . 193 Gradient . . . . . . . . . . . . . . . . . . . . . . . . . . . . . . . . . . . . . . . . . . . . . . . . . . . . . . . . . . . . . . . . . . . . . . . . . . . 204 Invert . . . . . . . . . . . . . . . . . . . . . . . . . . . . . . . . . . . . . . . . . . . . . . . . . . . . . . . . . . . . . . . . . . . . . . . . . . . . . 204 Mirroring . . . . . . . . . . . . . . . . . . . . . . . . . . . . . . . . . . . . . . . . . . . . . . . . . . . . . . . . . . . . . . . . . . . . . . . . . . 204 Shadow. . . . . . . . . . . . . . . . . . . . . . . . . . . . . . . . . . . . . . . . . . . . . . . . . . . . . . . . . . . . . . . . . . . . . . . . . . . . 206 Unskew . . . . . . . . . . . . . . . . . . . . . . . . . . . . . . . . . . . . . . . . . . . . . . . . . . . . . . . . . . . . . . . . . . . . . . . . . . . 207 Tilt Shift Effect (Miniature Effect). . . . . . . . . . . . . . . . . . . . . . . . . . . . . . . . . . . . . . . . . . . . . . . . . . . . 211 Wide Equalization. . . . . . . . . . . . . . . . . . . . . . . . . . . . . . . . . . . . . . . . . . . . . . . . . . . . . . . . . . . . . . . . . . 212 Old Style. . . . . . . . . . . . . . . . . . . . . . . . . . . . . . . . . . . . . . . . . . . . . . . . . . . . . . . . . . . . . . . . . . . . . . . . . . . 213 White Correction. . . . . . . . . . . . . . . . . . . . . . . . . . . . . . . . . . . . . . . . . . . . . . . . . . . . . . . . . . . . . . . . . . . 213 Creating a GIF animation . . . . . . . . . . . . . . . . . . . . . . . . . . . . . . . . . . . . . . . . . . . . . . . . . . . . . . . . . . . 214 User defined filters . . . . . . . . . . . . . . . . . . . . . . . . . . . . . . . . . . . . . . . . . . . . . . . . . . . . . . . . . . . . . . . . . 218 Color Permutations . . . . . . . . . . . . . . . . . . . . . . . . . . . . . . . . . . . . . . . . . . . . . . . . . . . . . . . . . . . . . . . . 218 Alpha Channels . . . . . . . . . . . . . . . . . . . . . . . . . . . . . . . . . . . . . . . . . . . . . . . . . . . . . . . . . . . . . . . . . . . 224 Layers . . . . . . . . . . . . . . . . . . . . . . . . . . . . . . . . . . . . . . . . . . . . . . . . . . . . . . . . . . . . . . . . . . . . . . . . . . . . . 227 Insert Text into Pictures . . . . . . . . . . . . . . . . . . . . . . . . . . . . . . . . . . . . . . . . . . . . . . . . . . . . . . . . . . . . 229
4
Recognize and read text in images. . . . . . . . . . . . . . . . . . . . . . . . . . . . . . . . . . . . . . . . . . . . . . . . . . 232 Face Recognition . . . . . . . . . . . . . . . . . . . . . . . . . . . . . . . . . . . . . . . . . . . . . . . . . . . . . . . . . . . . . . . . . . 233 Deep Data . . . . . . . . . . . . . . . . . . . . . . . . . . . . . . . . . . . . . . . . . . . . . . . . . . . . . . . . . . . . . . . . . . . . . . . . . 237 RAW-Developer. . . . . . . . . . . . . . . . . . . . . . . . . . . . . . . . . . . . . . . . . . . . . . . . . . . . . . . . . . . . . . . . . . . . 238
Viewing & Sorting
The Browser . . . . . . . . . . . . . . . . . . . . . . . . . . . . . . . . . . . . . . . . . . . . . . . . . . . . . . . . . . . . . . . . . . . . . . . 238 Pictures on your iPod . . . . . . . . . . . . . . . . . . . . . . . . . . . . . . . . . . . . . . . . . . . . . . . . . . . . . . . . . . . . . . 295 Slide show . . . . . . . . . . . . . . . . . . . . . . . . . . . . . . . . . . . . . . . . . . . . . . . . . . . . . . . . . . . . . . . . . . . . . . . . 296 Find duplicate files . . . . . . . . . . . . . . . . . . . . . . . . . . . . . . . . . . . . . . . . . . . . . . . . . . . . . . . . . . . . . . . . . 317 Preferences . . . . . . . . . . . . . . . . . . . . . . . . . . . . . . . . . . . . . . . . . . . . . . . . . . . . . . . . . . . . . . . . . . . . . . . . 319
Special
Batch Functions. . . . . . . . . . . . . . . . . . . . . . . . . . . . . . . . . . . . . . . . . . . . . . . . . . . . . . . . . . . . . . . . . . . . 321 Geo Coordinates . . . . . . . . . . . . . . . . . . . . . . . . . . . . . . . . . . . . . . . . . . . . . . . . . . . . . . . . . . . . . . . . . . 328 Set or export GPS data . . . . . . . . . . . . . . . . . . . . . . . . . . . . . . . . . . . . . . . . . . . . . . . . . . . . . . . . . . . . . 334 Images from Videos . . . . . . . . . . . . . . . . . . . . . . . . . . . . . . . . . . . . . . . . . . . . . . . . . . . . . . . . . . . . . . . . 337 Feathering . . . . . . . . . . . . . . . . . . . . . . . . . . . . . . . . . . . . . . . . . . . . . . . . . . . . . . . . . . . . . . . . . . . . . . . . . 338 Fisheye . . . . . . . . . . . . . . . . . . . . . . . . . . . . . . . . . . . . . . . . . . . . . . . . . . . . . . . . . . . . . . . . . . . . . . . . . . . . 338 Align images. . . . . . . . . . . . . . . . . . . . . . . . . . . . . . . . . . . . . . . . . . . . . . . . . . . . . . . . . . . . . . . . . . . . . . . 339 DRIMaker instead of HDR. . . . . . . . . . . . . . . . . . . . . . . . . . . . . . . . . . . . . . . . . . . . . . . . . . . . . . . . . . . 339 Focus Stacking. . . . . . . . . . . . . . . . . . . . . . . . . . . . . . . . . . . . . . . . . . . . . . . . . . . . . . . . . . . . . . . . . . . . . 340 Overlay . . . . . . . . . . . . . . . . . . . . . . . . . . . . . . . . . . . . . . . . . . . . . . . . . . . . . . . . . . . . . . . . . . . . . . . . . . . . 340 Recording Points for Determining Measurements . . . . . . . . . . . . . . . . . . . . . . . . . . . . . . . . . . . 341 Color Blindness . . . . . . . . . . . . . . . . . . . . . . . . . . . . . . . . . . . . . . . . . . . . . . . . . . . . . . . . . . . . . . . . . . . . 341 Touch Bar. . . . . . . . . . . . . . . . . . . . . . . . . . . . . . . . . . . . . . . . . . . . . . . . . . . . . . . . . . . . . . . . . . . . . . . . . . 342 Macros . . . . . . . . . . . . . . . . . . . . . . . . . . . . . . . . . . . . . . . . . . . . . . . . . . . . . . . . . . . . . . . . . . . . . . . . . . . . 343 AppleScript . . . . . . . . . . . . . . . . . . . . . . . . . . . . . . . . . . . . . . . . . . . . . . . . . . . . . . . . . . . . . . . . . . . . . . . . 343 Automator. . . . . . . . . . . . . . . . . . . . . . . . . . . . . . . . . . . . . . . . . . . . . . . . . . . . . . . . . . . . . . . . . . . . . . . . . 347 Terminal . . . . . . . . . . . . . . . . . . . . . . . . . . . . . . . . . . . . . . . . . . . . . . . . . . . . . . . . . . . . . . . . . . . . . . . . . . . 347 Troubleshooting . . . . . . . . . . . . . . . . . . . . . . . . . . . . . . . . . . . . . . . . . . . . . . . . . . . . . . . . . . . . . . . . . . 348 Shortcuts . . . . . . . . . . . . . . . . . . . . . . . . . . . . . . . . . . . . . . . . . . . . . . . . . . . . . . . . . . . . . . . . . . . . . . . . . . 350 Important formats . . . . . . . . . . . . . . . . . . . . . . . . . . . . . . . . . . . . . . . . . . . . . . . . . . . . . . . . . . . . . . . . . 351 Supported Formats . . . . . . . . . . . . . . . . . . . . . . . . . . . . . . . . . . . . . . . . . . . . . . . . . . . . . . . . . . . . . . . . 364 New in GraphicConverter . . . . . . . . . . . . . . . . . . . . . . . . . . . . . . . . . . . . . . . . . . . . . . . . . . . . . . . . . . 364 Index (discontinued, please use the search function in your PDF program)
5
Welcome to GraphicConverter
Introduction
After dealing with installation of the program, the first section of this manual looks at the most important functions for everyday use.
Welcome to GraphicConverter
GraphicConverter converts pictures into other picture formats allowing you to use graphics files from other computer systems, for example. The most important functions are:
–Converting the most frequent Atari, Amiga, UNIX, Organizer and IBM graphics formats to and from Macintosh formats. Numerous format-related parameters can be configured (page 22).
–Image editing
–Multiple conversion (page 28)
–Importing Pictures from Digital Cameras (page 138)
–Browser for quick viewing of all pictures contained in a folder (page 238)
–Slide show (page 296)
–Automatic creation of Internet pages with picture indices for download (page 89)
–Picture processing including dithering (e.g. from page 193)
–Remove red eyes (page 177)
–Simple text conversion (page 31)
–Print pictures indices (page 110)
We wish you all the best in your work with GraphicConverter.
System Requirements
GraphicConverter 9.7 or newer requires macOS X 10.8 or newer. Click here to download older versions of GraphicConverter for almost any older macOS.
Installation
Summary: Copy GraphicConverter onto your hard drive and start the program. GraphicConverter is a multi-language program that starts in the language set in the International section of the System Preferences. The languages available are: German, English, French, Danish, Sweden, Italian, Spanish, Japanese, Chinese (simplified), Chinese (traditional), Czech, Dutch, Catalan and Russian.
This manual is stored inside the GraphicConverter program file that is a so-called package. Packages can be opened by selecting Show Package Contents from the context menu in the Finder. They then work in the same way as folders. All documentation for GraphicConverter is under the path Contents / Resources. If you want to install a newer
6
Installation
version of the documentation, simply overwrite the old file with the new one. You may not change the names.
In macOS X, plug-ins are copied to the Library / Application Support / GraphicConverter / Plug-ins folder. User plug-ins are copied to the Users / ~ / Library / Application Support / GraphicConverter / Plug-ins folder. The tilde character ~ stands for the name of the respective user. User plug-ins are only available to the respective users. One very easy way to install plug-ins is to drag them onto the GraphicConverter program icon. After a query, they will be automatically copied into the correct folder.
macOS X already supports a large number of USB scanners. Connect your scanner via USB (not FireWire) and select File / Scan / Scan with Image Capture.... If you want to use the functions of the software supplied with the scanner, please follow the instructions in the scanner documentation. For further information see p 136 onwards.
Step By Step Installation
You may have downloaded GraphicConverter from the Internet or received it on a CD or you bought a license from the Mac App Store. Please read the paragraph that applies to you below.
Possibility 1: You downloaded GraphicConverter from the Internet: Double-click the file, which has been downloaded, if a window with a volume image does not open automatically.
A volume image is a volume, which can be used like a normal volume, even though it only exists in the RAM. The following volume image appears on the desktop:
7
Installation
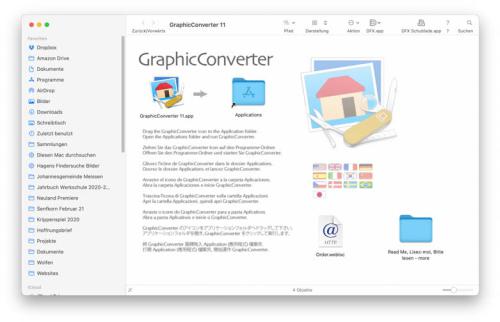
Double-click the volume image to open it.
In the Finder, drag GraphicConverter into the Applications folder on your hard drive. Installation is not complete. To delete the volume image from the RAM, click it and press Command-E (Eject).
Open the Programs folder on your hard drive and start the GraphicConverter program by double-clicking. To make opening GraphicConverter easy, we recommend dragging the program file into the dock. Alternatively you can drag the file to the Desktop while holding down the Command and Option keys to create an alias via which you can start the program.
8
Installation
Possibility 2: You purchased GraphicConverter in the Mac App Store. In this case, GraphicConverter will be installed automatically.
The Mac App Store is not a Web site, but instead a program that is pre-installed on your computer from macOS 10.6 (January 2011). You will receive a message in the Mac App Store program as soon as an update is available. The update is installed automatically with one click. You can install GraphicConverter on all Macs on which your iTunes account is active.
The Mac App Store will supply a version that supports sandboxing. This technology increases the protection against malware, but brings along a few limitations:
•The folder for Apple scripts must be created manually.
•mrSID import is not possible.
•ecw import is not possible.
•To display directories in the browser, you sometimes need to select them via the File/ Browse Folder... command or move them to the favorites using drag and drop.
•It is not possible to export the iPhoto / Photos library into the normal folder structure.
One further limitation to the version from the Mac App Store is that newer versions are delayed considerably because of Apple’s testing process.
If you want to avoid these limitations, you can obtain a normal serial number for the normal version of GraphicConverter (available for download from www.lemkesoft.com)
9
Installation
free of charge. Send the receipt that you received from Apple by e-mail to: support@lemkesoft.com. We will then send you a serial number by e-mail.
If you installed the normal version of GraphicConverter first, you will need to drag it to the Trash before installing the sandboxing version from the Mac App Store. After installing the sandboxing version, you can drag the normal version out of the Trash again, for example, to a subfolder in the program folder. You can use both versions parallel and also start them simultaneously.
If, for example, you have received a promocode for GraphicConverter because you are a journalist, click Redeem under Quick Links at the bottom right of the start page of the Mac App Store. GraphicConverter will start downloading immediately after you enter the promocode since the code contains the information about which program should be downloaded.
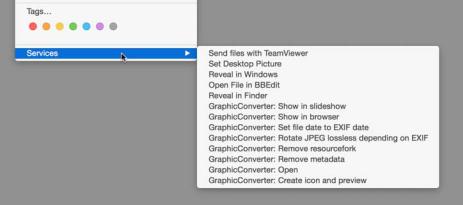
GraphicConverter services
In the Finder you can use some functions of GraphicConverter via the sub menu of Services from the context menu. The mouse has to be over a picture file. When your computer starts the Finder reads the services of all installed programs and shows them in the context menu.
Installing Plug-Ins
Copy plug-ins into the Library / Application Support / GraphicConverter / Plug-Ins folder and restart GraphicConverter if it was already running. The plug-ins need to be carbonized, i.e. suitable for macOS X. Carbon plug-ins are currently only available for some scanners. Plug-ins, which should only be available to one user, are copied to the Users / ~ / Library / Application Support / GraphicConverter / Plug-ins folder. The tilde character stands for the name of the respective user. You can check your user name in the System Preferences in the Users & Groups section. User plug-ins are only available to the respective users.
Please see Scanning with GraphicConverter from page 136 for further information.
10
Update
Installing TWAIN
The TWAIN driver is integrated in GraphicConverter. Simply install the TWAIN module for your scanner software (see page 136), which you open in GraphicConverter via File / Scan / Select TWAIN Scanner (Data Source). This module needs to support 64 bit. If there is not a TWAIN module for your scanner, you can try to use the TWAIN SANE Interface for macOS that can be downloaded at: http://www.ellert.se/twain-sane/
Update
GraphicConverter is constantly being revised. You will automatically receive messages about updates when an Internet connection is present and can install them automatically with a click. If you have not been online much for a while, you can search for updates with
GraphicConverter / Check for Updates... or on the www.lemkesoft.com pages. We recommend that you always use the latest version. All updates are free with a few exceptions. Your registration and default settings are not affected. If you bought GraphicConverter from Apple’s Mac App Store, you will receive notification from the store as soon as an update is available for automatic installation.
Auto Save and Fullscreen Mode
Under macOS 10.7 Lion, the new options include Auto Save and fullscreen mode. Auto Save can be disabled in the GraphicConverter Preferences under Save / General.
If you shut down your computer under Lion and have programs open at that moment, these will be lauched automatically on the next start of your computer with all windows opened which were open when you shut down. After quit and relaunch of a Program the windows will be opened again too. You can disable this option in the System preferences under General in macOS 10.7. If you leave this option active you can exclude GraphicConverter in the GraphicConverter Preferences part General / Misc / Upon Launch: Restore last Windows.
Under Lion, if you shut down your computer while programs are still open, they will be automatically restored when the computer is restarted and all windows that were open at the last shut down will be re-opened. In macOS 10.7, you can disable this option under System Preferences / General. If you leave this option enabled, you can exclude GraphicConverter by disabling the Upon Launch: Restore last Windows option in the General / Misc section of the GraphicConverter Preferences.
Auto Save
With Auto Save, changes to an open image are always saved automatically in the background. Therefore the latest editing progress is always available even after a crash. However, the main advantage is that you no longer have to worry about saving because the files are saved automatically. You can therefore switch off your computer at any time
11
Auto Save and Fullscreen Mode
without warning messages for unsaved documents appearing. The Auto Save option is disabled in GraphicConverter by default. You can enable Auto Save in the Preferences / Save / General with Features: Support auto save and versions.
The Auto Save functions have been changed in newer versions of macOS. For more information please see the end of this chapter.
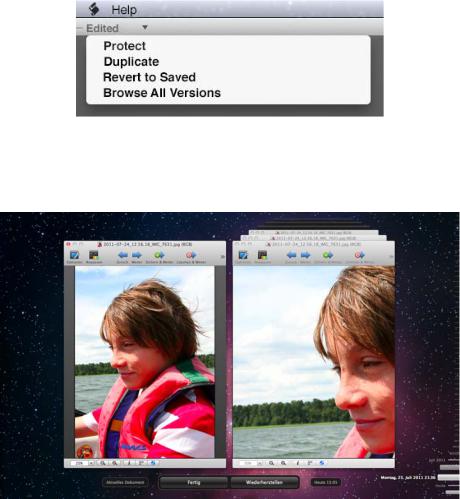
In the File menu, Save... has become the Save a Version command. The difference between the commands is that Save overwrites the open file so that only the modified version is available. Save a Version saves the current editing progress. The previously saved versions are, however, archived automatically and can be opened again at any time. To do this, click the filename in the window title and select Browse All Versions...
from the pop-up menu that opens. Alternatively you can select File / Revert to Saved.
Similar to the TimeMachine display, all older versions of the file will now be displayed on the right next to the current version. On the right-hand side of the screen, you can choose which of the older versions you want to display.
Click the required time bar or drag the time bars while holding down the mouse button to browse. Click Restore to make the selected version the current document. If you select the wrong version, you can repeat the process to find the right version since all versions are kept.
12

Auto Save and Fullscreen Mode
Auto Save helps you during your work by adding Edited to the filename in the window title, which appears as soon as you modify the image. If you want to prevent further modifications, select Lock from the window title pop-up menu. Locked will appear instead of
Edited.
Protected files can also be unlocked again via the pop-up menu for the window title with Unlock. We recommend creating a protected version once you have reached an editing stage that you want to keep. If you do not edit a file for two weeks, macOS Lion will automatically change the status to Locked. Select Unlock when you want to edit the file again.
Alternatively you can create a new version of the file that is not protected and needs to be saved under a new name like a new file with Duplicate. The save command will therefore become available for this file in the File menu.
File / Export... allows you to save a file under a new name like before with File / Save As....
Since automatic saving can inadvertently take up a large amount of hard drive space and slow down further work when you are working with larger files, you can disable it in the Preferences under Save / General. The usual commands, for example, Save, Save As... etc. will then appear in the File menu. If necessary, use another hard drive and TimeMachine to keep versions of your files.
Changes in macOS 10.9 Mavericks: The functions File / Save and Save as are available again. The function File / Save a Version is no longer available. File / Save now saves a version. File / Revert To / Last Opened - Date or Browse All Versions go back to the original version or a newer one.
The Duplicate function is available from the file menu. In the name dialog is a checkbox for locking the file and you can apply a Tag or edit the name of the file. You can move the file to another folder with the Where PopUp-Menu which is handy especially for moving to or from the iCloud.
13
macOS 10.9 Mavericks
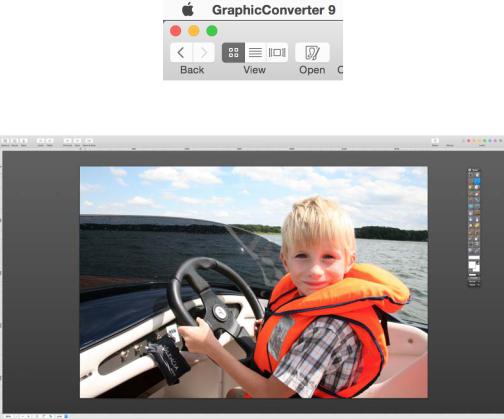
Fullscreen mode
Click the green circle with the diagonal double arrow in the top left corner of the window to activate full-screen mode in which GraphicConverter fills the whole screen so you can concentrate on the current document.
The menu bar is also hidden.
Move the mouse cursor to the top edge of the screen to display the menu bar again. To end full-screen mode, click the green circle again or press the Escape key.
If, for example, you open a browser and an image and look at it in full-screen mode, you can switch back and forth between the image and the browser by wiping with four fingers sideways to the right or left on the trackpad. The Swipe between full-screen apps option in the System Preferences / Trackpad should not be disabled in this case.
macOS 10.9 Mavericks
GraphicConverter supports the new features of Mavericks. The new technology App Nap saves a lot of energy, as programs in the background get frozen. Especially MacBooks benefit of that technology as the battery life extends by about one hour.
Another interesting new feature are the tags that can be defined and assigned in the Finder. The tags are the advanced labels which had fixed colors. You can select any color for a tag and change it later. Additionally tags have names that can be changed too. You
14
macOS 10.9 Mavericks
can and should change the tag „Red“ to „Projects“ or „Family“ any time. These tags will be displayed in GraphicConverter‘s Browser like the labels were before. You can copy the tags to the metadata of your pictures via the context menu.
Large Picture Files
Support for 64-bit is new in version 8 of GraphicConverter. It allows you to open and edit very large image files like, for example, panorama views. Please note that you require sufficient RAM for the picture since the macOS will otherwise transfer parts of the data to the hard drive. The transfer of data will slow down editing considerably.
64-bit support will not essentially accelerate picture processing. You can expect an approx. 5% increase in speed for standard processing. 64-bit technology shows its real advantages when you open images with file sizes of one gigabyte or more, edit them with filters and then save them. The reason for this is that old 32-bit systems can only use four gigabytes of RAM while modern 64-bit systems can address up to 16 million terabytes of RAM.
Sandbox and Gatekeeper
Apple has introduced Sandbox technology with macOS 10.7 Lion to protect your data against malicious programs and data theft. Programs that have integrated Sandbox protection cannot access all services on your computer and on your network.
The Sandbox version of GraphicConverter cannot, for example, read the data in your address book nor send e-mails by itself. It is unfavorable that the access to the hard disk is blocked except the picture folder. This means that you need to drag folders that are outside the picture folder onto the GraphicConverter icon to display the contents. You can not open the folders from the file tree on the left side of the browser. A list of all restrictions can be found on our website: https://www.lemkesoft.de/en/products/graphicconverter/mac-app-store/
Apple’s Mac App Store only supplies Sandbox versions of applications. Programs without Sandbox technology will still run without limitations under the macOS, however. If you purchased GraphicConverter through the Mac App Store and would rather have a version without Sandbox technology, please contact our support by e-mail and include your purchase receipt. You will then receive a license number for the version without Sandbox technology that you can download from our Web site www.lemkesoft.com free of charge.
When you switch from the Mac App Store version to the normal version or a newer version from the Mac App Store you need to export and import the preferences to keep them. Open the Mac App Store version and select Backup Preferences / Export... from the GraphicConverter Menu which is on the left side of the menu bar. For example, save the settings file on the desktop. Quit the Mac App Store version of GraphicConverter and
15
Support
open the regular version of GraphicConverter or the newer version of the Mac App Store version. From the same menu, choose Backup Settings / Import... and select the file you just created from the desktop. As soon as you quit GraphicConverter, the settings file is written to its normal location in the Library folder. The normal version of GraphicConverter will automatically apply the settings when upgrading.
Gatekeeper is an Apple system that, from OS 10.8 Mountain Lion, ensures that only signed programs can be installed and started. All programs that originate from a developer who is registered with Apple will get the signature without any checks by Apple. GraphicConverter is signed for Gatekeeper. Under macOS 10.8 Mountain Lion, you can enable Gatekeeper in the System Preferences / Security & Privacy to increase protection against malware. Gatekeeper and Sandbox have nothing to do with each other even though they both handle the security of your system.
Support
If you have questions on GraphicConverter or have problems (see also page 348), it is best to contact us by e-mail:
support@lemkesoft.com
If, in your country, support is available in your language through a distribution partner, a corresponding entry will appear in the Help menu so you can send an e-mail.
You can solve most problems by deleting the preference file (see p 348). Please limit your attachments to 100 kB as we receive a very large number of e-mails. If you want to attach a larger sample file, please ask us first. Please remember that problems can often be indicated with a small section of a picture.
We are always glad to hear about any problems and new formats. We would like to thank all users who have helped in the further development of GraphicConverter by sending us information and bug reports.
We prefer e-mails as a support medium because of the time factor.
Thorsten Lemke and Lemke Software GmbH accept no liability for damages and consequential damages (hardware, loss of data etc.) resulting from the use of the GraphicConverter program.
This Manual
The best way to work with the PDF version of this manual is if you display the file with the Apple Preview software under macOS X. A search box is then provided in the drawer on the right-hand edge of the window allowing you to quickly search for terms that are not listed in the index. Click one of the hits to access the corresponding page. The search
16
Starting the Program and Opening a Picture
term appears on the page with a colored background. You will find “Preview” in the program folder.
In the PDF version of this manual, you can click the page numbers in the index and the contents as well as any cross references to jump to the corresponding page.
We have organized this manual so that you can read it from start to finish and get to know GraphicConverter and its capabilities. We have put conversion and important topics like the Internet at the start after Installation and Support. Chapters on the functions that are most frequently needed follow: Scanning a picture, sharpening, optimizing brightness and contrast etc. Please use the extensive index on the last pages to find specific sections.
Starting the Program and Opening a Picture
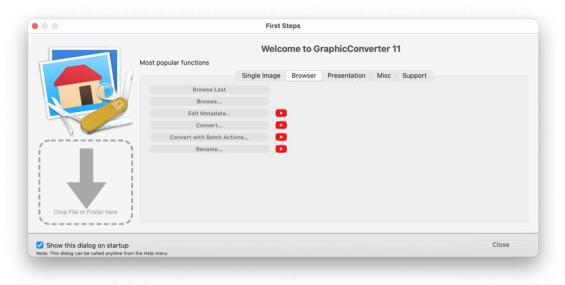
Double-click the program icon to start GraphicConverter. The First Steps dialog appears where you can select one of the basic options.
In the Browser tab you can use the Browse... button, for example, to select a folder whose content is displayed in a browser window. Alternatively, you can drag the folder from the Finder onto the gray arrow in the left area of the dialog.
Click on one of the red buttons with the play symbol to see a YouTube video about the corresponding function in your standard browser.
Create a new image from the Single Image tab opens an empty image window whose size you can specify in a dialog.
The following three features open the file selector allowing you to select an image to open or a folder to browse or display as a slide show. Do a batch conversion opens a Browser window in convert mode. You can access the options listed in this dialog at any
17
Starting the Program and Opening a Picture
time via the File menu. Choose Open an image... and click OK. Alternatively you can deselect Show this dialog on startup and click OK. You can then access the file selection dialog with File / Open....
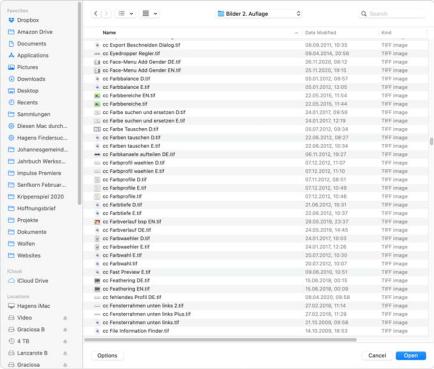
The file selection dialog opens. It may be different to the one shown depending on your macOS version (the screenshot is taken from macOS X 11.0.1).
Click Options to display a pop-up menu of image formats. Select an image format to display only images of that format.
Alternatively you can use the browser option to open files if the small preview icons in the list are too small. Select the folder containing the picture you want to open with File / Browse.... A browser window opens where a larger preview of all the pictures can be displayed. Open a picture in GraphicConverter by double-clicking one of the preview pictures. For further information, see the chapter Browser on page 238.
The program Default Folder from www.stclairsoft.com is a useful enhancement for the file selection dialog as it shows an enlarged preview under the file selection dialog in all programs.
Use the All available filter to display all files and folders. If you select a format from the Filter pop-up menu, only pictures with this format are displayed.
The technical document information for the selected picture is displayed below the preview picture. The documentation information is shown and hidden together with the preview picture.
18
Starting the Program and Opening a Picture
If a picture does not contain a preview, you can create one with Create Preview.
The options in the upper part of the file selection dialog are used for quicker navigation and are part of the macOS. You will find instructions in the documentation for your computer or your macOS package.
If you open several images, you can display them in tabs as is usual in web browsers. The setting for this can be found in the Finder under System Preferences / General / Prefer Tabs / always / when opening documents.
With the setting always or in full screen, you open all images from the second image in tabs in the window of the first image.
If you want to open a certain format, for example, all TIFF pictures, in GraphicConverter (even if the pictures were created with another program) when you double-click the files in the finder, you can configure this using the information dialog in the finder. Click a TIFF picture and press Command-I to open the information dialog. Click the triangle next to Open with. Select the current version of GraphicConverter from the pop-up menu. Click
19
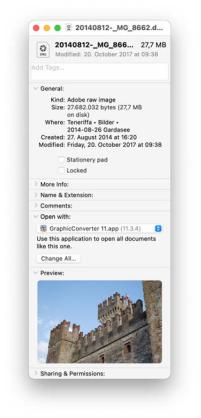
Starting the Program and Opening a Picture
the Change All button to open TIFF pictures with GraphicConverter in future by doubleclicking.
Repeat this procedure for each file format that you want to open with GraphicConverter by double-clicking. Simply click an image file with the corresponding format in the Finder and repeat the process. This replaces the Preview program that would otherwise be started for pictures without a creator.
20

Starting the Program and Opening a Picture
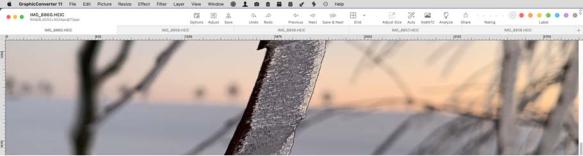
An open image is shown in a window. In the context menu, which you open by Ctrlclicking the image, you will find different options that are explained in more detail in the respective chapters.
You can modify the filename with Rename this file.... The change immediately affects the file on the hard drive and in the RAM.
In the General / Display Windows section of the Preferences, you can display rulers. You can set the ruler units to cm, for example, with a pop-up menu.
Please note that the values in cm, mm etc. depend on the resolution. Therefore change the resolution beforehand to 300 dpi for offset printing or to 180 dpi for printing on inkjet printers via the Picture / Resolution... dialog.
21
Converting a picture with Save as...
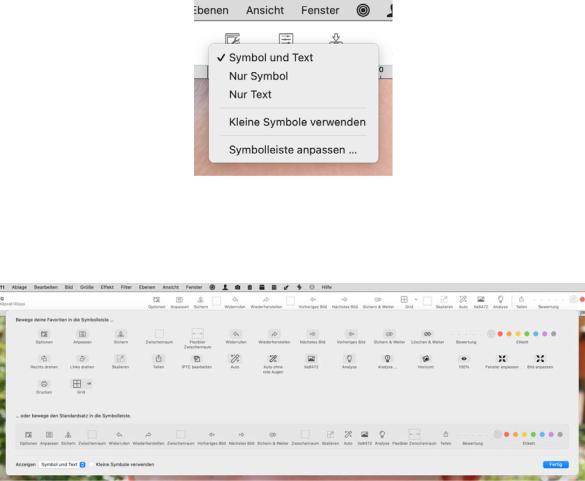
Right-clicking or Control-clicking the title bar of a picture allows you to call up a customize dialog via the context menu.
The customize dialog allows you to set up direct access to the labels, the Share function for online services, the navigation tools and functions for Adjust brightness etc. with their options. Select Customize Toolbar from the same context menu to open the dialog shown below.
Drag additional icons from the dialog onto the toolbar or remove the icons by dragging them downwards off the toolbar. The browser toolbar can be customized in the same way, see p 240 onwards.
Converting a picture with Save as...
Summary: Select File / Open, then the target format in the File / Save as... dialog and save.
1.Open the picture to be converted with File / Open. If pictures have already been opened using this option, they can be opened again quickly from the File / Open Recent submenu.
22
Converting a picture with Save as...
2.Select File / Save as... to convert the picture. The file selection dialog may appear different in older macOS versions. The necessary options are also available in the old file selection dialog, however.
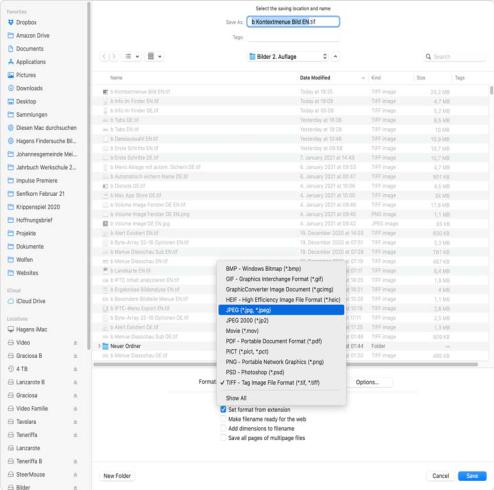
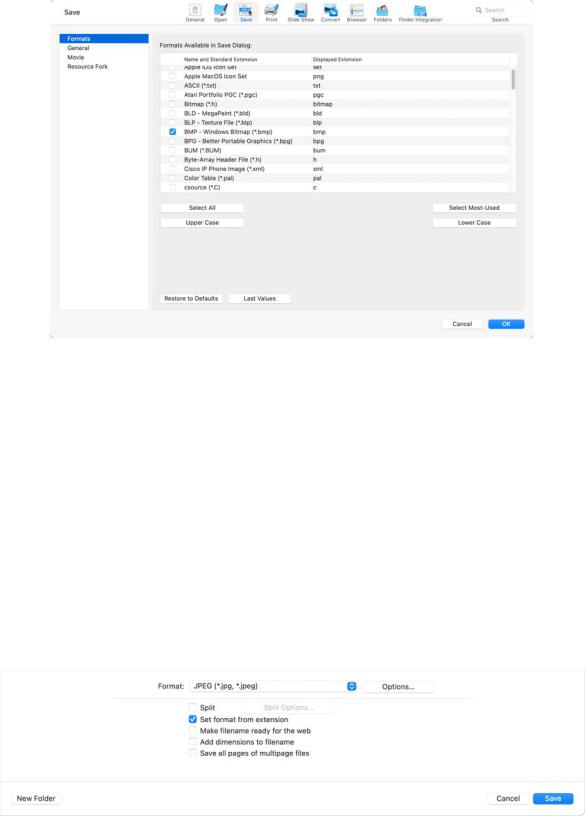
3.Select the required target format in the Format pop-up menu. If you need an unusual format, select Show All and open the pop-up menu again. Now all export formats will be shown. If you have a small monitor, you may need to scroll to reach the upper or lower entries as the list is very long. To scroll, position the cursor without clicking the black triangles at the very top or bottom in this pop-up menu. The further the arrow is positioned over the end of the list, the faster it scrolls.
In the Preferences in the Save / File Formats section, you can choose the formats to
23
Converting a picture with Save as...
show on this pop-up.
The uppercase and lowercase options allow you to specify whether the extension should be inserted as uppercase or lowercase letters.
Professional tip: You can enable the Set Format from Extension option in the file selection and simply add the format extension when writing the filename. For example, .tif. Make sure there is a period in front of the format extension. GraphicConverter then saves in the required format without the format having to be selected from the pop-up menu.
4.Save the picture under the required name. The file is then converted to the selected format.
There are other options available in the Save as... file selection dialog. The Options...
button is particularly powerful as the corresponding parameters can be selected with this option for the selected format. After clicking Options... a completely different dialog appears depending on the format.
24

Converting a picture with Save as...
The Options... button allows you to select any compression rate for JPEG pictures and other pictures.
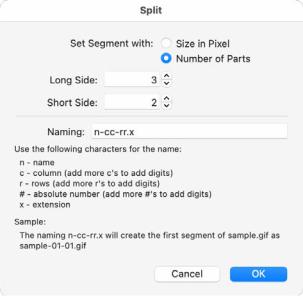
Split... makes several pictures from one picture that each contain part of the larger picture. Enable the option by selecting the check box in front of the button. If you click the split button in the file selection, a dialog opens where you can set the segments according to size or number.
For example, if you want to split a picture with a width of 960 pixels into three parts widthways, enter 320 pixels as the width for the segments.
25
Converting a picture with Save as...
If you select the Set segments with Number of parts option, you can enter the number of segments for the long side and the short side.
The individual files are automatically given a numbered name. The scheme for the automatically created name is shown in the Naming box. The “n” stands for the file name of the source file and should not be changed. The letter “c” stands for column and “r” stands for row. You can then determine the position of each individual picture using the filenames. The “x” at the end of the name is automatically replaced by the respective format extension.
Postprocess with ImageOptim can minimize file size additionally. Unnecessary color profiles and junk metadata are deleted and compression parameters get optimized without sacrificing quality. To be able to use this option you need to install the program ImageOptim which you can download from: https://imageoptim.com.
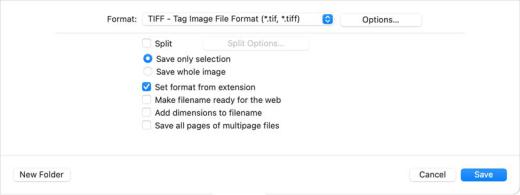
You can also specify in the file selection dialog whether just the current selection should be saved. The two additional Save only selection and Save picture with selection options are only available in the file selection dialog if you have made a selection. Save only selection saves a picture containing just the selection.
26
Saving and Closing
If the selection is not rectangular, a picture is created in which the selection fits. Save picture without selection saves the picture as if there were no selection. A selection that is simply an outline without content cannot be saved.
Set Format from Extension allows you to set the format by entering the extension with the filename and not by selecting it from the pop-up menu. For example, if you write Rose.tiff, the file is automatically saved in TIFF format.
Make filename ready for the web changes special characters like ä to ae and replaces blancs with underscores.
Save all pages of multipage files should be enabled if you want to save all pages in multipage files. Disable this option to save just the first page.
Saving and Closing
The current picture is saved with File / Save. Option-clicking the red ball at the top left of the window closes all open GraphicConverter windows. This option is part of the macOS and is available in all programs. The current window is closed with File / Close. Save All saves all windows. Force Save All saves all windows with the settings that you selected for the first picture. This option is useful, for example, when you have scanned in a large number of individual pictures and want to save them. You can also save to UFS partitions under macOS X.
Save a Copy as...
Save a Copy as... allows you to save a copy of the picture in a different format while you are still editing it. The format of the open picture is not changed, only the saved file has another format.
27

Batch Conversion with Convert & Modify
Batch Conversion with Convert & Modify
If you need to convert a number of pictures at the same time, the File menu contains a useful option called Convert & Modify that saves you having to open and save each picture individually. You can also switch to the Convert & Modify window with an icon in the top section of the browser. Batch actions, such as Scale, that are run on all pictures in a directory, can also be defined using Use Batches.
Select one or more files or a folder whose content should be converted by clicking in the previews on the middle section of the Convert & Modify window. A shift-click selects all files between the one you previously selected and the one you click. Command-Clicks deselect single files or add unselected files like in the Finder of the macOS. Files in subfolders are also converted. The folder structure is copied too.
In the preview section on the right, open a target directory where the converted files should be saved. Use the pop-up menus above the lists or drag and drop the required folders from the Finder to the list sections to select the directories. Click the arrow above the previews to set the source path as the target path. This is useful when the target folder is a subfolder of the source folder. Hold down the Alt key and the arrow changes direction so that you can set the target folder as the source folder. The desktop must not be selected as the target.
You can also open pictures in a multiple conversion window, for example, to check details.
You can find tutorial videos on GraphicConverter and the Convert & Modify window on our YouTube channel: https://www.youtube.com/user/lemkesoft.
28
Batch Conversion with Convert & Modify
GraphicConverter can edit more than 32,766 files per folder. Only the macOS limits the maximum number to around 4 million. If you want to convert a large number of files, you should make sure that your hard drive has enough space for the files being written. In addition, approximately 3 gigabytes space should be left for the operating system files to be on safe side. If more space is needed than available, the file system on your hard drive can become damaged meaning all files are unreadable.
Data rescue programs like DiskWarrior or Data Rescue can make the data readable again in some cases. To avoid loss of data, you should therefore always make a backup, for example, on an external hard drive and make sure that you have sufficient hard drive space. We recommend FoldersSynchronizer as a good low-cost solution for backups, TimeMachine from macOS 10.5 and, as a professional solution Retrospect from www.retrospect.com. We recommend managing large image stocks on external hard drives. If you define the target folder on a different drive to the source drive during conversion, the speed increases as the write/read heads do not constantly have to change position.
If you select a folder as the source, GraphicConverter creates a file with the name of the source folder in the target directory and, if necessary, saves the converted files in subfolders. A new folder is not created in the target folder if one or more files are selected as the source. In this case, the converted files are saved straight to the target directory.
Select the format you require for the conversion under Destination Format. Start the multiple conversion by clicking Start selected Function.
If you select a file format in the Show pop-up menu, only pictures with this format are displayed. All files are only displayed when you select All Files as well as Geotagged and untagged, Files and folders and All ratings.
Different settings, for example, compression, can be made for each target format using
Options....
For some functions of Convert & Modify there is noted modifies source in brackets. These functions change the source files without creating new files in the destination folder. Therefore you can ignore the right hand section of the window. The destination folder must not be identical with the source folder. Select another folder. The content of this folder will not be changed.
In the Function pop-up menu, you can choose further functions:
Conversion – General
Catalog (HTML for WWW usage)... is explained in detail in the chapter Photo Albums on the Internet from page 89. You can put pictures on the Internet as a download album with a few mouse clicks using the Catalog option.
Alternatively, you can create and print catalogs with File / Catalog / Print... (see Split splits large pictures into several small pictures, see p 25.
29
Batch Conversion with Convert & Modify
Overview pictures are created with Catalog (selected destination format)..., i.e. several catalog pictures are obtained that have small previews and the names of the selected pictures in the selection list on the left. The format selected is used. When you click this button, a dialog opens where you can select settings such as size, color depth, color, font, etc. for the catalog.
Convert converts the selected pictures in the destination format. Select the format of the source files if you want to use the batch function only.
Convert ony first File in each Folder makes sense if, for example, you need only a preview for every folder that reflects it‘s content.
Specific
Convert CRW to 48 Bit PSD file... converts CRW images into 48 Bit Photoshop files. CRW is the RAW format of some Canon Cameras.
Convert GIFs to one GIF Animation creates a GIF animation from GIF pictures.
Convert HPGL to PDF (vectors) creates vector PFD files from HPGL files in order to keep the file size small.
Convert Image/Movie to Movie creates a movie from the source pictures or movies.
With Convert Left/Right JPGs to MPOs you can convert 3D-JPGs for the left and right eye in MPO files.
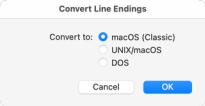
You can use Convert Line Endings to convert just the ends of the lines. A dialog where you can select the target format opens.
Convert PICT to PDF (vectors) converts PICT images with vector content into vector PDFs without dithering them.
You can use Convert Photo RAW to 16 Bit TIFF or Convert Photo RAW to EXR to convert RAW files from Canon cameras in CR2 format to 16 bit TIFF or Open EXR files used in movie industries to achieve high dynamic range (HDR) effects. The converted files contain the unchanged RAW data without gamma correction or white balance as recorded by the sensor.
With Convert SVG to PDF (vectors) you can preserve vectors in SVG pictures when converting to PDF.
30
Loading...