


Leica AP250 User Manual
AP250
Automated
Projector
Users Guide
13800-101-Rev. A 13

Contents
Introduction The AP250 is used for measuring visual acuity. 2
Package Contents Your new Leica AP250 and accessories 2
Safety Precautions Safety Precautions 2
Instrument Components Instrument Components 3
Installing the AP250 Installation Procedures 4
Alignment Optimally Focusing the AP250 5
Instructions for Use - Remote Control Changing the Emission Code 6
Programming 7
Masking Options 7
Care and Maintenance Changing the Halogen Bulb 8
Changing the Remote Control Batteries 8
Changing Fuses 8
Changing the Voltage 8
Routine Care 8
Screen Cleaning 8
AP250 Slide Library Slide Library 9
Technical Specifications Technical Specifications 9
Letter Sizing Charts Letter Sizing Charts in Feet and Meters 10
Warranty Warranty 12
© Reichert Ophthalmic Instruments, A Division of Leica Microsystems, Inc. All rights reserved.
No part of this publication may be reproduced, stored in a retrieval system, or transmitted in any form or by any means, electronic, mechanical,
recording, or otherwise, without the prior written permission from Reichert Ophthalmic Instruments.
13800-101-Rev. A 1

Introduction
Safety Precautions
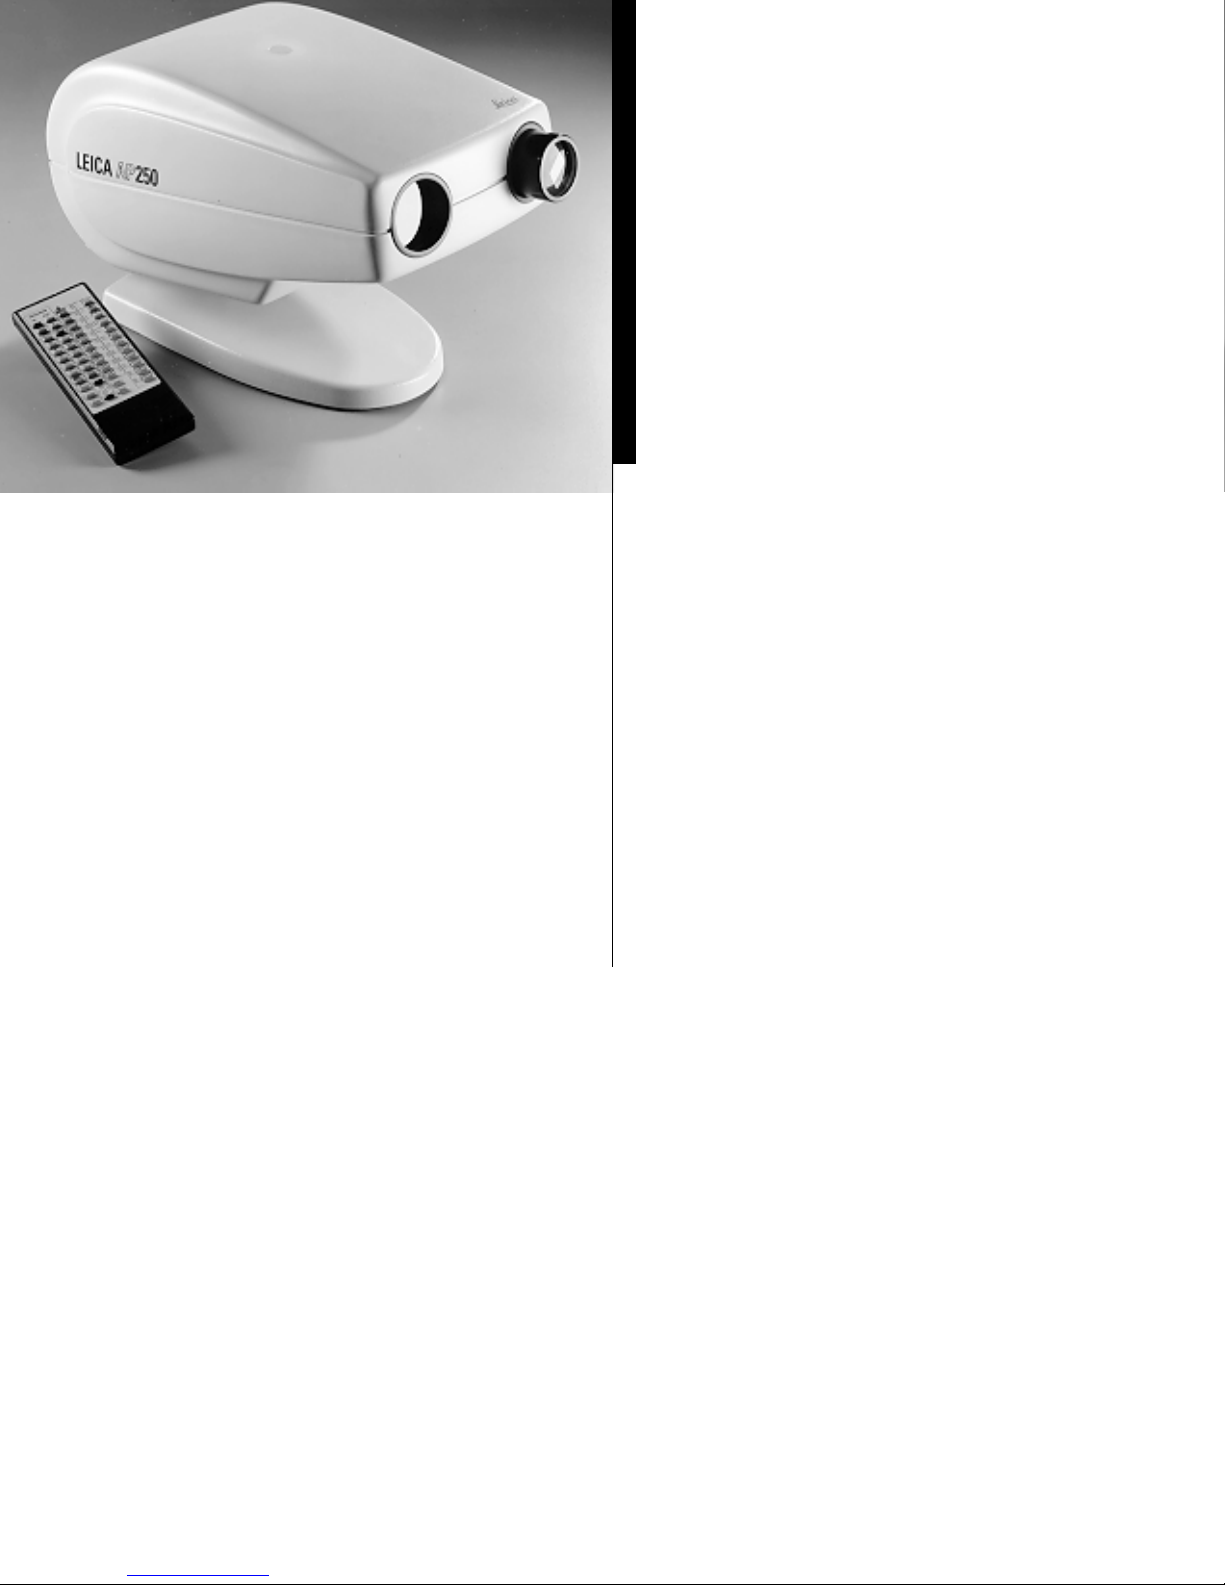
Congratulations on your purchase of the AP250 Automated
Projector.
In the field of subjective refraction, the AP250 is used for
measuring visual acuity.
This Users Guide is designed as a training and reference
manual. We recommend you carefully read and follow the
steps in this guide to ensure optimum performance from your
new instrument.
Please retain this guide for future reference and to share with
other users.
For additional copies or assistance with this product, contact:
An authorized Reichert Ophthalmic Instruments dealer,
or our
Customer Service Department by telephone at
(716) 686-4500, by fax at (716) 686-4555, or by e-mail
at info@reichert.com.
Package Contents
Your new AP250 Automated Projector and accessories were
carefully packed and checked prior to shipment; however,
please check condition and contents upon delivery. In addition
to your AP250, this shipment should include:
1 Projection Screen
1 Spare Halogen Bulb
1 Power Cord
1 Dust Cover
1 Remote Control
2 Hexagon Keys (3mm and 5mm)
2 Fuses 250ma (230V)
2 Fuses 500ma (110V)
1 Table Base
1 Pair of red/green polarizing spectacles
4 AAA-sized batteries
Except for changing the Halogen bulb and replacing the
fuses, any repair or service on the AP250 must be per-
formed only by authorized Reichert Ophthalmic Instru-
ments personnel.
Only qualified and trained personnel should operate the
AP250.
Training for operating personnel is the sole responsibility of
the owner.
Plug the AP250 only into a grounded electrical receptacle.
Do not remove or obstruct the grounded electrical connec-
tion or damage to the instrument or injury to the operator
may occur.
The line voltage setting on the instrument should agree
with the local line voltage. Otherwise, damage to the
instrument or injury to the operator may occur.
Always use the power switch when turning the unit off.
Turn the instrument off when not in use.
Do not cover any ventilation slots.
Do not use the AP250 in the presence of flammable
anesthetics and volatile solvents such as alcohol, benzine
or similar agents.
Do not set up the instrument in humid conditions. Avoid
dripping or splashing water near the instrument.
Use only accessories specified in this manual. If you intend
to use other accessories, consult an authorized Reichert
Ophthalmic Instruments dealer or our Customer Service
Department.
Never look into the AP250's light source.
Disconnect the power cable prior to replacing the AP250's
Halogen bulb. Allow the lamp to cool down a sufficient
amount of time or injury (burning) may occur.
Symbol Information
The following symbols appear on the instrument:
2 13800-101-Rev. A
CAUTION - Indicates that important operating
and maintenance instructions are included
in this Users Guide.
Type B Product Classification
Class 1 Equipment, Continuous Operation
Protective Earth
Dangerous Voltage
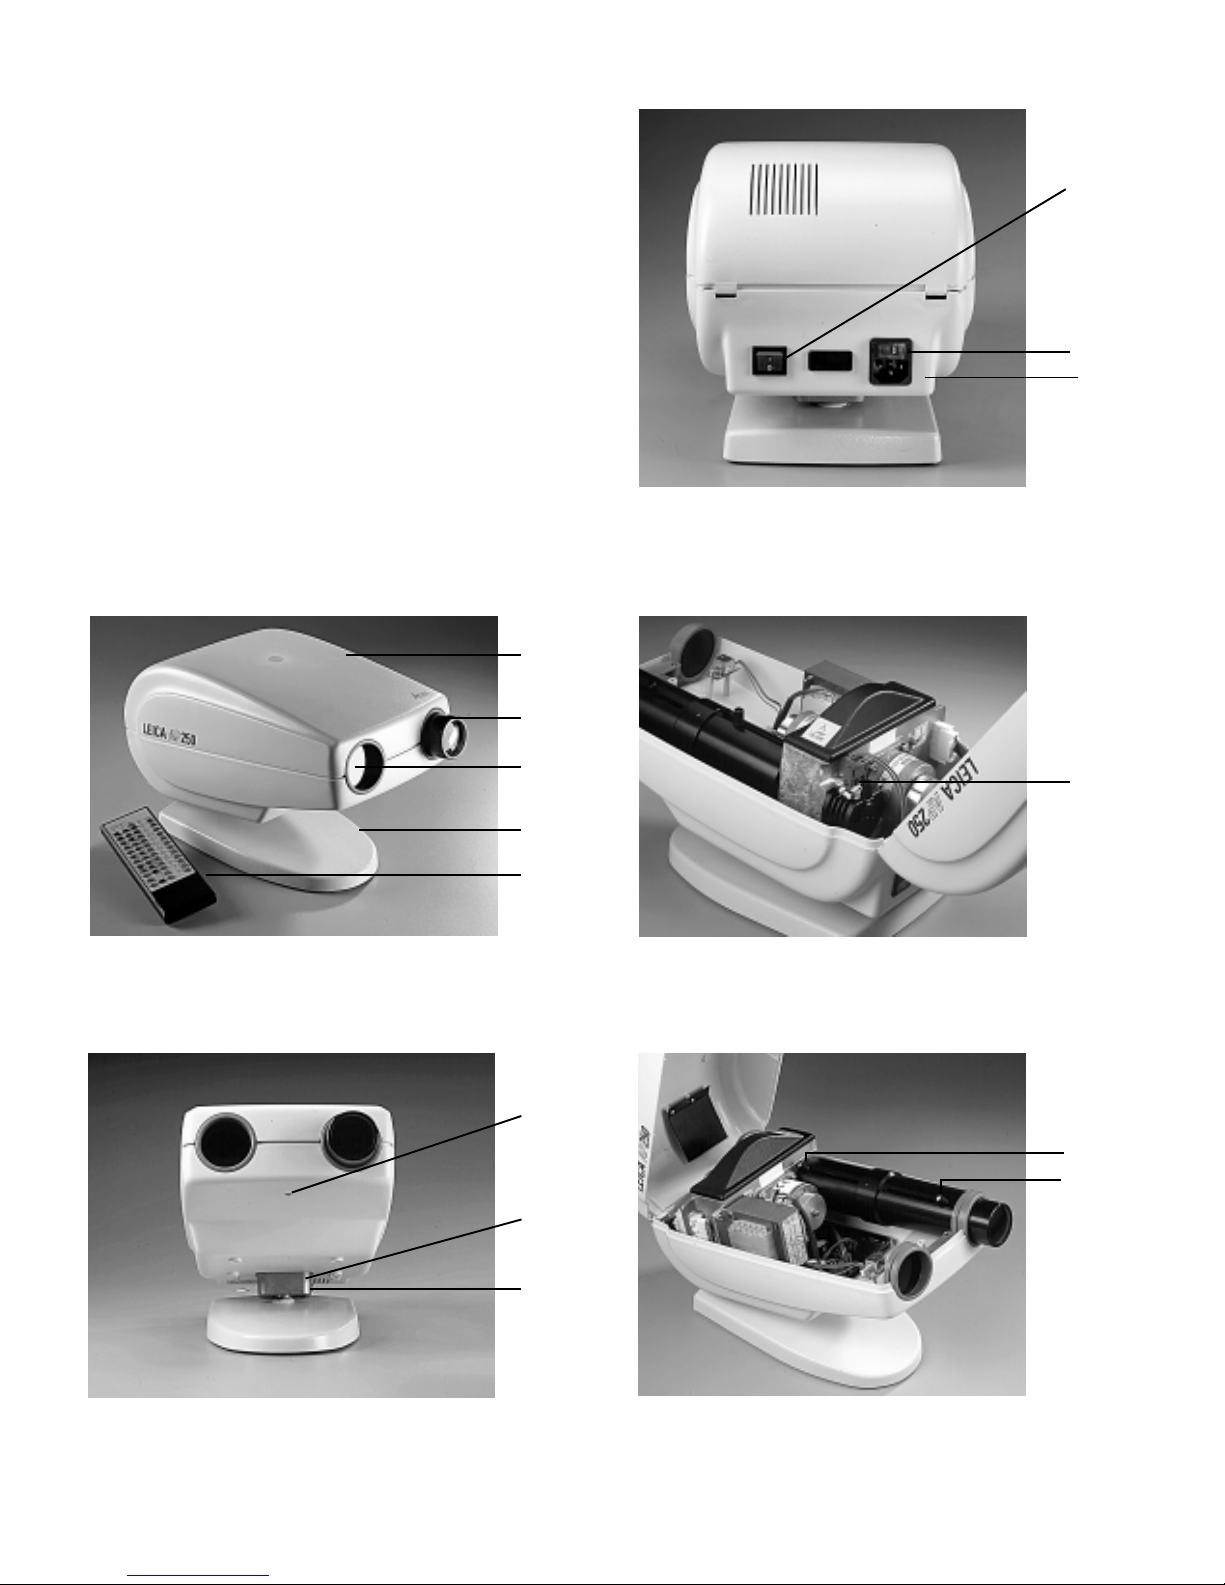
Instrument Components
1. Projector Head
2. Projection Lens
3. Window for Remote Detection
4. Base
5. Remote Control Unit
6. Hexagon Screw
7. Hinge for Tilting Projector
8. Mounting Screw
9. Power Switch
10. Fuse Compartment with Voltage Indicator
11. Power Connector
12. Halogen Bulb Assembly
13. Chart Focusing Control
14. Distance Focusing Control
9
10
11
1
2
3
4
5
6
7
8
12
13
14
13800-101-Rev. A 3