

Page 1
S165 BLK/BRN
S166 BLK/BRN
Nonmetallic Fittings
INSTALLATION INSTRUCTIONS
Walker® electrical systems conform to and should
be properly grounded in compliance with requirements of the current National Electrical Code or
codes administered by local authorities.
All electrical products may present a possible
shock or fire hazard if improperly installed or
used. Walker electrical products may bear the
mark as UL Listed and/or Classified and should
be installed in conformance with current local
and/or the National Electrical Code.
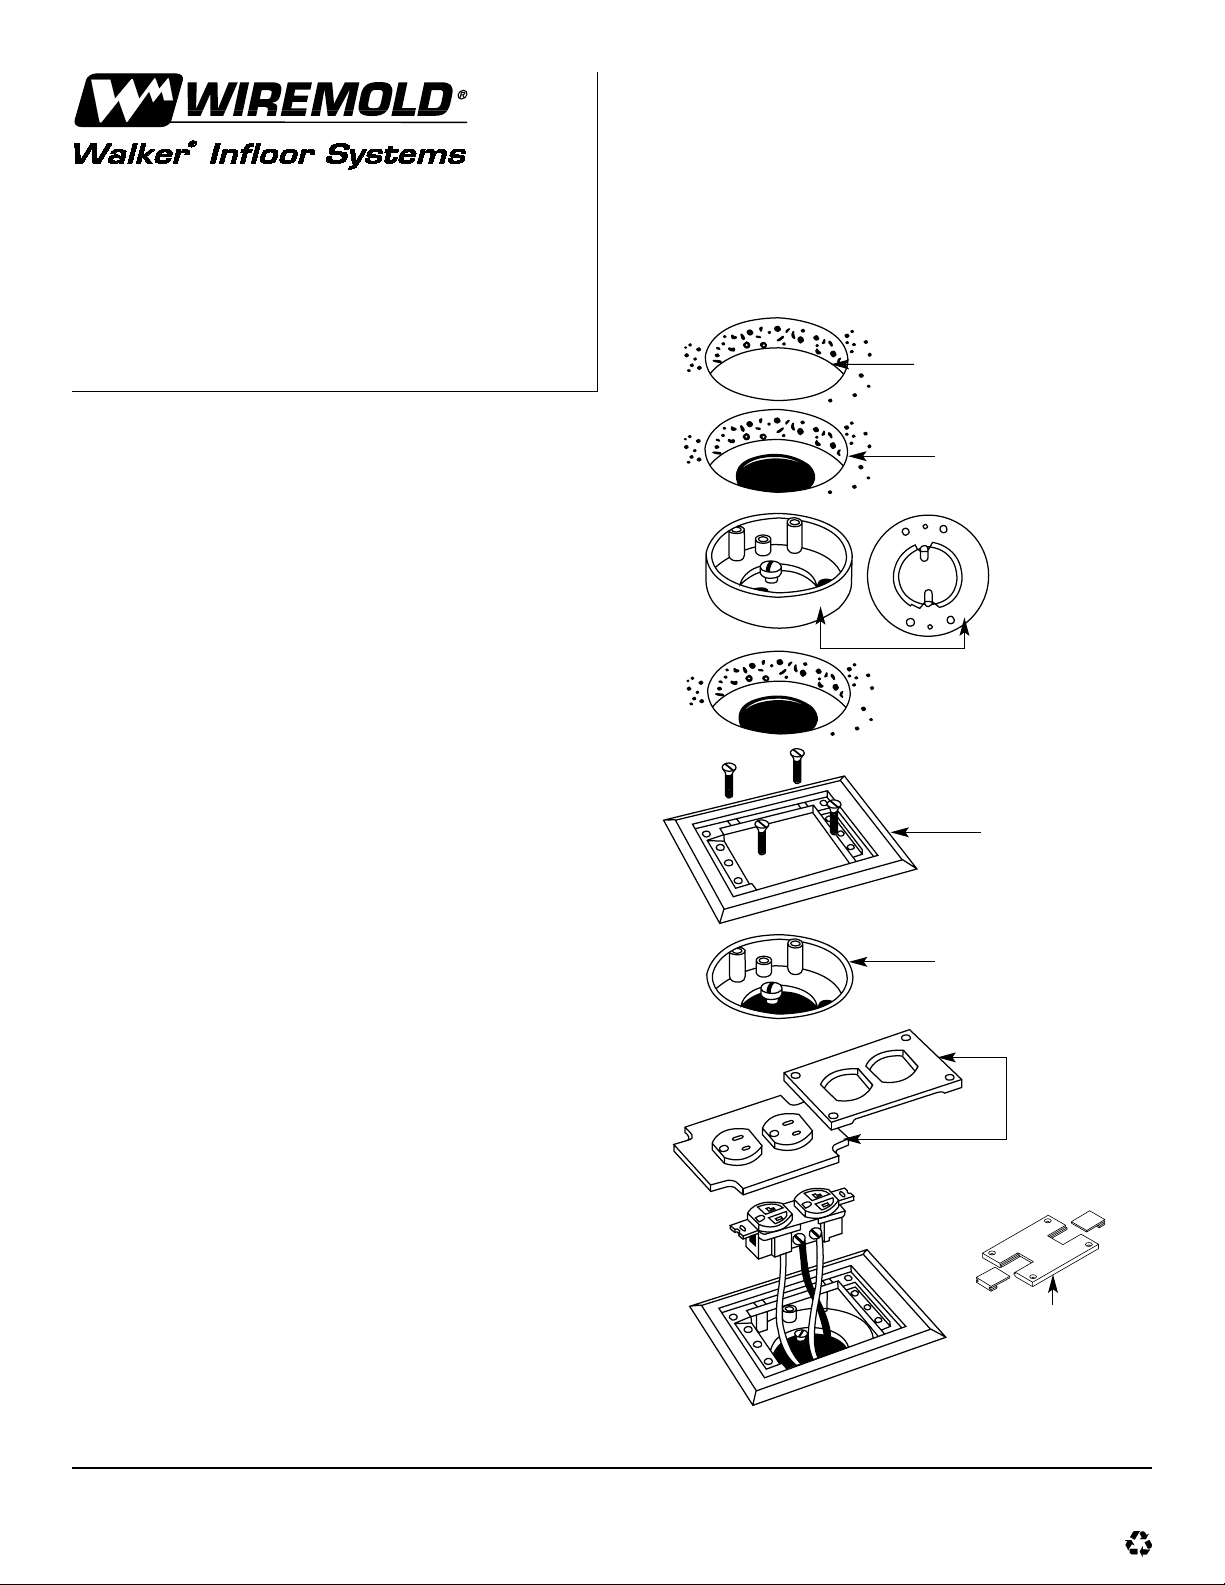
1. Locate centerline of duct from measurement from
Cat. No. 415 insert markers, existing presets and
activation, or junction boxes. Core drill 4" [102mm]
diameter hole in concrete.
NOTE: Do not drill through the metal top of raceway.
2. Drill 2 1/2" [64mm] diameter hole in duct in center
of 4" [102mm] diameter hole.
3. Install attaching ring (Cat. No. 439) in hole using
of locking tabs in bottom of attaching ring. As the
tabs are tightened, the locking tabs will rotate on
inside of raceway. Tighten these screws firmly to
lock attaching ring in place. Locking tabs are to
be secured parallel to the center line of the duct.
4. Attach flange (P/N 536089) to attaching ring with
four #6 flathead screws. (Length of screws determined by depth of slab.)
5. Install wires through hole in bottom of attaching ring.
6. Wire device and then attach to flange.
7. Place gasket on single receptacle plate.
8. Attach receptacle plate to flange with four
flathead screws.
4" [102mm]
Core Drilled Hole
Duct 2 1/2"
[64mm] Dia. Hole
439 Attaching Ring
for Use with
Polycarbonate
Fittings only and
only as an Afterset
S124BLK/BRN
Carpet Flange
439 Afterset Installed
S130BLK/BRN
Duplex Plate
with Membrane
S166BLK/BRN
Communication Plate
Walker Systems, Inc.
1000 Innovation Drive, Williamstown, WV 26187
IB0003 1100
© Copyright 2000 The Wiremold Company All Rights Reserved
 Loading...