

Page 1
Products Covered:
Cat. Nos. 425, 426, 422RD and 422GR
1.
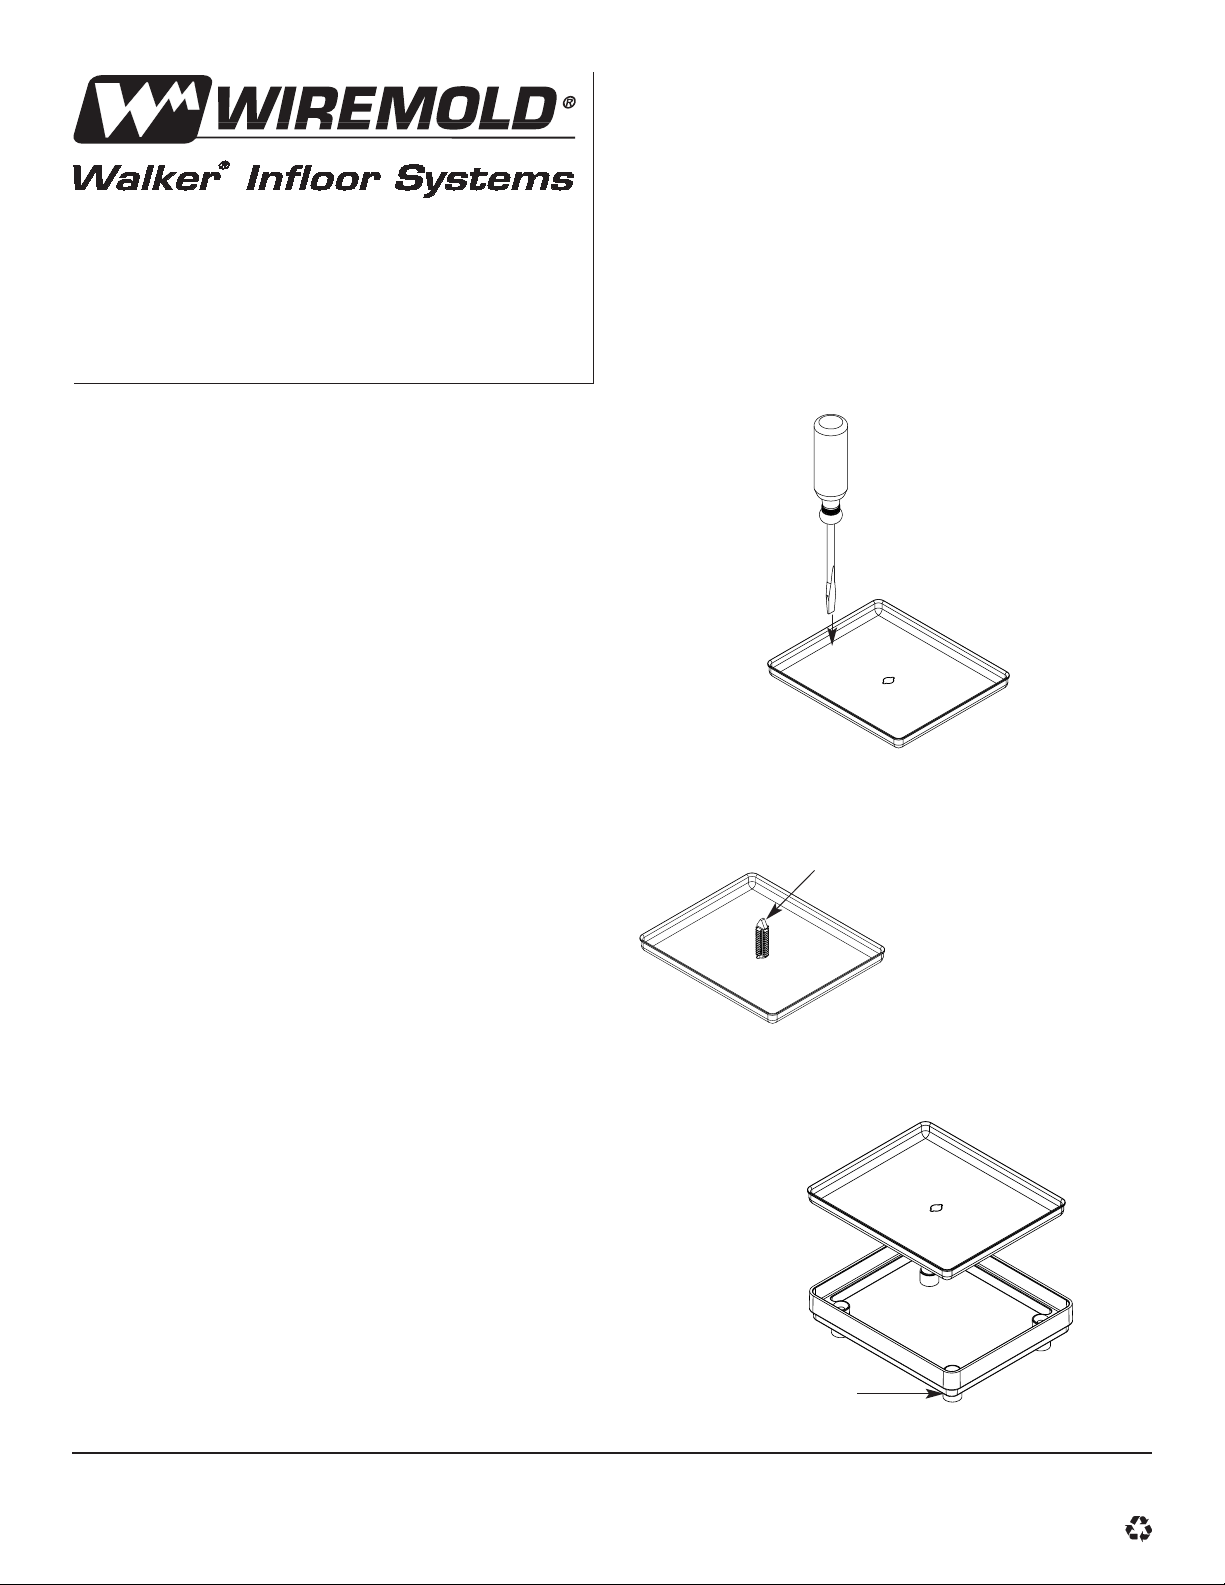
1. Remove Mudcap: (See Figure 1).
A. Strike blade of screwdriver or 1/4" [6.4mm] cold chisel
along side of mudcap as shown. Top edge of mudcap will
deflect inward.
B. Pry out cap with screwdriver by positioning blade between
preset wall and deflected edge of mudcap or, use pliers to
grab edge of cap and lift out.
2. Install Marker Cap:
A. Identify duct runs as to power or telecommunication.
B. Install marker cap at last preset in each run by tapping
down into preset using a wood block.
C. During concrete pour and finishing, locate marker post
and remove concrete, if required, so that marker post
is visible.
3. Install Extension:
A. See instructions above for removal of mudcap.
B. Position extension so coupling rings align with
post on preset.
C. Tap down firmly into preset using a wood block.
D. Tap down mudcap into preset using a wood block.
NOTE: 1" [25mm] high extensions may be stacked as high as needed.
1/2" [12.1mm] extensions cannot be stacked.
®
Walkerduct Pro Series
Preset Extensions and Marker Caps
INSTALLATION INSTRUCTIONS
Walker®electrical systems conform to and should
be properly grounded in compliance with requirements of the current National Electrical Code or
codes administered by local authorities.
All electrical products may present a possible
shock or fire hazard if improperly installed or
used. Walker electrical products may bear the
mark as UL Listed and/or Classified and should
be installed in conformance with current local
and/or the National Electrical Code.
Figure 2
Marker Post
Red – Power
Green – Telecommunications.
Marker Cap
Cat. No. 422RD and 422GR
Extension
Cat. No. 425 (1/2")
Cat. No. 426 (1")
Coupling
Ring
Figure 1
Walker Systems, Inc.
1000 Innovation Drive, Williamstown, WV 26187
1 000 204 0800
© Copyright 2000 The Wiremold Company All Rights Reserved
 Loading...