

LEGRAND Wattstopper LMCT-100-2 Quick Start Gude

Wattstopper
Down
IR Window
®
DLM Wireless IR Configuration Tool with USB
Outil de commande IR sans fil DLM avec USB
No: 25790 – 08/17 rev. 2
Herramienta de puesta en servicio inalámbrica por infrarrojos DLM con USB
Quick Start Guide • Guide de démarrage rapide • Guía de inicio rápido
Catalog Number • Numéro de Catalogue • Número de Catálogo: LMCT-100-2
Country of Origin: Made in China • Pays d’origine: Fabriqué en Chine • País de origen: Hecho en China
LMCT-100-2-U is BAA and TAA compliant (Product produced in the U.S.)
DESCRIPTION AND OPERATION
The LMCT-100-2 Digital Configuration Tool is a handheld tool for setup and testing of Wattstopper Digital Lighting Management (DLM)
devices. It provides wireless access to occupancy and daylighting sensors for setup and parameter changes, Wattstopper
Push n’ Learn™ (PnL) technology for load configuration, switch and dimmer assignment and operating parameter changes. The
LMCT-100-2’s display shows menus and prompts to lead you through each process. The navigation pad provides a familiar way to
navigate through the customization fields. The LMCT-100-2 allows modification of the system without requiring ladders or tools and can
be done simply with a touch of a few buttons.
The LMCT-100-2’s IR transceiver allows bidirectional communication between DLM devices and the LMCT-100-2. Simple menu screens
let you see the current status of the system and make changes. It can change any of the DLM occupancy sensor parameters such as
sensitivity, time delay and more. With the LMCT-100 you can also change load configurations, without any new wiring. The LMCT-100-2
can change dimming system options such as scene assignments, fade rates and other options not available through the standard user
interface. Additionally, the LMCT-100-2 can be used for initial configuration of the LML-400, LMLS-500, and LMS-600 daylight sensors.
For a detailed explanation of all the screens in the LMCT-100, see the LMCT-100-2 User Guide, which can be downloaded from from
the Wattstopper/Legrand website: http://www.legrand.us/wattstopper/digital-lighting-management/configuration-controls/lmct-100.aspx.
The LMCT-100-2 has a micro-USB port (found in the battery compartment when you remove the battery cover). This port is used to update
the firmware in the LMCT-100-2, when updates are made available. Details on updating can be found in the LMCT-100-2 User Guide.
NOTE: The micro USB port is only found on the LMCT-100-2, and not on the original LMCT-100.
Product Version Comparison LMCT-100 LMCT-100-2
Date DLM products last updated March 1, 2016 May 1, 2017 (as of date of this doc, but future updates possible)
Firmware Upgradeable No Yes, via USB
Wireless Type Infrared Infrared
BATTERIES
The LMCT-100-2 operates on
three standard 1.5V AAA Alkaline
batteries or three rechargeable
AAA NiMH batteries.
The battery status displays in
the upper right corner of the
display. Three bars next to BAT=
indicates a full battery charge. A
warning appears on the display
when the battery level falls below
a minimum acceptable level.
To conserve battery power, the
LMCT-100-2 automatically shuts
off 10 minutes after the last key
press.
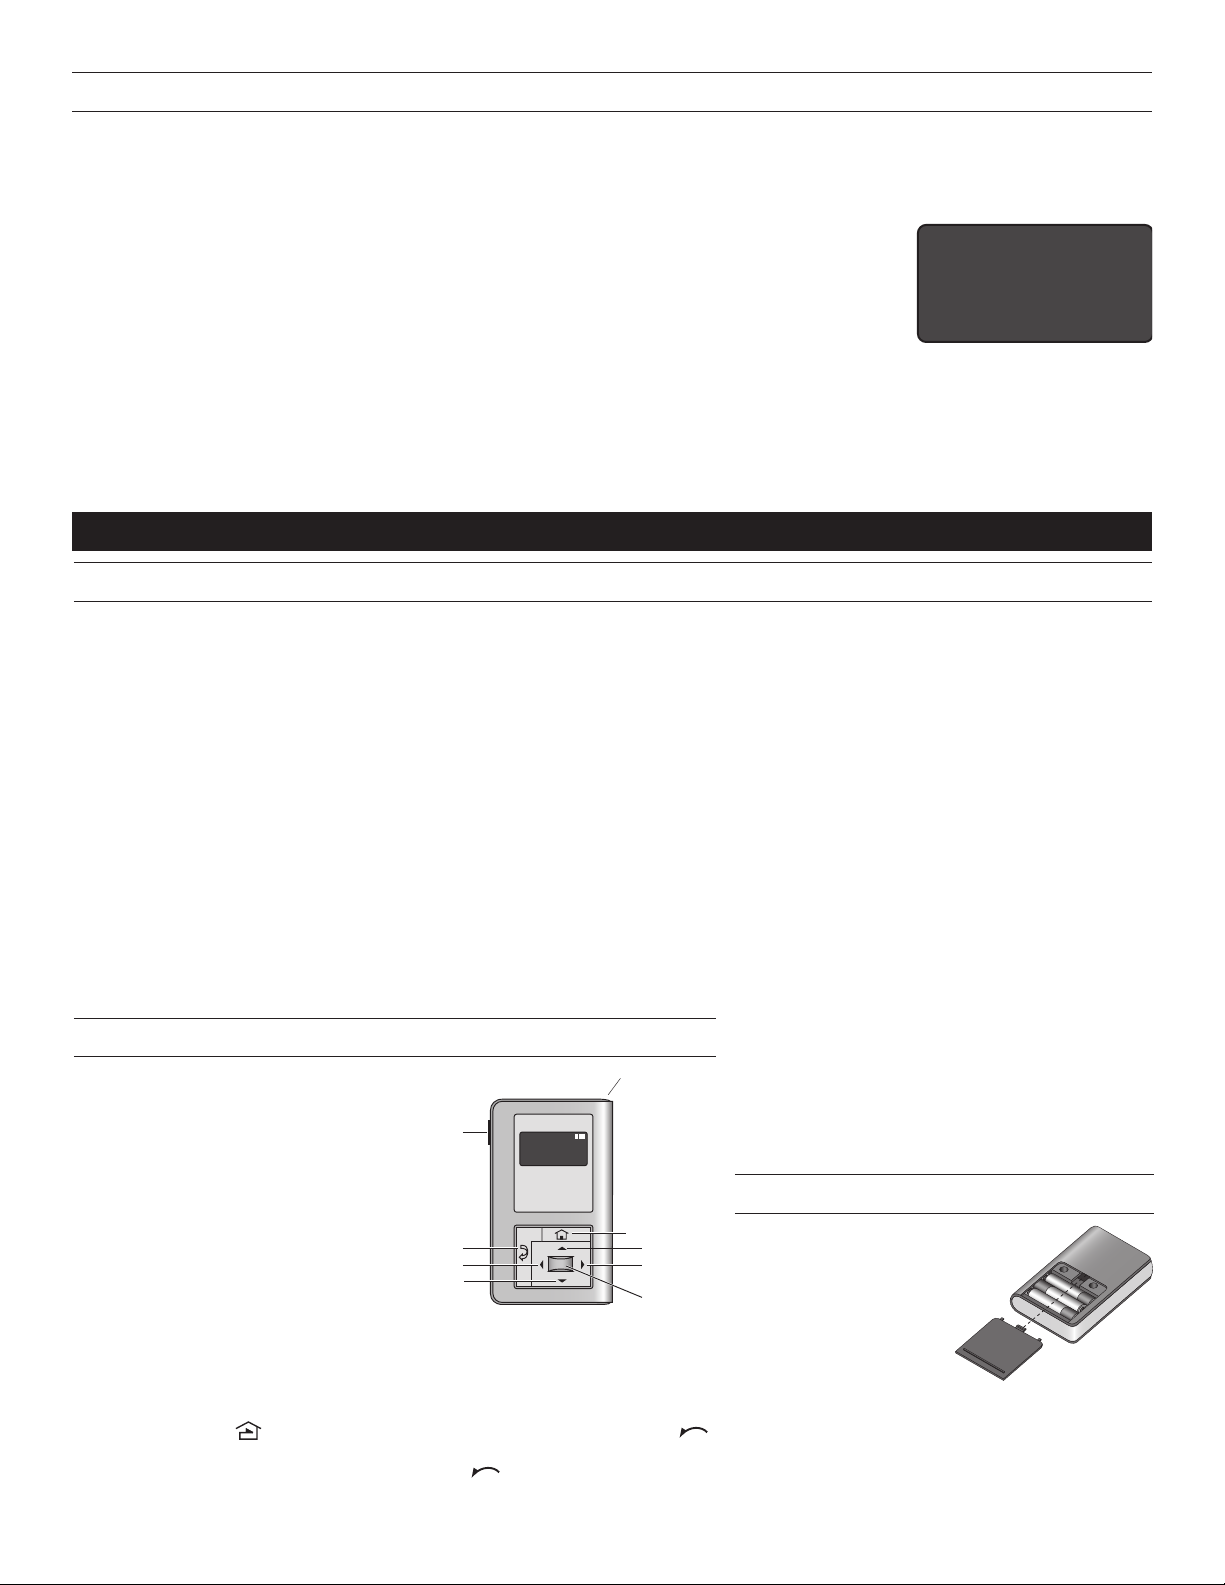
You navigate from one field
to another using (up)
or (down) arrow keys.
The active field is indicated
by flashing (alternates
between yellow text on black
background and black text
on yellow background).
Once active, use the Select
button to move to a menu
or function within the active
field.
Value fields are used to
adjust parameter settings. They are shown in “less-than/greaterthan” symbols: <value>. Once active, change them using (left) and
(right) arrow keys. The left key decrements and the right key
NAVIGATION
Power
On/Off
Select
Back
Left
Sensor Configuration
Load Config (PnL)
Daylighting Config
Button Configuration
Dimming Configuration
More
increments a value. Selections wrap-around if you continue to press
the key beyond maximum or minimum values. Moving away from the
value field (using / keys) overwrites the original value. The
(Home) button takes you to the main menu. The (Back) button
can be thought of as an undo function. It takes you back one screen.
Changes that were in process prior to pressing the button are lost.
BAT=
Home/
Main Menu
Up
Right/Next
Home Menu
The Home (or Main) menu displays after the powerup process
completes. It contains information on the battery status and six menu
choices. Press up/down buttons to locate the desired function then
press Select.
TROUBLESHOOTING
Sélection
Droite/Suivant
IR tx/rx
Problem: Display does not come on when I press the Power On Button.
• Make sure the batteries are installed correctly.
• Make sure batteries are good.
Problem: No Response Screen appears:
• Make sure that the device is not obstructed.
• Move closer to the device.
• The angle may be too high, move closer so that you are directly underneath the sensor.
• If still not successful, there may be too much IR interference from other sources. Programming the
unit at night when there is no daylight available may be the only way to communicate with the sensor.
No response
from device
Press ‘Select’
Problem: If the LMCT-100-2 still cannot get a response from the device:
• Point to the device and try again.
• Make sure you are pointing at the correct type of device.
• Make sure the device is within range.
• Make sure the device you are pointing at is powered.
• Make sure the IR lenses on the device and the LMCT-100-2 are clean.
• Check batteries.
INSTRUCTIONS EN FRANÇAIS
DESCRIPTION ET FONCTIONNEMENT
L’outil de configuration infrarouge sans fil LMCT-100-2 est un outil de poche pour la configuration et le test des périphériques Wattstopper
DLM. Il fournit un accès sans fil aux détecteurs de mouvement et de luminosité naturelle pour la configuration et les changements de
paramètres, la technologie Push n’Learn ™ (PnL) de Wattstopper pour la configuration de la charge, l’affectation des interrupteurs et des
gradateurs et les changements de paramètres de fonctionnement. L’affichage du LMCT-100-2 affiche des menus et des instructions pour
vous guider dans chaque processus. L’écran de navigation offre un moyen familier de naviguer dans les champs de personnalisation. Le
LMCT-100-2 permet la modification du système sans nécessiter d’échelles ou d’outils et peut se faire simplement avec quelques boutons.
L’émetteur-récepteur infrarouge LMCT-100-2 permet une communication bidirectionnelle entre les périphériques DLM et le LMCT-100-2
Les écrans de menu simples vous permettent de voir l’état actuel du système et de modifier. Il peut modifier n’importe quel des paramètres
du détecteur de mouvement DLM tels que la sensibilité, le délai et plus encore. Avec le LMCT-100, vous pouvez également modifier les
configurations de charge, sans aucun nouveau câblage. Le LMCT-100-2 peut modifier les options du système de gradation telles que les
affectations de scène, les délais de gradation et d’autres options non disponibles via l’interface utilisateur standard. En outre, le LMCT-100-2
peut être utilisé pour la configuration initiale des capteurs LML-400, LMLS-500 et LMS-600.
Pour une explication détaillée de tous les écrans dans le LMCT-100, consultez le Guide de l’utilisateur LMCT-100, qui peut être téléchargé à
partir du site Web Wattstopper: http://www.legrand.us/wattstopper/digital-lighting-management/configuration-controls/lmct-100.aspx
Le LMCT-100-2 possède un port micro-USB (dans le compartiment des piles lorsque vous retirez le capot de la batterie). Ce port est
utilisé pour mettre à jour le firmware dans le LMCT-100-2, lorsque les mises à jour sont disponibles. Vous trouverez des détails sur la
mise à jour dans le Guide de l’utilisateur LMCT-100-2.
REMARQUE: Le micro port USB ne se trouve que sur le LMCT-100-2 et non sur le LMCT-100 d’origine.
NAVIGATION
Pour naviguer d'un champ à l'autre,
utiliser les touches fléchées (haut) et
(bas). Le champ actif est indiqué par un
clignotement (alternance entre un texte
jaune sur fond noir et un texte noir sur un
fond jaune).
Une fois activé, utilisez le bouton
Sélectionner pour aller à un menu ou une
fonction à l'intérieur du champ actif.
Les champs de valeurs servent à ajuster
les paramètres. Ils sont indiqués par les
symboles « plus petit que/plus grand
que » : <valeur>. Une fois activés, modifiez-les avec les touches fléchées
(gauche) et (droite). La touche gauche diminue et la droite augmente
une valeur. Les sélections reviennent à leur point d'origine si vous continuez
d'appuyer sur les touches au-delà des valeurs maximales ou minimales.
S'éloigner du champ de valeur (en utilisant les touches /) remplace la valeur
d'origine. Le bouton (Accueil) vous amène au menu principal. Le bouton
(Retour) peut servir de fonction « annuler ». Il vous ramène un écran en arrière.
Les modifications en cours avant d'appuyer sur la touche sont perdues.
Marche/
Arrêt
Arrière
Gauche
Bas
BAT=
Sensor Configuration
Load Config (PnL)
Daylighting Config
Button Configuration
Dimming Configuration
More
Accueil/Menu
Principal
2
Haut
Menu Accueil
Le menu de la page d’accueil (ou principale)
s’affiche une fois que le processus d’allumage s’est
achevé. Il contient des informations sur l’état de
chargement des piles et six choix de menu. Appuyez
sur les touches haut/bas pour parvenir à la fonction
souhaitée puis appuyez sur le bouton Sélection.
PILES
Le LMCT-100-2
fonctionne avec trois
piles alcalines AAA 1,5 V
ou trois piles AAA NiMH
rechargeables.
L’état de la pile apparaît
dans le coin supérieur
droit de l’affichage. Trois
barres à côté de BAT=
indique que les piles sont pleines. Un avertissement
apparaît sur l’affichage lorsque le niveau des piles
est trop bas. Pour économiser la charge des piles,
le LMCT-100-2 s’éteint automatiquement 10 minutes
après la dernière utilisation du clavier.
 Loading...