

Legrand MRH6 User Manual

CUSTOMIZING OPERATION
Modify and Save the Light Levels of a Scene
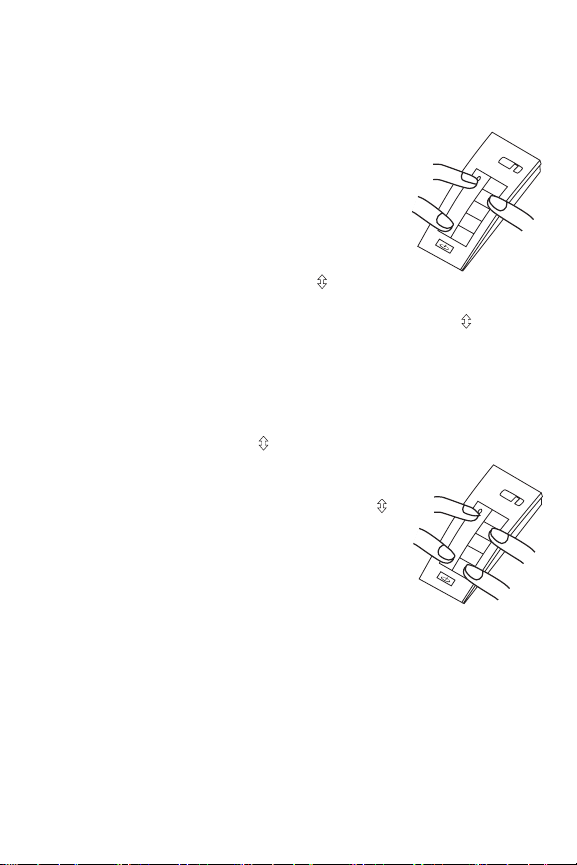
1. Change lighting levels as desired by pressing or on individual devices.
2. Press and hold the desired scene button on the room scene remote until the
LED flashes twice (about 2 seconds) to save the new settings.
Removing or Adding Devices to a Scene
1. Press on the MRH6 until the LED begins flashing (about 2 seconds).
2. Press the scene button that you wish to program. LEDs on all wireless Miro
devices begin to flash. You now have 5 minutes to complete this process.
3. To include or exclude a device in the scene press
changes color. Yellow flashing LED = Included in the active scene
Green flashing LED = NOT included in the active scene
If you get to a device and it is NOT flashing, see TROUBLESHOOTING.
NOTE: You must include devices that are off in the room scene if you want
them to turn off when that scene is recalled.
4. Return to the MRH6 used in step 1. Press
status LEDs in the room turn green. The MRH6 continues to flash (about 20‑25
seconds). Wait for the LED to stop flashing before pressing a button.
Removing or Adding Devices to the Paddle “On” Function
1. Press on the MRH6 until the LED begins flashing (about 2 seconds).
2. Tap the
3. To include or exclude a device press
Green flashing LED = NOT included in paddle operation
If you get to a device and it is NOT flashing, see TROUBLESHOOTING.
4. Return to the MRH6 used in step 1. Press
5. To test, tap
paddle on the MRH6. The LEDs on all the Miro wireless devices
begin to flash. You now have 5 minutes to complete this process.
on the device until the LED changes
color. Yellow flashing LED = Included in paddle operation
status LEDs in the room turn green. The MRH6 continues to flash (about 20‑25
seconds). Wait for the LED to stop flashing before pressing a button.
on any room scene controller that is bound to the same room to
switch included devices to on (dimmers go to full bright).
Removing or Adding Devices to the Paddle “Off” Function
1. Press on the MRH6 until the LED begins flashing (about 2 seconds).
2. Tap the
3. See step 3 above.
4. See step 4 above.
5. To test, tap
paddle on the MRH6. The LEDs on all the Miro wireless devices
begin to flash. You now have 5 minutes to complete this process.
on any room scene controller that is bound to the same room to
switch or fade included devices to off (dimmers go to 0%)
on the device until the LED
for 2 seconds or until all the
for 2 seconds or until all the
MORE SCENES
A
E
D
C
B
$
(
'
&
%
Up to 15 scenes are available per room, in sets of 1‑5, 6‑10, and 11‑15. The
MRH6 can access sets 1‑5 or 6‑10. It is assigned to scenes 1‑5 when shipped.
Binding multiple room level controllers (MRH6, MRD6, or DRD6) to the room and
assigning each to a different scene set, lets you dedicate a controller to each
scene set. You can bind more room scene controllers to the
room to control the same scenes from multiple locations.
All room scene controllers with the same scene assignment
operate the 5 scenes the same way as all other room scene
controllers with the same set. Scene buttons on controllers
with scene set 6‑10 default to 0%/All room devices OFF. Use
ROOM BINDING and CUSTOMIZING OPERATION procedures
to set up the additional scene controllers.
To assign scenes 6-10, simultaneously press and B until
the LED blinks twice (about 2 seconds).
Assigning the MRH6
for scene set 6‑10
To change the assignment back to scenes 1-5, simultaneously press and A
until the LED blinks twice (about 2 seconds).
LOCK ROOM CONFIGURATION
The Lock Configuration function operates from a wireless room level controller,
and prevents the Miro wireless devices in the room from being reprogrammed.
Other operations such as dimming, switching and scene recall are not affected.
When the configuration is locked, if is pressed and held on any Miro wireless
device, the device’s LED flashes red and the command is ignored.
To lock the configuration:
Go to any room scene controller. Simultaneously press
and buttons B and E until the LED flashes (about 2 seconds)
to toggle in and out of Lock Configuration.
• Ifthemodechangesfromunlockedtolocked,theLED
flashes red for 2 seconds, indicating that configuration is
now locked.
• Ifthemodechangesfromlockedtounlocked,theLED
flashes green for 2 seconds, indicating that configuration is now unlocked.
BATTERY INFORMATION
The MRH6 operates using three 1.5V Alkaline AAA size batteries. The remote
goes to sleep whenever it is not performing a function. When asleep, its LED is
off. To check battery status, press any button to wake up the remote.
IMPORTANT: Observe the color of the LED immediately after you wake it up.
•GREEN indicates the batteries are good.
•RED indicates the batteries are getting weak and should be replaced.

The battery compartment is on the bottom of the remote. Gently press up on the
battery door latching tab, then lift the cover to expose the batteries. Replace all
three using the same brand. Observe the pole orientation (+ ‑ ) illustration on the
bottom of the battery compartment. The SEEK list is automatically rebuilt. Wait
for the LED to stop flashing before attempting to use the MRH6.
TROUBLESHOOTING
During house ID binding, the LED is not flashing on some devices.
• If LED is solid green before initiating house ID binding:
The device already has another house ID. Reset it to the factory default so that
it can be bound to the desired house ID. See “I made a configuration mistake. I
need to start over” on the next page.
• IfLEDissolidyellowafterinitiatinghouseIDbinding:
The device may be out of range of the initiating device. Add a MRR2
Wireless Repeater to boost signal range.
During binding or customizing, all LEDs stop flashing before I
press
.
The 5 minute binding process timer may have expired. Restart the timer by
repeating steps 1 and 2 of the procedure you were using. Notice that the devices
you previously excluded are flashing green; those included are flashing yellow;
simply finish the process from where you left off.
The device LED flashes red when I press .
The house or room configuration may be locked.
Go to any house level scene controller and simultaneously press
B and E until the scene controller LED flashes GREEN.
Go back to the previously locked device and press
• Ifitashesgreenoryellow,youhaveunlockedthehouseconguration.
• Ifthedevicestillashesred,thecongurationmaybelockedbyaroomlevel
scene controller such as the MRD6 or MRH6 or DRD6.
Go to the room scene controller and simultaneously press
until the scene controller LED flashes GREEN.
Go back to the previously locked device and press
• Ifitashesgreenoryellow,youhaveunlockedtheroomconguration.
• Ifthedevicestillashesred,thecongurationmaybelocked
by another room level scene controller in the house. Repeat the procedure
from different controllers until the device is no longer flashing red.
.
.
The Seek button does not pick up all the devices in the Room.
When a remote is ‘asleep’ it cannot respond to room binding changes. Maybe a
new device was added, and the remote doesn’t know about it. Press
seconds TWO TIMES, and the remote will re‑tabulate its list of room members.
and buttons
and buttons B and E
for two

I made a configuration mistake. I need to start over.
IS-0522
To reset any Miro wireless device to factory default settings, press and hold
until the LED changes to solid yellow (approximately 10 seconds). During the
process, the LED flashes yellow. When complete, it becomes solid yellow. The
device can then be reconfigured, exactly like any new device.
FCC NOTICE
This equipment has been tested and found to comply with the limits for a Class
B digital device, pursuant to part 15 of the FCC Rules. These limits are designed
to provide reasonable protection against harmful interference in a residential
installation. This equipment generates, uses and can radiate radio frequency
energy and, if not installed and used in accordance with the instructions, may
cause harmful interference to radio communications. However, there is no
guarantee that interference will not occur in a particular installation. If this
equipment does cause harmful interference to radio or television reception,
which can be determined by turning the equipment off and on, the user is
encouraged to try to correct the interference by one or more of the following
measures:
• Reorientorrelocatethereceivingantenna.
• Increasetheseparationbetweentheequipmentandreceiver.
• Connecttheequipmentintoanoutletonacircuitdifferentfromthattowhich
the receiver is connected.
• Consultthedealeroranexperiencedradio/TVtechnicianforhelp.
Caution: Any changes or modifications to this device not explicitly approved by
manufacturer could void your authority to operate this equipment.
Warranty Information
Manufacturer warranties its products to be free of defects in materials and
workmanship for a period of five (5) years. There are no obligations or liabilities
on the part of manufacturer for consequential damages arising out of, or in
connection with, the use or performance of this product or other indirect damages
with respect to loss of property, revenue or profit, or cost of removal, installation
or reinstallation.
Legrand Customers contact: Vantage Customers contact:
301 Fulling Mill Road Suite G .
Middletown, PA 17057
Phone: 800.321.2343
www.legrand.us/onq
Please
Recycle
03883r2 9/2007
1061 South 800 East
Orem, UT 84097
Phone: 800.555.9891
www.vantagecontrols.com
 Loading...