

Page 1
User Guide
Whole House Lighting Controller
LC7001
radiant® RF Lighting Control
adorne® Wi-Fi Ready Lighting Control
1308243 REV. F
Page 2

Compliance
FCC Notice – FCC ID
These devices comply with part 15 of the FCC Rules. Operation is subject to the following two
conditions: (1) These devices may not cause harmful interference; and (2) these devices must
accept any interference received, including interference that may cause undesired operation.
Canadian Department of Communications – IC
These devices comply with Industry Canada license-exempt RSS standard(s). Operation is
subject to the following two conditions: (1) these devices may not cause interference; and (2)
these devices must accept any interference, including interference that may cause undesired
operation of the devices.
These Class B digital apparatus comply with Canadian ICES-003.
301 Fulling Mill Road, Suite G
Middletown, PA 17057
(800) 223-4162
© Copyright 2019 by Legrand, Inc. All Rights Reserved.
www.legrand.us
Whole House Lighting Controller - LC7001 1308243 REV. F
2
Page 3

Table of Contents
Quick Links .......................................................... 4
Overview............................................................... 5
Prerequisites ........................................................ 6
LC7001 Operation ................................................ 7
Setting up Remote Access ..............................8
Amazon Alexa Voice Control Integration ..........9
Prerequisites .................................................... 9
Connecting Alexa to the Legrand Lighting
Control System ................................................ 9
Grouping Discovered Devices ....................... 13
Create a Group ......................................... 13
Supported Commands .................................. 14
Google Home Voice Control Integration ......... 15
Prerequisites .................................................. 15
Connecting Google Home to the Legrand
Lighting Control System ................................ 15
Assigning Devices to a Room ........................ 18
Supported Commands ................................... 18
Go to the Lights Page .................................... 20
Go to the Scenes Page ................................. 22
Add a Scene .............................................. 22
Edit a Scene .............................................. 25
Go to Settings ................................................ 26
Setting a Location ..................................... 26
Set Time Zone ........................................... 26
Set Daylight Savings Time ........................26
In-Wall Scene Controllers ..........................27
Perform a Firmware Update ...................... 31
Check the Current Version of the App ....... 31
QMotion® Advanced Shading System
Integration .......................................................... 32
Prerequisites .................................................. 32
Integrating QMotion Shades .......................... 33
Connecting QMotion to the Legrand Lighting
Control System .......................................... 33
Lighting Control App Functionality with Shades
from QMotion ................................................. 34
Legrand Lighting Control App Functionality .. 19
System Discovery ................................................ 19
Add a Lighting Device .................................... 19
Using the Legrand Lighting Control App .............. 20
Turn All Lights ON or OFF ............................. 20
View Recent and Upcoming Scenes ............. 20
Whole House Lighting Controller - LC7001 1308243 REV. F
Apple Watch Operation ..................................... 36
Display Changes ....................................... 34
Shade Device Functionality ....................... 35
Accessing the App ......................................... 36
Lights Screen ............................................ 36
Scenes Screen .......................................... 37
3
Page 4

Quick Links
LC7001 Operation
How many RF Lighting Control devices can I control
with the LC7001?
Which legacy RF Lighting Control devices (DRDx
part numbers) are compatible with the LC7001?
What is the maximum distance that I can have
between RF Lighting Control devices?
How do I add a lighting device to my system?
How do I remove a light so it no longer appears in my
App?
How do I rename a light?
How do I create a scene?
How do I edit a scene?
How do I automate a scene?
Voice Integration
How do I use Amazon Alexa to control the LC7001?
How do I use Google Home to control the LC7001?
QMotion® Shades Integration
What is QMotion?
Are there any prerequisites for adding QMotion to my
Lighting Control System?
How many QMotion shades can I control with the
LC7001?
How do I add QMotion to my Lighting Control
System?
How do I perform a rmware update?
How do I set my location?
How many Legrand Scene Controllers can I add to
the LC7001 and how do I add them?
Legrand cloud
How do I sign up to use Legrand cloud?
Where is my Lights page?
What is the Devices page?
How can I use my Lighting Control App to control my
QMotion shades?
Apple Watch Integration
How do I use my Apple Watch to control the
LC7001?
Note: Amazon, Echo, Alexa, and all related logos are trademarks of Amazon.com, Inc. or its afliates.
Google, Google Home, and all related logos are trademarks of Google, Inc. or its afliates.
Whole House Lighting Controller - LC7001 1308243 REV. F
4
Page 5
Overview
This user guide (P/N 1308243) provides operating information for the Legrand Whole House
Lighting Controller (LC7001) and the Lighting Control iOS/Android mobile app.
The LC7001 is compatible with all dimmer, switch, and scene controller products in both the
radiant® (RF Lighting Control) and adorne® (Wi-Fi Ready) collections. The compatible legacy
RF Lighting Control devices include the DRD2x dimmer, DRD3x switch, and DRD4x dimmer.
The DRD9x fan speed controller is discoverable as a dimmer and offers only adjustable speed
control in that capacity.
The LC7001 works in conjunction with the Legrand Lighting Control iOS/Android app to provide
uninterrupted control and automation of RF Lighting Control System devices. Connecting the
LC7001 to a home network with an Ethernet cable and then using the app through a mobile
device enables you to:
• manage your home lighting system.
• set up to 100 manual and automated scenes.
• perform RF Lighting Control device discovery for up to 100 devices.
RF Lighting Control devices offer a default range of 100 ft. between devices. Using a MRR2-G
repeater extends this range by 100 ft. The system supports up to two repeaters for a maximum
range of 300 ft. between devices.
Once you have set up remote access via Legrand cloud, you can control the system when you
are outside of the home network, such as when you are at work or on vacation.
Whole House Lighting Controller - LC7001 1308243 REV. F
5
Page 6

Prerequisites
The proper function and control of the LC7001 Whole House Lighting Controller depends on the
following requirements:
• proper installation, conguration, and house/group binding of all system components, per
Legrand instructions, prior to the installation of the LC7001.
• a wired connection to the home network router or switch.
• connection of mobile devices running the Legrand Lighting Control app to the same home
network as the LC7001 for setup and conguration of the system.
NOTES:
• Refer to the installation instructions included with your lighting device for detailed information
• The Legrand Lighting Control app is available through the App Store and Google Play Store.
• Legrand’s rmware and app (version 3.0 or later) support the QMotion Advanced Shading
• Legrand’s rmware and app (version 1.3 or later) support the Apple Watch. Learn about
on binding and conguration.
System. Learn about integrating with the QMotion Advanced Shading System.
pairing an Apple Watch to an Apple iPhone.
Whole House Lighting Controller - LC7001 1308243 REV. F
6
Page 7
LC7001 Operation
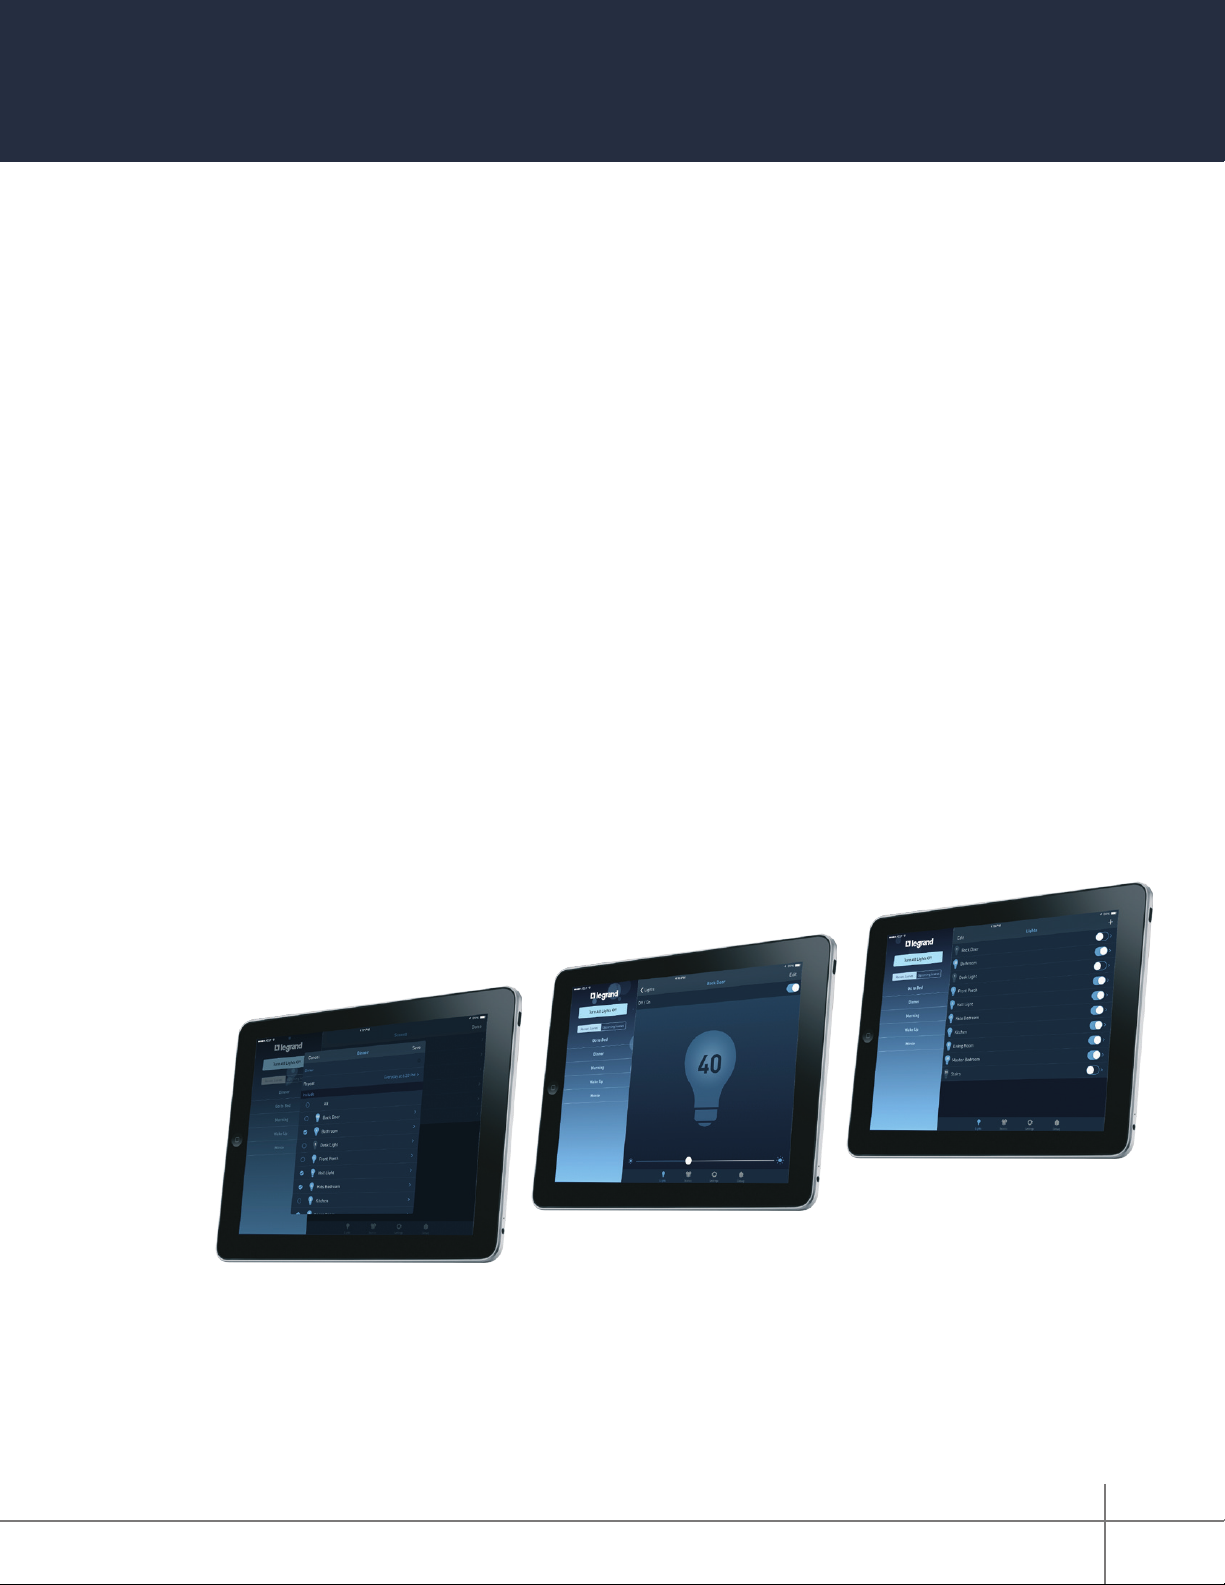
The LC7001 Whole House Lighting Controller operates through the Legrand Lighting Control
app for iOS and Android smartphone and tablet mobile devices. The app displays a single-pane
view on a smartphone and a double-pane view on a tablet.
The LC7001 allows for remote access to the system via Legrand cloud. Setting up a Legrand
cloud account provides voice control capability for the LC7001 through Amazon Alexa and the
Google Assistant.
Whole House Lighting Controller - LC7001 1308243 REV. F
7
Page 8

Setting up Remote Access for
RF Lighting Control
3. Sign in to an existing
account or select Sign
up now to create a new
account.
NOTE:
home and your phone is connected to the same
wireless network as your hub.
Create a remote access account.
Set up remote access ONLY when you are
1. Sign in to the Legrand
Lighting Control app.
A prompt appears for
remote access setup with
three options:
» No Thanks (exits the
account setup)
» Yes (sets up a remote
account)
» Later (sets the prompt
appearance for the
next time the app is
open)
Select Yes.
4. Request a verication
code, then verify the code
before moving forward.
The verication code
will be sent to the email
address you provide.
5. Once the code is veried,
create a password and
ll in the remainder of the
prole.
6. Tap .
NOTE:
prompt, go to Settings > Remote Access
Info > Remote Access Setup in the Legrand
Lighting Control app.
To open the Remote Access Setup
2. Tap .
Your setup is complete.
You will be redirected
back to the app.
Whole House Lighting Controller - LC7001 1308243 REV. F
8
Page 9
Amazon Alexa Voice Control Integration
Prerequisites
Enabling voice control of the Legrand Lighting Control System through devices with Amazon
Alexa requires the following:
• a device with Amazon Alexa (i.e. Amazon Echo) connected to the home network
• the Legrand Whole House Lighting Control System (LC7001)
• the Amazon Alexa app installed on a mobile device
• an Internet connection
• the Legrand Lighting Control app, version 4.0 or later, installed on a mobile device
• an active Legrand cloud account
NOTES:
• For instruction on creating and integrating a Legrand cloud account with the LC7001, refer
to “Setting up Remote Access” in the Legrand Whole House Lighting Controller User Guide
or go to Settings > Remote Access Info > Remote Access Setup in the Legrand Lighting
Control app.
• If you are transitioning your RF Lighting Control devices from Samsung ARTIK Cloud to
Legrand Cloud, please ensure you have disabled the previous Samsung skill and that you
have deleted all devices from the Alexa app.
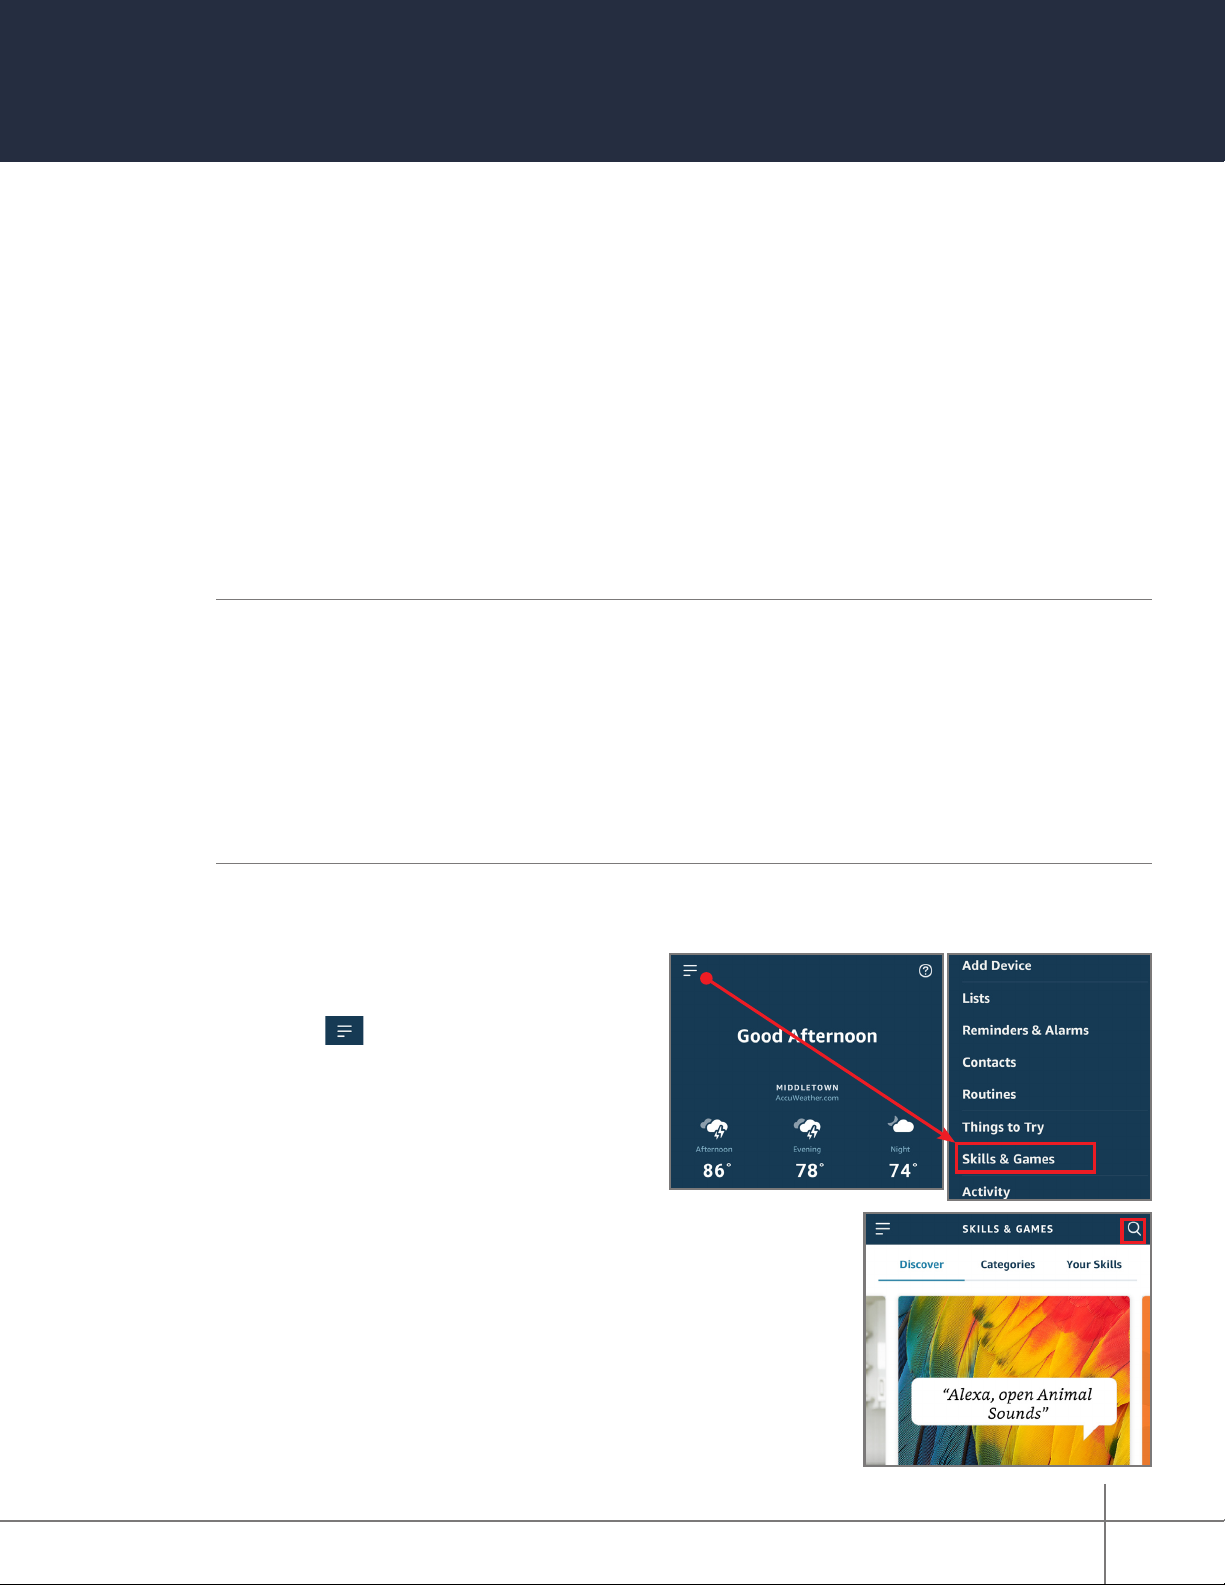
Connecting Alexa to the Legrand Lighting Control System
1. Open the Alexa app.
2. Select to open the side menu.
3. Select Skills & Games from the menu.
4. Open the Search option.
Whole House Lighting Controller - LC7001 1308243 REV. F
9
Page 10
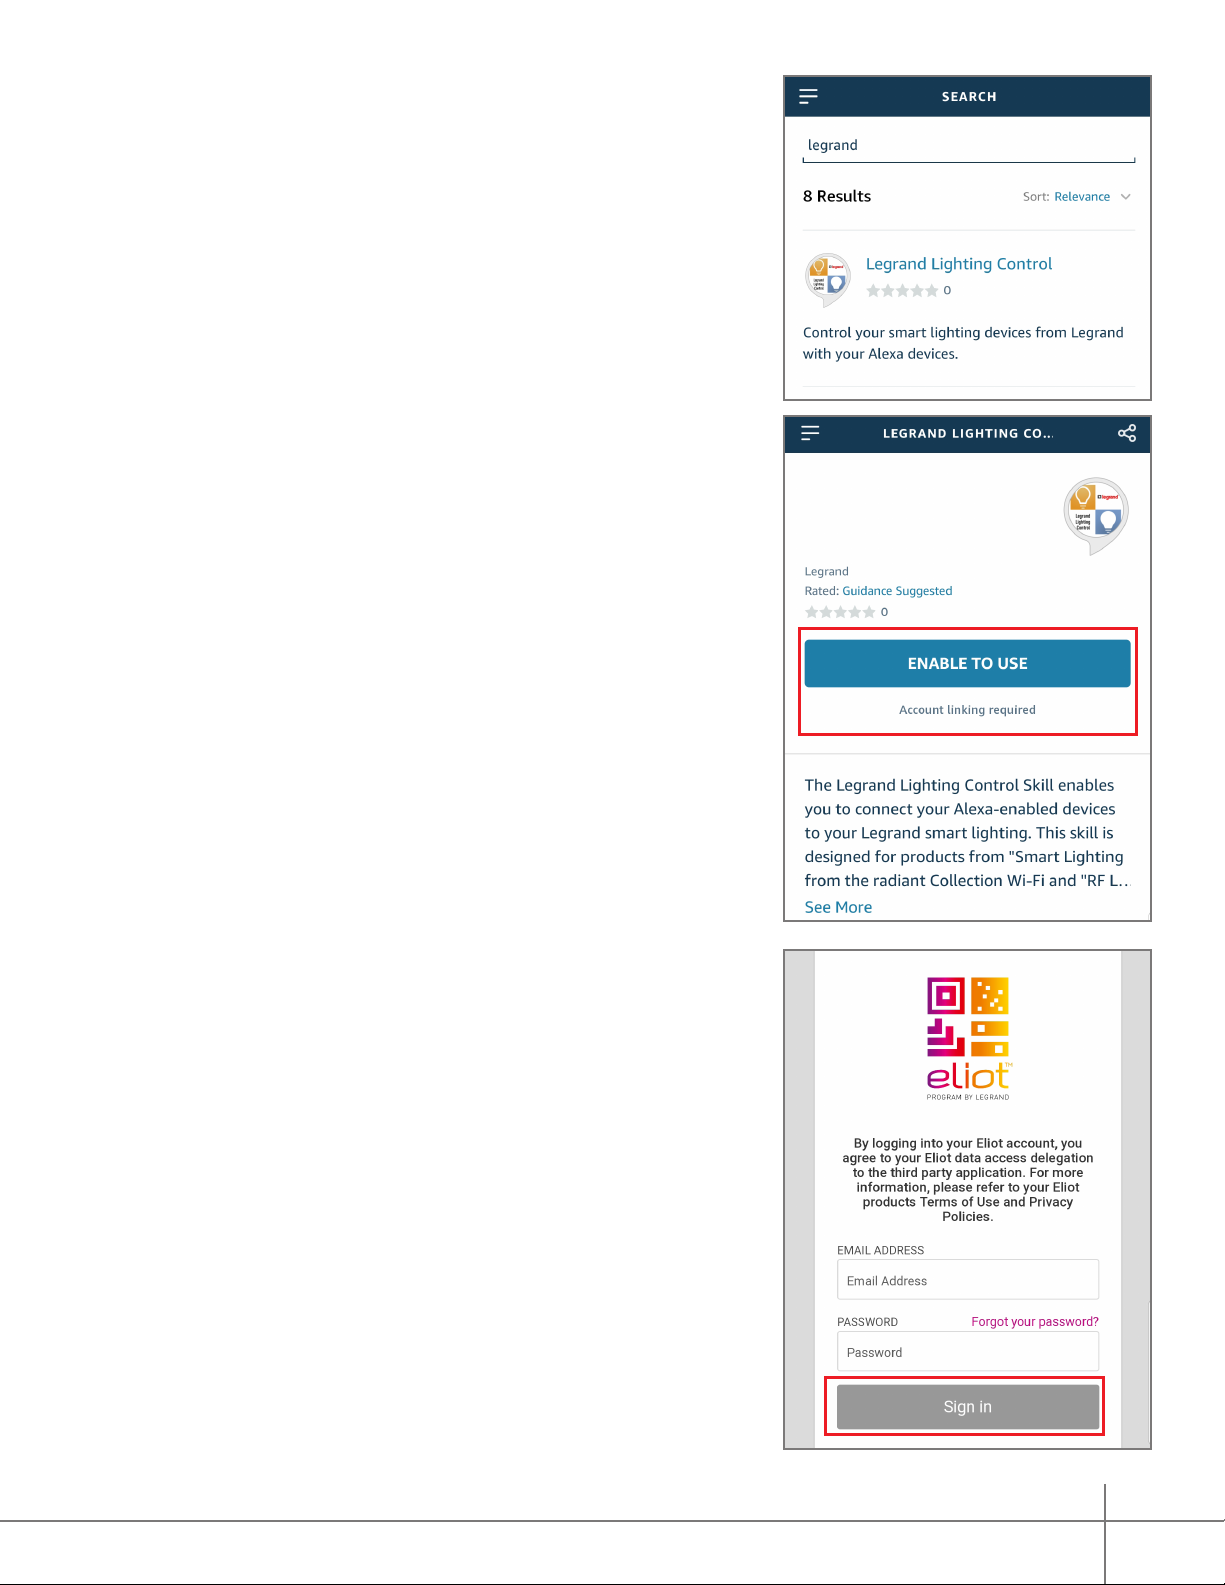
5. Search for Legrand, then select the
Legrand Lighting Control option.
Legrand has multiple Amazon Skills.
Be sure to pick the appropriate skill.
6. Select ENABLE TO USE.
7. Sign in to your Eliot Account. If you don’t have an
Eliot Account, select the option to create one.
An activation link will be sent, so you can nish
creating your account.
Whole House Lighting Controller - LC7001 1308243 REV. F
10
Page 11

8. Click Accept to grant Amazon Alexa permission
to access your Legrand data.
9. After receiving a successful link message,
close the window and return to the Skills page.
Whole House Lighting Controller - LC7001 1308243 REV. F
11
Page 12
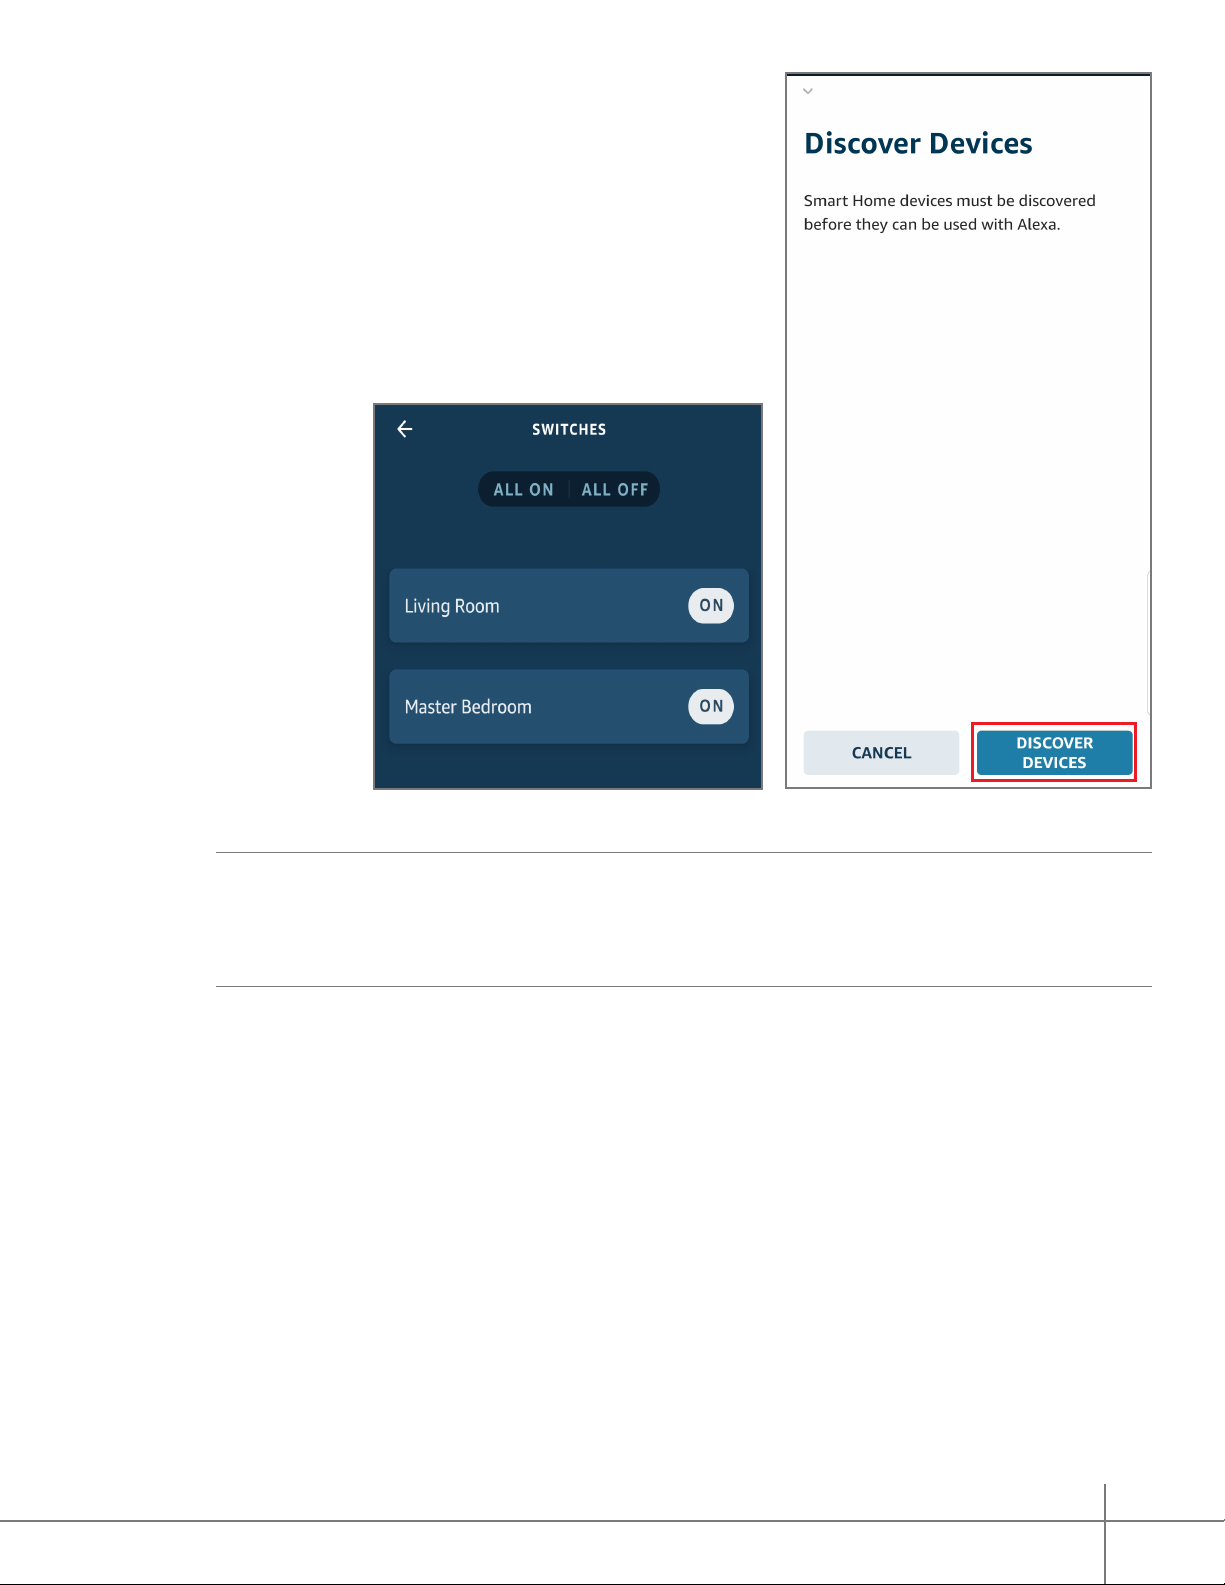
10. Select Discover Devices to import the
Legrand Lighting Control System devices into Alexa.
11. All done! Once your devices are discovered,
you can group them by room for convenient
operation.
NOTES:
• Device discovery can take up to 20 seconds.
• Device discovery must be performed after devices are added to the Legrand Lighting Control
app. In the Alexa app, go to Smart Home. Under Your Devices, select Discover Devices.
Whole House Lighting Controller - LC7001 1308243 REV. F
12
Page 13

Grouping Discovered Devices
Use the Alexa app to designate groups of Legrand Lighting Control System devices. Groups
allow control of multiple devices using a single Alexa command.
Example:
assigned to the group for control at one time.
Create a Group
1. Open the Alexa app and select Smart Home.
2. Select Create group.
A group named “basement” can have multiple devices located in the basement
3. Name the group.
4. Select the devices for control in the group.
5. Save the group.
Whole House Lighting Controller - LC7001 1308243 REV. F
13
Page 14

Supported Commands
Alexa supports both switching and dimming commands. Switching commands simply turn
devices on and off. Dimming commands allow various levels of control to be applied to the
devices.
NOTE:
Dimming commands only activate dimmable devices. While all dimmable and nondimmable devices in the same group respond to switching commands, only the dimmable
devices can respond to dimming commands.
Use the following supported control commands to change the light level for your controlled devices.
To turn a light ON/OFF
Alexa, turn <on/off> < light/room name >
Dim a light
(Results in an adjustment level of 45% for dimmable devices)
Alexa, dim the < light/room name >
Brighten a light
(Results in an adjustment level of 45% for dimmable devices)
Set a light brightness to a certain percentage
Alexa, set < light/room name > to <1-100%>
Dim/Brighten lights to a certain percentage
Alexa, dim/brighten < light/room name > to <1-100%>
Turn ON/OFF all the lights
Alexa, turn < on/off > everything
Alexa, brighten the < light/room name >
14
Whole House Lighting Controller - LC7001 1308243 REV. F
Page 15

Google Home Voice Control Integration
Prerequisites
Enabling voice control of the Legrand Lighting Control System through Google Home requires
the following:
• a Google Home device
• the Legrand Whole House Lighting Controller (LC7001)
• the latest version of the Google Home app
• the latest version of the Google app (Android only)
• a Google account
• an Internet connection
• the Legrand Lighting Control app, version 4.0 or newer
• an active Legrand cloud account integrated with the user’s Legrand Whole House Lighting
Controller (LC7001).
NOTE:
refer to “Setting up Remote Access” in the Legrand Whole House Lighting Controller User Guide
or go to Settings > Remote Access Info > Remote Access Setup in the Legrand Lighting
Control app.
For instruction on creating and integrating a Legrand cloud account with the LC7001,
Connecting Google Home to the Legrand Lighting Control System
1. Open the Google Home app.
2. Select Add.
3. Select Set up device.
Whole House Lighting Controller - LC7001 1308243 REV. F
15
Page 16

4. On the Set up page, select
Works with Google.
5. On the Manage accounts page, search
for Legrand.
6. Select Legrand Lighting Control.
Legrand has multiple Google Actions.
Be sure to pick the appropriate Action.
7. Sign in to your Eliot Account. If you don’t have
an Eliot Account, select the option to create one.
An activation link will be sent, so you can
nish creating your account.
Whole House Lighting Controller - LC7001 1308243 REV. F
16
Page 17

8. Click Accept to grant Google permission to
access your Legrand data.
9. All done! Return to the home screen to see
your added devices. Now, you can link these
devices to your home and sort them into rooms.
To add or change devices in your RFLC
system in the future, simply say “Hey Google,
sync my devices.”
Whole House Lighting Controller - LC7001 1308243 REV. F
17
Page 18

Assigning Devices to a Room
Google Home supports the control of Legrand Lighting
Control System devices, and other enabled devices,
with a single voice command using the ROOMS tab.
For details on setting up rooms, follow Step 4 of the
instructions on the Google support site at: https://support.
google.com/googlenest/answer/9159862?hl=en.
Supported Commands
Use the following supported control commands to change the light level for your controlled devices.
To turn a light ON/OFF
Ok Google, turn <on/off> < light/room name >
Dim a light
(Results in an adjustment level of 45% for dimmable devices)
Ok Google, dim the < light/room name >
Brighten a light
(Results in an adjustment level of 45% for dimmable devices)
Set a light brightness to a certain percentage
Ok Google, set < light/room name > to <1-100%>
Dim/Brighten lights to a certain percentage
Ok Google, dim/brighten < light/room name > to <1-100%>
Turn ON/OFF all the lights
Ok Google, turn < on/off > everything
Ok Google, brighten the < light/room name >
Whole House Lighting Controller - LC7001 1308243 REV. F
18
Page 19

Legrand Lighting Control App Functionality
This section details how to add and control system components and explains how to create,
delete, and automate lighting scenes.
System Discovery
The system discovery process initiates when opening the Legrand
Lighting Control app for the rst time. System discovery adds
devices to the LC7001 by wirelessly discovering a lighting device
in the home after it is touched. A prompt appears to begin adding
devices.
NOTE:
bounded prior to the installation of the LC7001. Reference the
individual device instructions for information on this process.
All RF lighting devices must be properly house and group
Add a Lighting Device
1. Tap a device to discover it on the system.
2. Name the device.
3. Repeat for each Legrand lighting device being added to the
LC7001.
Whole House Lighting Controller - LC7001 1308243 REV. F
19
Page 20

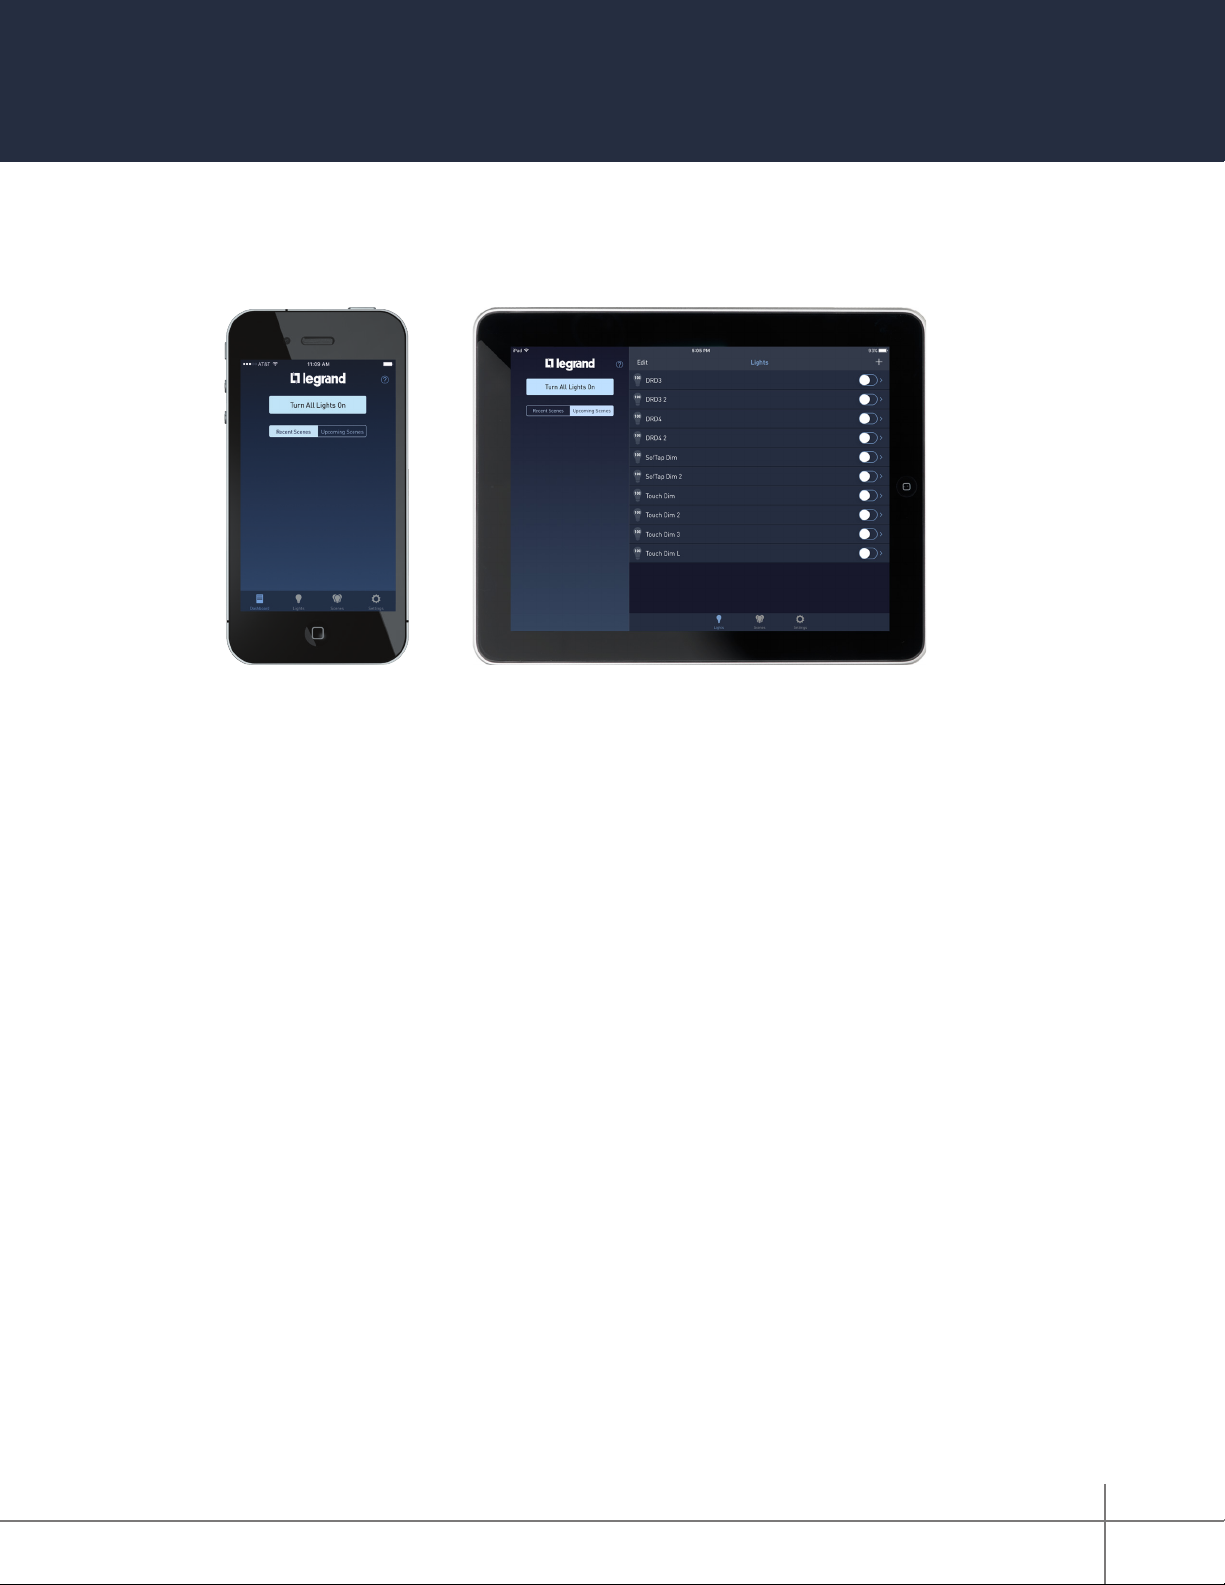
Using the Legrand Lighting Control App
After system discovery is complete, a dashboard
screen appears. The dashboard provides access to
various functions within the app.
• Turn All Lights ON or OFF
• View Recent and Upcoming Scenes
• Go to the Lights Page
• Go to the Scenes Page
• Go to Settings
Turn All Lights ON or OFF
Tap Turn All Lights On to collectively turn all of your lighting devices ON at the same time
when they are OFF. The button reads Turn All Lights Off to turn your lighting devices OFF
when they are ON.
• Press and hold Turn All Lights On to gradually increase the brightness of all of your
lighting devices to full brightness.
• With the lighting devices ON, swipe left and right to increase and lower the brightness of all
of your devices at once.
View Recent and Upcoming Scenes
• Recent Scenes : Select to view recent scenes triggered on the system.
• Upcoming Scenes : Select to view upcoming scenes set to occur within two days.
Go to the Lights Page
Select at the bottom of the dashboard screen.
The Lights page appears, displaying the names of all
controllable lighting devices within the system. This screen
shows the following options:
• : status of each lighting device (blue indicates ON).
• : current brightness level.
NOTE:
System, refer to “Display Changes” on page 34.
Whole House Lighting Controller - LC7001 1308243 REV. F
If integrating with the QMotion Advanced Shading
20
Page 21

Besides providing an overall view of the lighting devices
connected to the system, the Lights page allows you to edit,
add, remove, and control individual settings for each device.
• Edit : Tap edit to:
- change the name of a device.
- select to remove a device from the system.
• + : Tap [+] to add a new device to the LC7001.
Similar to the system discovery process, when selecting
+ , a prompt appears requesting that you tap the lighting
device to be added. Once tapped, the device becomes
part of the system and a prompt appears to name the
device.
• Name of Device : Tap the name of a specic lighting
device to display the individual lighting page for that device.
From the individual lighting page, the following options are available:
- Toggle the device ON and OFF.
- Turn the device ON and OFF by double-tapping.
- Edit Change the name of a device or remove it from the system.
- Adjust the brightness level.
NOTES:
• The LC7001 supports up to 100 devices.
• Sliders are visible for dimmer switches only.
• Dimmers are adjustable when the device is OFF in the app.
Making changes to the slider level does not change the device
status; it changes the brightness level for the next time the
device is turned ON. For immediate changes, use to turn
the device ON before making any slider adjustments.
Whole House Lighting Controller - LC7001 1308243 REV. F
21
Page 22

Go to the Scenes Page
Select at the bottom of the dashboard
screen. The Scenes page appears. This screen
allows you to program individual or multiple
lighting devices to turn ON, OFF, and/or dim on a
customized schedule.
Add a Scene
1. Tap + .
2. Name the scene.
3. Press Save .
4. Select Repeat .
On the Repeat pop-up box, select how often
the scene runs:
» Never : scene is triggered manually.
» Once : scene automatically runs one time.
» Weekly : scene repeats weekly based on the
day(s) and time dened.
Whole House Lighting Controller - LC7001 1308243 REV. F
22
Page 23

5. Select Date .
On the Date pop-up box, scroll through the
months, days, and years to set the date for the
scene to trigger.
If choosing the Weekly Repeat option,
the Date eld reads Days so you can
select the days of the week that
the scene triggers.
6. Press <Repeat to return to the Repeat
pop-up box.
7. Select Time .
On the Time pop-up box, select an option
to set the time the scene triggers:
Time
option:
Scroll to
select:
Specic Relative
Hour Number of minutes
Minute Before/At/After
AM or PM Sunrise or Sunset
8. Press <Repeat to return to the Repeat pop-up box and see your updated
selections.
9. Press <Add A Scene to return to the scene creation screen.
Whole House Lighting Controller - LC7001 1308243 REV. F
23
Page 24

10. Place a check mark next to the devices
participating in the scene by tapping next
to each name of the lighting device
on the Include menu.
To adjust the individual state (ON/OFF)
and the brightness level of a device in the
scene, tap the name of the device.
NOTES:
» Sliders are visible for dimmer switches only.
» When using a dimmer, the slider level can be adjusted when the lighting device is OFF in
the app. Making changes to the slider level does not change the device status; it
changes the brightness level for the next time the device is turned ON. For immediate
changes, use to turn the device ON before making any slider adjustments.
11. Tap Fade Rate .
The higher the number selected, the longer the scene takes to rise or fall to the desired
brightness level when the scene executes.
NOTE:
assigned, the fade rate applies only when the scene is ON. A second button press turns the
lighting devices ON or OFF at the system default rate. This setting is not adjustable. Learn
about the operation of lighting controllers.
When using a Legrand Scene Controller with a “Toggle Scene ON/OFF” button
12. Tap Save .
The new scene displays in the “Upcoming Scenes” category on the left side of the
dashboard page.
NOTE:
the next two days.
Whole House Lighting Controller - LC7001 1308243 REV. F
The scene appears in the “Upcoming Scenes” area only if it is scheduled to trigger in
24
Page 25

Edit a Scene
1. Select on the dashboard page.
2. Select Edit .
3. Tap next to the scene name.
4. Select an editing option:
» Delete : removes the scene entirely
from the system.
» Duplicate : allows duplication of the
scene for faster setup of similar scenes.
» Name of Scene : opens additional
options for changing a scene.
5. Tap Name of Scene .
A pop-up box appears with change
options for that scene:
» Name.
» Repeat settings.
» Fade Rate settings.
» Individual device settings.
Whole House Lighting Controller - LC7001 1308243 REV. F
25
Page 26

Go to Settings
Select at the bottom of the dashboard screen.
The Settings page appears. This screen allows you
to view and set location, time, hardware, rmware,
and software information for the system.
Setting a Location
1. Tap Location .
A map screen appears.
» If location services are enabled, the app
automatically determines the proper sunrise
and sunset times, based on your connection
location.
» If locations services are not enabled,
manually enter the address/zip code to set
sunrise and sunset times.
NOTES:
» This function requires an Internet connection.
» The rst time you access the location screen, a prompt appears asking for permission to
use the location services of your phone/tablet.
Set Time Zone
1. Tap Time Zone .
2. Check mark the desired time zone by tapping
the appropriate time zone name.
Set Daylight Savings Time
Tap to turn the “Observe Daylight Savings Time”
setting ON or OFF.
Whole House Lighting Controller - LC7001 1308243 REV. F
26
Page 27

In-Wall Scene Controllers
Legrand Scene Controllers provide the ability to manually trigger scenes created in the LC7001
Whole House Lighting Controller. This section describes how to control scene controllers
designed to work with the LC7001.
NOTES:
• The LC7001 supports a maximum of 40 compatible scene controllers.
• Bind the scene controller to the House ID prior to adding it to the Lighting Control app. Refer
• The LC7001 is compatible with:
• Create the Scene in the app prior to attempting to attach it
• The LC7001 Whole House Lighting Controller is not
to the installation instructions included with the scene controller for more information.
radiant® styleadorne® sofTap
- adorne® sofTap and Touch Scene Controllers
(part numbers ADTPRIWHCx1 or ADTHRIWHCx1).
- radiant® Scene Controllers (part number LC2303-xx).
to a scene controller.
compatible with the Legrand RFLC DRD5, DRD6, MRH5, MRH6 and adorne® ADMHRM4.
These products can still control the RF lighting devices in the home, but they are
independent of the LC7001 scenes.
Add a Scene Controller
1. Within Settings, select
In Wall Scene Controllers .
2. Tap + .
3. Push any button on the face of the
controller.
Whole House Lighting Controller - LC7001 1308243 REV. F
27
Page 28

4. Name the scene controller.
5. Tap Save .
The new scene displays in the list under the
“In-Wall Scene Controllers” menu.
Controller Editing Options
1. Tap > to the right of the scene name.
A pop-up box appears with options
to edit the controller name and the
selection of scenes associated with
the controller. Each controller button
is called a Bank.
2. Tap > to the right of a bank.
New menu options appear, showing a list of all
scenes available to assign to a Bank.
Whole House Lighting Controller - LC7001 1308243 REV. F
28
Page 29

3. Check mark the desired scene by tapping
the appropriate scene name.
4. Tap Execute Scene .
A new menu appears with options to change
the scene behavior.
5. Select a behavior option:
» Execute Scene : This option sets the
controller button to execute the scene
associated with the bank tied to the button.
Brightness levels are determined by the
levels set during the creation of the scene.
- When pressing an assigned “Execute Scene” button on the scene controller, the LED
indicator for the button slowly ashes to indicate initiation of the scene. The LED
stops ashing after the scene is activated.
» Toggle Scene ON/OFF : This option sets the controller button to trigger the scene ON.
Brightness levels are determined by the levels set during creation of the scene. Pressing
the button a second time commands the scene to trigger OFF.
- When assigning a “Toggle Scene ON/OFF” button on the scene controller, the LED
indicator for the button slowly ashes to indicate initiation of the scene. Once the
scene activates, the LED will be “ON” and brightly lit. Pressing the button again
causes the LED to ash slowly until the scene is OFF. The LED then turns off.
- If the scene controller has multiple assigned “Toggle Scene ON/OFF” buttons, the
LED behavior varies depending on which scene is active. When the “Toggle Scene
ON/OFF” button is pressed and the scene is completely executed, the LED indicator
appears brightly lit. This is now the active scene.
- Other assigned “Toggle Scene ON/OFF” buttons that are still ON but not active have
a dimmed LED indicator light. When pressing the button of an inactive scene, the
scene activates and the LED indicator becomes bright.
- Adjust the active scene by repeatedly pressing the “+” and “-“ buttons on the scene
controller. Press-and-hold will not function.
Whole House Lighting Controller - LC7001 1308243 REV. F
29
Page 30

6. Tap <Bank to return to the previous screen.
7. Tap <Scene to return to the previous screen.
8. Tap Save to save changes to the bank.
9. Repeat this process for the remaining banks on
the scene controller.
Removing a Controller
1. Within Settings, select
In Wall Scene Controllers .
2. Select Edit .
3. Tap next to the scene name to be removed.
4. Select Delete .
Whole House Lighting Controller - LC7001 1308243 REV. F
30
Page 31

Perform a Firmware Update
Tap > to the right of the Whole House Lighting
Controller Update option.
NOTE:
Updates should happen automatically.
Manually updating rmware is optional.
Check the Current Version of the App
The current version of the app appears to the right
of the App Version option.
Whole House Lighting Controller - LC7001 1308243 REV. F
31
Page 32

QMotion® Advanced Shading System Integration
Integrate shades from QMotion®, a Legrand company, to the LC7001 Whole House Lighting
Controller for shade control through the Legrand Lighting app.
The LC7001 supports up to 50 wired or wireless shades and QMotion groups, if they are
connected to a Qube bridge that runs on the same home network as the LC7001. The shades
and groups are included as part of the LC7001 device maximum (100 devices).
Prerequisites
Enabling control of QMotion shades through the Legrand Lighting Control System requires the
following:
• a wired connection to the home network router or switch
• an Internet connection
• the Legrand Whole House Lighting Controller (LC7001)
• the QMotion Qube bridge and QMotion shades:
» Qadvanced with ZigBee Home Automation version 1.2 battery-operated Roller shades
» Qadvanced Intelligent System (QIS) hardwired shades connected to the Qube bridge
• connection of mobile devices (iOS or Android) running the Legrand Lighting Control app
(3.0 or later) and rmware (3.0 or later) to the same home network as the LC7001
NOTE:
update, refer to “Perform a Firmware Update” on page 31 and “Check the Current Version of
the App” on page 31.
For additional detail on checking the current version of the app or performing a rmware
Whole House Lighting Controller - LC7001 1308243 REV. F
32
Page 33

Integrating QMotion Shades
To be used with the Legrand Lighting Control System, the QMotion System must be set up
through the Qube bridge device, using the Qube Coordinator app.
Connecting QMotion to the Legrand Lighting Control System
1. Set up the QMotion shading system through the Qube bridge device, using the Qube
Coordinator app.
NOTE:
Refer to the instructions included with the QMotion shading system for setup details.
2. Go to the Settings Menu.
NOTE:
system, select the “Add Shades” button on the Add a Light
page See “System Discovery” on page 19.
If shades are the rst devices being added to the
3. Select the QMotion Shades option.
4. Select Sync Now .
The LC7001 will automatically search for QMotion shades
and groups to attach to the lighting control system.
NOTE:
the added shades and groups appear alongside any previously
congured switches and dimmers.
The “Lights” page icon changes to a “Devices” icon and
5. Proceed to the Devices page to conrm that the shades
loaded properly.
Whole House Lighting Controller - LC7001 1308243 REV. F
33
Page 34

Lighting Control App Functionality with Shades from QMotion
When QMotion shades are successfully discovered within the Lighting Control app, several
changes occur on the display. These display changes are only active once the QMotion shades
are successfully integrated.
Display Changes
The Dashboard view provides options for all shade devices
to be opened or closed at the same time.
The Lights page
icon changes to a Devices
Lights
Devices
icon.
The integrated shades appear on the devices list with a
shade icon and the associated QMotion device name.
The All Shades row allows simultaneous control of
all shade devices.
NOTE:
The shade devices should respond immediately to
commands for All Shades. The app interface may take up
to 60 seconds to reect the updated status of an individual
shade device if the command comes from this QMotion
group, another QMotion group, or a command sent directly
to the QMotion Qube instead of the LC7001.
Whole House Lighting Controller - LC7001 1308243 REV. F
34
Page 35

Shade Device Functionality
Once the shades are populated, each device can be individually controlled through the Devices
menu or integrated into Scenes to control the shades as part of an activity.
NOTE:
Voice control with Amazon Alexa* or Google Home** is currently limited for shades.
Once integrated into the Legrand Lighting App and synced with the Amazon Alexa or Google
Home apps, the shades will respond to Set, Dim, and Brighten commands between 1 and
100%. The shades are not currently responsive to Open and Close commands.
Adjust the level of the shade using the scroll bar at the bottom of the screen.
*Amazon, Echo, Alexa, and all related logos are trademarks of Amazon.com, Inc. or its afliates.
**Google, Google Home, and all related logos are trademarks of Google, Inc. or its afliates.
Whole House Lighting Controller - LC7001 1308243 REV. F
35
Page 36

Apple Watch Operation
Using the Apple Watch
The Legrand Lighting Control app is compatible with the Apple Watch when it is
paired with an iPhone that has the Legrand Lighting Control app installed. The
Legrand Lighting Control app automatically appears on the Apple Watch home
screen once connected.
Learn about pairing your Apple Watch to an Apple iPhone.
NOTES:
• For Apple Watch compatibility, use the Legrand Lighting Control app, version 2.0 or later,
• For connection to the Legrand Lighting Control app through the Apple Watch, pair the Apple
• The Apple Watch app is not currently compatible with Remote Access.
• The Apple Watch app displays a maximum of 20 devices and 20 scenes.
and Legrand Whole House Lighting Controller rmware, version 2.1 or later.
Watch to an iPhone connected to the same wireless network as the LC7001 Whole House
Lighting Controller.
Accessing the App
1. Select the Legrand Lighting Control app icon on the Apple
Watch home screen.
Depending on the screen you use the most, the app may
open with the Scenes ( ) screen or the Lights ( )
screen.
2. Press and hold rmly (force press) anywhere on the Lights
or Scenes screen to access the following menu options:
» Turn all lighting devices ON or OFF.
» Toggle between the Lights and Scene screens.
Lights Screen
The Lights ( ) screen shows the list of lighting devices associated
with the LC7001.
The color of the toggle switch ( ) indicates the status of the
device (blue is ON). You can change the status by tapping the toggle
to turn the device ON or OFF.
Whole House Lighting Controller - LC7001 1308243 REV. F
36
Page 37

Detailed Views
1. Tap the name of an individual lighting device.
The detailed view screen appears. If the device is a dimmer, a
brightness slider also appears at the bottom of the screen.
» Tap to toggle the state of the device ON or OFF.
» Adjust the dimmer by pressing the and symbols to
increase or decrease the brightness level.
» Swipe right or left to move between the available lighting
devices.
NOTE:
» Press and hold rmly (force press) the detailed view screen.
A preset brightness level menu appears. This menu provides
access to four preset brightness levels.
- Tap the desired brightness level.
NOTE:
the device ON and adjusts the brightness level to the preset level.
2. Tap <Name of Device to return to the Lights screen.
NOTE:
them. The most used lighting devices and scenes always appear near the top of the list.
Scenes Screen
The brightness level increases or decreases by 5% per button press.
If the lighting device is currently OFF, this command turns
The app orders your lighting devices and scenes based upon how often you use
The Scenes screen displays the available scenes congured on the
LC7001.
• Tap the individual scene name to execute the desired scene.
Whole House Lighting Controller - LC7001 1308243 REV. F
37
Page 38

For technical assistance on your Lighting
Control app, contact On-Q Technical Support
between 8 AM and 6:30 PM EST.
Phone: 717-546-5412
Email: technical.support-hs@legrand.us
Chat: www.legrand.us/on-q
(Click on the
icon to open a dialogue box)
 Loading...