

Page 1
INSTRUCTION / INSTALLATION SHEET
Pre-Construction Speaker Brackets
301 Fulling Mill Road, Suite G
Middletown, PA 17057
Phone (800) 321-2343 / Fax (717) 702-2546
www.onqlegrand.com
1. Introduction
On-Q/Legrand offers four (4) styles of Pre-Construction
Speaker Brackets; 6.5” (364672-02) and 8” (364673-02) InCeiling and 6.5” (364674-02) and 8” (364675-02) In-Wall.
These speaker brackets are optimized for an easy and
flexible installation. They employ shatter proof aluminum
wings that have an integrated adjustment channel built in
and pre-wiring loops to aid in finding the speaker wire at
finish time, keeping it out of the way of the dry-wall saw. All
pre-construction brackets also come with center markings
for easy alignment with other devices in the ceiling.
2. Description
On-Q In-Ceiling and In-Wall speaker brackets are made of tough semi-flexible plastic frames and shatter proof
aluminum wings. These brackets can be used with 16” and 24” on center joist/stud spacing. They employ a
unique alignment channel that eases installation and adjustment for the installer especially when working from a
ladder. This adjustment channel allows the installer to confirm, adjust or remove the bracket before committing
to its final position without having to worry about damaging the bracket upon removal/adjustment.
3. Installation
NOTE: Please have dry-wall screws and or nails/staples handy for installation.
Figures 3 – 7 are on page 2.
A. Determine where in the room the speaker brackets will need to be located. After
determining, measure from a fixed location and mark the corresponding joists/studs.
(See Figure 1)
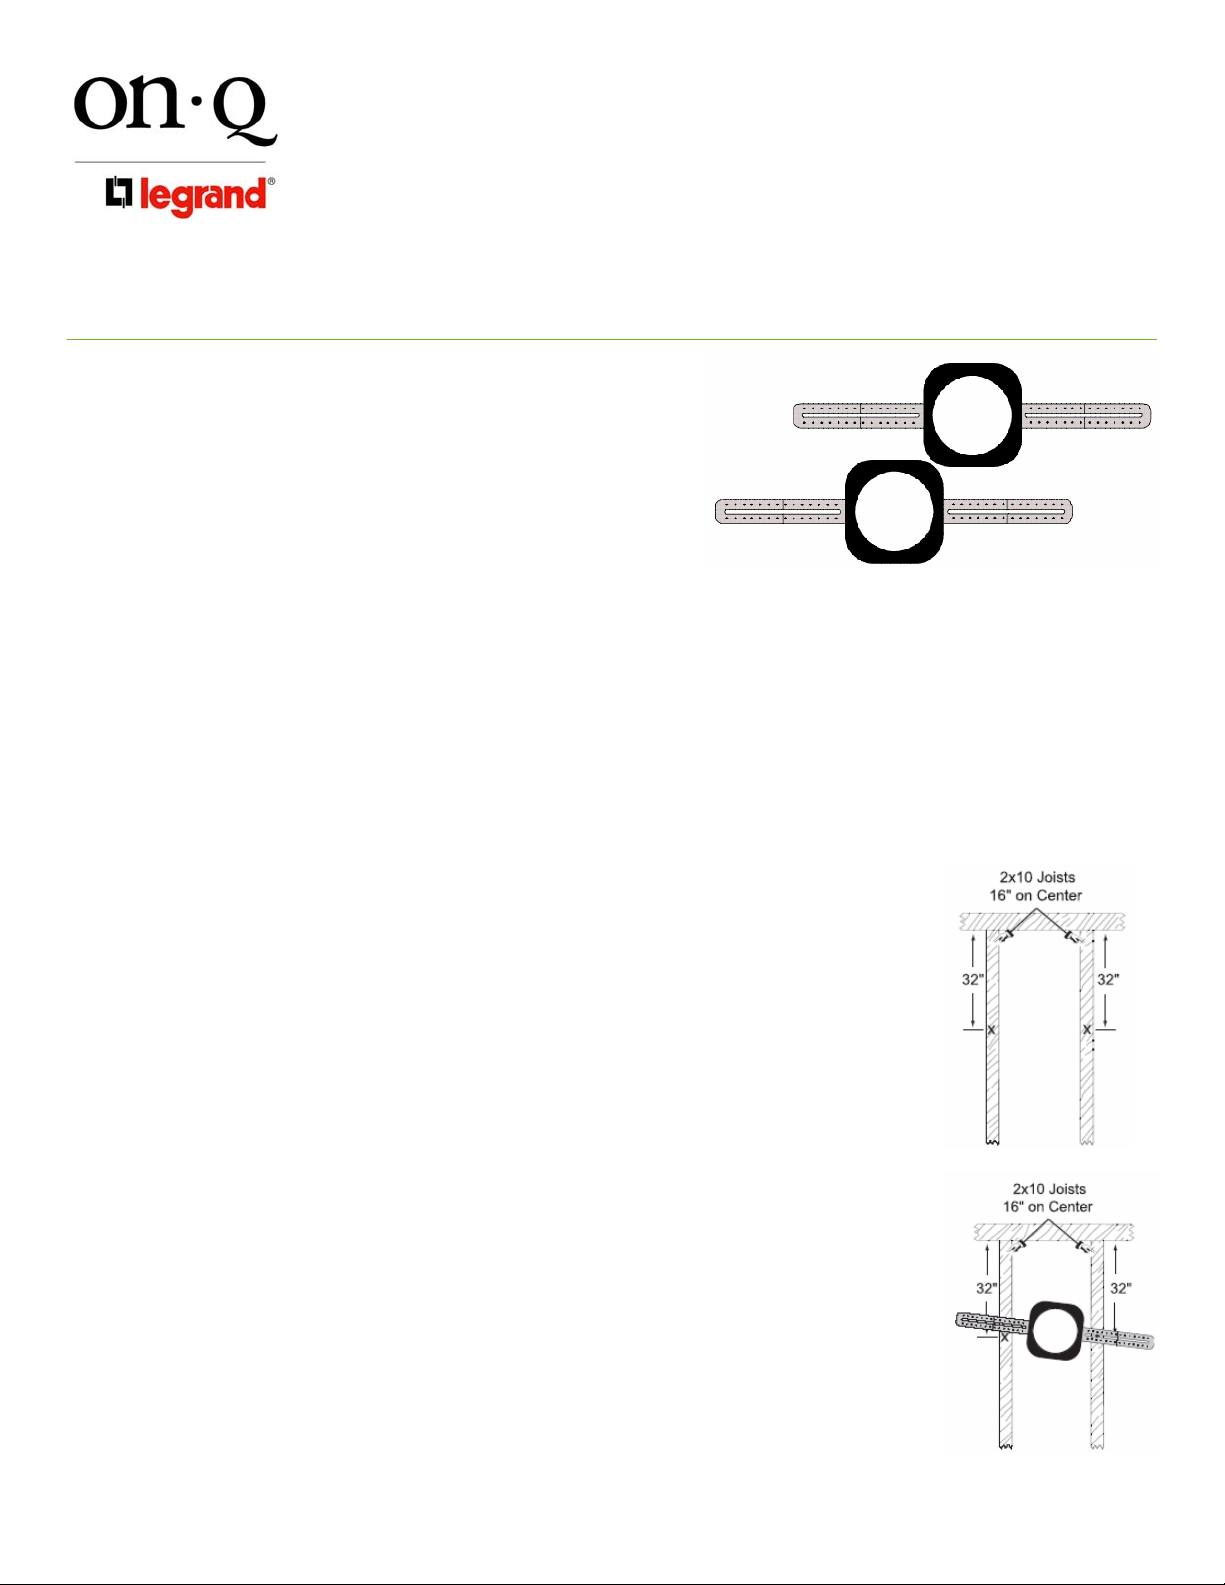
B. Attach one end of the bracket with a drywall screw through the adjustment
channel into the measurement mark. (See Figure 2)
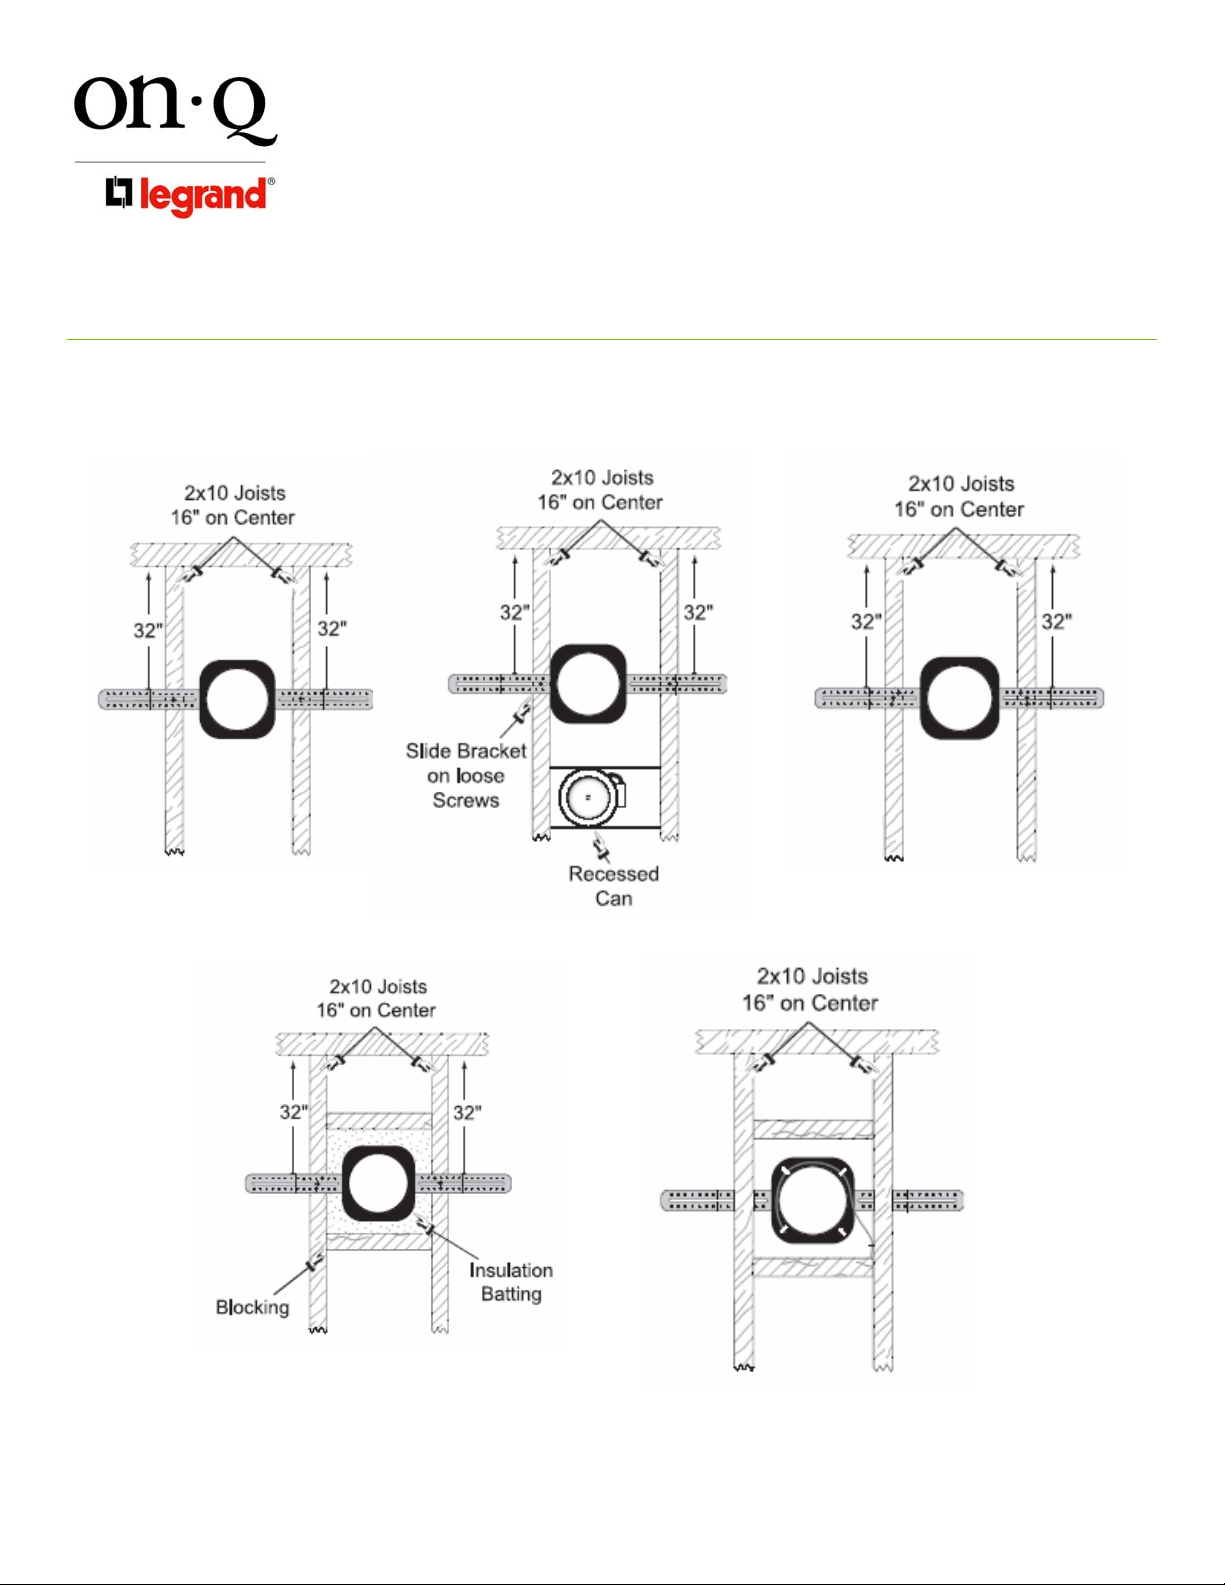
C. Adjust the bracket so that the other side aligns with the other marking and
install a screw through the speaker brackets adjustment channel.(See Figure 3)
D. If the bracket needs to be aligned with another object within the space, such as a
recessed light, leave the screws loose and slide the bracket until aligned with the
object.
NOTE: Each speaker bracket has a center marking for easy measuring.
(See Figure 4)
E. After the speaker bracket is properly positioned install some additional screws or
nails to lock down its location. Screws might be preferred if movement or removal
could be required at a later date. (See Figure 5)
F. It is recommended to install blocking and insulation for the best possible sound
quality. Refer to the On-Q speaker cubic footage chart included with the speaker
instruction sheet. (See Figure 6)
©Copyright 2006 by On-Q/Legrand All Rights Reserved. Page 1 of 2
On-Q/Legrand Pre-Construction Speaker
Brackets
IS-0243 Rev. A
Figure 1
Figure 2
Page 2
301 Fulling Mill Road, Suite G
Middletown, PA 17057
Phone (800) 321-2343 / Fax (717) 702-2546
www.onqlegrand.com
G. After the speaker bracket is installed, place the speaker wire through the speaker wire retaining clips to
protect it from dry-wall saws and ensure easy location at finish time. (See Figure 7)
INSTRUCTION / INSTALLATION SHEET
Pre-Construction Speaker Brackets
IS-0243 Rev. A
Figure 3
Figure 6
Figure 4
Figure 7
Figure 5
©Copyright 2006 by On-Q/Legrand All Rights Reserved. Page 2 of 2
 Loading...