

Legamaster PTX-8500 UHD Service Manual

Page 1/21
Service Manual: PTX8500 UHD
Legamaster
Service Manual
Model No.: PTX-8500 UHD

Page 2/21
Service Manual: PTX8500 UHD
Revision History
Version
Date
Page
Section
Description
V1.0
2015.01.16
All
First issued
V2.0
2015.04.29
All
Change PSU (11012436001-AA)
Page 3/21
Service Manual: PTX8500 UHD
HANDLING GUIDE
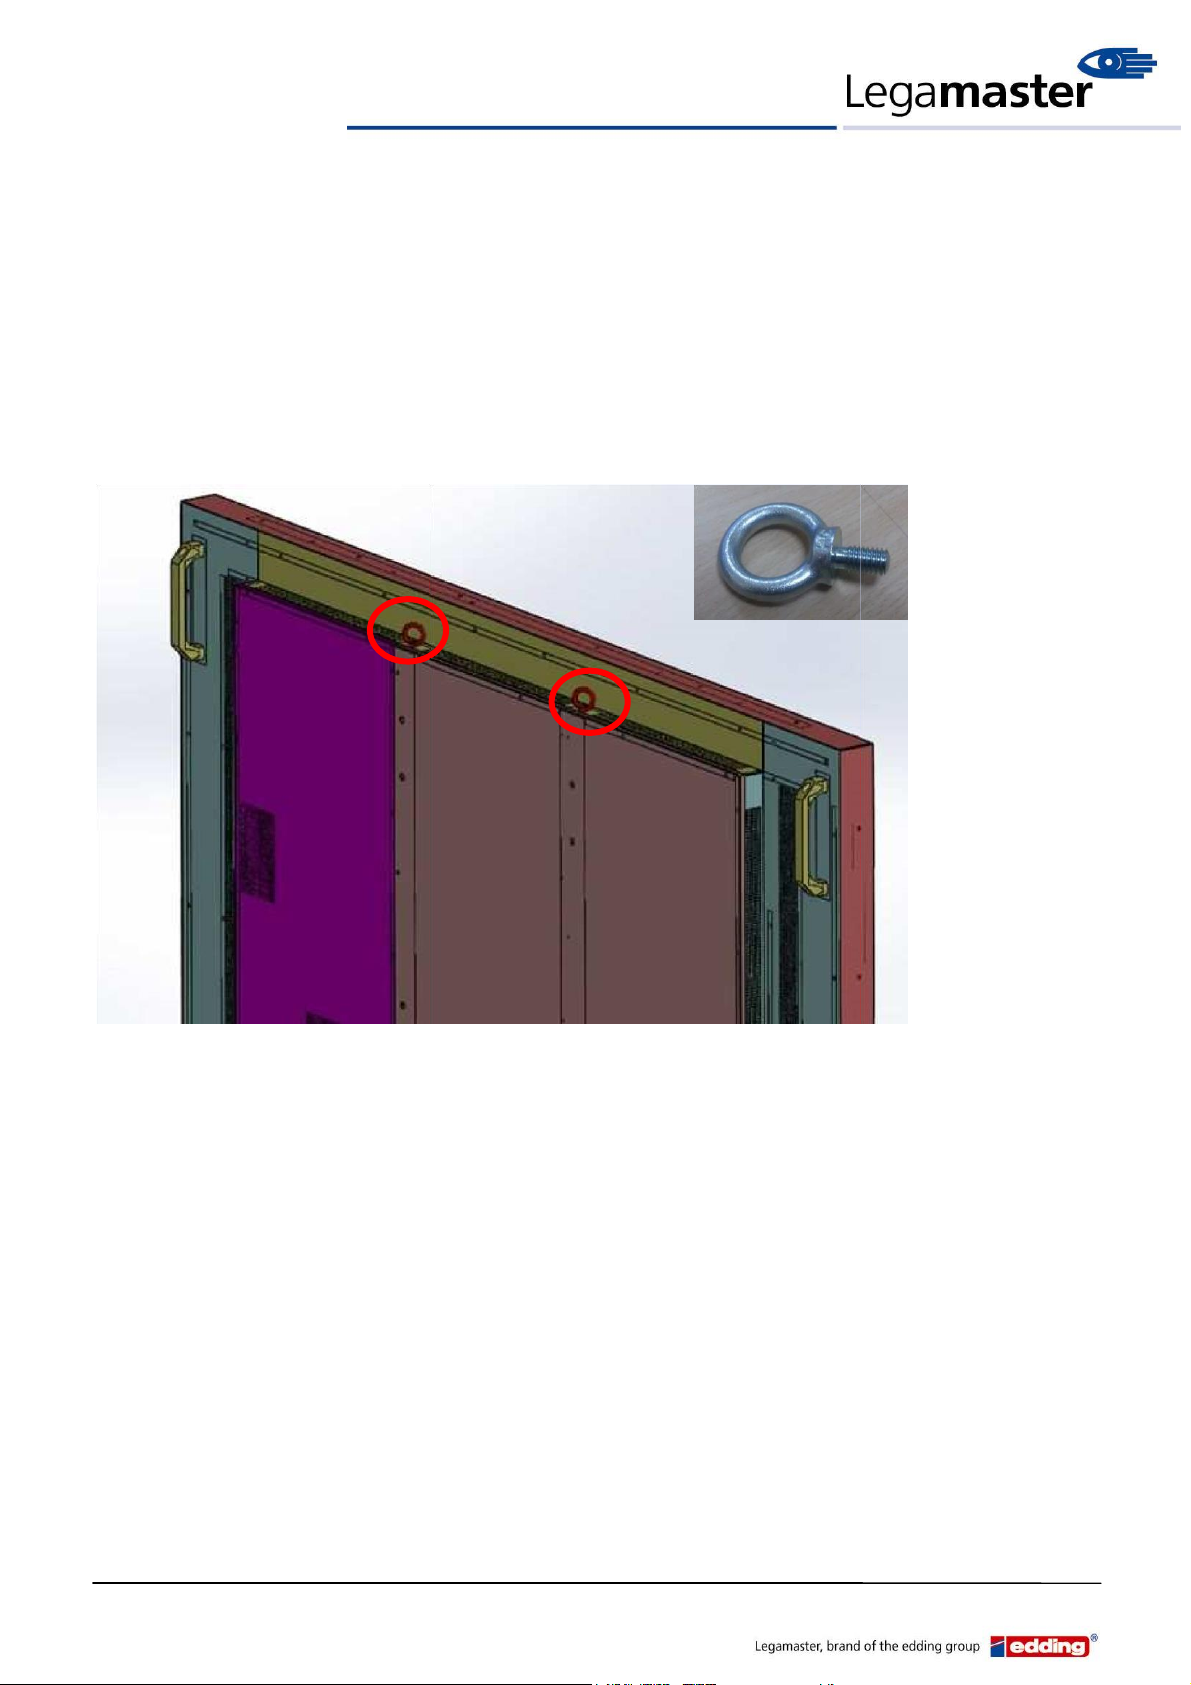
This 85” monitor is over 100KG in weight, there for two (2) eye-Bolt attachment
locations have been placed on top on the unit, you can use the eye-Bolts provided
(in the accessory box) to hang up this monitor.
The installation of the hooks as below photo, we strongly recommend to follow this method to
hang up this monitor.
Hook : 1SM8XXR15Z1-AA
Page 4/21
Service Manual: PTX8500 UHD
1. Repairing Condition
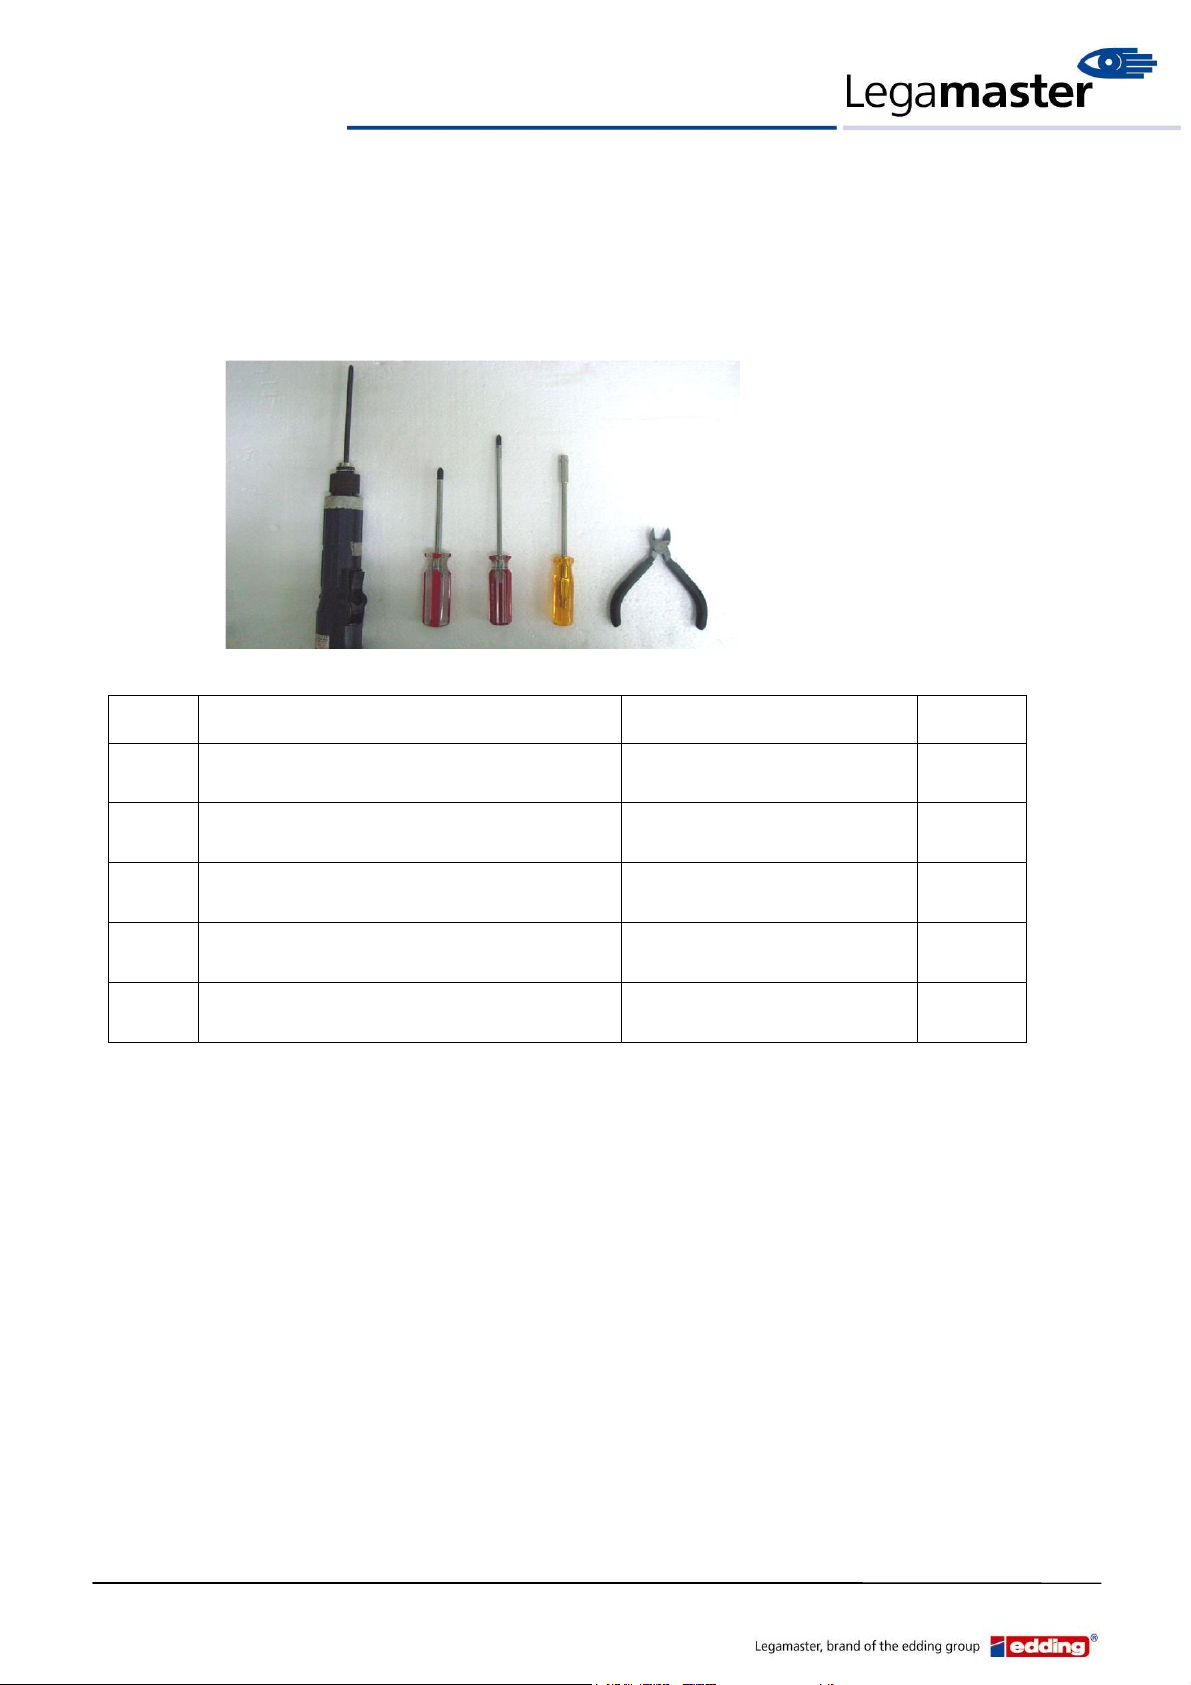
1.1. Repair Tools
List the type and size of the tools that would typically be used to disassemble the
product to a point where components and materials requiring selective repair can
be removed.
Item
Tool Description
Tool Size (if applicable)
Qty
1
Electric screwdriver
N/A
1 pcs
2
Philip Screwdriver
N/A
1 pcs
3
Philip Screwdriver
N/A
1 pcs
4
Hexagonal Socket
5mm
1 pcs
5
Mini Plastic Nipper
6”
1 pcs
1.2. Operation Space Required
1.2.1. Operation Space Required
1.2.2. Need a clean space (>=300cm*300cm)
1.2.3. Need a stable table (surface>200cm*120cm, load>60kg).
Page 5/21
Service Manual: PTX8500 UHD
2. Access to the key components
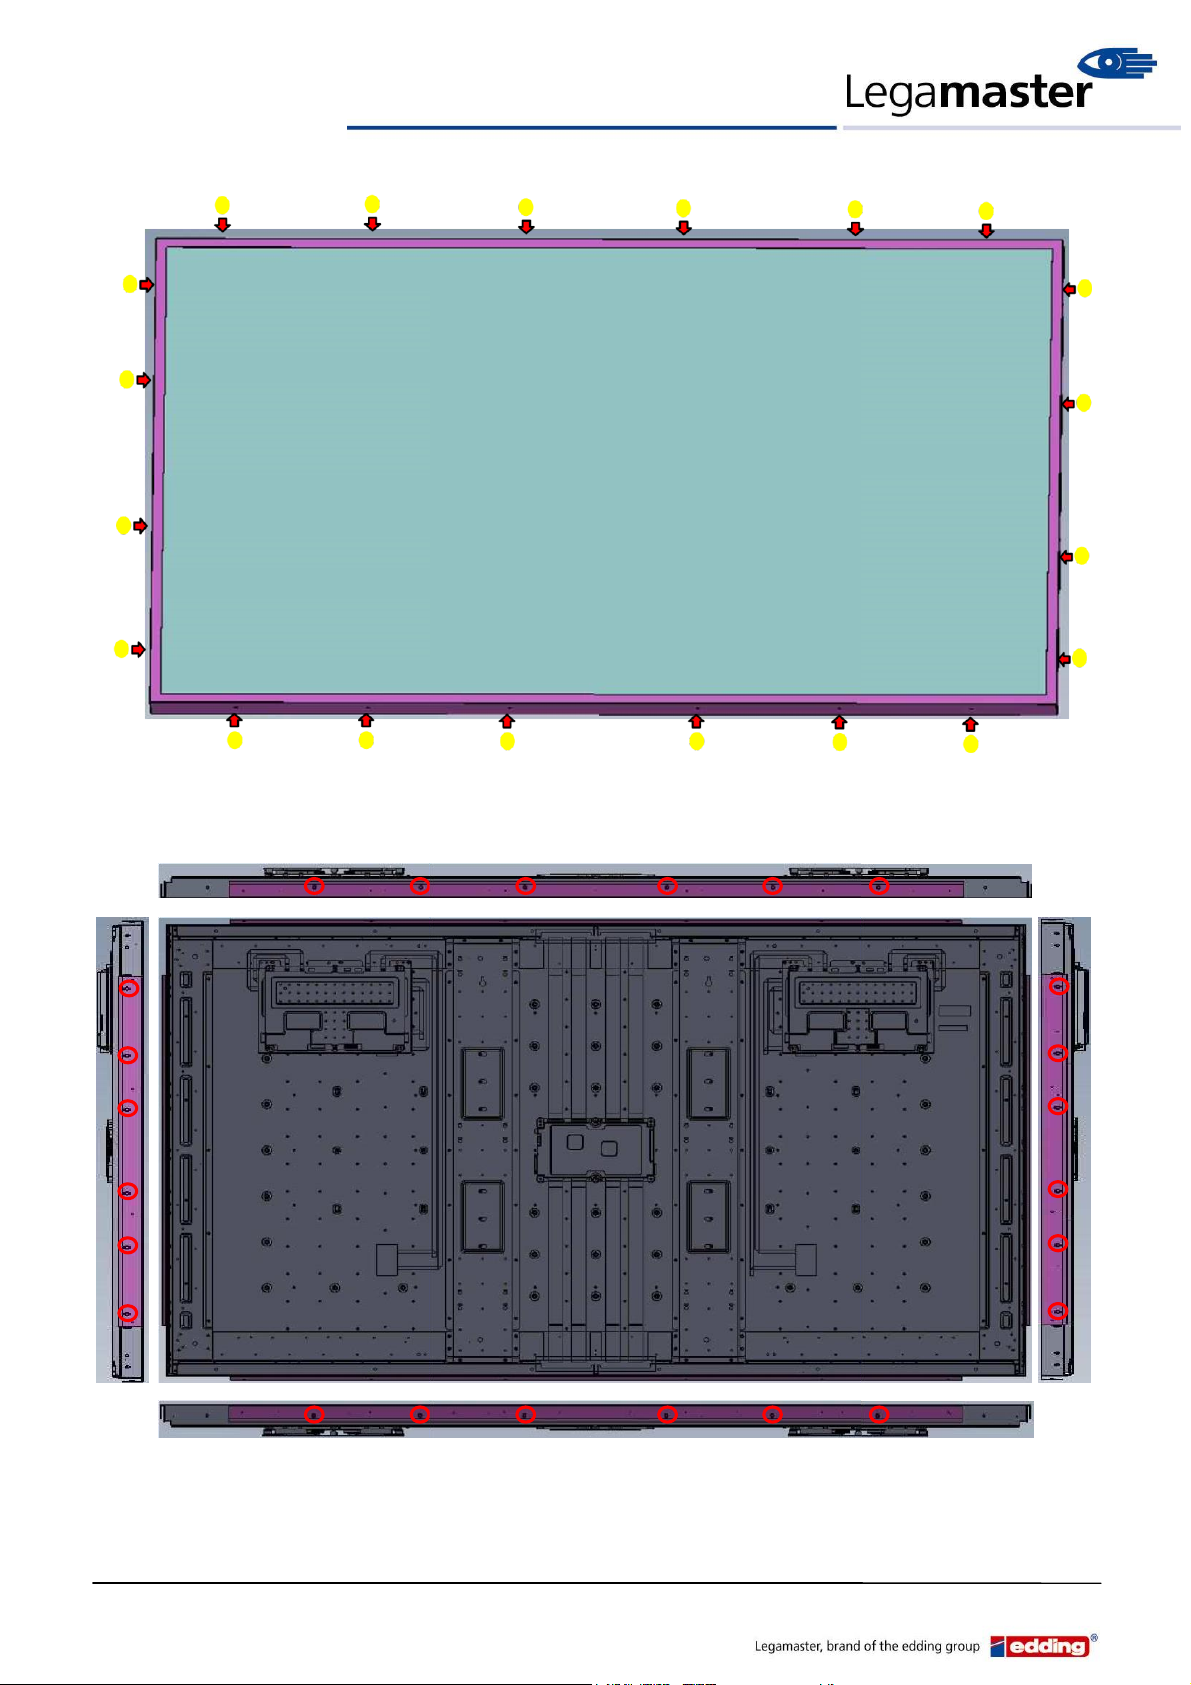
2.1. Panel
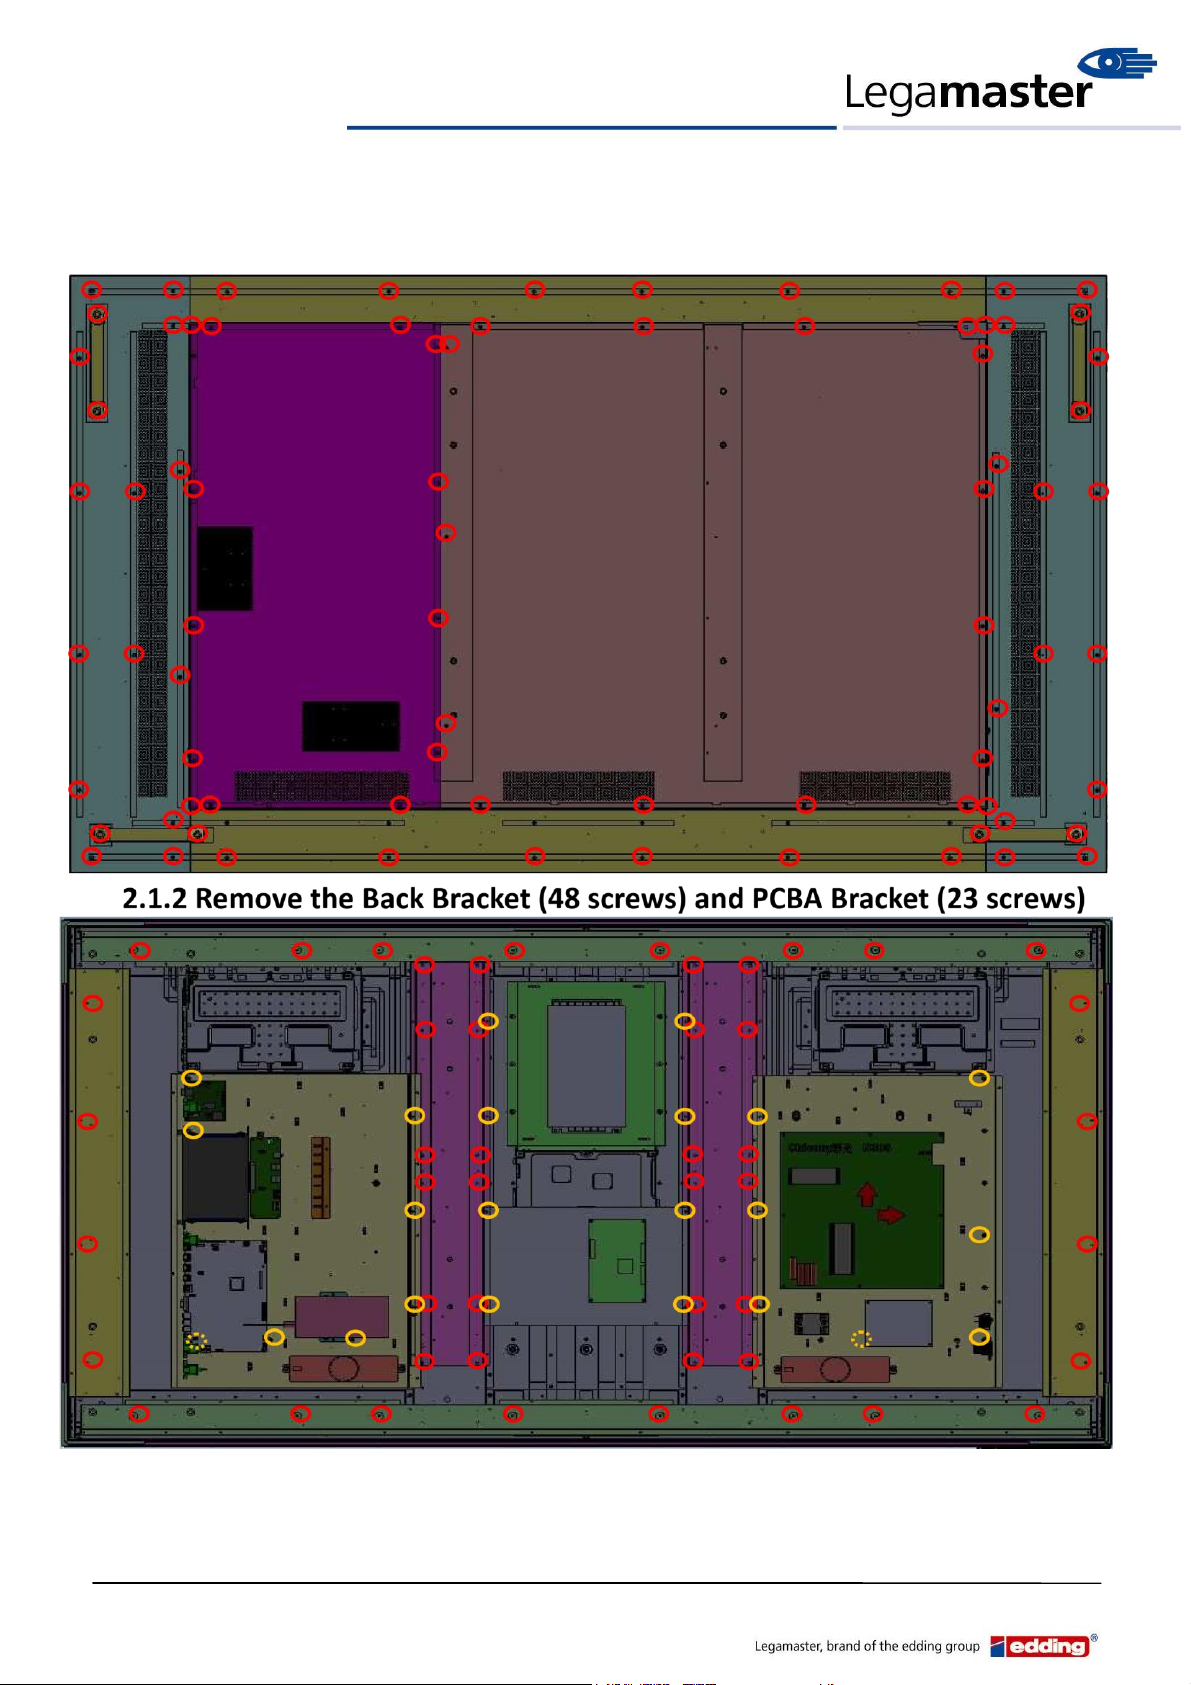
2.1.1. Remove the Rear Cover
Page 6/21
Service Manual: PTX8500 UHD
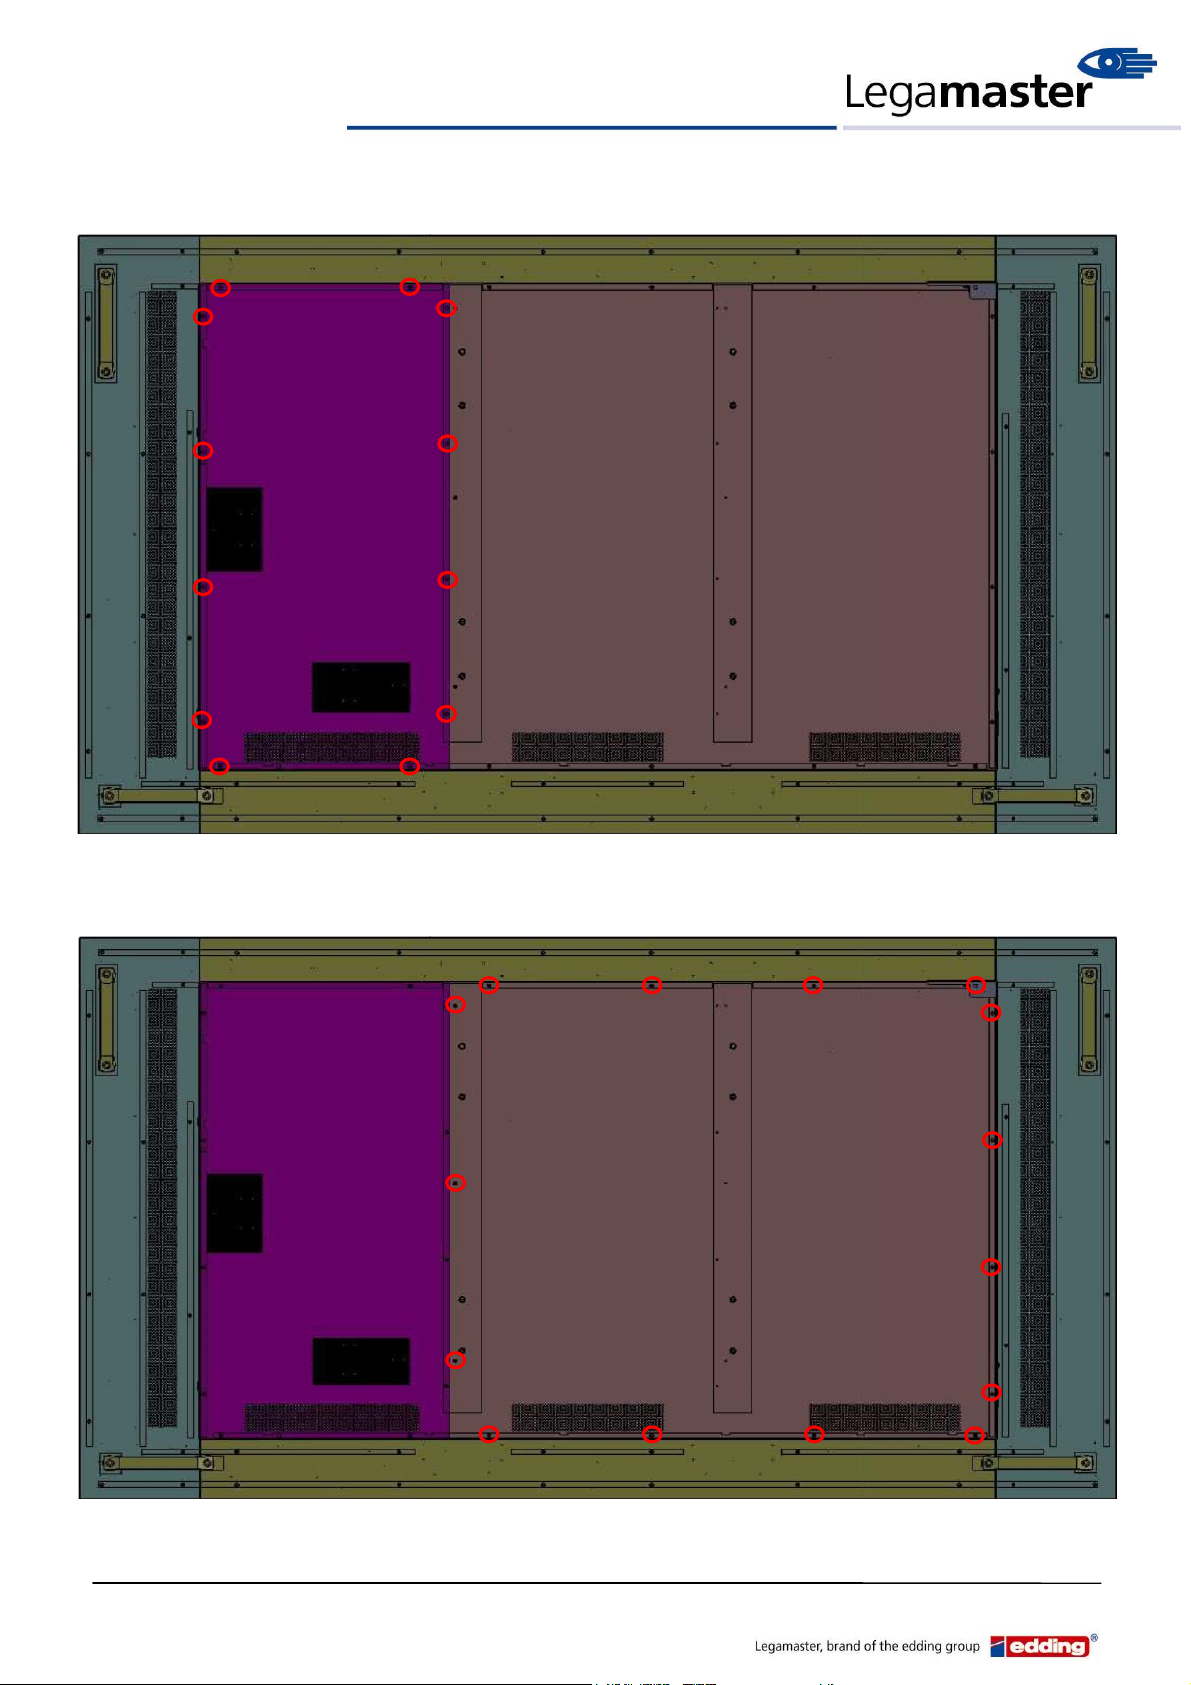
2.1.3. Remove the Bezel
2.1.4
. Panel BKT (24
s
crews)
Page 7/21
Service Manual: PTX8500 UHD
2.2. A/D board
(If you only replace A/D board, just take off A/D board cover)
2.3. Power board
(If you only replace Power board, just take off Power board cover)
A/D board cove
r
Power
board co
ver
 Loading...