

LeapFrog 2-in-1 LeapTop Touch Parents' Manual
This guide contains important information. Please keep it for future reference.
Parent’s Guide
91-003356-000
US
INTRODUCTION
Thank you for purchasing the 2-in-1 LeapTop Touch™! Learning
is a tap away! Kids can learn about letters, numbers, music and
more on a laptop that’s made just for them. Open the laptop
to see the screen in keyboard mode, then close the laptop and
watch the screen magically swivel into tablet mode. Plus, the
laptop can be customized to help your child spell their name!
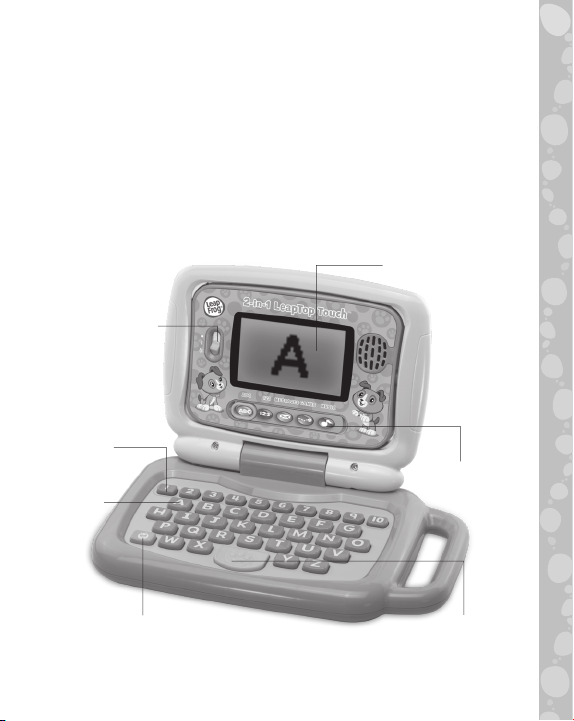
Light-Up Screen
On/Off/Volume
Control Switch
10 Number
Buttons
26 Letter
Buttons
Mode Selector
Silly Button
Paw Button
2
INCLUDED IN THIS PACKAGE
• One 2-in-1 LeapTop Touch
• One parent’s guide
WARNING:
All packing materials, such as tape, plastic sheets, packaging
locks, removable tags, cable ties and packaging screws are not
part of this toy, and should be discarded for your child’s safety.
ATTENTION:
Pour la sécurité de votre enfant, débarrassez-vous de tous
les produits d’emballage tels que rubans adhésifs, feuilles de
plastique, attaches, étiquettes et vis d’emballage. Ils ne font
pas partie du jouet.
NOTE:
Please keep this parent’s guide as it contains important
information.
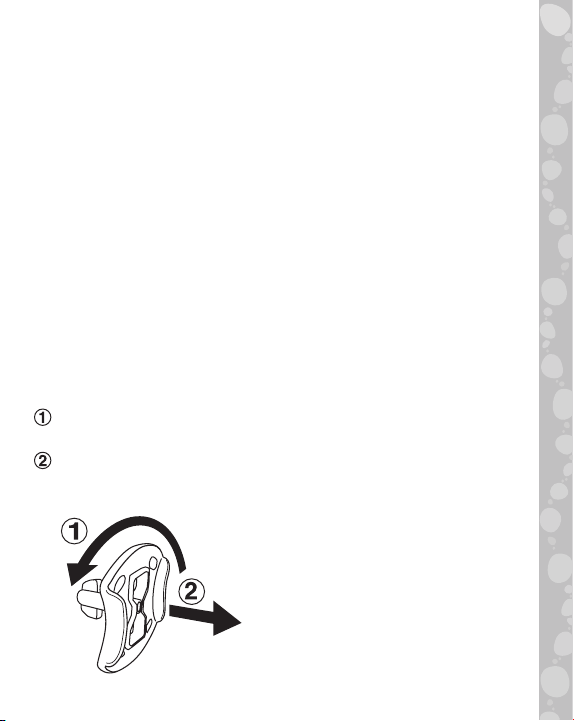
Unlock the packaging locks:
Rotate the packaging locks 90 degrees counterclockwise.
Pull out the packaging locks and discard.
TM
3

GETTING STARTED
BATTERY INSTALLATION
1. Make sure the unit is turned OFF.
2. Locate the battery cover on the bottom of the unit.
3. Use a screwdriver to loosen the screw and open the
battery cover.
4. Install 3 new AA (AM-3/LR6) batteries into the battery
box as illustrated. (The use of new alkaline batteries is
recommended for maximum performance.)
5. Replace the battery cover and tighten the screw to secure.
4
 Loading...