

LBL Lighting Mini-Veneto P User Manual
Installation Instructions for
980FSJMVNTP
Mini-Veneto
Fusion Jack™
GP I :ENERAL RODUCT NFORMATION
This product is ETL listed and suitable only for indoor dry locations
and approved for use at any height above the finished floor.
CAUTION - RISK OF FIRE
This product requires installation by a qualified
electrician. Before installing be sure to read all
instructions and TURNTHE POWER TO THE
ELECTRICAL BOX OFF.
HS379_
1.3
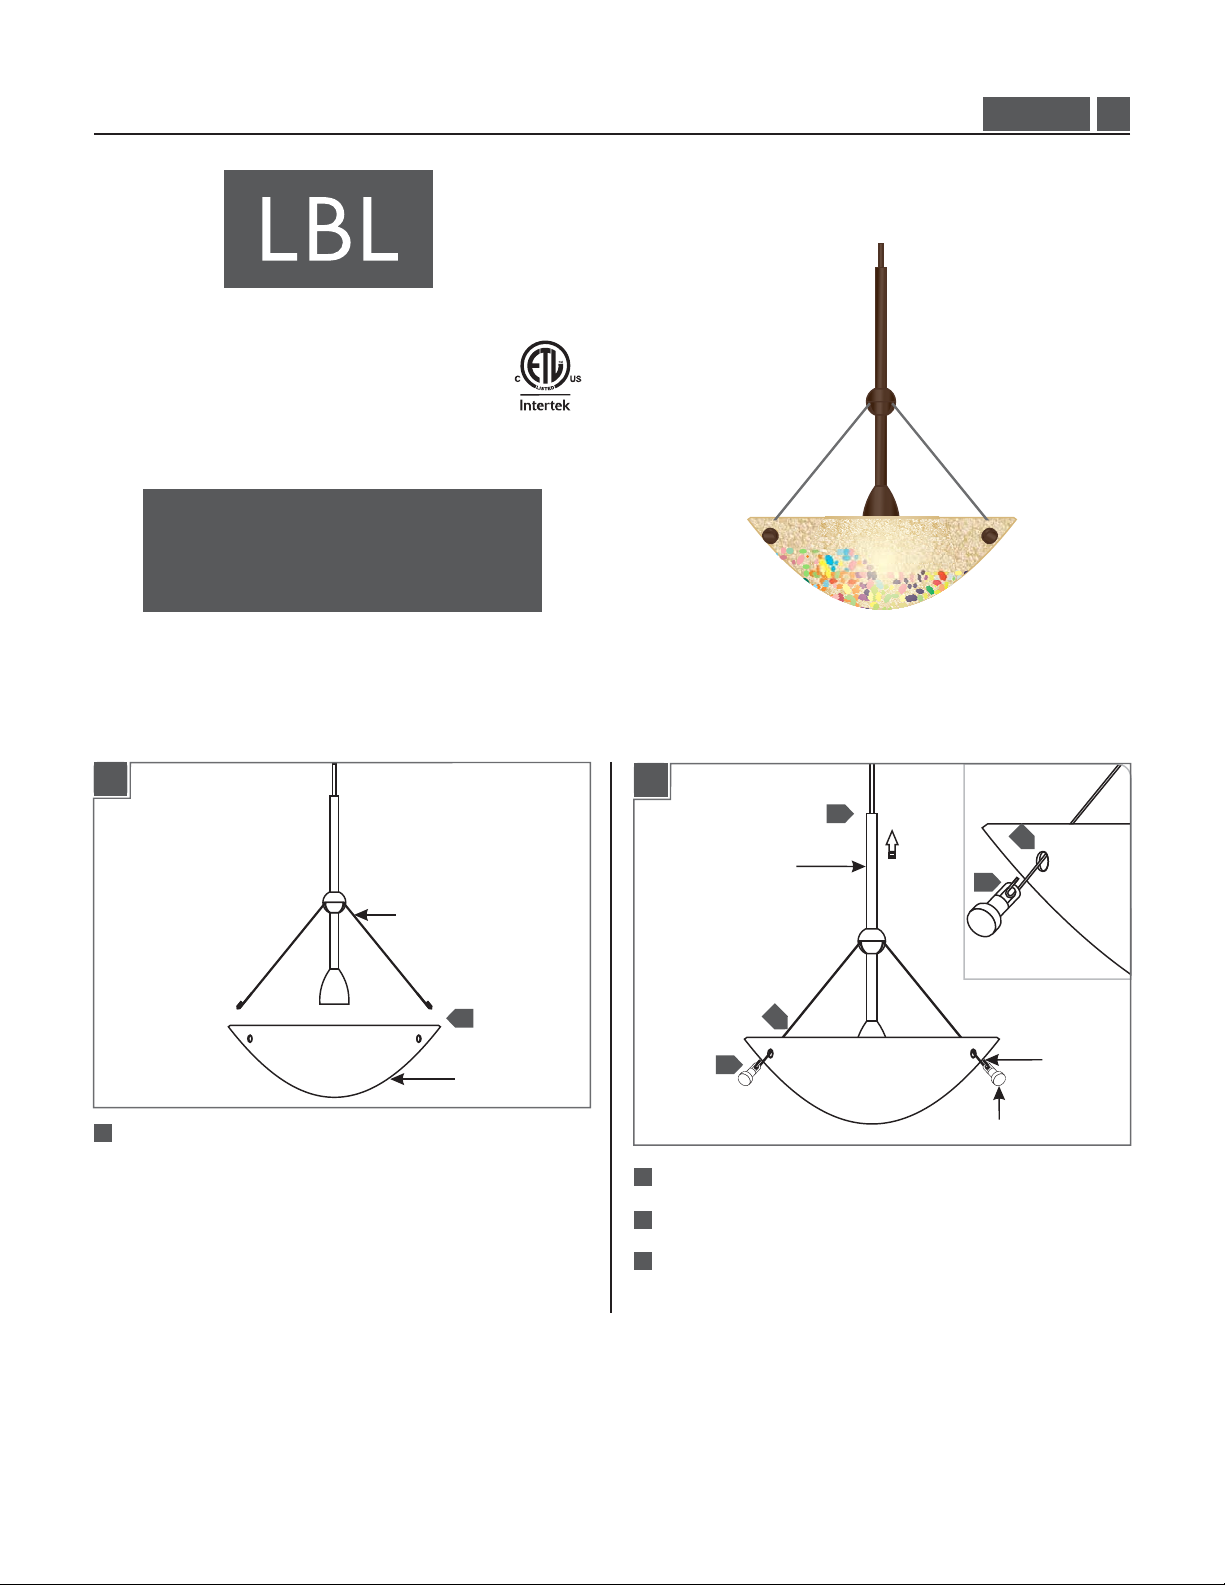
Install Lamp and Shade
1A
FIXTURE HOOKED WIRE
1
GLASS SHADE
1
Line up the fixture hooked wires with the glass shade holes.
1B
4
2
SOCKET ASSEMBLY
2
3
2
Insert the fixture hooked wires into the glass shade holes.
3
Insert each hooked wire into one support post slot.
4
Carefully, lift the socket assembly up to guide the support posts
into the glass holes. This will secure the glass in place.
3
FIXTURE
HOOKED
WIRE
SUPPORT POST
1
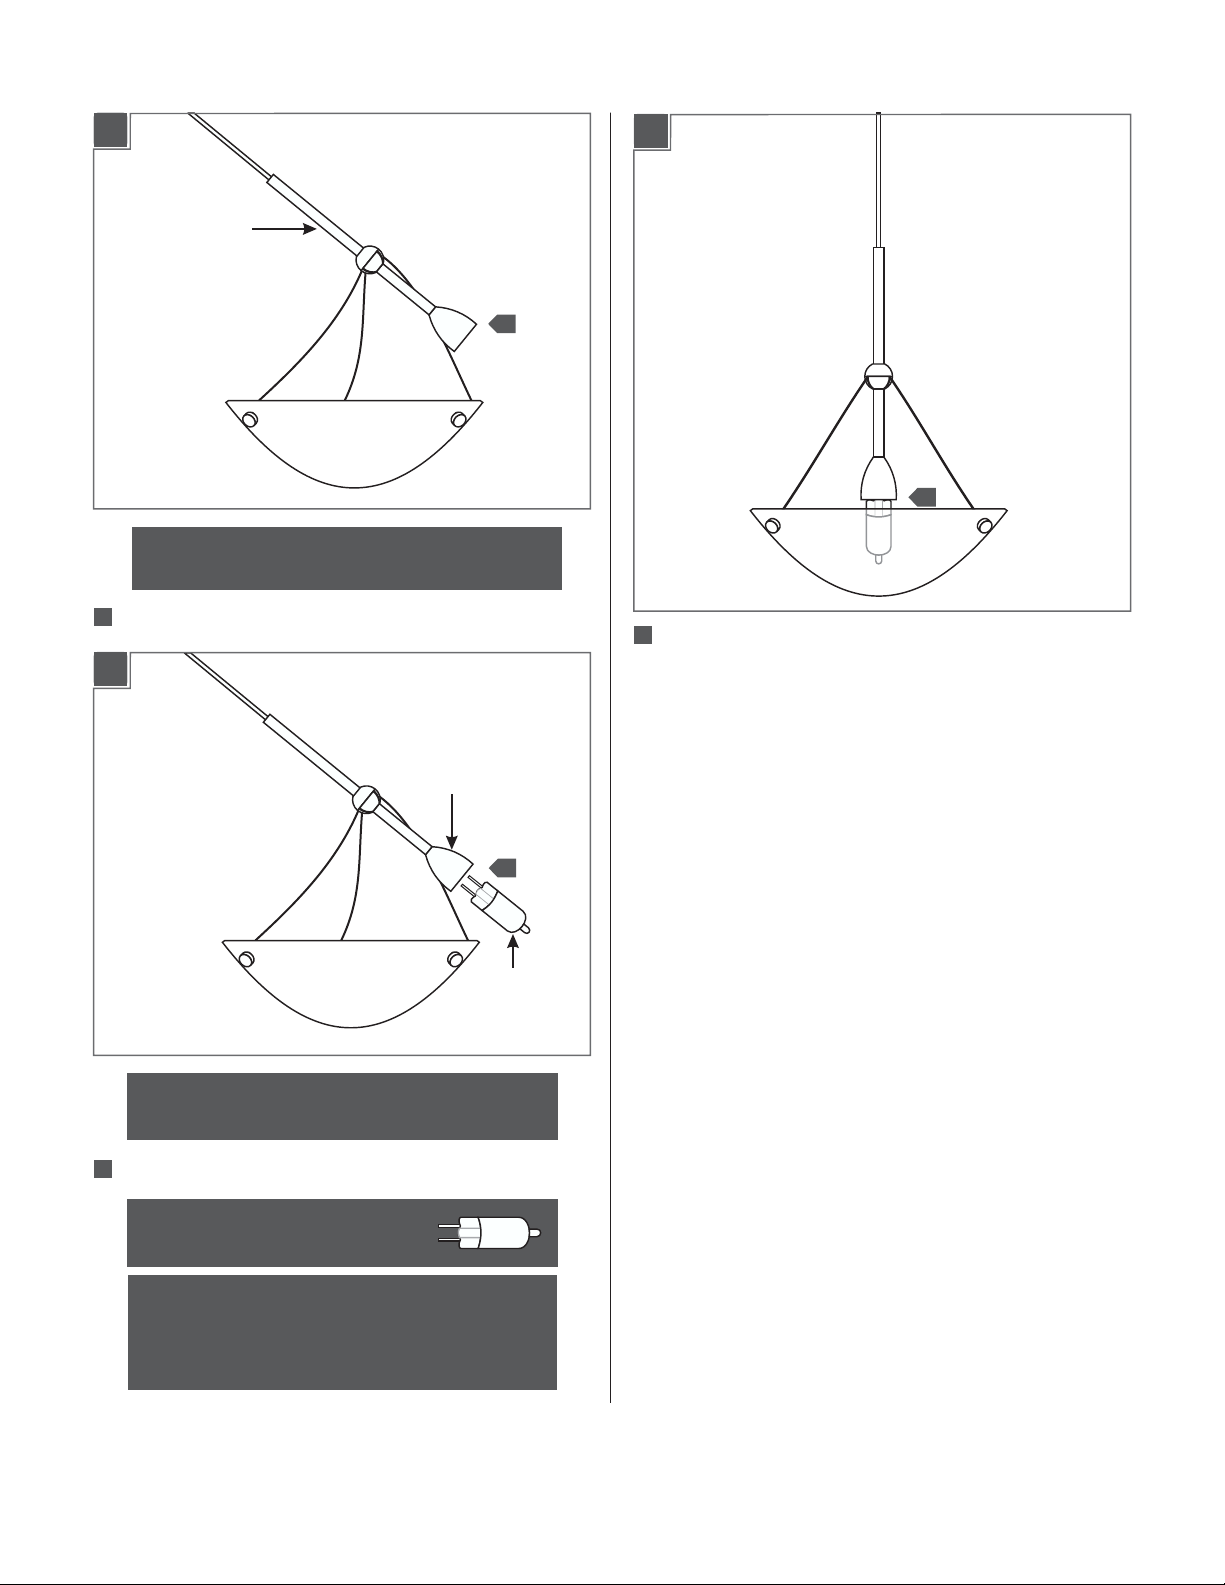
1C
SOCKET ASSEMBLY
NOTE:To reduce the risk of a burn or electric shock
during relamping, disconnect the power to the fixture.
5
Swing the socket assembly out of the glass shade.
1D
1E
5
7
7
Carefully swing the socket assembly back into the glass shade.
SOCKET
NOTE:Use only your fingers and soft cloth to replace
the lamp.
6
Push the lamp pins completely into the socket holes.
Use Watt,Type XelogenMAX 50
(Xenon) Bi-Pin Lamp.
WARNING: RISK OF FIRE
Never replace a Xenon (Xelogen) lamp with a regular
Halogen lamp.A regular Halogen lamp requires a
protective glass shield.
6
LAMP
2
 Loading...