

Page 1
Installation Instructions for
980FSJRCA
Fusion Jack Recessed Can Adapter
Fusion Jack™
GENERAL PRODUCT INFORMATION:
This product is suitable for indoor dry locations only.
The Fusion Jack recessed can adapter can be used with the
following Down Lights: Juno IC2, TC2, and TC2R; Halo H7T
and H7RT; Cooper Lighting H27RT, Capri (Thomas)
Lighting PR75ASIC/TPR75ASIC/DY6431; Progress Lighting
P7TG, P8-TG and PI08-TG.
LBL Lighting is not affiliated with, nor it is endorsed by, any
of the companies listed above. LBL Lighting does not
distribute or sell any of the products listed above.
CK001A-FJ-_
1.2
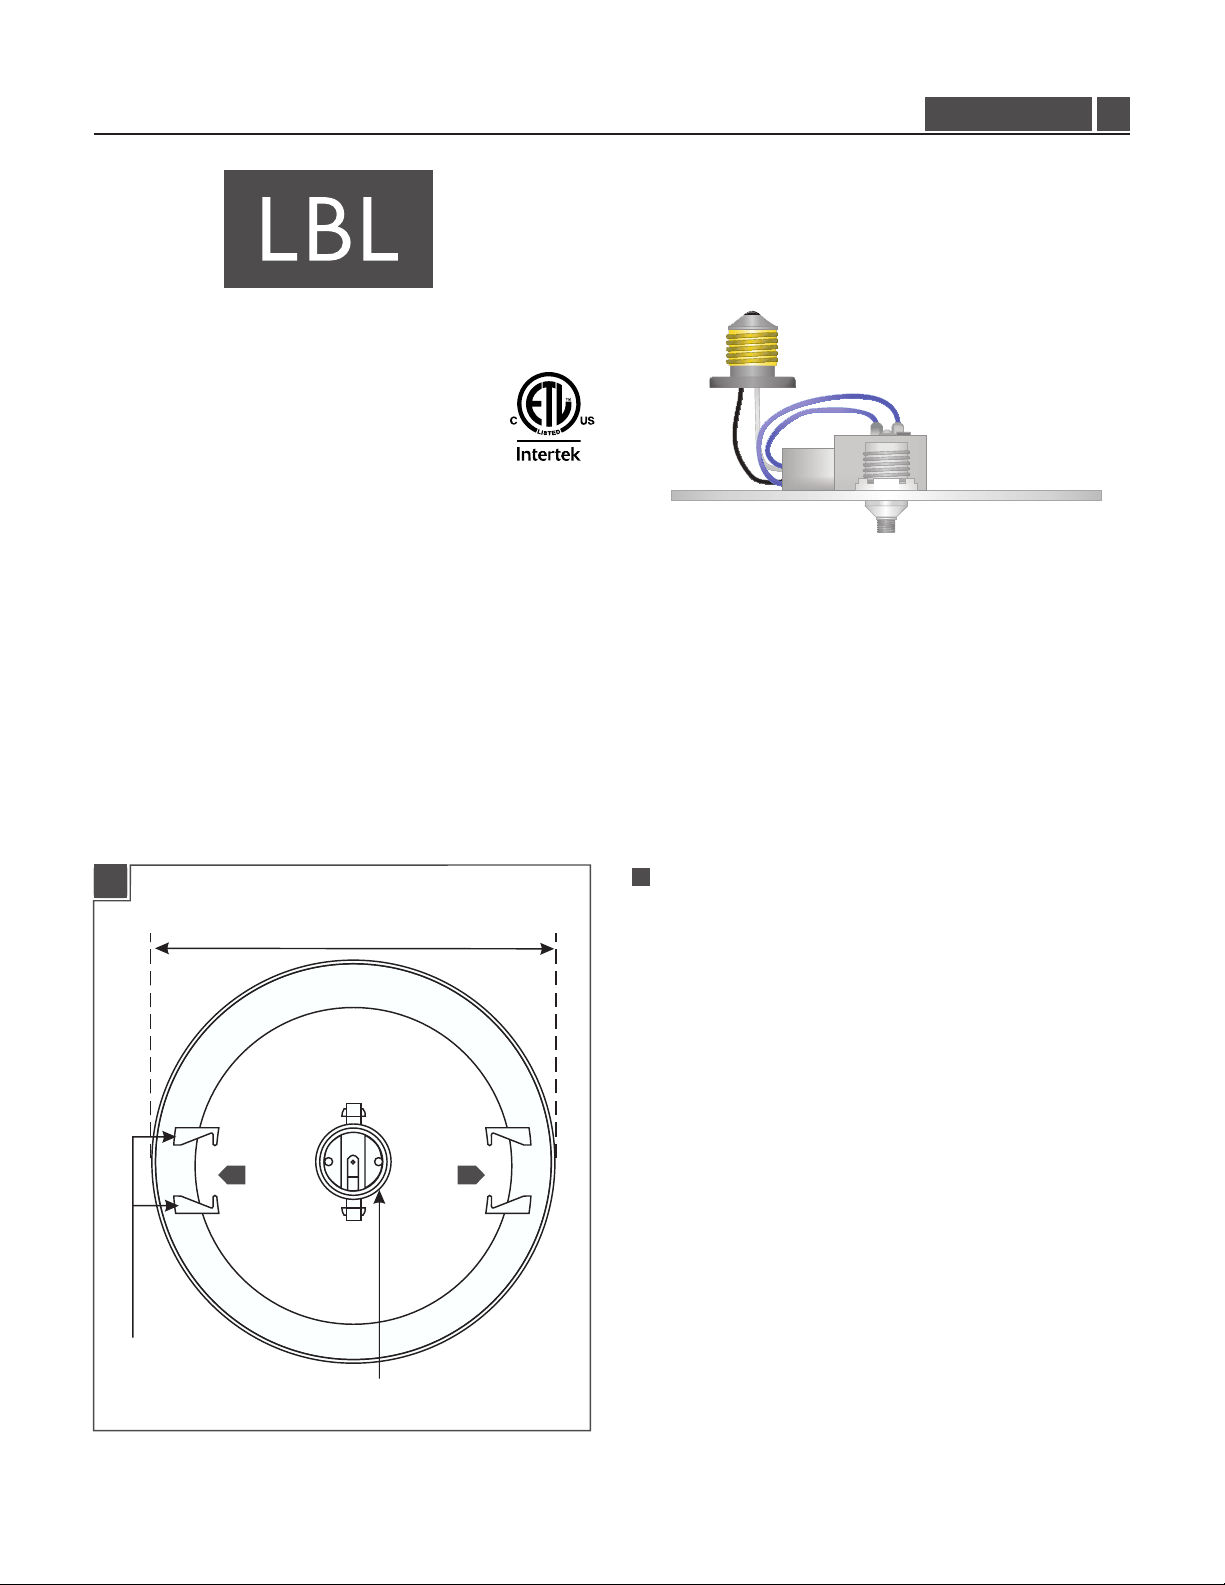
Down Light Specification
1A
6" TO 6-1/2"
"C" SHAPED
HOOKS
INCANDESCENT SOCKET
1
The Fusion Jack recessed can adapter can be mounted to
down light's that contain:
- "C" shape hooks on the inside of the can wall.
- That are 6" to 6-1/2" in diameter.
11
1
Page 2
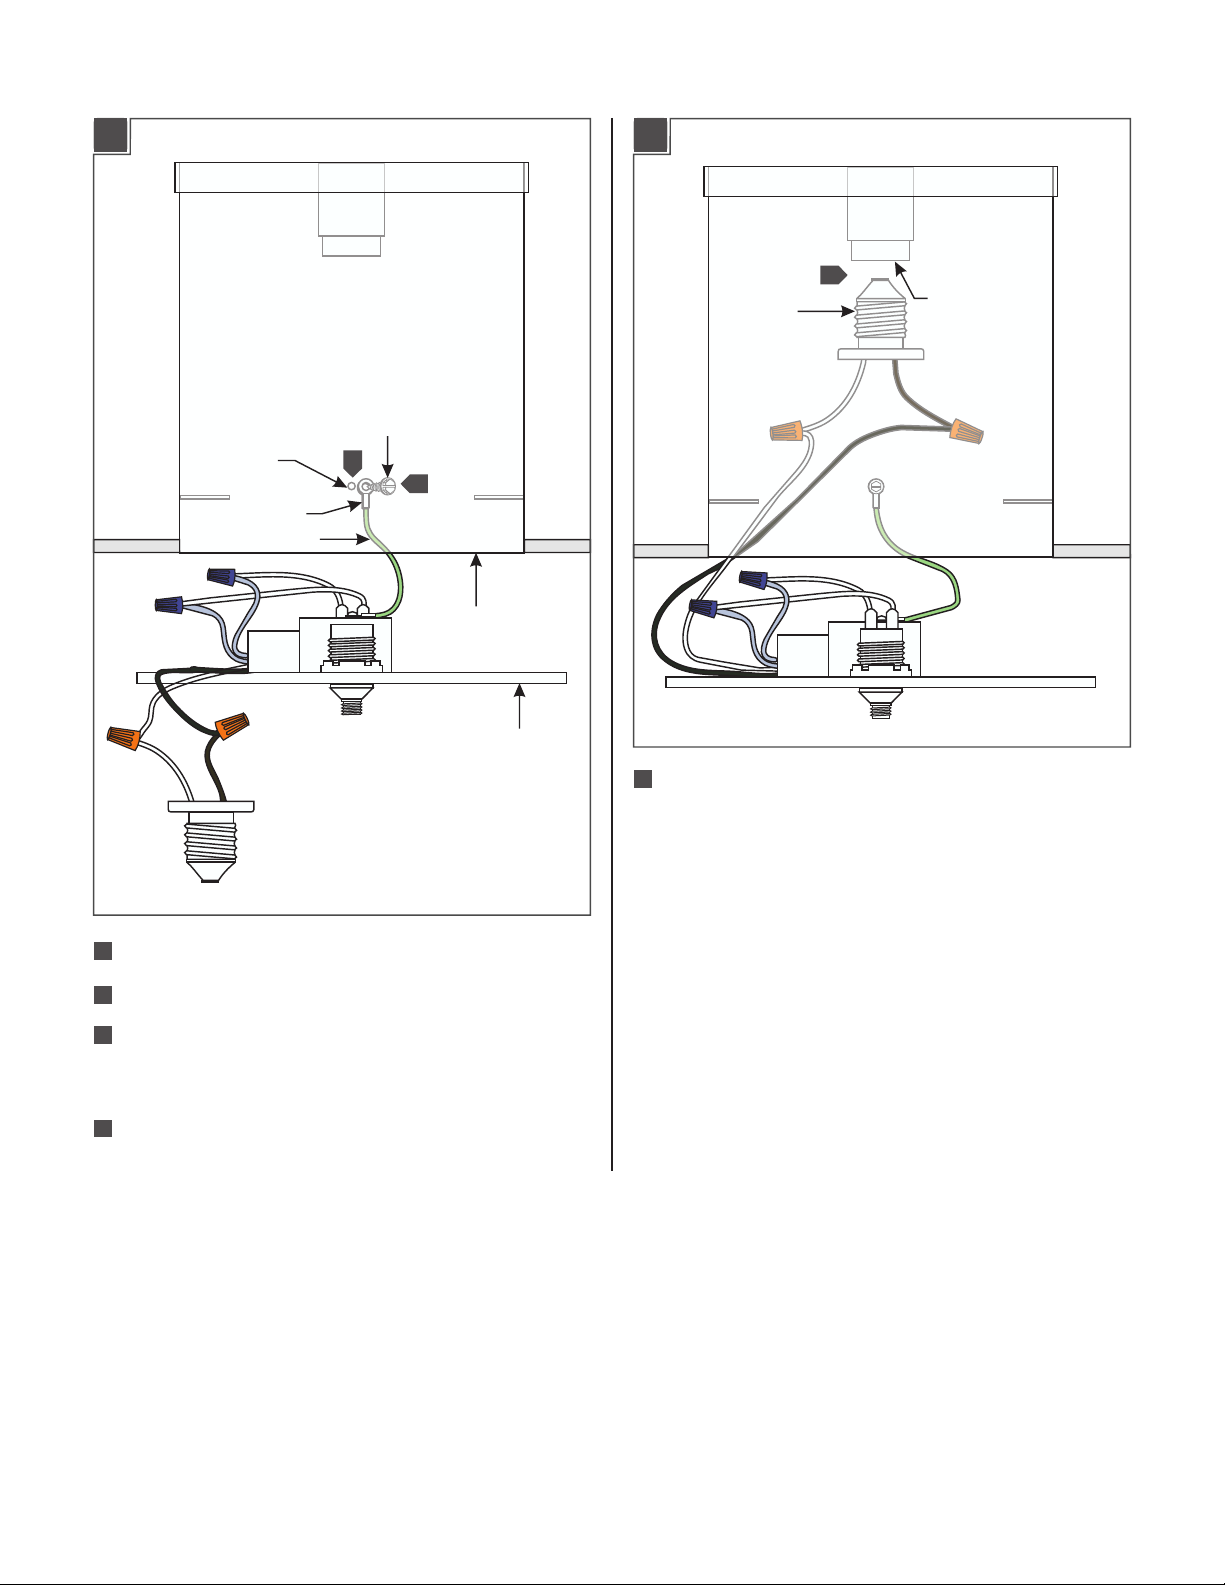
Power Connection
2A
9/64" HOLE
RING TERMINAL
GROUND WIRE
#8 SELF
TAPPING SCREW
3
4
RECESSED
DOWN LIGHT
2B
ADAPTER
5
INCANDESCENT
SOCKET
CANOPY
1
Turn the power to the recessed down light off.
2
Remove the existing trim and the incandescent lamp.
3
Drill a 9/64" hole inside the down light can wall (a pre-drilled
hole might exist that is applicable for the ground wire
connection).
4
Connect the canopy ground wire terminal to the drilled hole
with the #8 self tapping screw.
5
Screw the adapter tightly into the incandescent socket.
2
Page 3

Installing the Canopy Using the
Butterfly Anchors
3A
"C" SHAPED
HOOK
3
2
ALIGNED BUTTERFLY
ANCHORS
LONG SCREW
3B
LONG
SCREW
BUTTERFLY
ANCHOR
11
BUTTERFLY
ANCHOR
3
2
CANOPY
4 4
5
CANOPY
4
Align and hang the butterfly anchors onto the "C" shaped
5
"C" SHAPED
HOOK
hooks on both sides of the down light.
When the butterfly anchors are properly hung onto the "C"
5
shaped hooks, tighten the long screws by keeping a light
tension on the canopy. This will prevent the butterfly anchors
from slipping off of the "C" shaped hooks.
1
Bend the "C" shaped hooks slightly up to hold the butterfly
anchors.
2
Push the long screws through the canopy holes.
3
Screw the butterfly anchors onto the tip of the long screws.
Installing the Canopy Using the
Mounting Brackets
4A
CLEARANCE SIDE
HOLES
CLEARANCE CENTER
HOLE
1
There are four mounting brackets, two with threaded holes
and two with clearance holes. Each set uses a threaded and
clearance hole bracket.
THREADED SIDE
HOLES
THREADED HOLE
BRACKET
3
Page 4

4B
THREADED HOLE
BRACKET
3
4
4C
SHORT #8-32
SCREWS
"C" SHAPED
2
HOOKS
5
CLEARANCE
HOLE BRACKET
CANOPY
2
Bend the "C" shaped hooks slightly down to avoid cross
LONG #10-24
SCREWS
threading the long #10-24 screws that hold the canopy.
3
Lay one threaded hole bracket on top of the "C" shaped hook
so that the curved section of the bracket is in contact with the
inside can wall.
4
Similarly, from the bottom of the "C" shaped hook, hold the
clearance hole bracket. Line the two bracket holes up and
screw them together with the two short #8-32 screws so that
these brackets clamp the "C" shaped hooks.
5
Repeat steps 2 through 4 for the other "C" shaped hooks.
6 6
6
Screw the long #10-24 screws into the center hole of
brackets.
4D
FUSION JACK PORT
CONNECTOR
7
FUSION JACK FIXTURE
CONNECTOR
SAVE THESE INSTRUCTIONS!
7
Screw the Fusion Jack fixture connector into the Fusion Jack
port connector.
Turn the power on.
8
7400 Linder Ave, Skokie, IL 60077
800.323.3226 - 847.626.6300
www.lbllighting.com
© 2014 LBL Lighting. All rights reserved. The "LBL Lighting" graphic is a
registered trademark of LBL Lighting. LBL Lighting reserves the right to
change specifications for product improvements without notification.
4
A Generation Brands Company
 Loading...