

Page 1
Installation Instructions for
980CONSTCH
Constellation Chandelier
Fusion Jack™
GP I :ENERAL RODUCT NFORMATION
This product is suitable only for dry locations
and approved for use at any height above the finished floor.
This product can be dimmed with a low-voltage electronic dimmer.
Read through all the instructions before attempting installation.
CAUTION - RISK OF FIRE
This product must be installed in accordance with
the applicable installation code by a person familiar
with the construction and operation of the product
and the hazards involved.
Use minimum 90°c supply conductors.
HS513_
1.1
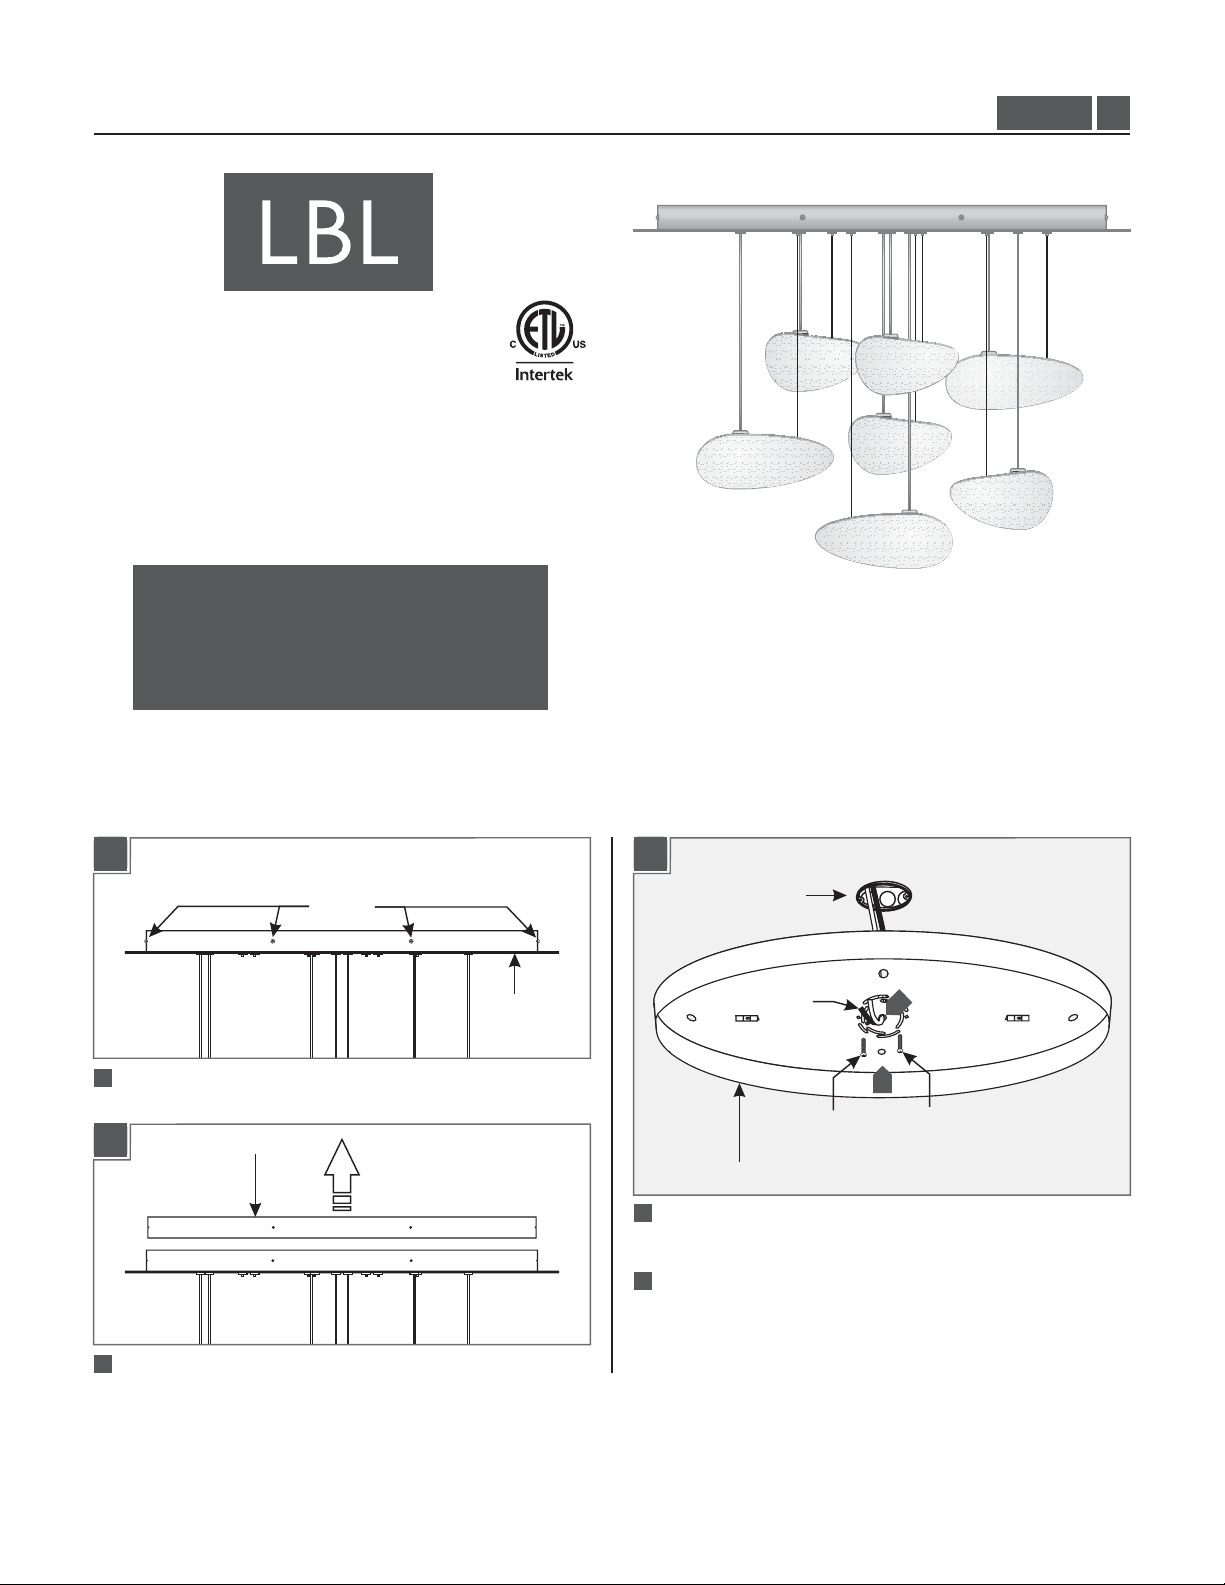
Mount the Backplate
1A
SCREWS
1
Remove all six screws from the sides of the canopy.
1B
2
Lift the backplate out of the canopy.
BACKPLATE
CANOPY
1C
ELECTRICAL BOX
POWER
LINE
WIRES
SCREW
BACKPLATE
3
Feed the power line wires through the center hole of the
backplate.
4
Mount the backplate to the electrical box with the two #8-32
button-head screws provided.
3
4
SCREW
1
Page 2
Attach the Canopy
1D
ANCHOR HOLE
5
ANCHOR
6
ANCHOR
6
5
Line up an anchor tip with one of the marks on the ceiling, and
push the anchor into the ceiling up to the threads.
6
Screw the anchor in the rest of the way with a screwdriver.
7
Repeat steps 6-7 for the other three anchors.
1E
2A
1
6
1
SAFETY
BRACKET
1
Hook a safety cable through the safety brackets on each end of
SAFETY
BRACKET
SAFETY
CABLE
the canopy and backplate.
2B
3
4
2
8
SCREW
WASHER
Secure the backplate to the anchors with a screw and washer
8
on each of the four anchors.
8
ANCHOR
88
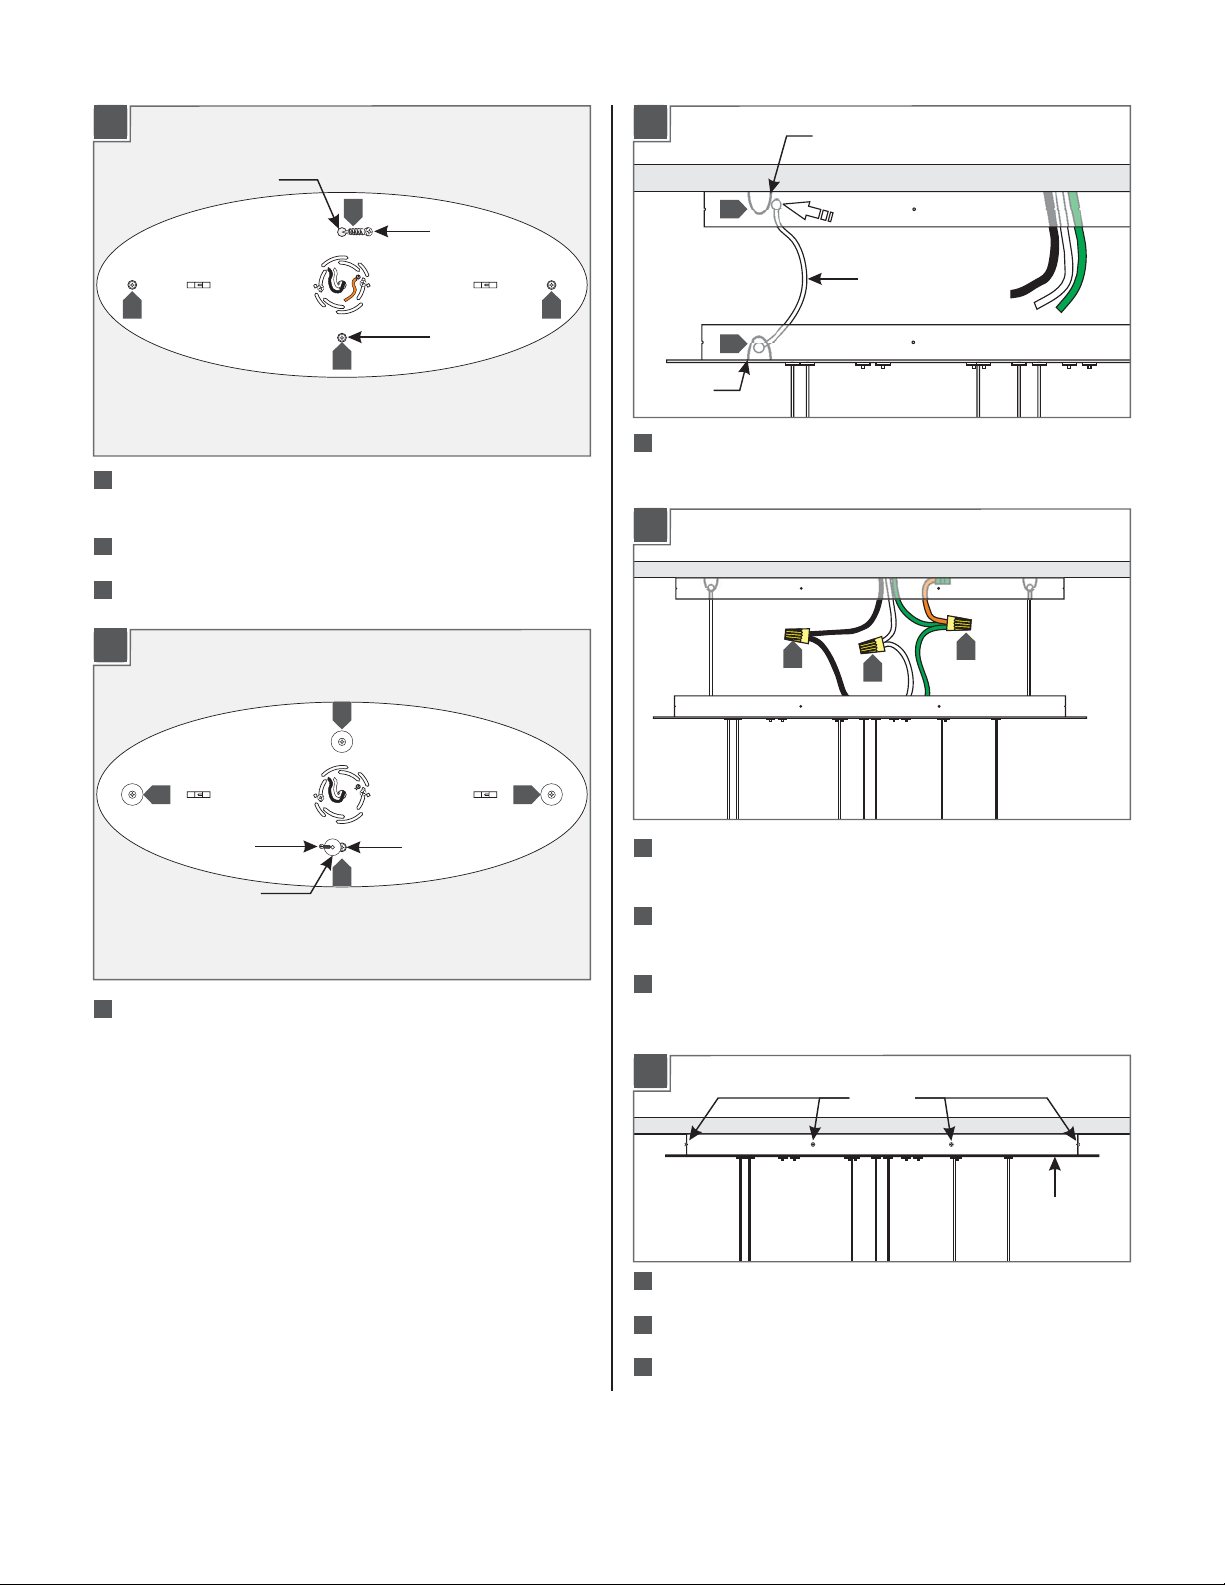
2
Connect the green canopy wire and bare copper backplate
wire to a suitable ground according to local electrical codes.
3
Connect the black canopy wire to the hot power line wire
with a wire nut.
Connect the white canopy wire to the neutral power line wire
4
with a wire nut.
2C
SCREWS
CANOPY
5
Place all wires and safety cables inside the canopy.
6
Slide the canopy onto the backplate.
7
Replace and tighten the six #8-32 screws to secure the canopy.
2
Page 3

Install the Lamps and Glass
3A
1
NOTE:Use only your fingers and a soft cloth to install
the lamp.
Use Frosted Bi-pinMAX 35 Watt
Xenon Lamp in each socket.
SOCKET
LAMP
3C
4
4
To adjust the glass holder (if necessary), bend the tabs in or out
slightly with needlenose pliers.
NOTE: Bend the tabs carefully. Excessive bending may
break the tabs.
TABS
NEEDLENOSE
PLIERS
1
Push the lamp pins completely into the socket holes.
Repeat for each socket.
3B
SUPPORT
CABLE
3
2
Refer to the diagrams on the back page to determine the
location of the glass piece.There are two different sizes of
glass: large and small.
GROOVED
GLASS HOLDER
GLASS
3D
CABLE
CLUTCH
NIPPLE
5
Push in the cable clutch nipple and feed in the support cable
from the glass.
6
Adjust the support cable until the glass is level. Feed the cable
into the cable clutch to raise the glass. Push in on the cable
clutch nipple to release the cable and lower the glass.
Repeat steps 1 through 4 for all the other glass pieces.
7
6
SUPPORT
CABLE
3
Push the glass opening completely onto the grooved glass
holder.The glass should fit snugly on the holder. If holder is too
big for the opening or the glass fits loosely on the holder,
follow step 4 to adjust the holder.
3
Page 4

BOTTOMVIEW
SIDE VIEW
L
S
S
S
L
L
S
S
L
SAVETHESE INSTRUCTIONS!
L
4
S
S
L
S
7400 Linder Ave, Skokie, IL 60077
800.323.3226 - 847.626.6300
www.lbllighting.com
© 2014 LBL Lighting.All rights reserved. The "LBL Lighting" graphic is a
registered trademark of LBL Lighting. LBL Lighting reserves the right to
change specifications for product improvements without notification.
A Generation Brands Company
 Loading...