

Lawmate TBR-1255CK, TBR-2455CK User Manual
TBR-1255CK/TBR-2455CK
Portable Sender & Receiver Kit
Manual
LawMate
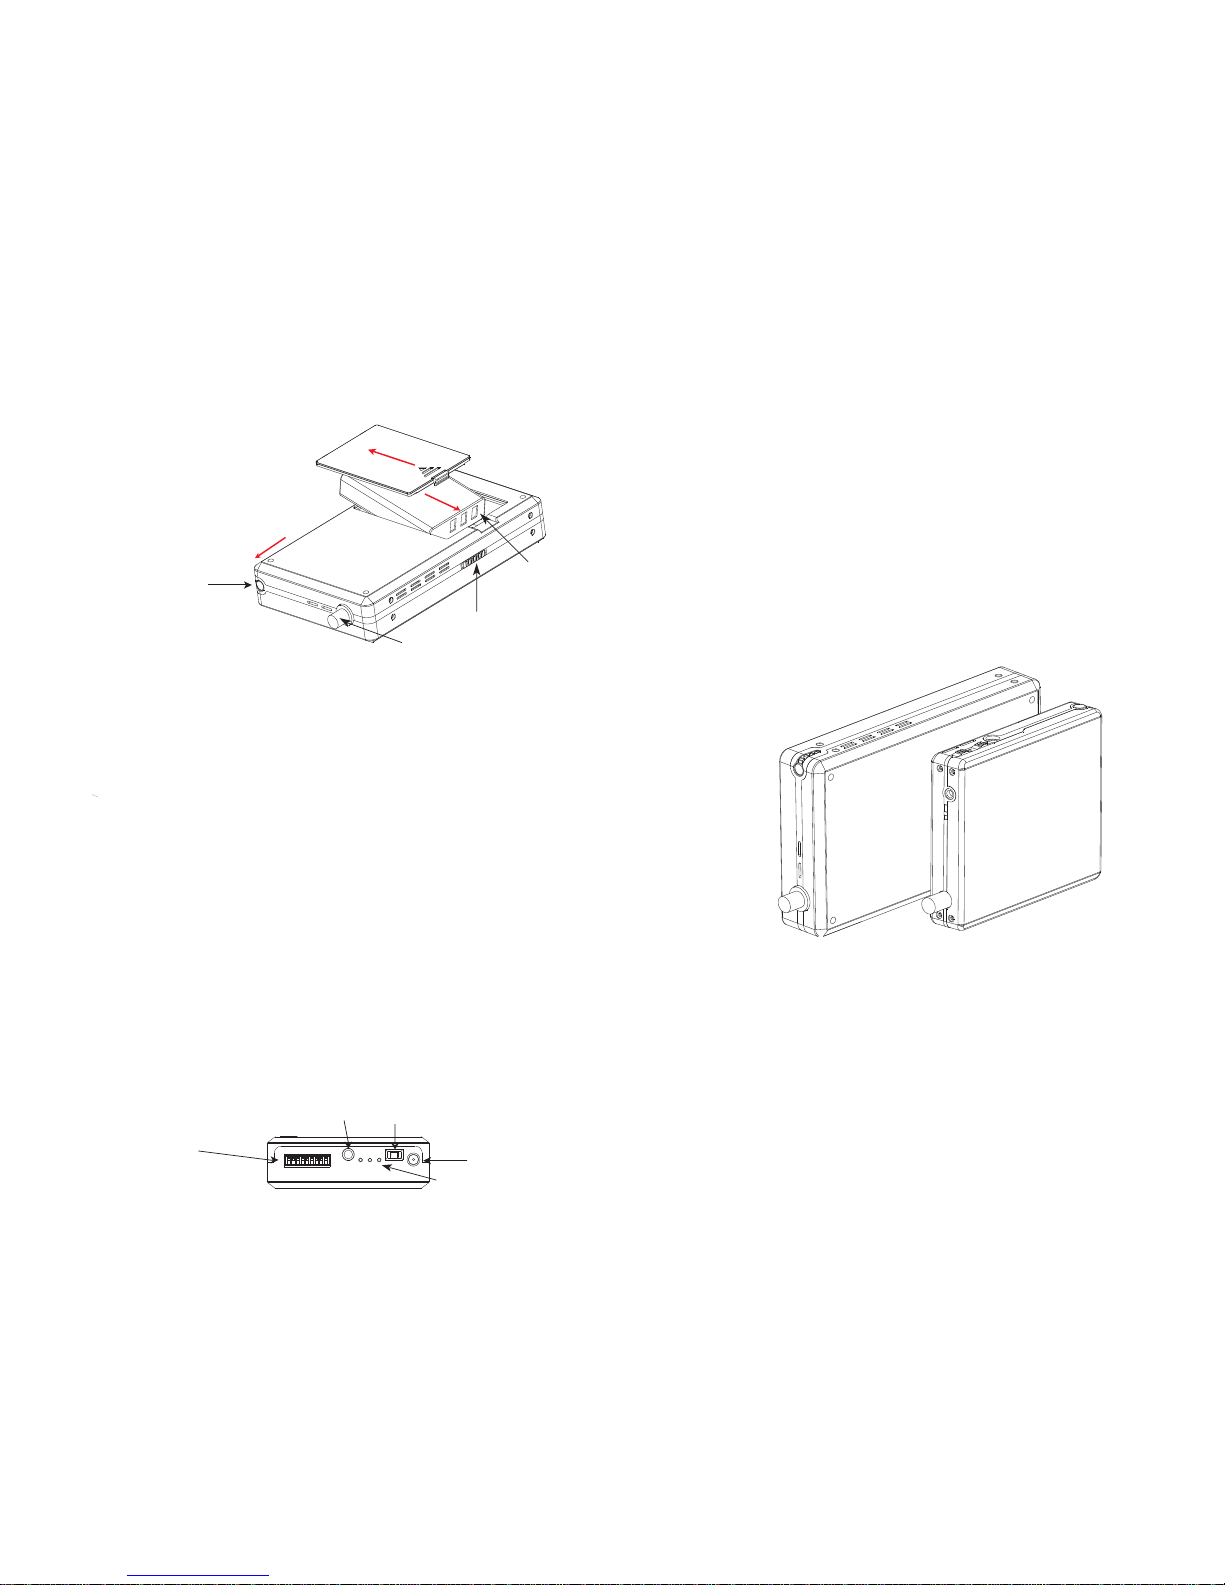
RX-1280BCK/2480BCK Receiver Operation Instruction
1).Placing battery
7).Channel pen
9).A/B group channel
10)Antenna connector
1).Placing a battery:
Open the back cover as the above red arrow direction, align the
supplied battery (NP-120) connectors with corresponding ones in the batt.
compartment and tilted push it as 15 dgree angle until it fits into the place.
2).Charging the battery:
Connect the supplied DC 5V power adapter to an AC wall outlet then connect
the other end of the power cord to the DC 5V In socket on base of the unit.
3).Power switch: As soon as power on,it will receive the transmitted signal
automatically. please twist the antenna tightly so that the transmitted signal
can be received well.
4-1).Charging: The 3 LED indicators will be blinking one by one when it is charging.
once 3 LED lights stop blinking and always light on, the unit is fully charged.
it needs to be charged about 3-4 hours normally,but at least 8 hours at the very first charge.
4-2).Low battery LED: When the unit is in use,3 LED will indicate the battery capacity level.
Such as all 3 LED will be on while the battery is just fully charged. If only one LED is on and
the other two is off, that means the battery needs to be charged right now.
5).Audio/Vedio out: Connect the attached cable”S-1R2R”and connect the other end to TV or DVR
(If there is no picture showed out please check the power is on and AV cable connects well)。
6).Channel adjustment: Push down the channel you need to receive the transmitted siganl from while
push down two channels if you need to receive two signal channels at the same time, the dwell time for
each channel is 4.5 sencons.(Be aware the channel adjustment on both sender & receiver must coincide with each other)
7).Channel adjustment pen: Please take out the adjustment pen as the arrow indicator showed. Push down the channel dip
switch you need by this pen with ease.
8).Antenna mount: Twist the attached antenna tightly,make the antenna straight up. It shall get better performance making the sender’s position higher than
the receiver position as possible as it could
9).A/B group channel: The factory setting is A group channel, you don’t need to switch to B group which will be for extended channel use in the future
2).Power In
3).Power switch
4-1).Charger LED
(Low battery indicator)
5).A/V out
6).Channel adjustment
(DC 5V Adaptor)
RX-1280BCK/RX-2480BCK Receiver
TB-1255CK/TB-2455CK Sender
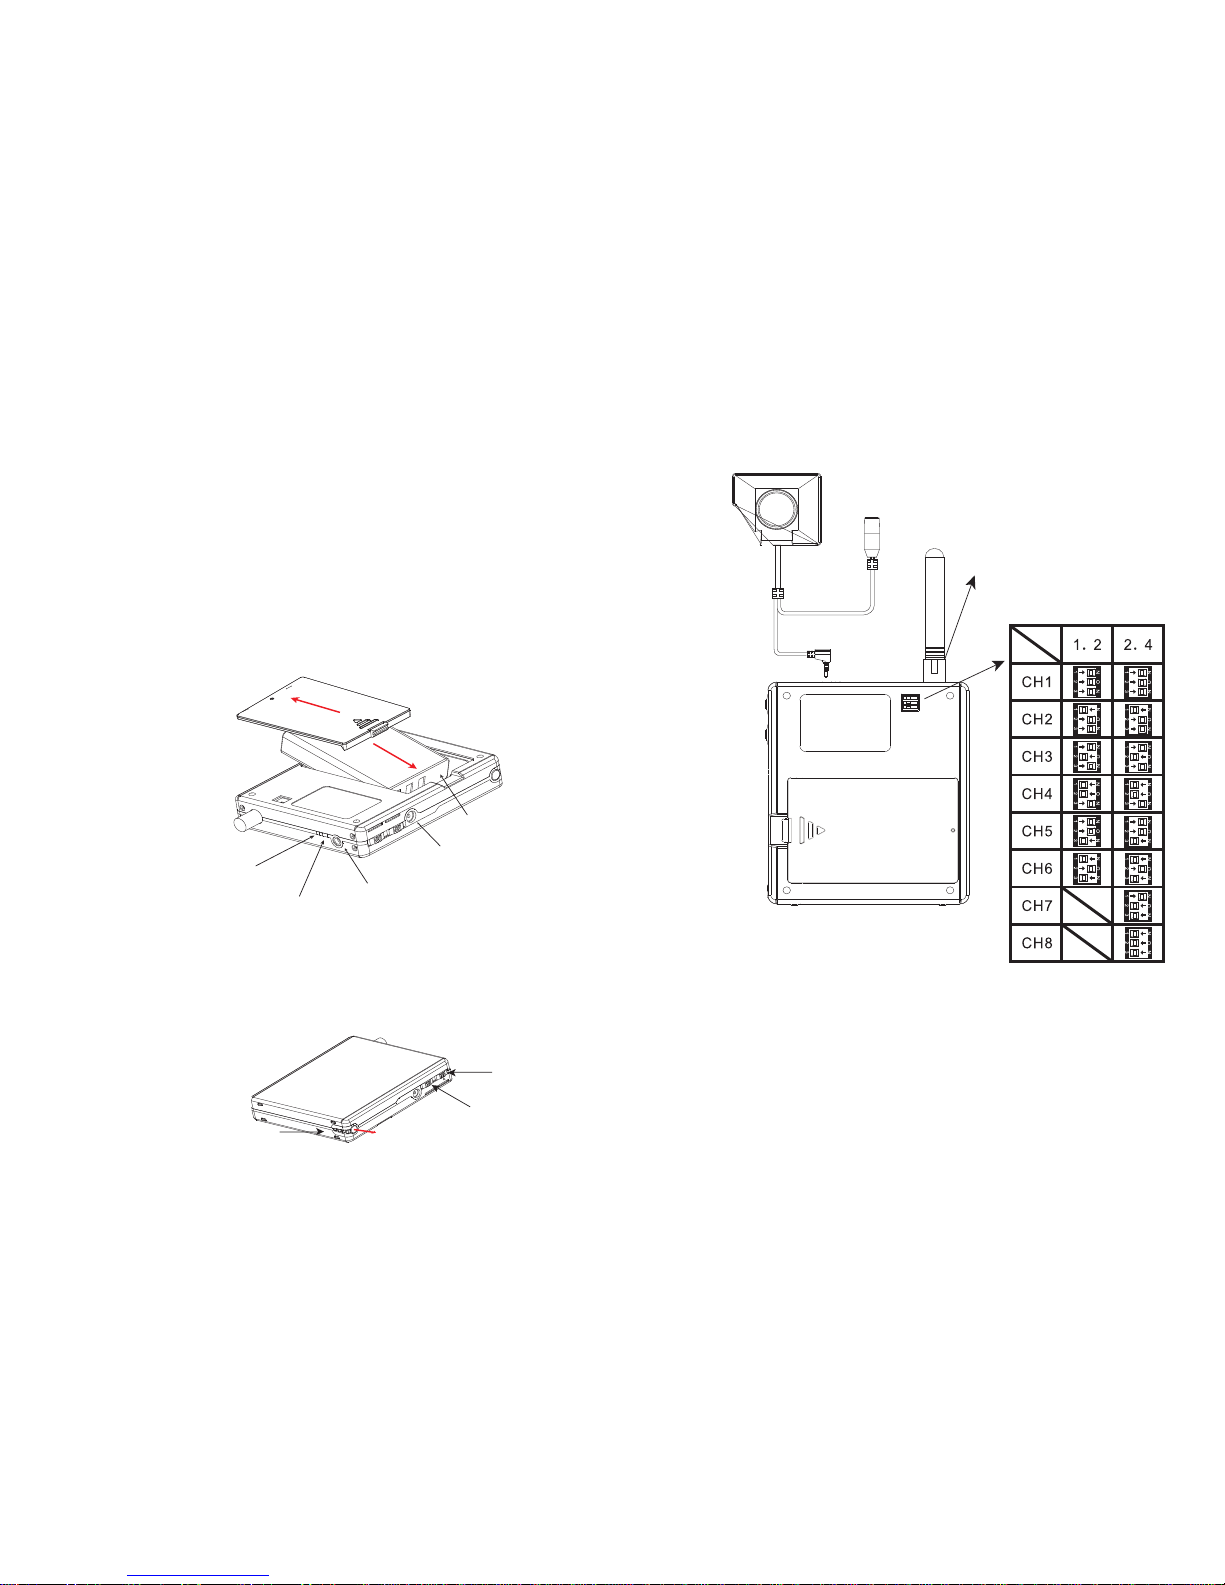
5).External camera in port
TB-1255CK/TB-2455CK Sender Operation Instruction
(NP-120)
1).Placing the battery: Remove the back cover as the above red arrow direction,
align the supplied battery (NP-120) connectors with corresponding connectors in the compartment
then tilted push it as 15 degree angle until it fits into the place.( Be aware of + - direction)
2).Charging the battery: Connect the supplied DC 5V power adapter to an AC wall outlet,
then connect the other end of the power cord to the DC 5V In port on base of the unit.
3).Charging indicator: A blue LED will start blinking to show that it is charging.
once LED lights has turned off,the unit is now fully charged and is ready to use.
(normally needs to charge 3-4 hours,according to current battery capacity).
but it needs at least 8 hours for charge at the first time.
4).Low battery indicator: A Red LED will light on to show the capacity of battery is low
then you have to charge it at once.
5).Camera in port: Conncet the external camera, The unit will receive the signal from the
camera and supply DC 5V power to the camera. (make sure the camera is connected well)
2).Power in (DC 5V Adaptor)
7).Power Switch
6).Lo-Batt. vibrate alert switch
8).Channel switching pen
1).Placing the battery
3).Charging indicator
4).Lo-Batt. indicator
9).Channel switch
10) Antenna mount
6).Low battery vibration alert awitch: Once you switch it on, the unit will vibrate when the battery is low.
7).Power switch: As soon as power on,it will transmitter the A/V singal to the receiver
automatically. please twist the antenna tightly so that the transmitted signal can be received well.
8).Channel switching pen: Please take it out as the arrow indicator. Use it to switch to the channel you need.
9).Channel switching: Refer to the above picture instruction,use
the switch pen to adjust to the channel that you need
(Be aware the channel adjustment on both sender & receiver must
coincide with each other)
10).Antenna mount: Twist the attached antenna tightly,make the
antenna straight up. It shall get better performance making the
sender’s position higher than the receiver’s as possible as it could
 Loading...