

Lawmate PV-RC300 Operation Manual

PV-RC300
MINI DVR OPERATION MANUAL
Law Enforcement Products Manufacturer
LawMate
Power LED (Blue)
Memory mode
Photo mode
REC/Photo LED(Red)
Charge LED (Green)
Microphone
Camera
Micro SD slot
Power On/Off switch
USB/Charge port
REC mode
Webcam mode
2.Standard accessories
1.Introduction
CD
Manual
Windshield mount
(1)
USB/Charge cable
USB
Charge
On Off
Photo Rec
Webcam
Memory
Reset
Micro SD Card
PV-RC300
Car charger
DC5V charger
Webcam driver
Pocket clip
T-Shirt clip
Reset
4.Inserting Micro SD card
(2)
(3)
Micro SD
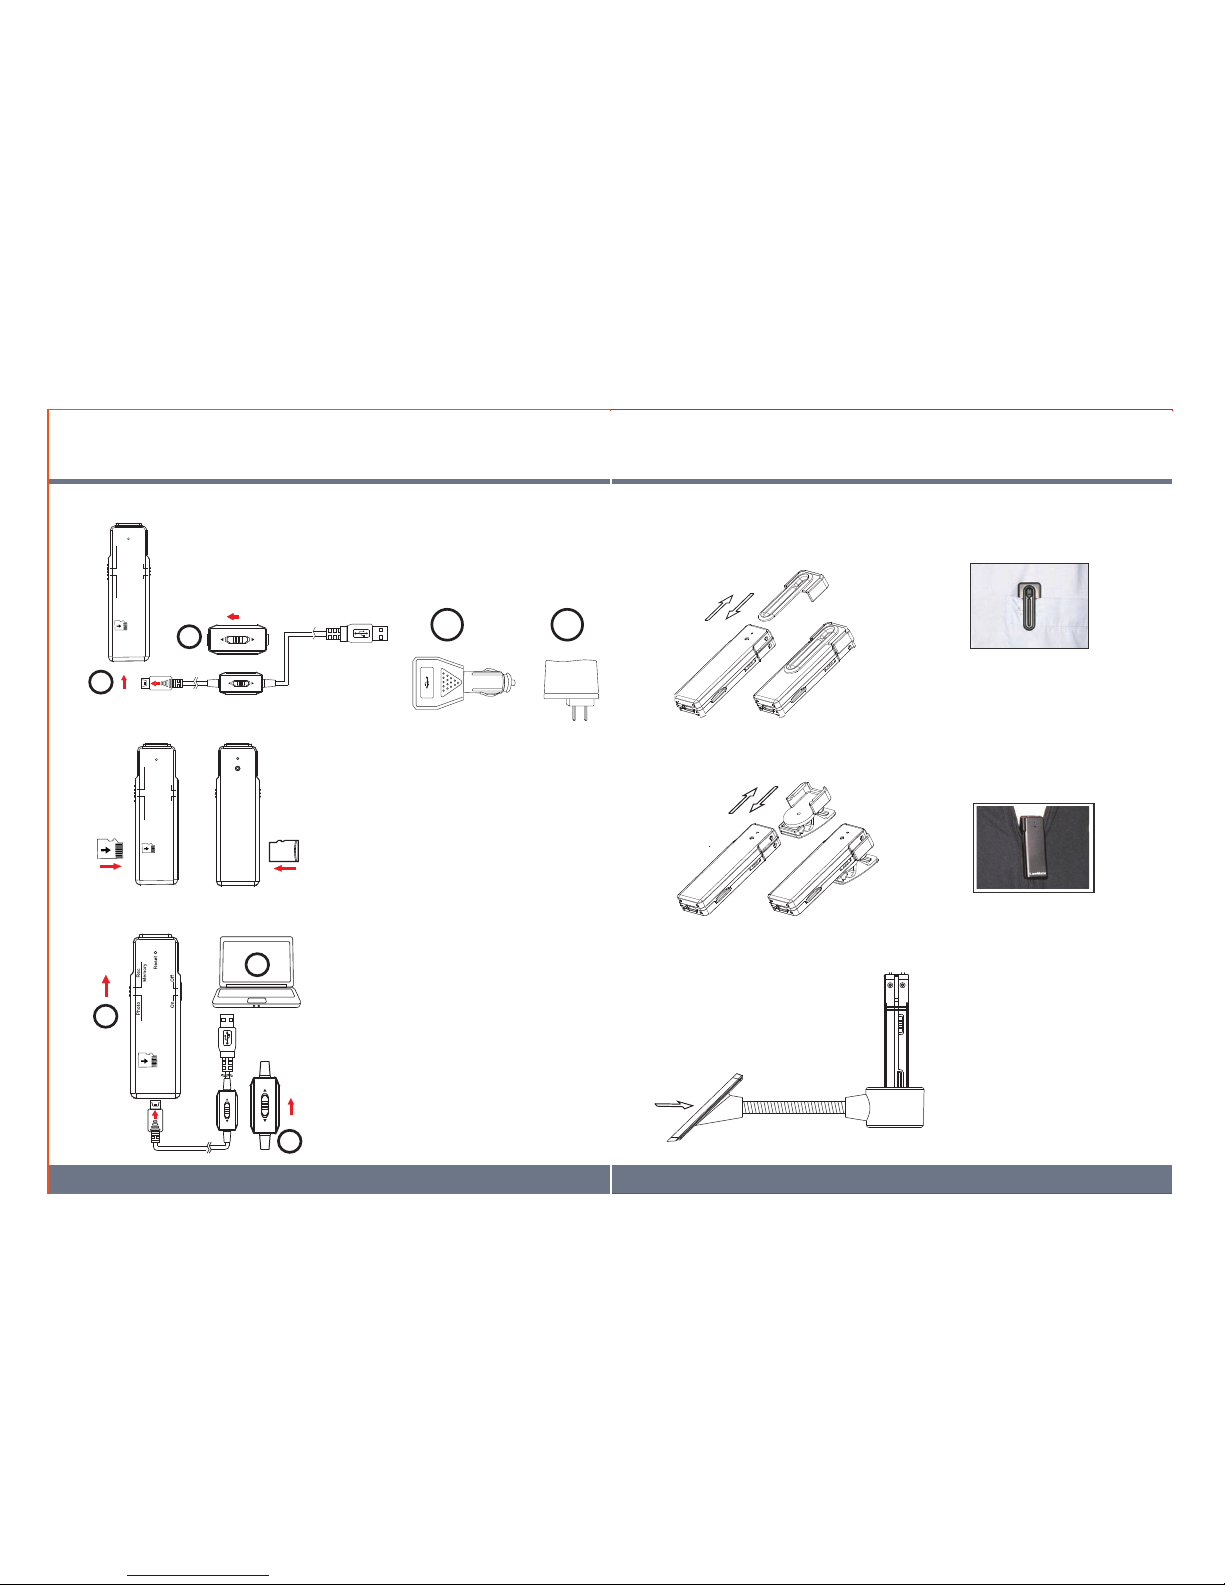
6.Various ways to use
3.Charging the battery
5.Date and time setting
On Off
Photo Rec
Webcam
Memory
Reset
On Off
Photo Rec
Webcam
Memory
Reset
USB
Charge
USB
Charge
1. Connect the supplied USB cable to the socket on the bottom of the device
2. Slide the switch on the cable to charge position
3. Charging options
a) Connect the other end of the cable to car charger
b) Connect the other end of the cable to wall charger(AC110-250V)
1
2
3a
Insert the Micro SD card gently to the
SD slot on the side of the device. Make
sure the golden contact area of the card
is facing upward. To eject the SD card,
gently push and release it. The card will
pop out from the slot
Webcam
USB
Charge
USB
Charge
1
2
3
6-1 Pocket Clip
6-2 T-Shirt Clip
6-3 Windshield Mount
1. Apply 3M Velcro to the base of the
mount and attach it to the windshield.
2. Place the device into the ring. The
windshield mount will firmly hold
the device
3. You may choose to point the camera.
facing outside or inside the car.
4. To charge the device in a car,
connect the supplied cable to the
device and the other end to the car
charger
3b
3M Velcro
1. Right-click your mouse on Windows desktop
Choose Notepad from the menu to create a .txt file
2. Double click on th newly created Notepad file
3. Assuming the current time is 2009, March, 9th
14:00p.m. Enter the date time information identically
as below, 2009.03-09 14:00:00
Please note the format MUST be identical as the
example. A space must be present in between date
and hour and time must be in 24-hour format
4. Name the file as “settime.txt” and save
5. Power on the PV-RC300 then connect it to the
computer
6. Copy the settime.txt file from Windows desktop to
the root directory of PV-RC300
7. Disconnect the PV-RC300 from computer
8. Power on the PV-RC300 first then power it off, now
the date and time setting is completed
9. To reset date and time, repeat above steps
 Loading...