

Lawmate PV-AC30 Quick Manual
PV-AC30
Video Recorder in Adapter Design
Quick Guide
V1.0
(3)
LawMate
Law Enforcement Product Manufacturer
SD
Card
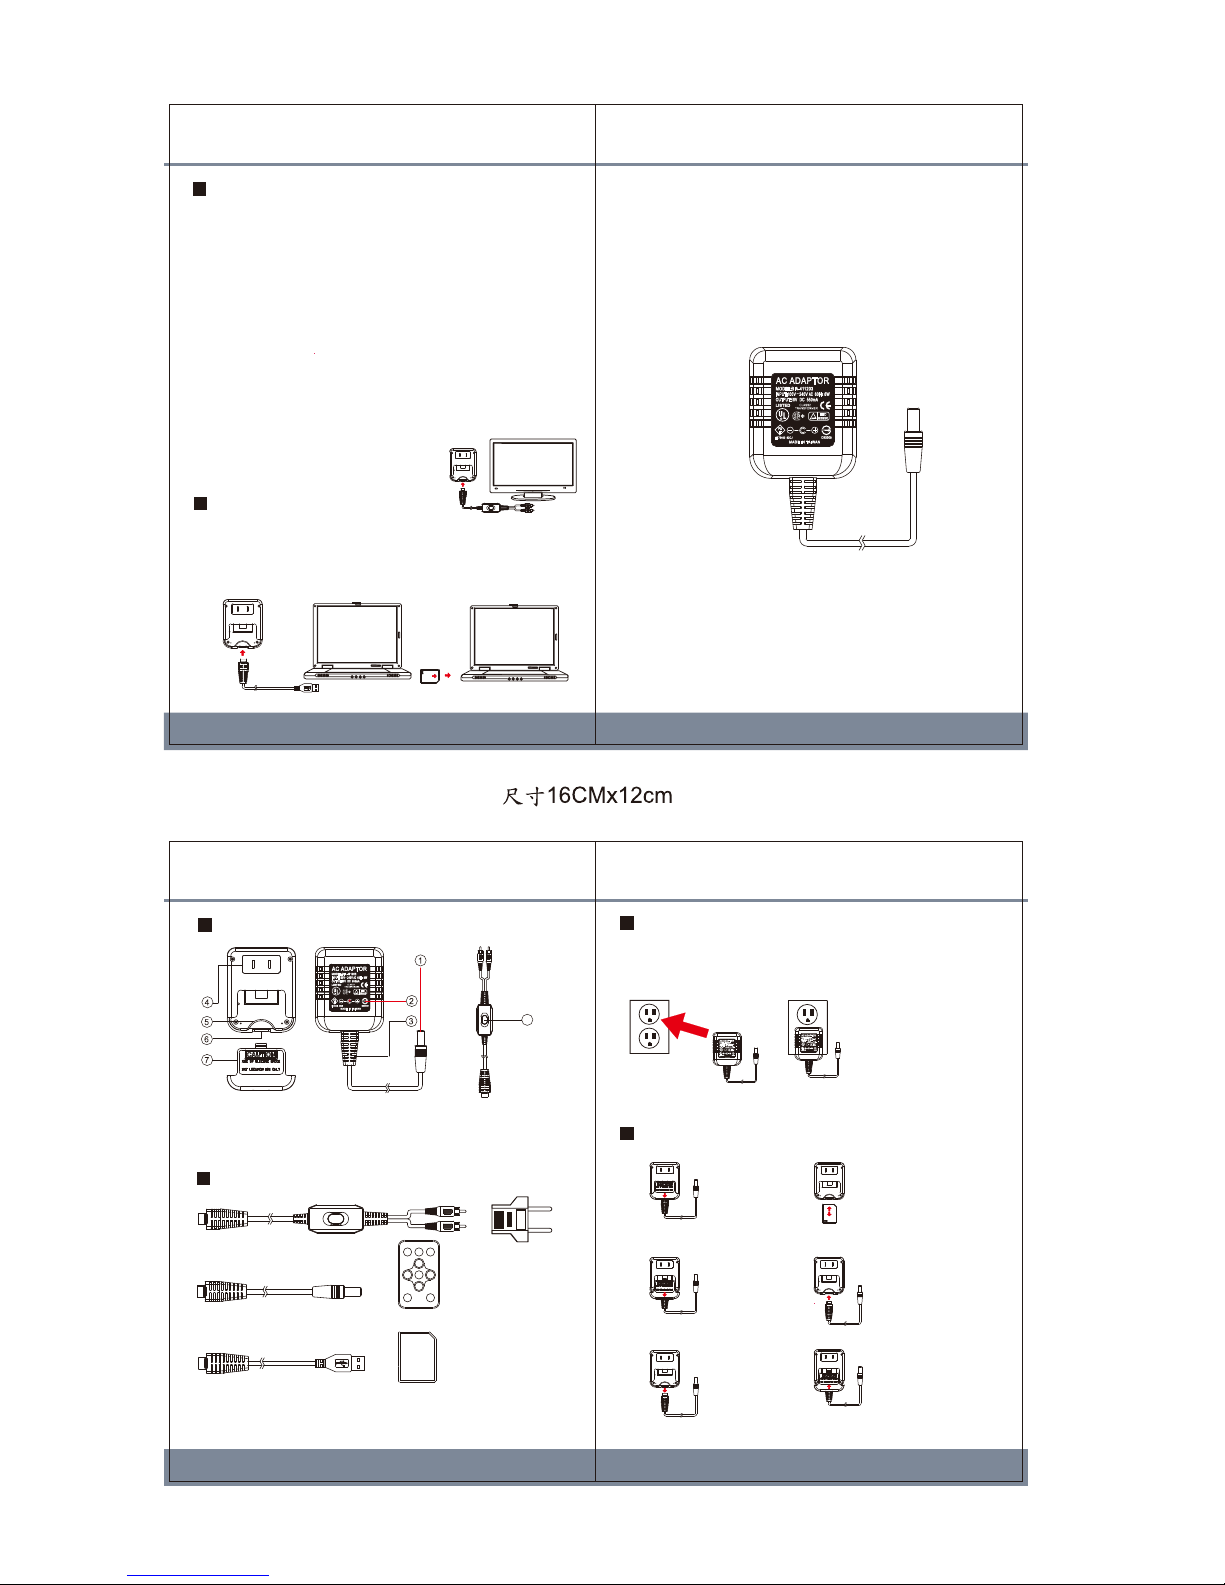
Package Content
Name and Parts
IR Remote Control
SD Memory Card
(4GB above)
USB Connection Cable
European Standard
Adapter Head
A/V Out Cable
1. Camera Lens
2. Microphone
3. Covert Power Cord
4. Two Prong Power Supply
5. SD Card Slot
6. Mini USB Port
7. Bottom Covert Piece
8. IR Sensor
Covert Power Cord Camera
8
(1)
(2)
DVR Installation
Step 1
Step 2
Step 3
Step 5
Step 6
Step 4
1. Slide the bottom
covert piece
in downward
direction.
2. Gently remove
the covert piece
completely.
3. Gently remove
the covert power
cord completely.
4. Insert 4GB storage
above SD memory
card into SD card slot.
5. Insert the covert power
cord into original
position.
6. Slide the bottom covert
piece back to original
position.
Retrieving Video Footage
1. Video file is stored in the SDHC Memory card.
2. There are two methods to retrieve video files.
(1) Using USB Cable to connect to computer
(2) Using SD card reader to read and write folder directory
3. Computer detects the storage and user may browse and
operate the storage as typical folder directory.
i.e.Rename, copy and paste, delete, duplicate, etc.
Using DVR
1. Plug-in DVR into wall outlet as shown in the illustration in
Powering DVR section.
2. Connects DVR using A/V Cable to connect to TV or monitor.
3. Operates IR remote controller to access Main Menu and
submenu via user interface shown on display. Note: IR remote
control is required to aim the IR sensor on the A/V out cable.
4. Access setting menu: Main Menu > Recorder Setting
5. Two different recording modes: (1) Normal (2) Motion Detect
6. Unplug DVR from wall outlet after setting is completed.
DVR saves the setting.
7. Plug-in DVR to wall outlet again to activate last saved setting.
8. DVR starts recording automatically when the DVR is plugged
into wall outlet. Recording mode is set according to last
change made on the Main Menu.
Powering DVR
1. This DVR is not powered by battery; instead, it is powered by
two-prong wall outlet.
2. Plug-in DVR into wall outlet as shown in the illustration below.
3. DVR starts recording automatically in motion detection mode.
(1)
(2)
NOTE:
This product is also compatible with extension cord in order to
adjust plug-in angle!
NOTE
Normal Recording is defined as continuously recording until memory
storage is full. Motion Detect recording is defined as being triggered by any
detected movement. Each video file is limited to 30 minutes recording in
Normal Recording mode and 1min/3min/5min recording in Motion Detect
recording mode. Selection can be made via user interface shown on display.
i.e. Main Menu>Recorder Setting>Motion Detect> Time.
File overwrite function is compatible to both
Normal and Motion Detect Recording mode.
 Loading...