

Lawmate PV-500EVO User Manual

CHAPTER 01 OVERVIEW 02
02 FUNCTION MODES 05
03 BASIC OPERATION 06
04 INTRODUCTION OF ALL SETTING FUNCTIONS 10
05 VIDEO PLAYBACK 22
06 VIDEO EDITING 25
07 PHOTO BROWSING 26
08 PHOTO EDITING MODE 27
09 SUPPORTED IMAGE FILE FORMAT 29
10 RECORD 30
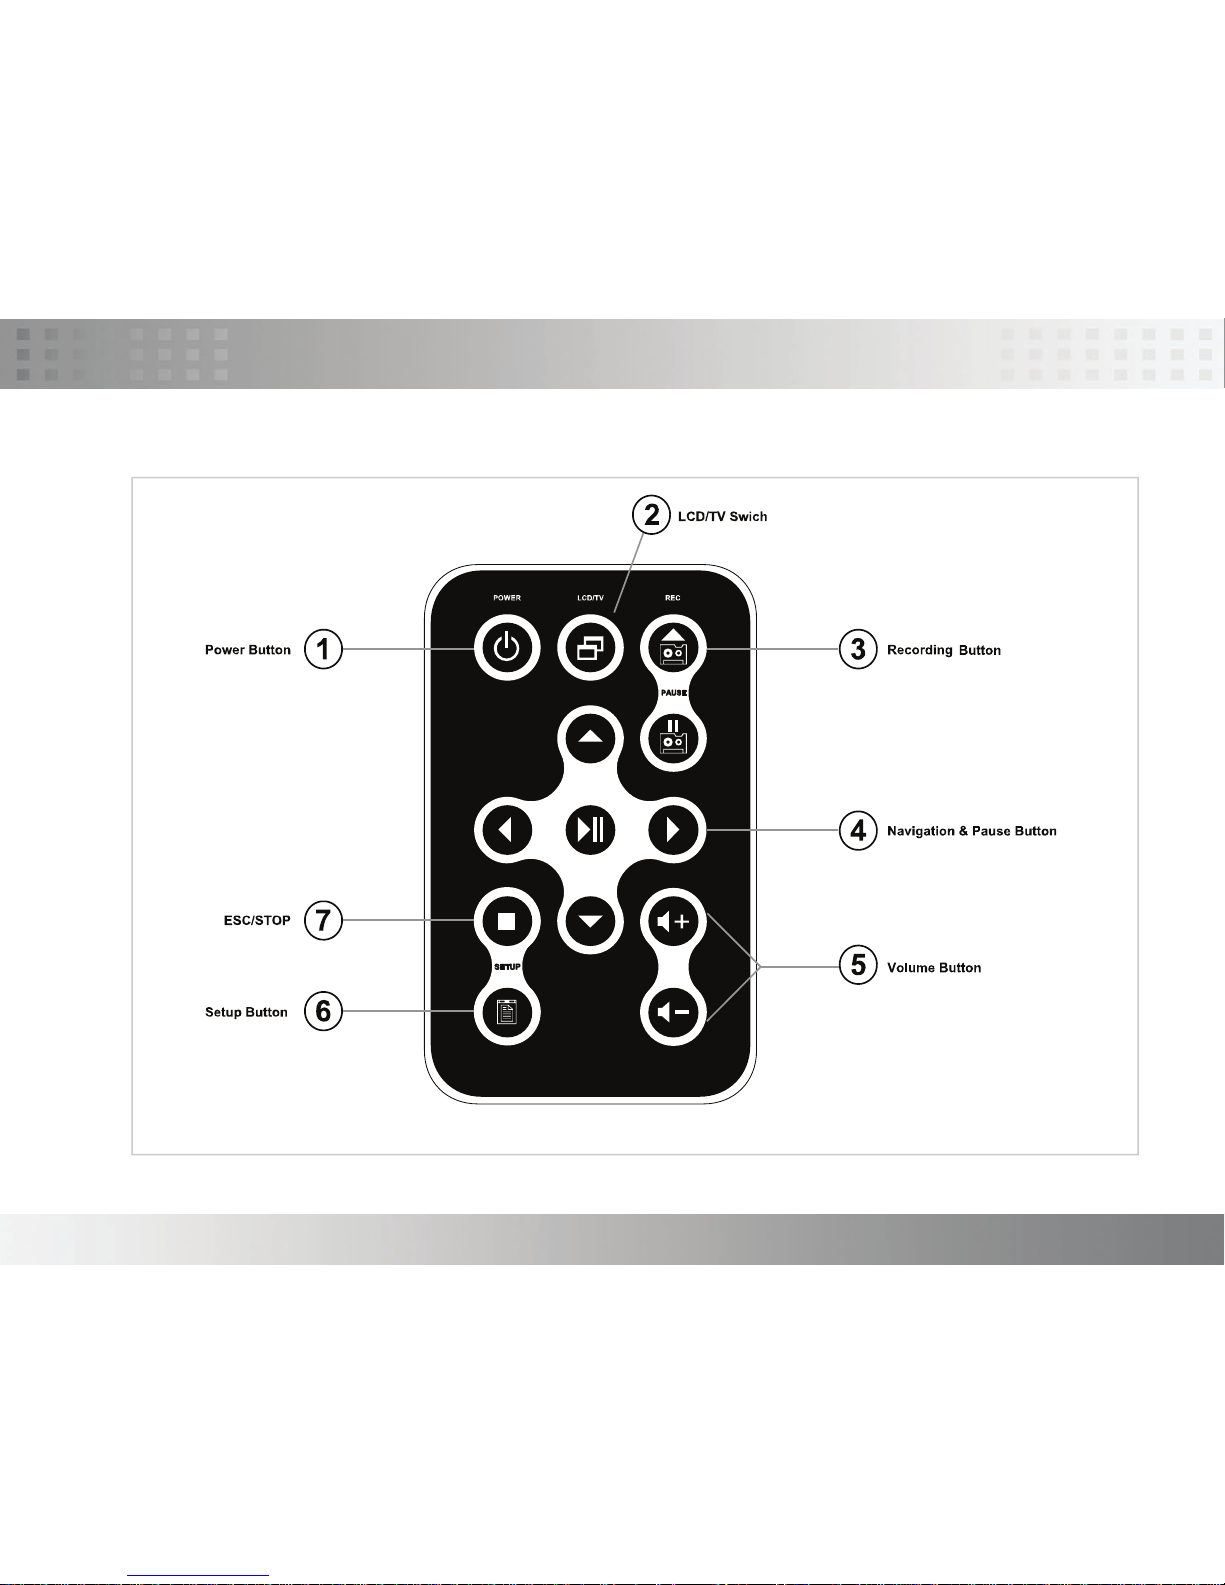
11 REMOTE CONTROLLER 34
12 SUPPORTED VIDEO FILE FORMAT 35
13 SPECIFICATIONS 36
14 IMPORTANT 37
15 NOTE 40
PV-500EVO User Manual
01
TABLE OF CONTENT
PV-500EVO User Manual
02
Overview
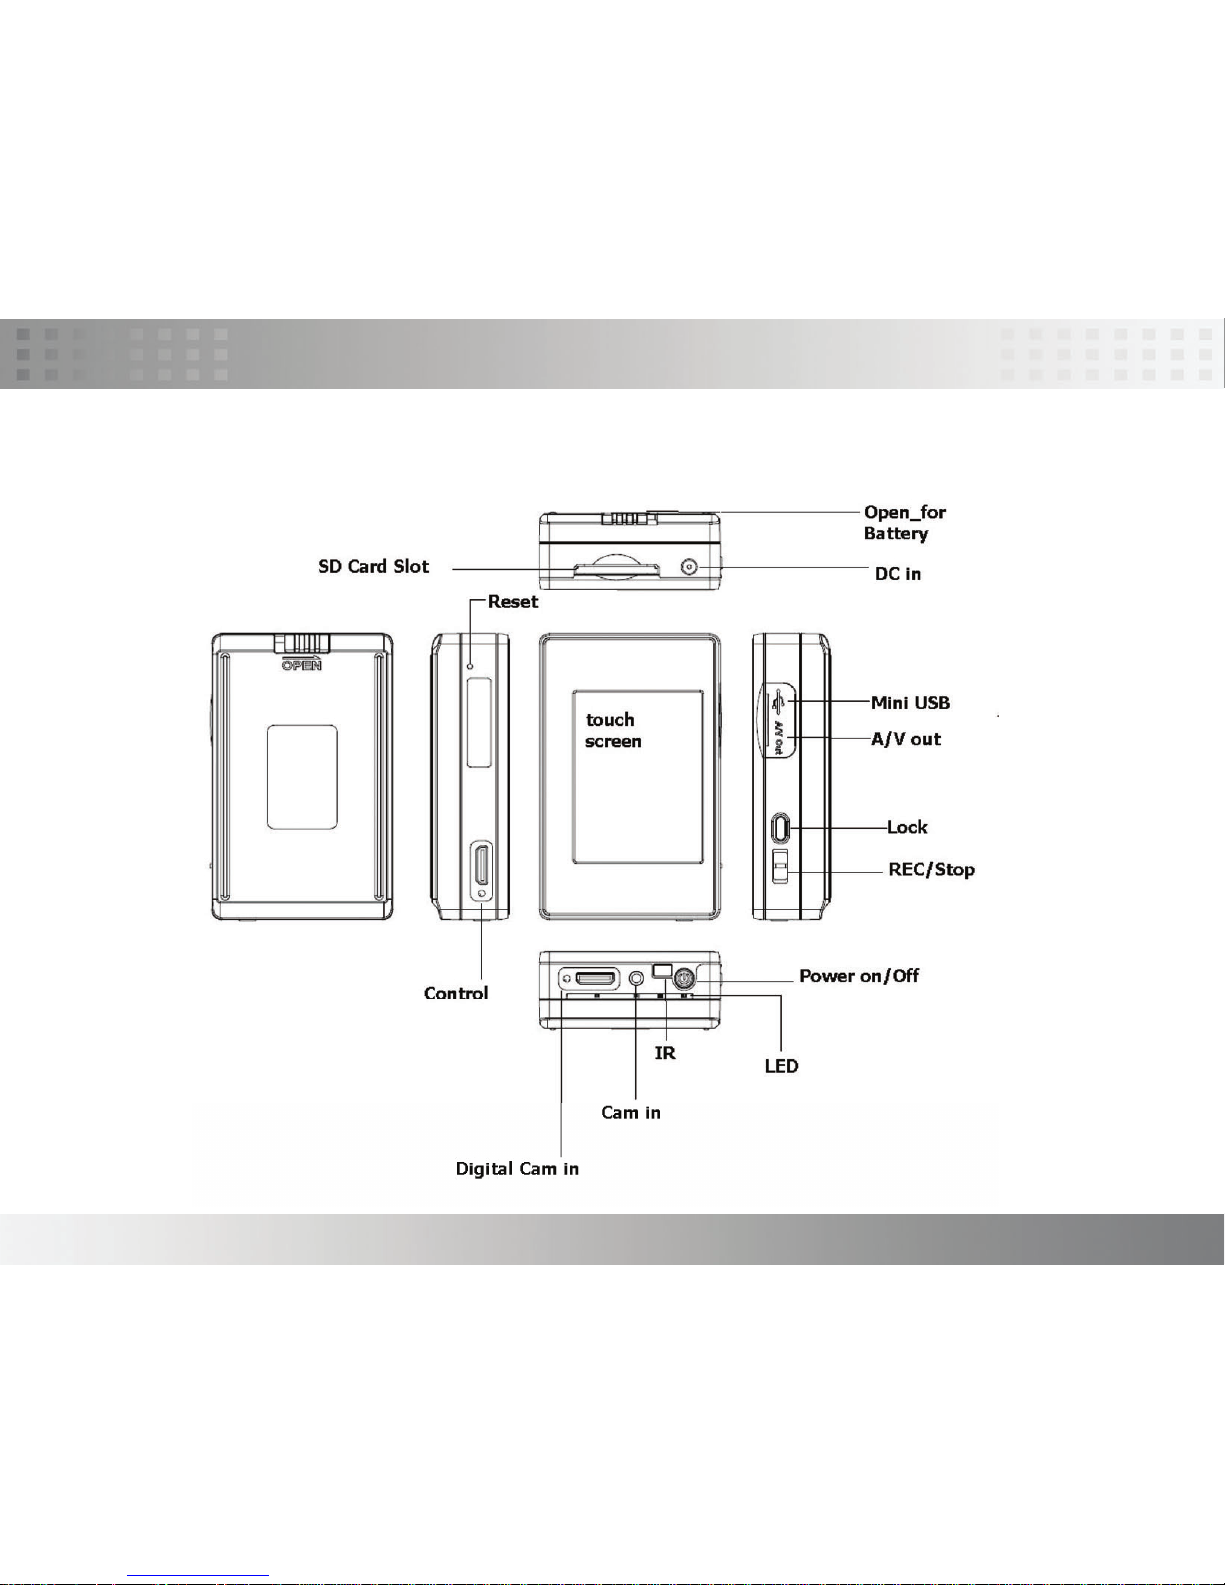
PV-500EVO Main Device
PV-500EVO User Manual
03
Overview
Remote
PV-500EVO User Manual
04
Overview
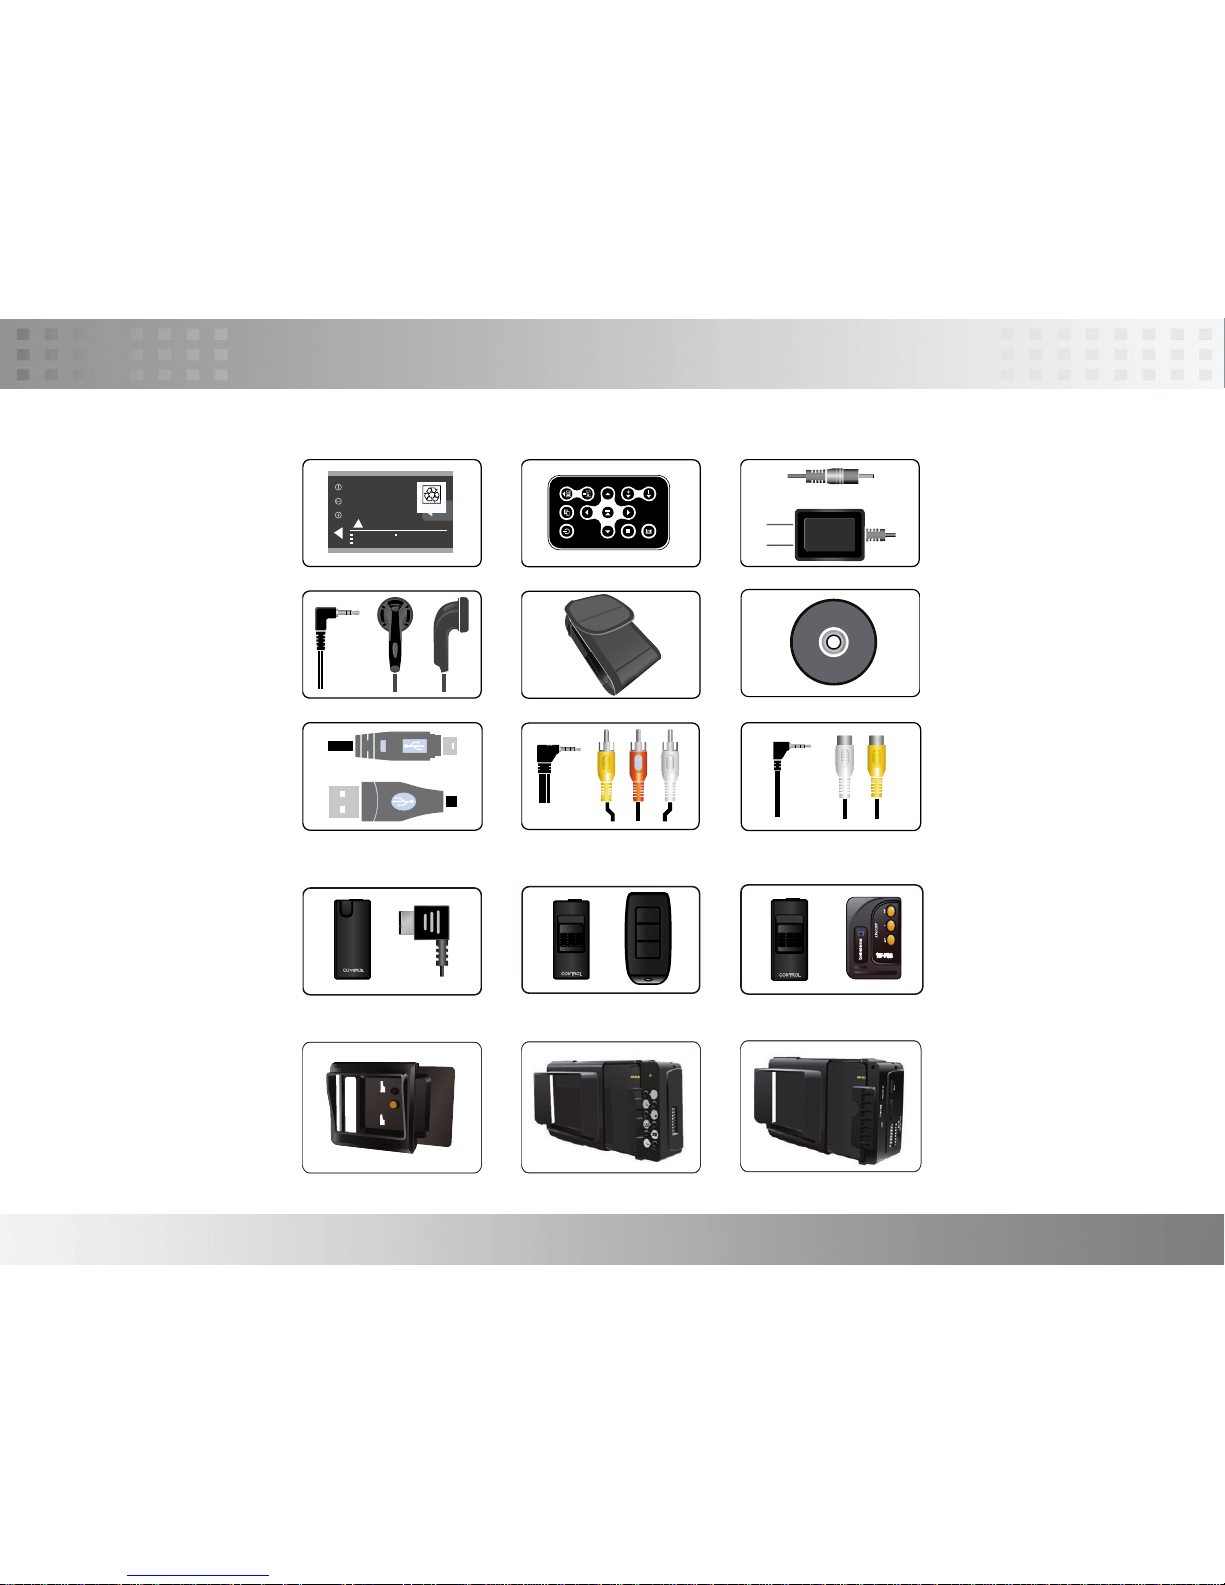
Accessories
3.7V Li-ion BATTERY
for F UJ I
NP120ID-L17
!
CAUTION
DON'T DISASSEMBLE. DON'T DISPOSE OF IN FIRE
DON'T STORE INTEMPERATURE OVER 6 0
0
C.
CHARGE ONLY WITH SPECIFIED CHARGER.
Li-ion
Li-ion
Li-io
PI-PV800 Controller BA-NP120 Battery CHG-0520 Charger
S-ER/PV800 earphone PT-1000 Pouch
S-USB/PV-500EVO USB
S-1R3R/PV-800 AV Cable
S-PJ2R AV Cable
Optional
Manual
PI-WL10 Controller
PI-VTR10 Controller
PI-WD10 Controller
JK-10 Dock
VQ-PV806 Dock
RX-PV800 Dock
PV-500EVO User Manual
05
Function Modes
Video file playback
Browse images and picture
External video source recording
Functions setting
PV-500EVO User Manual
06
Basic operation
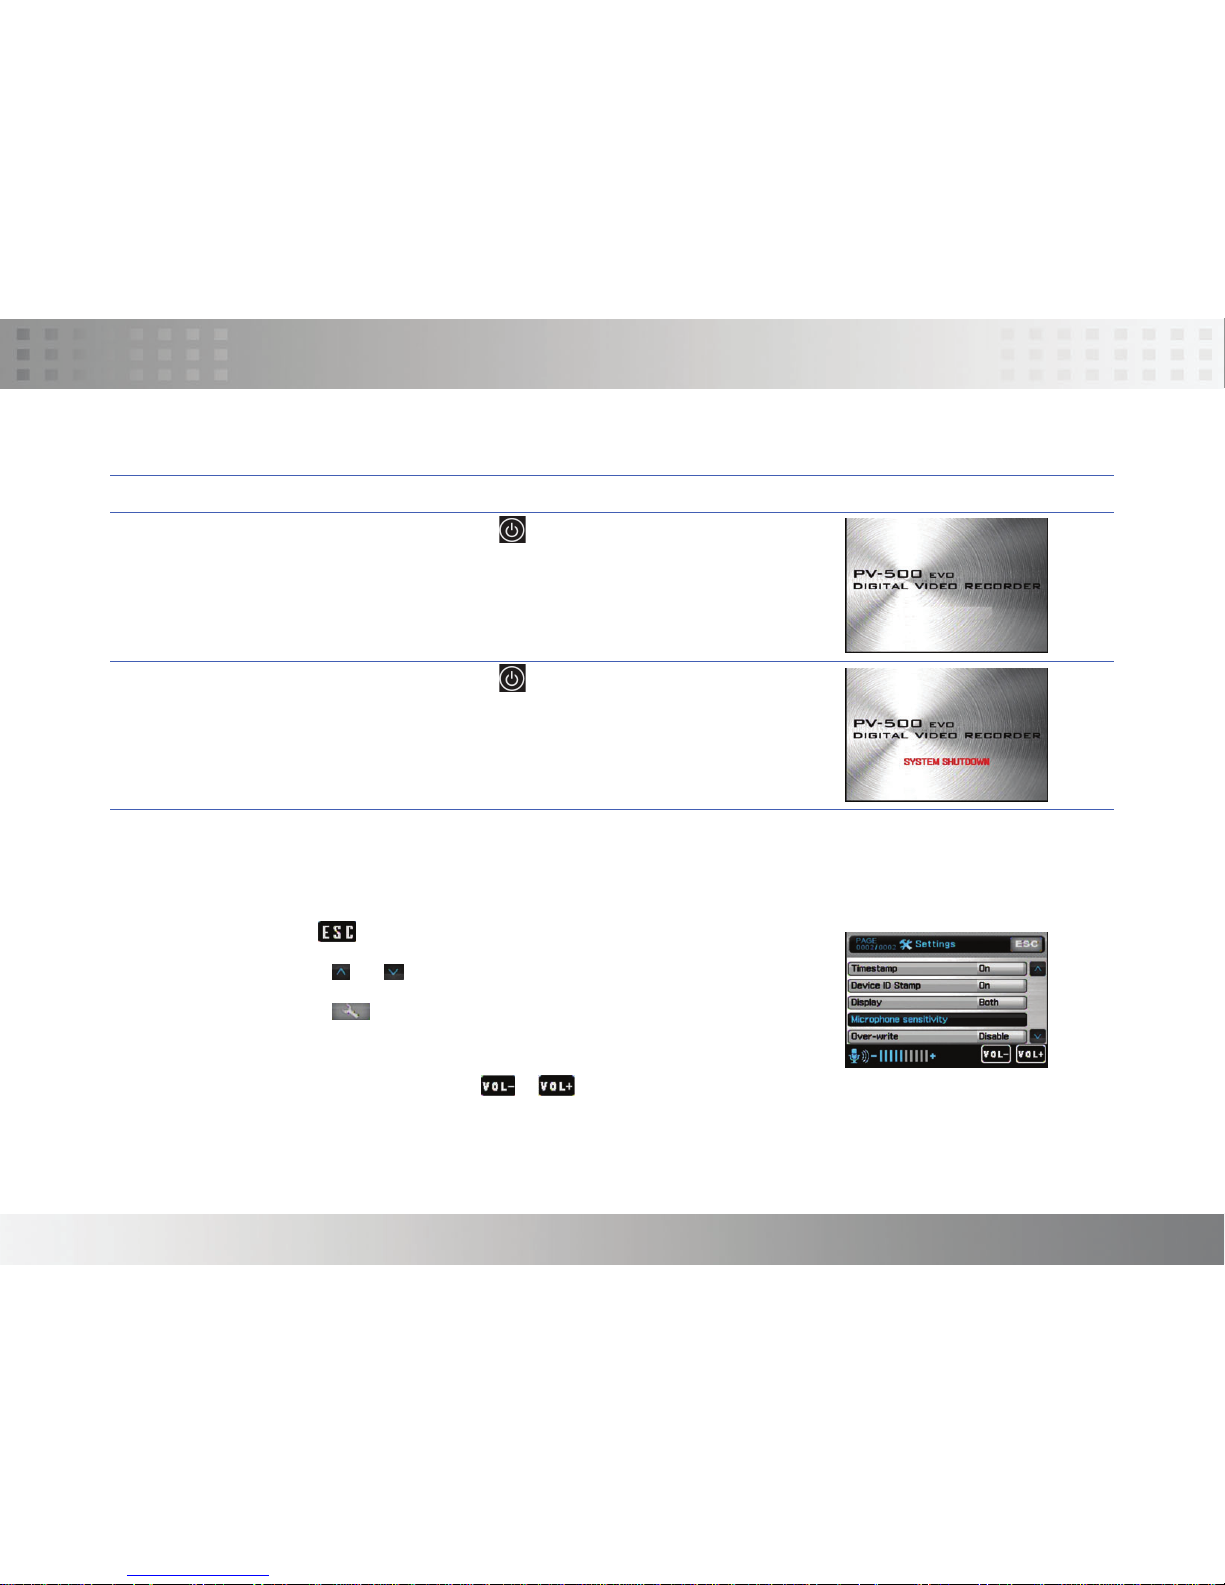
Turn on/ off of PV-500 EVO player
To Do this
Turn On
Press the Power On/ Off button about 1 sec.
on PV-500EVO, to turn on the power and the
greeting screen will appear.
Turn Off
Press the Power On/Off button about 1sec.
button on PV-500EVO or press the Power button
on the remote control to turn off PV-500EVO。
Using the touch screen
Tap any application to get started or tap an item in the list to choose it.
Tap icon to return last page or return back to main menu.
Tap icon or to move next page’s menu.
Tap icon for function setting.
Adjust Volume
While playing Video, Tap icon / or the one in the remote controller to adjust volume.
Volume varies in 10 steps.
Volume status will be displayed on the left–down side of screen.
PV-500EVO User Manual
07
Basic operation
Record button
● Start Recording: Push the REC button on the PV-500EVO or the one
on the remote controller to start recording.
● Stop Recording: Press STOP button or the one on the remote controller
to stop recording, and the screen will return to stand-by
mode of Preview to prepare for recording.
Link with other equipments
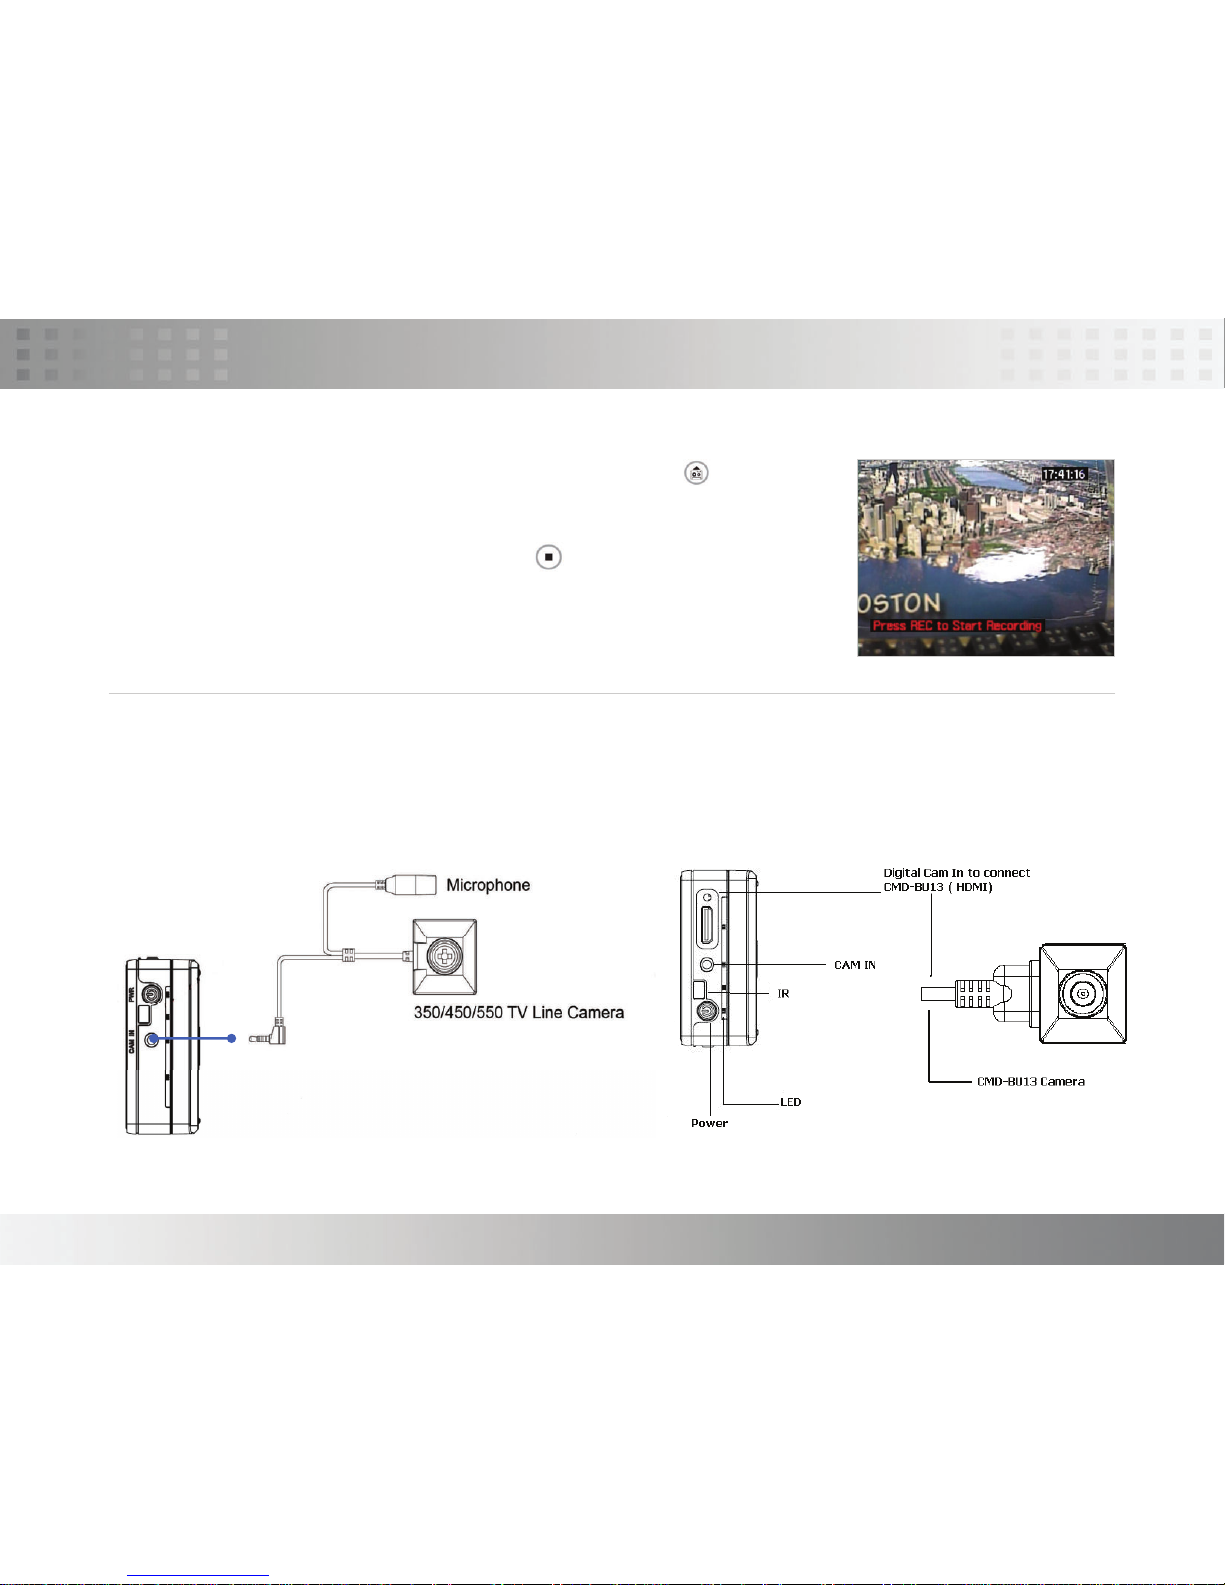
● External Video Source Recording– Cam in
Plug an external camera into
Cam-in , it enable recording.
● External Video Source Recording – Digital Cam in
PV-500EVO User Manual
08
Basic operation
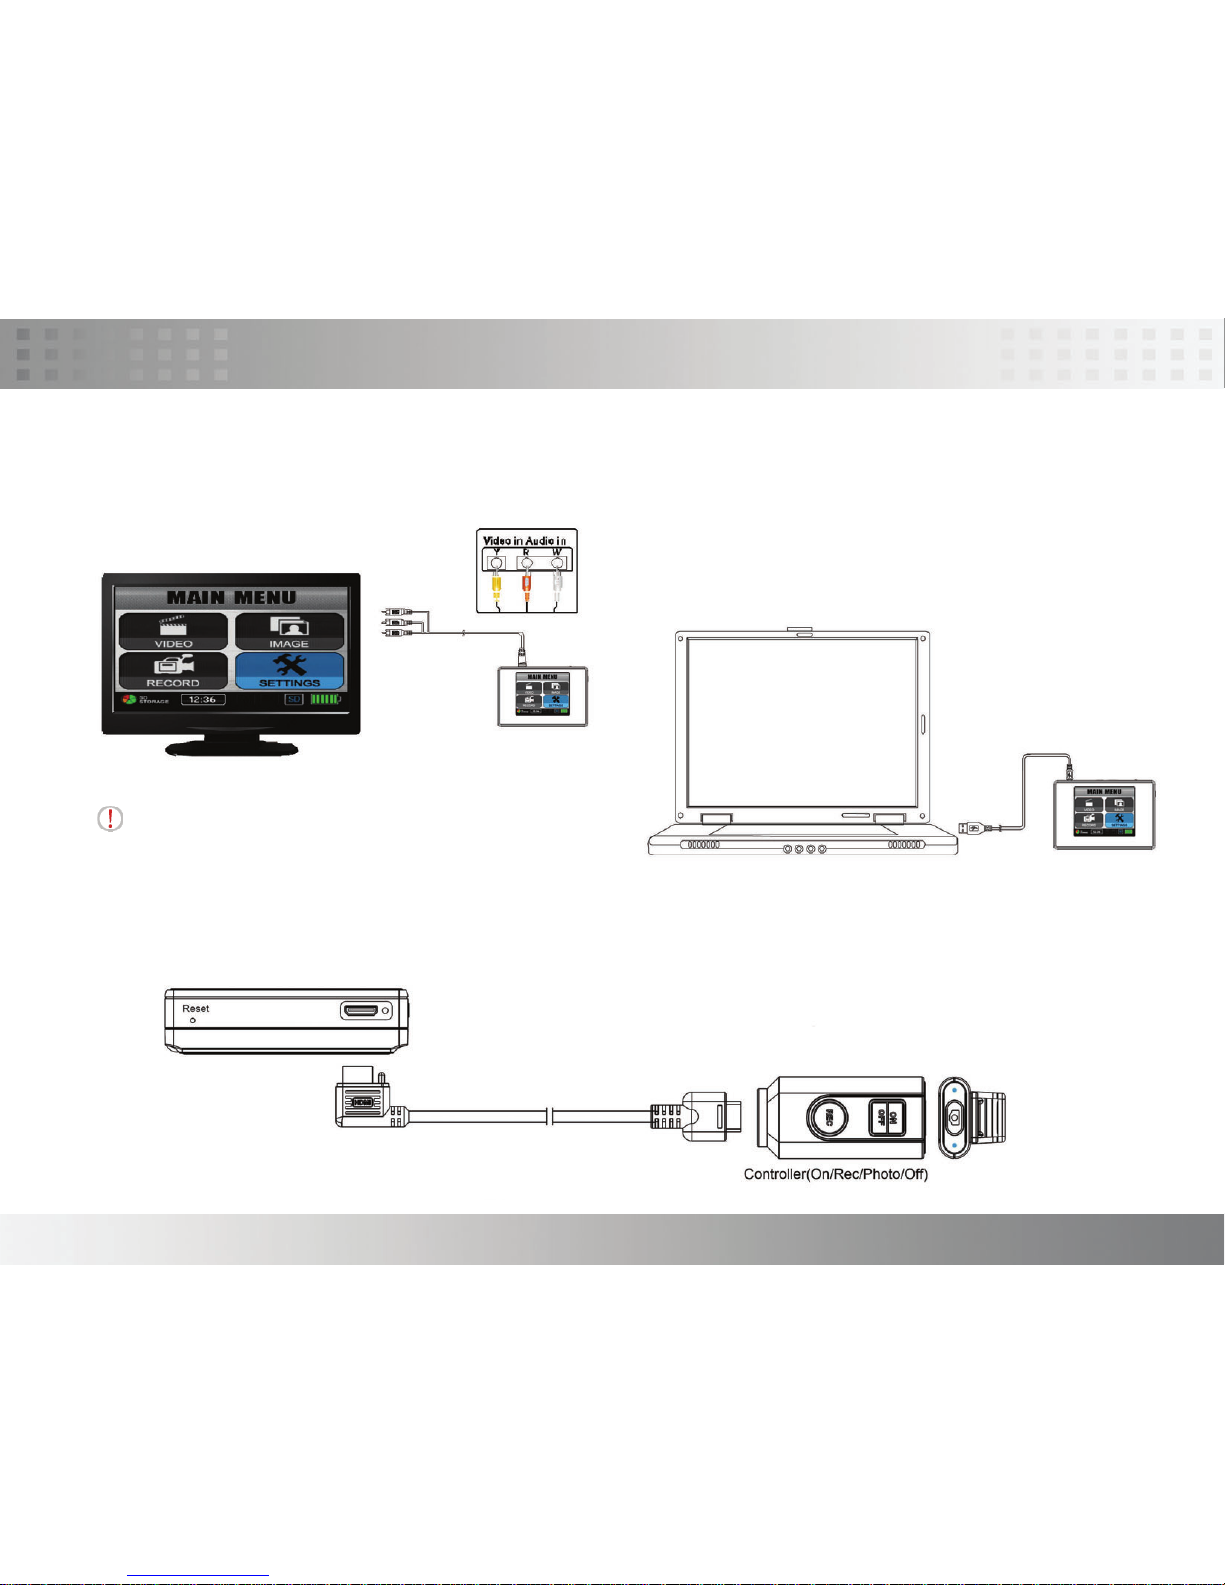
● Output to TV Screen:
Plug an RCA cable in AV-out to have the image output to the TV.
Precaution:
Check “Setup” Menu, the setting of “Display” must be
set from “LCD” into “TV” enable image output.
● Connect to PC:
● Connect to wire controller:
1. Connect the two ends of A/B type of USB cable to PV-500ECO and PC.
2. An indication for “USB Mode” appears on the screen for 5 seconds after
the link is properly installed.

PV-500EVO User Manual
09
Basic operation
● Charging:
When the power goes down, power LED indictor blinks (green) and the meter with no bars displays on the bottom right corner of the
screen, which indicates that the power of the host exhausts; please recharge it immediately. connect the main device with the
power supply and then plug the power supply into the electrical outlet. The LED light will be on Orange.
Precaution:
The LED light will be turned off after finishing charging; to keep long life-span of the battery , the power supply should be
unplugged after finishing charging; Please charge the battery last for 12 hours before 1st time to use
PV-500EVO User Manual
10
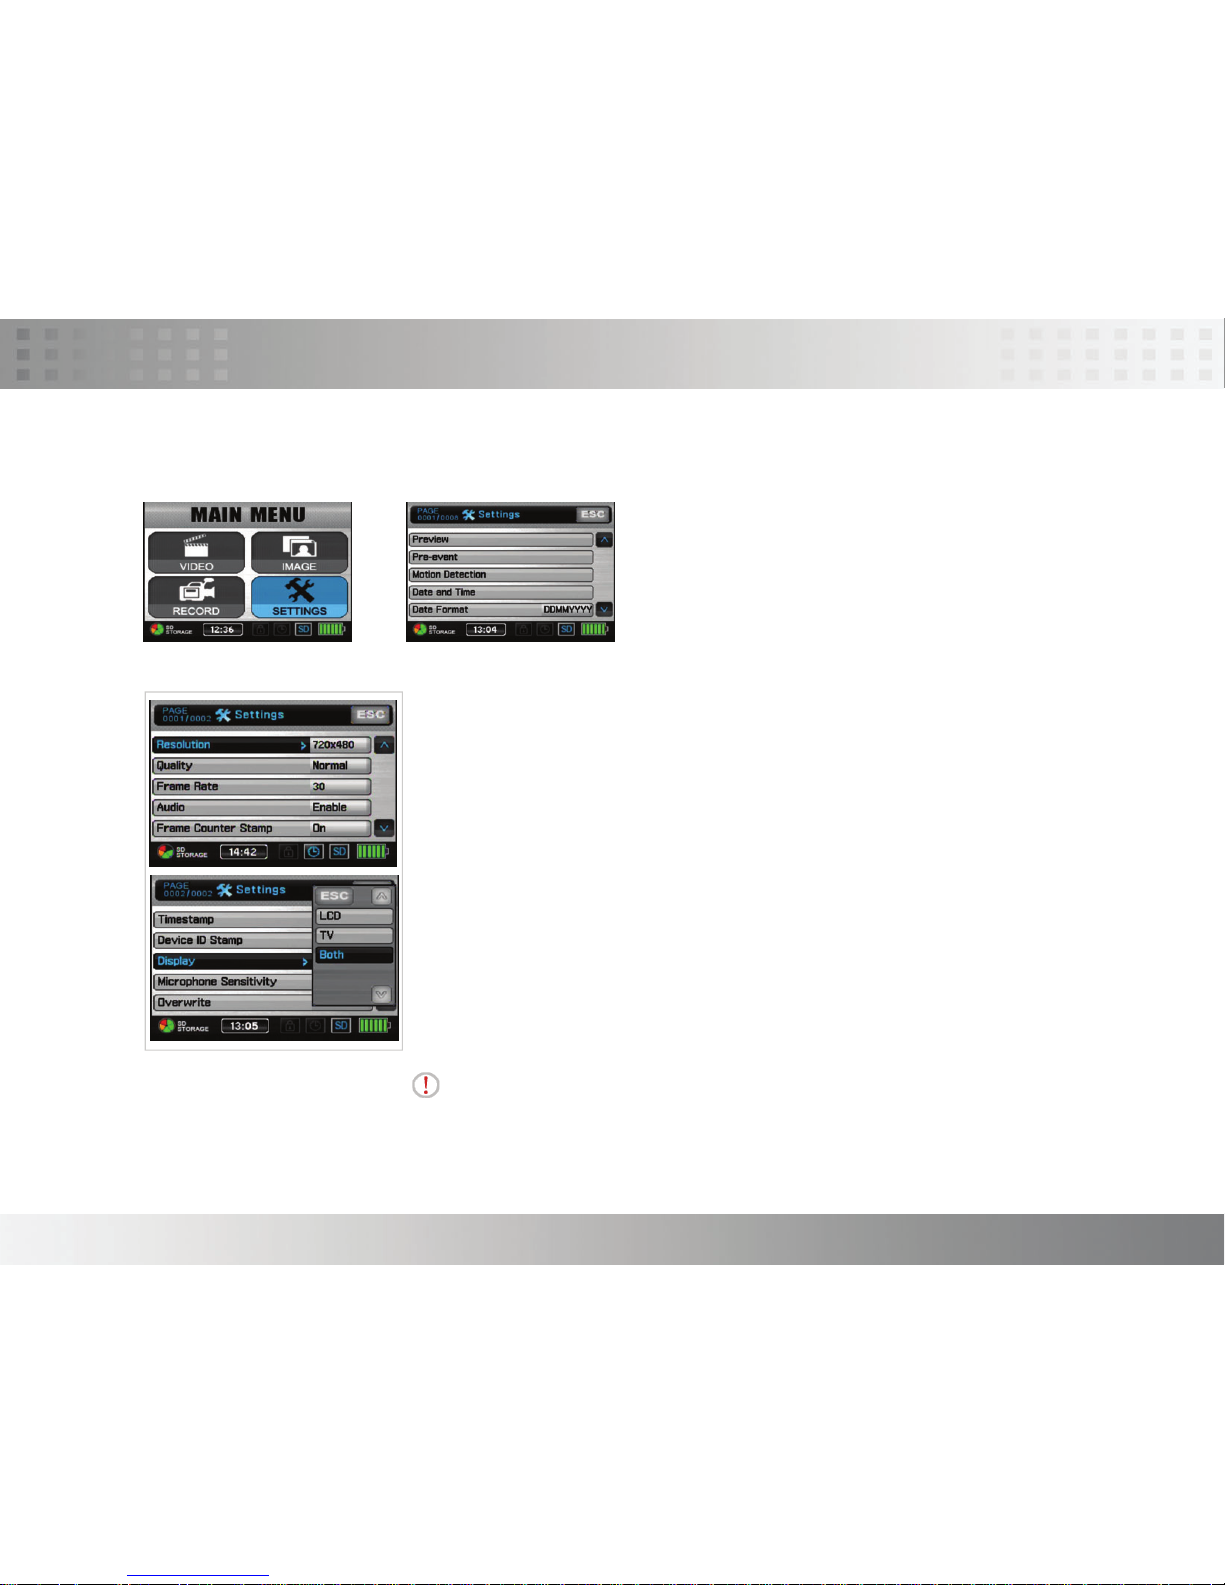
Introduction to all Setting Functions
● Resolution (352*288 /640*480/720*576/1024*768/1280*720/1280*960)
● Quality (Good/Normal/Low)
● Frame Rate( 1 / 5/ 15 /20/25)
● Audio (Enable/Disable)
● Frame Counter Stamp (On/Off)
● Timestamp (On/Off)
● Device ID Stamp (On/Off)
● Display (LCD/TV/Both)
● Microphone sensitivity
● Over-write
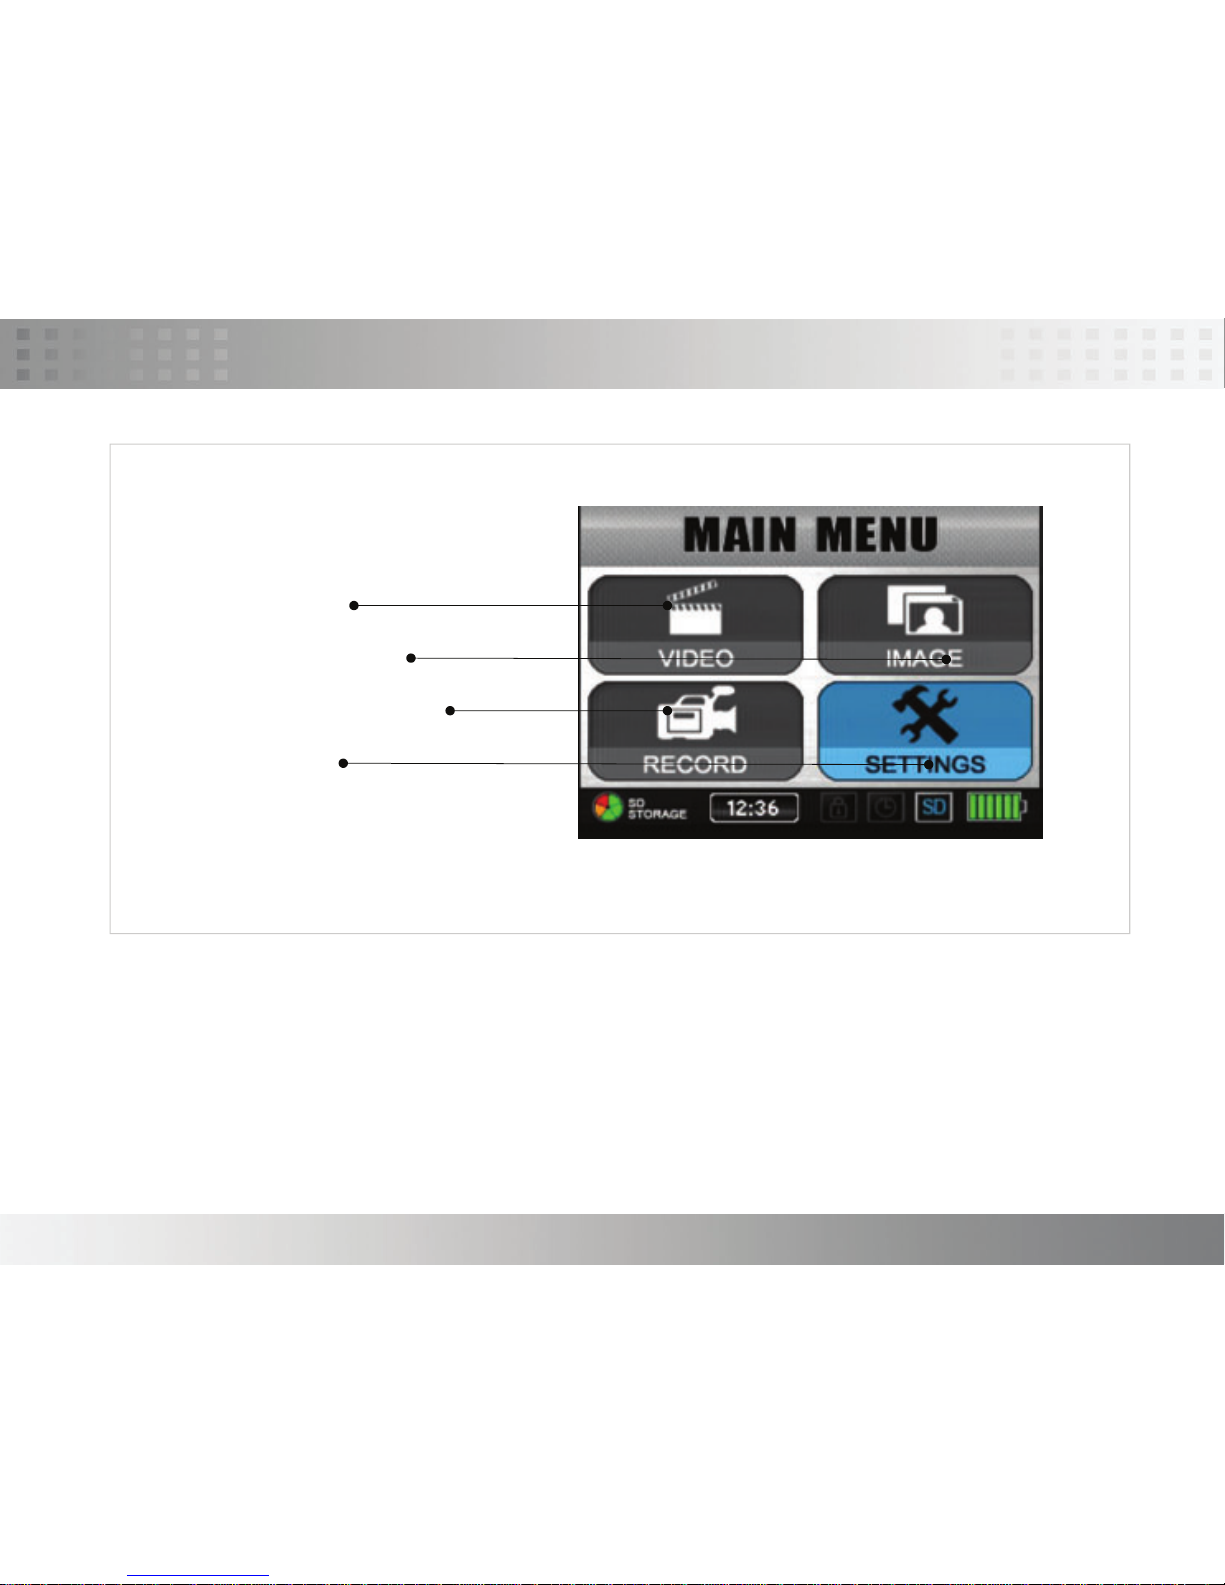
01. Preview >
Tap SETTINGS on the screen to the page1 of setting functions then Tap Preview to start setting each function as below.
Notice: For TV output, it is needed to select Display to TV or
PV-500EVO User Manual
11
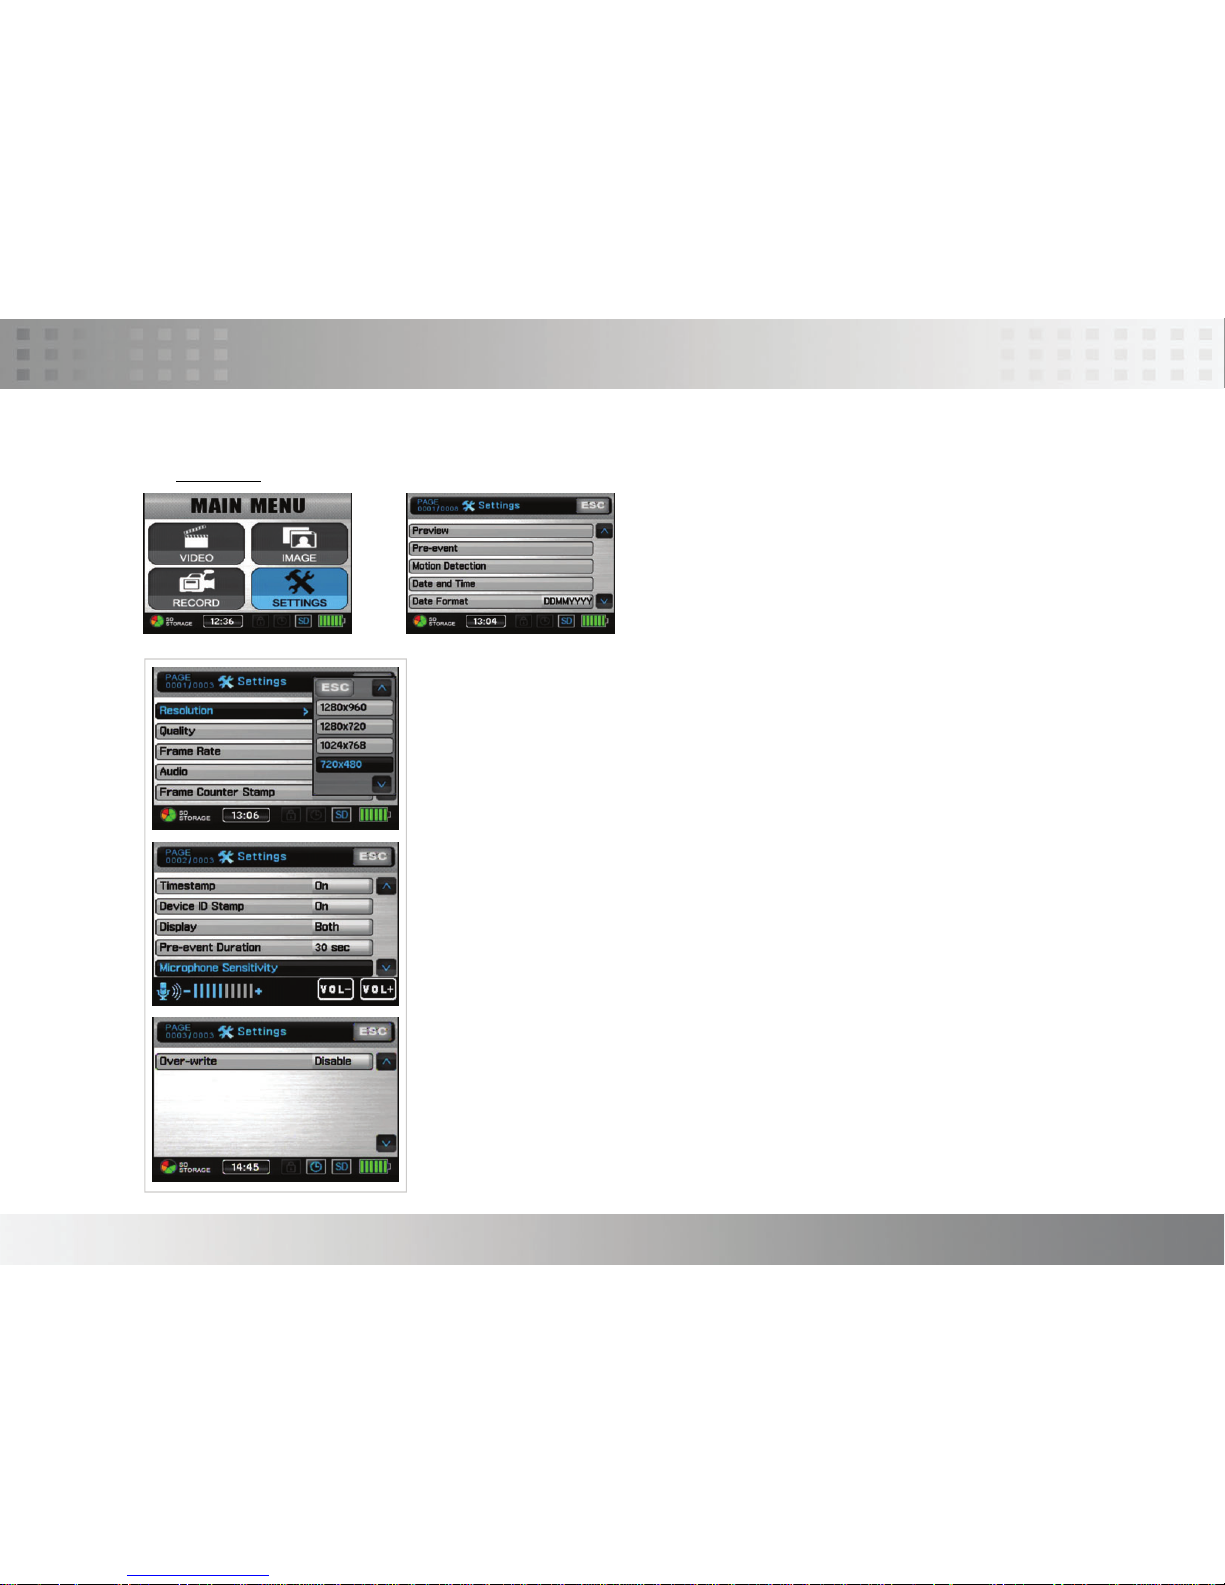
Introduction to all Setting Functions
02. Pre-event >
Tap SETTINGS
on the screen to the page1 of setting functions then Tap Pre-event to start setting each function as below.
● Resolution (352*288 /640*480/720*576/1024*768/1280*720/1280*960)
● Quality (Good/Normal/Low)
● Frame Rate ( 1 / 5/ 15 /20/25)
● Audio (Enable/ Unable)
● Frame Counter Stamp (On/Off)
● Timestamp (On/Off)
● Device ID Stamp (ON/Off)
● Display (LCD/TV/BOTH)
● Pre-Record Time (30 sec,15 sec)
● Microphone sensitivity
● Over-write (Disable/Enable)
PV-500EVO User Manual
12
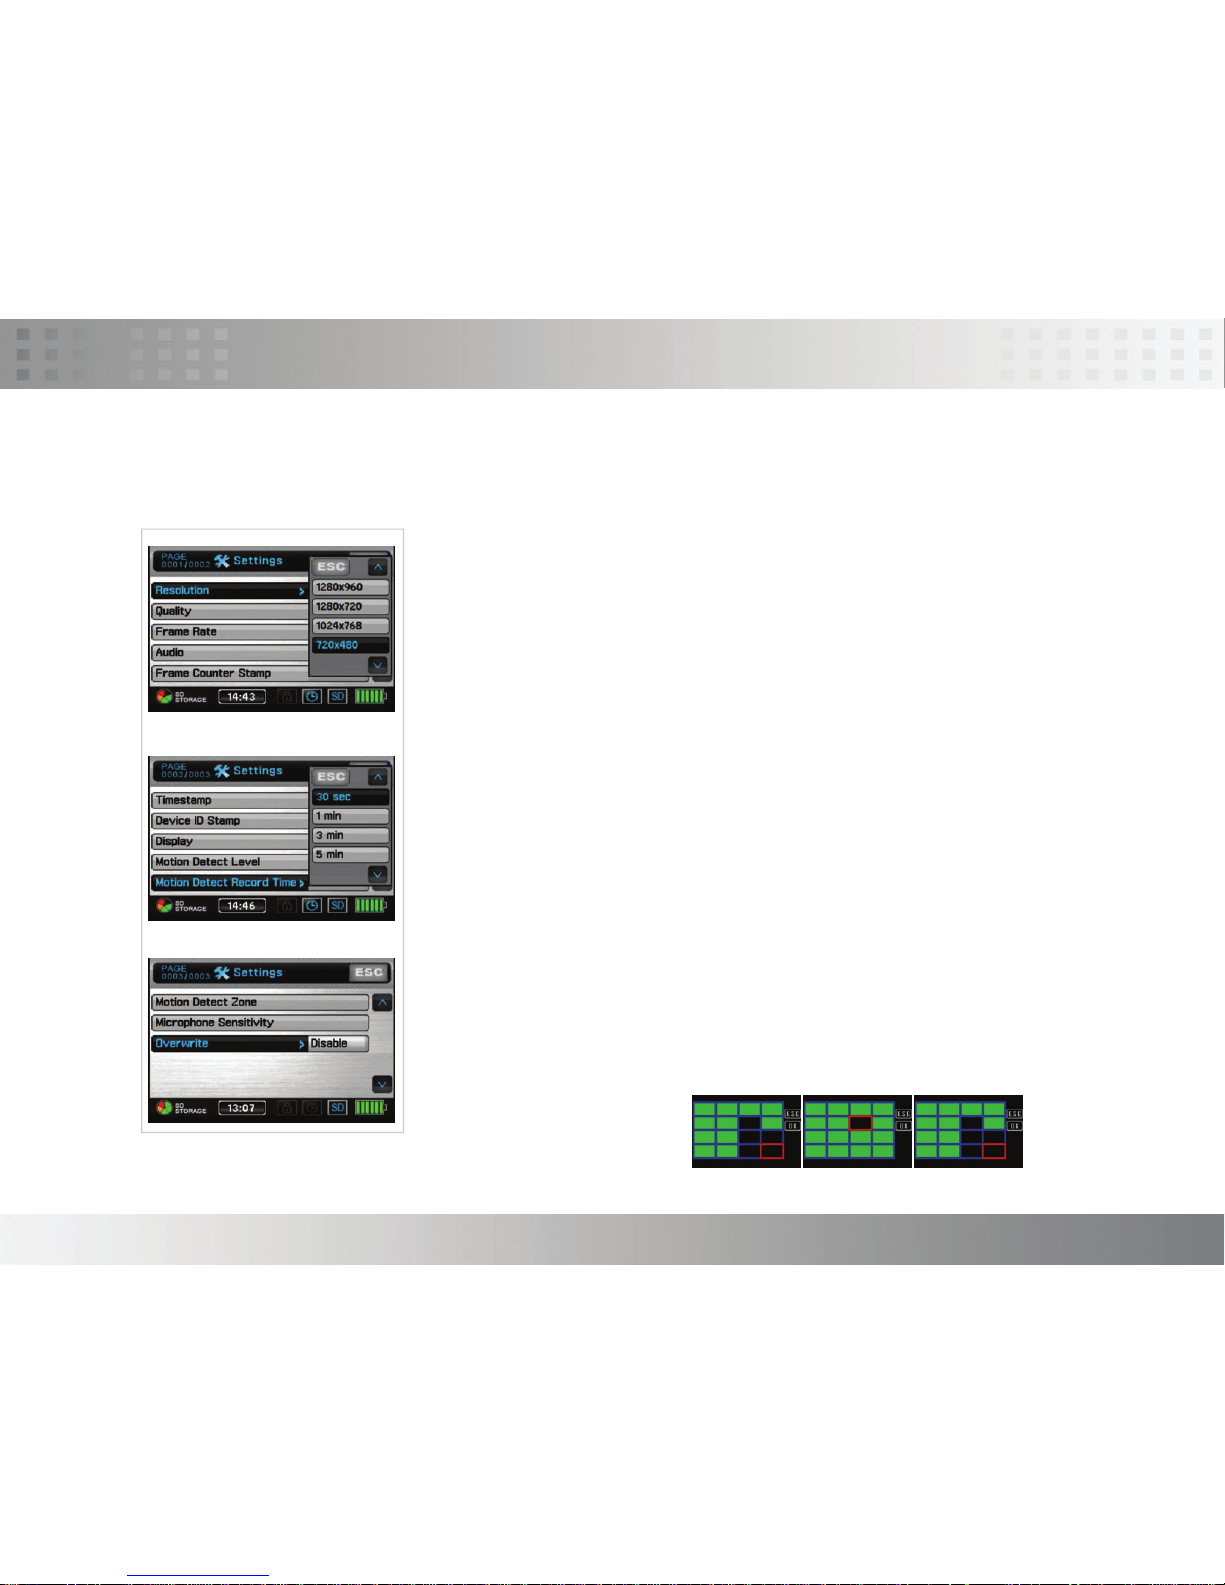
Introduction to all Setting Functions
● Resolution (352*288 /640*480/720*576/1024*768/1280*720/1280*960)
● Quality (Good/Normal/Low)
● Frame Rate ( 1 / 5/ 15 /20/25)
● Audio (Enable/ Unable)
● Frame Counter Stamp (On/Off)
● Timestamp (On/Off)
● Device ID Stamp (ON/Off)
● Display (LCD/TV/BOTH)
● Motion detection level (LOW/Medium/High)
● Motion Detect Record time (30sec/1min/3min/5min/10min)
● Motion Detect Zone
● Microphone sensitivity
● Over-write (Disable/Enable)
03. Motion detection >
Tap SETTINGS on the screen to the page1 of setting functions then Tap Motion detection to start setting each function as
below.
 Loading...