

Page 1
ISTRUZIONI PER L’USOI
INSTRUCTIONS FOR USEEN
MODE D’EMPLOIF
GEBRAUCHSANWEISUNGD
INSTRUCCIONESE
INSTRUÇÕES DE USOPT
GEBRUIKSAANWIJZINGNL
INSTRUKCJA OBSŁUGIPL
HASZNÁLATI ÚTMUTATÓ
HU
Page 2
2
MANUALE D’USO ED ISTRUZIONI PER CARICABATTERIE ELETTRONICO
12V MULTIFUNZIONE.
Conservare accuratamente le istruzioni di sicurezza e consegnarle al personale utilizzatore.
DESTINAZIONE D’USO
Il caricabatterie elettronico, è destinato al seguente uso:
• per la carica e l’alimentazione dei veicoli
• da utilizzare su batterie a 12V, Wet - Agm - lithium (LiFePO4)
• durante le fasi di riprogrammazione e autodiagnosi
Non sono consentite le seguenti operazioni:
• è vietato l’uso su batterie diverse da 12V
• è vietato l’utilizzo al di fuori delle prescrizioni tecniche contenute nella tabella DATI TECNICI
• è vietato l’utilizzo in ambienti umidi, bagnati o esposti ad intemperie
• è vietato l’utilizzo per tutte quelle applicazioni diverse da quelle indicate
SICUREZZA DELLA POSTAZIONE DI LAVORO
Non utilizzare il caricabatterie in ambienti contenenti atmosfere potenzialmente esplosive o
Impedire che bambini o visitatori possano avvicinarsi alla postazione di lavoro mentre si sta
operando con il tester batterie. La presenza di altre persone provoca distrazione e può
comportare la perdita del controllo durante l’utilizzo.
Non inalare eventuali gas nocivi sprigionati dalla batteria del veicolo, mentre si opera sul motore.
Durante le operazioni di collegamento, allontanare il volto dalla batteria del veicolo. Il liquido
contenuto all’interno della batteria è corrosivo, qualora vi fosse un contatto accidentale con
dell’acido con la pelle o con gli occhi sciacquare immediatamente con acqua e consultare
un medico.
della batteria stessa.
Utilizzare il caricabatterie in una zona asciutta evitando umidità.
SICUREZZA CARICABATTERIE
• Controllare prima dell’utilizzo che il caricabatterie non abbia subito danneggiamenti, e che non vi
siano cavi scoperti o parti usurate.
• Non utilizzare il caricabatterie se è danneggiato, poiché vi è rischio di scosse elettriche, non cercare
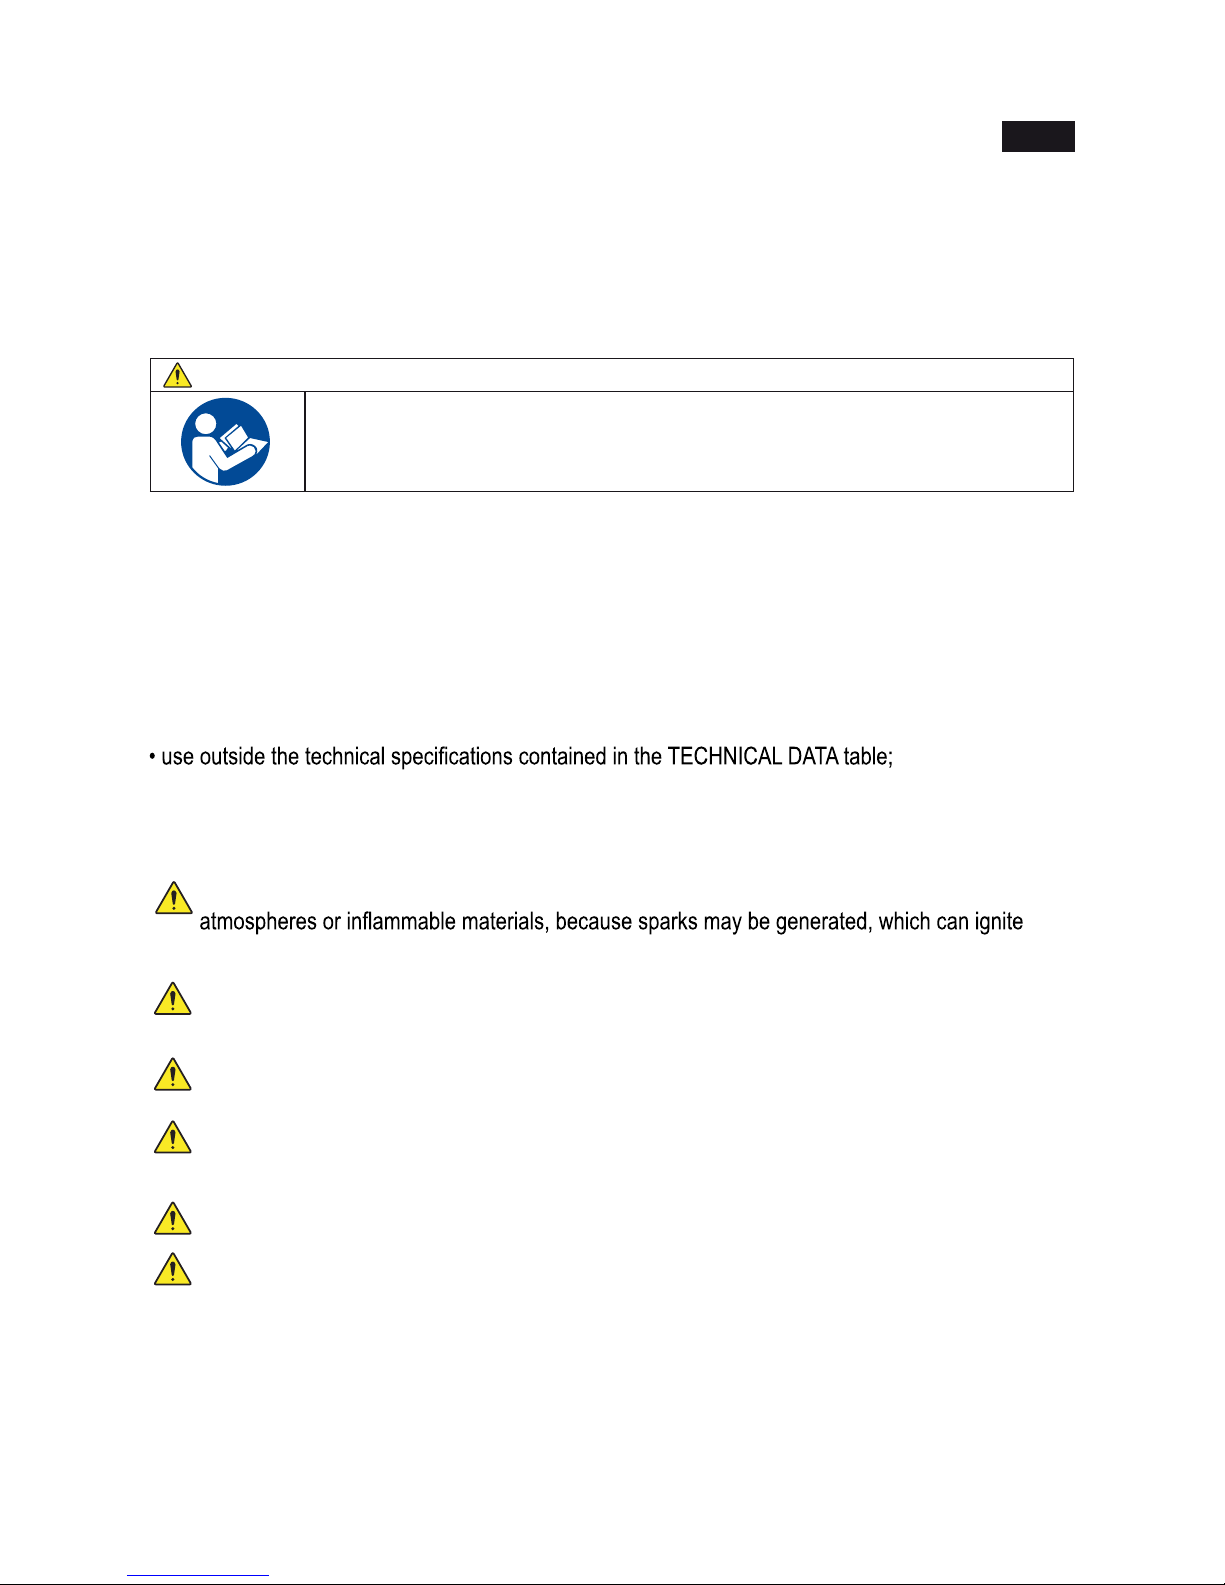
IMPORTANTE LEGGERE COMPLETAMENTE IL PRESENTE MANUALE PRIMA
DI UTILIZZARE IL CARICABATTERIE. IN CASO DI MANCATO RISPETTO
DELLE NORME DI SICUREZZA E DELLE ISTRUZIONI OPERATIVE,
POSSONO VERIFICARSI SERI INFORTUNI.
ATTENZIONE
ISTRUZIONI PER L’USO
I
Page 3
3
• Collegare il cavo di alimentazione del caricabatterie alla presa di rete, assicurandosi che la tensione di
rete sia quella indicata sul dispositivo di alimentazione. (Vedere tabella DATI TECNICI)
• Al termine delle operazioni non lasciare il caricabatterie collegato alla presa di rete per un lungo
periodo.
• Non manomettere il circuito elettronico del caricabatterie.
INDICAZIONE PER LA SICUREZZA DEL PERSONALE
• Si raccomanda la massima attenzione, avendo cura di concentrarsi sempre sulle proprie azioni.
Non utilizzare il caricabatterie in caso di stanchezza o sotto l’effetto di droghe, bevande alcoliche o
medicinali.
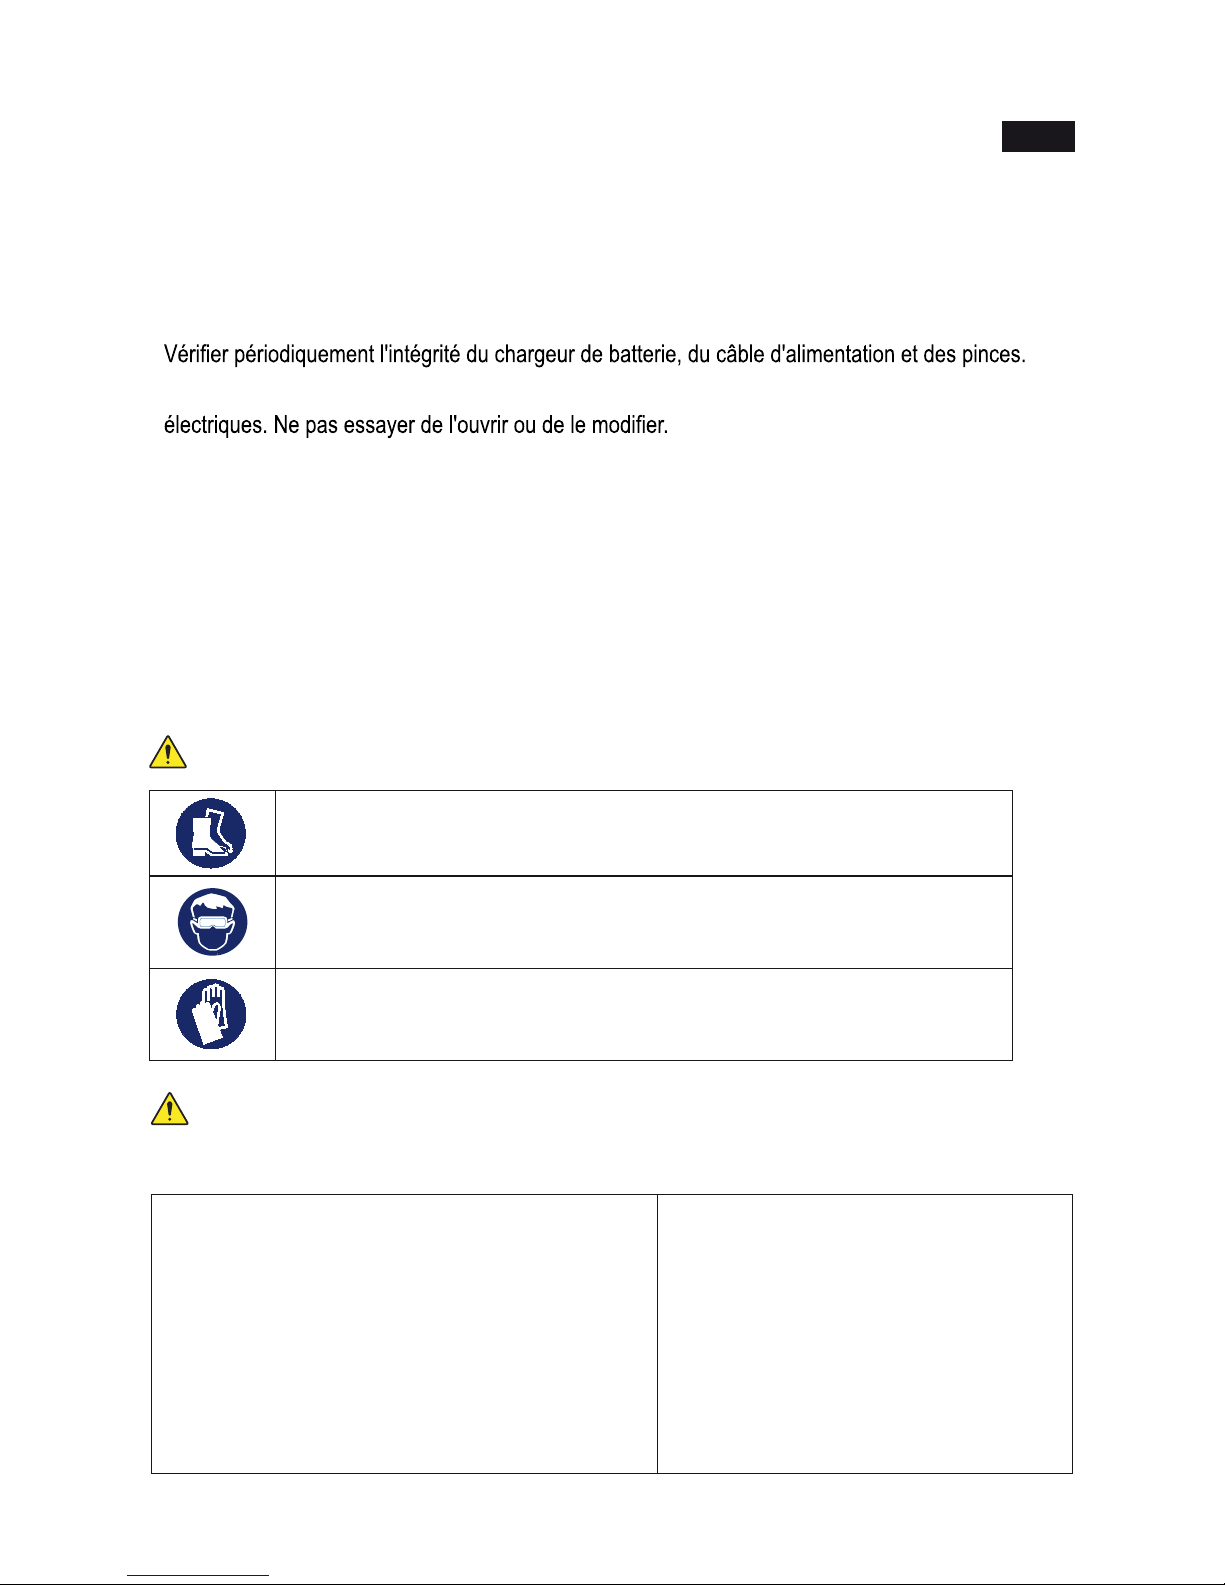
• Utilizzare sempre i seguenti dispositivi individuale di protezione:
• scarpe di sicurezza
• occhiali di protezione
• Effettuare tutte le operazioni previste in ambienti adeguatamente areati ed asciutti.
• Non mettere mai in contatto fra di loro i morsetti delle due pinze (rossa (+) positiva; nero (-)
negativo).
• Assicurarsi che i cavi del caricabatterie siano lontani da ventole, parti in movimento e dal condotto del
carburante.
• Non indossare vestiti larghi, non portare bracciali, catenine o oggetti metallici quando si lavora sul
veicolo.
• Prima di riporre il caricabatterie assicurarsi che sia raffreddato raggiungendo la temperatura ambiente.
UTILIZZO ACCURATO DEL CARICABATTERIE
•
caricabatterie.
• Non utilizzare mai il caricabatterie se la custodia, le pinze, i cavi o il cavo di alimentazione sono
danneggiati. Se si sentono odori inusuali o se produce troppo calore.
•
sicurezza ed aumentare i rischi per l’operatore.
• Far riparare il caricabatterie solo ed esclusivamente da personale specializzato e solo impiegando
pezzi di ricambio originali.
• Pima di eseguire ogni operazione, spegnere le luci del veicolo e tutti gli accessori eventualmente in
funzione.
•
del veicolo. Eventuale superamento può causare esplosioni, danni al veicolo, al caricabatterie
ed alle persone.
• Collegare sempre il conduttore di uscita con pinza rossa (+) al polo positivo della batteria, il
conduttore di uscita con pinza nera (-) alla massa del veicolo.
ISTRUZIONI PER L’USO
I
Page 4
4
DISPOSITIVI DI PROTEZIONE INDIVIDUALI PREVISTI DURANTE L’UTILIZZO DEL CARICABATTERIE
Può essere necessario l’utilizzo di ulteriori dispositivi di protezione individuali da utilizzare in
funzione dei valori riscontrati nell’indagine di igiene ambientale/analisi rischi, nell’eventualità
che i valori superino i limiti previsti dalle vigenti normative.
DATI TECNICI
INDOSSARE SEMPRE GLI OCCHIALI PROTETTIVI
UTILIZZARE SEMPRE CALZATURE DI SICUREZZA
UTILIZZARE SEMPRE GUANTI DI PROTEZIONE PER AGENTI FISICI DURANTE
L’UTILIZZO DEL TESTER BATTERIE
DA UTILIZZARE PER BATTERIE
TENSIONE NOMINALE
TENSIONE DI RICARICA
POTENZA ASSORBITA
CAPACITÀ BATTERIA IN CARICA
CAPACITÀ BATTERIA IN MANTENIMENTO
LUNGHEZZA CAVO PINZE
SEZIONE CAVO MORSETTI
GRADO DI PROTEZIONE
LUNGHEZZA CAVO ALIMENTAZIONE
DIMENSIONI
PESO
12V Wet - Agm - Lithium LiFePO4
110V-240V 50/60Hz
12V max
1800 Watt
10÷1200 Ah
10÷3000 Ah
2.7 m
25 mm
2
IP20
1.7 m
350x450x150 mm
8.8 kg
• Non invertire mai la polarità l’inversione di polarità può causare esplosioni, danni al veicolo, al
caricabatterie ed alle persone.
• Per la pulizia utilizzare un panno asciutto, scollegando sempre il caricabatterie dalla rete di
alimentazione. Non utilizzare mai panni umidi o bagnati.
INDICAZIONI DI SICUREZZA PER IL CARICABATTERIE
•
• Non utilizzare il caricabatterie se è danneggiato, poiché vi è rischio di scosse elettriche, non cercare di
• Collegare il caricabatterie alla presa di rete, assicurandosi che la tensione di rete sia quella indicata sul
dispositivo di alimentazione. (Vedere tabella DATI TECNICI)
• Non coprire in alcun modo il caricabatterie durante il suo l’utilizzo. Garantire uno spazio adeguato per
la ventilazione.
• Non utilizzare il caricabatterie in ambienti umidi, bagnati, non esporlo a pioggia. Ambienti umidi e
contaminati aumentano il rischio di scosse elettriche.
ISTRUZIONI PER L’USO
I
Page 5
5
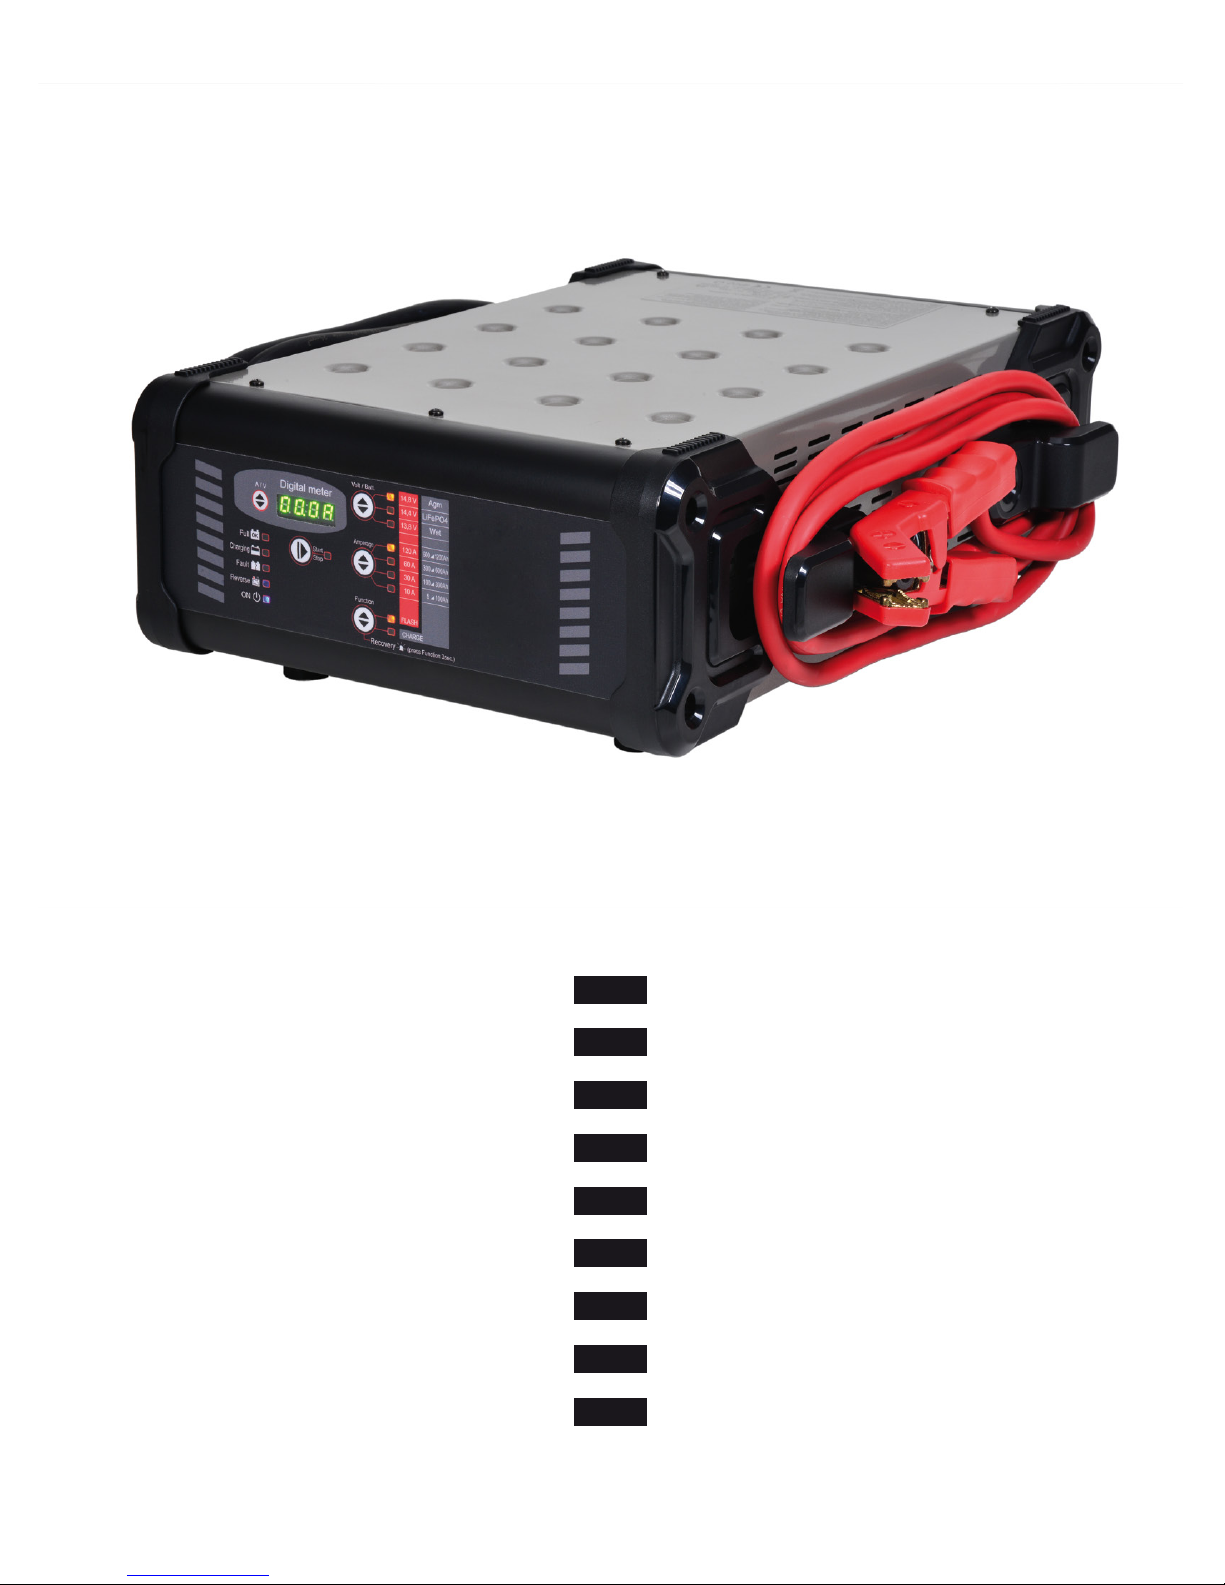
LED DI SEGNALAZIONE
Sul pannello frontale del caricabatterie sono presenti 15 led. N° 4 led sullo stato della batteria,
che segnalano:
• “Full” la batteria è carica, ed in mantenimento
• “Charging” la batteria è in carica
• “Fault” la batteria è danneggiata
• “Reverse” inversione di polarità
• N°1 “led ON” sullo stato di carica della batteria (colore Blu)
• N°1 “Start/Stop” (colore Giallo) sullo stato di funzionamento, segnala se sta erogando nella modalità
selezionata
• N°2 led sulla modalità operativa “Function” Flash o Charge (led Giallo)
• N°4 led sulla segnalazione di corrente erogata “Amperage” descritte successivamente (led giallo)
• N°3 led sulla segnalazione della tensione di alimentazione e tipo di batteria “Volt/Batt” descritte
successivamente (led Giallo).
Sul pannello frontale del caricabatterie sono previsti n° 5 pulsanti:
• “Start/Stop” avvia o ferma l’erogazione nella modalità selezionata
• “Function” selezionala modalità operativa
• “Volt/Batt” seleziona la tensione di Supply o il tipo di batteria da caricare
• “Amperage” seleziona la corrente erogata
• “A/V” (display) seleziona cosa visualizzare sul display
DISPLAY DIGITALE
Il tasto di selezione “A/V” permette di visualizzare a display la tensione o la corrente.
FUNZIONI DEL CARICABATTERIE E MODALITÀ OPERATIVE
A) Modalità operative: “Function”
Charge
Modalità di carica della batteria. Prevede 7 fasi di carica, di seguito descritte:
• FASE 1: Analisi 1. Se la batteria presenta una tensione superiore ai 6,5V, procede con la successiva fase.
Tensioni sotto i 6,5V causano il ritorno in stand-by del dispositivo.
i 13V
• FASE 3: Analisi 2. Ricerca elemento in corto. Il caricabatterie stacca l’erogazione di corrente per 5 minuti. Se
durante questo arco di tempo la tensione della batteria scende al di sotto degli 11,7V il dispositivo ritornerà
in stand-by. Se la tensione rimane superiore agli 11,7V si passa alla FASE 4. In caso di elemento in corto
o batteria solfatata (segnalata da ERR02 sul display durante la FASE 3) è consigliato ricaricare la batteria
in modalità RECOVERY.
• FASE 6: Tampone. La tensione scende al livello di mantenimento e viene completato il ciclo di carica.
Si accende il led verde di FULL.
• FASE 7: Ciclo a impulsi. Ciclo di mantenimento batteria a impulsi (per periodi prolungati).
Flash
Modalità Alimentatore per assistenza nella programmazione dei veicoli. Non prevede alcuna fase di
carica al suo interno, è un puro alimentatore stabilizzato alla tensione nominale di batteria. Il suo scopo è
quello di fornire corrente in supporto alla batteria, per evitare la sua scarica in operazioni che richiedono
energia per brevi o lunghi periodi.
Recovery
Modalità di recupero per batterie solfatate accessibile mediante pressione prolungata del tasto
“Function”. Sullo schermo apparirà la scritta “rEC” con la visualizzazione della misura di tensione o
ISTRUZIONI PER L’USO
I
Page 6
6
corrente istantanea, durante questa fase lampeggia il led “Charge”.
Il caricabatterie esegue un ciclo di ricarica speciale nel quale vengono forzate tensioni superiori alla
media per tentare il recupero della batteria. In questa modalità non sono previsti messaggi di errore
durante il ciclo di carica, viene segnalato alla conclusione se la batteria è stata recuperata o meno in
base alla tensione e corrente assorbita. Modalità a 6 fasi di carica, di seguito descritte:
• FASE 1: Analisi1. Se la batteria presenta una tensione superiore ai 3V, procede con la successiva
fase. Tensioni sotto i 3V causano il ritorno in stand-by del dispositivo.
raggiunge i 13V
• FASE 5: Tampone. La tensione scende al livello di mantenimento e viene completato il ciclo di carica.
Si accende il led verde di FULL.
• FASE 6: Ciclo a impulsi. Ciclo di mantenimento batteria a impulsi (per periodi prolungati).
ATTENZIONE: a causa della tensione elevate che si raggiunge durante questo ciclo di ricarica,
si deve effettuare il recupero con batteria scollegata dal veicolo. Un recupero con batteria
collegata al veicolo potrebbe causare danni all'elettronica di bordo.
Tensione minima batterie
Se la tensione iniziale della batteria è inferiore a 2.5V, la batteria non può essere recuperata.
B) Modalità di alimentazione “Flash” e carica “Amperage”
Fasce di corrente di alimentazione preimpostate:
Flash 10A: corrente di alimentazione impostata a 10A
Flash 30A: corrente di alimentazione impostata a 30A
Flash 60A: corrente di alimentazione impostata a 60A
Flash 120A: corrente di alimentazione impostata a 120A
Fasce di carica preimpostate per selezionare la batteria connessa (la corrente di uscita è regolata in
automatico)
Charge 10Ah – 100Ah
Charge 100Ah – 300Ah
Charge 300Ah – 600Ah
Charge 600Ah – 1200Ah
C) Tensioni di alimentazione “Flash” e Batterie Supportate “Volt / Batt.”
Fasce di tensione di alimentazione preimpostate:
13,8V: Tensione di alimentazione impostata a 13,8V
14,4V: Tensione di alimentazione impostata a 14,4V
14,8V: Tensione di alimentazione impostata a 14,8V
Tipologie di batterie preimpostate:
Wet: Batterie con elettrolita all’acido. Fine carica a 14,4V
Agm: Batterie Agm a piastra piana o batterie a spirale tipo Optima. Fine carica a 14,7V
LiFePO4: Batterie LiFePO4
Memorizzazione delle impostazioni
Il dispositivo realizza la memorizzazione delle impostazioni sul pannello frontale di controllo. Nel caso
caricabatterie si avvia con le ultime impostazioni memorizzate. Con caricabatterie impostato in modalità
FLASH il ciclo di lavoro riprende automaticamente al ritorno dell’alimentazione.
In modalità CHARGE, invece, verrà visualizzato sul display l’errore ER01 e sarà necessario premere il
tasto START/ STOP per riprendere il normale ciclo di ricarica.
ISTRUZIONI PER L’USO
I
Page 7

7
Analisi Batteria
Le analisi all'interno delle modalità operative, possono terminare con la segnalazione di alcuni errori.
• Batteria Danneggiata: si accende il led ''Fault'' e si spegne il led ''Start / Stop'', entra in Stand-By,
compare sul display la scritta ''Errx'' dove 'x' è il numero corrispondente alla causa dell'errore (Vedi
tabella 1). Segnale acustico singolo di due secondi.
• Inversione di polarità: si accende il led ''Reverse'' e viene visualizzato a display ''Err7'' con segnale
acustico di due secondi.
INDICAZIONI ERRORI
Gli errori che possono essere segnalati sono riportati in tabella 1.
Tabella 1: indicazione degli Errori
SEGNALAZIONE
DISPLAY
CAUSA RIMEDIO
Er01 Cavi scollegati, cavi in
cortocircuito.
Posizionare correttamente le pinze e riprendere
la carica della batteria; (vedere il paragrafo
“Utilizzo del caricabatterie”).
Batteria completamente in
cortocircuito.
Consultare il Centro Servizi della batteria più
vicino.
Er02 Batteria guasta o non
recuperabile.
Non accetta corrente
dopo 20h di recovery
La batteria può essere difettosa.
Er03 Sovratemperatura interna del
caricabatteria. Sovraccarico del
dispositivo
Rimuovere eventuali oggetti che coprono l'area di
ventilazione del caricabatteria o spostarlo in una
zona più fresca. Attendere che il caricabatteria
riparta automaticamente.
Er04 Errore di tensione.
Tensione batteria troppo bassa.
(Si sta tentando di caricare una
batteria da 6Volt).
Impostare un ciclo di “Recovery”.
Utilizzare il caricabatterie solo con batterie
supportate a 12V.
Riprendere la carica della batteria (vedere
paragrafo “Come si usa il caricabatterie”).
Batteria con uno o più elementi
in cortocircuito.
La batteria può essere difettosa.
Er05 Batteria con tensione troppo
alta rispetto a quella impostata.
(Si sta tentando di caricare una
batteria da 24Volt).
Utilizzare il caricabatterie solo con batterie
supportate a 12V.
Riprendere la carica della batteria (vedere
paragrafo “Come si usa il caricabatterie”).
Er06 Batteria di capacità eccessiva.
carica.
Utilizzare un caricabatteria con capacità di carica
maggiore.
Er07 and led
reverse
Le pinze dei conduttori di uscita
sono collegati impropriamente
alla batteria.
Posizionare correttamente le pinze e riprendere
la carica della batteria; (vedere il paragrafo
“Come si usa il caricabatterie”).
Er08 Corrente di uscita troppo alta.
Corrente sopra il limite
massimo.
Diminuire l’assorbimento sulla batteria.
ISTRUZIONI PER L’USO
I
Page 8
8
CARICA DELLA BATTERIA
Carica di batterie collegate al veicolo
2. Individuare il polo corrispondente alla massa del veicolo; in genere collegata al morsetto negativo.
3. Carica di una batteria con morsetto negativo collegato alla massa del veicolo, nel seguente modo:
• Collegare il conduttore di uscita con pinza rossa al polo (+) positivo della batteria.
• Collegare il conduttore di uscita con pinza nera alla massa del veicolo, lontano dalla batteria
e dal condotto del carburante.
4. Carica di una batteria con morsetto positivo collegato alla massa del veicolo, nel seguente modo:
• Collegare il conduttore di uscita con pinza nera al polo (-) negativo della batteria.
• Collegare il conduttore di uscita con pinza rossa alla massa del veicolo, lontano dalla batteria
e dal condotto del carburante.
Carica di batterie non collegate ad un veicolo
2. Collegare il conduttore di uscita con pinza rossa al polo (+) positivo della batteria.
3. Collegare il conduttore di uscita con pinza nera al polo (-) negativo della batteria.
ATTENZIONE Assicurarsi che entrambi i morsetti dei conduttori di uscita abbiano un contatto
adeguato con i loro rispettivi terminali.
UTILIZZO DEL CARICABATTERIE
1. Una volta connessi i cavi dei conduttori di uscita alla batteria, collegare il cavo di alimentazione
dell’apparecchio alla presa di rete, assicurandosi che la tensione corrisponda a quella nominale del
caricabatterie (230V-50Hz); a questo punto, l’apparecchio emette un segnale acustico per 0,5 secondi e
tutti i led di segnalazione, posti sul pannello di comando, si illuminano per due secondi; in questa fase il
display mostra “- - - -”.
CHARGE 10-100Ah acceso. L'accensione dei led varia a seconda dell'ultimo programma memorizzato.
3. A questo punto, con il caricabatterie in modalità “stand-by”, settare i parametri di carica appropriati al tipo
di batteria da caricare, mediante i tasti posti sul pannello di comando. I parametri di carica scelti sono
evidenziati dall’accensione del led corrispondente.
Parametri di carica impostabili:
• Tasto Function: (vedere paragrafo A - Modalità operative: “Function”) a seconda del ciclo di lavoro,
selezionare:
- Flash, Charge o Recovery.
• Tasto Amperage: (vedere paragrafo B - Modalità di alimentazione e carica: “Amperage”)
A seconda della corrente di alimentazione necessaria per sostenere la tensione di batteria durante le
operazioni di riprogrammazione è possibile selezionare quattro diverse correnti di alimentazione:
Se selezioniamo la funzione FLASH possiamo scegliere tra:
- Flash 10A: il caricabatteria eroga 10A costanti
- Flash 30A: il caricabatteria eroga 30A costanti
- Flash 60A: il caricabatteria eroga 60A costanti
- Flash 120A: il caricabatteria eroga 120A costanti
A seconda della capacità della batteria da ricaricare selezionare la funzione CHARGE; possiamo
scegliere tra:
- Charge 10Ah – 100Ah:
- Charge 100Ah – 300Ah:
- Charge 300Ah – 600Ah:
- Charge 600Ah – 1200Ah:
ISTRUZIONI PER L’USO
I
Page 9
9
• Tasto Volt / Batt (vedere paragrafo C - Tensioni di alimentazione “Flash” e Batterie Supportate:
“Volt / Batt.”)
A seconda della tensione di alimentazione necessaria per sostenere la tensione di batteria durante le
operazioni di riprogrammazione.
(SOLO MODALITÀ FLASH) è possibile selezionare tre diverse tensioni di alimentazione:
13,8V: Tensione di alimentazione impostata a 13,8V
14,4V: Tensione di alimentazione impostata a 14,4V
14,8V: Tensione di alimentazione impostata a 14,8V
A seconda della tecnologia costruttiva della batteria (SOLO MODALITÀ CHARGE) selezionare: Wet,
LiFePO4 o Agm.
4. Dopo aver impostato i parametri di carica, premere il tasto START/STOP per avviare la carica della
batteria. L’accensione dei led START/STOP e CHARGING indicano che la carica è in corso, il display
indicherà la corrente di carica e la tensione della batteria.
5. Durante la carica della batteria nelle fasi “I” ed “U0” rimane acceso il led CHARGING.
6. All’accensione del led FULL la batteria sarà caricata al 100%, da questo momento il caricabatterie
batteria, provvedendo a mantenerla sempre ad un livello ottimale di carica. In questa fase di carica
l’apparecchio può rimanere collegato per diversi mesi.
carica.
INTERRUZIONE VOLONTARIA DEL CICLO DI CARICA
dell’apparecchio dalla presa di rete e scollegare i conduttori di uscita dai morsetti della batteria.
INTERRUZIONE DEL CICLO DI CARICA IN CASO DI INTERRUZIONE DELLA LINEA DI RETE
In caso di interruzioni sulla linea di rete 110V - 230V il caricabatteria memorizza il ciclo di lavoro che
stava eseguendo in modo da poterlo riprende automaticamente (solo in modalità FLASH) al ritorno
dell'alimentazione sulla linea di rete a 230Volt. Questa funzione è fondamentale nei casi in cui il
caricabatteria esegua cicli di alimentazione molto lunghi anche in assenza di operatore. In modalità
CHARGE sarà invece necessario premere il pulsante START/STOP per riprendere il ciclo di lavoro.
FINE CARICA
1. Terminata la carica premere il tasto START/STOP del caricabatterie. Lo spegnimento del led indica
che il caricabatteria ha terminato il ciclo di lavoro.
2. Scollegare il cavo di alimentazione dell’apparecchio dalla presa di rete.
3. Scollegare il conduttore di uscita con pinza nera dalla massa del veicolo o dal morsetto negativo (-)
della batteria.
4. Scollegare il conduttore di uscita con pinza rossa dal morsetto positivo (+) della batteria.
Al termine delle operazioni riporre il caricabatteria in una zona asciutta e priva di umidità. Per la pulizia
del corpo esterno utilizzare un panno asciutto.
MANUTENZIONE
Gli interventi di manutenzione e di riparazione devono essere eseguiti da personale specializzato.
SMALTIMENTO
Il simbolo del cassonetto barrato riportato sull’apparecchiatura o sulla confezione indica che il prodotto,
L’utilizzatore che intendesse smaltire questo strumento può:
ISTRUZIONI PER L’USO
I
Page 10
10
- Riconsegnarlo al proprio rivenditore al momento dell’acquisto di uno strumento equivalente.
- Nel caso di prodotti ad uso esclusivo professionale, contattare il produttore che dovrà disporre
una procedura per il corretto smaltimento.
Il corretto smaltimento di questo prodotto permette il riutilizzo delle materie prime in esso contenute ed
evita danni all’ambiente ed alla salute umana.
pericolosi, comporta l’applicazione delle sanzioni previste.
GARANZIA
Questa attrezzatura è fabbricata e collaudata secondo le norme attualmente vigenti nella Comunità
Europea. E’ coperta da garanzia per un periodo di 12 mesi per uso professionale o 24 mesi per uso non
professionale.
Vengono riparati guasti dovuti a difetti di materiale o di produzione, mediante ripristino o sostituzione dei
pezzi difettosi a nostra discrezione.
stessa.
Non sono soggetti a garanzia difetti dovuti all’usura, all’uso errato od improprio e a rotture causate da
colpi e/o cadute.
quando viene inviato all’assistenza smontato.
Sono espressamente esclusi danni causati a persone e/o cose di qualsiasi genere e/o natura, diretti
e/o indiretti.
DICHIARAZIONE DI CONFORMITÀ UE
Dichiariamo sotto la nostra responsabilità che il prodotto descritto è conforme a tutte le disposizioni
pertinenti alle seguenti Direttive:
• Direttiva Compatibilità Elettromagnetica (E.M.C.) 2014/30/UE;
• Direttiva Bassa Tensione (L.V.D.) 2014/35/UE;
• Direttiva sulla restrizione dell’uso di determinate sostanze pericolose nelle apparecchiature elettriche
ed elettroniche (Ro.H.S.) 2011/65/UE;
ISTRUZIONI PER L’USO
I
Page 11
11
OPERATING MANUAL AND INSTRUCTIONS FOR ELECTRONIC MULTIPURPOSE 12V
BATTERY CHARGER.
Store the safety instructions with care and hand them over to the users.
PURPOSE OF USE
The electronic battery charger can be used for the following purposes:
• charging and supplying power to motor vehicles;
• use on 12V, Wet - Agm - lithium (LiFePO4) batteries;
• reprogramming and self-diagnosis.
The electronic battery charger must not be used for the following operations:
• use on batteries other than 12V
• use in humid or wet environments, or in bad weather;
• use for any applications other than stated ones.
WORK AREA SAFETY
Do not operate the battery charger in environments containing potentially explosive
the dust or fumes.
Keep children and bystanders away from your workplace while operating the battery charger.
Distractions from other people can cause you to lose control over the battery charger during use.
Do not inhale any harmful gases that may be released by the battery of the motor vehicle while
working on the engine.
During connection operations, keep your face away from the motor vehicle battery. The battery
contains corrosive liquid; in the event of accidental contact with your skin or eyes, rinse
immediately with water and seek medical advice.
Do not drop any metal tools on the motor vehicle battery: it may short-circuit.
Use the battery charger in a dry area, avoiding humidity.
BATTERY CHARGER SAFETY
• Before use, check that the battery charger has not been damaged, and that there are no uncovered
cables or worn parts.
• Do not use the battery charger when damaged, to avoid the risk of electric shocks; do not try to open
or modify it.
IMPORTANT! READ THIS MANUAL CAREFULLY BEFORE USING THE BATTERY
CHARGER. FAILURE TO COMPLY WITH THE SAFETY STANDARDS AND
OPERATING INSTRUCTIONS MAY RESULT IN SERIOUS INJURY.
CAUTION
INSTRUCTIONS FOR USE
EN
Page 12
12
• Connect the power supply cable of the battery charger to the mains socket, making sure that the mains
voltage matches the voltage stated on the power supply device. (See TECHNICAL DATA table)
• After use, do not leave the battery charger connected to the mains socket for a long time.
• Do not damage the electronic circuit of the battery charger.
PERSONNEL SAFETY
•
of drugs, alcohol, or medications.
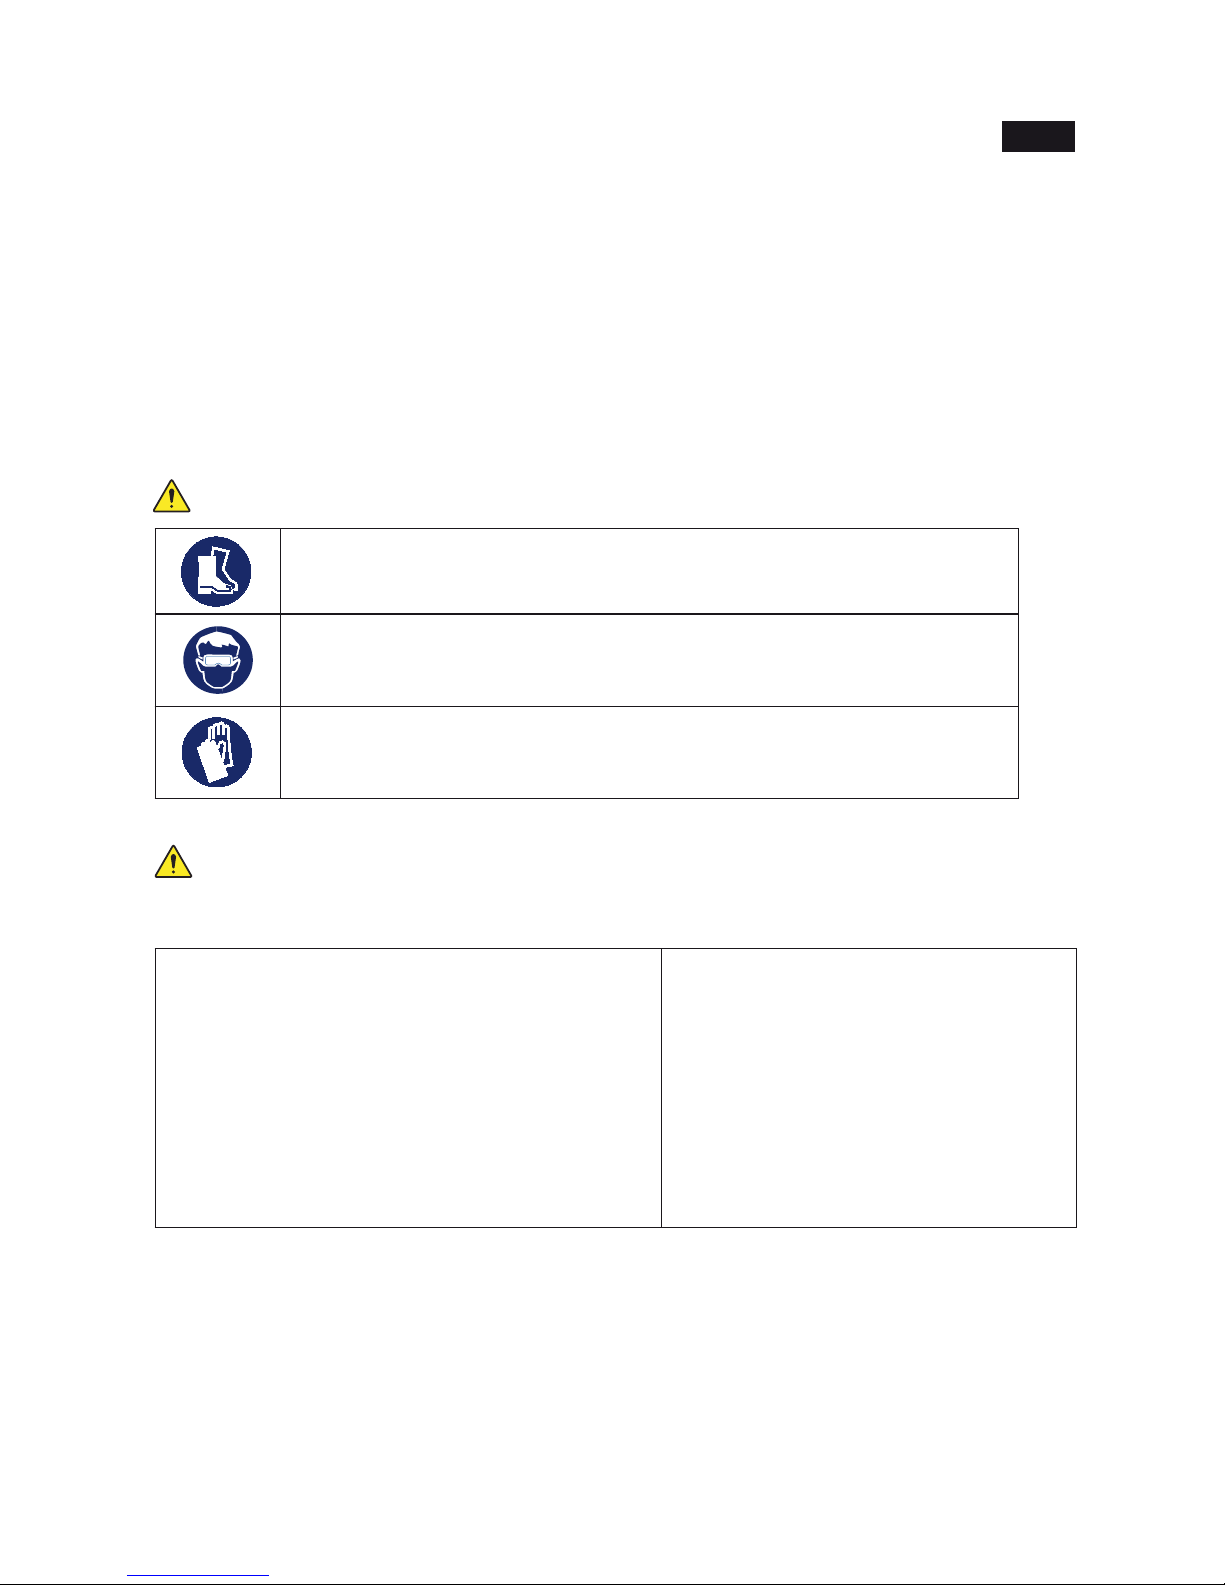
• Always use the following personal protective equipment:
• safety shoes;
• eye protection;
• protective gloves against physical agents.
• Use the battery charger in well-aired, dry rooms.
• Never allow the clips of the clamps (positive-red and negative-black) to touch together.
• Check that the cables of the battery charger are kept away from fans, moving parts and the fuel pipe.
• Do not wear loose clothing, jewellery or metal objects when working on the motor vehicle.
• Before replacing the battery charger, make sure that it has cooled to room temperature.
BATTERY CHARGER USE AND CARE
• Do not put any objects into any slots or openings on the surface of the battery charger.
• Do not use the battery charger if the case, the clamps, the cables or the power supply cable have been
damaged, if it gives off unusual smells or too much heat.
• Do not modify the battery charger. This can reduce the effectiveness of safety measures and increase
operator risk.
• Have the battery charger repaired only through a trained repair person and only using original
replacement parts.
• Before carrying out any operations, turn off the lights of the motor vehicle and cut out any running
accessories.
• Always check that the voltage of the battery charger matches the voltage of the motor vehicle’s
system, to prevent explosions, damage to the motor vehicle, the battery charger and people.
• Always connect the output lead with red clamp (+) to the positive post of the battery, and the
output lead with black clamp (-) to the motor vehicle’s chassis.
• Never reverse polarity; reversed polarity can cause explosions or damage to the motor vehicle,
the battery charger and people.
• To clean the battery charger, use a dry cloth. Always disconnect the battery charger from the power
supply mains. Never use damp or wet cloths.
BATTERY CHARGER SAFETY
• Periodically check the battery charger, the power supply cable and the clamps.
INSTRUCTIONS FOR USE
EN
Page 13
13
• Do not use the battery charger when damaged, to avoid the risk of electric shocks; do not try to open
or modify it.
• Connect the battery charger to the mains socket, making sure that the mains voltage matches that
stated on the power supply device. (See TECHNICAL DATA table)
• Do not cover the battery charger when using it. Allow adequate space for ventilation.
• Do not use the battery charger in humid or wet environments; do not expose it to rain. Wet and
contaminated environments increase the risk of electric shocks.
SIGNALLING LEDS
The front panel of the battery charger accommodates 15 LEDs, including 4 battery status LEDs,
indicating the following:
• “Full”: battery is charged, and is in charge maintenance status
• “Charging”: battery is charging
• “Fault”: battery is damaged
• “Reverse”: polarity reversal
• 1 battery charge status LED, “led ON” (blue colour)
PERSONAL PROTECTIVE EQUIPMENT TO WEAR WHILE OPERATING BATTERY CHARGER
Failure to observe the following warnings may result in physical injury and/or disease.
Additional personal protective equipment to wear according to the values found in the
environmental hygiene/risk analysis survey if the values exceed the limits under current
regulations.
TECHNICAL DATA
ALWAYS WEAR EYE PROTECTION
ALWAYS WEAR SAFETY SHOES
ALWAYS WEAR PROTECTIVE GLOVES AGAINST PHYSICAL AGENTS WHILE
OPERATING BATTERY CHARGER
FOR USE WITH BATTERIES
RATED VOLTAGE
CHARGING VOLTAGE
ABSORBED POWER
BATTERY CHARGING CAPACITY
BATTERY HOLDING CAPACITY
CLAMP CABLE LENGTH
CLIP CABLE SECTION
DEGREE OF PROTECTION
POWER SUPPLY CABLE LENGTH
DIMENSIONS
WEIGHT
12V Wet - Agm - Lithium LiFePO4
110V-240V 50/60Hz
12V max
1800 Watt
10÷1200 Ah
10÷3000 Ah
2.7 m
25 mm
2
IP20
1.7 m
350x450x150 mm
8.8 kg
INSTRUCTIONS FOR USE
EN
Page 14

14
• 1 operating status LED, “Start/Stop” (yellow colour); indicates whether output is in accordance with
selected mode
• 2 operating mode LEDs, “Function”: Flash or Charge (yellow LED)
• 4 supplied current LEDs, “Amperage”, described below (yellow LED)
• 3 supply voltage and battery type LEDs, “Volt/Batt”, described below (yellow LED).
The front panel of the battery charger accommodates 5 buttons:
• “Start/Stop”: starts or stops supply in selected mode
• “Function”: selects operating mode
• “Volt/Batt”: selects supply voltage or type of battery to charge
• “Amperage”: selects supplied current
• “A/V” (display): selects information to display
DIGITAL DISPLAY
The “A/V” selector button selects voltage or current display.
BATTERY CHARGER FEATURES AND OPERATING MODES
A) Operating modes: “Function”
Charge
Battery charging mode. There are 7 charging steps, as described below:
• STEP 1: Test 1. If battery output is above 6.5V, the unit proceeds with the next step. Outputs below 6.5V will
cause the device to revert to stand-by.
• STEP 2: Pre-charge. Charge starts at a constant current, until battery voltage reaches 13V.
• STEP 3: Test 2. Checks whether the battery has short-circuited elements. The battery charger stops
supplying current for 5 minutes. If during this time battery voltage falls below 11.7V, the device reverts to
stand-by. If voltage remains above 11.7V, the battery charger moves on to STEP 4. If any element short-
the battery should be charged in the RECOVERY mode.
• STEP 4: Deep cycle charging. The battery charges until the set limit is reached.
• STEP 5: Constant voltage. Keeps the battery at charge end voltage.
• STEP 6: Buffer. Voltage falls to the maintenance level and the charging cycle is completed. The green FULL
LED turns on.
• STEP 7: Pulsed current cycle. Pulsed battery maintenance cycle (over long periods).
Flash
Power Supplier mode assisting in motor vehicle programming. No charge phase occurs in it. It is just a
power supplier stabilized at rated battery voltage. It is designed to deliver current supporting the battery,
Recovery
Recovery mode for sulphated batteries accessible by a prolonged press of the “Function” key. The
screen displays the message “rEC” and shows the instantaneous voltage or current reading; during this
The battery charger performs a special charging cycle, in which higher than average voltages are forced,
to attempt recovery of the battery. In this mode, no error messages are generated during the charging
cycle; when the cycle is completed, a message is displayed to indicate whether or not the battery has
been recovered on the basis of voltage or current absorption. This mode has 6 charging steps, as
described below:
• STEP 1: Test 1. If battery output is above 3V, the unit proceeds with the next step. Outputs below 3V
will cause the device to revert to stand-by.
• STEP 2: Pre-charge. Charge starts at a constant current, until battery voltage reaches 13V.
• STEP 3: Deep cycle charging. The battery charges until the set limit value is reached.
• STEP 4: Constant voltage. Keeps the battery at charge end voltage.
• STEP 5: Buffer. Voltage falls to the maintenance level and the charging cycle is completed. The green
INSTRUCTIONS FOR USE
EN
Page 15

15
FULL LED will turn on.
• STEP 6: Pulsed current cycle. Pulsed battery maintenance cycle (over long periods).
ATTENTION: Because of the high voltage reached during this charging cycle, the battery recovery
process must be performed with the battery disconnected from the motor vehicle. Recovery
with the battery connected to the motor vehicle may result in damage to the motor vehicle’s
electronics.
Minimum battery voltage
If the initial voltage of the battery is lower than 2.5V, the battery cannot be recovered.
B) “Flash” supply and charging mode: “Amperage”
Preset supply current bands:
Flash 10A: supply current set to 10A
Flash 30A: supply current set to 30A
Flash 60A: supply current set to 60A
Flash 120A: supply current set to 120A
Preset charging bands to select connected battery (output current adjusted automatically)
Charge 10Ah – 100Ah: Supports batteries from 10Ah to 100Ah
Charge 100Ah – 300Ah: Supports batteries from 100Ah to 300Ah
Charge 300Ah – 600Ah: Supports batteries from 300Ah to 600Ah
Charge 600Ah – 1200Ah: Supports all batteries from a minimum of 600Ah to a maximum of 1200Ah.
C) “Flash” supply voltage and supported batteries: “Volt / Batt.”
Preset supply bands:
13.8V: Supply voltage set to 13.8V
14.4V: Supply voltage set to 14.4V
14.8V: Supply voltage set to 14.8V
Preset battery types:
Wet: Acid electrolyte batteries. Charge end at 14.4V
Agm: Flat plate Agm batteries or Optima type spiral batteries. Charge end at 14.7V
LiFePO4: LiFePO4 batteries
Saving settings
The battery charger saves the settings on the front control panel. In the event of an accidental power
loss or voluntary power off, when the charger is restarted, it will restart with the latest saved settings.
With the battery charger set to the FLASH mode, the work cycle will resume automatically when the
power supply is restored.
Whereas in the CHARGE mode, the screen will display the error message ER01, and the START/STOP
key will have to be pressed, to resume the normal charge cycle.
Battery testing
The tests within the operating modes may terminate with the signalling of some errors.
• Damaged Battery: the “Fault” LED switches on and the “Start / Stop” LED switches off, and the charger
enters Stand-by mode. The display shows the message “Errx”, where ‘x’ is the number corresponding
to the cause of the error (see Table 1). Single two second audible warning.
• Polarity reversal: the “Reverse” LED switches on, and the display shows the message “Err7” with a two
second audible warning.
ERROR CODES
The errors that may be reported are described in Table 1.
INSTRUCTIONS FOR USE
EN
Page 16

16
Table 1: Numbering of errors
DISPLAY
INDICATION
CAUSE SOLUTION
Er01 Leads disconnected, leads
short-circuited.
Position the clamps correctly and start charging
the battery again (see section “Operating Battery
Charger”).
Battery completely
short-circuited.
Contact your nearest battery service centre.
Er02 Battery faulty or unrecoverable.
No current accepted after 20
hours of recovery
The battery could be defective.
Er03 Internal overheating of battery
charger. Battery charger
overload.
Remove any objects that could be covering the
ventilation area of the battery charger or move it
to a cooler area. Wait for the battery charger to
start again automatically.
Er04 Voltage error.
Battery voltage too low. (You
are attempting to charge a 6V
battery).
Set a “Recovery” cycle.
Only use the battery charger with supported 12V
batteries.
Start charging the battery again (see section
“Operating Battery Charger”).
One or more elements of the
battery has/have short-circuited.
The battery could be defective.
Er05 Battery voltage too high
compared to that set. (You are
attempting to charge a 24V
battery).
Only use the battery charger with supported 12V
batteries.
Start charging the battery again (see section
“Operating Battery Charger”).
Er06 Battery capacity excessive.
Unable to reach end condition.
Use a battery charger with greater capacity.
Er07 and led
reverse
The clamps of the output leads
are not connected correctly to
the battery.
Position the clamps correctly and start charging
the battery again (see section “Operating Battery
Charger”).
Er08 Excessively high output current.
Current exceeds maximum limit.
Reduce battery absorption.
BATTERY CHARGING
Charging batteries connected to motor vehicle
1. Before starting to charge the battery, make sure that the power supply lead is not plugged into the
mains supply.
2. Locate the motor vehicle’s earthing point, which is normally connected to the negative battery terminal.
3. Charge a battery with negative earth, grounded to the motor vehicle’s chassis, as follows:
• Connect the output lead with the red clamp to the positive terminal (+) of the battery.
• Connect the output lead with the black clamp to the motor vehicle’s earthing point, keeping it away
from the battery and fuel pipe.
4. Charge a battery with positive earth, grounded to the motor vehicle’s chassis, as follows:
• Connect the output lead with the black clamp to the negative terminal (-) of the battery.
• Connect the output lead with the red clamp to the motor vehicle’s earthing point, keeping it away
from the battery and fuel pipe.
Connecting batteries that are not connected to a motor vehicle
1. Before starting to charge the battery, make sure the power supply lead is not plugged into the mains
supply.
INSTRUCTIONS FOR USE
EN
Page 17
INSTRUCTIONS FOR USE
EN
17
2. Connect the output lead with the red clamp to the positive terminal (+) of the battery.
3. Connect the output lead with the black clamp to the negative terminal (-) of the battery.
ATTENTION: Make sure that both clamps of the output leads generate a suitable contact with
their corresponding terminals.
OPERATING BATTERY CHARGER
1. Once the output leads have been connected to the battery, plug the power supply lead of the battery
charger into the mains socket, making sure that the voltage matches the rated voltage of the battery
charger (230V-50Hz); having done this, the battery charger will emit an acoustic signal for 0.5 seconds,
and all the LED indicators on the control panel will switch on for 2 seconds; at this stage, the display shows
“- - - -”.
5-30Ah LED on. The LEDs light up differently based on the last programme saved.
3. At this stage, with the battery charger in “stand-by” mode, set the charging parameters suitable for the
type of battery to be charged, using the keys on the control panel. The charging parameters selected are
displayed by the corresponding LED, which switches on.
Settable charging parameters:
• Function key: (see section A – Operating Modes: “Function”) depending on the work
cycle, select:
- Flash, Charge or Recovery.
• Amperage key: (see section B – Supply and charging mode: “Amperage”)
Based on the supply current required to support the battery voltage during reprogramming operations,
you can select four different supply currents:
If you select the FLASH feature, you can choose among the following options
- Flash 10A: battery charger delivers a constant current of 10A
- Flash 30A: battery charger delivers a constant current of 30A
- Flash 60A: battery charger delivers a constant current of 60A
- Flash 120A: battery charger delivers a constant current of 120A
Based on the capacity of the battery to charge, select the CHARGE feature; you can choose among the
following options:
- Charge 10Ah – 100Ah: Supports batteries from 10Ah to 100Ah.
- Charge 100Ah – 300Ah: Supports batteries from 100Ah to 300Ah
- Charge 300Ah – 600Ah: Supports batteries from 300Ah to 600Ah
- Charge 600Ah – 1200Ah: Supports all batteries from 600Ah to 1200Ah.
• Volt / Batt key (see section C - “Flash” supply voltage and supported batteries: “Volt / Batt.”)
Depending on the supply voltage required to support the battery voltage during reprogramming
operations (ONLY FLASH MODE), you can select three different supply voltages:
13.8V: Supply voltage set to 13.8V
14.4V: Supply voltage set to 14.4V
14.8V: Supply voltage set to 14.8V
Depending on the construction/type of the battery (ONLY CHARGE MODE), select: Wet, LiFePO4 or Agm.
4. Once the charging parameters have been set, press the START/STOP key to start charging the
battery. When the START/STOP and CHARGING LEDs light up, the battery is charging; the display
will show the charging current and the voltage of the battery.
5. The CHARGING LED remains lit in phases “I” and “U0” whilst the battery is charging.
6. When the FULL LED switches on, it means that the battery is fully charged (100%), and the charger will
Page 18
INSTRUCTIONS FOR USE
EN
18
so that it is always at an optimal level of charge. In this charging phase, the appliance can be left
connected to the battery for several months.
7. If you wish to end or interrupt the charging cycle, follow the charge end/interruption instructions.
INTENTIONAL INTERRUPTION OF CHARGING CYCLE
If you want to interrupt the battery charging cycle, simply press the START/STOP key; the corresponding
LED will switch off to show that the work cycle has ended. Disconnect the output lead of the appliance
from the mains socket and the output leads from the battery terminals.
INTERRUPTION OF CHARGING CYCLE IN CASE OF A POWER SUPPLY CUT
In the case of a 110V – 230V mains power supply cut, the battery charger saves the work cycle it was
performing in order to restore it automatically (only in the FLASH mode) as soon as the 230V power
supply is restored. This feature is fundamental if the battery charger is used to charge batteries without
the operator supervising the cycle; for example, during very long charging cycles. Whereas, in the
CHARGE mode, the START/STOP key must be pressed to resume the work cycle.
END OF CHARGING
1. Once the battery is charged, press the START/STOP key of the battery charger. The LED will turn off
to show that the battery charger has completed the work cycle.
2. Disconnect the power supply lead of the appliance from the mains socket.
3. Disconnect the output lead with the black clamp from the motor vehicle’s earthing point or from the
negative terminal (-) of the battery.
4. Disconnect the output lead with the red clamp from the positive terminal (+) of the battery.
After use, replace the battery charger in a dry place free from humidity. To clean the outer casing, use
a dry cloth.
MAINTENANCE
Maintenance and repair jobs must be carried out by trained personnel.
DISPOSAL
The crossed-out wheelie bin symbol on the equipment or packaging means that the product should be
collected separately from other types of urban waste at the end of its useful life.
Any user who is going to dispose of this tool can:
- deliver it to an appropriate collection facility for electronic or electrotechnical equipment;
- return it to the dealer upon purchase of a new, equivalent item of equipment;
- in case of a product for professional use only, contact the manufacturer which will arrange for the
product to be properly disposed of.
Proper disposal of this product allows the raw materials contained in it to be reused and prevents
damage to the environment or human health.
Illegal disposal of this product is a violation of the provision concerning the disposal of hazardous waste
WARRANTY
This tool is manufactured and tested in accordance with current EU regulations. It is covered by a
12-month warranty for professional use or a 24-month warranty for nonprofessional use.
pieces or replacing them at our discretion.
Page 19

19
Should assistance be required once or several times during the warranty period, the expiry date of this
warranty will remain unchanged.
This warranty will not cover defects due to wear, misuse or breakdowns caused by blows and/or falls.
In addition, this warranty will no longer be valid if any changes are made, or if the tool is damaged or
sent to the customer service in pieces.
This warranty explicitly excludes any damage to people and/or things, whether direct or consequential.
EU DECLARATION OF CONFORMITY
We hereby declare, assuming full responsibility, that the described product complies with all the relevant
provisions of the following Directives:
• Electromagnetic Compatibility Directive (EMC) 2014/30/EU;
• Low Voltage Directive (LVD) 2014/35/EU;
• Directive concerning the restriction of the use of certain hazardous substances in electric and electronic
equipment (RoHS) 2011/65/EU.
INSTRUCTIONS FOR USE
EN
Page 20
20
NOTICE D'UTILISATION ET INSTRUCTIONS POUR CHARGEUR DE BATTERIE
ÉLECTRONIQUE 12V MULTIFONCTIONS.
Garder scrupuleusement les instructions sur la sécurité et les remettre au personnel concerné.
DESTINATION D’USAGE
Le chargeur de batterie électronique est destiné à l’usage suivant :
• la charge et l’alimentation des véhicules
• à utiliser sur batteries à 12V, Wet - Agm - lithium (LiFePO4)
• pendant les phases de reprogrammation et d'autodiagnostic.
Les opérations suivantes ne sont pas autorisées :
• il est interdit d’utiliser ce dispositif sur des batteries autres que 12V ;
• il est interdit d’utiliser ce dispositif en dehors des prescriptions techniques contenues dans le tableau
DONNÉES TECHNIQUES ;
• il est interdit d’utiliser ce dispositif dans des lieux humides, mouillés ou exposés aux intempéries ;
• il est interdit d’utiliser ce dispositif pour toutes les opérations autres que celles indiquées
SÉCURITÉ DU POSTE DE TRAVAIL
Ne pas utiliser le chargeur de batteries dans des lieux présentant des atmosphères
aux poussières ou aux vapeurs.
Empêcher que des enfants ou des visiteurs s’approchent du poste de travail pendant les
opérations avec le chargeur de batterie. La présence d’autres personnes peut distraire
l’opérateur qui peut perdre le contrôle du chargeur de batteries.
Ne pas inhaler les éventuels gaz nocifs qui se dégagent de la batterie du véhicule pendant
l’intervention sur le moteur.
Pendant les opérations de branchement, éloigner le visage de la batterie du véhicule.
Le liquide se trouvant dans la batterie est corrosif ; en cas de contact accidentel de l’acide
avec la peau ou les yeux, rincer immédiatement à l'eau et consulter un médecin.
Ne pas faire tomber d'outils métalliques sur la batterie du véhicule qui pourrait provoquer un
court-circuit de la batterie.
Utiliser le chargeur de batterie dans une zone sèche en évitant l'humidité.
SÉCURITÉ CHARGEUR DE BATTERIE
• Avant l'utilisation, contrôler que le chargeur de batterie n'ait pas été endommagé, qu'il ne présente
pas de câbles découverts ou de pièces usées.
IL EST IMPORTANT DE LIRE INTÉGRALEMENT LE PRÉSENT MANUEL AVANT
D’UTILISER LE CHARGEUR DE BATTERIE. LE NON-RESPECT DES NORMES
DE SÉCURITÉ ET DES INSTRUCTIONS D’UTILISATION PEUT PROVOQUER DE
GRAVES ACCIDENTS.
ATTENTION
MODE D’EMPLOI
F
Page 21
21
• Ne pas utiliser le chargeur de batteries s'il est endommagé car cela pourrait provoquer des secousses
• Brancher le câble d'alimentation à la prise en s'assurant que la tension de réseau soit celle indiquée
sur le dispositif d’alimentation. (Consulter le tableau DONNÉES TECHNIQUES)
• Au terme des opérations, ne pas laisser le chargeur de batterie branché à la prise de courant pendant
une période prolongée.
• Ne pas intervenir sur le circuit électronique du chargeur de batterie.
RECOMMANDATIONS POUR LA SÉCURITÉ DU PERSONNEL
• La plus grande attention doit être apportée aux actions effectuées. Ne pas utiliser le chargeur de
batterie en cas de fatigue ou sous l’effet de drogues, de boissons alcooliques ou de médicaments.
• Utiliser systématiquement les équipements de protection individuelle suivants :
• chaussures de sécurité ;
• lunettes de protection ;
• gants de protection contre les agents physiques.
• Ne jamais mettre en contact entre elles les bornes des deux pinces (rouge (+) positive ;
noire (-) négative).
• S'assurer que les câbles du chargeur de batterie soient loin de ventilateurs, de pièces en mouvement
et du conduit du carburant.
• Ne pas porter de vêtements larges, de bracelets, de chainettes ou d'objets métalliques pendant le
travail sur le véhicule.
• Avant de ranger le chargeur de batterie, s'assurer qu'il revienne à une température ambiante.
UTILISATION ATTENTIVE DU CHARGEUR DE BATTERIE
•
de batterie.
• Ne jamais utiliser le chargeur de batterie si l'étui, les pinces, les câbles ou le câble d’alimentation sont
endommagés; en cas d'odeurs inhabituelles ou de chaleur trop élevée.
•
mesures de sécurité et augmenter les risques pour l’opérateur.
• Faire réparer le chargeur de batterie seulement et exclusivement par un personnel spécialisé et en
utilisant uniquement des pièces de rechange originales.
• Avant d'effectuer toute opération, éteindre les lumières du véhicule et tous les accessoires
éventuellement en fonction.
•
tension de l'installation du véhicule. L'éventuel dépassement peut provoquer des explosions,
des dommages au véhicule, au chargeur de batterie et aux personnes.
• Brancher systématiquement le conducteur de sortie avec pince rouge (+) au pôle positif de la
batterie et le conducteur de sortie avec pince noire (-) à la masse du véhicule.
MODE D’EMPLOI
F
Page 22
22
• Ne jamais inverser la polarité. L'inversion de polarité peut provoquer des explosions, des
dommages au véhicule, au chargeur de batterie et aux personnes.
• Pour le nettoyage, utiliser un chiffon sec, en débranchant toujours le chargeur de batterie. Ne jamais
utiliser de chiffons humides ou mouillés.
RECOMMANDATIONS POUR LA SÉCURITÉ DU CHARGEUR DE BATTERIE
•
• Ne pas utiliser le chargeur de batterie s'il est endommagé car cela pourrait provoquer des secousses
• Brancher le chargeur de batterie à la prise de courant en s'assurant que la tension de réseau soit celle
indiquée sur le dispositif d'alimentation. (Consulter le tableau DONNÉES TECHNIQUES)
• Ne couvrir en aucun cas le chargeur de batterie pendant son utilisation. Prévoir un espace approprié
pour l'aération.
• Ne pas utiliser le chargeur de batterie dans des milieux humides, mouillés, ne pas l'exposer à la pluie.
Les milieux humides et contaminés augmentent le risque de secousses électriques.
ÉQUIPEMENTS DE PROTECTION INDIVIDUELLE PRÉVUS PENDANT L'UTILISATION DU CHARGEUR DE BATTERIE
Le non-respect des indications suivantes peuvent entraîner des lésions physiques
et/ou des pathologies.
Autres équipements de protection individuelle à utiliser en fonction des valeurs relevées au
cours de l’analyse d’hygiène environnementale/des risques si les valeurs dépassent les limites
prévues par les normes en vigueur.
DONNÉES TECHNIQUES
PORTER SYSTÉMATIQUEMENT DES LUNETTES DE PROTECTION
UTILISER SYSTÉMATIQUEMENT DES CHAUSSURES DE SÉCURITÉ
UTILISER SYSTÉMATIQUEMENT DES GANTS DE PROTECTION CONTRE LES
AGENTS PHYSIQUES PENDANT L’UTILISATION DU CHARGEUR DE BATTERIE
À UTILISER POUR LES BATTERIES
TENSION NOMINALE
TENSION DE RECHARGE
PUISSANCE ABSORBÉE
CAPACITÉ BATTERIE EN CHARGE
CAPACITÉ BATTERIE EN MAINTIEN
LONGUEUR CÂBLE PINCE
SECTION CÂBLE BORNES
DEGRÉ DE PROTECTION
LONGUEUR CÂBLE ALIMENTATION
DIMENSIONS
POIDS
12V Wet - Agm - Lithium LiFePO4
110V-240V 50/60Hz
12V max
1800 Watt
10÷1200 Ah
10÷3000 Ah
2,7 m
25 mm
2
IP20
1,7 m
350x450x150 mm
8,8 kg
MODE D’EMPLOI
F
Page 23
23
DEL D’AVERTISSEMENT
Sur le panneau avant du chargeur de batterie sont présents 15 Del. 4 Del pour l’état de charge
de la batterie qui signalent :
• “Full” la batterie est rechargée et en maintien
• “Charging” la batterie est en charge
• “Fault” la batterie est endommagée
• “Reverse” : inversion de polarité
• 1 “led ON” pour l’état de charge de la batterie (couleur Bleu)
• 1 Del “Start/Stop” (couleur Jaune) pour l’état de fonctionnement, signale s’il fonctionne dans la
modalité sélectionnée
• 2 Del sur la modalité opérationnelle “Function” Flash ou Charge (Del Jaune)
• 4 Del d’avertissement du courant “Ampérage” décrits dans le chapitre suivant (Del Jaune)
• 3 Del d’avertissement tension d’alimentation électrique et type de batterie “Volt/Batt” décrits dans le
chapitre suivant (Del Jaune).
Sur le panneau avant du chargeur de batterie sont prévues 5 touches :
• “Start/Stop” : mise en marche ou arrêt de fourniture dans la modalité sélectionnée
• “Function” : sélection de la modalité de fonctionnement
• “Volt/Batt” : sélection de la tension de Supply ou le type de batterie à charger
• “Amperage” : sélection du courant distribué
•
AFFICHEUR NUMÉRIQUE
FONCTIONS DU CHARGEUR DE BATTERIE ET MODALITÉS DE FONCTIONNEMENT
A) Modalités de fonctionnement : “Function”
Charge
Modalités de charge de la batterie. Elle prévoit 7 phases de charge, décrites ci-après :
• PHASE 1 : Analyse 1. Si la batterie présente une tension supérieure à 6,5 V, on passe à la phase suivante.
Des tensions inférieures à 6,5 V provoquent le retour en veille du dispositif.
• PHASE 2 : Pré-charge. Début de la charge à courant constant jusqu’à ce que la tension de la batterie
atteigne les 13 V.
• PHASE 3 : Analyse 2. Recherche de l’élément en court-circuit. Le chargeur de batterie interrompt l’arrivée
de courant pendant 5 minutes. Si pendant ce laps de temps la tension de la batterie descend sous les 11,7
V, le dispositif se remettra en veille. Si la tension reste supérieure à 11,7 V, passer à la PHASE 4. En cas
il est conseillé de recharger la batterie en modalité RECOVERY.
• PHASE 6 : Tampon. La tension descend au niveau de maintien et le cycle de charge est complété. Le Del
vert de FULL s’éclaire.
• PHASE 7 : Cycle à impulsions. Cycle de maintien batterie à impulsions (pendant des périodes prolongées).
Flash
Modalité Alimentateur pour assistance dans la programmation des véhicules. Ne prévoit aucune phase
de charge à l’intérieur, c’est un pur alimentateur stabilisé à la tension nominale de batterie. Son but est
de fournir du courant en support à la batterie pour éviter sa décharge lors d’opérations qui demandent
de l’énergie pour des périodes brèves ou longues.
Recovery
Modalité de récupération pour les batteries sulfatées accessible en appuyant longuement sur la touche
instantané. Pendant cette phase, le Del “Charge” clignote.
MODE D’EMPLOI
F
Page 24
24
Le chargeur de batterie effectue un cycle de recharge spécial lors duquel sont forcées les tensions
supérieures à la moyenne pour tenter la récupération de la batterie. Les messages d’erreur ne sont pas
prévus pendant le cycle de charge pour ces modalités, le signal de récupération de la batterie apparaît
• PHASE 1 : Analyse 1. Si la batterie présente une tension supérieure à 3 V, on passe à la phase
suivante. Des tensions inférieures à 3 V provoquent le retour en veille du dispositif.
• PHASE 2 : Pré-charge. Début de la charge à courant constant jusqu’à ce que la tension de la batterie
atteigne les 13V.
• PHASE 5 : Tampon. La tension descend au niveau de maintien et le cycle de charge est complété. Le
Del vert de FULL s’éclaire.
• PHASE 6 : Cycle à impulsions. Cycle de maintien batterie à impulsions (pendant des périodes
prolongées).
ATTENTION : à cause de la haute tension que l’on atteint pendant ce cycle de charge, il faut
effectuer la récupération avec batterie débranchée du véhicule. Une récupération avec batterie
branchée au véhicule pourrait provoquer des dommages à l’électronique de bord.
Tension minimum batteries
Si la tension initiale de la batterie est inférieure à 2,5 V, la batterie ne peut pas être récupérée.
B) Modalités d’alimentation “Flash” et charge “Ampérage”
Fourchettes de courant d’alimentation préalablement programmées :
Flash 10A : courant d’alimentation programmé à 10A
Flash 30A : courant d’alimentation programmé à 30A
Flash 60A : courant d’alimentation programmé à 60A
Flash 120A : courant d’alimentation programmé à 120A
Fourchettes de charge préalablement programmées pour sélectionner la batterie associée (le courant
de sortie est réglé en automatique)
Charge 10Ah – 100Ah : supporte les batteries de 10 Ah à 100 Ah
Charge 100Ah – 300Ah : supporte les batteries de 100Ah à 300Ah
Charge 300Ah – 600Ah : supporte les batteries de 300Ah à 600Ah
Charge 600Ah – 1200Ah : supporte toutes les batteries de 600 Ah minimum à 1200 Ah maximum.
C) Tensions d’alimentation “Flash” et Batteries Supportées “Volt / Batt.”
Fourchettes de tension d’alimentation préalablement programmées :
13,8V : Tension d’alimentation programmée à 13,8V
14,4V : Tension d’alimentation programmée à 14,4V
14,8V : Tension d’alimentation programmée à 14,8V
Typologies de batteries préalablement programmées :
Wet : Batteries avec électrolyte à l’acide. Fin de charge à 14,4 V
Agm : Batteries Agm à plaque plate ou batteries à spirale type Optima. Fin de charge à 14,7 V
LiFePO4 : Batteries LiFePO4
Mémorisation des réglages
Le dispositif effectue la mémorisation des réglages sur le panneau avant de contrôle. En cas d’interruption
accidentelle ou volontaire de l’alimentation, au moment de la remise en marche, le chargeur de batterie
repart avec les derniers réglages mémorisés. Avec le chargeur de batterie réglé en modalité FLASH, le
cycle de travail reprend automatiquement au retour de l’alimentation.
touche START/STOP pour reprendre le cycle normal de charge.
MODE D’EMPLOI
F
Page 25

25
Analyse Batterie
Les analyses des modalités opérationnelles peuvent terminer avec l’indication de certaines erreurs.
• Batterie endommagée : le Del ''Fault'' s’éclaire et le Del ''Start / Stop'' s’éteint, se met en Stand-
(consulter tableau 1). Signal acoustique unique de deux secondes.
secondes.
INDICATIONS ERREURS
Les erreurs pouvant être signalées sont reportées dans le tableau 1.
Tableau 1 : indication des Erreurs
SIGNAL ÉCRAN
D’AFFICHAGE
CAUSE SOLUTION
Er01 Câbles débranchés, câbles en
court-circuit.
Position the clamps correctly and start charging
the battery again (see section “Operating Battery
Charger”).
Batterie complètement en
court-circuit.
Consulter le Centre de Services le plus proche.
Er02 Batterie en panne ou non
récupérable.
N’accepte pas le courant après
20 heures de recovery.
La batterie peut être défectueuse.
Er03 Surchauffe interne du chargeur
de batterie. Surcharge du
dispositif.
Éliminer les éventuels objets qui couvrent la
partie de la ventilation du chargeur de batterie ou
le placer dans un lieu plus frais. Attendre que le
chargeur de batterie reparte automatiquement.
Er04 Erreur de tension.
Tension de batterie trop basse
(essai de chargement d’une
batterie de 6 Volts).
Programmer un cycle de “Recovery”.
Utiliser le chargeur de batterie uniquement avec
batteries supportées à 12 V.
Reprendre la charge de la batterie (consulter le
paragraphe “Comment utiliser le chargeur de
batterie”).
Batterie présentant un ou
plusieurs éléments
en court-circuit.
La batterie peut être défectueuse.
Er05
Batterie avec tension trop
élevée par rapport à la
tension programmée (essai de
chargement d’une batterie de
12 Volts).
Utiliser le chargeur de batterie uniquement avec
batteries supportées à 12 V.
Reprendre la charge de la batterie (consulter le
paragraphe “Comment utiliser le chargeur de
batterie”).
Er06 Batterie de capacité excessive.
atteinte.
Utiliser un chargeur de batterie avec capacité de
charge supérieure.
Er07 and led
reverse
Les pinces des conducteurs
de sortie sont branchées de
manière incorrecte à la batterie.
Positionner correctement les pinces et reprendre
la charge de la batterie (consulter le paragraphe
“Comment utiliser le chargeur de batterie”).
Er08 Courant en sortie trop élevé.
Courant au-dessus de la limite
maximum.
Diminuer l’absorption sur la batterie.
MODE D’EMPLOI
F
Page 26
26
CHARGE DE LA BATTERIE
Charge de batterie branchée au véhicule
3. Charge d’une batterie avec borne négative branchée à la masse du véhicule, de la façon suivante :
• Brancher le conducteur de sortie avec pince rouge au pôle (+) positif de la batterie.
• Brancher le conducteur de sortie avec pince noire à la masse du véhicule, loin de la batterie et du
conduit du carburant.
4. Charge d’une batterie avec borne positive branchée à la masse du véhicule, de la façon suivante :
• Brancher le conducteur de sortie avec pince noire au pôle (-) négatif de la batterie.
• Brancher le conducteur de sortie avec pince rouge à la masse du véhicule, loin de la batterie et du
conduit du carburant.
Charge de batterie non branchée au véhicule
2. Brancher le conducteur de sortie avec pince rouge au pôle (+) positif de la batterie.
3. Brancher le conducteur de sortie avec pince noire au pôle (-) négatif de la batterie.
ATTENTION ! S’assurer que les deux bornes des conducteurs de sortie aient un contact avec
leurs embouts respectifs.
COMMENT UTILISER LE CHARGEUR DE BATTERIE
1. Après avoir branché les câbles des conducteurs de sortie à la batterie, brancher le câble d’alimentation de
l’appareil à la prise de courant en s’assurant que la tension corresponde à la tension nominale du chargeur
de batterie (230V-50Hz) ; à ce point, l’appareil émet un signal acoustique pendant 0,5 secondes et tous les
indique “- - - -”.
Del CHARGE 5-30 Ah allumé. L'éclairage des Del varie en fonction du dernier programme mémorisé.
3. À ce point, avec le chargeur de batterie en modalité “stand-by”, régler les paramètres de charge appropriés
au type de batterie à charger au moyen des touches situées sur le panneau de commande. Les paramètres
de charge choisis sont mis en évidence par l’éclairage du Del correspondant.
Paramètres de charges programmables :
• Touche “Function” : (consulter le paragraphe A - Modalités opérationnelles : “Function”) en fonction du
cycle de travail, sélectionner :
- Flash, Charge ou Recovery.
• Touche Ampérage : (consulter le paragraphe B - Modalités d’alimentation et charge : “Ampérage”)
En fonction du courant d’alimentation nécessaire à soutenir la tension de batterie pendant les opérations
de reprogrammation, il est possible de sélectionner quatre courants d’alimentation différents :
En sélectionnant la fonction FLASH, il est possible de choisir parmi :
- Flash 10A : le chargeur de batterie libère 10A constants
- Flash 30A : le chargeur de batterie libère 30A constants
- Flash 60A : le chargeur de batterie libère 60A constants
- Flash 120A : le chargeur de batterie libère 120A constants
En fonction de la capacité de la batterie à charger à recharger, sélectionner la fonction CHARGE ; il est
possible de choisir parmi :
- Charge 10Ah – 100Ah : Supporte les batteries de 10 Ah à 100 Ah.
- Charge 100Ah – 300Ah : Supporte les batteries de 100Ah à 300Ah
- Charge 300Ah – 600Ah : Supporte les batteries de 300Ah à 600Ah
- Charge 600Ah – 1200Ah : Supporte toutes les batteries de 600Ah à 1200Ah.
MODE D’EMPLOI
F
Page 27

27
• Touche Volt / Batt (consulter le paragraphe C - Tensions d’alimentation “Flash” et Batteries
Supportées : “Volt / Batt.”)
En fonction de la tension d’alimentation nécessaire pour soutenir la tension de batterie pendant les
opérations de reprogrammation (UNIQUEMENT MODALITÉ FLASH), il est possible de sélectionner
trois différentes tensions d’alimentation :
13,8V : Tension d’alimentation programmée à 13,8V
14,4V : Tension d’alimentation programmée à 14,4V
14,8V : Tension d’alimentation programmée à 14,8V
En fonction de la technologie de construction de la batterie (UNIQUEMENT MODALITÉ CHARGE)
sélectionner : Wet, LiFePO4 ou Agm.
4. Après avoir programmé les paramètres de charge, appuyer sur la touche START/STOP pour activer
la charge de la batterie. L’éclairage des Del START/STOP et CHARGING indiquent que la charge est
5. Lors des phases de charge de batterie “I” et “U0”, le Del “CHARGING” reste éclairé.
6. Lorsque le Del ”FULL” s’éclaire, la batterie est chargée à 100 %, à partir de ce moment le chargeur de
en faisant en sorte de la garder en permanence à un niveau de charge optimal. Pendant cette phase
de charge, l’appareil peut rester brancher pendant plusieurs mois.
de charge.
INTERRUPTION VOLONTAIRE DU CYCLE DE CHARGE
de l’appareil de la prise de courant et débrancher les conducteurs de sortie des bornes de la batterie.
INTERRUPTION DU CYCLE DE CHARGE EN CAS D’INTERRUPTION DE LA LIGNE DE RÉSEAU
En cas d’interruptions sur la ligne de réseau 110 V - 230 V, le chargeur de batterie mémorise le cycle
de travail qu’il était en train d’effectuer de sorte à pouvoir le reprendre automatiquement (uniquement
en modalité FLASH) au retour de l'alimentation sur la ligne de réseau à 230 Volts. Cette fonction est
fondamentale si le chargeur de batterie effectue des cycles d’alimentation prolongés même en l’absence
d’opérateurs. En modalité CHARGE, il faudra en revanche appuyer sur la touche START/STOP pour
reprendre le cycle de travail.
FIN DE CHARGE
indique que le chargeur de batterie a terminé son cycle de travail.
2. Débrancher le câble d’alimentation de l’appareil de la prise de courant.
3. Débrancher le conducteur de sortie avec pince noire de la masse du véhicule ou de la borne négative
(-) de la batterie.
4. Débrancher le conducteur de sortie avec pince rouge de la borne positive (+) de la batterie.
Au terme des opérations, ranger le chargeur de batterie dans un lieu sec à l’abri de l’humidité. Pour le
nettoyage du corps extérieur, utiliser un chiffon sec.
MAINTENANCE
Les interventions de maintenance et de réparation doivent être effectuées par un personnel spécialisé.
ÉCOULEMENT
durée de vie, doit être écoulé séparément des autres déchets urbains.
L’utilisateur qui doit écouler cet instrument peut :
MODE D’EMPLOI
F
Page 28

28
- le remettre à un centre de collecte de déchets électroniques ou électrotechniques ;
- le retourner au vendeur au moment de l'achat d'un instrument équivalent ;
- en cas de produit à usage professionnel exclusif, contacter le producteur qui devra disposer d'une
procédure pour l'écoulement correct.
L'écoulement correct de ce produit permet la réutilisation des matières premières qui le composent et
évite les dommages à l'environnement et à la santé humaine.
L'écoulement illégal du produit représente une violation de la norme sur l'écoulement des déchets
dangereux et comporte l'application des sanctions prévues.
GARANTIE
Cet appareil est fabriqué et testé conformément aux normes actuellement en vigueur dans la
Communauté Européenne et est couvert par une garantie de 12 mois pour une utilisation professionnelle
et de 24 mois pour une utilisation non professionnelle.
Toutes les pannes dues à un défaut matériel ou de production seront réparées, en ajustant ou en
remplaçant les pièces défectueuses à notre discrétion.
date d’échéance.
La garantie ne couvre pas les problèmes dus à l’usure des composants, à un usage erroné ou incorrect
de l’appareil, aux ruptures causées pas des coups et/ou des chutes.
l'assistance de l'instrument démonté.
Tous les dommages causés aux personnes et/ou aux biens, directs et/ou indirects et de quelque genre
ou nature que ce soit, sont exclus de la garantie.
DÉCLARATION DE CONFORMITÉ UE
Nous déclarons sous notre pleine responsabilité que le produit est conforme à toutes les dispositions
pertinentes aux Directives :
• Directive Compatibilité Électromagnétique (E.M.C.) 2014/30/UE;
• Directive Basse Tension (L.V.D.) 2014/35/UE;
• Directive sur la restriction de l'emploi de certaines substances dangereuses dans les appareils
électriques et électroniques (Ro.H.S.) 2011/65/UE.
MODE D’EMPLOI
F
Page 29

29
DEGERÄT 12V.
Die Sicherheitsanweisungen sorgfältig aufbewahren und dem Bedienerpersonal übergeben.
BESTIMMUNGSZWECK
Das elektronische Batterieladegerät ist für den folgenden Gebrauch bestimmt:
• Für die Ladung und Spannungsversorgung von Fahrzeugen
• Geeignet für den Gebrauch an 12V-Batterien, Wet - Agm - Lithium (LiFePO4)
• Während der Neuprogammierung und Eigendiagnose
Unzulässig sind folgende Vorgänge:
• Verboten ist der Gebrauch an anderen als 12V-Batterien
• Verboten ist die Verwendung, die nicht den technischen Anforderungen in der Tabelle TECHNISCHE
DATEN entsprechen
Umgebungen
• Verboten ist die Verwendung für alle Anwendungen, die nicht hier angegeben sind
SICHERHEIT DES ARBEITSPLATZES
könnten.
Dafür sorgen, dass sich Kinder oder Besucher nicht dem Arbeitsplatz nähern können, wenn
Sie mit dem Batterieladegerät arbeiten. Der Aufenthalt anderer Personen lenkt bei der Arbeit ab,
wodurch die Kontrolle über das Batterieladegerät verloren gehen könnte.
Keine eventuell aus der Fahrzeugbatterie heraustretenden schädlichen Gase einatmen,
während Sie am Motor arbeiten.
Während der Verbindungsvorgänge das Gesicht von der Fahrzeugbatterie fernhalten. Die in der
Batterie enthaltene Flüssigkeit ist korrosiv bzw. ätzend. Bei unbeabsichtigtem Kontakt der Säure
mit der Haut oder den Augen sofort mit Wasser ausspülen und einen Arzt kontaktieren.
Lassen Sie keine Werkzeuge aus Metall auf die Fahrzeugbatterie fallen, da dies zu einem
Kurzschluss der Batterie führen kann.
Das Batterieladegerät in einer trockenen Umgebung verwenden und Feuchtigkeit vermeiden.
SICHERHEIT DES BATTERIELADEGERÄTES
• Vor dem Gebrauch des Batterieladegerätes ist sicherzustellen, dass es nicht beschädigt ist, dass es
keine freiliegenden Kabel oder verschlissenen Teile aufweist.
WICHTIG! VOR GEBRAUCH DES BATTERIELADEGERÄTES DIESE
BEDIENUNGSANLEITUNGEN VOLLSTÄNDIG LESEN. DIE NICHTBEACHTUNG
DER SICHERHEITSVORSCHRIFTEN UND DER BEDIENUNGSANLEITUNGEN
KANN SCHWERE VERLETZUNGEN VERURSACHEN.
ACHTUNG
BEDIENUNGSANLEITUNG FÜR ELEKTRONISCHES MULTIFUNKTIONS-BATTERIELA-
GEBRAUCHSANWEISUNG
D
Page 30

30
• Das beschädigte Batterieladegerät niemals verwenden, da das Risiko elektrischer Stromschläge
besteht; nicht versuchen, das Batterieladegerät zu öffnen oder zu ändern.
• Das Netzkabel an die Netzsteckdose anschließen, vorab sicherstellen, dass die Netzspannung mit
der auf dem Versorgungsgerät angegebenen Spannung übereinstimmt. (Siehe Tabelle TECHNISCHE
DATEN)
• Bei Abschluss der Vorgänge das Batterieladegerät nicht für lange Zeit an der Netzsteckdose
angeschlossen lassen.
• Den elektronischen Kreis des Batterieladegerätes auf keinen Fall beschädigen oder umändern.
SICHERHEITSHINWEISE FÜR DAS PERSONAL
• Es ist höchste Vorsicht und Konzentration beim Arbeiten mit diesem Gerät geboten. Verwenden Sie
Medikamenten stehen.
• Stets die folgenden persönlichen Sicherheitsausrüstungen tragen:
• Sicherheitsschuhe;
• Schutzbrille;
• Schutzhandschuhe gegen physikalische Einwirkungen.
• Alle vorgesehenen Arbeiten in angemessen belüfteten und trockenen Umgebungen durchführen.
• Niemals die Klemmen der zwei Zangen (rote Zange (+) Plus, schwarze Zange (-) Minus)
untereinander in Kontakt bringen.
• Stellen Sie sicher, dass die Kabel des Batterieladegerätes außer Reichweite von Lüftern, beweglichen
• Bei der Arbeit am Fahrzeug keine weiten Kleider, Armreife, Halsketten oder Gegenstände aus Metall
tragen.
• Vor dem Wegstellen des Batterieladegerätes ist sicherzustellen, dass es auf Umgebungstemperatur
abgekühlt ist.
SORGFÄLTIGER GEBRAUCH DES BATTERIELADEGERÄTES
•
stecken.
• Das Batterieladegerät niemals benutzen, wenn die Hülle, die Zangen, die Kabel oder das
Spannungsversorgungskabel beschädigt sind. Das gleiche gilt, wenn Sie ungewöhnliche Gerüche
vernehmen oder das Gerät übermäßig heiß ist.
• Das Batterieladegerät darf nicht umgerüstet werden. Die Änderungen können die Wirksamkeit der
Sicherheitsvorrichtungen reduzieren und somit das Risiko für den Bediener erhöhen.
• Das Batterieladegerät darf ausschließlich von Fachpersonal und nur unter Verwendung von
Originalersatzteilen repariert werden.
• Vor Durchführung aller Arbeitsvorgänge die Lichter des Fahrzeugs und alle eventuell eingeschalteten
Zusatzverbraucher ausschalten.
• Stets die Übereinstimmung zwischen der Voltspannung des Batterieladegerätes und der Spannung
der Fahrzeuganlage überprüfen. Das eventuelle Überschreiten kann Explosionen, Schäden am
GEBRAUCHSANWEISUNG
D
Page 31

31
Fahrzeug, am Batterieladegerät und an Personen verursachen.
• Stets den Ausgangsleiter mit roter Zange (+) am Pluspol der Batterie und den Ausgangsleiter mit
schwarzer Zange (-) an der Fahrzeugmasse anschließen.
• Niemals die Polarität umkehren. Die Polaritätsumkehrung kann Explosionen, Schäden am Fahrzeug,
am Batterieladegerät und an Personen verursachen.
• Für die Reinigung ein trockenes Tuch verwenden, und das Batterieladegerät vom Stromnetz trennen.
Niemals feuchte oder nasse Tücher benutzen.
SICHERHEITSHINWEISE FÜR DAS BATTERIELADEGERÄT
• In regelmäßigen Zeitabständen die Unversehrtheit des Batterieladegerätes, des
Spannungsversorgungskabels und der Zangen überprüfen.
• Das beschädigte Batterieladegerät niemals verwenden, da das Risiko elektrischer Stromschläge
besteht; nicht versuchen, das Batterieladegerät zu öffnen oder zu ändern.
• Das Batterieladegerät an die Netzsteckdose anschließen und sicherstellen, dass die Netzspannung mit
der auf dem Versorgungsgerät angegebenen Spannung übereinstimmt. (Siehe Tabelle TECHNISCHE
DATEN)
• Das Batterieladegerät während seinem Gebrauch auf keinen Fall abdecken. Einen angemessenen
Freiraum für die Belüftung garantieren.
• Das Batterieladegerät nicht in feuchten und nassen Umgebungen verwenden, es nicht Regen
aussetzen. Feuchte und verschmutzte Umgebungen erhöhen das Risiko von Stromschlägen.
VORGESCHRIEBENE KÖRPERLICHE SCHUTZAUSRÜSTRUNG WÄHREND DES GEBRAUCHS DES
BATTERIELADEGERÄTES
Die Nichtbeachtung der folgenden Warnhinweise kann zu körperlichen Verletzungen und/oder
Krankheiten führen.
Die nachfolgende persönliche Schutzausrüstung ist zu verwenden, wenn die im Rahmen
der Raumhygieneuntersuchungen/Risikoanalyse ermittelten Werte die von den geltenden
Vorschriften vorgesehenen Grenzwerte überschreiten.
STETS EINE SCHUTZBRILLE TRAGEN
STETS SICHERHEITSSCHUHE VERWENDEN
BEI DEM GEBRAUCH DES BATTERIELADEGERÄTES STETS
SCHUTZHANDSCHUHE GEGEN PHYSIKALISCHE EINWIRKUNGEN VERWENDEN
GEBRAUCHSANWEISUNG
D
Page 32

32
ANZEIGELEDS
zeigen Folgendes an:
• “Full”: Die Batterie ist geladen und in Erhaltungsladung
• “Charging”: Die Batterie wird geladen
• “Fault”: Die Batterie ist beschädigt
• “Reverse”: Polaritätsumkehrung
• 1 “LED ON” zum Batterieladezustand (Farbe Blau)
• 1 LED “Start/Stop” (Farbe Gelb) zum Betriebsstatus, zeigt an, ob das Gerät im ausgewählten Modus arbeitet
• 2 LEDs zur Anzeige des Betriebsmodus “Function” Flash oder Charge (gelbe LED)
• 4 LEDs zur Anzeige des abgegebenen Stroms “Amperage”, wird später beschrieben (gelbe LED)
• 3 LEDs zur Anzeige der Versorgungsspannung und des Batterietyps “Volt/Batt”, wird später
beschrieben (gelbe LED).
Auf dem Frontbedienfeld des Batterieladegeräts sind 5 Tasten vorgesehen:
• “Start/Stop”: Startet oder stoppt die Spannungsabgabe im ausgewählten Modus
• “Function”: Auswahl des Batteriemodus
• “Volt/Batt”: Auswahl der Versorgungsspannung (Supply) oder des zu ladenden Batterietyps
• “Amperage”: Auswahl des gelieferten Stroms
• “A/V” (Display): Auswahl der gewünschten Displayanzeige
DIGITALES DISPLAY
Mit der Auswahltaste “A/V” wird auf dem Display die Spannung oder der Strom angezeigt.
FUNKTIONEN DES BATTERIELADEGERÄTS UND BETRIEBSARTEN
A) Betriebsmodus: “Function”
Charge
Batterielademodus. Umfasst 7 Ladephasen, die nachstehend beschrieben werden:
• PHASE 1: Analyse 1. Wenn die Batterie eine Spannung über 6,5V aufweist, startet die nächste Phase. Bei
Spannungen unter 6,5V kehrt das Gerät in den Standby-Modus zurück.
• PHASE 2: Vorladen. Es beginnt ein Ladevorgang mit konstantem Strom, bis die Batterie eine Spannung
von 13V erreicht
• PHASE 3: Analyse 2. Suche nach kurzgeschlossenem Element. Das Ladegerät unterbricht die Stromabgabe
für 5 Minuten. Wenn während dieser Zeitspanne die Batteriespannung unter 11,7V abfällt, kehrt das Gerät
in den Standby-Modus zurück. Wenn die Spannung über 11,7V bleibt, erfolgt der Übergang auf die PHASE
4. Falls ein kurzgeschlossenes Element vorliegt oder die Batterie sulfatiert (durch ERR02 auf dem Display
während PHASE 3 angezeigt), wird empfohlen, die Batterie im RECOVERY Modus aufzuladen.
• PHASE 4: Intensives Laden. Laden der Batterie bis zum eingestellten Grenzwert.
• PHASE 5: Konstante Spannung. Hält die Batterie auf der Ladeendspannung.
• PHASE 6: Puffer. Die Spannung sinkt auf den Erhaltungspegel und der Ladezyklus wird vervollständigt. Die
TECHNISCHE DATEN
VERWENDUNG FÜR BATTERIEN
NENNSPANNUNG
AUFLADESPANNUNG
LEISTUNGSAUFNAHME
KAPAZITÄT BATTERIE IN LADUNG
KAPAZITÄT BATTERIE IN ERHALTUNG
LÄNGE KLEMMENKABEL
QUERSCHNITT KLEMMENKABEL
SCHUTZART
LÄNGE VERSORGUNGSKABEL
ABMESSUNGEN
GEWICHT
12V Wet - Agm - Lithium LiFePO4
110V-240V 50/60Hz
12V max
1800 Watt
10÷1200 Ah
10÷3000 Ah
2,7 m
25 mm
2
IP20
1,7 m
350x450x150 mm
8,8 kg
GEBRAUCHSANWEISUNG
D
Page 33

33
grüne LED FULL leuchtet auf.
• PHASE 7: Pulsladezyklus. Batterie Ladungserhaltung durch Ladung mit Stromimpulsen (für längere Zeiträume).
Flash
Netzteil-Modus zur Unterstützung bei der Programmierung der Fahrzeuge. Umfasst keine Ladephase,
es ist ein reines Netzteil, das auf die Sollspannung der Batterie stabilisiert ist. Der Modus dient zur
Lieferung von Strom für die Unterstützung der Batterie, um zu vermeiden, dass sie sich während
Arbeitsvorgängen, für die Energie für kurze oder lange Zeiträume notwendig ist, entlädt.
Recovery
Auffrischungsmodus für sulfatierte Batterien durch langes Drücken der Taste “Function”. Auf dem
Bildschirm erscheint die Schrift “rEC” mit der Anzeige der Ist-Spannungsmessung oder des Ist-Stroms,
während dieser Phase blinkt die LED “Charge”.
Das Batterieladegerät führt einen Spezialladezyklus durch, während dem überdurchschnittlich hohe
Spannungen erzwungen werden, um die Batterie wiederherzustellen bzw. aufzufrischen. In diesem
Modus werden während dem Ladevorgang keine Fehlermeldungen angezeigt. Bei Abschluss des
Vorgangs wird anhand der Spannungs- oder Stromaufnahme angezeigt, ob die Batterie wiederhergestellt
worden ist oder nicht. Modus mit den nachstehend beschriebenen 6 Ladephasen:
• PHASE 1: Analyse1. Wenn die Batterie eine Spannung über 3V aufweist, startet die nächste Phase.
Bei Spannungen unter 3V kehrt das Gerät in den Standby zurück.
• PHASE 2: Vorladen. Es beginnt ein Ladevorgang mit konstantem Strom, bis die Batterie eine Spannung
von 13V erreicht
• PHASE 3: Intensives Laden. Laden der Batterie bis zum eingestellten Grenzwert.
• PHASE 4: Konstante Spannung. Hält die Batterie auf der Ladeendspannung.
• PHASE 5: Puffer. Die Spannung sinkt auf den Erhaltungspegel und der Ladezyklus wird vervollständigt.
Die grüne LED FULL leuchtet auf.
• PHASE 6: Pulsladezyklus. Batterie Ladungserhaltung durch Ladung mit Stromimpulsen (für längere
Zeiträume).
ACHTUNG: Aufgrund der hohen Spannungen, die während dieses Ladezyklus erreicht werden,
muss die Auffrischung bzw. der Recovery mit vom Fahrzeug getrennter Batterie durchgeführt
werden. Eine Auffrischung bzw. ein Recovery mit am Fahrzeug angeschlossener Batterie könnte
Schäden an der Bordelektronik verursachen.
Mindestspannung Batterien
Wenn die Anfangsspannung der Batterie niedriger als 2,5V ist, kann die Batterie nicht aufgefrischt bzw.
wiederhergestellt werden.
B) Versorgungsmodus “Flash” und Laden “Amperage”
Voreingestellte Versorgungsstromstufen:
Flash 10A: Versorgungsstrom eingestellt auf 10A
Flash 30A: Versorgungsstrom eingestellt auf 30A
Flash 60A: Versorgungsstrom eingestellt auf 60A
Flash 120A: Versorgungsstrom eingestellt auf 120A
Voreingestellte Ladestufen zur Auswahl der angeschlossenen Batterie (der Ausgangsstrom wird
automatisch reguliert)
Charge 10Ah – 100Ah: Unterstützt die Batterien von 10Ah bis 100Ah
Charge 100Ah – 300Ah: Unterstützt die Batterien von 100Ah bis 300Ah
Charge 300Ah – 600Ah: Unterstützt die Batterien von 300Ah bis 600Ah
Charge 600Ah – 1200Ah: Unterstützt alle Batterien von mindestens 600Ah bis maximal 1200Ah.
C) Versorgungsspannungen “Flash” und unterstützte Batterien “Volt / Batt.”
Voreingestellte Versorgungsspannungsstufen:
13,8V: Versorgungsspannung eingestellt auf 13,8V
GEBRAUCHSANWEISUNG
D
Page 34

GEBRAUCHSANWEISUNG
D
34
14,4V: Versorgungsspannung eingestellt auf 14,4V
14,8V: Versorgungsspannung eingestellt auf 14,8V
Preset battery types:
Wet: Batterien mit Säure-Elektrolyten. Ende des Ladevorgangs bei 14,4V
Agm: Flachplatten – oder spiralgewickelte AGM-Batterien, Typ Optima. Ende des Ladevorgangs bei 14,7V
LiFePO4: Batterien LiFePO4
Speichern der Einstellungen
Das Gerät ermöglicht das Speichern der Einstellungen auf dem Frontbedienfeld. Bei unabsichtlicher oder
absichtlicher Unterbrechung der Versorgung startet das Batterieladegerät beim erneuten Einschalten
mit den zuletzt gespeicherten Einstellungen. Mit auf den Modus FLASH eingestelltem Batterieladegerät
setzt der Arbeitszyklus automatisch fort, sobald die Stromversorgung wiederhergestellt worden ist.
Im Modus CHARGE hingegen wird auf dem Display der Fehler ER01 angezeigt, und zur Wiederaufnahme
des normalen Ladezyklus müssen Sie die Taste START/ STOP drücken.
Batterieanalyse
Die Analysen innerhalb der Betriebsmodi können mit der Meldung einiger Fehler enden.
• Batterie beschädigt: Die LED “Fault” leuchtet auf und die LED ''Start / Stop'' schaltet aus, stellt sich in
Standby, auf dem Display erscheint die Schrift ''Errx'', wo 'x' der Nummer der Fehlerursache entspricht
(siehe Tabelle 1). Signalton von 2 Sekunden.
• Polaritätsumkehrung: Die LED “Reverse” leuchtet auf und auf dem Display erscheint “Err7'' mit 2
Sekunden langem Signalton.
FEHLERANZEIGEN
Die möglichen Fehler sind in der nachstehenden Tabelle 1 aufgeführt.
Tabelle 1: Fehleranzeige
MELDUNG AUF
DEM DISPLAY
URSACHE ABHILFE
Er01 Kabel getrennt oder
kurzgeschlossen.
Die Klemmen korrekt anschließen und den
Ladevorgang wieder aufnehmen (siehe Abschnitt
“Gebrauch des Batterieladegerätes”).
Batterie vollständig
kurzgeschlossen.
Die Vertragskundenservicestelle in der Nähe
aufsuchen.
Er02 Batterie defekt oder nicht
wiederherstellbar.
Keine Stromaufnahme nach 20
Stunden Recovery möglich
Batterie vermutlich defekt.
Er03 Batterieladegerät überhitzt.
Überlastung des Gerätes
Eventuelle Gegenstände entfernen, die die
Lüftungsschlitze des Batterieladegerätes
bedecken, oder das Batterieladegerät an
einen kühleren Ort bringen. Abwarten, dass
das Batterieladegerät sich automatisch wieder
einschaltet.
Er04 Spannungsfehler.
Batteriespannung zu niedrig.
(Es wird versucht, eine
6V-Batterie zu laden).
Einen “Recovery” Zyklus einstellen.
Das Batterieladegerät nur mit 12V-Batterien
verwenden. Den Ladevorgang wieder aufnehmen
(siehe Abschnitt “Gebrauch des Ladegerätes“).
Batterie mit einem oder
mehreren kurzgeschlossen
Elementen.
Batterie vermutlich defekt.
Er05 Batterie mit zu hoher Spannung
im Vergleich zur eingestellten
Spannung. (Es wird versucht,
eine 24V-Batterie zu laden).
Das Batterieladegerät nur mit 12V-Batterien
verwenden.
Den Ladevorgang wieder aufnehmen (siehe
Abschnitt “Gebrauch des Batterieladegerätes”).
Page 35

GEBRAUCHSANWEISUNG
D
35
LADEN DER BATTERIE
Laden von Batterien, die am Fahrzeug angeschlossen sind
1. Vor Beginn des Ladevorgangs überprüfen, dass das Versorgungskabel aus der Netzsteckdose
gezogen ist.
2. Den Pol ermitteln, der an die Masse des Fahrzeugs angeschlossen ist. In der Regel ist die Masse an
die negative Klemme angeschlossen.
3. Laden einer Batterie mit an die Fahrzeugmasse angeschlossener negativer Klemme. Wie folgt vorgehen:
• Den Ausgangsleiter mit roter Klemme an den Pluspol (+) der Batterie anschließen.
• Den Ausgangsleiter mit schwarzer Klemme an die Masse des Fahrzeugs anschließen, und zwar in
4. Laden einer Batterie mit an die Fahrzeugmasse angeschlossener positiver Klemme. Wie folgt vorgehen:
• Den Ausgangsleiter mit schwarzer Klemme an den Minuspol (-) der Batterie anschließen.
• Den Ausgangsleiter mit roter Klemme an die Masse des Fahrzeugs anschließen, und zwar in
Ladung von Batterien, die nicht am Fahrzeug angeschlossen sind
1. Vor Beginn des Ladevorgangs überprüfen, dass das Versorgungskabel aus der Netzsteckdose gezogen ist.
2. Den Ausgangsleiter mit roter Klemme an den Pluspol (+) der Batterie anschließen.
3. Den Ausgangsleiter mit schwarzer Klemme an den Minuspol (-) der Batterie anschließen.
ACHTUNG Sicherstellen, dass beide Klemmen der Ausgangsleiter einen angemessenen Kontakt
mit den entsprechenden End-/Anschlussklemmen haben.
GEBRAUCH DES BATTERIELADEGERÄTES
1. Nach erfolgtem Anschluss der Kabel der Ausgangsleiter an die Batterie, das Versorgungskabel des Gerätes
an die Netzsteckdose anschließen, wobei sicherzustellen ist, dass die Spannung mit der Nennspannung
des Batterieladegerätes (230V-50Hz) übereinstimmt; nun ertönt für 0,5 Sekunden ein Signalton, und alle
Anzeigeleds auf dem Bedienfeld leuchten 2 Sekunden lang auf; während dieser Phase erscheint auf dem
Display “- - - -”.
WET eingeschaltet, Led CHARGE 5-30Ah eingeschaltet. Das Einschalten der LEDs ist je nach dem zuletzt
gespeicherten Programm unterschiedlich.
den Batterietyp geeigneten Ladeparameter einstellen. Die ausgewählten Ladeparameter werden durch
Einschalten der entsprechenden LED angezeigt.
Einstellbare Ladeparameter:
• Taste Function: (siehe Abschnitt A - Betriebsarten: “Function”) je nach Arbeitszyklus auswählen unter:
- Flash, Charge oder Recovery.
• Taste Amperage: (siehe Abschnitt B – Versorgungs- und Lademodus: “Amperage”)
Je nachdem, welcher Versorgungsstrom notwendig ist, um die Batteriespannung während der
Neuprogrammierungsvorgänge aufrecht zu erhalten, können vier verschiedene Versorgungsstrome
ausgewählt werden:
Er06 Batterie mit zu hoher
Ladekapazität. Ende des
Ladevorgangs wird nie erreicht.
Ein Batterieladegerät mit höherer Ladekapazität
verwenden
Er07 and led
reverse
Die Klemmen der
Ausgangsleiter sind nicht
korrekt an der Batterie
angeschlossen.
Die Klemmen korrekt positionieren und den
Ladevorgang wieder aufnehmen (siehe Abschnitt
“Gebrauch des Batterieladegerätes”).
Er08 Ausgangsstrom zu hoch.
Strom über max. Grenzwert.
Die Aufnahme an der Batterie reduzieren.
Page 36

GEBRAUCHSANWEISUNG
D
36
Bei Auswahl der Funktion FLASH können Sie auswählen unter:
- Flash 10A: Das Batterieladegerät gibt konstant 10A ab
- Flash 30A: Das Batterieladegerät gibt konstant 30A ab
- Flash 60A: Das Batterieladegerät gibt konstant 60A ab
- Flash 120A: Das Batterieladegerät gibt konstant 120A ab
Bei Auswahl der Funktion CHARGE können Sie je nach Batteriekapazität auswählen unter:
- Charge 10Ah – 100Ah: Unterstützt die Batterien von 10Ah bis 100Ah.
- Charge 100Ah – 300Ah: Unterstützt die Batterien von 100Ah bis 300Ah.
- Charge 300Ah – 600Ah: Unterstützt die Batterien von 300Ah bis 600Ah.
- Charge 600Ah – 1200Ah: Unterstützt die Batterien von 600Ah bis 1200Ah.
• Taste Volt / Batt (siehe Abschnitt C – Versorgungsspannungen “Flash” und Unterstützte Batterien:
“Volt / Batt.”)
Je nachdem, welcher Versorgungsstrom notwendig ist, um die Batteriespannung während der
Neuprogrammierungsvorgänge aufrecht zu erhalten (NUR FLASH MODUS), können drei verschiedene
Versorgungsspannungen ausgewählt werden:
13,8V: Versorgungsspannung eingestellt auf 13,8V
14,4V: Versorgungsspannung eingestellt auf 14,4V
14,8V: Versorgungsspannung eingestellt auf 14,8V
Je nach Bautechnologie der Batterie (NUR CHARGE MODUS) auswählen unter: Wet, LiFePO4 oder Agm.
4. Nach erfolgter Einstellung der Ladeparameter die Taste START/STOP drücken, um den Ladevorgang
Ladevorgang läuft; auf dem Display werden der Ladestrom und die Spannung der Batterie angezeigt.
5. Während der Ladung der Batterie bleibt in den Phasen “I” und “U0” die LED CHARGING eingeschaltet.
überwacht. Auf diese Weise wird die Batterie auf einem optimalen Ladepegel gehalten. In dieser
Ladephase kann das Gerät verschiedene Monate lang angeschlossen bleiben.
7. Wenn der Ladevorgang unterbrochen oder abgeschlossen werden soll, bitte entsprechend den
Anleitungen ‚Abbrechen/Ende des Ladevorgangs‘ vorgehen.
GEWÜNSCHTES ABBRECHEN DES LADEZYKLUS
Zum Abbrechen des Ladezyklus der Batterie einfach die Taste START/STOP drücken; das Ausschalten
der entsprechenden LED zeigt das Ende des Arbeitszyklus an. Das Versorgungskabel des Gerätes von
der Netzsteckdose trennen, und die Ausgangsleiter von den Batterieklemmen abtrennen.
UNTERBRECHUNG DES LADEZYKLUS WEGEN STROMAUSFALL
Bei Stromausfall der 110V-230V Netzstromleitung speichert das Batterieladegerät den Ladezyklus, der
gerade ausgeführt wurde, um ihn bei Wiederherstellung der 230V-Netzversorgung wieder automatisch
fortfahren zu können (nur im Flash Modus). Diese Funktion ist von grundlegender Wichtigkeit, wenn das
Ladegerät sehr lange Ladezyklen, auch in Abwesenheit des Bedieners, durchführt. Im CHARGE Modus
muss hingegen die Taste START/STOP gedrückt werden, um den Arbeitszyklus wieder aufzunehmen.
ENDE DES LADEVORGANGS
1. Nach Abschluss des Ladevorgangs die Taste START/STOP des Batterieladegerätes drücken. Das
Ausschalten der LED zeigt an, dass das Batterieladegerät den Arbeitszyklus beendet hat.
2. Das Versorgungskabel des Gerätes von der Netzsteckdose trennen.
3. Den Ausgangsleiter mit schwarzer Klemme von der Masse des Fahrzeugs und von der negativen
Klemme (-) der Batterie trennen.
4. Den Ausgangsleiter mit roter Klemme von der positiven Klemme (+) der Batterie trennen.
Am Ende der Arbeiten das Batterieladegerät an einem trockenen Ort, vor Feuchtigkeit geschützt,
Page 37

37
aufbewahren. Zur Reinigung des Gerätegehäuses ein trockenes Tuch verwenden.
WARTUNG
Die Wartungs- und Reparatureingriffe sind von Fachpersonal durchzuführen.
ENTSORGUNG
Das auf dem Gerät oder auf der Verpackung aufgeführte Symbol der durchgestrichenen Mülltonne weist darauf
hin, dass das Produkt am Ende seiner Nutzzeit getrennt von anderen Abfällen entsorgt werden muss.
Der Benutzer kann wie folgt das Gerät entsorgen:
- Es an einer Sondermüllentsorgungsstelle für elektronische und elektrotechnische Geräte abgeben.
- Es dem Händler beim Kauf eines gleichwertigen Gerätes zurückgeben.
- Bei Produkten für den professionellen Gebrauch kontaktieren Sie den Hersteller, der für die korrekte
Entsorgung sorgen muss.
Die korrekte Entsorgung dieses Produkts ermöglicht die Wiederverwertung der enthaltenen Rohstoffe
und vermeidet Umwelt- und Gesundheitsschäden.
Die widerrechtliche Entsorgung des Produkts stellt eine Übertretung des Gesetzes für die Entsorgung von
gefährlichen Abfällen dar und führt zur Anwendung einer vom Gesetz vorgesehenen Verwaltungsstrafe.
GARANTIE
Dieses Werkzeug wird entsprechend den in der Europäischen Gemeinschaft geltenden Bestimmungen
Gebrauch oder von 24 Monaten für den privaten Gebrauch.
Störungen, die auf Material- oder Fertigungsfehler zurückzuführen sind, werden unentgeltlich durch
Reparatur oder Austausch der defekten Teile beseitigt bzw. wieder instandgesetzt.
Die Durchführung einer oder mehrerer Reparaturen unter Garantie hat keinerlei Auswirkungen auf die
Garantiedauer des Werkzeugs.
Von der Garantie ausgeschlossen sind Fehler, die auf natürlichen Verschleiß, unsachgemäßen
Gebrauch und Brüche infolge von Stößen und/oder Stürzen zurückzuführen sind.
Der Garantieanspruch verfällt in folgenden Fällen: Vornehmen von Änderungen, Beschädigung
und Umrüstung des Gerätes, Versand des ausgebauten und zerlegten Gerätes an den technischen
Kundendienst.
Ausdrücklich ausgeschlossen sind Personen- und/oder Sachschäden jeglicher Herkunft, direkter und/
oder indirekter Art.
EU-KONFORMITÄTSERKLÄRUNG
Wir erklären unter unserer Verantwortung, dass das beschriebene Produkt allen einschlägigen
Bestimmungen der folgenden Richtlinien:
• Richtlinie über die elektromagnetische Verträglichkeit (EMV) 2014/30/EU;
• Niederspannungsrichtlinie (LVD) 2014/35/EU;
• Richtlinie zur Beschränkung der Verwendung bestimmter gefährlicher Stoffe in Elektro- und
Elektronikgeräten (RoHS) 2011/65/EU;
GEBRAUCHSANWEISUNG
D
Page 38

38
MANUAL DE USO E INSTRUCCIONES PARA CARGADOR DE BATERÍAS ELECTRÓNICO
12V MULTIFUNCIONES.
Guarde con cuidado las instrucciones de seguridad y entréguelas al personal usuario.
DESTINO DE USO
El cargador de baterías electrónico está destinado al siguiente uso:
• para la carga y la alimentación de vehículos
• a utilizar en baterías de 12V, Wet - Agm - lithium (LiFePO4)
• durante las fases de reprogramación y autodiagnóstico
No están permitidas las siguientes operaciones:
• está prohibido el uso en baterías diferentes de 12V
• está prohibido el uso fuera de las indicaciones técnicas referidas en la tabla DATOS TÉCNICOS
• está prohibido el uso en medios húmedos, mojados o expuestos a la intemperie
• está prohibido el uso en todas las aplicaciones diferentes de las indicadas
SEGURIDAD DEL PUESTO DE TRABAJO
No utilice el cargador de baterías en medios que contienen atmósferas potencialmente
polvos o vapores.
Impida que niños o visitantes puedan acercarse al puesto de trabajo mientras se está
trabajando con el cargador de baterías. La presencia de otras personas produce distracción
que puede suponer la pérdida de control en el cargador de batería.
No inhalar posibles gases nocivos que salen de la batería del vehículo mientras está
trabajando en el motor.
Durante las operaciones de conexión, aleje el rostro de la batería del vehículo. El líquido
contenido en la batería es corrosivo; de producirse un contacto accidental entre el ácido y la
piel o los ojos, enjuague inmediatamente con agua y consulte a un médico.
No deje que se caigan herramientas metálicas sobre la batería del vehículo, puede producirse
un corto circuito de la misma batería.
Utilice el cargador de baterías en una zona seca evitando la humedad.
SEGURIDAD DEL CARGADOR DE BATERÍAS
• Compruebe antes del uso que el cargador de baterías no haya sufrido daños y que no haya cables
descubiertos o partes desgastadas.
• No utilice el cargador de baterías cuando está dañado porque puede haber riesgo de calambres
IMPORTANTE: LEA COMPLETAMENTE ESTE MANUAL ANTES DE UTILIZAR EL
CARGADOR DE BATERÍAS. DE NO RESPETAR LAS NORMAS DE SEGURIDAD
Y LAS INSTRUCCIONES OPERATIVAS, PUEDEN PRODUCIRSE ACCIDENTES
GRAVES.
ATENCIÓN
INSTRUCCIONES
E
Page 39

39
• Conecte el cable de alimentación a la toma de red, asegurándose de que la tensión de red sea la
indicada en el dispositivo de alimentación. (Vea tabla DATOS TÉCNICOS)
•
período de tiempo.
•
INDICACIONES PARA LA SEGURIDAD DEL PERSONAL
•
Se recomienda la máxima atención, tratando de concentrarse siempre en lo que se hace. No utilizar el
cargador de baterías en caso de cansancio o bajo el efecto de drogas, bebidas alcohólicas o medicinas.
• Utilice siempre los siguientes dispositivos individuales de protección:
• calzado de seguridad;
• gafas de protección;
• guantes de protección para agentes físicos.
• Lleve a cabo todas las operaciones previstas en medios adecuadamente aireados y secos.
• No ponga nunca en contacto entre sí los bornes de las dos pinzas (rojo (+) positivo; negro (-) negativo).
• Asegúrese de que los cables del cargador de baterías estén lejos de ventiladores, partes en
movimiento y del conducto de carburante.
• No lleve puestos vestidos largos, no lleve pulseras, cadenas u objetos metálicos cuando trabaja en el
vehículo.
• Antes de guardar el cargador de baterías asegúrese de que se haya enfriado alcanzando la
temperatura ambiente.
UTILIZACIÓN ATENTA DEL CARGADOR DE BATERÍAS
•
del cargador de baterías.
• No utilice nunca el cargador de baterías de estar dañados el estuche, las pinzas, los cables o el cable
de alimentación, de percibir olores extraños o producirse demasiado ruido.
•
medidas de seguridad y aumentar los riesgos para el operario.
• La reparación del cargador de baterías ha de correr a cargo exclusivamente de personal especializado
utilizando tan sólo piezas de repuesto originales.
• Antes de llevar a cabo cualquier operación, apague las luces del vehículo así como todos los
accesorios que estén, en su caso, funcionando.
• Compruebe siempre la correspondencia del voltaje del cargador de baterías y la tensión de la
instalación del vehículo. De ser superior pueden producirse explosiones, daños al vehículo,
al cargador de baterías y la personas.
• Conecte siempre el conductor de salida con pinza roja (+) al polo positivo de la batería, el
conductor de salida con pinza negra (-) a la masa del vehículo.
INSTRUCCIONES
E
Page 40

40
• No invierta nunca la polaridad. La inversión de polaridad puede producir explosiones, daños al
vehículo, al cargador de baterías y las personas.
• Para la limpieza utilice un trapo seco, desconectando siempre la alimentación de red del cargador de
baterías. No utilice nuca trapos húmedos o mojados.
INDICACIONES PARA LA SEGURIDAD DEL CARGADOR DE BATERÍAS
• Periódicamente compruebe la integridad del cargador de baterías, del cable de alimentación y de las pinzas.
• No utilice el cargador de baterías cuando está dañado porque puede haber riesgo de calambres
• Conecte el cargador de baterías a la toma de red, asegurándose de que la tensión de red sea la
indicada en el dispositivo de alimentación. (Vea tabla DATOS TÉCNICOS)
• No cubra bajo ningún concepto el cargador de baterías durante el uso. Asegure un espacio adecuado
para la ventilación.
• No utilice el cargador de batería en medios húmedos, mojados, no lo exponga a la lluvia. Medios
húmedos y contaminados aumentan el riesgo de calambres eléctricos.
DISPOSITIVOS DE PROTECCIÓN INDIVIDUAL PREVISTOS DURANTE LA UTILIZACIÓN DEL
CARGADOR DE BATERÍAS
El incumplimiento de las siguientes advertencias puede ocasionar lesiones físicas y/o enfermedades.
Otros dispositivos de protección individual a utilizar dependiendo de los valores detectados
durante la investigación de higiene del medio/análisis de riesgos de sobrepasar los valores
límite previstos por la normativa vigente.
DATOS TÉCNICOS
LLEVE SIEMPRE PUESTAS GAFAS DE PROTECCIÓN
UTILICE SIEMPRE CALZADO DE SEGURIDAD
UTILICE SIEMPRE GUANTES DE PROTECCIÓN PARA AGENTES FÍSICOS
DURANTE LA UTILIZACIÓN DEL CARGADOR DE BATERÍAS
A UTILIZAR EN BATERÍAS
TENSIÓN NOMINAL
TENSIÓN DE RECARGA
POTENCIA ABSORBIDA
CAPACIDAD BATERÍA CARGANDO
CAPACIDAD BETERÍA EN MANTENIMIENTO
LONGITUD CABLE PINZAS
SECCIÓN CABLE BORNES
GRADO DE PROTECCIÓN
LONGITUD CABLE DE ALIMENTACIÓN
DIMENSIONES
PESO
12V Wet - Agm - Lithium LiFePO4
110V-240V 50/60Hz
12V max
1800 Watt
10÷1200 Ah
10÷3000 Ah
2,7 m
25 mm
2
IP20
1,7 m
350x450x150 mm
8,8 kg
INSTRUCCIONES
E
Page 41

41
LEDS DE SEÑALIZACIÓN
En el panel frontal del cargador de baterías hay 15 leds. 4 leds son sobre el estado de la batería,
que señalizan:
• “Full” la batería está cargada y en mantenimiento
• “Charging” la batería está cargando
• “Fault” la batería está dañada
• “Reverse” inversión de polaridad
• 1 “led ON” sobre el estado de carga de la batería (color Azul)
• 1 “Start/Stop” (color Amarillo) sobre el estado de funcionamiento, señaliza si está suministrando en el
modo seleccionado
• 2 leds en el modo operativo “Function” Flash o Charge (led Amarillo)
• 4 leds en la señalización de corriente suministrada “Amperage” que se detallan más adelante (led
amarillo)
• 3 leds en la señalización de la tensión de alimentación y tipo de batería “Volt/Batt” que se detallan más
adelante (led Amarillo).
En el panel frontal del cargador de baterías hay 5 pulsadores:
• “Start/Stop”: arranca o para el suministro en el modo seleccionado
• “Function”: selecciona el modo operativo
• “Volt/Batt”: selecciona la tensión de suministro o el tipo de batería por cargar
• “Amperage”: selecciona la corriente suministrada
• “A/V” (pantalla): selecciona qué visualizar en pantalla
PANTALLA DIGITAL
La tecla de selección “A/V” permite visualizar en pantalla la tensión o la corriente.
FUNCIONES DEL CARGADOR DE BATERÍAS Y MODOS OPERATIVOS
A) Modos operativos: “Function”
Charge
Modo de carga de la batería. Tiene 7 fases de carga, que se detallan a continuación:
• FASE 1: Análisis. De presentar la batería una tensión superior a 6,5V, procede con la fase siguiente.
Tensiones por debajo de los 6,5V producen el paso al modo stand-by del dispositivo.
• FASE 2: Pre-carga. Comienza una carga a corriente constante hasta cuando la tensión de la batería
alcanza los 13V
• FASE 3: Análisis 2. Busca elemento en corto. El cargador de baterías desconecta el suministro de corriente
durante 5 minutos. De bajar durante este período de tiempo la tensión de la batería por debajo de 11,7V, el
dispositivo pasará al modo stand-by. De permanecer la tensión superior a 11,7V se pasa a la FASE 4. En
caso de elemento en corto o batería sulfatada (señalizada por ERR02 en la pantalla durante la FASE 3) se
recomienda recargar la batería en modo RECOVERY.
• FASE 4: Carga profunda. Carga la batería hasta el valor límite seleccionado.
• FASE 6: Tampón. La tensión baja al nivel de mantenimiento y se completa el ciclo de carga. Se enciende
el led verde de FULL.
• FASE 7: Ciclo por impulsos. Ciclo de mantenimiento batería por impulsos (períodos prolongados).
Flash
Modo Alimentador para asistencia en la programación de los vehículos. No contempla ninguna fase de
carga en su interior, es un mero alimentador estabilizado a la tensión nominal de batería. Su objeto es
el de aportar corriente para dar soporte a la batería, para evitar que se descargue durante operaciones
que precisan de energía durante períodos de tiempo largos o cortos.
Recovery
Modo de recuperación para baterías sulfatadas accesible mediante presión prolongada de la tecla
“Function”. En la pantalla aparecerá la escrita “rEC” viéndose la medida de tensión o corriente
INSTRUCCIONES
E
Page 42

42
instantánea, durante esta fase parpadea el led “Charge”.
El cargador de baterías lleva a cabo un ciclo de carga especial en el que se fuerzan tensiones superiores
a la media para tratar de recuperar la batería. En este modo no hay mensajes de error durante el ciclo
absorbida. Modo de 6 fases de carga, que se detallan a continuación:
• STEP 1: Test 1. If battery output is above 3V, the unit proceeds with the next step. Outputs below 3V
will cause the device to revert to stand-by.
• STEP 2: Pre-charge. Charge starts at a constant current, until battery voltage reaches 13V.
• STEP 3: Deep cycle charging. The battery charges until the set limit value is reached.
• STEP 4: Constant voltage. Keeps the battery at charge end voltage.
• STEP 5: Buffer. Voltage falls to the maintenance level and the charging cycle is completed. The green
FULL LED will turn on.
• STEP 6: Pulsed current cycle. Pulsed battery maintenance cycle (over long periods).
ATENCIÓN: debido a la tensión elevada que se alcanza durante este ciclo de carga, la
recuperación ha de llevarse a cabo con la batería desconectada del vehículo. La recuperación
con batería conectada al vehículo podría ocasionar daños a la electrónica de a bordo.
Tensión mínima baterías
De ser la tensión inicial de la batería inferior a 2,5V, la batería no puede recuperarse.
B) Modos de alimentación “Flash” y carga “Amperage”
Intervalos de corriente de alimentación preseleccionados:
Flash 10A: corriente de alimentación seleccionada a 10A
Flash 30A: corriente de alimentación seleccionada a 30A
Flash 60A: corriente de alimentación seleccionada a 60A
Flash 120A: corriente de alimentación seleccionada a 120A
Intervalos de carga preseleccionados para seleccionar la batería conectada (la corriente saliente se
ajusta automáticamente)
Charge 10Ah – 100Ah:
Charge 100Ah – 300Ah: para baterías de 100Ah hasta 300Ah
Charge 300Ah – 600Ah: para baterías de 300Ah hasta 600Ah
Charge 600Ah – 1200Ah: para todas la baterías de un mínimo de 600Ah hasta un máximo de 1200Ah.
C) Tensiones de alimentación “Flash” y Baterías Soportadas “Volt / Batt.”
Intervalos de tensión de alimentación preseleccionados:
13,8V: Tensión de alimentación seleccionada a 13,8V
14,4V: Tensión de alimentación seleccionada a 14,4V
14,8V: Tensión de alimentación seleccionada a 14,8V
Tipos de baterías preseleccionados:
Wet: Baterías con electrolito de ácido. Fin de carga a 14,4V
Agm: Baterías Agm de placa plana o baterías en espiral tipo Optima. Fin de carga a 14,7V
LiFePO4: Baterías LiFePO4
Almacenamiento de selecciones
El dispositivo almacena las selecciones en el panel frontal de control. De producirse una interrupción
accidental o voluntaria de la alimentación, al volver a encender el cargador de baterías éste arranca
con las últimas selecciones almacenadas. Con el cargador de baterías seleccionado en modo FLASH
el ciclo de trabajo reanuda automáticamente al volver la alimentación.
Sin embargo, en modo CHARGE, aparecerá en pantalla el error ER01 y habrá que pulsar la tecla
START/ STOP para reanudar el ciclo de recarga normal.
INSTRUCCIONES
E
Page 43

43
Análisis Batería
Los análisis dentro de los modos operativos pueden terminar con la señalización de algunos errores.
• Batería Dañada: se enciende el led ''Fault'' y se apaga el led ''Start / Stop'', entra en modo Stand-By,
aparece en pantalla la escrita ''Errx'' donde 'x' es el número correspondiente a la causa del error (Vea
tabla 1). Señal acústico individual de dos segundos.
• Inversión de polaridad: se enciende el led ''Reverse'' y aparece en pantalla ''Err7'' con señal acústico
de dos segundos.
INDICACIONES DE ERRORES
Los errores que pueden señalarse aparecen en la tabla 1.
Tabla 1: indicación de Errores
SEÑALIZACIÓN
EN PANTALLA
CAUSA REMEDIO
Er01 Cables desconectados, cables
en cortocircuito.
Coloque correctamente las pinzas y reanude la
carga de la batería (vea apartado “Utilización del
cargador de baterías”).
Batería completamente en
cortocircuito.
Acuda al Centro de Servicios de la batería más
cercano.
Er02 Batería averiada o imposible de
recuperar.
No acepta corriente después de
20h de recuperación.
La batería puede ser defectuosa.
Er03 Exceso de temperatura interna
del cargador de baterías.
Exceso de carga dispositivo.
Retire posibles objetos que cubren el área
de ventilación del cargador de baterías o
desplácelo a una zona más fresca. Aguarde a
que el cargador de baterías vuelva a arrancar
automáticamente.
Er04 Error de tensión.
Tensión batería demasiado
baja. (Se está tratando de
cargar una batería de 6 Voltios).
Seleccione un ciclo de “Recovery”.
Utilice el cargador de baterías tan sólo con
baterías soportadas a 12V.
Reanude la carga de la batería (vea apartado
“Cómo se usa el cargador de baterías”).
Batería con uno o más
elementos en cortocircuito.
La batería puede ser defectuosa.
Er05 Batería con tensión demasiado
alta con respecto a la
seleccionada. (Se está tratando
de cargar una batería de 24
Voltios).
Utilice el cargador de baterías tan sólo con
baterías soportadas a 12V.
Reanude la carga de la batería (vea apartado
“Cómo se usa el cargador de baterías”).
Er06 Batería de capacidad excesiva.
carga.
Utilice un cargador de baterías con capacidad de
carga mayor.
Er07 and led
reverse
Las pinzas de los conductores
de salida están mal conectadas
a la batería.
Coloque correctamente las pinzas y reanude la
carga de la batería (vea apartado “Cómo se usa
el cargador de baterías”).
Er08 Corriente de salida demasiado
alta. Corriente por encima del
límite máximo.
Disminuya la absorción en la batería.
INSTRUCCIONES
E
Page 44

CARGA DE LA BATERÍA
Carga de baterías conectadas al vehículo
1. Antes de comenzar la carga compruebe que el cable de alimentación esté desenchufado de la toma de red.
2. Detecte el polo correspondiente a la masa del vehículo; por lo general está conectada al borne negativo.
3. Carga de una batería con borne negativo conectado a la masa del vehículo, de la siguiente manera:
• Conecte el conductor de salda con pinza roja al polo (+) positivo de la batería.
• Conecte el conductor de salida con pinza negra a la masa del vehículo, lejos de la batería y del
tubo de combustible.
4. Carga de una batería con borne positivo conectado a la masa del vehículo, de la siguiente manera:
• Conecte el conductor de salida con pinza negra al polo (-) negativo de la batería.
• Conecte el conductor de salida con pinza roja a la masa del vehículo, lejos de la batería y del tubo
del combustible.
Carga de baterías no conectadas a un vehículo
1. Antes de comenzar la carga compruebe que el cable de alimentación esté desenchufado de la toma
de red.
2. Conecte el conductor de salida con pinza roja al polo (+) positivo de la batería.
3. Conecte el conductor de salida con pinza negra al polo (-) negativo de la batería.
ATENCIÓN Asegúrese de que ambos bornes de los conductores de salida tengan un contacto
adecuado con sus terminales correspondientes.
USO DEL CARGADOR DE BATERÍAS
1. Una vez conectados los cables de los conductores de salida a la batería, conecte el cable de alimentación
del aparato a la toma de red, asegurándose de que la tensión corresponda a la nominal del cargador de
baterías (230V-50Hz); a continuación, el aparato emite una señal acústica durante 0,5 segundos y todos
los leds de señalización, situados en el panel de mandos, se encienden durante dos segundos; en esta
fase la pantalla muestra “- - - -”.
encendido, led CHARGE 5-30Ah encendido. El encendido de los leds varía dependiendo del último
programa almacenado.
3. A continuación, con el cargador de baterías en modo “stand-by”, seleccione los parámetros de carga
adecuados al tipo de batería a cargar, mediante las teclas situadas en el panel de mandos. Los parámetros
de carga seleccionados se evidencian al encenderse el led correspondiente.
Parámetros de carga que pueden seleccionarse:
• Tecla Function: (vea apartado A – Modos operativos: “Function”) dependiendo del ciclo de trabajo,
seleccione:
- Flash, Charge o Recovery.
• Tecla Amperage: (vea apartado B – Modo de alimentación y carga: “Amperage”)
Dependiendo de la corriente de alimentación necesaria para soportar la tensión de batería durante las
operaciones de reprogramación se pueden seleccionar cuatro corrientes de alimentación diferentes:
Si seleccionamos la función FLASH podemos escoger entre:
- Flash 10A: el cargador de baterías suministra 10A constantes
- Flash 30A: el cargador de baterías suministra 30A constantes
- Flash 60A: el cargador de baterías suministra 60A constantes
- Flash 120A: el cargador de baterías suministra 120A constantes
Dependiendo de la capacidad de la batería por recargar seleccione la función CHARGE; podemos
escoger entre:
- Charge 10Ah – 100Ah: para las baterías de 10Ah hasta 100Ah.
- Charge 100Ah – 300Ah: para las baterías de 100Ah hasta 300Ah
- Charge 300Ah – 600Ah: para las baterías de 300Ah hasta 600Ah
INSTRUCCIONES
E
44
Page 45

- Charge 600Ah – 1200Ah: para todas las baterías de 600Ah hasta 1200Ah.
• Tecla Volt / Batt (vea apartado C – Tensiones de alimentación “Flash” y Baterías Soportadas: “Volt / Batt.”)
Dependiendo de la tensión de alimentación necesaria para soportar la tensión de batería durante las
operaciones de reprogramación (SÓLO MODO FLASH) se pueden seleccionar tres tensiones de
alimentación diferentes:
13,8V: Tensión de alimentación seleccionada a 13,8V
14,4V: Tensión de alimentación seleccionada a 14,4V
14,8V: Tensión de alimentación seleccionada a 14,8V
Dependiendo de la tecnología constructiva de la batería (SÓLO MODO CHARGE) seleccione: Wet,
LiFePO4 o Agm.
4. Después de seleccionar los parámetros de carga, pulse la tecla START/STOP para arrancar la carga
cargando, la pantalla mostrará la corriente de carga y la tensión de la batería.
5. Durante la carga de la batería en las fases “I” y “U0” permanece encendido el led CHARGING.
6. Al encenderse el led FULL la batería estará cargada al 100%; a partir de este momento el cargador
de la batería y manteniéndola siempre a un nivel óptimo de carga. En esta fase de carga, el aparato
puede permanecer conectado por muchos meses.
INTERRUPCIÓN VOLUNTARIA DEL CICLO DE CARGA
del aparato de la toma de red y desconecte los conductores de salida de los bornes de la batería.
INTERRUPCIÓN DEL CICLO DE CARGA EN CASO DE INTERRUPCIÓN DE LA LÍNEA DE RED
En caso de interrupciones en la línea de red 110V - 230V, el cargador de baterías almacena el ciclo
de trabajo que estaba llevando a cabo para poderlo reaundar automáticamente (tan sólo en modo
FLASH) cuando vuelve la alimentación en la línea de red de 230Voltios. Dicha función es imprescindible
cuando el cargador de baterías lleva a cabo ciclos de alimentación muy largos incluso sin la presencia
de un operador. Sin embargo, en modo CHARGE, se tendrá que pulsar la tecla START/STOP para
reanudar el ciclo de trabajo.
FIN DE CARGA
2. Desconecte el cable de alimentación del aparato de la toma de red.
3. Desconecte el conductor de salida con pinza negra de la masa del vehículo o del borne negativo (-)
de la batería.
4. Desconecte el conductor de salida con pinza roja del borne positivo (+) de la batería.
limpiar el cuerpo externo utilice un trapo seco.
MANTENIMIENTO
Las actuaciones de mantenimiento y reparación ha de llevarlas a cabo personal especializado.
ELIMINACIÓN
El usuario que desea eliminar este instrumento puede:
INSTRUCCIONES
E
45
Page 46
46
- Entregarlo a un centro de recogida de residuos electrónicos o electrotécnicos.
- Devolverlo al revendedor cuando compra un instrumento equivalente.
- En caso de productos de uso profesional exclusivo, contacte con el fabricante que tendrá que llevar a
cabo el procedimiento para la eliminación correcta.
La eliminación correcta de este producto permite reutilizar las materias primas contenidas en el mismo
y evita daños al medio ambiente y la salud humana.
La eliminación abusiva del producto representa una violación de la norma sobre la eliminación de
residuos peligrosos y supone la aplicación de las sanciones previstas.
GARANTÍA
Esta herramienta se ha fabricado y ensayado conforme a la normativa actualmente vigente en la Unión
Europea y tiene una garantía por un periodo de 12 meses para uso profesional o 24 meses para uso
no profesional.
Se repararán averías debidas a defectos de material o producción mediante reposición o sustitución de
piezas defectuosas a nuestra discreción.
caducidad de la misma.
No están sujetos a garantía defectos debidos al desgaste, al uso incorrecto o impropio y las rupturas
ocasionadas por golpes y/o caídas.
servicio de asistencia desmontado.
Quedan expresamente excluidos daños ocasionados a personas y/o objetos de cualquier tipo y/o
naturaleza, directos y/o indirectos.
DECLARACIÓN DE CONFORMIDAD UE
Declaramos bajo nuestra responsabilidad que el producto descrito cumple con todas las disposiciones
relativas a las siguientes Directivas:
• Directiva Compatibilidad Electromagnética (E.M.C.) 2014/30/UE;
• Directiva Baja Tensión (L.V.D.) 2014/35/UE;
• Directiva sobre restricciones a la utilización de determinadas sustancias peligrosas en aparatos
eléctricos y electrónicos (Ro.H.S.) 2011/65/UE.
INSTRUCCIONES
E
Page 47

47
12V MULTIUSO.
Guardar cuidadosamente as instruções de segurança e entregá-las ao pessoal utilizador.
DESTINO DE USO
r:
• para a carga e alimentação de veículos
• a utilizar em baterias de 12V, Wet - Agm - lítio (LiFePO4)
• durante as fases de reprogramação e autodiagnóstico
Não são permitidas as operações a seguir:
• é proibido o uso em baterias diferentes de 12V
• é proibida a utilização fora das prescrições técnicas contidas na tabela DADOS TÉCNICOS
• é proibida a utilização em ambientes húmidos, molhados ou expostos a intempéries
• é proibido utilizar em todas as aplicações diferentes daquelas indicadas
SEGURANÇA DA POSIÇÃO DE TRABALHO
Não utilizar o carregador de baterias em ambientes que contêm atmosferas potencialmente
senvolvidas faíscas capazes de
incendiar poeiras ou vapores.
Impedir que crianças ou visitantes possam aproximar-se da posição de trabalho enquanto se
está operando com o carregador de baterias. A presença de outras pessoas provoca distração
que pode implicar na perda do controlo do carregador de baterias.
Não inalar eventuais gases nocivos desprendidos pela bateria do veículo, enquanto se
está a trabalhar no motor.
Durante as operações de ligação, afaste o rosto da bateria do veículo. O líquido contido dentro
da bateria é corrosivo, se houver um contato acidental do ácido com a pele ou com os olhos
enxague imediatamente com água e consulte um médico.
Não deixe cair ferramentas metálicas sobre a bateria do veículo, pode ocorrer um curto-circuito
da própria bateria.
Utilize o carregador de baterias em uma área seca evitando a humidade.
SEGURANÇA DO CARREGADOR DE BATERIAS
• Antes da utilização controle que o carregador de baterias não tenha sofrido danos, que não tenha
cabos descobertos ou partes consumidas.
•
abri-lo ou alterá-lo.
IMPORTANTE: LER TOTALMENTE O PRESENTE MANUAL ANTES DE UTILIZAR
O CARREGADOR DE BATERIAS. SE AS NORMAS DE SEGURANÇA E AS
INSTRUÇÕES OPERACIONAIS NÃO FOREM RESPEITADAS, PODEM OCORRER
SÉRIOS ACIDENTES.
ATENÇÃO
MANUAL DE USO E INSTRUÇÕES PARA CARREGADOR ELECTRÓNICO DE BATERIAS
INSTRUÇÕES DE USO
PT
Page 48

48
indicada no dispositivo de alimentação. (Ver tabela DADOS TÉCNICOS)
•
tempo.
• Não adultere o circuito electrónico do carregador de baterias.
INSTRUÇÕES PARA A SEGURANÇA DO PESSOAL
• Recomenda-se a máxima atenção tomando o cuidado de concentrar-se sempre nas próprias ações.
Não utilizar o carregador de baterias no caso de cansaço ou sob o efeito de drogas, bebidas alcoólicas
ou remédios.
• Utilizar sempre os equipamentos de proteção individual a seguir:
• calçados de segurança;
• óculos de proteção;
• luvas de proteção para agentes físicos.
• Efetue todas as operações previstas em ambientes apropriadamente ventilados e secos.
• Nunca devem ser colocados em contato entre si os bornes das duas pinças (vermelha (+)
positiva; preto (-) negativo).
•
movimento e da mangueira de combustível.
• Não use roupas largas, não use pulseiras, correntinhas ou objetos metálicos quando está a trabalhar
no veículo.
•
UTILIZAÇÃO CUIDADOSA DO CARREGADOR DE BATERIAS
• Não introduza nenhum objeto no interior de fendas ou aberturas de qualquer tipo existentes na
superfície do carregador de baterias.
• Não utilize nunca o carregador de baterias se o estojo, as pinças, os cabos ou o cabo de alimentação
.
•
medidas de segurança e aumentar os riscos para o operador.
• O carregador de baterias deve ser reparado apenas e exclusivamente por pessoal especializado e
apenas com a utilização de peças sobressalentes originais.
• Antes de efetuar cada operação, desligue as luzes do veículo e todos os acessórios que porventura
estiverem em funcionamento.
•
da instalação do veículo. Se porventura houver excesso pode causar explosões, danos no
veículo, no carregador de baterias e nas pessoas.
• Conecte sempre o condutor de saída com pinça vermelha (+) no polo positivo da bateria, o
condutor de saída com pinça preta (-) na massa do veículo.
• Não inverta nunca a polaridade, a inversão de polaridade pode causar explosões, danos no
veículo, no carregador de baterias e nas pessoas.
INSTRUÇÕES DE USO
PT
Page 49

49
• Para a limpeza utilizar um pano seco e desligar sempre a alimentação de rede do carregador de
baterias. Nunca devem ser utilizados panos húmidos ou molhados.
INSTRUÇÕES PARA A SEGURANÇA DO CARREGADOR DE BATERIAS
•
•
abri-lo ou alterá-lo.
•
indicada no dispositivo de alimentação. (Ver tabela DADOS TÉCNICOS)
• Não cubra de maneira nenhuma o carregador de baterias durante a sua utilização. Providencie um
espaço apropriado para a ventilação.
• Não utilize o carregador de baterias em ambientes húmidos, molhados, não exponha-o à chuva.
Ambientes húmidos e contaminados aumentam o risco de choques elétricos.
EQUIPAMENTOS DE PROTEÇÃO INDIVIDUAL PREVISTOS DURANTE A UTILIZAÇÃO DO
CARREGADOR DE BATERIAS
A falta de observação dos seguintes avisos pode causar ferimentos físicos e/ou patologias.
Outros equipamentos de proteção individual a utilizar em função dos valores encontrados na
investigação de higiene ambiental/análise de riscos no caso em que os valores ultrapassem
os limites previstos pelas normas vigentes.
DADOS TÉCNICOS
UTILIZAR SEMPRE OS ÓCULOS DE PROTEÇÃO
UTILIZAR SEMPRE CALÇADOS DE SEGURANÇA
UTILIZAR SEMPRE LUVAS DE PROTEÇÃO PARA AGENTES FÍSICOS DURANTE A
UTILIZAÇÃO DO CARREGADOR DE BATERIAS
A UTILIZAR PARA BATERIAS
TENSÃO NOMINAL
TENSÃO DE RECARGA
POTÊNCIA ABSORVIDA
CAPACIDADE DA BATERIA EM CARGA
CAPACIDADE DA BATERIA EM MANUTENÇÃO
COMPRIMENTO DO CABO PINÇAS
SEÇÃO DO CABO DE BORNES
GRAU DE PROTEÇÃO
COMPRIMENTO DO CABO DE ALIMENTAÇÃO
DIMENSÕES
PESO
12V Wet - Agm - Lithium LiFePO4
110V-240V 50/60Hz
12V max
1800 Watt
10÷1200 Ah
10÷3000 Ah
2,7 m
25 mm
2
IP20
1,7 m
350x450x150 mm
8,8 kg
INSTRUÇÕES DE USO
PT
Page 50

50
LED DE SINALIZAÇÃO
No painel da frente do carregador de baterias há 15 leds. N° 4 leds sobre o estado da bateria, indicam:
• “Full” a bateria está carregada e em manutenção
• “Charging” a bateria está sob carga
•
• “Reverse” inversão de polaridade
• N°1 “led ON” sobre o estado de carga da bateria (cor Azul)
• N°1 “Start/Stop” (cor Amarelo) sobre o estado de funcionamento, indica se está a abastecer na
modalidade selecionada.
• N°2 leds na modalidade operacional “Function” Flash ou Charge (led Amarelo)
• N°4 leds na indicação de corrente abastecida “Amperage” descrita a seguir (led amarelo)
• N°3 leds na indicação da tensão de alimentação e tipo de bateria “Volt/Batt” descritos a seguir (led
Amarelo).
No painel da frente do carregador de baterias há n° 5 botões:
• “Start/Stop” inicia ou para o abastecimento na modalidade selecionada
• “Function” seleciona a modalidade operacional
• Volt/Batt” seleciona a tensão de Supply ou o tipo de bateria a carregar
• “Amperage” seleciona a corrente abastecida
• “A/V” (ecrã) seleciona o que visualizar no ecrã
ECRÃ DIGITAL
A tecla de seleção ''A/V'' permite visualizar no ecrã a tensão ou a corrente.
FUNÇÕES DO CARREGADOR DE BATERIAS E MODALIDADES OPERACIONAIS
A) Modalidades operacionais: “Function”
Charge
Modalidades de carga da bateria. Prevê 7 fases de carga, descritas a seguir:
FASE 1: Análise 1. Se a bateria tiver uma tensão superior a 6,5V, prosseguir com a fase seguinte.
Tensões abaixo de 6,5V, causam o retorno do dispositivo em stand-by.
• FASE 2: Pré-carga. Começa uma carga com corrente constante até a tensão da bateria chegar a 13V.
• FASE 3: Análise 2. Busca do elemento em curto. O carregador de baterias desliga o abastecimento de
corrente durante 5 minutos. Se durante esse período de tempo a tensão da bateria descer abaixo de
11,7V o dispositivo voltará em stand-by. Se a tensão permanece superior a 11,7V passa-se à FASE 4.
No caso de elemento em curto ou bateria sulfatada (indicada com ERR02 no ecrã durante a FASE 3)
é recomendável recarregar a bateria na modalidade RECOVERY.
• FASE 6: Tampão. A tensão desce no nível de conservação e é completado o ciclo de carga. Acende-se
o led verde de FULL.
• FASE 7: Ciclo por pulsos. Ciclo de conservação bateria por pulsos (para períodos prolongados).
Flash
Modalidade Alimentador para assistência na programação dos veículos. Não prevê nenhuma fase
de carga no seu interior, é um simples alimentador estabilizado na tensão nominal da bateria. A sua
que exigem energia para períodos longos ou curtos.
Recovery
Modalidade de recuperação para baterias sulfatadas acessível por meio da pressão prolongada da tecla
“Function”. No ecrã aparecerá a escrita “REC” com a visualização da medida de tensão ou corrente
instantânea, durante esta fase lampeja o led “Charge”.
O carregador de baterias efetua um ciclo de recarga especial no qual são forçadas tensões superiores
à média para tentar a recuperação da bateria. Nessa modalidade não são previstas mensagens de erro
INSTRUÇÕES DE USO
PT
Page 51

51
durante o ciclo de carga, quando o ciclo termina é indicado se a bateria foi recuperada ou não, segundo
a tensão e corrente absorvida. Modalidade com 6 fases de carga, descritas a seguir:
• FASE 1: Análise 1. Se a bateria apresenta uma tensão superior a 3V, prosseguir com a fase seguinte.
Tensões abaixo de 3V causam o retorno do dispositivo em stand-by.
• FASE 2: Pré-carga. Começa uma carga com corrente constante até a tensão da bateria alcançar 13V.
• FASE 5: Tampão. A tensão desce no nível de conservação e é completado o ciclo de carga. Acende-se
o led verde de FULL.
• FASE 6: Ciclo por pulsos. Ciclo de conservação da bateria por pulsos (para períodos prolongados).
ATENÇÃO: por causa da tensão elevada que é atingida durante este ciclo de recarga, devese efetuar a recuperação com bateria desconectada do veículo. Uma recuperação com bateria
conectada no veículo poderá causar danos na electrónica de bordo.
Tensão mínima das baterias
Se a tensão inicial da bateria for inferior a 2,5V, a bateria não pode ser recuperada.
B) Modalidade de alimentação “Flash” e carga “Amperage”
Flash 10A:
Flash 30A:
Flash 60A:
Flash 120A:
regulada em automático)
Charge 10Ah – 100Ah: Suporta as baterias de 10Ah até 100Ah
Charge 100Ah – 300Ah: Suporta as baterias de 100Ah até 300Ah
Charge 300Ah – 600Ah: Suporta as baterias de 300Ah até 600Ah
Charge 600Ah – 1200Ah: Suporta todas as baterias do mínimo de 600Ah até o máximo de 1200Ah.
C) Tensões de alimentação “Flash” e Baterias Suportadas “Volt / Batt.”
13,8V:
14,4V:
14,8V:
Wet: Baterias com eletrólito de ácido. Fim da carga de 14,4V
Agm: Baterias Agm com placa plana ou baterias espiral tipo Optima. Fim da carga de 14,7V
LiFePO4: Baterias LiFePO4
interrupção acidental ou voluntária da alimentação, no momento em que for ligado de novo o carregador
na modalidade FLASH o ciclo de trabalho retoma automaticamente no retorno da alimentação.
Na modalidade CHARGE, por outro lado, será visualizado no ecrã o erro ER01 e será necessário
carregar a tecla START/STOP para retomar o ciclo normal de recarga.
Análise da Bateria
A análise dentro das modalidades operacionais, podem terminar com a indicação de alguns erros.
aparece a escrita ''Errx'' onde 'x' é o número correspondente à causa do erro (Ver tabela 1). Sinal
INSTRUÇÕES DE USO
PT
Page 52

52
sonoro simples de dois segundos.
• Inversão de polaridade: acende o led ''Reverse'' e é visualizado no ecrã ''Err7'' com sinal sonoro de
dois segundos.
INDICAÇÕES DE ERROS
Os erros que podem ser indicados estão contidos na tabela 1.
Tabela 1: indicação dos Erros
INDICAÇÃO
ECRÃ
CAUSA SOLUÇÃO
Er01 Cabos desligados, cabos em
curto-circuito.
Posicionar as pinças corretamente e retomar a
carga da bateria (ver o parágrafo “Modo de uso
do carregador de baterias”).
Bateria totalmente em
curto-circuito.
Consultar o Centro de Assistência da bateria
mais próximo.
Er02 Bateria avariada ou não
recuperável.
Não aceita corrente depois de
20h de recovery.
A bateria pode estar defeituosa.
Er03 Sobrecarga de temperatura
interna do carregador de
bateria. Sobrecarga do
dispositivo
Remover possíveis objetos que cobrem a área
de ventilação do carregador de bateria ou
colocá-lo numa área mais fresca. Esperar que o
carregador de bateria reinicie automaticamente.
Er04 Erro de tensão.
Tensão muito baixa da bateria.
(Está a tentar carregar uma
bateria de 6Volts).
Utilizar o carregador de baterias somente com
baterias suportadas de 12V.
Retomar a carga da bateria (ver parágrafo “Modo
de uso do carregador de baterias”).
Bateria com um ou mais
elementos em curto-circuito.
A bateria pode estar defeituosa.
Er05 Bateria com tensão muito alta
(Está a tentar carregar uma
bateria de 24Volts).
Utilizar o carregador de baterias somente com
baterias suportadas de 12V.
Retomar a carga da bateria (ver parágrafo “Modo
de uso do carregador de baterias”).
Er06 Bateria de capacidade
excessiva. Nunca alcança-se o
Utilizar um carregador de bateria com
capacidade de carga maior.
Er07 and led
reverse
As pinças dos condutores de
saída estão ligadas de forma
imprópria na bateria.
Posicionar corretamente as pinças e retomar a
carga da bateria (ver o parágrafo “Modo de uso
do carregador de baterias”).
Er08 Corrente de saída muito alta.
Corrente acima do limite
máximo.
Diminuir a absorção na bateria.
CARGA DA BATERIA
Carga de baterias ligadas no veículo
3. Carga de uma bateria com borne negativo ligado à massa do veículo, conforme a seguir:
• Conectar o condutor de saída com pinça vermelha no polo (+) positivo da bateria.
• Conectar o condutor de saída com pinça preta à massa do veículo, longe da bateria e da mangueira
do combustível.
4. Carga de uma bateria com borne positivo ligado à massa do veículo, conforme a seguir:
INSTRUÇÕES DE USO
PT
Page 53

53
• Conectar o condutor de saída com pinça preta no polo (-) negativo da bateria.
• Conectar o condutor de saída com pinça vermelha à massa do veículo, longe da bateria e da mangueira
do combustível.
Carga de baterias não conectadas num veículo
2. Conectar o condutor de saída com pinça vermelha no polo (+) positivo da bateria.
3. Conectar o condutor de saída com pinça preta no polo (-) negativo da bateria.
com seus respectivos terminais.
UTILIZAÇÃO DO CARREGADOR DE BATERIAS
1. Depois de conectados os cabos dos condutores de saída na bateria, ligar o cabo de alimentação do
baterias (230V-50Hz); nessa altura, o aparelho emite um sinal sonoro durante 0,5 segundos e todos os
leds de sinalização, situados no painel de comando, iluminam-se durante dois segundos; nessa fase o
ecrã mostra “- - - -”.
WET aceso, led CHARGE 5-30Ah aceso. O acendimento dos leds varia conforme o último programa
memorizado.
carga apropriados ao tipo de bateria a carregar, mediante as teclas situadas no painel de comando. Os
parâmetros de carga escolhidos são salientados pelo acendimento do led correspondente.
• Tecla Function: (ver parágrafo A – Modalidades operacionais: “Function”) conforme o ciclo de trabalho,
selecionar:
- Flash, Charge ou Recovery.
• Tecla Amperage: (ver parágrafo B – Modalidade de alimentação e carga: “Amperage”)
Segundo a corrente de alimentação necessária para suportar a tensão da bateria durante as operações
de reprogramação é possível selecionar quatro correntes diferentes de alimentação:
Se selecionamos a função FLASH podemos escolher entre:
- Flash 10A: o carregador de baterias abastece 10A constantes
- Flash 30A: o carregador de baterias abastece 30A constantes
- Flash 60A: o carregador de baterias abastece 60A constantes
- Flash 120A: o carregador de baterias abastece 120A constantes
Conforme a capacidade da bateria a ser recarregada selecionar a função CHARGE, pode-se escolher entre:
- Charge 10Ah – 100Ah: Suporta as baterias de 10Ah até 100Ah.
- Charge 100Ah – 300Ah: Suporta as baterias de 100Ah até 300Ah
- Charge 300Ah – 600Ah: Suporta as baterias de 300Ah até 600Ah
- Charge 600Ah – 1200Ah: Suporta todas as baterias de 600Ah até 1200Ah.
• Tecla Volt / Batt (ver parágrafo C - Tensões de alimentação “Flash” e Baterias Suportadas: “Volt / Bat.”)
Segundo a corrente de alimentação necessária para suportar a tensão da bateria durante as operações
de reprogramação
(SOMENTE MODALIDADE FLASH), é possível selecionar três tensões diferentes de alimentação:
13,8V:
14,4V:
14,8V:
INSTRUÇÕES DE USO
PT
Page 54

54
Segundo a tecnologia de fabrico da bateria (SOMENTE MODALIDADE CHARGE), selecionar: Wet,
LiFePO4 ou Agm.
carga da bateria. O acendimento dos leds START/STOP e CHARGING indicam que a carga está em
andamento, o ecrã indicará a corrente de carga e a tensão da bateria.
5. Durante a carga da bateria nas fases “I” e “U0” permanece aceso o led CHARGING.
6. Quando acende o led FULL a bateria está 100% carregada, a partir desse momento o carregador
de baterias entrará na fase de conservação e manterá constantemente monitorado o estado de
carga o aparelho pode permanecer ligado durante vários meses.
carga.
INTERRUPÇÃO VOLUNTÁRIA DO CICLO DE CARGA
Se for preciso interromper o ciclo de recarga da bateria basta apertar a tecla START/STOP; quando
alimentação do aparelho e desligar os condutores de saída dos bornes da bateria.
INTERRUPÇÃO DO CICLO DE CARGA NO CASO DE INTERRUPÇÃO DA LINHA DE REDE
No caso de interrupções na linha de rede 110V - 230V, o carregador de baterias memoriza o ciclo de
trabalho que estava a realizar de forma a poder retomá-lo automaticamente (somente na modalidade
FLASH) na volta da alimentação na linha de rede com 230Volts. Esta função é fundamental se o
carregador de bateria efetua ciclos de alimentação muito longos também na ausência do operador. Na
modalidade CHARGE, por outro lado, será necessário apertar o botão START/STOP para retomar o
ciclo de trabalho.
FIM DA CARGA
1. Terminada a carga apertar a tecla START/STOP do carregador de baterias. Quando o led apaga
indica que o carregador de baterias terminou o ciclo de trabalho.
2. Desligar da tomada de rede o cabo de alimentação do aparelho.
3. Desligar o condutor de saída com pinça preta da massa do veículo ou do borne negativo (-) da
bateria.
4. Desligar o condutor de saída com pinça vermelha do borne positivo (+) da bateria.
corpo externo utilizar um pano seco.
MANUTENÇÃO
As operações de manutenção e de reparação devem ser efetuadas por pessoal especializado.
ELIMINAÇÃO
da sua vida útil, deve ser eliminado separadamente dos outros lixos urbanos.
O utilizador que pretende eliminar este instrumento pode:
- Entregá-lo junto a um ponto de coleta de lixos eletrónicos ou eletrotécnicos.
- Devolvê-lo ao próprio revendedor no momento da compra de outro instrumento equivalente.
procedimento para a eliminação correta.
A eliminação correta deste produto possibilita a reutilização das matérias-primas contidas no mesmo e
evita danos ao ambiente e à saúde humana.
A eliminação do produto de maneira irregular constitui uma violação da norma sobre a eliminação de
lixos perigosos, implica a aplicação das penalidades previstas.
INSTRUÇÕES DE USO
PT
Page 55

55
GARANTIA
Esta ferramenta é fabricada e testada segundo as normas vigentes atualmente na Comunidade
São reparadas avarias devido a defeitos de material ou de fabrico mediante restauração ou substituição
das peças defeituosas a nosso critério.
A realização de uma ou mais intervenções no prazo da garantia não altera a data de seu vencimento.
Não estão sujeitos a garantia os defeitos devido ao desgaste, ao uso errado ou impróprio e as quebras
causadas por batidas e/ou caídas.
A garantia decai quando forem efetuadas alterações, quando o instrumento for adulterado ou quando
for enviado à assistência desmontado.
São expressamente excluídos danos causados a pessoas e/ou coisas de qualquer género e/ou
natureza, diretos e/ou indiretos.
DECLARAÇÃO DE CONFORMIDADE UE
Declaramos sob a nossa responsabilidade que o produto descrito é conforme a todas as disposições
pertinentes às Diretivas a seguir:
• Diretiva de Compatibilidade Eletromagnética (E.M.C.) 2014/30/UE;
• Diretiva de Baixa Tensão (L.V.D.) 2014/35/UE;
• Diretiva sobre a restrição do uso de determinadas substâncias perigosas nas aparelhagens eléctricas
e electrónicas (Ro.H.S.) 2011/65/UE.
INSTRUÇÕES DE USO
PT
Page 56

GEBRUIKSHANDLEIDING VOOR 12 V MULTIFUNCTIONELE ELEKTRONISCHE ACCULADERS.
56
Bewaar de veiligheidsinstructies zorgvuldig en geef ze aan het personeel dat de nietmachine
gebruikt.
GEBRUIKSDOEL
De elektronische acculader is bestemd voor het volgende gebruik:
• het laden en de stroomvoorziening van voertuigen
• te gebruiken bij accu’s van 12V, Natte - AGM - lithium (LiFePO4) accu’s
• tijdens de herprogrammering en zelfdiagnose
De volgende handelingen zijn niet toegestaan:
• het is verboden de acculader voor andere accu’s te gebruiken dan die van 12V
vallen die in de tabel TECHNISCHE GEGEVENS staan
• het is verboden het apparaat in vochtige, natte omgevingen te gebruiken of in omgevingen die aan
weer en wind zijn blootgesteld
• het is verboden het apparaat voor iets anders te gebruiken dan voor de toepassingen die hier worden
beschreven
VEILIGHEID VAN DE WERKPLEK
Gebruik de acculader niet in omgevingen met mogelijk explosieve atmosferen of brandbare
materialen, omdat er vonken kunnen ontstaan, waardoor stof of damp in brand kunnen vliegen.
Voorkom dat kinderen of bezoekers in de buurt van de werkplek kunnen komen terwijl met de
acculader wordt gewerkt. De aanwezigheid van andere personen leidt af, waardoor men tijdens
het gebruik van het apparaat de controle erover kan verliezen.
Inhaleer de schadelijke gassen niet, die de accu afgeeft terwijl aan de motor wordt gewerkt.
Wend bij de aansluitingswerkzaamheden het gezicht van de accu van het voertuig. In de accu
zit een bijtende vloeistof. Indien die per ongeluk in aanraking komt met de huid of de ogen
moeten deze onmiddellijk met water worden afgespoeld en moet een arts worden geraadpleegd.
Laat geen metalen gereedschap op de accu van het voertuig vallen. Er kan hierdoor kortsluiting
in de accu zelf ontstaan.
Gebruik de acculader op een droge plek en voorkom vocht.
VEILIGHEID ACCULADER
• Controleer voor het gebruik of de acculader niet beschadigd is, of er geen kale kabels of versleten
delen zijn.
BELANGRIJK: LEES DEZE HANDLEIDING HELEMAAL DOOR ALVORENS DE
ACCULADER TE GEBRUIKEN. INDIEN DE VEILIGHEIDSVOORSCHRIFTEN
EN DE AANWIJZINGEN NIET IN ACHT WORDEN GENOMEN, KUNNEN ZICH
ERNSTIGE ONGEVALLEN VOORDOEN.
LET OP
GEBRUIKSAANWIJZING
NL
Page 57

• Gebruik de acculader niet als hij beschadigd is, omdat er dan gevaar voor elektrische schokken
57
bestaat. Probeer niet om hem te openen of er wijzigingen aan aan te brengen.
• Steek de stekker van de stroomkabel van de acculader in het stopcontact en verzeker u ervan dat de
netspanning overeenkomt met de netspanning die op het stroomvoorzieningsapparaat staat. (Zie de
tabel met TECHNISCHE GEGEVENS).
•
aangesloten.
• Knoei niet met het elektronische circuit van de acculader.
AANWIJZINGEN VOOR DE VEILIGHEID VAN HET PERSONEEL
• We raden u aan uiterst voorzichtig te zijn en u altijd te concentreren op uw handelingen. Gebruik de
acculader niet als u moe, of onder invloed van drugs, alcohol of medicijnen bent.
• Gebruik altijd de volgende persoonlijke beschermingsmiddelen:
• veiligheidsschoenen;
• een beschermende bril;
• beschermende handschoenen voor fysische agentia.
• Verricht alle voorgeschreven werkzaamheden in goed geventileerde en droge ruimtes.
• Zorg dat de twee klemmen onderling geen contact maken (rood (+) positief; zwart (-) negatief).
• Controleer of de kabels van de acculader zich uit de buurt van ventilatoren, bewegende delen en de
• Draag geen wijde kleding, armbanden, kettingen of metalen voorwerpen wanneer u aan het voertuig werkt.
• Voordat u de acculader opbergt, verzekert u zich ervan dat hij zodanig is afgekoeld dat hij de
omgevingstemperatuur heeft.
EEN ZORGVULDIG GEBRUIK VAN DE ACCULADER
• Steek geen voorwerpen in gleuven of openingen van welke aard dan ook in het oppervlak van de
acculader.
• Gebruik de acculader nooit wanneer de behuizing, de klemmen, de kabels of de voedingskabel
beschadigd zijn, wanneer u ongebruikelijke geuren ruikt of het apparaat te warm wordt.
•
van de veiligheidsmaatregelen verminderen en meer gevaren voor de gebruiker inhouden.
• Laat de acculader enkel en alleen door vakmensen met gebruik van originele reserveonderdelen
repareren.
• Voordat u werkzaamheden begint te verrichten, doet u de lichten van het voertuig en alle eventueel
werkende accessoires uit.
• Controleer altijd of het voltage van de acculader en de spanning van de installatie van het voertuig
overeenkomen. Eventuele overschrijding kan explosies, schade aan het voertuig, de acculader en
personen veroorzaken.
• Sluit de uitgangskabel met de rode klem (+) op de positieve pool van de accu en de uitgangskabel met
de zwarte klem (-) op de massa van het voertuig aan.
GEBRUIKSAANWIJZING
NL
Page 58

58
• Verwissel de polen nooit. Als de polen worden verwisseld kan dat explosies, schade aan het voertuig,
de acculader en personen veroorzaken.
• Gebruik een droge doek om de acculader schoon te maken en koppel hem hiervoor altijd van het
elektriciteitsnet. Gebruik nooit vochtige of natte doeken.
VEILIGHEIDSAANWIJZINGEN VOOR DE ACCULADER
• Controleer regelmatig of de acculader, de voedingskabel en de klemmen intact zijn.
• Gebruik de acculader niet als hij beschadigd is, omdat er dan gevaar voor elektrische schokken
bestaat. Probeer niet om hem te openen of er wijzigingen aan aan te brengen.
• Steek de stekker van de acculader in het stopcontact en verzeker u ervan dat de netspanning
overeenkomt met de netspanning die op het stroomvoorzieningsapparaat staat. (Zie de tabel met
TECHNISCHE GEGEVENS)
• Dek de acculader tijdens het gebruik op geen enkele wijze af. Garandeer een geschikte ruimte voor de
ventilatie.
• Gebruik de acculader niet in een vochtige, natte omgeving. Stel hem niet bloot aan regen. Een vochtige
en vuile omgeving verhoogt het gevaar voor elektrische schokken.
INDIVIDUELE BESCHERMINGSMIDDELEN DIE NODIG ZIJN TIJDENS HET GEBRUIK VAN DE ACCULADER
Niet inachtneming van de volgende waarschuwingen kan lichamelijk letsel en/of ziektes
veroorzaken.
Andere persoonlijke beschermingsmiddelen die moeten worden gebruikt, afhankelijk van
de waarden die zijn gevonden bij het onderzoek van de milieuhygiëne /risicoanalyse indien
de waarden de maximumwaarden overschrijden, die in de geldende voorschriften staan.
TECHNISCHE GEGEVENS
GEBRUIK ALTIJD EEN BESCHERMENDE BRIL
GEBRUIK ALTIJD VEILIGHEIDSSCHOENEN
GEBRUIK ALTIJD BESCHERMENDE HANDSCHOENEN VOOR FYSISCHE AGENTIA
TIJDENS HET GEBRUIK VAN DE ACCULADER
MOET WORDEN GEBRUIKT VOOR ACCU’S VAN
NOMINALE SPANNING
OPLAADSPANNING
GEABSORBEERD VERMOGEN
ACCUCAPACITEIT TIJDENS HET OPLADEN
ACCUCAPACITEIT BIJ DRUPPELLADING
LENGTE VAN DE KABEL MET KLEMMEN
DOORSNEDE VAN DE KABEL MET KLEMMEN
BESCHERMINGSGRAAD
LENGTE VAN DE VOEDINGSKABEL
AFMETINGEN
GEWICHT
12V Wet - Agm - Lithium LiFePO4
110V-240V 50/60Hz
12V max
1800 Watt
10÷1200 Ah
10÷3000 Ah
2,7 m
25 mm
2
IP20
1,7 m
350x450x150 mm
8,8 kg
GEBRUIKSAANWIJZING
NL
Page 59

59
CONTROLELAMPJE
Op het voorpaneel van de acculader bevinden zich 15 leds. 4 leds voor de staat van de accu, die
het volgende aangeven:
• “Full” : de accu is opgeladen en er is overgeschakeld op druppellading
• “Charging” : de accu wordt opgeladen
• “Fault” : de accu is beschadigd
• “Reverse”: polariteitinversie
• 1 “led ON” voor het laadniveau van de accu (blauw)
• 1 Start/Stop led (geel) voor de bedrijfstoestand, geeft aan of hij op de gekozen modus werkt
• 2 leds op de bedrijfsmodus "Function" Flash of Charge (gele led)
• 4 leds op de melding voor geleverde stroom “Amperage” die vervolgens zullen worden beschreven
(gele led)
• 3 leds voor de melding van de voedingsspanning en het type accu “Volt/Batt”, die vervolgens zullen
worden beschreven (gele led).
Op het voorpaneel van de acculader bevinden zich 5 knoppen:
• “Start/Stop”: start of stopt de stroomlevering op de gekozen modus
• “Function”: kiest de bedrijfsmodus
• “Volt / Batt”: kiest de voedingsspanning Supply of het type accu dat moet worden opgeladen
• “Amperage”: kiest de geleverde stroom
• “A/V” (display): kiest wat op het display moet worden weergegeven
DIGITAAL DISPLAY
Met de ”A/V” keuzetoets kan de spanning of de stroom op het display worden weergegeven.
FUNCTIES VAN DE ACCULADER EN BEDRIJFSMODI
A) Bedrijfsmodi: “Function”
Charge
Laadmodus van de accu. Er zijn 7 laadfasen, die vervolgens worden beschreven:
• FASE 1: Analyse 1. Als de spanning van de accu hoger is dan 6,5V gaat u over op de volgende fase.
Door spanningen die lager zijn dan 6,5V keert het apparaat terug naar de stand-bystand.
• FASE 2: Voorladen. Begint met constante stroom te laden tot de spanning van de accu de 13V bereikt.
• FASE 3: Analyse 2. Zoekt kortgesloten onderdelen. De acculader schakelt de stroomlevering gedurende
5 minuten uit. Wanneer de spanning van de accu binnen die tijd onder de 11,7V zakt, keert het apparaat
terug op de stand-bystand. Als de spanning hoger blijft dan 11,7V gaat u over op FASE 4. Wanneer
een element kortgesloten is of een accu gesulfateerd (weergegeven door ERR02 op het display tijdens
FASE 3) is het raadzaam de accu op de RECOVERY stand op te laden.
• FASE 4: Intensief laden. Laadt de accu tot de ingestelde grenswaarde op.
• FASE 5: Constante spanning. Houdt de accu op de spanning die hij aan het eind van het opladen had.
• FASE 6: Buffer. De spanning zakt onder het onderhoudsniveau en de oplaadcyclus wordt voltooid. De
groene led FULL gaat branden.
• FASE 7: Pulscyclus. Onderhoudscyclus van de accu met pulscyclus (gedurende langere periodes).
Flash
Stroomvoorzieningsmodus voor assistentie bij het programmeren van voertuigen. Er is hier geen
enkele oplaadfase. Het is een pure stroomvoorziening die op de nominale spanning van de accu is
gestabiliseerd. Het doel ervan is stroom te leveren ter ondersteuning van de accu om te voorkomen dat
hij leegloopt bij werkzaamheden waarvoor korte of lange tijd energie nodig is.
Recovery
Recovery-modus voor gesulfateerde accu's die toegankelijk is door lang op de "Function" toets te
drukken. Op het scherm verschijnt het opschrift “rEC” met de weergave van de meting van de spanning
of de ogenblikkelijke stroom. Tijdens deze fase knippert de “Charge” led.
De acculader verricht een speciale oplaadcyclus waarin hogere spanningen dan gemiddeld worden
GEBRUIKSAANWIJZING
NL
Page 60

60
geforceerd om te proberen de accu te redden. Op deze stand zijn geen foutmeldingen tijdens de
oplaadcyclus voorzien. Aan het eind wordt op grond van de spanning en de opgenomen stroom
aangegeven of de accu is hersteld of niet. Er zijn 6 laadstanden, die vervolgens worden beschreven:
• FASE 1: Analyse 1. Als de spanning van de accu hoger is dan 3V gaat u over op de volgende fase.
Door spanningen die lager zijn dan 3V keert het apparaat terug naar de stand-bystand.
• FASE 2: Voorladen. Begint met constante stroom te laden tot de spanning van de accu de 13V bereikt.
• FASE 3: Intensief laden. Laadt de accu tot de ingestelde grenswaarde op.
• FASE 4: Constante spanning. Houdt de accu op de spanning die hij aan het eind van het opladen had.
• FASE 5: Buffer. De spanning zakt onder het onderhoudsniveau en de oplaadcyclus wordt voltooid. De
groene led FULL gaat branden.
• FASE 6: Pulscyclus. Onderhoudscyclus van de accu met pulscyclus (gedurende langere periodes).
LET OP: vanwege de hoge spanning die tijdens deze laadcyclus wordt bereikt, moet de accu
worden hersteld terwijl deze van het voertuig is gekoppeld. Wordt de accu hersteld terwijl hij op
het voertuig is aangesloten, dan kan dat de elektronica ervan beschadigen.
Minimumspanning accu’s
Wanneer de beginspanning van de accu lager is dan 2,5 V kan de accu niet worden hersteld.
B) Voedingsmodus “Flash” en opladen “Amperage”
Vooringestelde categorieën voedingsstroom:
Flash 10A: op 10A ingestelde voedingsstroom
Flash 30A: op 30A ingestelde voedingsstroom
Flash 60A: op 60A ingestelde voedingsstroom
Flash 120A: op 120A ingestelde voedingsstroom
Vooringestelde oplaadcategorieën om de aangesloten accu te kiezen (de uitgangsstroom wordt
automatisch geregeld)
Charge 10Ah – 100Ah: Ondersteunt accu’s van 10Ah tot 100Ah
Charge 100Ah – 300Ah: Ondersteunt accu’s van 100Ah tot 300Ah
Charge 300Ah – 600Ah: Ondersteunt accu’s van 300Ah tot 600Ah
Charge 600Ah – 1200Ah: Ondersteunt alle accu's van een minimum van 600Ah tot een maximum van
1200Ah.
C) “Flash” voedingsspanningen en “Volt / Batt.” ondersteunde accu's:
Vooringestelde categorieën voedingsspanning:
13,8V: op 13,8V ingestelde voedingsspanning
14,4V: op 14,4V ingestelde voedingsspanning
14,8V: op 14,8V ingestelde voedingsspanning
Vooringestelde soorten accu's:
Natte accu’s: accu's met zure elektrolyt. Het opladen stopt bij 14,4V
AGM: AGM-accu met platte plaat of spiraalaccu type Optima. Het opladen stopt bij 14,7V
LiFePO4: LiFePO4 AA accu’s
De instellingen opslaan
Het apparaat slaat de instellingen op het bedieningspaneel aan de voorkant op. Wanneer de stroom per
ongeluk uitvalt of deze expres wordt uitgezet, wordt de acculader wanneer hij weer wordt ingeschakeld
met de laatst opgeslagen instellingen gestart. Bij acculader ingesteld op de FLASH-modus wordt de
werkcyclus bij terugkeer van de stroom automatisch hervat.
Op de CHARGE-modus daarentegen wordt de fout ER01 op het display weergegeven en moet op de
START/STOP-knop worden gedrukt om de normale oplaadcyclus te hervatten.
Accu-analyse
De analyses verricht tijdens de bedrijfsmodi kunnen eindigen met de melding van enkele fouten.
GEBRUIKSAANWIJZING
NL
Page 61

61
• Accu beschadigd: de led ''Fault'' gaat branden en de led ''Start / Stop'' gaat uit. Het apparaat gaat
over op de stand-bystand. Op het display verschijnt het opschrift ''Errx'' waarbij 'x' het nummer is dat
overeenkomt met de oorzaak van de fout (Zie tabel 1). Twee seconden durend enkel geluidssignaal.
• Polariteitinversie : de led ''Reverse'' gaat branden en op het display wordt ''Err7'' weergegeven met
een twee seconden durend geluidssignaal.
FOUTMELDINGEN
De fouten die kunnen worden gemeld staan in tabel 1.
Tabel 1: foutmeldingen
MELDING
DISPLAY
OORZAAK OPLOSSING
Er01 Kabels zitten los, kabels
kortgesloten.
Breng de klemmen goed aan en hervat het
opladen van de accu; (zie de paragraaf "De
acculader gebruiken").
Accu volledig kortgesloten. Wend u tot het dichtstbijzijnde Servicecentrum.
Er02 De accu is kapot of kan niet
worden hersteld.
Neemt na 20h recovery geen
stroom op.
De accu kan defect zijn.
Er03 Interne overtemperatuur van de
acculader. Overbelasting van
het apparaat.
Verwijder eventuele voorwerpen die de
ventilatiezone van de batterijlader bedekken of
verplaats hem in een koeler gebied. Wacht tot de
acculader automatisch weer gaat werken.
Er04 Spanningsfout.
Accuspanning te laag. (U
probeert een accu van 6 Volt op
te laden).
Stel een “Recovery” cyclus in
Gebruik de acculader alleen met ondersteunde
accu's van 12V.
Hervat het opladen van de accu; (zie de
paragraaf "De acculader gebruiken").
Accu met een of meerdere
kortgesloten elementen.
De accu kan defect zijn.
Er05 Accu met te hoge spanning ten
opzichte van de ingestelde. (U
probeert een accu van 24 Volt
op te laden).
Gebruik de acculader alleen met ondersteunde
accu's van 12V.
Hervat het opladen van de accu; (zie de
paragraaf "De acculader gebruiken").
Er06 Te sterke accu. Hij is nooit klaar
met opladen.
Gebruik een acculader met een groter
laadvermogen.
Er07 and led
reverse
De klemmen van de
uitgangsgeleiders zijn niet goed
op de accu aangesloten.
Breng de klemmen goed aan en hervat het
opladen van de accu (zie de paragraaf "De
acculader gebruiken").
Er08 Uitgangsstroom te hoog.
Stroom hoger dan de
maximumlimiet.
Verminder de opname van de accu.
GEBRUIKSAANWIJZING
NL
Page 62

62
DE ACCU OPLADEN
Accu's opladen die op het voertuig zijn aangesloten.
1. Voordat u met opladen begint, controleert u of de stroomkabel van het elektriciteitsnet is gekoppeld.
2. Zoek de pool die overeenstemt met de massa van het voertuig. Over het algemeen is die op de
negatieve klem aangesloten.
3. Laad een accu die met de negatieve klem op de massa van het voertuig is aangesloten op de
volgende manier op:
• Sluit de uitgangsgeleider met de rode klem aan op de positieve pool (+) van de accu.
• Sluit de uitgangsgeleider met de zwarte klem aan op de massa van het voertuig, ver van de accu en
4. Laad een accu die met de positieve klem op de massa van het voertuig is aangesloten op de volgende
manier op:
• Sluit de uitgangsgeleider met de zwarte klem aan op de negatieve pool (-) van de accu.
• Sluit de uitgangsgeleider met de rode klem aan op de massa van het voertuig, ver van de accu en de
Accu's opladen die niet op een voertuig zijn aangesloten
1. Voordat u met opladen begint, controleert u of de stroomkabel van het elektriciteitsnet is gekoppeld.
2. Sluit de uitgangsgeleider met de rode klem aan op de positieve pool (+) van de accu.
3. Sluit de uitgangsgeleider met de zwarte klem aan op de negatieve pool (-) van de accu.
LET OP Controleer of beide klemmen van de uitgangsgeleiders goed contact hebben met de
bijbehorende klemmen.
GEBRUIK VAN DE ACCULADER
1. Zodra de kabels van de uitgangsgeleiders op de accu zijn aangesloten, steekt u de stekker van de
stroomkabel van het apparaat in het stopcontact. Controleer of de spanning overeenkomt met de
nominale spanning van de acculader (230V-50Hz); nu geeft het apparaat gedurende een halve seconde
een geluidssignaal af en gaan alle controlelampjes op het bedieningspaneel gedurende 2 seconden
branden; tijdens deze fase geeft het display “- - - -” weer.
led CHARGE 5-30Ah brandt. Het branden van de leds verandert afhankelijk van het laatst opgeslagen
programma.
3. Stel nu met de acculader op de “stand-by” stand met behulp van de knoppen op het bedieningspaneel
de oplaadparameters in die geschikt zijn voor het type accu dat moet worden opgeladen. De gekozen
oplaadparameters worden weergegeven door het branden van de bijbehorende led.
Instelbare oplaadparameters:
• Function-toets: (zie paragraaf A -Bedrijfsmodi: “Function”) afhankelijk van de werkcyclus kiest u:
- Flash, Charge of Recovery.
• Amperage-toets: (zie paragraaf B - Voedingsmodus en opladen: “Amperage”)
Afhankelijk van de voedingsstroom die nodig is om de spanning van de accu te ondersteunen tijdens
de herprogrammeringswerkzaamheden kunnen vier verschillende voedingsstromen worden gekozen:
Als we de FLASH-functie kiezen, kunnen we kiezen uit:
- Flash 10A: de acculader levert constant 10A
- Flash 30A: de acculader levert constant 30A
- Flash 60A: de acculader levert constant 60A
- Flash 120A: de acculader levert constant 120A
Afhankelijk van de capaciteit van de op te laden accu, selecteert u de CHARGE functie; we kunnen
kiezen tussen:
- Charge 10Ah – 100Ah: Ondersteunt accu's van 10Ah tot 100Ah.
- Charge 100Ah – 300Ah: Ondersteunt accu's van 100Ah tot 300Ah
GEBRUIKSAANWIJZING
NL
Page 63

63
- Charge 300Ah – 600Ah: Ondersteunt accu's van 300Ah tot 600Ah
- Charge 600Ah – 1200Ah: Ondersteunt accu's van 600Ah tot 1200Ah.
• Toets Volt / Batt (zie paragraaf C - Voedingsspanning “Flash” en ondersteunde accu’s: “Volt / Batt.”)
Afhankelijk van de voedingsspanning die nodig is om de spanning van de accu te ondersteunen tijdens
de herprogrammeringswerkzaamheden (ALLEEN FLASH-MODUS) er kunnen drie verschillende
voedingsspanningen worden gekozen:
13,8V: op 13,8V ingestelde voedingsspanning
14,4V: op 14,4V ingestelde voedingsspanning
14,8V: op 14,8V ingestelde voedingsspanning
Afhankelijk van de fabricagetechnologie van de accu (ALLEEN BIJ DE CHARGE-MODUS) kiest u: Nat,
LiFePO4 of AGM.
4. Na de oplaadparameters te hebben ingesteld, drukt u op de START/STOP-toets om het opladen van
de accu te starten. Wanneer de leds START/STOP en CHARGING gaan branden wil dat zeggen dat
de accu wordt opgeladen. Het display geeft de laadstroom en de spanning van de accu weer.
5. Tijdens het opladen van de accu blijft de led CHARGING in de fasen “I” en “U0” branden.
6. Wanneer de led FULL gaat branden is de accu 100% geladen. Vanaf nu gaat de acculader over op de
dat hij altijd optimaal geladen blijft. Tijdens deze oplaadfase kan het apparaat meerdere maanden
aangesloten blijven.
7. Als u het opladen wilt stoppen of afronden, volgt u de aanwijzingen voor het stoppen/afronden van
het opladen.
DE OPLAADCYCLUS VRIJWILLIG STOPPEN
Als u de oplaadcyclus van de accu wilt stoppen, drukt u op de START/STOP-toets; als de bijbehorende
led uitgaat, geeft dat het einde van de werkcyclus aan. Haal de voedingskabel van het apparaat uit het
stopcontact en koppel de uitgangsgeleiders van de klemmen van de accu.
ONDERBREKING VAN DE LAADCYCLUS BIJ STROOMUITVAL
Wanneer het 110V - 230V elektriciteitsnet uitvalt, slaat de acculader de lopende werkcyclus op om hem
automatisch te kunnen hervatten (alleen bij de FLASH-modus) bij de terugkeer van de stroom van 230
Volt. Deze functie is van fundamenteel belang in die gevallen waarin de acculader in afwezigheid van
de operator erg lange voedingscycli verricht. Bij de CHARGE-stand moet daarentegen op de START/
STOP-knop worden gedrukt om de werkcyclus te hervatten.
NA HET OPLADEN
1. Na het opladen drukt u op de START/STOP-toets van de acculader. Als de led uitgaat, wil dat zeggen
dat de acculader klaar is met de werkcyclus.
2. Haal de stekker van het apparaat uit het stopcontact.
3. Koppel de uitgangsleider met zwarte klem van de massa van het voertuig of van de negatieve klem
(-) van de accu.
4. Koppel de uitgangskabel met rode klem van de positieve pool (+) van de accu.
Berg de acculader na de werkzaamheden op een droge plek zonder vocht op. Om de buitenkant van de
behuizing te reinigen gebruikt u een droge doek.
ONDERHOUD
Onderhoudswerkzaamheden
en reparaties mogen uitsluitend door vakmensen worden verricht.
DISPOSAL
Het symbool van de doorgestreepte vuilnisbak op het apparaat of op de verpakking geeft aan dat het
product op het einde van zijn levenscyclus afzonderlijk van het gemeentelijk afval moet worden afgedankt.
GEBRUIKSAANWIJZING
NL
Page 64

64
De gebruiker die dit instrument wenst af te danken, kan:
- Het bij een centrum voor afvalophaling voor elektrische en elektronische afval afgeven.
- Het terugbezorgen aan de eigen verkoper op het moment waarop een nieuw gelijkwaardig instrument
wordt gekocht.
- In geval van producten voor uitsluitend professioneel gebruik contact opnemen met de fabrikant,
die een goede afdankprocedure moet voorschrijven.
Door dit product op de goede manier af te danken, kunnen de grondstoffen ervan worden gerecycled,
en schade aan het milieu en de gezondheid worden voorkomen.
Illegaal afdanken van het product houdt een overtreding van de voorschriften betreffende het afdanken
van gevaarlijk afval in, waarvoor de voorziene sancties worden toegepast.
GARANTIE
Deze apparatuur is vervaardigd en getest in overeenstemming met de voorschriften die momenteel van
kracht zijn in de Europese Gemeenschap. Hij heeft 12 maanden garantie bij professioneel gebruik of 24
maanden bij niet-professioneel gebruik.
Storingen veroorzaakt door materiaal- of fabrieksfouten worden naar ons goeddunken ofwel gerepareerd
of de defecte onderdelen worden vervangen.
Eén of meerdere reparaties tijdens de garantieperiode wijzigt de verloopdatum ervan niet.
Defecten veroorzaakt door slijtage, een verkeerd of oneigenlijk gebruik, of door vallen en/of stoten
worden niet door de garantie gedekt.
De garantie komt te vervallen wanneer er wijzigingen worden aangebracht, wanneer er met het apparaat
wordt geknoeid en wanneer het gedemonteerd naar de servicedienst wordt gestuurd.
Schade toegebracht aan personen en / of voorwerpen van welke aard en / of natuur, direct en / of
indirect is uitdrukkelijk uitgesloten.
VERKLARING VAN OVEREENSTEMMING EU
We verklaren onder eigen verantwoordelijkheid dat het beschreven product voldoet aan alle relevante
bepalingen van de volgende richtlijnen:
• Richtlijn met betrekking tot de elektromagnetische compatibiliteit (E.M.C.) 2014/30/EU;
• Laagspanningsrichtlijn (L.V.D.) 2014/35/EU;
• Richtlijn betreffende de beperking van het gebruik van bepaalde gevaarlijke stoffen in elektrische en
elektronische apparatuur (Ro.H.S.) 2011/65/EU.
GEBRUIKSAANWIJZING
NL
Page 65

65
INSTRUKCJA OBSŁUGI I ZALECENIA DO ŁADOWARKI AKUMULATOROWEJ WIELO-
FUNKCYJNEJ 12V.
Starannie przechowywać niniejsze instrukcje bezpieczeństwa i przekazać je personelowi
korzystającemu z urządzenia.
PRZEZNACZENIE UŻYTKOWE
Ładowarka elektroniczna akumulatorowa (prostownik) przeznaczona jest do następującego użycia:
• do ładowania i zasilania pojazdów
• do stosowania do akumulatorów 12V, Wet - Agm - lithium (LiFePO4)
• w trakcie faz przeprogramowania i autodiagnostyki.
Nie są dozwolone następujące operacje:
• zabrania się używania do akumulatorów innych niż 12V
TECHNICZNE
• zabrania się używania w środowisku wilgotnym, mokrym lub narażonym na działanie warunków
atmosferycznych
• zabrania się stosowania do wszelkich innych celów niż te określone
BEZPIECZEŃSTWO NA STANOWISKU PRACY
Nie używać prostownika do ładowania akumulatorów w środowiskach zawierających atmosferę
potencjalnie wybuchową lub materiały łatwopalne, ponieważ mogą powstać iskry i spowodować
zapalenie się pyłów lub oparów.
Nie pozwalać dzieciom lub odwiedzającym zbliżać się do stanowiska pracy, podczas
używania ładowarki akumulatorowej. Obecność innych osób powoduje rozproszenie uwagi i
może doprowadzić do utraty kontroli podczas jej użycia.
Nie wdychać ewentualnych szkodliwych gazów emitowanych z akumulatora pojazdu, pracując
przy silniku.
Podczas czynności podłączania trzymać twarz jak najdalej od akumulatora pojazdu. Akumulator
zawiera elektrolit będący żrąca cieczą, w razie przypadkowego kontaktu elektrolitu ze skórą lub
oczami należy miejsce skażone natychmiast przemyć wodą i skonsultować się z lekarzem.
Nie upuszczać metalowych narzędzi na akumulator pojazdu, może to spowodować zwarcie
akumulatora.
Używać ładowarki akumulatorowej-prostownika w miejscu suchym, unikając wilgoci.
BEZPIECZEŃSTWO PROSTOWNIKA DO ŁADOWANIA AKUMULATORÓW
• Sprawdzić przed użyciem, czy prostownik nie doznał uszkodzeń i czy nie ma odsłoniętych przewodów
lub zużytych części.
BARDZO WAŻNE, ABY PRZED UŻYCIEM ŁADOWARKI PRZECZYTAĆ
CAŁĄ NINIEJSZĄ INSTRUKCJĘ OBSŁUGI. NIEPRZESTRZEGANIE ZASAD
BEZPIECZEŃSTWA I INSTRUKCJI OBSŁUGI MOŻE BYĆ PRZYCZYNĄ
POWAŻNYCH WYPADKÓW.
UWAGA
INSTRUKCJA OBSŁUGI
PL
Page 66

66
• Nie należy używać prostownika, jeśli jest uszkodzony, ponieważ istnieje ryzyko porażenia prądem, nie
• Podłączyć przewód zasilania prostownika do gniazda sieciowego upewniając się, że napięcie z sieci
jest takie, jak wskazano na urządzeniu zasilającym. (Patrz tabela DANE TECHNICZNE)
• Po zakończeniu pracy nie pozostawiać prostownika podłączonego do gniazda sieciowego przez
dłuższy czas.
• Nie wolno naruszać obwodu elektronicznego prostownika.
ZALECENIA DOTYCZĄCE BEZPIECZEŃSTWA PERSONELU
• Zaleca się maksymalną uwagę, starając się zawsze skupić na czynnościach, które się wykonuje. Nie
używać prostownika ładowarki, gdy jest się zmęczonym lub pod wpływem narkotyków, alkoholu lub leków.
• Należy zawsze stosować następujące środki ochrony indywidualnej:
• obuwie ochronne;
• okulary ochronne;
• Wszystkie przewidziane prace wykonywać w pomieszczeniach suchych i dobrze wentylowanych.
• Nigdy nie doprowadzać do styku między sobą końcówek dwóch zacisków (czerwony (+)
dodatni; czarny (+) ujemny).
• Upewnić się, że kable prostownika są oddalone od wirników, ruchomych części i przewodu paliwowego.
• Nie nosić luźnej odzieży, bransoletek, łańcuszków czy metalowych przedmiotów podczas pracy z
pojazdem.
• Przed odłożeniem prostownika upewnić się, że ochłodził się do temperatury pokojowej.
PRAWIDŁOWE UŻYCIE PROSTOWNIKA DO ŁADOWANIA AKUMULATORÓW
• Nie wkładać żadnych przedmiotów do szczelin czy jakichkolwiek otworów, które znajdują się na
powierzchni prostownika do ładowania akumulatorów.
• Nigdy nie używać prostownika, jeśli obudowa, zaciski, przewody czy przewód zasilający są uszkodzone.
Jeśli czuje się dziwny zapach lub wytwarza zbyt dużo ciepła.
• Prostownik do ładowania akumulatorów nie może być przerabiany. Zmiany mogą zmniejszyć
skuteczność środków bezpieczeństwa i zwiększyć ryzyko dla operatora.
•
części zamiennych.
• Przed wykonaniem jakiejkolwiek czynności, wyłączyć światła pojazdu i wszystkie funkcjonujące
akcesoria.
• Zawsze należy sprawdzić zgodność między napięciem prostownika a napięciem pojazdu. Ewentualny
nadmiar może spowodować wybuch, uszkodzenie pojazdu, prostownikai oraz obrażenia osób.
• Podłączać zawsze przewód wyjściowy z czerwonym zaciskiem (+) do bieguna dodatniego akumulatora,
a przewód wyjściowy z czarnym zaciskiem (-) do masy pojazdu.
• Nigdy nie odwracać biegunowości, odwrócenie biegunowości może spowodować wybuch, uszkodzenie
INSTRUKCJA OBSŁUGI
PL
Page 67

67
pojazdu, prostownika oraz obrażenia osób.
• Do czyszczenia należy używać suchej szmatki, odłączając zawsze ładowarkę od sieci zasilania.
Nigdy nie używać wilgotnych lub mokrych szmatek.
ZALECENIA BEZPIECZEŃSTWA DOTYCZĄCE PROSTOWNIKA
• Okresowo należy sprawdzać integralność prostownika, przewodu zasilającego i zacisków.
• Nie należy używać prostownika jeśli jest uszkodzony, ponieważ istnieje ryzyko porażenia prądem, nie
• Podłączyć prostownik do gniazda sieciowego, upewniając się, że napięcie z sieci jest takie, jak
wskazano na urządzeniu zasilania. (Patrz tabela DANE TECHNICZNE)
• W żaden sposób nie należy przykrywać prostownika podczas używania. Należy zapewnić odpowiednią
przestrzeń do wentylacji.
• Nie używać prostownika w środowiskach wilgotnych, mokrych i nie wystawiać jej na deszcz.
Środowiska wilgotne i zanieczyszczone zwiększają ryzyko porażenia prądem.
ŚRODKI OCHRONY INDYWIDUALNEJ PRZEWIDZIANE W TRAKCIE UŻYWANIA PROSTOWNIKA
Nieprzestrzeganie poniższych zaleceń może spowodować obrażenia ciała i/lub choroby.
Dodatkowe środki ochrony osobistej, które muszą być stosowane w zależności od wartości
odczytanych podczas badania higieny środowiska/analizy ryzyka w przypadku, gdy wartości
przekraczają limity określone przez obowiązujące przepisy.
DANE TECHNICZNE
ZAKŁADAĆ ZAWSZE OKULARY OCHRONNE
UŻYWAĆ ZAWSZE OBUWIE BEZPIECZEŃSTWA
KORZYSTAĆ ZAWSZE Z RĘKAWIC CHRONIĄCYCH PRZED CZYNNIKAMI
FIZYCZNYMI, W TRAKCIE UŻYWANIA PROSTOWNIKA
UŻYWAĆ DO AKUMULATORÓW
NAPIĘCIE NOMINALNE
NAPIĘCIE ŁADOWANIA
MOC ABSORBOWANA
POJEMNOŚĆ AKUMULATORA W ŁADOWANIU
POJEMNOŚĆ AKUMU. W STANIE PODTRZYMYWANIA
DŁUGOŚĆ KABLA ZE SZCZYPCAMI
PRZEKRÓJ KABLA Z ZACISKAMI
STOPIEŃ OCHRONY
DŁUGOŚĆ KABLA ZASILANIA
WYMIARY
WAGA
12V Wet - Agm - Lithium LiFePO4
110V-240V 50/60Hz
12V max
1800 Watt
10÷1200 Ah
10÷3000 Ah
2,7 m
25 mm
2
IP20
1,7 m
350x450x150 mm
8,8 kg
INSTRUKCJA OBSŁUGI
PL
Page 68

68
SYGNALIZACJA DIODOWA
Na przednim panelu ładowarki znajduje się 15 diod LED. 4 diody LED stanu akumulatora, które
sygnalizują:
• “Full” akumulator jest naładowany, i jest w stanie podtrzymywania
• “Charging” ładowanie akumulatora jest w toku
• “Fault” akumulator jest uszkodzony
• “Reverse” odwrócenie biegunowości
• 1 dioda LED “led ON” stanu prostownika (kolor Niebieski)
• 1 dioda LED “Start/Stop” (kolor Żółty) stanu działania, wskazuje, czy ładowanie następuje w wybranym trybie
• 2 diody LED trybu pracy „Function” Flash lub Charge (Kolor ŻÓŁTY)
• 4 diody LED wskazujące dostarczany prąd „Amperage” opisane poniżej (Kolor ŻÓŁTY)
• 3 diody LED wskazujące napięcie zasilania i rodzaj akumulatora “Volt/Bat” opisane poniżej (kolor
ŻÓŁTY).
Na przednim panelu ładowarki znajduje się 5 przycisków:
• “Start/Stop”: uruchamia lub zatrzymuje ładowanie w wybranym trybie
• “Function”: wybiera tryb pracy
• „Volt/Batt”: wybiera zasilanie Supply lub rodzaj akumulatora do ładowania
• “Amperage”: wybiera dostarczany prąd
• "A/V" (wyświetlacz): wybiera, co wyświetlić na wyświetlaczu
CYFROWY WYŚWIETLACZ
Przycisk wyboru „A/V" umożliwia wyświetlanie na wyświetlaczu napięcia lub prądu.
FUNKCJE PROSTOWNIKA I TRYBY PRACY
A) Tryb pacy: “Function”
Charge
Tryb ładowania akumulatora. Przewiduje 7 faz ładowania, jak opisano poniżej:
• FAZA 1: Analiza1. Jeżeli akumulator ma napięcie wyższe niż 6,5V, przechodzi do następnej fazy. Napięcia
poniżej 6,5V powodują powrót urządzenia do trybu stand-by (gotowości).
• FAZA 2: Ładowanie wstępne. Rozpoczyna ładowanie przy stałym prądzie, aż napięcia akumulatora osiągnie
wartość 13V
• FAZA 3: Analiza 2. Poszukiwanie elementu w zwarciu. Prostownik wyłącza zasilanie na 5 minut. Jeżeli w
tym czasie napięcie akumulatora spadnie poniżej 11,7V urządzenia powróci do stanu stand-by (gotowości).
Jeśli napięcie utrzymuje się powyżej 11,7V przechodzi się do FAZY 4. W przypadku elementu w zwarciu
lub zasiarczonego akumulatora (sygnalizowanego na wyświetlaczu: ERR02 podczas FAZY 3) zalecane jest
ładowanie akumulatora w trybie RECOVERY.
• FAZA 4: Głębokie ładowanie. Akumulator zostaje naładowany do ustawionej wartości granicznej.
• FAZA 5: Napięcie stałe. Utrzymuje akumulator w napięciu występującym na koniec ładowania.
• FAZA 6: Rezerwa. Napięcie spadnie do poziomu podtrzymywania i zostanie zakończony cykl ładowania.
Zaświeci się zielona dioda FULL.
• FAZA 7: Cykl impulsowy. Cykl impulsowego podtrzymywania akumulatora (w długim przedziale czasu).
Flash
Tryb Zasilacza, funkcja wspierająca podczas programowania pojazdu. Tryb ten nie przewiduje żadnej
fazy ładowania, jest zwykłym zasilaczem ustabilizowanym na znamionowe napięcie akumulatora. Jego
celem jest zapewnienie prądu wsparcia dla akumulatora, aby zapobiec jego rozładowaniu podczas
operacji, które wymagają energii na krótki lub długi okres.
Recovery
Tryb regeneracji dla zasiarczonych akumulatorów, dostępny jest przez dłuższe naciśnięcie przycisku
“Function". Na ekranie pojawi się napis “rEC” z wyświetleniem wartości chwilowego napięcia lub prądu,
w czasie tej fazy dioda „Charge” miga.
Prostownik wykona specjalny cykl ładowania, w którym zostaną wymuszone napięcia powyżej średniej,
INSTRUKCJA OBSŁUGI
PL
Page 69

69
starając się w ten sposób odzyskać akumulator. Tryb ten nie przewiduje komunikatów o błędach
podczas cyklu ładowania, sygnalizowany jest wynik końcowy, czy akumulator został odzyskany czy nie,
w zależności od napięcia i poboru prądu. Tryb ładowania na 6 faz, jak opisano poniżej:
• FAZA 1: Analiza1. Jeżeli akumulator ma napięcie wyższe niż 3V, przechodzi do następnej fazy.
Napięcia poniżej 3V powodują powrót urządzenia do trybu stand-by (gotowości).
• FAZA 2: Ładowanie wstępne. Rozpoczyna ładowanie przy stałym prądzie, aż napięcia akumulatora
osiągnie wartość 13V
• FAZA 3: Głębokie ładowanie. Akumulator zostaje naładowany do ustawionej wartości granicznej.
• FAZA 4: Napięcie stałe. Utrzymuje akumulator w napięciu występującym na koniec ładowania.
• FAZA 5: Rezerwa. Napięcie spadnie do poziomu podtrzymywania i zostanie zakończony cykl
ładowania. Zaświeci się zielona dioda FULL.
• FAZA 6: Cykl impulsowy. Cykl impulsowego podtrzymywania akumulatora (w długim przedziale czasu).
UWAGA: ze względu na wysokie napięcie osiągane podczas tego cyklu ładowania, odzyskiwanie
należy wykonywać z akumulatorem odłączonym od pojazdu. Odzysk z podłączonym do pojazdu
akumulatorem może spowodować uszkodzenie elektroniki pokładowej
Minimalne napięcie akumulatora
Jeśli początkowe napięcie akumulatora wynosi poniżej 2,5 V, akumulator nie może być odzyskany.
B) Tryb zasilania “Flash” i ładowanie “Amperage”
Ustalone przedziały prądu zasilania:
Flash 10A: prąd zasilania ustawiony na 10A
Flash 30A: prąd zasilania ustawiony na 30A
Flash 60A: prąd zasilania ustawiony na 60A
Flash 120A: prąd zasilania ustawiony na 120A
Ustalone przedziały ładowania do wyboru podłączonego akumulatora (prąd wyjściowy regulowany
automatycznie)
Charge 10Ah – 100Ah: Obsługuje akumulatory od 10Ah do 100Ah
Charge 100Ah – 300Ah: Obsługuje akumulatory od 100Ah do 300Ah
Charge 300Ah – 600Ah: Obsługuje akumulatory od 300Ah do 600Ah
Charge 600Ah – 1200Ah: Obsługuje wszystkie akumulatory od minimum 600Ah do maksymalnie
1200Ah.
C) Napięcia zasilania "Flash" i obsługiwane akumulatory “Volt / Batt.”
Ustalone przedziały napięcia zasilania:
13,8V: Napięcie zasilania ustawione na 13,8V
14,4V: Napięcie zasilania ustawione na 14,4V
14,8V: Napięcie zasilania ustawione na 14,8V
Ustalone rodzaje akumulatorów:
Wet: Akumulatory z elektrolitem kwasowym. Koniec ładowania przy 14,4V
Agm: Akumulatory na bazie płaskiej płyty AGM lub akumulatory spiralne typu Optima. Koniec ładowania
przy 14,7V
LiFePO4: Akumulatory litowo-żelazowo-fosforanowe LiFePO4
Zapamiętywanie ustawień
Urządzenie realizuje zapamiętywanie ustawień na przednim panelu sterowania. W razie przypadkowego
lub dobrowolnego przerwania zasilania, w momencie ponownego włączenia
ładowarka rozpoczyna
pracę według ostatnio zapamiętanych ustawień. Gdy prostownik ustawiony jest na tryb FLASH, cykl
pracy wznawia się automatycznie po powrocie dostawy prądu.
Natomiast w trybie CHARGE, na ekranie zostanie wyświetlony błąd ER01 i należy nacisnąć przycisk
START/STOP, aby powrócić do normalnego cyklu ładowania.
INSTRUKCJA OBSŁUGI
PL
Page 70

70
Analiza akumulatora
Analizy wewnątrz trybów pracy mogą kończyć się sygnalizacją niektórych błędów.
• Akumulator uszkodzony: zaświeci się dioda „Fault” i zgaśnie dioda „Start / Stop”, przechodzi do stanu
Stand-By, na wyświetlaczu pojawi się napis „Errx”, gdzie „x” oznacza numer odpowiadający przyczynie
błędu (patrz tabela 1). Pojedynczy sygnał dźwiękowy przez dwie sekundy.
• Odwrócenie biegunowości: zaświeci się dioda „Reverse" i na wyświetlaczu pojawi się „Err7” z
sygnalizacją dźwiękową przez dwie sekundy.
SYGNALIZACJA BŁĘDÓW
Błędy, które mogą być raportowane są przedstawione w tabeli 1.
Tabela 1: wskazania błędów
OZNACZENIE NA
WYŚWIETLACZU
PRZYCZYNA ŚRODEK ZARADCZY
Er01 Odłączone przewody, zwarcie w
przewodach.
Umieścić zaciski w sposób poprawny i przywrócić
ładowanie akumulatora; (patrz akapit „Jak używa
się prostownika do ładowania akumulatorów”).
Całkowite zwarcie akumulatora. Skonsultować się z najbliższym Centrum
Serwisowym akumulatora.
Er02 Akumulator uszkodzony lub
niedający się naładować
Nie akceptuje prądu po 20 godz
regeneracji
Akumulator może być wadliwy.
Er03 Przegrzanie wewnętrzne
prostownika. Przeciążenie
urządzenia
Usunąć ewentualne przedmioty, które
uniemożliwiają wentylację prostownika lub
przenieść go w chłodniejsze miejsce. Poczekać
do momentu, aż prostownik automatycznie
rozpocznie ponowne ładowanie.
Er04 Błąd napięcia.
Napięcie akumulatora zbyt
niskie. (Usiłuje się ładować
akumulator 6Volt).
Ustawić cykl “Recovery”.
Używać prostownika tylko do akumulatorów
obsługiwanych przez 12V.
Przywrócić ładowanie akumulatora (patrz akapit
“Jak używa się prostownika do ładowania
akumulatorów”).
Zwarcie jednego lub więcej
elementów akumulatora.
Akumulator może być wadliwy.
Er05 Zbyt wysokie napięcie
akumulatora w stosunku do
napięcia ustawionego. (Usiłuje
się ładować akumulator 6Volt).
Używać prostownika tylko do akumulatorów
obsługiwanych przez 12V.
Przywrócić ładowanie akumulatora (patrz akapit
“Jak używa się prostownika do ładowania
akumulatorów”).
Er06 Akumulator o zbyt dużej
ładowności. Nigdy nie osiągnie
się końca ładowania.
Używać prostownikao większej zdolności
doładowczej.
Er07 and led
reverse
Zaciski przewodów wyjściowych
są niewłaściwie podłączone do
zacisków akumulatora.
Umieścić zaciski w sposób poprawny i przywrócić
ładowanie akumulatora; (patrz paragraf
„Jak używa się prostownika do ładowania
akumulatorów”).
Er08 Prąd wyjściowy jest zbyt wysoki.
Prąd powyżej maksymalnej
granicy.
Obniżyć absorpcję akumulatora.
INSTRUKCJA OBSŁUGI
PL
Page 71

71
ŁADOWANIE AKUMULATORA
Ładowanie akumulatorów podłączonych do pojazdu
1. Przed rozpoczęciem ładowania sprawdzić, czy przewód zasilania jest odłączony od gniazda
sieciowego.
2. Określić biegun odpowiadający masie pojazdu; zazwyczaj połączona ona jest z zaciskiem ujemnym.
3. Ładowanie akumulatora z zaciskiem ujemnym podłączonym do masy pojazdu, jak następuje:
• Podłączyć przewód wyjściowy z czerwonym zaciskiem do bieguna dodatniego (+) akumulatora.
• Podłączyć przewód wyjściowy z czarnym zaciskiem do masy pojazdu, z daleka od akumulatora i
przewodu paliwowego.
4. Ładowanie akumulatora z zaciskiem dodatnim podłączonym do masy pojazdu, jak następuje:
• Podłączyć przewód wyjściowy z czarnym zaciskiem do bieguna ujemnego (-) akumulatora.
• Podłączyć przewód wyjściowy z czerwonym zaciskiem do masy pojazdu, z daleka od akumulatora i
przewodu paliwowego.
Ładowanie akumulatorów niepodłączonych do pojazdu
1. Przed rozpoczęciem ładowania sprawdzić, czy przewód zasilania jest odłączony od gniazda
sieciowego.
2. Podłączyć przewód wyjściowy z czerwonym zaciskiem do bieguna dodatniego (+) akumulatora.
3. Podłączyć przewód wyjściowy z czarnym zaciskiem do bieguna ujemnego (-) akumulatora.
UWAGA Upewnić się, że obydwa zaciski przewodów wyjściowych mają prawidłowy styk z ich
odpowiednimi końcówkami.
JAK UŻYWA SIĘ PROSTOWNIKA DO ŁADOWANIA AKUMULATORÓW
1. Po podłączeniu przewodów wyjściowych do akumulatora, podłączyć przewód zasilania urządzenia do
gniazda sieciowego upewniając się, że napięcie odpowiada napięciu nominalnemu prostownika do
ładowania akumulatorów (230V-50Hz); teraz urządzenie przez 0,5 sekundy emituje sygnał dźwiękowy
a wszystkie diody sygnalizacyjne umieszczone na panelu sterowania świecą się przez dwie sekundy, w
tej fazie wyświetlacz cyfrowy pokazuje “----”
zapalona, dioda WET zapalona, dioda CHARGE 5-30Ah zapalona. Diody zapalają się w zależności od
ostatniego, zapamiętanego programu.
3. Teraz, gdy prostownik jest już w trybie “stand-by” za pomocą klawiszy umieszczonych na panelu
sterowania, ustawić parametry ładowania odpowiednie do typu akumulatora do naładowania. Wybrane
parametry ładowania zostają oznaczane przez zapalenie się odpowiedniej diody.
Parametry ładowania możliwe do ustawienia:
• Przycisk Function: (patrz akapit A - Tryb pacy: “Function”) w zależności od cyklu pracy, należy wybrać:
- Flash, Charge lub Recovery.
• Przycisk Amperage: (patrz akapit B - Tryb zasilania i ładowanie: “Amperage”)
W zależności od prądu zasilania wymaganego do podtrzymania napięcia akumulatora podczas
przeprogramowywania, można wybrać cztery różne prądy zasilania:
Jeśli wybieramy funkcję FLASH możemy wybrać spośród:
- Flash 10A: prostownik dostarcza 10A stałe
- Flash 30A: prostownik dostarcza 30A stałe
- Flash 60A: prostownik dostarcza 60A stałe
- Flash 120A: prostownik dostarcza 120A stałe
W zależności od pojemności ładowanego akumulatora wybrać funkcję CHARGE; możemy wybrać między:
- Charge 10Ah – 100Ah: Obsługuje akumulatory od 10Ah do 100Ah.
- Charge 100Ah – 300Ah: Obsługuje akumulatory od 100Ah do 300Ah.
- Charge 300Ah – 600Ah: Obsługuje akumulatory od 300Ah do 600Ah.
- Charge 600Ah – 1200Ah: Obsługuje wszystkie akumulatory od 600Ah do 1200Ah.
INSTRUKCJA OBSŁUGI
PL
Page 72

72
• Przycisk Volt / Batt (patrz akapit C - Napięcia zasilania “Flash” i Obsługiwane akumulatory: “Volt / Batt.”)
W zależności od prądu zasilania wymaganego do podtrzymania napięcia akumulatora podczas
przeprogramowywania. (TYLKO TRYB FLASH) można wybrać trzy różne napięcia zasilania:
13,8V: Napięcie zasilania ustawione na 13,8V
14,4V: Napięcie zasilania ustawione na 14,4V
14,8V: Napięcie zasilania ustawione na 14,8V
W zależności od technologii konstrukcji akumulatora (TYLKO W TRYBIE CHARGE), wybrać: Wet,
LiFePO4 lub Agm.
4. Po ustawieniu parametrów ładowania, nacisnąć klawisz START/STOP, aby uruchomić ładowanie
akumulatora. Zapalone diody START/STOP i CHARGING wskazują, że ładowanie jest w toku, na
wyświetlaczu wyświetli się prąd ładujący oraz napięcie akumulatora.
5. Podczas ładowania akumulatora w fazach „I” i „U0” pozostaje zapalona dioda CHARGING.
6. Przy zapaleniu diody FULL akumulator będzie naładowany w 100%, od tego momentu prostownik
wejdzie w fazę podtrzymywania i będzie stale monitorował stan sprawności akumulatora, utrzymując
go zawsze na optymalnym poziomie naładowania. W tej fazie ładowania urządzenie może pozostawać
podłączone przez wiele miesięcy.
7. Jeżeli chce się przerwać lub zakończyć sesję ładowania należy postępować według instrukcji
przerywania/końca ładowania.
DOBROWOLNE PRZERWANIE CYKLU ŁADOWANIA
Jeśli chce się przerwać cykl ładowania akumulatora wystarczy nacisnąć przycisk START/STOP;
wyłączy się dioda oznaczająca zakończenie cyklu ładowania. Odłączyć przewód zasilający urządzenia
od gniazda sieciowego i odłączyć przewody wyjściowe od zacisków akumulatora.
PRZERWANIE CYKLU ŁADOWANIA W PRZYPADKU BRAKU PRĄDU SIECIOWEGO
W przypadku zakłóceń na linii sieciowej 110V - 230V, prostownik zapisze wykonywany cykl roboczy, tak,
aby móc wznowić go automatycznie (tylko w trybie FLASH) po powrocie dostawy prądu sieciowego
o napięciu 230V. Ta funkcja ma podstawowe znaczenie w przypadkach,
gdy prostownik wykonuje
bardzo długie cykle zasilania nawet w przypadku braku operatora. W trybie CHARGE konieczne będzie
naciśnięcie przycisku START/STOP, aby wznowić cykl roboczy.
KONIEC ŁADOWANIA
1. Po zakończeniu ładowania nacisnąć przycisk START/STOP prostownika do ładowania akumulatorów.
Wyłączenie się diody oznacza, że prostownik zakończył cykl ładowania.
2. Odłącz przewód zasilający urządzenia od gniazdka sieciowego.
3. Odłączyć przewód wyjściowy z czarnym zaciskiem od masy pojazdu lub od zacisku ujemnego (-)
akumulatora.
4. Odłączyć przewód wyjściowy z czerwonym zaciskiem od zacisku dodatniego (+) akumulatora.
After use, replace the battery charger in a dry place free from humidity. To clean the outer casing, use
a dry cloth.
KONSERWACJA
Symbol skreślonego kubła naniesiony na urządzeniu lub na opakowaniu oznacza, że wyrób po
zakończeniu swojej użytecznej funkcji musi być likwidowany oddzielnie od innych odpadów komunalnych.
Użytkownik, który zamierza zlikwidować to urządzenie może:
- Dostarczyć je do centrum zbiórki odpadów elektronicznych lub elektrotechnicznych.
- Oddać je w punkcie sprzedaży, przy zakupie ekwiwalentnego urządzenia.
- W przypadku produktów do użytku wyłącznie profesjonalnego, należy skontaktować się z producentem,
INSTRUKCJA OBSŁUGI
PL
Page 73

73
który przekaże procedurę do prawidłowego usuwania.
Prawidłowe usuwanie tego produktu umożliwi ponowne wykorzystanie surowców w nim zawartych i
zapobiega szkodom wobec środowiska i zdrowia ludzi.
Nielegalne usuwanie produktu stanowi naruszenie prawa o usuwaniu odpadów niebezpiecznych i
podlega zastosowaniu przewidzianych sankcji.
DEKLARACJA ZGODNOŚCI UE
Niniejszym oświadczamy z pełną odpowiedzialnością, że opisany produkt jest zgodny ze wszystkimi
odnośnymi przepisami następujących Dyrektyw:
• Dyrektywa kompatybilności elektromagnetycznej (EMC) 2014/30/UE;
• Dyrektywa Niskonapięciowa (LVD) 2014/35/UE;
• Dyrektywa w sprawie ograniczenia stosowania niektórych niebezpiecznych substancji w sprzęcie
elektrycznym i elektronicznym (RoHS) 2011/65/UE.
INSTRUKCJA OBSŁUGI
PL
Page 74

74
HASZNÁLATI KÉZIKÖNYV ÉS ÚTMUTATÓ A 12V-OS MULTIFUNKCIÓS ELEKTROMOS
AKKUMULÁTORTÖLTŐHÖZ.
Őrizzük meg a biztonsági útmutatót és adjuk át a műszert felhasználó személyzetnek.
FELHASZNÁLÁSI CÉLZAT
Az elektromos akkumulátortöltőt a következő célra fejlesztették ki:
• gépjárművek feltöltésére és tápellátására
• 12V-os, Wet - Agm - lítium (LiFePO4) típusú akkumulátorokhoz
• újraprogramozási és autodiagnózis munkafázis alatt
A műszer nem használható a következő célokra:
• tilos 12V-tól eltérő töltetű akkumulátorhoz használni
• tilos a TECHNIKAI ADATOK részben leírt technikai adatoktól eltérő feltételekkel használni
• tilos nedves, vizes környezetben használni, illetve rossz időjárásnak kitenni
• tilos az előírt felhasználástól eltérő esetekben használni
A MUNKAHELY BIZTONSÁGA
Az akkumulátortöltőt nem szabad robbanásveszélyes környezetben használni, mivel a működés
alatt szikrák pattanhatnak ki, amelyek a környezeti port vagy gőzöket berobbanthatják.
Figyeljünk arra, hogy gyermekek illetve látogatók ne lépjenek be abba a munkahelyi
környezetbe, ahol az akkumulátortöltőt hasznosítják. Más személyek jelenléte elvonhatja a
A motor gyorsindítása alatt, tilos a gépjármű által kiengedett gázokat belélegezni.
A csatlakoztatási folyamat alatt tartsuk távol az arcunkat a gépjármű akkumulátorától.
Az akkumulátor belsejében található folyadék maró hatású, abban az esetben, ha véletlenül
bőrre vagy szembe kerülne, azonnal le kell öblíteni bő vízzel és orvoshoz kell fordulni.
Vigyázzunk, hogy ne essen fémszerszám az akkumulátorra. Ez az akkumulátor rövidzárlatát
okozhatná.
Az akkumulátortöltőt kizárólag száraz, nedvességtől mentes helyen szabad használni.
AZ AKKUMULÁTOR TESZTER BIZTONSÁGA
• Használat előtt bizonyosodjunk meg arról, hogy az akkumulátortöltő ép legyen, a műszeren ne
legyenek fedetlen vezetékek vagy elhasználódott részek.
• Tilos sérült akkumulátortöltőt használni, ez áramütést okozhat, valamint ilyen esetben tilos felnyitni
vagy módosítani a műszert.
AZ AKKUMULÁTORTÖLTŐ HASZNÁLATA ELŐTT HASZNÁLATA ELŐTT
ELENGEDHETETLEN A KÉZIKÖNYV TARTALMÁNAK MEGISMERÉSE. A
BIZTONSÁGI ELŐÍRÁSOK ÉS A FELHASZNÁLÁSI ÚTMUTATÓBAN FOGLALTAK
BE NEM TARTÁSA SÚLYOS SÉRÜLÉSEKET OKOZHAT.
FIGYELEM
HASZNÁLATI ÚTMUTATÓ
HU
Page 75

75
• Csatlakoztassuk az akkumulátortöltő tápellátási vezetékét az elektromos hálózathoz, de előtte
bizonyosodjunk meg arról, hogy a hálózat feszültsége megfeleljen a tápellátási készüléken feltüntetett
értékeknek. (Lásd TECHNIKAI ADATOK táblázat)
• A munkafolyamat elvégzése után ne hagyjuk hosszú időn át az akkumulátortöltőt az elektromos
hálózathoz csatlakoztatva.
• Tilos módosítani az akkumulátortöltő elektromos bekötéseit.
SZEMÉLYI BIZTONSÁGI ELŐÍRÁSOK
•
Az akkumulátor tesztert nem szabad használni, ha fáradtak vagyunk vagy drog, alkohol, gyógyszerek
hatása alatt állunk.
• Használjuk mindig a személybiztonsági eszközöket:
• munkavédelmi cipő;
• munkavédelmi szemüveg;
• munkavédelmi kesztyű.
• Minden munkavégzést kizárólag száraz, jól szellőztetett munkakörnyezetben szabad elvégezni.
• Sose érintkezzenek a csípő harapó két felülete a piros-pozitív (+) és a fekete-negatív (-) felületek.
• Bizonyosodjunk meg arról, hogy az akkumulátortöltő vezetékei ne kerüljenek a ventillátor, a mozgó
részek vagy az üzemanyag vezeték közelébe.
• Munkavégzés közben ne viseljünk bő ruhát vagy gyűrűt, karkötőt vagy fém tárgyat.
• Mielőtt eltennénk az akkumulátortöltőt, bizonyosodjunk meg arról, hogy a műszer megfelelően lehűlt,
és legalább szobahőmérsékletű legyen.
AZ AKKUMULÁTORTÖLTŐ BIZTONSÁGOS HASZNÁLATA
• Ne illesszünk semmilyen tárgyat az akkumulátortöltő készülék felületén található nyílásokba.
• Ha az akkumulátortöltő tokja, a csipeszek, vezetékek vagy a töltőegység sérült lenne a műszert
tilos használni. Tilos a műszert használni, ha a felhasználás alatt kellemetlen szagot vagy túlzott hőt
termelne a műszer.
• Tilos az akkumulátortöltőt módosítani. A módosítások lecsökkentik a biztonsági egységek
hatásosságát és megemelik a felhasználó személyt érintő veszélyeket.
• Az akkumulátortöltőt kizárólag szakember javíthatja, a javításhoz kizárólag eredeti cserealkatrészeket
szabad használni.
• Bármilyen munkafolyamat elvégzése előtt le kell kapcsolni a gépjármű lámpáit, illetve minden
bekapcsolt állapotú kiegészítőt.
• Minden esetben ellenőrizzük le az akkumulátortöltő volt értékét és a gépjármű műszerének feszültség
értékét. Az előírt értékek túllépése robbanást, a gépjármű, akkumulátortöltő vagy a felhasználó
személy sérülését okozhatja.
• A kimeneti vezetéket mindig a piros csipesszel csatlakoztatjuk az akkumulátor (+) pozitív pólusához,
míg a fekete csipesszel (-) a jármű földelésével kötjük össze.
• Tilos felcserélni a polaritást ez robbanást okozhat, valamint a gépjármű, akkumulátortöltő vagy a
HASZNÁLATI ÚTMUTATÓ
HU
Page 76

76
felhasználó személy sérülését okozhatja.
• Az akkumulátortöltőt az elektromos hálózatról való lecsatlakoztatás után, száraz törlőkendővel szabad
megtisztítani. Tilos nedves vagy vizes törlőkendőt használni.
AZ AKKUMULÁTORTÖLTŐ BIZTONSÁGA
• Rendszeresen ellenőrizzük le az akkumulátortöltő épségét, bizonyosodjunk meg arról, hogy az
áramellátási vezeték és a csipeszek épek legyenek.
• Tilos sérült akkumulátortöltő használni, mert áramütés veszélye alakulhat ki, ilyen esetben tilos felnyitni
vagy módosítani a műszert.
• Csatlakoztassuk az akkumulátortöltő tápellátási vezetékét az elektromos hálózathoz, de előtte
bizonyosodjunk meg arról, hogy a hálózat feszültsége megfeleljen a tápellátási készüléken feltüntetett
értékeknek. (Lásd TECHNIKAI ADATOK táblázat)
• Az akkumulátortöltőt tilos letakarni a használat alatt. A használat alatt bizonyosodjunk meg arról, hogy
megfelelő szabad tér és levegő legyen a munkakörnyezetben.
• Az akkumulátor tesztert ne használjuk nedves környezetben, esőben vagy hóban. A nedves és
tisztátlan munkakörnyezet megnövelik a szikrák képződését.
AZ AKKUMULÁTORTÖLTŐ HASZNÁLATA ALATT SZÜKSÉGES SZEMÉLYVÉDELMI ESZKÖZÖK
Az alábbi szabályok be nem tartása súlyos sérüléseket és/vagy betegségeket okozhat.
További személyvédelmi eszközök, amelyek a munkavédelmi környezeti higiénia/veszély
bevizsgálás eredménye alapján alkalmazandóak, abban az esetben ha az értékek meghaladják
az érvényes törvényben előírtakat.
TECHNIKAI ADATOK
VISELJÜNK MINDIG MUNKAVÉDELMI SZEMÜVEGET
VISELJÜNK MINDIG MUNKAVÉDELMI CIPŐT
HASZNÁLJUNK MINDEN ESETBEN MUNKAVÉDELMI KESZTYŰT, AMELY
VÉDELMET NYÚJT A KÜLSŐ FIZIKAI ELEMEK ELLEN, AZ AKKUMULÁTORTÖLTŐ
TELJES HASZNÁLATA ALATT
TÖLTHETŐ AKKUMULÁTOR TÍPUSOK
NOMINÁLIS FESZÜLTSÉG
KIMENETI FESZÜLTSÉG
FELVETT TELJESÍTMÉNY
AKKUMULÁTOR KAPACITÁS, TÖLTÉS ALATT
AKKUMULÁTOR KAPACITÁS, TÖLTÉS MEGTARTÁS ALATT
CSIPESZEK VEZETÉKÉNEK HOSSZA
CSIPESZEK VEZETÉKÉNEK NAGYSÁGA
VÉDELMI FOKOZAT
TÁPVEZETÉK HOSSZÚSÁGA
MÉRETEK
SÚLY
12V Wet - Agm - Lithium LiFePO4
110V-240V 50/60Hz
12V max
1800 Watt
10÷1200 Ah
10÷3000 Ah
2,7 m
25 mm
2
IP20
1,7 m
350x450x150 mm
8,8 kg
HASZNÁLATI ÚTMUTATÓ
HU
Page 77

77
KIJELZŐ LED-JEI
Az akkumulátortöltő elülső kijelző paneljén összesen 15 led kijelző van. 4 LED az akkumulátor
állapotát jelzik, amelyek feladata a következő:
• “Full” az akkumulátor töltve van, és megtartja a töltését
• “Charging” az akkumulátor feltöltés alatt áll
• “Fault” az akkumulátor sérült
• “Reverse” polaritás felcserélődés történt
• 1db “led ON” a készülék töltési állapotát jelzi (Kék színű)
• 1db “Start/Stop” (Sárga színű) azt jelzi, hogy az ellátás a kiválasztott módon történik-e
• 2 DB led, amelyek a “Function” Flash vagy Charge (Sárga led) operációs üzemmódot jelzik
• 4 DB led, amelyek a leadott áram mennyiséget jelzik, mint “Amperage”, lásd lentebbi leírás (sárga led)
• 3 DB led, amelyek a tápfeszültséget és az akkumulátor típust jelzik, mint “Volt/Batt”, lásd lentebbi
leírás (sárga led).
Az akkumulátortöltő elülső kijelző paneljén 5db gombot találnak:
• “Start/Stop” beindítja vagy leállítja az ellátást az előre kiválasztott módon
• “Function” kiválasztott működési üzemmód
• “Volt/Batt” választja ki a Supply feszültséget, illetve a feltöltendő akkumulátor típusát
• “Amperage” kiválasztja az ellátási áramot
• “A/V” (kijelző) azt választja ki, hogy mi tűnjön fel a kijelzőn
DIGITÁLIS KIJELZŐ
Az “A/V” kijelző kiválasztó gombja lehetővé teszi, hogy a kijelzőn a feszültséget vagy az áramerősséget
jeleníthetjük meg.
AZ AKKUMULÁTORTÖLTŐ FUNKCIÓI ÉS AZ OPERATÍV ÜZEMMÓDOK
A) Operatív üzemmód: “Function”
Charge
Akkumulátortöltő üzemmód. A feltöltésnek 7 fázisa van, amelyekről alább adunk leírást:
• 1 FÁZIS: 1 analízis. Amikor az akkumulátor feszültsége 6,5V alá süllyed, tovább lehet lépni a következő
fázisára. A 6,5V alatti feszültség stand-by állapotra állítja vissza a készüléket.
• 2 FÁZIS: Töltés előtti állapot. A töltés állandó árammal kezdődik meg egészen addig, amíg az akkumulátor
el nem éri a 13V-os feszültséget.
• 3 FÁZIS: 2 analízis. Rövidzárlatos részek felkutatása. Az akkumulátortöltő 5 percen át felfüggeszti a töltési
folyamatot. Ha ez idő alatt az akkumulátor feszültsége11,7V alá csökkenne, a készülék stand-by állapotra
áll vissza. Ha a feszültség 11,7V feletti értéken marad, tovább lehet lépni a következő 4 FÁZISRA. Abban
az esetben, ha a rövidzárlatos részek lennének vagy az akkumulátor kénelvont (ezt a 3 FÁZIS alatt az
ERR02 hibajel jelzi a kijelzőn), tanácsoljuk, hogy az akkumulátort RECOVERY üzemmódban töltsék fel.
• 4 FÁZIS: Teljes feltöltés. Az akkumulátort a beállított határértékig tölti.
• 5 FÁZIS: Állandó feszültség. Megtartja az akkumulátort a töltés végén elért feszültségen.
• 6 FÁZIS: Ütköző. A feszültség a megtartási szintre süllyed és befejeződik a töltési ciklus. A zöld színű kijelző
gyullad ki a FULL jelnél.
• 7 FÁZIS: Pulzáló áram ciklus. Az akkumulátort pulzálással tartja szinten. (hosszabb időtartamra).
Flash
Tápellátási üzemmód a gépjármű programozásának ideje alatti ellátáshoz. A fázis lefolyása alatt
nem zajlik feltöltés, kizárólag egy stabilizált ellátás ad az akkumulátor nominális feszültségéhez. Az
üzemmód célja, hogy áramellátást biztosítson az akkumulátornak, megelőzve, hogy töltésre kellene
tenni olyan munkafolyamatok alatt, amelyek rövidebb vagy hosszabb időre igényelnek energiát.
Recovery
A kénezett akkumulátorok helyreállítását a “Function” gomb hosszú lenyomásával tudjuk elérni. A
kijelzőn a „rEC” felirat és a feszültség vagy a pillanatnyi feszültség értékének kiírása olvasható majd,
ezalatt a fázis alatt a “Charge” felirat fog villogni a kijelzőn.
HASZNÁLATI ÚTMUTATÓ
HU
Page 78

78
Az akkumulátortöltő el fog végezni egy speciális, a középértékeket meghaladó értékeket erőltető töltési
ciklust, az akkumulátor helyreállítása érdekében. Ebben a töltési fázisban nem lesznek hibaüzenetek a
kijelzőn, kizárólag a fázis végén, a feszültség és a felvett áram alapján jelzi ki a készülék, hogy sikerült-e
helyreállítani az akkumulátort. A 6 fázisos töltési üzemmód, amelynek leírása a következő:
• 1 FÁZIS: Analízis1. Ha az akkumulátor 3V-nál magasabb feszültség értéket mutat, tovább lép a
következő fázisra. 3V alatti feszültségértékek a készüléket stand-by módra állítják vissza.
• 2 FÁZIS: Töltés előtti állapot. A töltés állandó árammal kezdődik meg egészen addig, amíg az
akkumulátor el nem éri a 13V-os feszültséget.
• 3 FÁZIS: Teljes feltöltés. Az akkumulátort a beállított határértékig tölti.
• 4 FÁZIS: Állandó feszültség. Megtartja az akkumulátort a töltés végén elért feszültségen.
• 5 FÁZIS: Ütköző. A feszültség a megtartási szintre süllyed és befejeződik a töltési ciklus. A zöld színű
kijelző gyullad ki a FULL jelnél.
• 6 FÁZIS: Pulzáló áram ciklus. Az akkumulátort pulzálással tartja szinten. (hosszabb időtartamra).
FIGYELEM: az említett töltési fázis lefolytatása alatt elért magas feszültség következtében, a
helyreállítási munkafolyamatot a gépjárműről lekötött akkumulátorral kell elvégezni. Ha a
gépjárműre kötött akkumulátorral végeznénk el a folyamatot, az kárt okozhat a jármű fedélzeti
elektronikájában.
Az akkumulátor feszültsége minimális
Ha az akkumulátor kezdeti feszültsége alacsonyabb, mint 2.5V, az akkumulátor menthetetlen.
B) Ellátási üzemmód “Flash” és töltési “Amperage”
Előre beállított ellátási feszültségek:
Flash 10A: a beállított ellátási feszültség 10A
Flash 30A: a beállított ellátási feszültség 30A
Flash 60A: a beállított ellátási feszültség 60A
Flash 120A: a beállított ellátási feszültség 120A
Előre beállított töltési sávok a csatlakoztatott akkumulátor kiválasztásához (a kimeneti feszültség
automatikusan szabályozódik)
Charge 10Ah – 100Ah: 10Ah és 100Ah közti akkumulátorokat tud ellátni
Charge 100Ah – 300Ah: 100Ah és 300Ah közti akkumulátorokat tud ellátni
Charge 300Ah – 600Ah: 300Ah és 600Ah közti akkumulátorokat tud ellátni
Charge 600Ah – 1200Ah: Minimum 600Ah maximum 1200Ah közti akkumulátorokat tud ellátni.
C) Ellátási feszültség “Flash” és az Ellátott akkumulátor “Volt / Batt.”
Előre beállított ellátási feszültség sávok:
13,8V: a beállított ellátási feszültség 13,8V
14,4V: a beállított ellátási feszültség 14,4V
14,8V: a beállított ellátási feszültség 14,8V
Előre beállított akkumulátor típusok:
Wet: Savas elektrolittal töltött akkumulátor. Végső feszültség 14,4V-on.
Agm: Lapos lemezes Agm típusú vagy Optima típusú spirális akkumulátor. Végső feszültség 14,7V-on
LiFePO4: LiFePO4 batteries
A beállítások elmentése
A készülék a frontális kontrol fedőlapon menti el a megadott beállításokat. Abban az esetben, ha a
tápellátás véletlenszerűen vagy szándékosságból félbeszakadna, az újraindítás pillanatában az
akkumulátortöltő a legutolsó elmentett beállításokkal indul be. FLASH üzemmódban beállított
akkumulátortöltők esetében, a tápellátás pillanatában automatikusan újraindul a munkaciklus.
CHARGE üzemmódban, a kijelzőn az ER01 hibajel tűnik elő és szükséges lesz a START/ STOP gombok
lenyomása, ahhoz, hogy a normál töltési ciklus visszaálljon.
HASZNÁLATI ÚTMUTATÓ
HU
Page 79

79
Az akkumulátor analízise
Az operatív módokban levégzett analízis végeztével a készülék kijelzi az esetleges hibákat.
• Sérült akkumulátor: a ''Fault'' felirat jelenik meg és kikapcsol a ''Start / Stop'' kijelzés, a Stand-By mód
lép közbe, a kijelzőn a ''Errx'' felirat tűnik elő, ahol az 'x' jel a hibának megfelelő számot tünteti fel (lásd
1 táblázat). Két másodperces egyszeri hangjelzés.
• Polaritás felcserélődés: a ''Reverse'' kijelző gyúllad ki, ekkor az ''Err7'' kiírás tűnik fel a kijelzőn és két
másodperces hangjelzés hallatszik.
HIBAJELZÉSEK
A jelezhető hibákat az 1 táblázat tartalmazza.
1 táblázat: Hibák megjelölése
A KIJELZŐN
MEGJELENŐ
FELIRAT
OK MEGOLDÁS
Er01 Lecsatlakozott vezeték, zárlatos
vezeték.
Csatlakoztassuk megfelelően a csipeszeket és
folytassuk tovább az akkumulátor töltését; (lásd a
“Az akkumulátortöltő használata” című fejezetet).
Rövidzárlatos akkumulátor. Vegye fel a kapcsolatot a legközelebbi Szerviz
Központtal
Er02 Hibás vagy javíthatatlan
akkumulátor.
20 órás javítás után sem
fogadja az áramot
Az akkumulátor sérült lehet.
Er03 Az akkumulátortöltő belső
hőmérséklete túl magas
A készülék túlmelegedik
Távolítsunk el minden olyan tárgyat, ami
meggátolja az akkumulátortöltő szellőzését, vagy
vigyük ki a szabad levegőre. Várjuk meg, hogy az
akkumulátortöltő magától újra induljon.
Er04 Feszültség hiba.
Az akkumulátor feszültsége
túl alacsony. (6Volt-os
akkumulátort próbálunk
újratölteni).
Állítsuk be a “Recovery” ciklust.
Az akkumulátortöltőt kizárólag 12V-os
akkumulátorral szabad használni.
Folytassuk az akkumulátor feltöltését (lásd a
“Hogyan töltsük fel az akkumulátortöltőt” című
fejezetet).
Az akkumulátor egy vagy több
része zárlatos.
Az akkumulátor sérült lehet.
Er05 Az akkumulátor áramszintje
meghaladja a beállított szintet.
(24Volt-os akkumulátort
próbálunk újratölteni).
Az akkumulátortöltőt kizárólag 12V-os
akkumulátorral szabad használni.
Folytassuk az akkumulátor feltöltését (lásd a
“Hogyan töltsük fel az akkumulátortöltőt” című
fejezetet).
Er06 Az akkumulátor kapacitás túl
magas Sosem éri el a töltési
fázis végét.
Használjunk nagyobb kapacitású
akkumulátortöltőt.
Er07 and led
reverse
A kimeneti csipeszek rosszul
vannak az akkumulátorra
csatlakoztatva.
Csatlakoztassuk megfelelően a csipeszeket és
folytassuk tovább az akkumulátor töltését (lásd a
“Az akkumulátortöltő használata” című fejezetet).
Er08 Kimeneti áram szintje túl magas
Az áramszint meghaladja a
maximális értéket.
Csökkentsük le az akkumulátor felvételét.
HASZNÁLATI ÚTMUTATÓ
HU
Page 80

80
AZ AKKUMULÁTOR FELTÖLTÉSE
A gépjárműre kötött akkumulátor feltöltése
1. Mielőtt megkezdenénk a feltöltést, bizonyosodjunk meg arról, hogy a tápvezeték ne legyen
felcsatlakoztatva a hálózatra.
2. Válasszuk ki gépjármű földelésének megfelelő pólust; általában a negatív csipeszre kötött rész.
3. Az akkumulátor feltöltése, miközben a készülék negatív csipesze van a gépjármű földeléséhez
csatlakoztatva, a következő képpen zajlik:
• Csatlakoztassuk a kimeneti vezetéket az akkumulátor (+) pólusú piros csipeszéhez.
• Csatlakoztassuk a kimeneti vezetéket a gépjármű földelés fekete csipeszéhez, az akkumulátortól és
az üzemanyag tömlőtől távol
4. Az akkumulátor feltöltése, miközben a készülék pozitív csipesze van a gépjármű földeléséhez
csatlakoztatva, a következő képpen zajlik:
• Csatlakoztassuk a kimeneti vezetéket az akkumulátor (-) pólusú fekete csipeszéhez.
• Csatlakoztassuk a kimeneti vezetéket a gépjármű földelés piros csipeszéhez, az akkumulátortól és
az üzemanyag tömlőtől távol.
A gépjárműre nem kötött akkumulátor feltöltése
1. Mielőtt megkezdenénk a feltöltést, bizonyosodjunk meg arról, hogy a tápvezeték ne legyen
felcsatlakoztatva a hálózatra.
2. Csatlakoztassuk a kimeneti vezetéket az akkumulátor (+) pólusú piros csipeszéhez.
3. Csatlakoztassuk a kimeneti vezetéket az akkumulátor (-) pólusú fekete csipeszéhez.
FIGYELEM Bizonyosodjunk meg arról, hogy minden kimeneti vezetékhez tartozó csipesz
megfelelően csatlakozzon a saját végződéséhez.
AZ AKKUMULÁTORTÖLTŐ HASZNÁLATA
1. Miután a kimeneti vezetékeket rákötöttük az akkumulátorra, csatlakoztassuk a berendezést az
elektromos hálózatra, ügyelve arra, hogy a névleges feszültség megfeleljen az akkumulátortöltő
névleges feszültségének (230V-50Hz); ezek után, a készülék 0,5 másodperces hangjelzést fog adni
és az irányító panel kijelzőjének minden fénye felgyullad két másodpercre; ebben a fázisban a kijelző a
következőt fogja mutatni: “- - - -”.
2. Az akkumulátortöltő “stand-by” üzemmódra áll, például: ON kijelző bekapcsolva, WET kijelző
bekapcsolva, CHARGE 5-30Ah kijelző bekapcsolva. A kijelzők a legutóbbi elmentett beállítási program
szerint gyulladnak ki.
3. Ekkor az akkumulátortöltő “stand-by” üzemmódon van, az ellenőrző panelen található gombok
segítségével állítsuk be a feltöltendő akkumulátornak megfelelő töltési paramétereket. A betöltött töltési
paramétereket a kijelzőn felvillanó jelek fogják visszajelezni.
Beállítható töltési paraméterek:
• Function gomb: (lásd A – Operatív üzemmódok: “Function” című fejezetet) a munkaciklustól függően,
a következők közül válasszunk:
- Flash, Charge vagy Recovery.
• Amperage gomb: (lásd B – Ellátási és töltési üzemmód: “Amperage” című fejezetet)
Attól függően, hogy milyen tápellátási áramot igényel az akkumulátor feszültségének megtartása a
beállítási munkavégzés alatt, négy ellátási feszültség típusból választhatjuk ki a legmegfelelőbbet:
Ha a FLASH funkciót választjuk ki, a következőkből választhatunk:
- Flash 10A: az akkumulátortöltő 10A-t ad le, folyamatosan
- Flash 30A: az akkumulátortöltő 30A-t ad le, folyamatosan
- Flash 60A: az akkumulátortöltő 60A-t ad le, folyamatosan
- Flash 120A: az akkumulátortöltő 120A-t ad le, folyamatosan
Attól függően, hogy milyen a feltöltendő akkumulátor kapacitása, válasszuk ki a CHARGE funkciót; a
következőkből választhatunk:
HASZNÁLATI ÚTMUTATÓ
HU
Page 81

81
- Charge 10Ah – 100Ah: 10Ah és 100Ah közti akkumulátorokat tud ellátni.
- Charge 100Ah – 300Ah: 100Ah és 300Ah közti akkumulátorokat tud ellátni
- Charge 300Ah – 600Ah: 300Ah és 600Ah közti akkumulátorokat tud ellátni
- Charge 600Ah – 1200Ah: 600Ah és 1200Ah közti akkumulátorokat tud ellátni.
• Volt / Batt gombok (lásd C - Ellátási feszültség “Flash” és az Ellátott akkumulátor “Volt / Batt.” című fejezetet)
Attól függően, hogy milyen tápellátási áramot igényel az akkumulátor feszültségének megtartása a beállítási
munkavégzés alatt. (KIZÁRÓLAG FLASH ÜZEMMÓDBAN) három lehetséges tápfeszültség közül lehet
választani:
13,8V: a beállított ellátási feszültség 13,8V
14,4V: a beállított ellátási feszültség 14,4V
14,8V: a beállított ellátási feszültség 14,8V
Az akkumulátor megépítési technológiájától függően (KIZÁRÓLAG CHARGE ÜZEMMÓDBAN)
választhatjuk: Wet, LiFePO4 vagy Agm.
4. A töltési paraméterek beállítása után nyomjuk le a START/STOP gombot és indítsuk el az akkumulátor
töltését. A START/STOP és CHARGING jelek kigyulladása azt jelzi, hogy a feltöltés folyamatban van,
a kijelzőn az akkumulátor töltési szintje és a feszültség mértéke lesz olvasható.
5. A feltöltés folyamatban, az “I” és “U0” fázisok alatt a kijelzőn a CHARGING jel fog égni.
6. Amikor a FULL jel gyullad ki, ez azt jelenti, hogy az akkumulátor 100%-an feltöltődött, innentől kezdve
az akkumulátortöltő a megtartási folyamatba lép, a készülék folyamatosan ellenőrzés alatt fogja
tartani az akkumulátor hasznosíthatóságát, illetve gondoskodik arról, hogy optimális szinten tartsa az
akkumulátor töltési szintjét. Az akkumulátor akár több hónapon át is maradhat ebben a csatlakoztatási
állapotban.
7. Abban az esetben, ha meg akarjuk szakítani vagy be akarjuk fejezni a töltési fázist, kövessük a
megszakítás/töltés befejezési eljárás lépéseit.
A TÖLTÉSI FOLYAMAT SZÁNDÉKOS MEGSZAKÍTÁSA
Ha szeretnénk megszakítani az akkumulátor töltési ciklusát, elegendő, ha lenyomjuk a START/STOP
gombot; a kikapcsolásnak megfelelő kijelző kialvása azt jelenti, hogy a munkafolyamat
a végére
ért. Ekkor csatlakoztassuk le az akkumulátor az áramellátási hálózatról és az akkumulátor kimeneti
vezetékeinek csipeszét.
A TÖLTÉSI CIKLUS MEGSZAKÍTÁSA, ABBAN AZ ESETBEN HA MEGSZAKADNA A HÁLÓZATI
ÁRAMELLÁTÁS
Abban az esetben, ha a hálózati 110V - 230V-os áramellátás megszakadna az akkumulátortöltő
elmenti azt a munkaciklust, amelyen éppen dolgozott, így a 230Voltos áramellátás visszaálltakor
automatikusan (kizárólag FLASH üzemmódban) visszaáll a megkezdett munkavégzésre. Ez a
funkció elengedhetetlenül fontos azokban az esetekben, amikor az akkumulátortöltő rendkívül hosszú
töltési ciklust végez, felügyelő személyzet jelenléte nélkül. CHARGE üzemmódban, a munkavégzés
újraindításához a START/STOP gombok lenyomása lesz szükséges.
A TÖLTÉS BEFEJEZÉSE
1. A töltés befejezése után nyomjuk meg a START/STOP gombot az akkumulátortöltőn. A kijelző
fényeinek kialvása jelzi, hogy az akkumulátortöltő befejezte a munkafolyamatot.
2. Csatlakoztassuk le az áramellátási vezetéket a készülékről.
3. Csatlakoztassuk le a fekete csipeszéhez csatlakoztatott kimeneti vezetéket a jármű földeléséről vagy
az akkumulátor (-) pólusú csipeszéről.
4. Csatlakoztassuk le a piros csipeszhez csatlakoztatott kimeneti vezetéket az akkumulátor (+) pólusú
csipeszéről.
A munkafolyamat elvégzése után az akkumulátortöltőt száraz, nedvességtől mentes helyre kell eltenni.
A külső test megtisztításához, áramtalanítsuk a készüléket és használjunk száraz puha törlőt.
HASZNÁLATI ÚTMUTATÓ
HU
Page 82

82
KARBANTARTÁS
A javítási és karbantartási munkálatokat kizárólag szakember végezheti.
HULLADÉK FELDOLGOZÁS
A terméken vagy a csomagoláson feltüntetett áthúzott szemeteskuka szimbólum azt jelenti, hogy a
műszer elhasználódása után a normál házi szeméttől külön kell kerüljön. A felhasználó a műszert a
következő módon tudja kezelni az elhasználódás után:
- elektronikus- vagy elektrotechnikai hulladék gyűjtésére specializálódott gyűjtőhelyre viszi
- visszaviszi az eladónak és becseréli egy új műszerre
- a kizárólag professzionális használatra eladott műszerek esetében, vegye fel a kapcsolatot a gyártóval,
aki utasítást ad majd a hulladék kezelésére.
A műszer megfelelő hulladék kezelésével a visszamaradó anyagok egy része újra hasznosíthatóvá
válik, megelőzve a környezet szennyezését és megvédve a személyek egészségét. A veszélyes
hulladékokra vonatkozó előírásoktól eltérő hulladékkezelés pénzbüntetést illetve jogi következményeket
vonhat maga után.
GARANCIA
Ezt a műszert az Európai Unióban érvényes vonatkozó szabályzatok szerint gyártották és vizsgáltak be.
Szakirányú felhasználás esetén az eszközt 12 hónapos garancia fedi, nem szakirányú használat esetén
24 hónapos garancia fedi.
Kizárólag anyaghibából történő javítást vagy gyártási helyreállítást vagy a hibás részek cseréjét
végezzük el, saját meglátásunk szerint.
A készüléket vissza kell küldeni a Beszerzési Központba a megfelelő dokumentációval együtt (vásárlást
igazoló elismervény).
A garancia által fedett munkálatok elvégzése nem befolyásolja a garancia érvényességét, annak lejárata
nem változik.
A garancia érvényét veszti, ha a szerszámon módosításokat, változtatásokat végeznek, vagy már
bontott állapotban érkeznek be a javítási központba.
A garancia semmi esetre sem fedi a személyi és/vagy tárgyak, legyenek azok bármilyen természetűek,
legyen a kár közvetett és/vagy közvetlen.
MEGFELELŐSÉGI BIZONYLAT EU
Felelősségünk teljes tudatában kijelentjük, hogy az itt leírt műszer mindenben megfelel a vonatkozó
előírásoknak, illetve a következő Irányelveknek és azok módosításainak:
• Elektromágneses Kompatibilitás Irányelve (E.M.C.) 2014/30/EU;
• Alacsony Feszültségi Irányelv (L.V.D.) 2014/35/EU;
• Veszélyes anyagok elektromos és elektronikus
berendezésekben való alkalmazásának korlátozásáról
szóló (Ro.H.S.) 2011/65/EU irányelv.
HASZNÁLATI ÚTMUTATÓ
HU
Page 83

83 83
Page 84

84
 Loading...