

Page 1
Fiber Optic Systems - Tools
www.lanpro.com
123 Manual, LPT-OTDR70 Fiber Optic Time-domain Reectometer (OTDR).
How to administrate a Test.
LPTOTDR70_M123_ENB01W
123 Manual, LPT-OTDR70 Fiber Optic Time-domain
Reectometer (OTDR). How to administrate a Test.
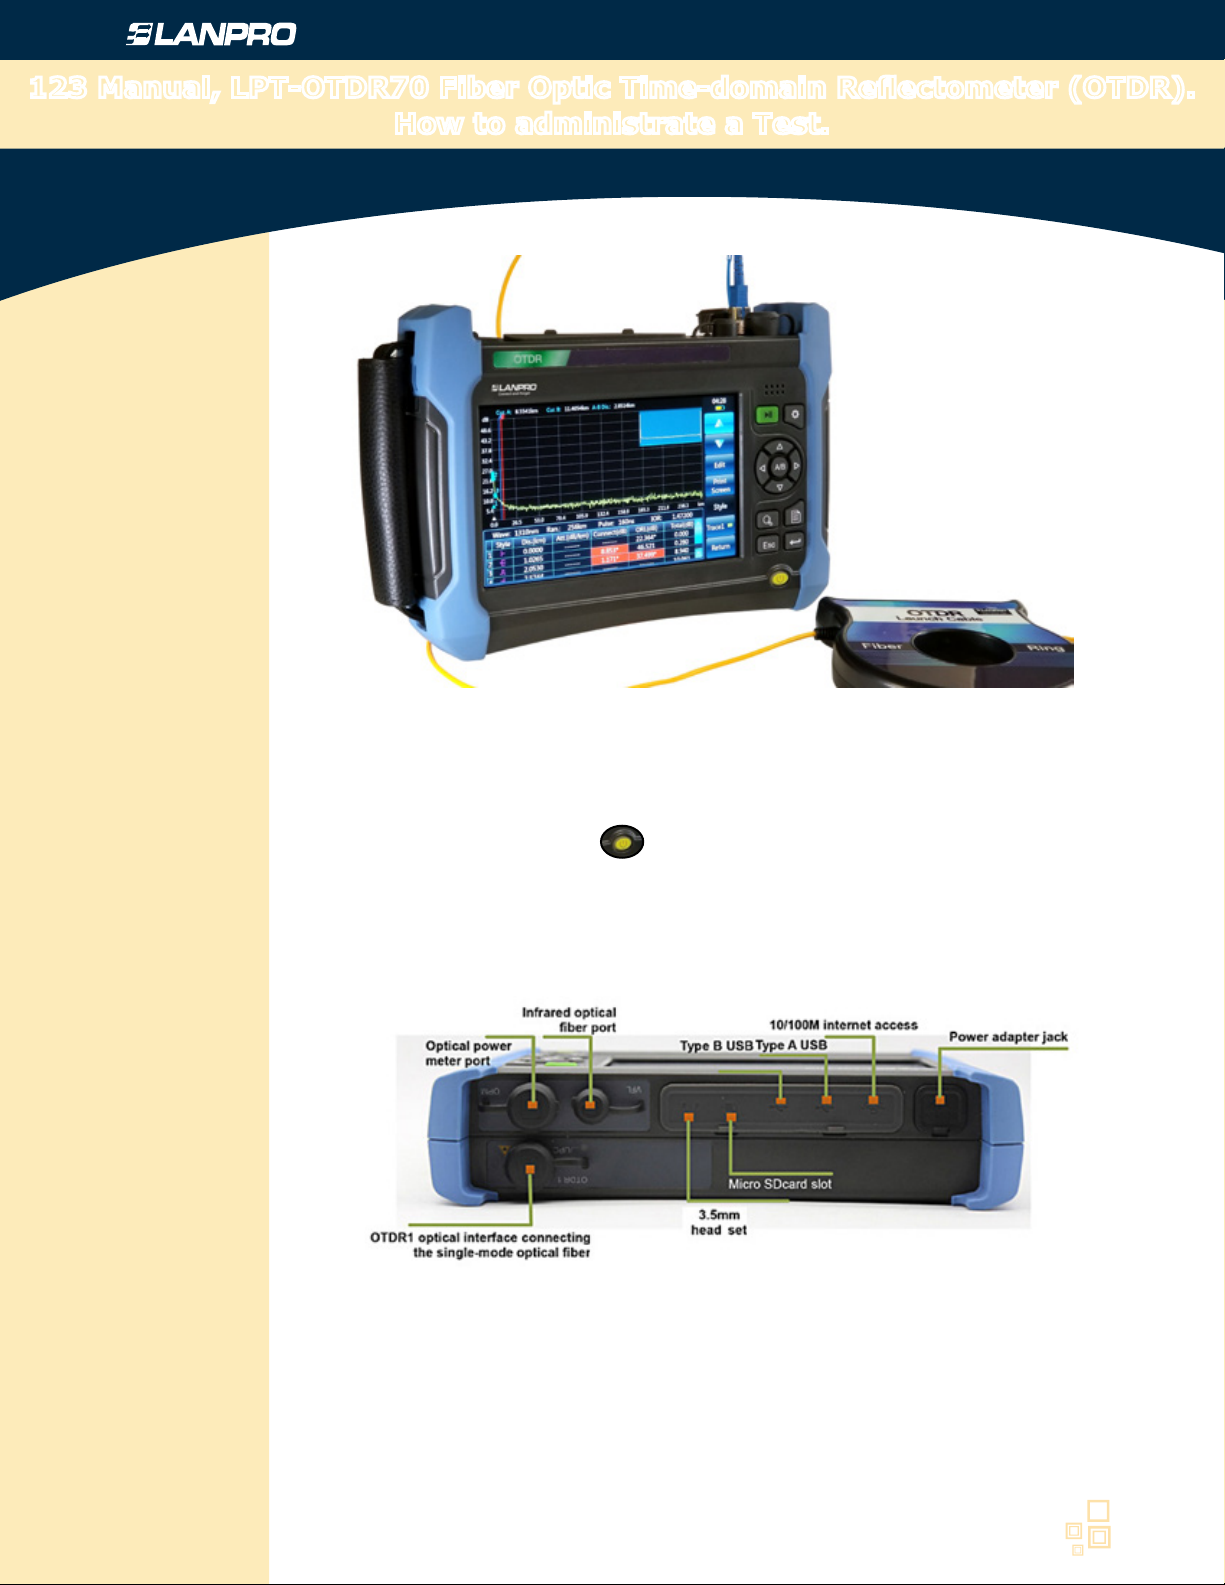
1. Turn on the OTDR LPT-OTDR70 Fiber Optic Time-Domain Reectometer by pressing
the power button for 3 seconds.
2. Connect a dirt and dust free referenced patch cord to the optical connection interface
identied as OTDR1.
2.1 Identify the type of interface provided on the LPT-OTDR70: SC/UPC to SC/
UPC, LC/UPC to LC/UPC, FC/UPC to FC/UPC or ST/UPC to ST/UPC.
2.2 Provide a coupler consistent with the interface provided on the LPT-OTDR70.
2.3 The patch cord connector referenced free of impurities and dust must be
consistent with the interface of the coupler, same type and polish.
3. Connect a launch coil of 500 meters or 1000 meters free of impurities and dust, it must
be consistent with the interface of the coupler, same type and polish.
3.1 Provide a coupler consistent with the interface arranged on the launch coil.
Page 2
Fiber Optic Systems - Fiber Optic Tools - 123 Manual - LPT-OTDR70
Fiber Optic Time-domain Reectometer (OTDR). How to administrate a Test.
Cableado - Soluciones en Fibra - Herramientas - LPT-FLCLEAVFC7
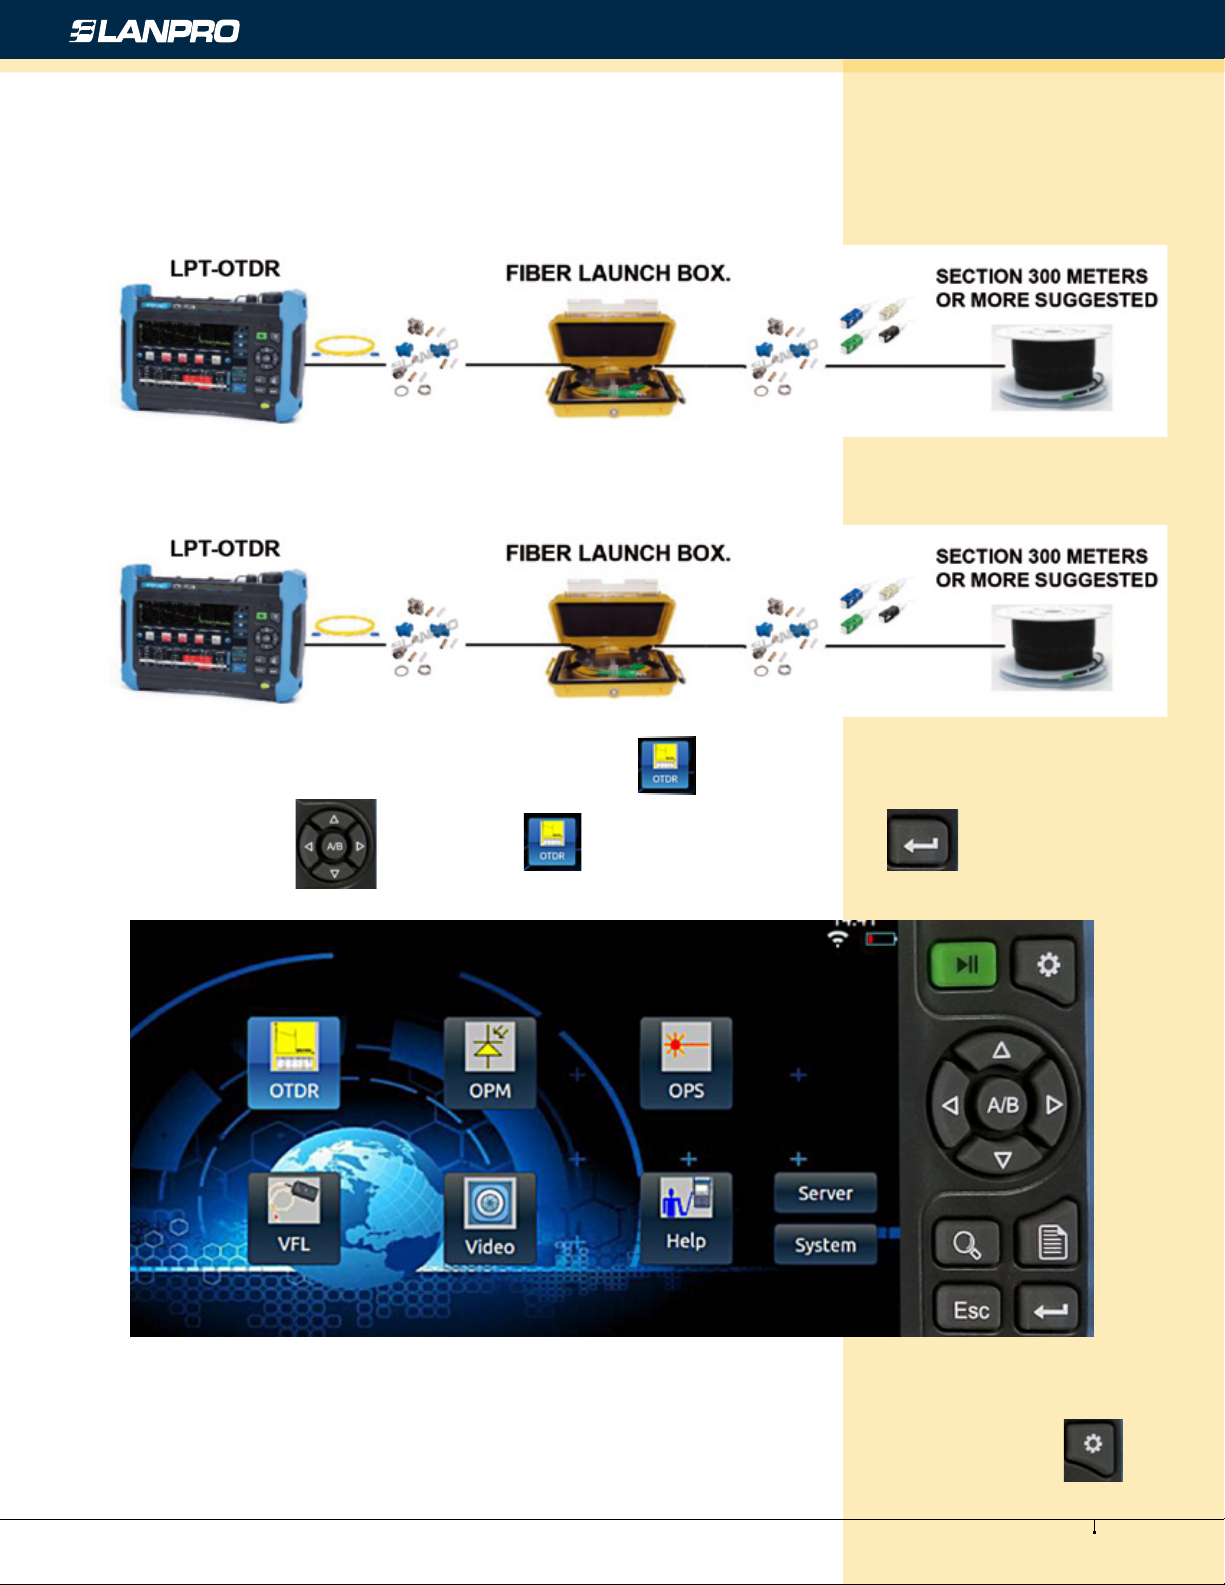
4. Connect the ber length to test sections of 300 meters or higher recommended for consistent test.
4.1. If you are using mechanical connectors make sure the interface is consistent with the coupler, same type and
polish.
4.2. If you are using fusion splicing make sure that the Pigtail interface is consistent with the coupler, same type and
polish.
5. On the OTDR LPT-OTDR70 touch screen, click on the OTDR icon
or move with the cursors to the OTDR icon and then select with Enter.
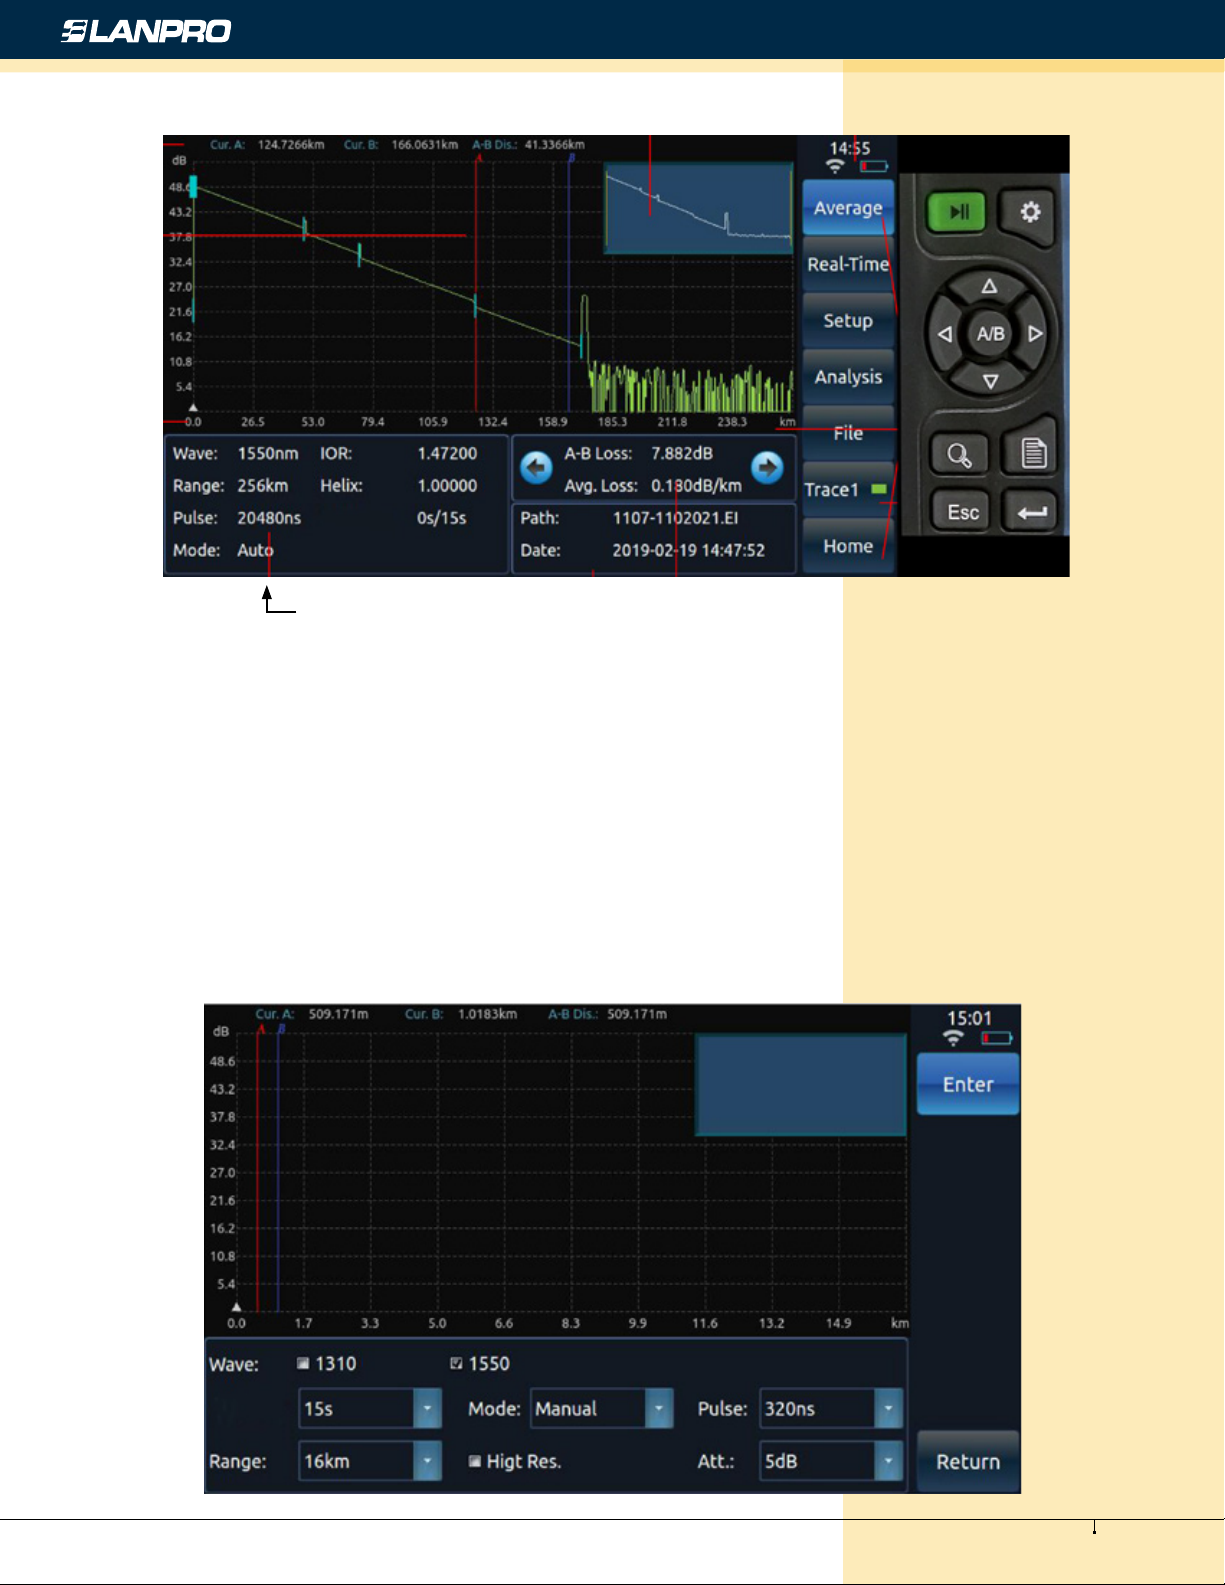
6. In the main OTDR LPT-OTDR70 operations window, click on the box called the test conditions display bar located at the
bottom left of the main operations window where you can nd the: Wave, Range, IOR or index of ber refraction, Pulse,
Mode and Time to display the edit mode of the test conditions display bar, or click on the conguration button
2
www.lanpro.com
Page 3
Fiber Optic Systems - Fiber Optic Tools - 123 Manual - LPT-OTDR70
Fiber Optic Time-domain Reectometer (OTDR). How to administrate a Test.
Cableado - Soluciones en Fibra - Herramientas - LPT-FLCLEAVFC7
Test condition display bar
6.1. In the Edit Mode of the test conditions display bar, select the Mode, in Manual Mode - Recommended, you can
edit all the test conditions, in Automatic Mode the test conditions are denied because the OTDR LPT-OTDR70 congure
them for you.
6.2. In the edit mode of the test condition display bar, select the wavelength for the 1310nm, 1550nm test or you can
use both tests in a single measurement.
6.3. In the edit mode of the test condition display bar, select the number of seconds the test will last, choose from 6s
to 180s.
6.4. In the edit mode of the test condition display bar, select Distance range or link length, choose the length in
kilometers that is consistent with the length of your link, choose from 400m to 512Km.
6.5. In the edit mode of the test conditions display bar, select Pulse to tell the equipment how many ns the laser will
be on during the test, choose from 3ns to 2048ns.
6.6. In the edit mode of the test condition display bar, select Attenuation which will be the power in decibels from where
the test will start, choose from 0dB to 20dB.
6.7. If you are satised with all the test conditions congured, click on the enter button on the touch screen.
3
www.lanpro.com
Page 4
Fiber Optic Systems - Fiber Optic Tools - 123 Manual - LPT-OTDR70
Fiber Optic Time-domain Reectometer (OTDR). How to administrate a Test.
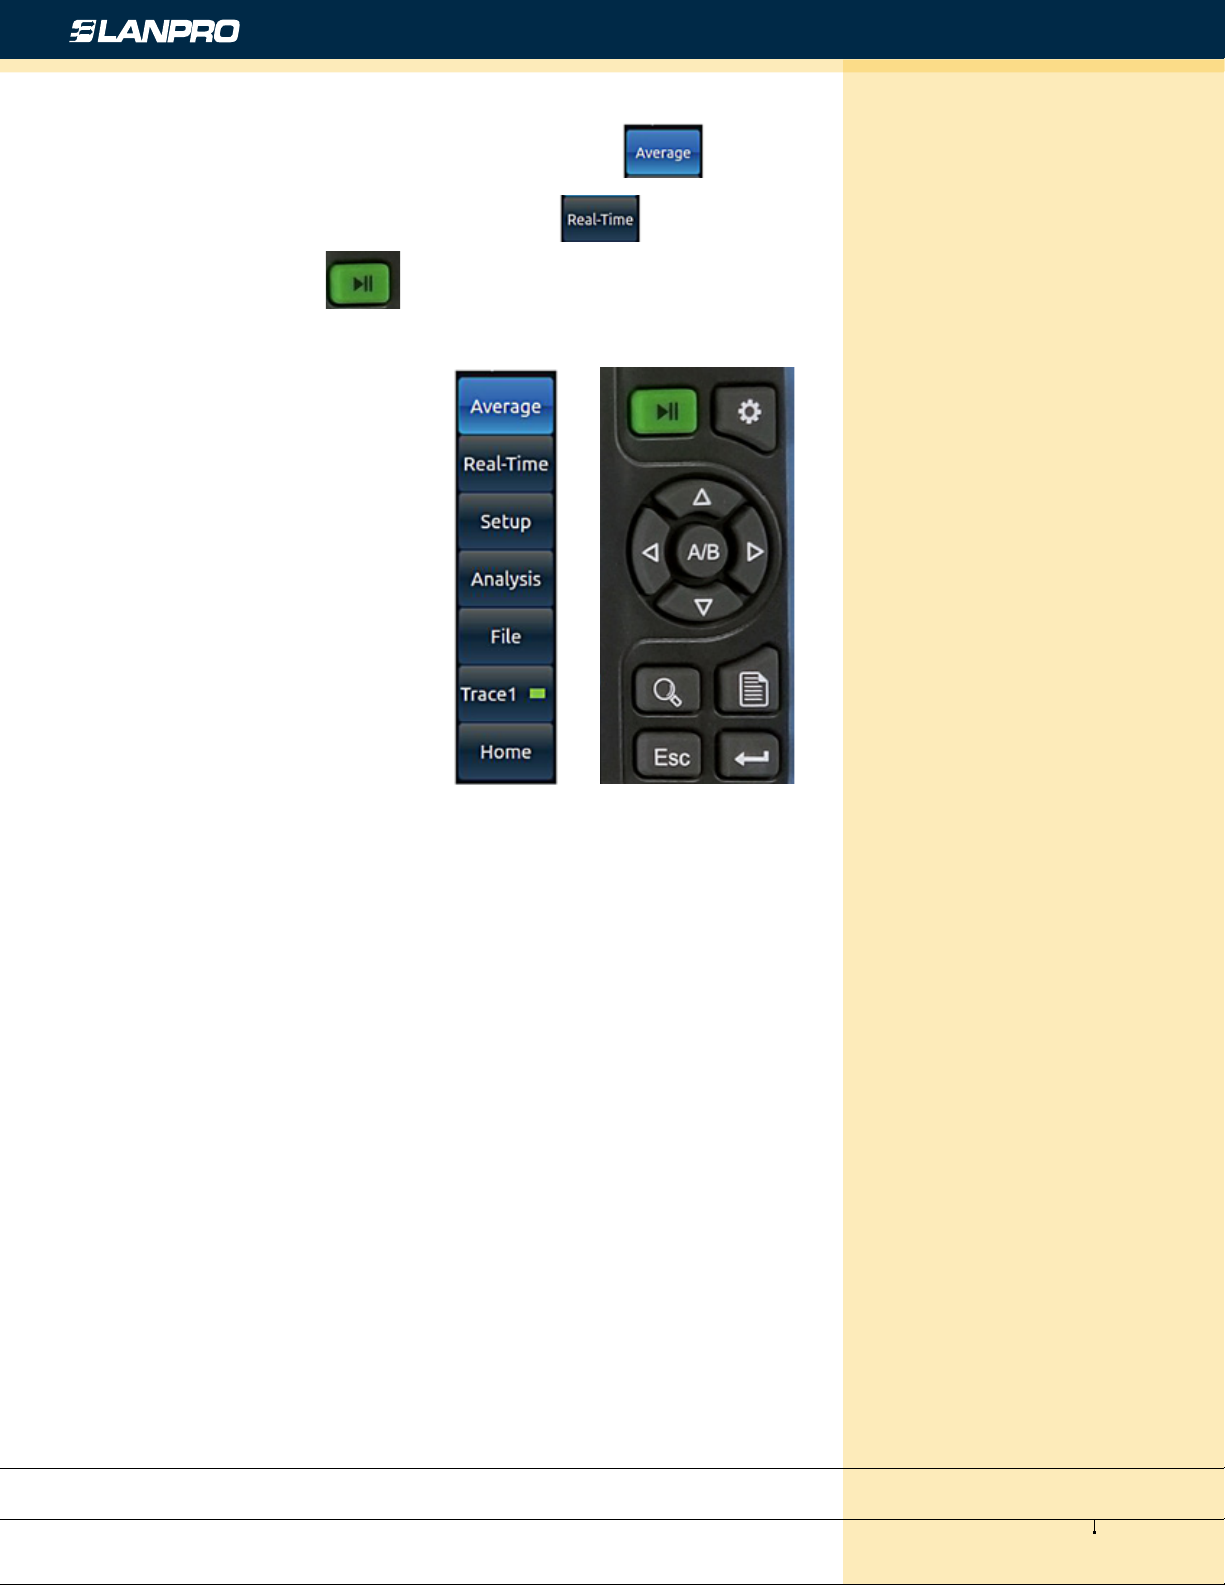
7. To start the test, click on the Measure – Average button
on the touch screen or on the Real Time - Real Time
button or press Test – Test
Cableado - Soluciones en Fibra - Herramientas - LPT-FLCLEAVFC7
LanPro is continuously improving its products and reserves the right to change
specications and availability without prior notice.
4
www.lanpro.com
 Loading...