

Page 1
Wireless - Equipment
LP-289ai 123 Manual for AP Mode setup.
LP289ai_M123_ENE02W
LP-289ai
123 Manual for AP Mode setup.
www.lanpro.com
Page 2
Wireless - Equipment - 5.8 GHz - LP-289ai 123 Manual for AP Mode setup
The following instructions will let you congure your LP-289ai in AP Mode.
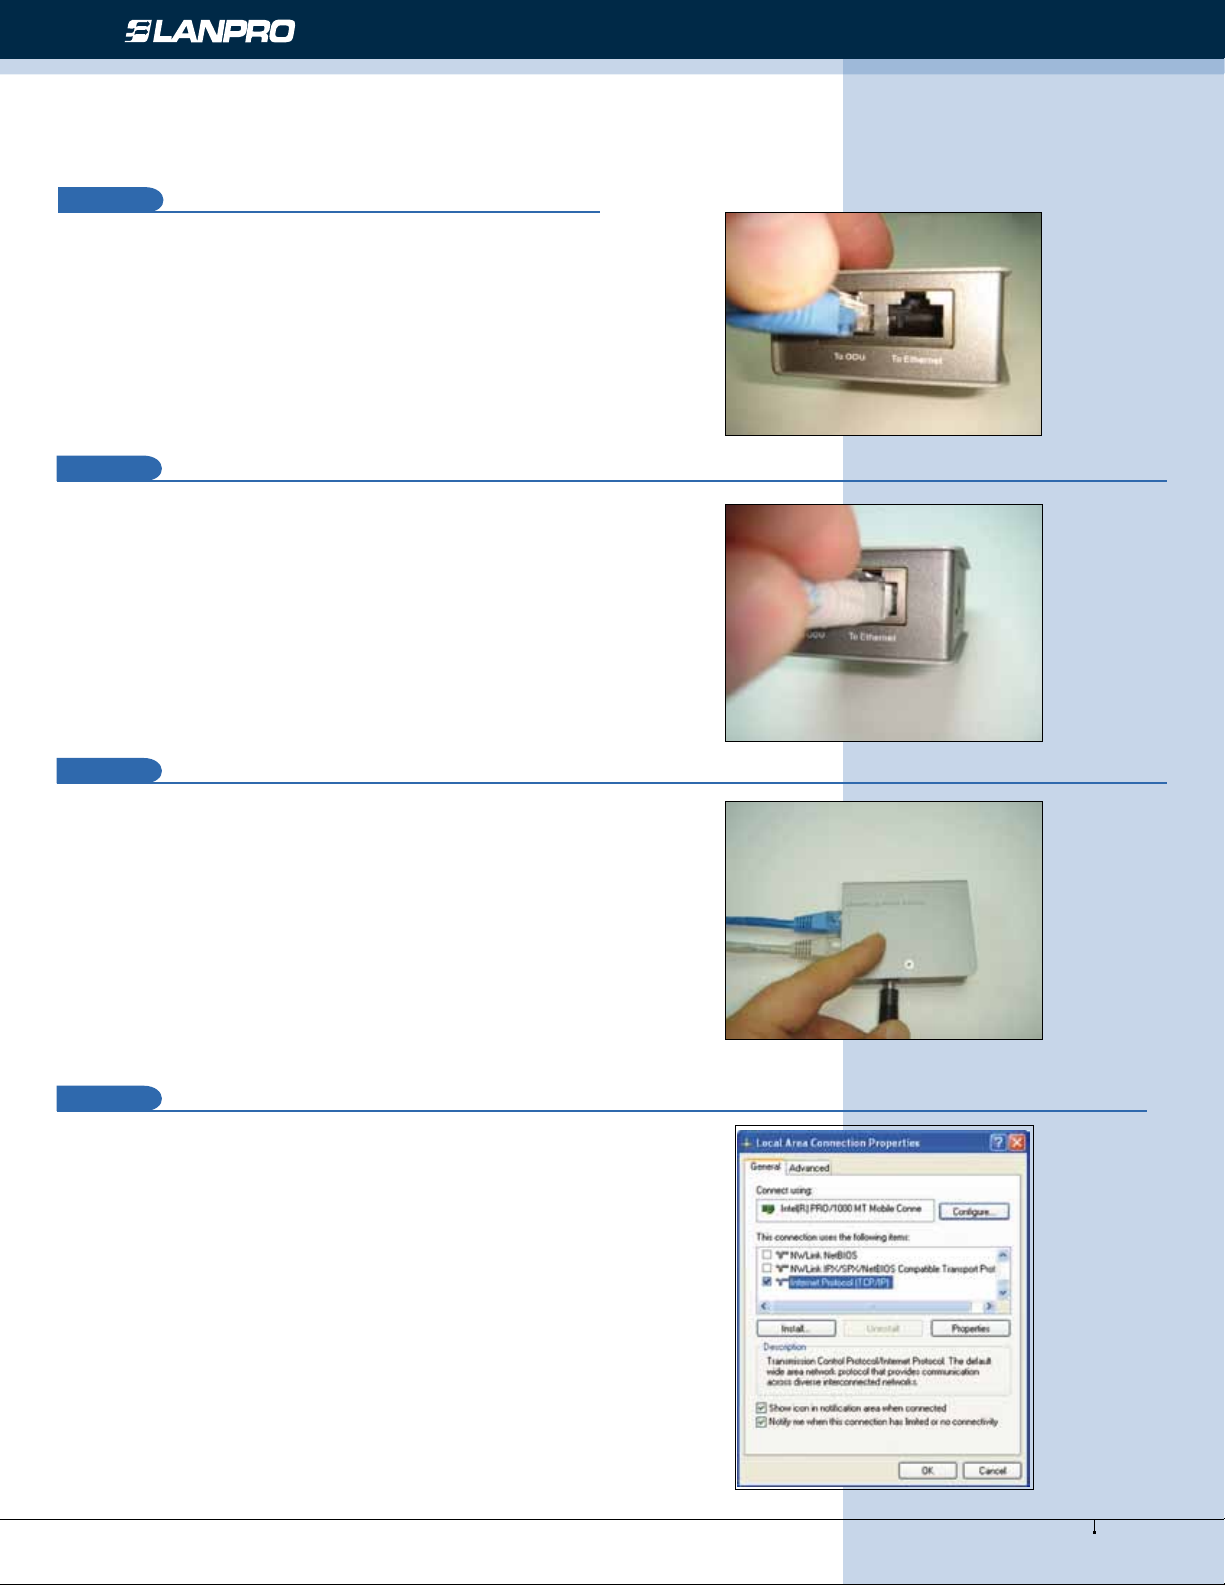
1
Once the 123 manual for assembly of the LP-289ai has been
executed, proceed to congure it by rst connecting a cable
coming from the LP-289ai to the PoE port named: To Odu
as shown in gure 1.
Figure 1
2
Connect a cable now from the PoE port: To Ethernet to the
Switch or PC as shown in gure 2.
Figure 2
3
Connect power to the PoE as shown in figure 3.
Figure 3
4
In gure 4 go to your NIC card properties and select:
Internet Protocol, select: Properties.
Figure 4
2
www.lanpro.com
Page 3
Wireless - Equipment - 5.8 GHz - LP-289ai 123 Manual for AP Mode setup
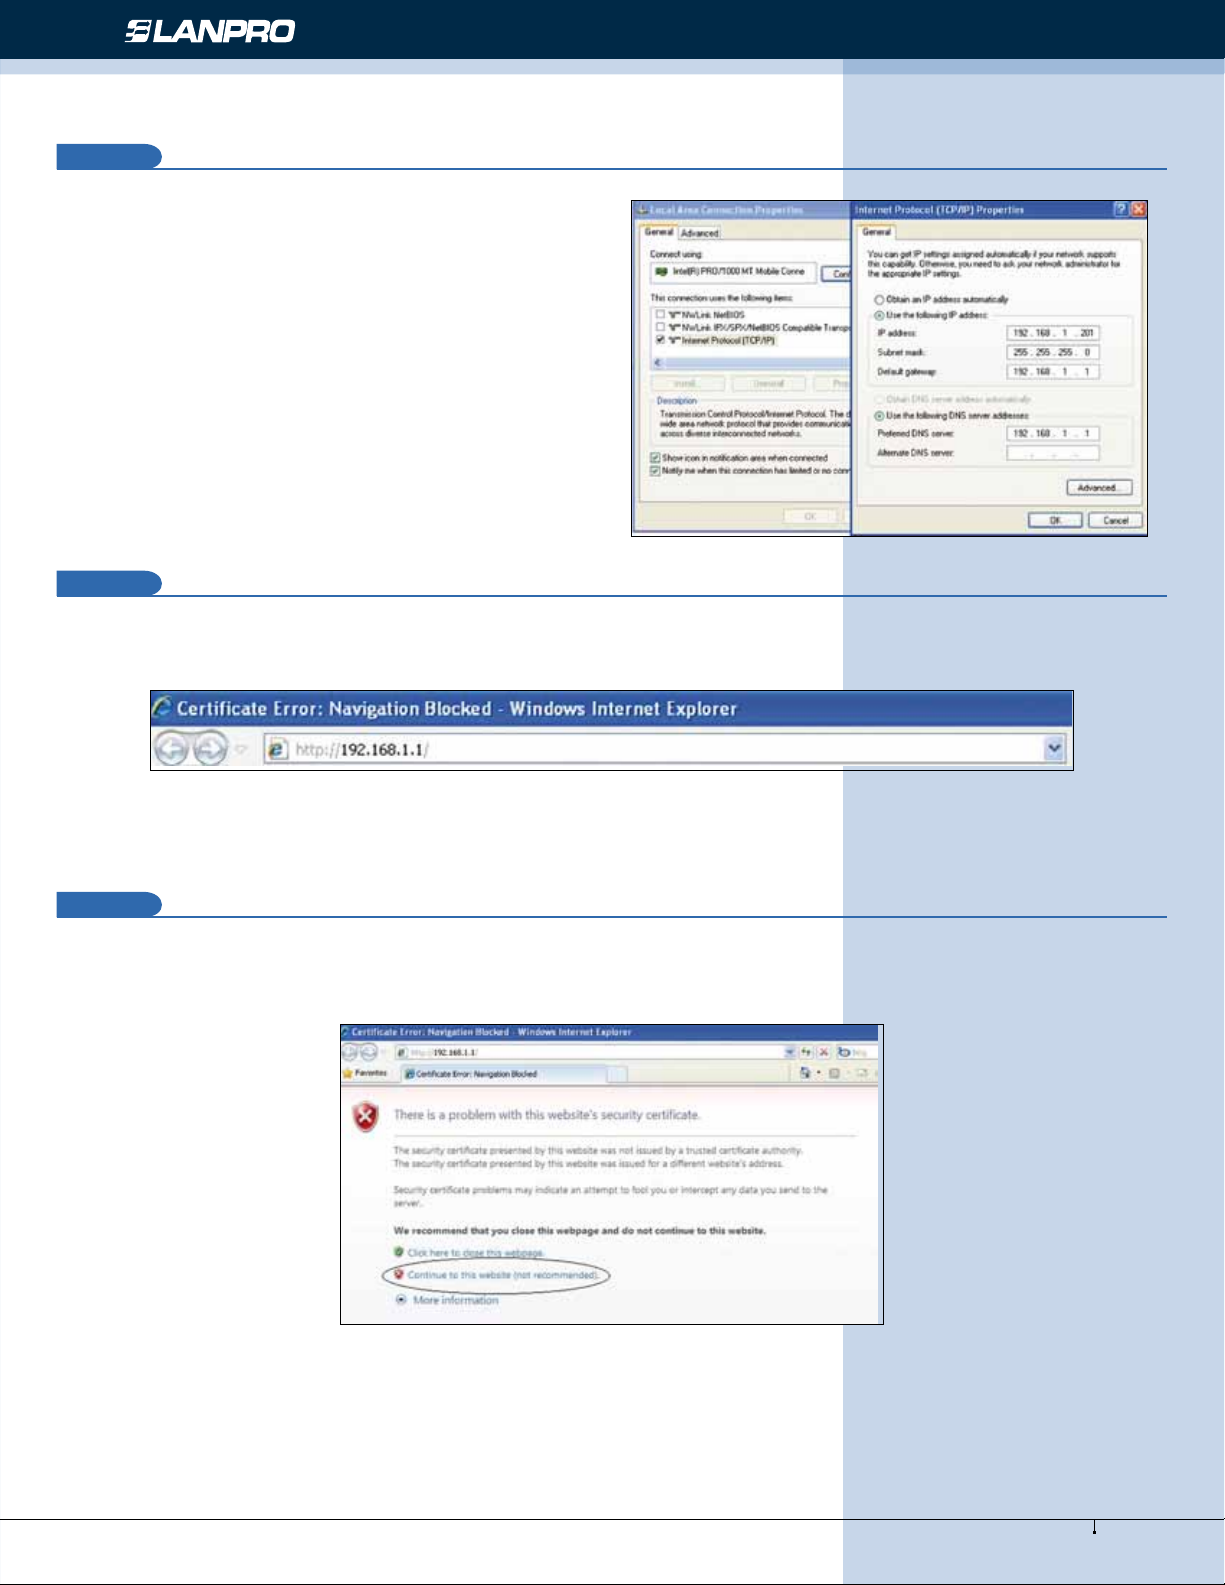
5
In the window shown in gure 5, select: Use the following
IP address and next input an IP address in the default
range of the LP-289ai. In this example, we have selected
address 192.168.1.201, the LP-289ai has a default address
of 192.168.1.1, input now in: Subnet mask 255.255.255.0
and in the: Default gateway the destination router address;
in the: DNS you should input your Service provider´s DNS
or the destination router’s IP address which will provide you
with internet service, this will permit any queries to reach
the router of the destination network.
Figure 5
6
Open your preferred browser and input the default address: 192.168.1.1, please see gure 6.
Figure 6
7
In the validation window of gure 7 select: Continue to this website.
Figure 7
3
www.lanpro.com
Page 4
Wireless - Equipment - 5.8 GHz - LP-289ai 123 Manual for AP Mode setup
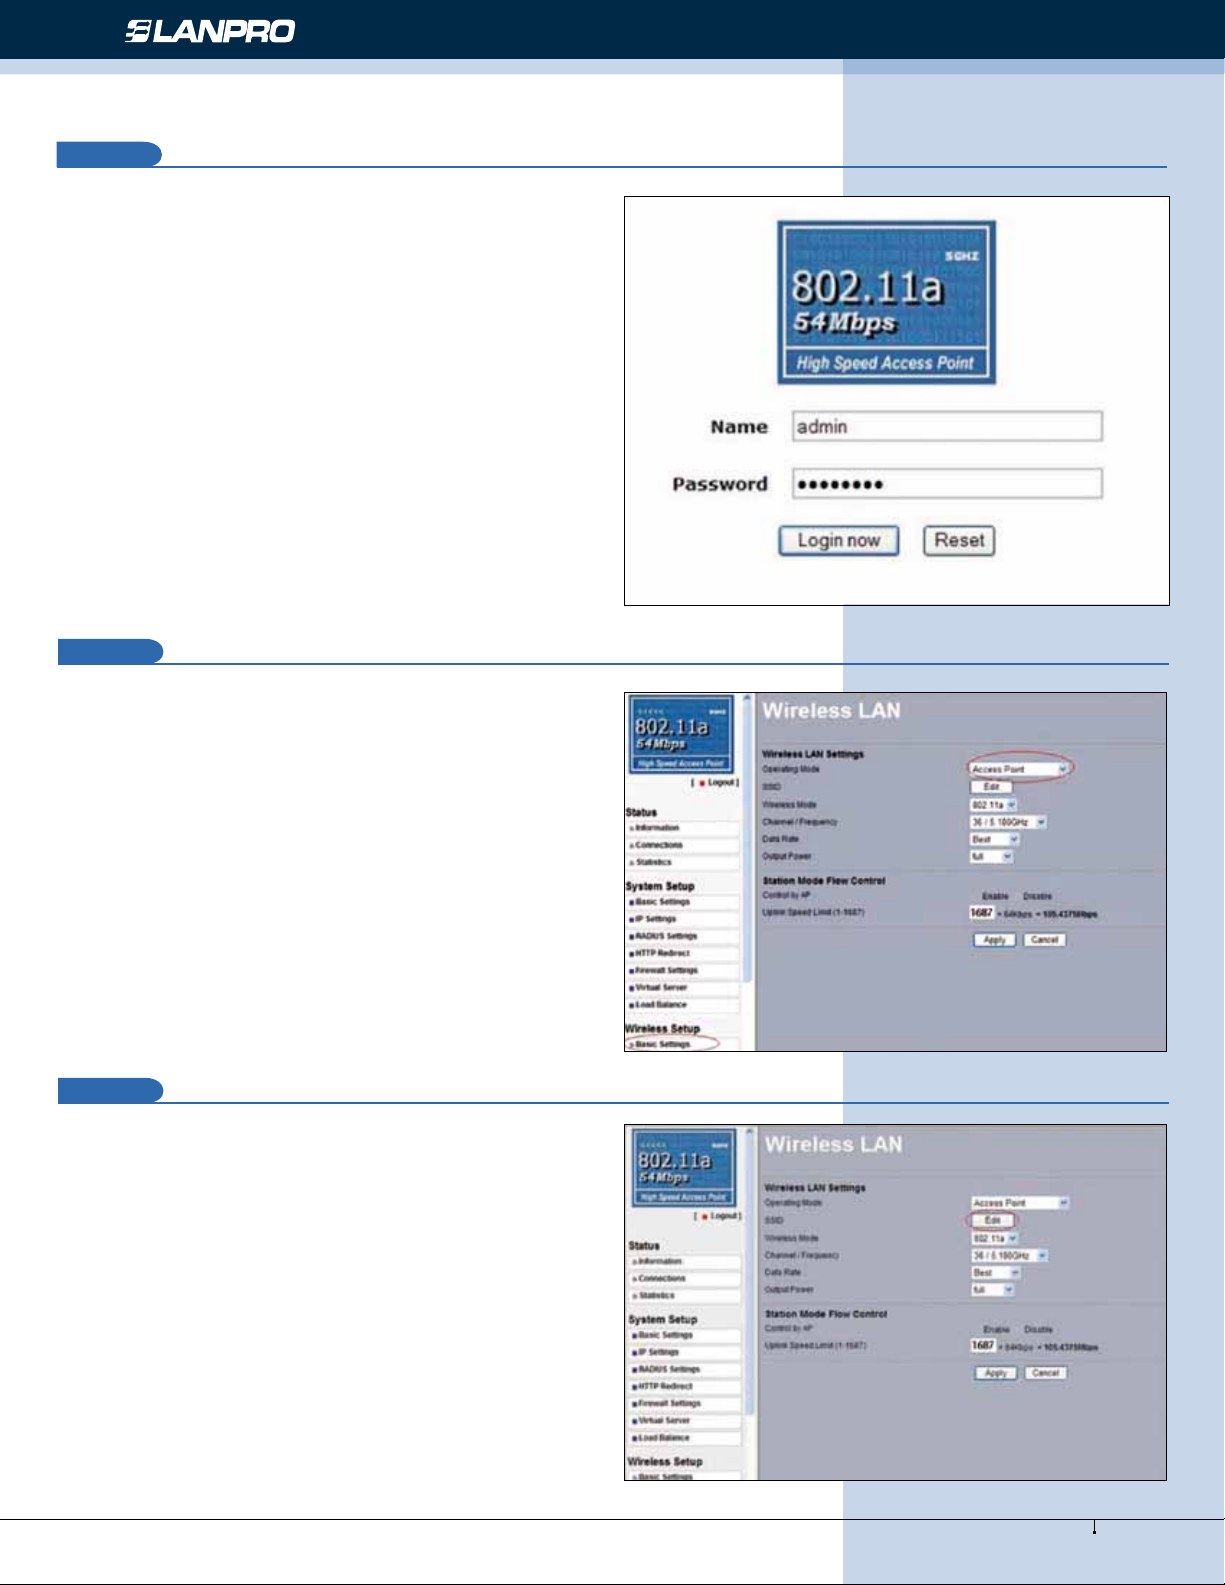
8
In the window of gure 8 input in: Name: the word: admin
and the in the: password: the word: password.
Figure 8
9
In the window of gure 9, you have the option of conguring
eight (8) Virtual APs or VAPs. In the LP-289ai, if you enable
that function, you will be able to connect up to 32 Clients.
By default, the LP-289ai comes in mode AP, but if this is not
your case, select option: Basic Settings in the submenu of
Wireless Setup, and select: Access Point as shown, then
select: Apply.
Figure 9
10
In the window shown in gure 10, select: Edit in order to
proceed to congure the different VAPs or Virtual AP’s. In
this window you will be able to congure also the channel or
frequency in which you wish to transmit. It is important to
highlight that all VAPs are going to be in the same frequency.
Figure 10
4
www.lanpro.com
Page 5
Wireless - Equipment - 5.8 GHz - LP-289ai 123 Manual for AP Mode setup
11
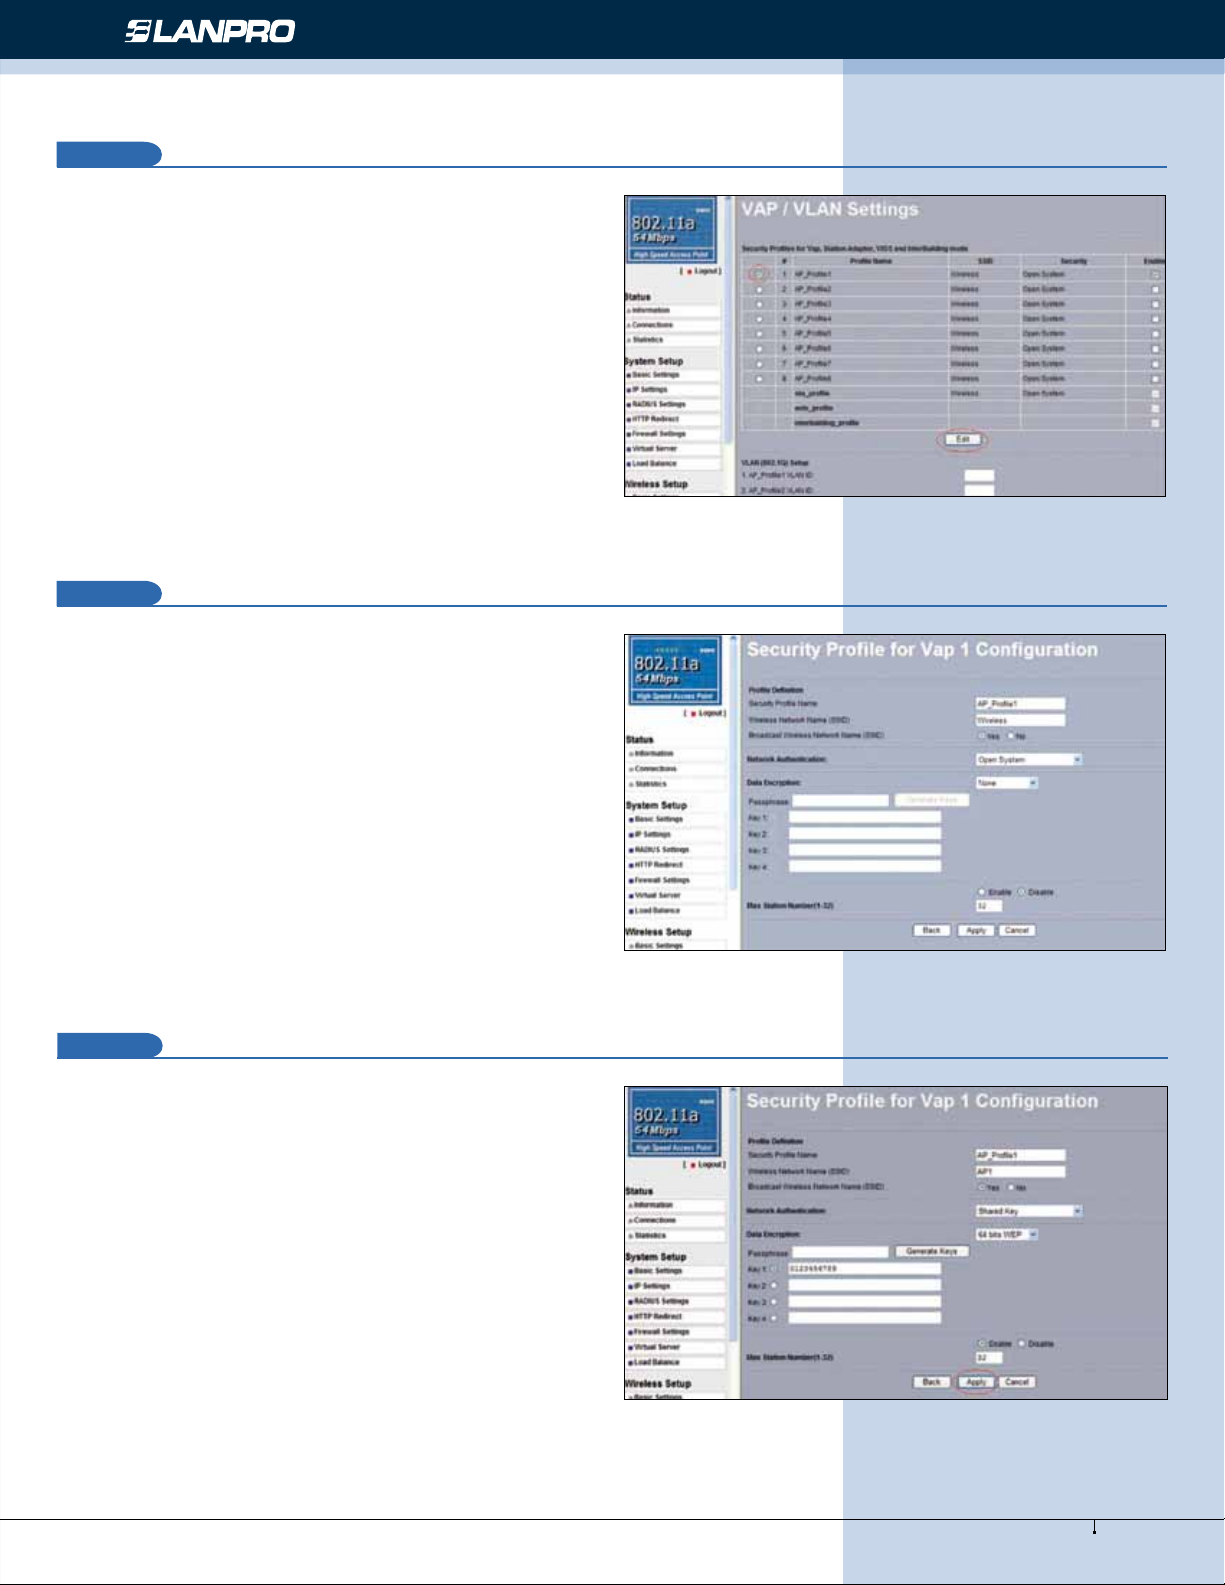
In the window shown in gure 11, select the virtual AP you
wish to congure. Only one is enabled by default and without
security. Select: Edit if you wish to change it.
Figure 11
12
In the window of gure 12, several options will appear for
conguring your rst VAP or Virtual AP.
Figure 12
13
In gure 13, input in the SSID the name you wish to use for
this virtual AP, select encryption mode desired and the key it
will use. In the: Max Station Number (1-32) you will be
able to limit the number of clients that can be simultaneously
connected to this VAP, something we highly recommend,
because this has the purpose of getting a better performance
of the equipment and to establish better control over the
clients. Select: Apply for the changes to take effect.
Figure 13
5
www.lanpro.com
Page 6
Wireless - Equipment - 5.8 GHz - LP-289ai 123 Manual for AP Mode setup
14
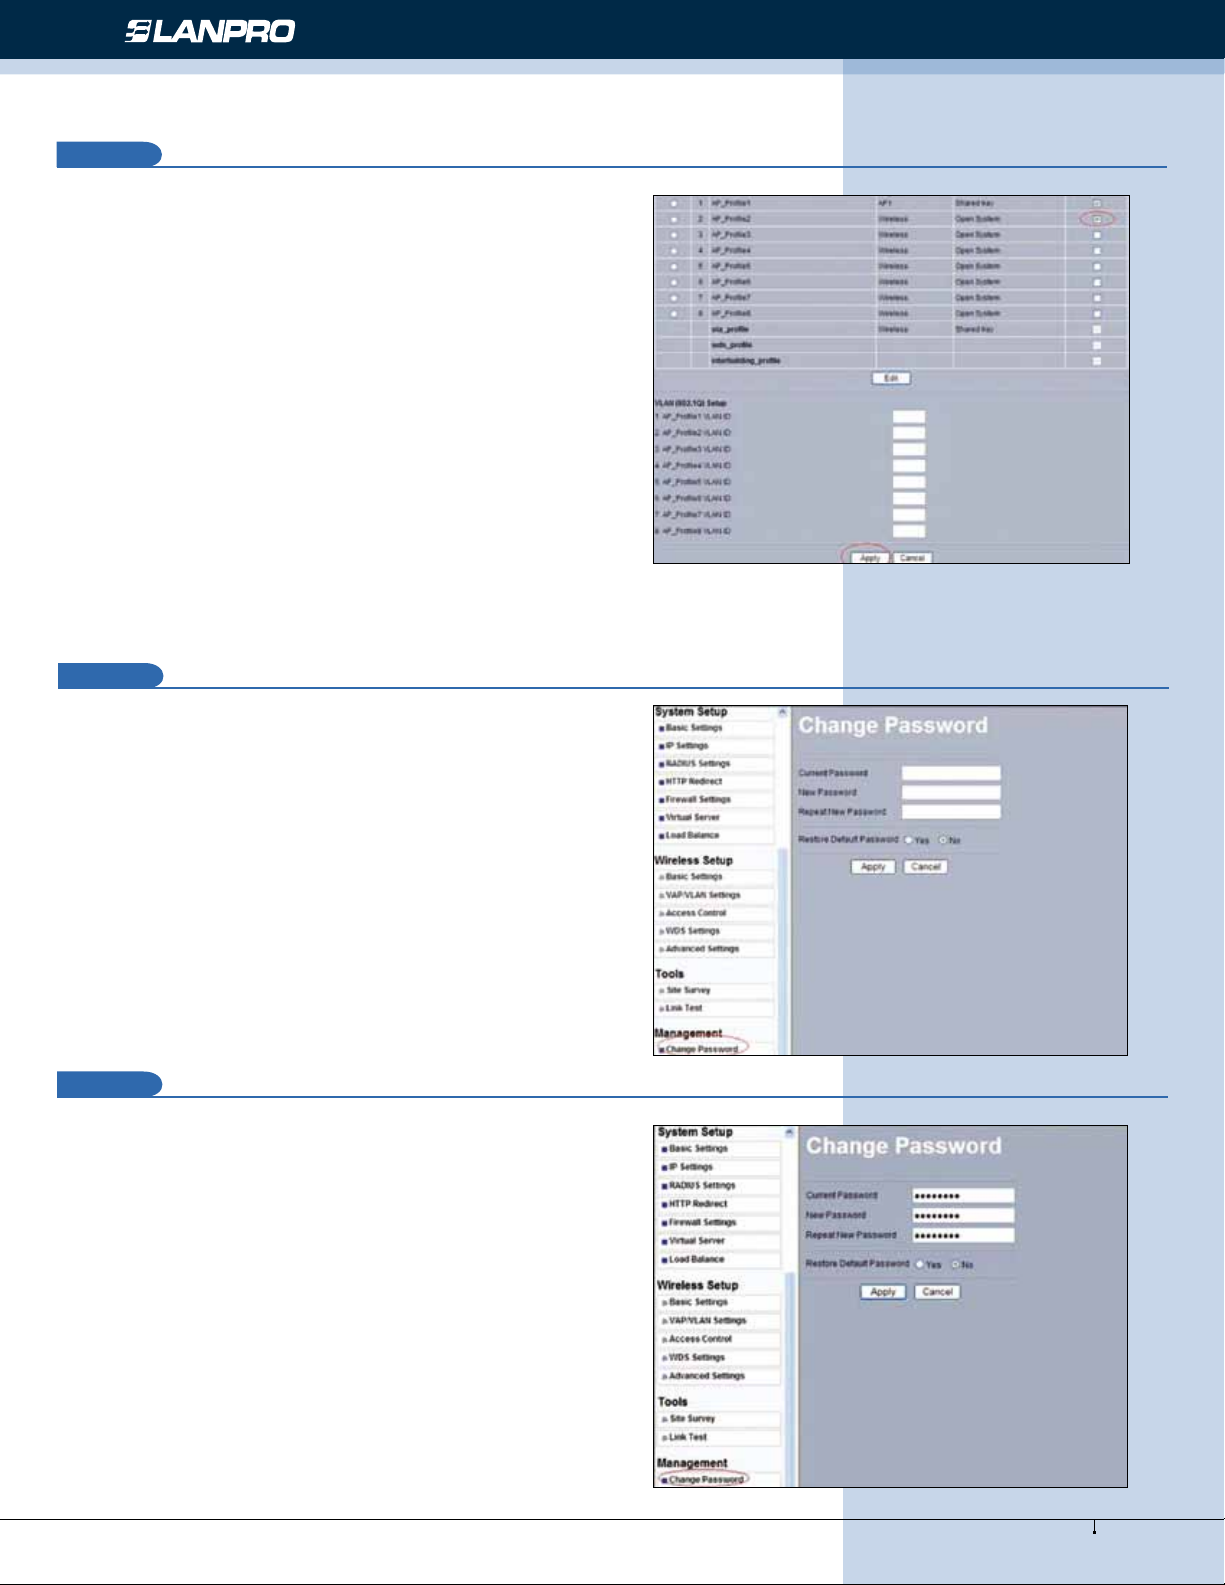
It is important to mention that all the VAPs will share the set
of keys in WEP, being only able to change the default key
used for authentication and encryption. In order to enable
another VAP, you must select the box named: Enable and
then select: Apply as shown in gure 14. Then, proceed to
congure the security by repeating steps: 11, 12 y 13 for
this VAP.
Figure 14
15
It is recommended to change the administration password
of your equipment, we remind you to save it in a safe place
because losing it implies opening the equipment so as to
reset it to factory values and losing the warranty.
In order to change the password, select option: change
password in the menu: Management, as shown in the
window of gure 15.
Figure 15
16
In the window of gure 16, input the old password in: Current
Password and the new password in: New Password,
repeat it in: Repeat New Password and select: Apply.
Figure 16
6
www.lanpro.com
 Loading...